
Unlock the Secret to Soft & Fluffy White Bread

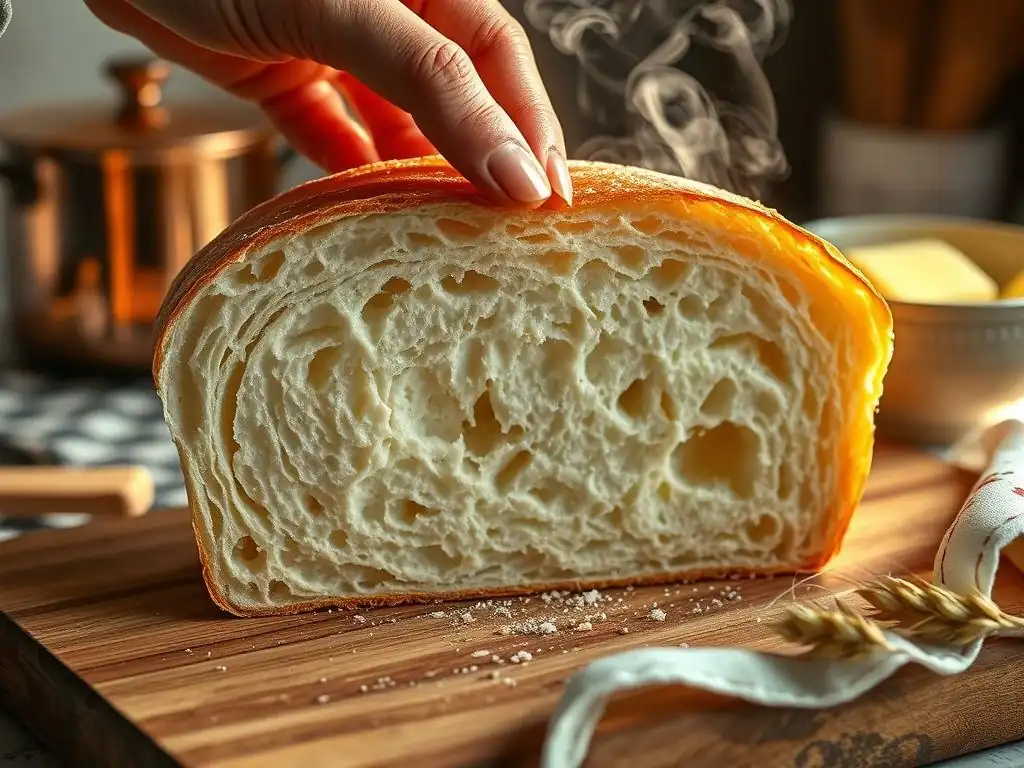
Welcome to BakeWithEase, your haven for baking brilliance! Are you ready to unlock the secret to that perfect, pillowy bite? Discover our Soft & Fluffy White Bread Recipe and transform simple ingredients into a loaf that's truly extraordinary. But that's just the beginning! What if we told you that perfecting this bread opens the door to countless other baking adventures? Explore the techniques and variations within, and let your baking journey begin!
- Unlock the Secret to Soft & Fluffy White Bread: A BakeWithEase Guide
- Introduction: The Perfect Soft & Fluffy White Bread Recipe Awaits
- Understanding the Key Ingredients for Soft Bread
- Step-by-Step Guide to Baking the Ultimate Soft & Fluffy White Bread
- Tips and Tricks for Achieving Extra Softness
- Troubleshooting Common White Bread Baking Problems
- Variations and Additions to Your Soft White Bread
- Storing Your Soft & Fluffy White Bread for Maximum Freshness
- Enjoying Your Homemade Soft White Bread
- Conclusion: Mastering the Art of Soft & Fluffy White Bread with BakeWithEase
-
Frequently Asked Questions
- What makes this soft fluffy white bread recipe different from other bread recipes?
- Is this recipe suitable for beginner bakers?
- Can I substitute any of the ingredients in this recipe?
- How long does it take to make this soft fluffy white bread?
- What's the best way to store leftover soft fluffy white bread?
- Final Reflection: The Enduring Allure of Perfectly Fluffy Bread
- Unleash Your Inner Baker: Craft the Perfect Loaf!
Unlock the Secret to Soft & Fluffy White Bread: A BakeWithEase Guide
Introduction: The Perfect Soft & Fluffy White Bread Recipe Awaits
Why This Soft White Bread Recipe is a Must-Try
There's something incredibly comforting about a slice of homemade white bread, especially when it's wonderfully soft and fluffy. Unlike store-bought varieties that can sometimes feel dry or lack flavor, mastering a truly exceptional soft fluffy white bread recipe at home gives you complete control over the texture, taste, and ingredients.
This specific recipe is designed to be approachable for beginners while yielding results that impress even seasoned bakers. It focuses on proven techniques and ingredient ratios that consistently produce a loaf with a delicate crumb and a melt-in-your-mouth quality that's perfect for sandwiches, toast, or simply enjoying warm with butter.
Achieving that signature soft texture isn't just about the ingredients; it's also about understanding the process. This guide will walk you through each crucial step, from activating the yeast correctly to mastering the perfect bake. We'll delve into why certain ingredients are chosen and how simple adjustments can make a significant difference in the final outcome.
Our goal is to demystify the process, showing you that baking incredibly soft fluffy white bread from scratch is not only achievable but also incredibly rewarding. Get ready to fill your home with the irresistible aroma of freshly baked bread and enjoy the satisfaction of pulling a perfectly golden, soft loaf from your oven.
BakeWithEase: Your Partner in Bread Baking Success
At BakeWithEase, our passion is empowering home bakers of all skill levels to create delicious baked goods with confidence and joy. We understand that baking bread, particularly achieving a consistently soft fluffy white bread recipe, can sometimes feel intimidating. That's why we break down complex techniques into simple, easy-to-follow steps, providing the knowledge you need to understand why things work in baking. Think of us as your friendly guide in the kitchen, ready to help you navigate the nuances of yeast, flour, and proofing.
This comprehensive guide on baking soft white bread is a prime example of our commitment to making baking accessible. We've tested and refined this soft fluffy white bread recipe to ensure it delivers outstanding results with minimal fuss. Beyond just providing instructions, we offer insights into the science behind the bake, helping you troubleshoot common issues and build a strong foundation in bread making. With BakeWithEase by your side, you'll gain the skills and confidence to bake not just this recipe, but many others, turning baking from a challenge into a delightful and rewarding hobby.
Understanding the Key Ingredients for Soft Bread
The Importance of Flour in Achieving Fluffiness
Flour is the backbone of any bread recipe, and the type you choose significantly impacts the final texture of your soft fluffy white bread. All-purpose flour is typically the go-to for this type of loaf due to its moderate protein content, usually ranging from 10-12%.
This protein develops into gluten when kneaded with liquid, forming the structure that traps the gases produced by yeast, allowing the bread to rise and achieve a light, airy texture. Using flour with too low a protein content might result in a loaf that doesn't hold its shape well, while a very high protein flour, like bread flour (12-14% protein), can create a chewier crumb, which might not be ideal for a bread specifically aiming for maximum softness and fluffiness.
Sifting your flour before measuring can also contribute to a softer loaf by aerating the flour and removing clumps, ensuring more even distribution in the dough. While precise measurements are key in baking, understanding that flour density can vary is important. Measuring by weight (grams) is always more accurate than volume (cups) for consistent results in your soft fluffy white bread recipe. For example, a cup of all-purpose flour can weigh anywhere from 120 to 140 grams depending on how it's scooped and settled, a variation that can significantly affect the dough's hydration and the final texture.
Yeast: The Leavening Agent for Soft Texture
Yeast is the living organism responsible for making your soft fluffy white bread rise. It consumes sugars in the dough and produces carbon dioxide gas, which gets trapped within the gluten structure, causing the dough to expand. There are several types of yeast available, but for most home baking, Instant Dry Yeast or Active Dry Yeast are common.
Instant yeast can often be mixed directly into the dry ingredients, while active dry yeast typically requires activation in warm liquid before being added to the flour. Using yeast that is fresh and active is paramount to achieving a good rise and a soft, airy crumb.
To test if your active dry yeast is still viable, you can perform a simple proofing test. Dissolve 1 teaspoon of sugar in 1/4 cup of warm water (around 105-115°F or 40-46°C), then sprinkle 2 1/4 teaspoons (one standard packet) of yeast over the top. Let it sit for 5-10 minutes.
If the mixture becomes foamy and bubbly, your yeast is active and ready to work its magic in your soft fluffy white bread recipe. If it remains flat, your yeast is likely dead and won't provide the necessary lift for a fluffy loaf. Always check the expiration date on your yeast packet.
Sugar's Role in Softness and Flavor
Sugar in a soft fluffy white bread recipe does more than just add a touch of sweetness; it plays several crucial roles that contribute to the bread's desirable qualities. Firstly, sugar acts as food for the yeast, helping to kickstart fermentation and ensure a vigorous rise. Without sugar, the yeast would eventually find starches to convert, but adding a small amount provides readily available fuel, resulting in a faster and more reliable initial rise. This contributes to a lighter texture.
Beyond feeding the yeast, sugar also helps tenderize the crumb by interfering with gluten development, leading to a softer texture. It also contributes to moisture retention, helping the bread stay soft for longer after baking. Furthermore, sugar assists in achieving a beautiful golden-brown crust during baking due to caramelization. While too much sugar can inhibit yeast activity and make the dough sticky, the moderate amount typically used in a soft white bread recipe is perfectly balanced to enhance both flavor and texture.
Milk vs. Water: Which Liquid Creates a Softer Loaf?
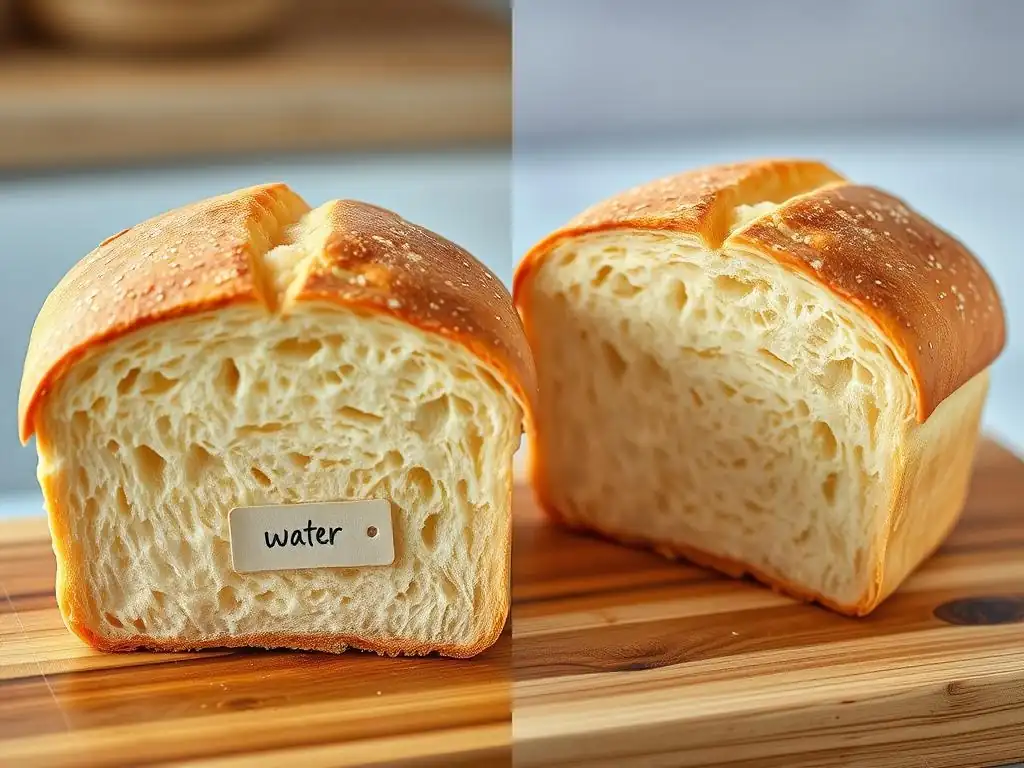
The choice between milk and water as the liquid in your soft fluffy white bread recipe significantly impacts the final texture and richness. While water works perfectly well for bread, milk generally produces a softer, more tender crumb and a richer flavor. Milk contains fats, sugars (lactose), and proteins that contribute to these characteristics. The fat and protein tenderize the gluten structure, resulting in a finer, softer crumb. The lactose, a sugar, doesn't get consumed by yeast but contributes to browning during baking, giving the crust a lovely color.
Using milk, especially whole milk, adds richness that water alone cannot provide. It also helps the bread stay fresh and soft for a longer period compared to bread made solely with water. If you prefer not to use dairy milk, plant-based milks like almond or soy milk can often be substituted, though the fat and protein content may vary, potentially leading to slight differences in texture. For the ultimate soft fluffy white bread, milk is generally the preferred liquid. Ensure the milk is warmed to the correct temperature (around 105-115°F or 40-46°C) if activating active dry yeast with it.
Fat: Adding Richness and Tenderness to Your White Bread
Fat, typically in the form of butter, oil, or sometimes shortening, is a key ingredient in achieving a truly soft and tender crumb in your soft fluffy white bread recipe. Fat coats the strands of gluten as they form during kneading, preventing them from bonding too tightly.
This interference with gluten development results in a more delicate and tender structure, rather than a chewy one. The type of fat used can influence the flavor and texture; butter adds a rich, classic taste and contributes to a slightly more structured crumb, while oil can lead to an even softer, more cottony texture.
Adding fat also helps to enrich the dough, contributing to a moist crumb and extending the bread's shelf life by helping it retain moisture. For this soft fluffy white bread recipe, melted butter is often preferred for its flavor contribution. It's typically added after the initial mixing of other ingredients to allow gluten development to begin unhindered, although some recipes incorporate it from the start. A typical soft white bread recipe might include anywhere from 2 to 4 tablespoons of butter or oil per loaf, a quantity sufficient to significantly enhance softness without making the dough greasy.
Step-by-Step Guide to Baking the Ultimate Soft & Fluffy White Bread
Step 1: Activating the Yeast for Optimal Rise
The first step to achieving that coveted soft fluffy white bread is ensuring your yeast is active and ready to work. If using active dry yeast, you'll need to proof it. Measure out the warm liquid (milk or water, around 105-115°F or 40-46°C) specified in your recipe. If the liquid is too hot, it can kill the yeast; too cold, and it won't activate properly.
Sprinkle the yeast and a pinch of sugar (from the recipe's total amount) over the warm liquid in a small bowl or the mixing bowl. Let it sit undisturbed for 5-10 minutes. You should see a foamy layer develop on the surface, indicating the yeast is alive and active.
If you are using instant dry yeast, this proofing step is often optional, as instant yeast is milled finer and designed to be mixed directly with the dry ingredients. However, even with instant yeast, a quick proof can provide peace of mind that your yeast is viable before you commit all your ingredients. Once the yeast is foamy (for active dry) or you've confirmed its freshness, you're ready to combine it with the remaining ingredients. A successful activation here is the critical foundation for a good rise and ultimately, a wonderfully soft fluffy white bread.
Step 2: Mixing the Dough: Achieving the Right Consistency
Mixing the dough is where the magic begins for your soft fluffy white bread. Start by combining the activated yeast mixture with the remaining liquid, sugar, salt, and about half of the measured flour in a large mixing bowl or the bowl of a stand mixer. Mix these ingredients until they are just combined into a shaggy dough. Salt is crucial for flavor and controlling yeast activity, but it should ideally not come into direct contact with the yeast initially, as it can inhibit it.
Gradually add the remaining flour, a bit at a time, mixing after each addition, until the dough starts to pull away from the sides of the bowl. The dough should be soft and slightly sticky, but not overly wet. If using a stand mixer, use the dough hook on low speed for about 6-8 minutes.
If mixing by hand, turn the dough out onto a lightly floured surface and knead for 8-10 minutes. The goal is to develop the gluten structure, which will allow the dough to become smooth, elastic, and capable of trapping gas for a light texture. The dough is ready when it passes the 'windowpane test': you can stretch a small piece thinly enough to see light through it without it tearing.
Step 3: First Rise: Letting the Dough Develop Flavor
The first rise, also known as bulk fermentation, is a critical stage for developing both the texture and flavor of your soft fluffy white bread. After kneading, shape the dough into a smooth ball and place it in a lightly oiled bowl, turning to coat the surface. Cover the bowl tightly with plastic wrap or a clean kitchen towel to prevent the dough from drying out. Place the bowl in a warm, draft-free place. An oven with the light on (but not heated) is an ideal environment, typically maintaining a temperature around 75-80°F (24-27°C).
Allow the dough to rise until it has doubled in size. This usually takes about 1 to 1.5 hours, but the time can vary significantly depending on the temperature of your kitchen and the activity of your yeast. Don't rely solely on the clock; look for visual cues. Gently poke the dough with a floured finger; if the indentation remains, it's ready. This slow fermentation process allows enzymes to break down starches into sugars, which enhances the flavor, and the yeast produces alcohol and organic acids that also contribute to the bread's final taste profile.
Step 4: Shaping the Dough for a Beautiful Loaf
Once the dough has doubled in size during the first rise, it's time to shape it into a loaf for your soft fluffy white bread. Gently punch down the dough to release the accumulated gases. Turn the dough out onto a lightly floured surface. For a standard sandwich loaf, gently shape the dough into a rectangle roughly the width of your loaf pan. Fold one-third of the dough lengthwise towards the center, pressing down gently. Then, fold the remaining third over the top, creating a seam.
Turn the dough seam-side down and gently tuck the ends under to create a neat shape. The surface should be relatively smooth and taut. The goal is to create some tension on the surface while ensuring the seam is sealed, which helps the loaf hold its shape and rise evenly in the pan.
Avoid using too much flour during shaping, as this can result in a dry crust. Place the shaped loaf seam-side down into a greased standard loaf pan, typically 9x5 inches. This careful shaping prepares the dough for the second rise and ensures a well-formed loaf of soft fluffy white bread.
Step 5: Second Rise: Achieving Maximum Fluffiness
The second rise, or proofing, is where your shaped loaf of soft fluffy white bread achieves its final volume and airy texture before baking. Once the dough is shaped and placed in the loaf pan, cover the pan loosely with plastic wrap or a light towel. Return the pan to a warm, draft-free place for the final rise. This rise is usually shorter than the first, typically lasting 30-45 minutes, or until the dough has risen about 1 inch above the rim of the loaf pan.
Proper proofing is crucial for a soft crumb. If the dough is under-proofed, it won't reach its full potential volume in the oven and might result in a dense loaf. If it's over-proofed, the structure can collapse, leading to a gummy texture or even deflation during baking.
A good test for doneness is to gently poke the side of the loaf with a floured finger; if the indentation springs back very slowly or only partially, it's ready to bake. The dough should look puffy and feel airy, ready to expand beautifully in the heat of the oven, contributing significantly to that soft fluffy white bread quality you're aiming for.
Step 6: Baking to Golden Perfection
Baking is the final, exciting step in creating your soft fluffy white bread. Preheat your oven to the temperature specified in your recipe, typically around 375°F (190°C). Ensure the oven is fully preheated before placing the bread inside for even baking and optimal oven spring (the final burst of rising that occurs in the hot oven). Some bakers like to place a pan of hot water in the bottom of the oven during preheating to create steam, which can help the crust stay soft initially, allowing the loaf to expand more fully before the crust hardens.
Carefully place the loaf pan in the preheated oven. Bake for 25-35 minutes, or until the crust is a beautiful golden brown and the internal temperature of the bread reaches 190-200°F (88-93°C) when measured with an instant-read thermometer. Using a thermometer is the most reliable way to ensure the bread is fully baked through.
If the top starts browning too quickly, you can loosely tent the loaf with aluminum foil. Once baked, immediately remove the loaf from the pan and place it on a wire rack to cool completely. This crucial cooling step prevents the bottom crust from becoming soggy from trapped steam.
Tips and Tricks for Achieving Extra Softness
The Tangzhong Method: A Secret to Enhanced Softness
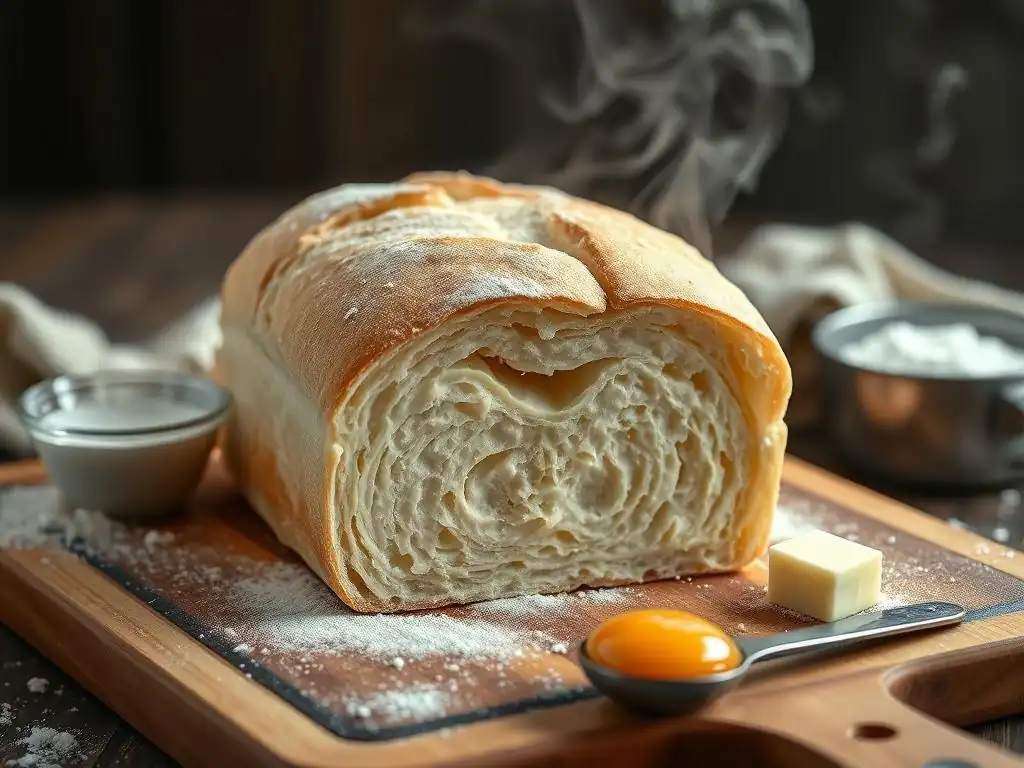
For truly exceptional softness and a loaf that stays fresh longer, consider incorporating the Tangzhong method into your soft fluffy white bread recipe. Tangzhong is a Japanese technique where a small portion of the flour and liquid (usually milk or water) from the recipe are cooked together to form a thick paste or slurry. This paste gelatinizes the starches in the flour, allowing them to absorb and retain significantly more liquid than they normally would.
When this Tangzhong paste is added to the rest of the dough ingredients, it introduces extra moisture without making the dough overly wet or sticky, which would make it difficult to handle. This increased hydration potential leads to a bread with an incredibly soft, moist, and tender crumb that resists staling. Typically, the Tangzhong is made by whisking together about 5-10% of the total flour and 5 times its weight in liquid, then cooking it over low heat, stirring constantly, until it thickens like a pudding (around 149°F or 65°C).
Once cooled, it's added to the main dough ingredients. Incorporating this simple step can elevate your soft fluffy white bread to a new level of tenderness.
Proofing in a Warm, Humid Environment
Creating the right environment for your dough to rise is just as important as the ingredients and kneading for achieving that signature soft fluffy white bread texture. Yeast thrives in warmth and humidity. An ideal temperature range for proofing is between 75-85°F (24-29°C). Temperatures too low will result in a very slow rise, while temperatures too high can cause the yeast to overwork and produce off-flavors.
Humidity prevents the surface of the dough from drying out and forming a skin, which can restrict the dough's ability to expand fully. A simple way to create a warm, humid environment is to place the covered dough in a turned-off oven with the oven light on. You can also place a pan of hot water on the rack below the dough. This setup helps maintain both the temperature and humidity levels necessary for an optimal rise, ensuring your dough develops into a light, airy structure ready for baking into soft fluffy white bread.
The Importance of Dough Temperature
Maintaining the correct dough temperature throughout the process significantly impacts yeast activity and gluten development, both crucial for soft fluffy white bread. Starting with liquids that are the right temperature (around 105-115°F or 40-46°C for activating yeast) is key. During kneading, the dough temperature will naturally rise slightly due to friction. Aim for a final dough temperature after kneading in the range of 75-78°F (24-26°C).
If the dough is too cold, fermentation will be sluggish, requiring much longer rise times. If it's too warm, the yeast can become overly active, potentially leading to a rapid rise that doesn't allow for sufficient flavor development or can result in an over-proofed dough that collapses. Using a thermometer to check the temperature of your liquids and the dough itself can help ensure consistency and predictability in your soft fluffy white bread recipe results. Factors like the temperature of your flour and the ambient room temperature also play a role and should be considered.
Kneading Techniques for a Light and Airy Texture
Proper kneading is fundamental to developing the gluten network that gives your soft fluffy white bread its structure and contributes to its light, airy texture. Whether you're kneading by hand or using a stand mixer, the goal is to work the dough until the gluten is sufficiently developed. For a stand mixer with a dough hook, this usually takes 6-10 minutes on a low to medium-low speed. For hand kneading, it typically requires 8-12 minutes of consistent work.
You'll know the dough is properly kneaded when it becomes smooth, elastic, and less sticky. It should spring back slowly when gently poked. Over-kneading can sometimes make the dough tough, while under-kneading won't allow the dough to rise properly, resulting in a dense loaf. The windowpane test mentioned earlier is the best indicator: pinch off a small piece of dough and gently stretch it outwards. If you can stretch it thin enough to see light through it without it tearing, the gluten is well-developed, and your dough is ready to produce a beautifully textured soft fluffy white bread.
Troubleshooting Common White Bread Baking Problems
Why is My Bread Dense and Heavy?
A dense and heavy loaf is one of the most common disappointments when baking soft fluffy white bread. Several factors can contribute to this issue. One primary cause is insufficient kneading. Without proper gluten development, the dough cannot effectively trap the carbon dioxide gas produced by the yeast, preventing a good rise and resulting in a tight, heavy crumb. Ensure you are kneading for the recommended time and checking for the windowpane test.
Another major culprit is under-proofing. If the dough hasn't had enough time to rise sufficiently in either the first or second rise, it won't achieve its full volume and airy structure. Make sure your yeast is active and allow the dough to rise in a warm, draft-free environment until it has doubled in size (first rise) and is puffy and risen above the pan rim (second rise).
Using too much flour, especially during mixing or shaping, can also lead to a dry, dense dough that struggles to rise and results in a heavy loaf of soft fluffy white bread. Measure your flour accurately, preferably by weight.
My Bread Didn't Rise Enough: Troubleshooting Yeast Issues
If your soft fluffy white bread didn't rise as expected, the yeast is likely the source of the problem. The most common reason for poor rise is inactive or dead yeast. Always check the expiration date on your yeast package. If using active dry yeast, make sure you proof it in warm liquid (105-115°F or 40-46°C) with a pinch of sugar to confirm it becomes foamy before adding it to your dry ingredients. If it doesn't foam, the yeast is dead, and you need a fresh packet.
Other factors affecting yeast activity include the temperature of your liquid (too hot kills the yeast, too cold inhibits it) and the presence of salt. While salt is necessary for flavor and structure, direct contact with yeast before mixing can harm it. Ensure salt is added with other ingredients after the yeast has been mixed with the liquid. Finally, the proofing environment matters; a cold kitchen will significantly slow down or even halt yeast activity. Find a warm spot, ideally around 75-85°F (24-29°C), for your dough to rise properly and achieve that desired soft fluffy white bread texture.
My Bread is Too Dry: Hydration Solutions
A dry, crumbly loaf of soft fluffy white bread is often a result of insufficient hydration. The ratio of liquid to flour is critical. Too little liquid results in a stiff dough that produces a dry, dense crumb. Ensure you are measuring your ingredients accurately, especially the liquid and flour. Using a scale to weigh flour is highly recommended for consistency, as measuring by volume can be inaccurate, leading to varying hydration levels.
If you find your dough consistently too dry when following a recipe, you might need to slightly increase the amount of liquid (milk or water) or decrease the amount of flour in future attempts. Factors like the humidity in your kitchen and the specific type of flour used can affect how much liquid is absorbed. A dough that is slightly sticky but manageable is often ideal for achieving a soft crumb.
Don't be afraid to add a tablespoon or two of extra liquid during mixing if the dough feels too stiff and dry. Proper cooling is also essential; cutting into the bread before it has fully cooled traps steam, which can make the crumb seem gummy rather than dry, but improper storage after cooling can lead to rapid drying.
Achieving a Golden-Brown Crust: Baking Time and Temperature Adjustments
Getting that perfect golden-brown crust on your soft fluffy white bread is the crowning glory of the baking process. If your crust is too pale, it could be due to insufficient baking time or a low oven temperature. Make sure your oven is accurately preheated to the specified temperature, typically around 375°F (190°C). An oven thermometer can help verify your oven's actual temperature, as they can sometimes be off by several degrees.
Allow the bread to bake for the full recommended time, or until the internal temperature reaches 190-200°F (88-93°C). If the crust is still too pale but the internal temperature is reached, you can try increasing the baking time by a few minutes or slightly increasing the oven temperature (by 10-15°F or 5-8°C) during the last 5-10 minutes of baking, keeping a close eye on it to prevent burning.
Conversely, if the crust is browning too quickly before the interior is cooked, your oven might be too hot, or the bread is positioned too close to the heating element. Try lowering the oven temperature slightly, moving the rack to a different position, or loosely tenting the loaf with aluminum foil for part of the baking time to slow down the crust development while the interior finishes cooking.
Variations and Additions to Your Soft White Bread
Adding Herbs and Spices for a Flavor Boost
While a basic soft fluffy white bread recipe is delicious on its own, incorporating herbs and spices can transform it into something truly special. These additions can be mixed into the dough during the kneading stage. For a savory twist, consider adding dried herbs like rosemary, thyme, or dill. About 1-2 tablespoons of dried herbs per loaf is a good starting point, depending on how intense you want the flavor. Fresh herbs can also be used, though you may need a larger quantity (around 3-4 tablespoons) as their flavor is less concentrated when dried.
Spices such as garlic powder, onion powder, or a pinch of black pepper can also enhance the savory profile. Imagine a soft fluffy white bread with roasted garlic mixed into the dough – perfect for pairing with soups or pasta dishes. When adding dried ingredients like herbs or spices, remember they can absorb a small amount of moisture, so your dough might feel slightly drier. You might need a tiny splash more liquid to maintain the desired consistency for your soft fluffy white bread dough.
Making Sandwich Bread: Adjusting the Shape and Size
The standard loaf shape produced by this soft fluffy white bread recipe is inherently perfect for slicing into sandwich bread. However, you can easily adjust the shape and size to suit your preference or intended use. Instead of shaping into a single large loaf, you could divide the dough after the first rise and shape it into smaller loaves or rolls. For instance, dividing the dough into 12 equal pieces and shaping them into dinner rolls will result in delightful individual portions of soft fluffy white bread.
When making rolls, the baking time will be significantly shorter, perhaps 15-20 minutes, as they are smaller. You'll bake them on a baking sheet rather than in a loaf pan. If you want a taller, narrower loaf ideal for uniform sandwich slices, ensure your loaf pan is the standard 9x5 inch size and that you shape the dough tightly enough to create surface tension that encourages upward rise. The shaping technique described in Step 4 is specifically designed to produce a classic sandwich loaf shape from your soft fluffy white bread dough.
Sweet White Bread: Adding Sugar and Flavorings
Transforming your soft fluffy white bread into a sweet version is simple and opens up a world of possibilities, perfect for breakfast toast or dessert-like pairings. The basic soft fluffy white bread recipe already contains some sugar to feed the yeast and tenderize the crumb. To make it sweeter, you can increase the amount of sugar in the recipe. Be cautious not to add too much (e.g., more than 1/4 cup per standard loaf), as excessive sugar can inhibit yeast activity and result in a dense loaf.
Beyond increasing sugar, you can introduce sweet flavorings like vanilla extract, cinnamon, or even citrus zest during the mixing stage. For instance, adding 1 teaspoon of vanilla extract and 1-2 teaspoons of ground cinnamon can create a wonderful cinnamon-flavored soft fluffy white bread. You could also incorporate dried fruits like raisins or cranberries, or chocolate chips, though these additions are best mixed in gently towards the end of the kneading process to avoid tearing the gluten structure. Remember that adding extra dry ingredients like dried fruit might require a slight increase in liquid to maintain dough hydration.
Storing Your Soft & Fluffy White Bread for Maximum Freshness
Proper Cooling Techniques to Prevent Soggy Bread
Once your soft fluffy white bread emerges from the oven, its journey isn't quite finished. Proper cooling is absolutely essential for achieving the best texture and preventing a soggy bottom crust. As the bread cools, residual heat continues to cook the interior slightly, and more importantly, trapped steam needs to escape. If the bread is left in the hot pan, or placed on a flat, non-porous surface, moisture will condense on the bottom, making the crust wet and the crumb gummy.
Immediately after removing the loaf from the oven, carefully turn it out of the loaf pan onto a wire cooling rack. The wire rack allows air to circulate freely around the entire loaf, facilitating the release of steam from all sides. Allow the bread to cool completely before slicing, which can take at least 1-2 hours for a standard loaf. Slicing warm bread traps steam inside, leading to a dense, moist crumb that quickly becomes stale. Patience during this cooling phase is key to enjoying the full soft fluffy white bread experience.
Best Methods for Storing White Bread
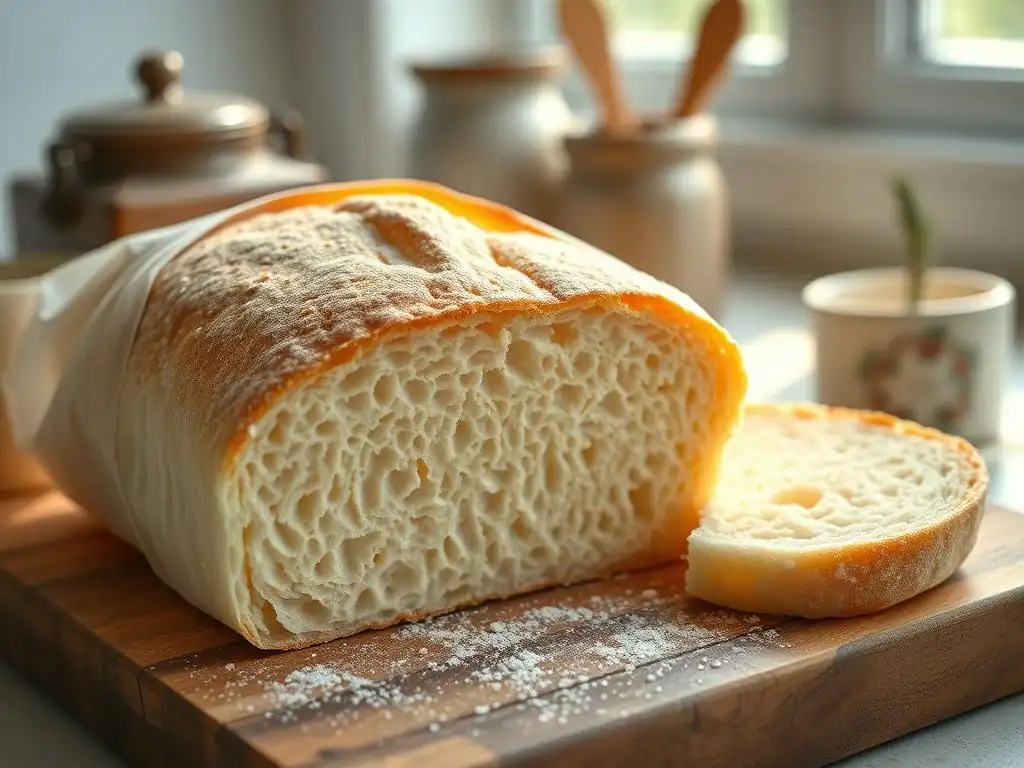
Once your soft fluffy white bread has cooled completely, storing it properly is crucial to maintain its freshness and softness. The best method depends on how quickly you plan to consume the loaf. For short-term storage (1-2 days), placing the cooled loaf in a clean paper bag is a good option. A paper bag allows the crust to remain relatively crisp while protecting the interior. However, this method can lead to the bread drying out faster in low-humidity environments.
For slightly longer storage at room temperature (3-4 days), wrapping the loaf tightly in plastic wrap or placing it in a resealable plastic bag or bread box is generally recommended for soft white bread. This helps retain moisture, keeping the crumb soft. Avoid storing soft white bread in the refrigerator, as this accelerates the staling process due to starch retrogradation. Keep the wrapped bread in a cool, dry place away from direct sunlight.
Freezing White Bread for Later Enjoyment
Freezing is an excellent way to preserve your homemade soft fluffy white bread for longer periods, allowing you to enjoy its freshness weeks or even months later. Ensure the bread is completely cooled before freezing; freezing warm bread will create ice crystals that damage the texture. For best results, slice the loaf before freezing if you plan to use individual slices.
Wrap the cooled loaf or slices tightly in plastic wrap, ensuring there are no gaps where air can enter. Then, place the wrapped bread in a freezer-safe bag or wrap it again in aluminum foil. Proper wrapping prevents freezer burn, which dries out the bread and affects its texture and flavor. Frozen soft fluffy white bread can be stored for up to 3-4 months. To thaw, simply take out the desired amount, leave it wrapped at room temperature for a few hours, or pop slices directly into a toaster.
Enjoying Your Homemade Soft White Bread
Serving Suggestions and Recipe Ideas
Your freshly baked soft fluffy white bread is incredibly versatile and ready to be enjoyed in countless ways! Of course, a simple slice warm from the oven, spread with butter, is a classic and deeply satisfying treat. It's the perfect foundation for classic sandwiches, from a simple ham and cheese to a hearty BLT, holding up beautifully to various fillings without crumbling.
Consider using your soft fluffy white bread for French toast – the soft crumb absorbs the custard mixture wonderfully, resulting in a rich, tender breakfast. It's also fantastic for making homemade breadcrumbs or croutons; simply cube stale bread and bake until golden and crisp. For a quick snack, slice it thickly, toast it lightly, and top with avocado, jam, or cream cheese. This versatile soft fluffy white bread recipe is truly a staple that can elevate everyday meals.
The Perfect Pairings for Your Freshly Baked Bread
The simple, comforting flavor of soft fluffy white bread makes it an ideal companion for a wide variety of dishes. Serve slices alongside a warm bowl of soup or chili, perfect for soaking up every last drop. Pair it with a fresh salad for a light lunch, or use it to make garlic bread as a side for pasta dishes.
For a more substantial meal, your soft fluffy white bread is the ultimate base for open-faced sandwiches topped with meats, cheeses, or vegetables. Don't forget breakfast – besides toast and French toast, it's wonderful served with eggs and bacon. The tender crumb and mild flavor of this soft fluffy white bread complement both sweet and savory pairings, making it a truly versatile addition to your kitchen repertoire.
Conclusion: Mastering the Art of Soft & Fluffy White Bread with BakeWithEase
Keep Baking and Experimenting!
Congratulations! By following this guide, you've taken significant steps towards mastering the art of baking a truly soft fluffy white bread. Baking is a skill that improves with practice, and each loaf you bake will teach you something new. Don't be discouraged if your first attempt isn't absolutely perfect; note what happened, review the steps, and try again. Pay attention to the feel of the dough, the temperature of your ingredients, and the signs of proper proofing.
Experimenting with slight variations, like trying the Tangzhong method or adjusting the liquid ever so slightly based on your flour and environment, can lead to even better results tailored to your kitchen. The joy of baking lies in the process and the delicious outcome. Keep practicing this soft fluffy white bread recipe, and soon you'll be turning out consistently wonderful loaves with ease.
We love seeing what our community creates! Your success in baking a perfect soft fluffy white bread is our success. We encourage you to share photos of your beautiful loaves and tell us about your baking journey. Did you find a specific tip particularly helpful? Did you add any fun variations?
Sharing your experiences helps inspire other home bakers and builds our community. At BakeWithEase, we're here to support you every step of the way on your bread baking adventures. Keep exploring new recipes, honing your skills, and most importantly, enjoy the delicious, comforting results of your effort in baking soft fluffy white bread!
Frequently Asked Questions
What makes this soft fluffy white bread recipe different from other bread recipes?
This recipe focuses on specific hydration levels and a longer proofing time to achieve a truly soft and airy texture. It also uses simple, easy-to-find ingredients.
Is this recipe suitable for beginner bakers?
Yes, absolutely! The recipe includes detailed, step-by-step instructions and emphasizes simple techniques. We also offer tips for troubleshooting common baking problems.
Can I substitute any of the ingredients in this recipe?
While we recommend sticking to the recipe for the best results, you can experiment with different types of flour or add-ins like herbs or seeds. However, changes may affect the final texture.
How long does it take to make this soft fluffy white bread?
The entire process, including preparation, proofing, and baking, takes approximately 3-4 hours. Most of this time is dedicated to proofing the dough.
What's the best way to store leftover soft fluffy white bread?
Store the bread in an airtight container at room temperature for up to 3 days, or freeze for longer storage. Slicing before freezing can make it easier to use later.
Final Reflection: The Enduring Allure of Perfectly Fluffy Bread
The pursuit of the perfect loaf of soft, fluffy white bread transcends mere culinary skill; it's a journey into the heart of comfort and tradition. This seemingly simple goal—achieving that ethereal texture and delicate crumb—requires precision, patience, and a deep understanding of the interplay between ingredients and technique. The methods explored in this article, from the careful selection of flour to the precise control of fermentation, are not just recipes; they are keys to unlocking a timeless culinary experience.
The enduring appeal of soft, fluffy white bread lies in its ability to evoke powerful memories and emotions. It's the smell that transports us back to childhood kitchens, the taste that anchors us to familiar comforts, and the simple act of sharing a warm loaf that strengthens bonds. As food writer Michael Pollan eloquently stated, Food is symbolic of love when words are inadequate.
This sentiment perfectly encapsulates the emotional resonance of this seemingly simple food, a resonance that continues to shape our cultural landscape and individual experiences.
Now, consider your own relationship with bread. What memories does the aroma of freshly baked bread evoke? What role does this simple food play in your life and traditions? I encourage you to experiment with the techniques outlined in this article, not just to achieve a perfectly fluffy loaf, but to deepen your appreciation for the artistry and the profound connection between food, memory, and community. Embrace the process, savor the results, and share the joy of perfectly fluffy bread with those you love.
Unleash Your Inner Baker: Craft the Perfect Loaf!
Thanks for joining us on this bread-baking adventure! You've just unlocked the secrets to achieving that incredibly soft and fluffy white bread you've always dreamed of. Now it's time to put your new skills to the test!
- Bake your masterpiece: Grab those ingredients and try out the recipe today. The results will be deliciously rewarding!
- Share your success: Post a picture of your freshly baked loaf on social media and tag us – we'd love to see your creation!
- Experiment with variations: Try adding different seeds, herbs, or even a touch of sweetness to personalize your bread.
Ready to create the fluffiest, most delightful white bread your family has ever tasted? What unique twist will you add to your perfect loaf?