
Baking Methods Compared: Steam vs. Dutch Oven for Rustic Breads

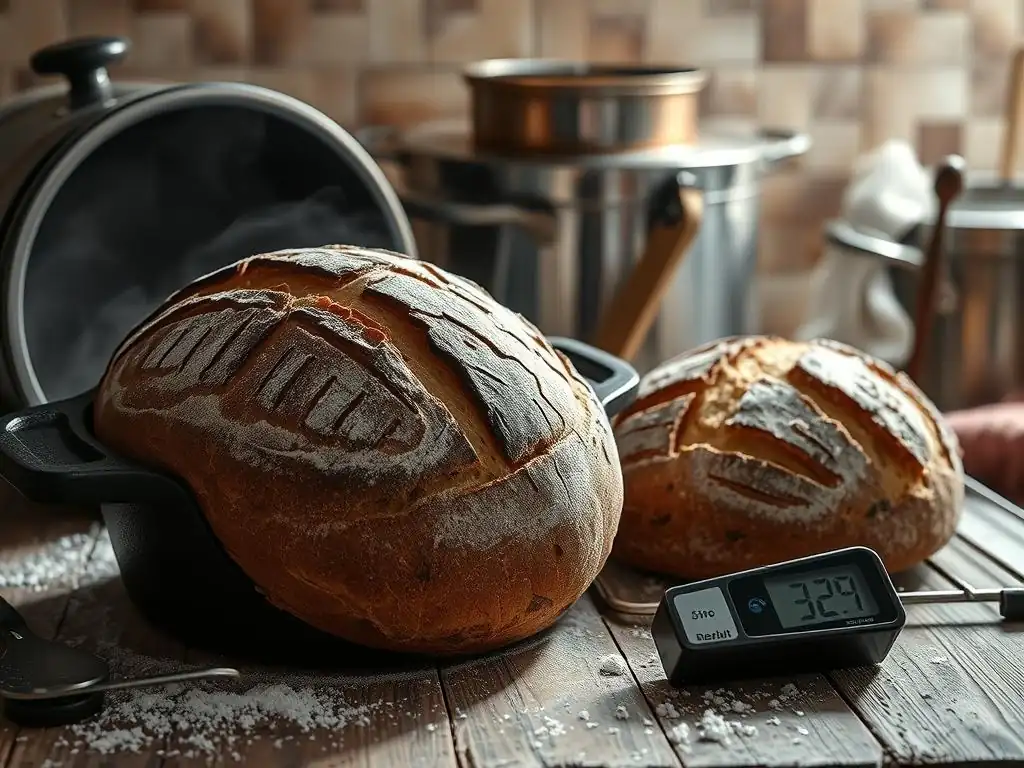
Welcome to BakeWithEase, where baking dreams become delicious realities! Ever wondered about the secret to achieving that perfect crust on your rustic bread? We're diving deep into the fascinating world of Steam vs Dutch oven baking techniques. Discover which method reigns supreme for creating artisan-quality loaves right in your own kitchen. Intrigued? Let's unlock the secrets to baking bread perfection!
- Introduction: Achieving the Perfect Crust for Rustic Bread
- Steam Baking for Rustic Bread: A Deep Dive
- Dutch Oven Baking for Rustic Bread: An In-Depth Look
- Steam vs. Dutch Oven: A Detailed Comparison
- Which Method is Right for You? Steam or Dutch Oven?
- Troubleshooting Common Issues with Each Method
- Recipes: Putting Steam and Dutch Oven to the Test
- Conclusion: Mastering Rustic Bread Baking with Steam and Dutch Oven Techniques
-
Frequently Asked Questions
- What is the main difference between steam baking and using a Dutch oven?
- Which method is better for creating a crusty loaf of bread?
- Can I use a Dutch oven for all types of breads?
- How do I create steam in my oven if I'm not using a Dutch oven?
- Are there specific recipes that work best with steam vs Dutch oven?
- Final Reflection: The Perfect Crust: Choosing Your Bread-Baking Path
- Unleash Your Inner Baker: Master Rustic Breads Today!
Introduction: Achieving the Perfect Crust for Rustic Bread
The Quest for Artisan Bread at Home
Baking rustic bread with that signature crackly crust and airy interior is a rewarding pursuit for home bakers. Many aspire to replicate the results of professional bakeries, where loaves boast deep color, a satisfying shatter when sliced, and an open crumb structure. Achieving this often hinges on managing the baking environment, specifically the presence of steam, which is crucial for developing the crust and ensuring proper oven spring. The debate often centers on the most effective way to introduce and manage this steam in a standard home oven.
For years, bakers have experimented with various techniques to mimic the high-humidity environments of commercial bread ovens. While a simple loaf baked without any special treatment might develop a crust, it often becomes thick, hard, and less appealing, sometimes even splitting unpredictably. The goal is a thin, crisp crust that yields easily to the knife, a hallmark of truly artisan loaves like ciabatta or classic sourdough. This pursuit leads many to explore specialized methods, primarily focusing on the role of moisture in the initial stages of baking.
Understanding Crust Development in Bread Baking
The crust of a loaf of bread develops through a complex series of chemical reactions primarily driven by heat. However, the presence of moisture, especially steam, plays a critical role in the initial phase of baking. When a dough is placed in a hot oven, the surface temperature rises rapidly. Without sufficient moisture in the air, the surface dries out too quickly, forming a hard crust prematurely. This hard shell restricts the dough's ability to expand during the final burst of rising, known as oven spring.
Introducing steam in the early stages prevents the surface from drying out immediately. The moisture keeps the surface soft and pliable, allowing the dough to expand maximally before the crust sets. As the baking progresses and the internal temperature rises, the steam dissipates or is absorbed, and the Maillard reaction and caramelization processes take over, browning the starches and sugars on the surface to form the final, flavorful, and crisp crust. Effective steam management is key to transitioning from a soft, pliable surface to a beautifully colored, crisp exterior.
Steam Baking for Rustic Bread: A Deep Dive
How Steam Creates a Superior Crust
Steam creates a high-humidity environment around the dough during the critical first 10-15 minutes of baking. This humid atmosphere prevents the surface of the dough from drying out and forming a hard crust too early. Think of it like giving the dough a temporary protective layer. This pliant surface allows the dough to expand freely and achieve maximum oven spring, resulting in a larger, airier loaf. Furthermore, the presence of steam promotes the gelatinization of starches on the dough's surface.
As the baking continues and the steam disperses, these gelatinized starches dehydrate and become brittle, contributing significantly to the desired thin, crisp texture of a rustic bread crust. The moisture also keeps the surface cooler for slightly longer, allowing enzymes to remain active and contribute to better browning and flavor development before they are deactivated by the heat. This initial period of moist heat is fundamental to achieving the characteristic blistered and shiny crust often seen on artisan loaves.
Benefits of Using Steam in Bread Baking
Using steam offers several distinct advantages when baking rustic breads. These benefits directly impact the final quality of the loaf, from its appearance to its texture and volume. Understanding these benefits helps clarify why managing moisture is so crucial in achieving professional-level results at home. The primary goal is to control the rate at which the crust forms, allowing the dough's internal structure to develop fully before being encased in a rigid exterior.
The controlled environment provided by steam allows for a more predictable and desirable outcome. Instead of a thick, tough crust that might tear or inhibit expansion, you get a thinner, more delicate shell that shatters appealingly. This leads to a loaf that is not only aesthetically pleasing but also has a better volume and a more open, desirable crumb structure. It's a key technique for unlocking the full potential of high-hydration doughs often used for rustic breads.
Enhanced Crust Color and Shine
Steam significantly contributes to the beautiful, deep golden-brown color and subtle shine characteristic of artisan bread. By keeping the surface moist longer, it allows for better development of caramelization and the Maillard reaction. These complex chemical processes, responsible for the rich flavors and aromas in baked goods, occur more effectively on a hydrated surface. Without sufficient steam, the crust might set and brown too quickly, resulting in a pale, dull, or unevenly colored exterior.
Consider a baguette baked with ample steam versus one baked in a dry oven. The steamed baguette will likely have a richer, deeper brown color with appealing blisters and a slight sheen. The dry-baked one might be paler and have a more uniform, matte surface. This difference in appearance is a direct result of how steam influences the chemical reactions on the dough's surface during the initial baking phase. Approximately 8-10 minutes of steam is often sufficient to initiate these beneficial processes.
Improved Crust Texture and Crispness
Perhaps the most celebrated benefit of using steam is the resulting crust texture. Steam helps create a thinner, more brittle crust that develops a satisfying crispness upon cooling, rather than becoming thick and chewy. As the steam dissipates, the gelatinized starches on the surface dehydrate, forming a delicate, glass-like layer beneath the outer surface. This is what gives a great rustic loaf its characteristic shatter.
A loaf baked without adequate steam often develops a tough, hard crust that can be difficult to slice and lacks the delightful crispness. The difference is particularly noticeable in high-hydration doughs, where the goal is a light, airy interior encased in a delicate, crisp shell. Achieving this specific texture is a primary reason bakers go to the effort of creating a steamy environment in their ovens.
Increased Oven Spring
Oven spring, the final dramatic rise a loaf experiences in the oven, is maximized when the crust remains pliable during the first phase of baking. Steam ensures the dough surface stays soft and elastic, allowing the rapidly expanding gases within the dough to push outwards without resistance from a prematurely set crust. This leads to a higher rise and a more open crumb structure.
In a dry oven, the crust can set within the first few minutes, essentially putting a 'cap' on the loaf's expansion. This restricts oven spring, resulting in a denser loaf with a tighter crumb. For rustic breads, where an open, irregular crumb is desired, maximizing oven spring through steam is essential. Loaves baked with proper steam can often increase in volume by 30-50% or more in the oven.
Methods for Creating Steam in Your Oven
Creating sufficient steam in a standard home oven requires deliberate effort, as these ovens are designed to vent moisture. Several methods can be employed, each with its own advantages and considerations regarding effectiveness and safety. The key is to generate a significant amount of steam just before or as the bread goes in and maintain it for the initial baking period (typically 10-20 minutes).
Common techniques range from simple to more elaborate setups. Regardless of the method chosen, it's crucial to preheat the oven thoroughly, often to temperatures between 450°F and 500°F (230°C - 260°C), as the heat helps instantly convert water to steam. Safety is paramount, especially when dealing with boiling water and hot ovens.
Using a Water Pan
One of the simplest and most common methods involves placing a pan of hot water in the oven while it preheats. A cast iron skillet or a metal baking pan works well. For maximum steam, many bakers place an empty pan on the bottom rack during the initial preheat, and then carefully pour a cup or two of boiling water into it just before loading the bread. The hot pan helps flash the water into steam instantly.
Using lava rocks or crumpled metal chains in the water pan can increase the surface area, generating even more steam. This method is relatively easy but the steam can dissipate quickly from a vented oven. It's important to use boiling water for instant steam generation and to be extremely careful when pouring hot water into a hot pan in a hot oven to avoid burns. A typical setup might involve a pan holding 1-2 cups (240-480ml) of water.
Spritzing with Water
Another technique involves spritzing the walls and floor of the hot oven with water from a spray bottle just before loading the bread. Some bakers repeat this process a couple of times during the first 5-10 minutes of baking. This method creates immediate steam but it is often less sustained than other methods. It works best in ovens that retain moisture relatively well.
Care must be taken not to spray the oven light or heating elements, which can cause them to break. Using distilled water can help prevent mineral buildup on oven surfaces. While easy to implement, this method often provides less dense and less consistent steam compared to using a dedicated steam source like a water pan or lava rocks. It's a quick fix but may not yield the absolute best results for demanding rustic loaves.
Adding Lava Rocks
A more effective method for sustained steam generation is to place a tray or cast iron pan filled with lava rocks (or even clean metal nuts and bolts) on the bottom rack of the oven during preheating. These porous rocks absorb and retain heat exceptionally well. Just before loading the bread, boiling water is poured over the hot lava rocks, creating a powerful burst of steam that can last for 15-20 minutes.
This method provides more consistent and longer-lasting steam than just a pan of water. The porous nature of the lava rocks offers a large surface area for the water to instantly vaporize. Approximately 1-2 cups (240-480ml) of boiling water poured over a pan filled with lava rocks can create a very humid environment ideal for the initial stages of steam baking. This technique requires caution due to the intense steam produced.
Steam Baking: Best Practices and Tips
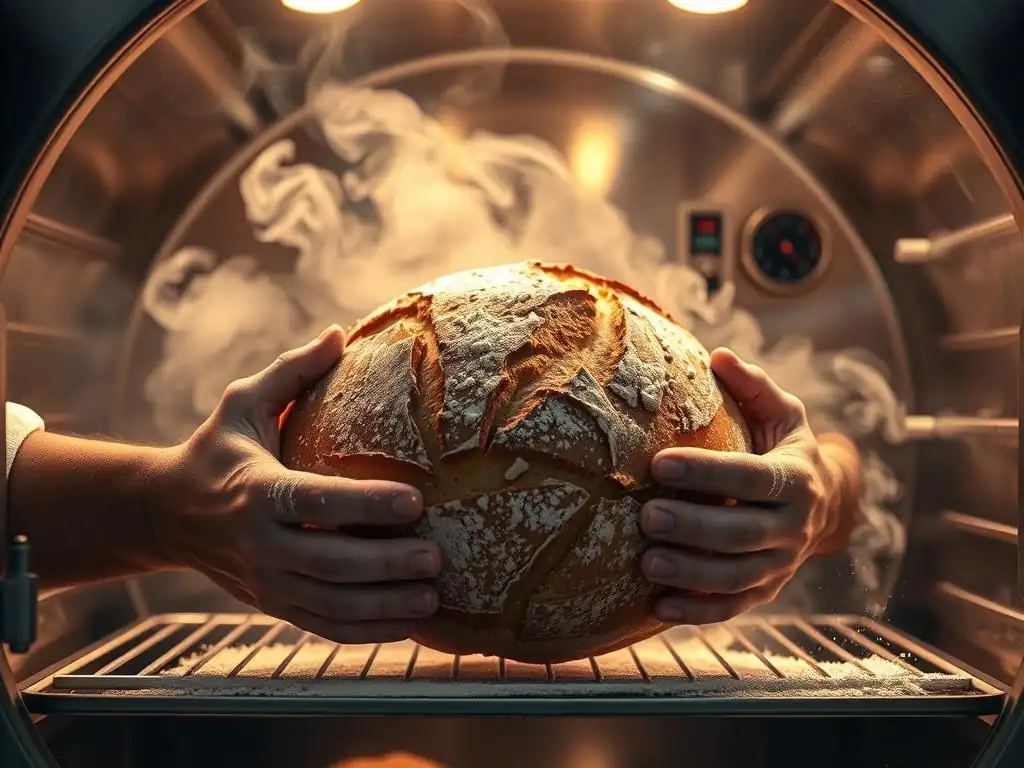
To get the best results with steam baking, timing and technique are key. Preheat your oven and steam setup thoroughly – often for 30-60 minutes – to ensure everything is hot enough to generate instant, powerful steam. Load your bread quickly and close the oven door promptly to trap the steam. After the initial steaming period (typically 15-20 minutes), carefully open the oven door for a few seconds to release the steam before continuing to bake at a potentially lower temperature to finish browning and drying the crust.
Using a baking stone or steel on a rack above your steam source can help transfer heat efficiently to the base of the loaf, promoting good oven spring from the bottom. Ensure your steam setup allows space for the bread to expand. Using a peel or parchment paper makes transferring the dough into the hot oven and onto the baking surface easier and safer when using steam methods. Remember, consistency in steam generation is vital for consistent results.
Steam Baking: Ideal Bread Types
Steam baking is particularly beneficial for high-hydration doughs and breads that benefit from an exceptionally crisp, thin crust and maximum oven spring.
Ciabatta and Baguettes
These classic rustic breads are prime examples of loaves that thrive in a steam-rich environment. Ciabatta relies on high hydration for its open, irregular crumb, and steam allows its relatively wet surface to expand fully without tearing, resulting in the characteristic bubbly crust. Baguettes require a thin, crispy crust and significant oven spring to achieve their elongated shape and airy interior; steam is indispensable for this. Baking these loaves with adequate steam ensures the desired texture and volume.
Consider a traditional French baguette recipe; the instructions almost universally include a method for generating steam. This is because the thin shape and high surface area-to-volume ratio of a baguette mean its crust sets very quickly in a dry oven, severely limiting expansion. Steam provides the necessary grace period for the dough to achieve its potential shape and structure.
Crusty Rolls
Smaller loaves like ciabatta rolls, Kaiser rolls, or other crusty dinner rolls also benefit greatly from steam. Their smaller size means the crust sets even faster than on a large loaf. Steam keeps the surface pliable, allowing these rolls to achieve a good rise and develop a crisp exterior proportional to their size. A basket of perfectly steamed rolls with a delicate crust is far more appealing than rolls with a thick, tough shell.
Even simple sandwich rolls can be elevated by baking with steam. It helps achieve a tender interior and a pleasant, slightly crisp crust rather than a dry, crumbly one. The principle remains the same: keeping the surface moist allows for better expansion and a finer crust texture, making steam a valuable tool for any baker making smaller, crusty items.
Dutch Oven Baking for Rustic Bread: An In-Depth Look
The Dutch Oven Advantage: A Self-Contained Steaming Environment
The Dutch oven offers a fundamentally different approach to managing steam compared to methods that fill the entire oven cavity with moisture. Its primary advantage lies in creating a small, self-contained environment around the loaf. When a lid is placed on a hot Dutch oven, the moisture naturally released by the dough as it bakes is trapped inside. This creates a humid microclimate precisely where the dough needs it most, right around its surface.
This self-steaming capability simplifies the process considerably compared to trying to humidify a large, vented oven space. The Dutch oven effectively becomes a miniature steam oven for the loaf. This method is particularly effective for single loaves and works exceptionally well for doughs that are otherwise challenging to handle and transfer, like high-hydration sourdoughs or no-knead recipes.
How a Dutch Oven Works for Bread Baking
A Dutch oven leverages two key principles: trapping steam and providing even, radiant heat. When a preheated Dutch oven is used, the instant the dough is placed inside and the lid is closed, the heat begins to convert the dough's surface moisture into steam. Because the lid is on, this steam is held captive within the pot, surrounding the loaf.
This trapped steam performs the same crucial function as external steam: it keeps the dough's surface soft and pliable, allowing for maximum oven spring. After a period (typically 20-30 minutes), the lid is removed. This allows the steam to escape, and the dry heat of the oven, combined with the radiant heat from the hot Dutch oven walls, finishes baking the loaf, developing the crust's color, flavor, and final crispness.
Trapping Steam for Optimal Crust Formation
The sealed environment created by the Dutch oven lid is highly effective at trapping the moisture released by the baking dough. A typical loaf of bread contains a significant amount of water, perhaps 65-80% of the dough's weight. As the dough heats up, this water turns to steam. In a Dutch oven, this steam has nowhere to go, saturating the air immediately surrounding the loaf.
This high humidity prevents the surface from drying out and setting too quickly, allowing the dough to expand freely. The effect is similar to baking in a professional deck oven with steam injection, but on a smaller, more manageable scale for the home baker. The steam persists as long as the lid is on, providing a consistent humid environment during the initial critical phase of oven spring and crust development.
Even Heat Distribution
Beyond steam, the cast iron (or other heavy material) of a Dutch oven provides excellent heat retention and distribution. Preheating the Dutch oven ensures that the loaf is hit with intense, even heat from all sides (bottom, sides, and top via the lid) the moment it's placed inside. This promotes rapid oven spring and helps set the structure of the loaf quickly.
The radiant heat from the pot contributes to a well-baked base and sides, preventing pale spots. Once the lid is removed, the radiant heat helps in achieving a uniform, deep brown color on the entire crust. This combination of trapped steam followed by intense dry heat is a powerful one-two punch for creating beautiful rustic loaves.
Dutch Oven Baking: Best Practices and Tips
Properly using a Dutch oven for bread baking involves a few key steps to ensure safety and optimal results. Always preheat the Dutch oven thoroughly inside the oven – typically for 30-60 minutes at the target baking temperature (often 450°F - 500°F / 230°C - 260°C). This ensures the pot is hot enough to instantly create steam and provide radiant heat. Use heavy-duty oven mitts or heat-resistant gloves when handling the hot pot.
Transferring the dough into a blazing hot Dutch oven requires care. Using parchment paper to lift and lower the dough is highly recommended; you can even leave the parchment in for the first part of the bake. Alternatively, a peel dusted with cornmeal or rice flour can be used. Remember to remove the lid carefully after the initial steaming period (usually 20-30 minutes) to allow the crust to brown.
Preheating the Dutch Oven
Preheating is arguably the most critical step when using a Dutch oven for bread. A cold pot will not generate sufficient instant steam from the dough's moisture, nor will it provide the necessary radiant heat for immediate oven spring. Place the empty Dutch oven (with its lid) in the cold oven and turn it on to the desired temperature. Allow it to preheat for at least 30 minutes after the oven reaches temperature, and preferably 45-60 minutes, especially for thicker cast iron pots.
This extended preheat ensures the entire pot and lid are uniformly hot, creating the ideal environment for the dough. Skipping this step can lead to poor oven spring and a pale, underdeveloped crust. Using a high-quality, heavy Dutch oven made from cast iron or enameled cast iron is recommended for best results due to their superior heat retention.
Scoring the Dough
Scoring (or slashing) the surface of the dough just before placing it in the Dutch oven is essential. Scoring provides weak points on the dough's surface, guiding where the loaf will expand during oven spring. Without scoring, the crust will tear unpredictably as the dough expands, resulting in a less attractive loaf. Use a sharp blade (like a lame) to make swift, clean cuts about 1/2 inch deep.
The type and pattern of scoring can also influence the final shape and appearance of the loaf. For a round loaf, a simple cross or a few parallel slashes are common. Scoring should be done confidently and quickly just before the dough goes into the hot pot to maximize its effectiveness during the rapid initial expansion phase facilitated by the Dutch oven's steam trap.
Safe Handling of a Hot Dutch Oven
Handling a Dutch oven preheated to 450°F (230°C) or higher requires extreme caution. Always use heavy-duty, dry oven mitts or specialized heat-resistant gloves that cover your wrists. Never use wet mitts, as moisture transfers heat rapidly. Place the hot lid somewhere safe where it won't be accidentally touched – on a heatproof surface or trivet.
When removing the loaf or taking the pot out of the oven, be mindful of the weight and temperature. Use both hands and maintain a firm grip. The handle on the lid will also be extremely hot. Steam will escape when the lid is removed, so angle it away from your face and hands. Safety is paramount when working with such high temperatures and heavy equipment like a cast iron Dutch oven.
Dutch Oven Baking: Ideal Bread Types
The Dutch oven method is particularly well-suited for free-form loaves, especially those with high hydration levels that might be difficult to handle or maintain their shape without support.
Sourdough Loaves
Sourdough bread, with its often high hydration (70% or more) and vigorous oven spring, is a perfect candidate for Dutch oven baking. The contained steam environment is ideal for developing the thin, blistered crust and maximizing the dramatic expansion characteristic of well-made sourdough. The radiant heat from the pot also helps achieve a deep, rich color on the crust.
Many popular sourdough recipes online specifically call for baking in a Dutch oven due to its reliability in creating the necessary steam and heat conditions for a professional-quality loaf at home. The support of the pot also helps maintain the shape of the relatively slack sourdough dough during baking.
No-Knead Breads
Jim Lahey's famous no-knead bread recipe, which popularized the use of a Dutch oven for home baking, is a testament to this method's effectiveness. No-knead doughs are typically very wet and slack, making them difficult to shape and bake free-form in a standard oven. The Dutch oven provides the necessary structure and, crucially, the trapped steam to allow these wet doughs to achieve incredible oven spring and a fantastic crust.
The ease of simply dropping the wet dough into a hot pot makes the Dutch oven ideal for this type of minimal-effort, high-reward bread. The results – a loaf with a beautiful craggy crust and an open, irregular crumb – are difficult to replicate as consistently using other methods without specialized equipment.
Steam vs. Dutch Oven: A Detailed Comparison
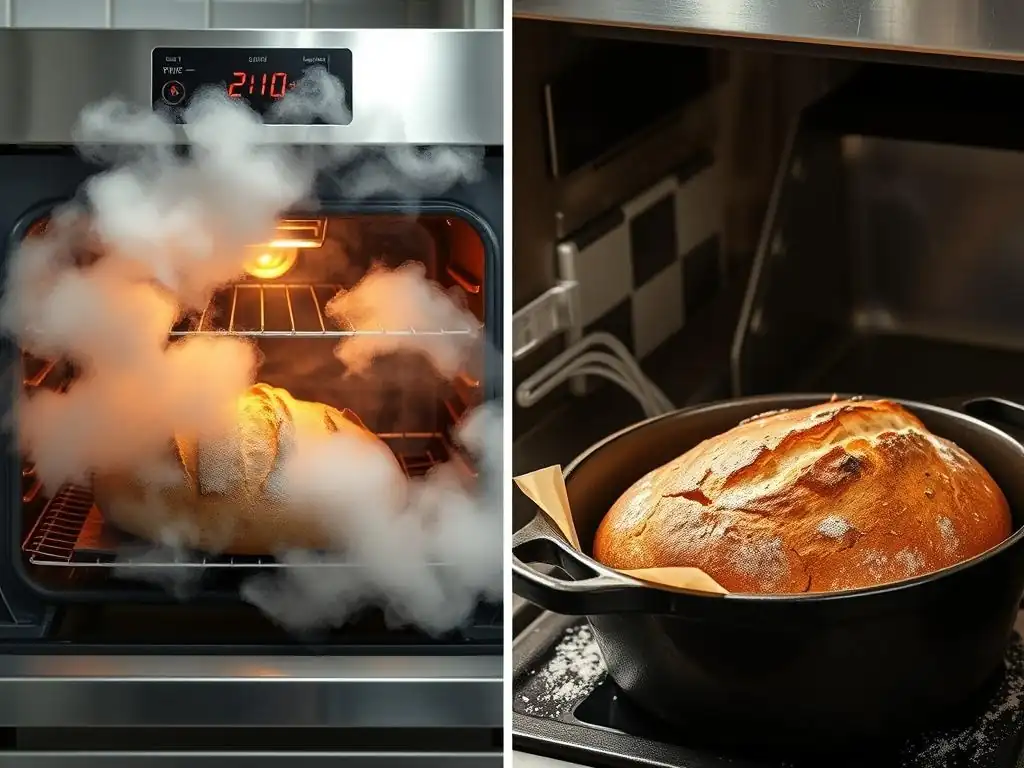
Choosing between steam baking methods and the Dutch oven technique often comes down to a trade-off between control, convenience, and the desired outcome. Both aim to provide moisture during the initial bake to improve the crust and crumb, but they achieve this through different means and have distinct impacts on the baking process and the final loaf. Let's compare Steam vs Dutch oven across several key characteristics.
Understanding the nuances of each method helps bakers decide which approach best suits their needs, equipment, and the specific type of rustic bread they are trying to bake. There isn't a single "better" method; rather, there is the method that is better for you and for your bread in a given situation.
Crust Characteristics: Steam vs. Dutch Oven
The most noticeable difference between bread baked with external steam and bread baked in a Dutch oven is often found in the crust. While both methods aim for a crisp, thin crust, there can be subtle variations in thickness, crispness, and color depending on the method used and executed. Comparing Steam vs Dutch oven crusts reveals these subtle but important distinctions.
Generally, both methods produce superior crusts compared to baking in a dry oven. The choice might depend on whether you prefer a very thin, slightly blistered crust or one that is uniformly crisp and potentially slightly thicker.
Evaluating Crust Thickness
Breads baked using external steam methods (like water pans or lava rocks) often develop a slightly thinner, more delicate crust. The steam permeates the entire oven cavity, potentially leading to a more uniform softening of the surface across multiple loaves if baking more than one. The crust tends to be quite brittle upon cooling.
Bread baked in a Dutch oven, while also having a crisp crust, can sometimes develop a slightly thicker crust, especially on the bottom and sides due to direct contact with the hot pot walls. However, this thickness is usually still desirable and contributes to the structural integrity of the loaf, particularly for round loaves. The internal steam trapped in the pot is highly effective at keeping the top surface pliable initially.
Comparing Crust Crispness
Both methods yield wonderfully crisp crusts, a key characteristic of rustic bread. External steam methods can sometimes result in a crust with more pronounced blistering and a very fine, almost glass-like shatter upon slicing. This is often seen on baguettes and ciabatta.
The Dutch oven method reliably produces a very crisp crust that holds up well. The transition from the humid environment inside the pot to the dry heat after the lid is removed seems particularly effective at creating a sturdy yet crisp exterior. The crispness is often more uniform around the loaf compared to external steaming methods where hot spots in the oven might affect different parts of the crust differently.
Analyzing Crust Color
Both steam methods and Dutch oven baking facilitate excellent crust color development through caramelization and the Maillard reaction. The sustained moisture in the initial phase allows these processes to occur over a longer period at lower surface temperatures before the crust fully sets and browns.
Dutch oven baking often results in a very deep, rich, and uniform brown color on the entire surface of the loaf. The radiant heat from the pot contributes to this even browning. External steam methods also produce great color, but achieving uniformity across multiple loaves or on oddly shaped loaves might require careful oven management. A well-executed bake using either Steam vs Dutch oven will yield a beautifully colored crust.
Interior Characteristics: Steam vs. Dutch Oven
While steam primarily affects the crust, its influence on oven spring has a direct impact on the interior or crumb structure of the bread. Both methods, by promoting better oven spring, contribute to a more open and desirable crumb compared to baking without steam.
The key difference in the interior isn't necessarily caused directly by the steam method itself, but rather by how effectively the method facilitates oven spring and even baking throughout the loaf.
Assessing Crumb Structure
Both steam baking and Dutch oven baking methods are excellent for achieving an open, airy crumb structure, which is highly desirable in rustic breads. The extended pliability of the crust allows the internal gases to expand maximally during oven spring, creating larger, more irregular holes.
While both methods are effective, some bakers find that the intense, uniform heat and trapped steam of the Dutch oven are particularly reliable for consistently achieving a very open, somewhat irregular crumb, especially with high-hydration doughs like sourdough. External steam can achieve similar results but might be more sensitive to oven hot spots or variations in steam density.
Comparing Moisture Levels
Neither method directly adds moisture to the interior of the bread; they manage the moisture on the surface and allow the interior to bake properly. However, by preventing the crust from setting too early, both methods allow the interior of the loaf to reach the correct internal temperature (typically 200-210°F / 93-99°C) without the exterior becoming overbaked or burnt.
This proper, even baking results in a loaf with a moist, tender crumb. A loaf baked without sufficient steam might have a dense or gummy interior if the crust sets too fast, preventing the inside from fully cooking before the outside burns. Both Steam vs Dutch oven methods help avoid this issue, ensuring a well-baked interior with good moisture retention.
Ease of Use: Steam vs. Dutch Oven
When comparing Steam vs Dutch oven from a practical perspective, ease of use is a significant factor. This includes the setup required, the complexity of the baking process itself, and the cleanup afterwards.
The Dutch oven method is often considered simpler and more reliable for single loaves, while external steam methods can be more versatile for baking multiple loaves simultaneously, though potentially more complex to set up.
Setup and Preparation
Setting up for external steam baking can involve multiple steps: placing a pan, adding lava rocks, boiling water, and carefully pouring it into the hot oven. This requires coordination and safety precautions when handling boiling water near a hot oven.
The Dutch oven setup is relatively simple: place the empty pot and lid in the oven and preheat. There's no need to boil water separately or manage hot water inside the oven cavity during the bake. This simplicity makes the Dutch oven method very appealing, especially for beginners or those baking just one loaf at a time.
Baking Process
The baking process for external steam involves loading the bread, adding the steam source (if not pre-added), baking for the steaming period, and then venting the oven. This might require opening the oven door at a specific time to release steam, which can cause temperature fluctuations.
The Dutch oven process involves loading the bread into the preheated pot, covering it, baking with the lid on for a set time, then carefully removing the lid and continuing to bake uncovered. This two-stage process is straightforward and less prone to temperature swings from opening the door to manage steam.
Cleanup
Cleanup for external steam can involve dealing with a hot water pan, potentially mineral deposits on oven surfaces if tap water is used for spritzing, and possibly cleaning up spills if water is mishandled.
Cleanup for the Dutch oven method typically only involves washing the Dutch oven itself after it has cooled. There are generally no spills or residue within the oven cavity related to the steam generation. This makes the Dutch oven method generally cleaner and simpler from a post-bake perspective.
Cost and Accessibility: Steam vs. Dutch Oven
The cost and accessibility of equipment also play a role in deciding between Steam vs Dutch oven baking. Both methods require basic baking equipment, but the specific tools for steam generation or the Dutch oven itself represent differing investments.
Considering budget and what equipment you already own is important when choosing a preferred method for baking rustic bread.
Equipment Requirements
Basic steam baking requires a baking stone or steel (optional but recommended), a pan for water or lava rocks, and potentially a spray bottle. These items are relatively common in many kitchens or are inexpensive to acquire.
The Dutch oven method requires a heavy-duty Dutch oven with a tight-fitting lid that is oven-safe to high temperatures (typically 500°F / 260°C or higher). These can range in price significantly, from budget-friendly cast iron options to more expensive enameled versions, but represent a more substantial initial investment than a simple water pan.
Budget Considerations
For bakers on a tight budget or those just starting out, external steam methods using existing pans or inexpensive lava rocks can be a very cost-effective way to improve rustic bread crusts without a significant outlay.
A good quality Dutch oven can be a considerable expense, often ranging from $50 to over $300 depending on size, material, and brand. However, a Dutch oven is a versatile piece of cookware usable for many other dishes, which can justify the cost for many home cooks and bakers. Comparing Steam vs Dutch oven cost requires considering both initial outlay and multi-purpose utility.
Which Method is Right for You? Steam or Dutch Oven?
Deciding between using external steam methods and baking in a Dutch oven depends on several personal factors and baking goals. Both are effective techniques for achieving a superior rustic crust compared to baking in a dry oven, but they cater to different preferences and situations.
Consider your experience level, the equipment you already have or are willing to purchase, and the specific characteristics you desire in your final loaf. There's no single "best" method; the right choice is the one that aligns with your needs and helps you achieve your baking goals.
Factors to Consider When Choosing a Method
Several practical considerations should guide your choice. Think about how often you plan to bake rustic bread, the types of bread you want to make, and the space and equipment you have available in your kitchen.
- Baking Experience Level: Beginners might find the self-contained nature of the Dutch oven simpler to manage.
- Equipment Availability: Do you already own a suitable Dutch oven or the components for a steam setup?
- Desired Bread Outcome: Are you aiming for a very specific crust type (e.g., maximum blistering) or simply a reliable, crisp crust?
- Batch Size: Do you typically bake one loaf or multiple loaves at once?
These questions help narrow down which method, or combination of methods, might be the most practical and effective for your home baking setup.
Baking Experience Level
For novice bakers venturing into rustic bread, the Dutch oven often provides a more forgiving and consistent environment. The trapped steam is automatically generated by the dough's moisture, removing the variable of manually creating and maintaining steam in a large oven cavity. Transferring dough into a hot pot can be tricky, but the overall process is often perceived as simpler than managing external steam sources.
More experienced bakers might appreciate the flexibility of external steam methods, which allow for baking multiple loaves simultaneously or using different baking surfaces (like a stone or steel) that don't fit inside a Dutch oven. They may also be more comfortable with the safety aspects of handling hot water and steam. Comparing Steam vs Dutch oven ease for beginners often favors the latter.
Equipment Availability
Your current kitchen equipment is a major factor. If you already own a heavy-duty Dutch oven suitable for high-temperature baking, you can start using that method immediately with minimal extra cost. Ensure it's rated for the temperatures required (often 450-500°F / 230-260°C) and that any knobs or handles are also oven-safe or can be replaced.
If you don't own a Dutch oven, consider the cost versus purchasing a baking stone/steel and components for a steam setup (like a cast iron skillet or lava rocks). A baking stone/steel is also highly versatile and useful for pizzas and other baked goods, making it a worthwhile investment even if you later acquire a Dutch oven.
Desired Bread Outcome
If your primary goal is to reliably produce a consistently well-risen loaf with a good, crisp crust, especially with high-hydration doughs like sourdough or no-knead, the Dutch oven is exceptionally effective. It provides structure and a guaranteed steam environment.
If you are aiming for specific rustic bread types known for extensive blistering (like some ciabattas or baguettes) or if you want to bake multiple loaves that won't fit in a single Dutch oven, external steam methods might be more appropriate. They offer flexibility in loaf shape and size. Ultimately, both methods are excellent for achieving a desirable rustic crust when comparing Steam vs Dutch oven results.
Recommendation Based on Specific Needs
- For Beginners: Start with the Dutch oven method, especially for sourdough or no-knead breads. It's simpler, more forgiving, and produces reliable results for single loaves.
- For Bakers on a Budget: Explore external steam methods using existing pans or inexpensive lava rocks. Combine with a baking stone if possible for best results.
- For Baking Multiple Loaves: External steam methods are generally necessary as most Dutch ovens only accommodate one loaf at a time.
- For High-Hydration Doughs (Sourdough, No-Knead): The Dutch oven is often the easiest and most reliable way to manage these slack doughs and ensure maximum oven spring and a great crust.
- For Baguettes or Very Flat Breads (like some Ciabatta): External steam methods are usually preferred due to the shape of the loaves which don't fit well in a Dutch oven.
Regardless of the method chosen, practice is key. Experimentation will help you fine-tune the technique to your specific oven and preferences when comparing Steam vs Dutch oven outcomes.
Troubleshooting Common Issues with Each Method
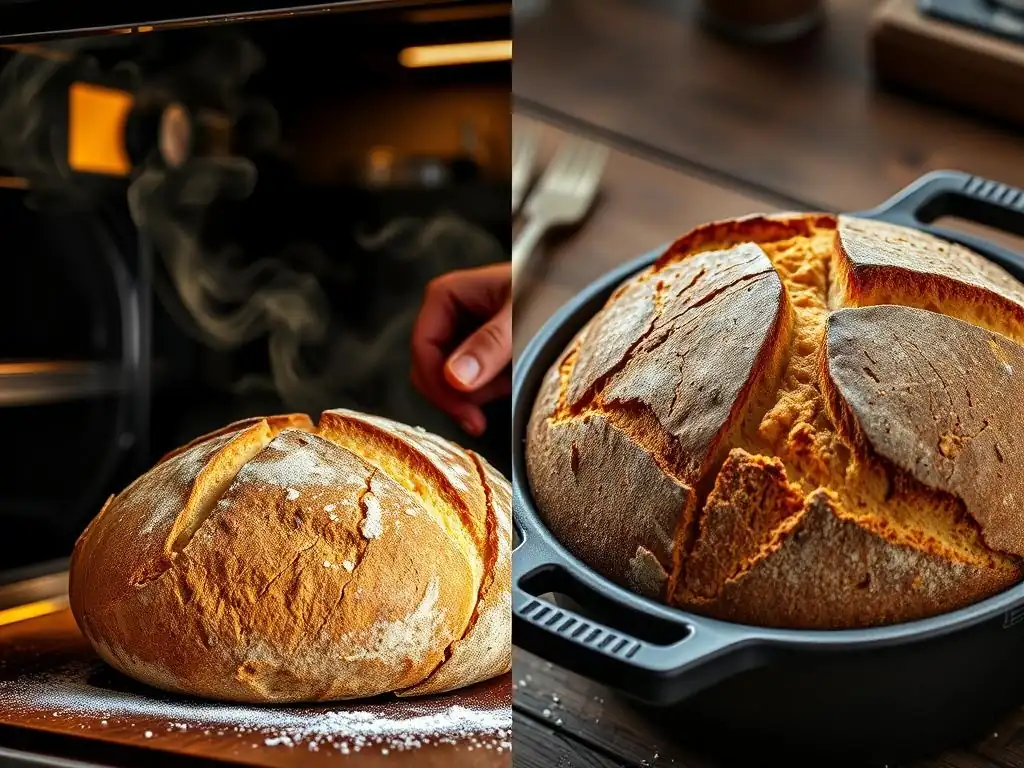
While both steam baking and Dutch oven baking are effective, they are not without their potential pitfalls. Understanding common problems and their solutions can save you frustration and help you achieve better results consistently.
Addressing issues like insufficient steam, burnt crusts, or underbaked interiors requires understanding the mechanics of each method and making targeted adjustments.
Common Steam Baking Problems and Solutions
Issues with steam baking often relate to generating enough steam, maintaining it for the correct duration, or managing the overall oven environment.
Insufficient Steam
- Problem: Crust setting too early, poor oven spring, pale or thick crust.
- Cause: Not enough water used, water not boiling when added, oven not hot enough, steam escaping too quickly from the oven.
- Solution: Use boiling water; use more water (e.g., 1.5-2 cups / 350-480ml); use lava rocks or chains to increase surface area for steam generation; ensure oven is fully preheated for 30-60 minutes; minimize opening the oven door during the steaming period. Consider sealing large oven vents with foil if safe to do so according to your oven manual (use caution! ).
Over-Proofing
- Problem: Dough collapses when transferred, poor shape, dense crumb.
- Cause: Dough proofed for too long before baking, losing structural integrity.
- Solution: Pay close attention to proofing times; dough should be proofed until just ready, not fully proofed, as it will get significant oven spring with steam. A poke test should show the dough slowly springing back, not holding the indentation completely or springing back instantly. Bake slightly under-proofed dough directly from the refrigerator for better handling and oven spring.
Common Dutch Oven Baking Problems and Solutions
Issues with Dutch oven baking often involve managing the intense heat and ensuring the loaf bakes evenly throughout the two stages.
Burnt Crust
- Problem: Bottom crust is burnt or excessively dark and hard while the top is fine.
- Cause: Dutch oven bottom is too hot, baking too long with the lid off, oven temperature too high.
- Solution: Reduce oven temperature slightly (e.g., by 25°F / 15°C) after removing the lid; place a baking sheet on the rack below the Dutch oven to shield the bottom from direct heat; reduce the total baking time; slightly shorten the lid-on baking time.
Underbaked Interior
- Problem: Crust looks good but the inside is dense, gummy, or feels heavy.
- Cause: Not enough baking time total, especially after the lid is removed.
- Solution: Ensure the dough reaches an internal temperature of 200-210°F (93-99°C) using an instant-read thermometer. If the crust is browning too quickly, tent the loaf loosely with foil for the remainder of the baking time after the lid is off. Ensure the Dutch oven was preheated sufficiently to provide enough initial heat.
Recipes: Putting Steam and Dutch Oven to the Test
To truly understand the difference between Steam vs Dutch oven baking, try applying each method to a similar rustic bread dough. While a full recipe is beyond the scope here, we can outline the general process for a simple rustic loaf using both techniques. This hands-on comparison is the best way to see which method you prefer.
The dough itself would typically be a medium to high hydration dough made with flour, water, salt, and yeast or sourdough starter, allowed to ferment and proof appropriately before baking. The key difference lies solely in the baking environment.
Rustic Bread Recipe Using Steam
- Prepare Dough: Mix, knead (or fold), ferment, and proof your rustic bread dough according to your preferred recipe.
- Preheat Oven: Place a baking stone or steel on a middle rack and a sturdy pan (like a cast iron skillet or broiler pan) on the bottom rack. Preheat oven to 450-475°F (230-245°C) for 45-60 minutes. If using lava rocks in the bottom pan, add them now.
- Generate Steam: Just before loading the bread, carefully pour 1-2 cups (240-480ml) of boiling water into the hot pan on the bottom rack. Close the oven door quickly to trap the steam. Alternatively, spritz oven walls with water.
- Load Bread: Score the dough. Carefully slide the dough onto the preheated baking stone/steel using a peel or parchment paper.
- Bake with Steam: Bake for 15-20 minutes in the steamy environment.
- Vent Steam & Finish Bake: Carefully open the oven door to release steam. Continue baking at the same or slightly reduced temperature (e.g., 425°F / 220°C) for another 20-30 minutes until the crust is deep golden brown and the internal temperature is 200-210°F (93-99°C).
- Cool: Remove from oven and cool on a wire rack for at least 1 hour before slicing.
Rustic Bread Recipe Using a Dutch Oven
- Prepare Dough: Mix, knead (or fold), ferment, and proof your rustic bread dough according to your preferred recipe.
- Preheat Oven & Dutch Oven: Place the empty Dutch oven (with lid) inside the oven. Preheat oven to 450-475°F (230-245°C) for 45-60 minutes.
- Load Bread: Carefully remove the hot Dutch oven from the oven using heavy mitts. Remove the lid and place it safely on a heatproof surface. Score the dough. Gently lower the dough into the hot Dutch oven using parchment paper or by hand (carefully! ).
- Bake with Lid On: Place the lid back on the Dutch oven. Carefully place the covered pot back into the oven. Bake for 20-30 minutes with the lid on.
- Finish Bake (Lid Off): Carefully remove the hot lid and place it safely aside. Continue baking the uncovered loaf for another 20-30 minutes (or until the crust is deep golden brown and internal temperature is 200-210°F / 93-99°C). If the bottom is browning too fast, place a baking sheet underneath the Dutch oven.
- Cool: Carefully remove the Dutch oven from the oven, then carefully lift the loaf out of the pot (using parchment if used). Cool on a wire rack for at least 1 hour before slicing.
Conclusion: Mastering Rustic Bread Baking with Steam and Dutch Oven Techniques
Achieving the perfect rustic bread crust at home is a goal within reach for any baker willing to explore the power of steam. Whether you choose to create a steamy environment within your oven cavity or harness the self-steaming power of a Dutch oven, introducing moisture during the initial phase of baking is transformative. Both the Steam vs Dutch oven methods are highly effective at promoting oven spring, enhancing crust color and crispness, and contributing to a beautiful crumb structure.
The choice between Steam vs Dutch oven often comes down to practical considerations like equipment availability, budget, desired batch size, and personal preference for ease of use. The Dutch oven offers simplicity and reliability for single loaves, particularly high-hydration ones. External steam provides versatility for multiple loaves and specific shapes like baguettes, though it requires more effort in setup and steam management.
Elevating Your Bread Baking Skills
Mastering rustic bread baking involves more than just following a recipe; it's about understanding the science behind the bake and controlling the variables. By implementing either steam or Dutch oven techniques, you are taking a significant step towards elevating your skills from simply baking bread to crafting artisan loaves. The difference in the final product – a loaf with a thin, crackly crust and an open, airy interior – is truly rewarding and makes the effort worthwhile.
Don't be discouraged if your first attempts aren't perfect. Like any baking skill, achieving consistent results with either Steam vs Dutch oven method requires practice. Pay attention to the signs your dough gives you, observe how it behaves in the oven, and make small adjustments to your process based on the outcome.
The Art of Experimentation
The beauty of home baking lies in the ability to experiment and find what works best in your specific kitchen environment. Try baking the same dough using both the Steam vs Dutch oven methods to compare the results side-by-side. Adjust temperatures, steaming times, and lid-on/lid-off durations. Perhaps you'll find a hybrid approach that suits you best.
Embrace the journey of learning. Each loaf provides valuable insights into the process. With dedication and a willingness to experiment with techniques like steam vs Dutch oven, you can consistently bake beautiful, delicious rustic breads that rival those from your favorite bakery. Happy baking!
Frequently Asked Questions
What is the main difference between steam baking and using a Dutch oven?
Steam baking involves adding moisture to the oven during the baking process, while a Dutch oven traps steam within its enclosed space, creating a similar effect. Both methods help achieve a crispy crust.
Which method is better for creating a crusty loaf of bread?
Both methods are effective, but many bakers prefer the Dutch oven for its ability to maintain consistent temperature and humidity, resulting in a superior crust and oven spring.
Can I use a Dutch oven for all types of breads?
Yes, a Dutch oven is versatile and works well for many types of breads, particularly rustic styles like sourdough. However, some delicate breads may not require such a heavy vessel.
How do I create steam in my oven if I'm not using a Dutch oven?
You can create steam by placing a pan of hot water at the bottom of the oven or by spraying water onto the oven walls during the first few minutes of baking to achieve a moist environment.
Are there specific recipes that work best with steam vs Dutch oven?
Yes, recipes for rustic breads like ciabatta or sourdough benefit from both methods, but using a Dutch oven is particularly recommended for achieving the best texture and flavor in these breads.
Final Reflection: The Perfect Crust: Choosing Your Bread-Baking Path
The quest for the perfect rustic bread crust is a journey as old as baking itself, and the debate between steam and Dutch oven methods remains a fiercely contested one. This article has explored the nuances of each technique, highlighting the strengths and weaknesses of both in achieving that coveted golden-brown, crackling exterior and a tender, airy crumb. The choice, ultimately, isn't about declaring a single "winner," but understanding which method best suits your individual goals and resources.
The impact of these baking techniques extends beyond the simple act of creating a loaf. It speaks to a deeper connection with food, a desire to understand the process, and a celebration of artisanal craftsmanship. Bread is the staff of life,
a simple phrase, yet it encapsulates the profound role bread plays in our cultures and histories. The methods we use to bake it reflect our values, our patience, and our commitment to quality. From the ancient practice of steam-baking to the more modern adaptation of the Dutch oven, each technique carries a legacy, a story waiting to be discovered and shared.
Now, I invite you to consider your own baking journey. Which method resonates most with you? Will you embrace the controlled humidity of steam, or the even heat retention of the Dutch oven? Perhaps you'll even experiment with both, discovering your own unique approach to crafting the perfect loaf. The most important takeaway isn't a definitive answer, but the empowerment to explore, to experiment, and to find joy in the process of baking. So, gather your ingredients, preheat your oven, and embark on your own culinary adventure. The perfect crust awaits.
Unleash Your Inner Baker: Master Rustic Breads Today!
Thanks for exploring the wonderful world of rustic bread baking with us! We hope you gained valuable insights into the unique benefits of steam and Dutch oven methods. Now it's time to put your newfound knowledge into practice.
- Try our recommended steam method this weekend: Start with a simple recipe, focusing on mastering the steam technique before venturing into more complex loaves. This is your gateway to perfectly crusty, airy bread!
- Share your baking journey: Post a picture of your creation on social media using #BakeWithEaseSteamBread and tag us! Let's build a community of passionate bakers.
- Experiment with different flours and grains: Discover how different ingredients impact the texture and flavor of your bread. What unexpected combinations will you uncover?
Ready to transform your kitchen into a rustic bread haven? What unique ingredient will you experiment with first?