
Cold Proofing vs. Room Temperature Proofing: Which is Best for Flavor?

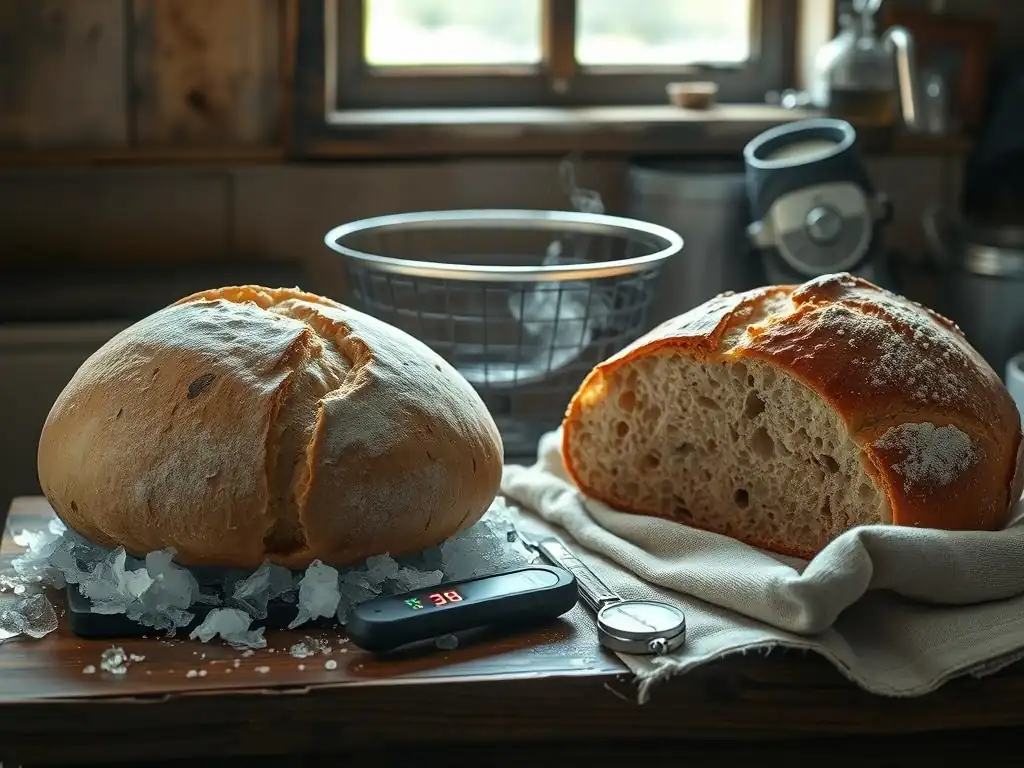
Welcome to BakeWithEase, your companion in the delightful world of baking! Ever wondered if your sourdough's flavor potential is truly unlocked? We're diving deep into the age-old debate of room temperature proofing sourdough bread versus cold fermentation. Unlock the secrets to the perfect loaf and discover which method reigns supreme in our latest guide. Prepare to elevate your bread baking game!
- Cold Proofing vs. Room Temperature Proofing: Which is Best for Sourdough Flavor?
- Introduction: Understanding Sourdough Proofing Methods
- What is Cold Proofing Sourdough?
- What is Room Temperature Proofing Sourdough?
- Cold Proofing vs. Room Temperature Proofing: A Detailed Comparison
- Factors Influencing Proofing Results
- Room Temperature Proofing Sourdough Bread: A Step-by-Step Guide
- Cold Proofing Sourdough Bread: A Step-by-Step Guide
- Expert Tips for Optimizing Sourdough Proofing
- Choosing the Right Proofing Method for Your Sourdough
- Conclusion: Mastering Sourdough Proofing
-
Frequently Asked Questions
- What is room temperature proofing for sourdough bread?
- How does room temperature proofing affect the flavor of sourdough bread compared to cold proofing?
- What are the potential risks of room temperature proofing sourdough bread?
- Is room temperature proofing suitable for all sourdough recipes?
- How can I determine the ideal room temperature proofing time for my sourdough bread?
- Final Reflection: The Subtle Art of Sourdough Proofing
- Unlock Your Bread's Flavor Potential!
Cold Proofing vs. Room Temperature Proofing: Which is Best for Sourdough Flavor?
Introduction: Understanding Sourdough Proofing Methods
The Importance of Proofing in Sourdough Bread Baking
Proofing, often referred to as the final rise, is a critical stage in the sourdough bread baking process. It's the period after shaping the dough but before baking, during which the yeast and bacteria in the sourdough starter continue to ferment, producing carbon dioxide gas. This gas inflates the gluten network, causing the dough to rise and develop its characteristic airy structure.
Proper proofing is essential for achieving good oven spring, a light crumb, and the signature tangy flavor of sourdough. Without adequate proofing, the bread can be dense and heavy; over-proofing, on the other hand, can lead to a collapsed structure and a gummy texture.
Beyond just leavening, proofing significantly impacts the flavor and aroma of the finished loaf. During this time, complex biochemical reactions occur, driven by the wild yeast and lactic acid bacteria present in the starter.
These microorganisms break down sugars and proteins, producing a myriad of volatile organic compounds, including various acids (like lactic and acetic acid), alcohols, and esters. The temperature and duration of proofing directly influence the activity of these microbes and, consequently, the types and quantities of flavor compounds produced, making the choice between cold and room temperature proofing a key decision for bakers aiming for specific taste profiles.
A Guide to Mastering Sourdough Proofing
Mastering sourdough proofing involves understanding the dynamics of fermentation and learning to read your dough. It's not simply about following a strict time guideline, as fermentation speed is highly dependent on factors like starter activity, dough temperature, ambient temperature, and hydration. A successful baker learns to observe the dough's volume increase, its texture, and its responsiveness to touch (the "poke test") to determine when it is perfectly proofed. This skill comes with practice and requires paying close attention to the dough throughout the process.
Developing proficiency in proofing also means knowing how different techniques, such as cold proofing and room temperature proofing, affect the final product. Each method offers unique advantages and disadvantages regarding flavor development, dough handling, and scheduling. By experimenting with both methods and understanding the science behind them, bakers can gain greater control over their sourdough results, consistently producing loaves with desired characteristics, whether that's a deeply tangy flavor or a milder, sweeter profile. This guide will explore these methods in detail to help you decide which is best for your baking goals.
What is Cold Proofing Sourdough?
Defining Cold Proofing: Slow Fermentation in the Refrigerator
Cold proofing, also known as cold retardation or cold fermentation, is a sourdough proofing technique where the shaped dough is placed in a refrigerator, typically at temperatures ranging from 2°C to 5°C (about 35°F to 41°F), for an extended period. This low temperature significantly slows down the metabolic activity of the yeast and bacteria in the sourdough starter.
While the yeast activity is drastically reduced, the lactic acid bacteria remain relatively more active at these cooler temperatures compared to yeast, allowing for a prolonged fermentation process that can last anywhere from 12 hours up to 72 hours or even longer, depending on the desired outcome and dough characteristics.
The primary purpose of this slow, cold fermentation is not rapid leavening, but rather the development of complex flavors and aromas. The extended time allows enzymes in the flour to break down starches into simpler sugars, which the microbes can then ferment. Simultaneously, the relatively higher activity of lactic acid bacteria produces a greater proportion of organic acids, particularly lactic and acetic acid. This process contributes significantly to the characteristic tangy flavor and aroma associated with well-developed sourdough bread.
Benefits of Cold Proofing Sourdough Dough
Enhanced Flavor Development
One of the most celebrated benefits of cold proofing is the significant enhancement of flavor. As mentioned, the slow, prolonged fermentation at low temperatures allows for the accumulation of a wider range of aromatic compounds. The extended time gives enzymes more opportunity to break down complex carbohydrates and proteins into simpler molecules, which the microbes then metabolize into flavorful byproducts.
Specifically, the cooler environment favors the production of acetic acid by heterofermentative lactic acid bacteria. Acetic acid contributes a sharper, more vinegary tang compared to the milder, yogurt-like tang of lactic acid.
A study published in the Journal of Cereal Science (though specific data points vary widely based on starter, flour, and conditions) generally indicates that longer fermentation times, especially cold ones, lead to higher concentrations of both lactic and acetic acids, resulting in a more complex and nuanced flavor profile. For many sourdough enthusiasts, this deeper, tangier flavor is the hallmark of a superior loaf.
Improved Dough Handling
Cold proofing also offers significant advantages in terms of dough handling. When dough is cold, it becomes much firmer and less sticky. This makes it considerably easier to score cleanly before baking. The cold dough holds its shape better when the scoring blade cuts through the surface, allowing for more intricate and controlled patterns.
Furthermore, transferring cold dough from the proofing vessel to the baking surface (like a Dutch oven or baking stone) is much simpler, as it maintains its structure and is less prone to collapsing or stretching unevenly. This improved manageability can be particularly helpful for bakers working with high-hydration doughs, which can be quite slack and challenging to handle at room temperature. The cold effectively "freezes" the dough's structure, making it robust enough to withstand manipulation just before hitting the hot oven.
Scheduling Flexibility
Perhaps one of the most practical benefits of cold proofing is the flexibility it offers to a baker's schedule. Unlike room temperature proofing, which requires constant vigilance and can be unpredictable depending on ambient temperature, cold proofing puts the fermentation process on pause, or at least in slow motion. This allows bakers to fit baking around their daily lives. You can shape your dough in the evening, place it in the refrigerator, and then bake it the following morning, afternoon, or even the day after.
This eliminates the pressure of needing to be available exactly when the dough reaches its peak at room temperature. For busy individuals, this ability to delay the final bake makes sourdough baking a much more manageable and less stressful hobby or routine. It provides a convenient window of several hours, sometimes even days, during which the dough remains in a prime condition for baking.
Potential Drawbacks of Cold Proofing
Longer Proofing Time
The most obvious drawback of cold proofing is the significantly longer time required compared to room temperature proofing sourdough bread. While room temperature proofing might take just 2-4 hours, cold proofing typically demands a minimum of 12 hours, often extending to 24, 48, or even 72 hours. This means you need to plan your baking schedule well in advance.
If you decide you want fresh sourdough bread today, cold proofing is not a viable option unless you started the process a day or two earlier. This extended timeline can be a barrier for spontaneous baking and requires patience and foresight in planning. It's a trade-off: you gain flexibility in when you bake, but the overall process duration from mixing to baking is considerably longer.
Requires Refrigerator Space
Another practical consideration is the need for adequate refrigerator space. Depending on the size and number of loaves you are proofing, the proofing containers (like bannetons or bowls covered with plastic wrap or a damp towel) can take up a substantial amount of room in your refrigerator. This can be problematic for individuals with small refrigerators or those who are proofing multiple loaves simultaneously.
Ensuring the dough is properly covered to prevent drying out also adds to the bulk. This logistical challenge means that cold proofing, while beneficial for flavor and schedule, might not always be feasible depending on your kitchen setup and storage capacity.
What is Room Temperature Proofing Sourdough?
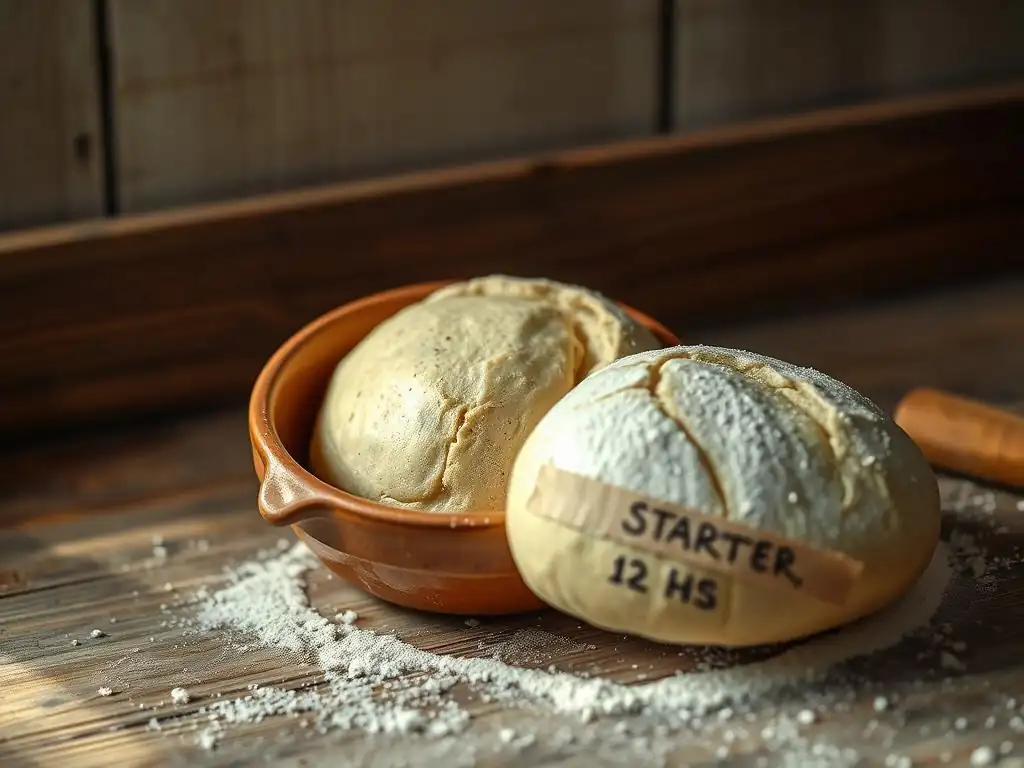
Defining Room Temperature Proofing: Active Fermentation at Ambient Temperatures
Room temperature proofing sourdough bread involves allowing the shaped dough to complete its final rise at typical ambient kitchen temperatures, usually ranging from 20°C to 25°C (about 68°F to 77°F). At these warmer temperatures, the yeast and lactic acid bacteria in the sourdough starter are much more active than they are in a cold environment. This increased activity leads to a significantly faster rate of fermentation and gas production. The dough will visibly increase in volume much more quickly than it would in the refrigerator.
This method allows bakers to complete the entire sourdough process, from mixing to baking, within a single day, often within 6-10 hours including bulk fermentation and proofing. While faster, the fermentation process at room temperature primarily favors the production of lactic acid over acetic acid, especially in shorter proofing times. This tends to result in a milder, less overtly tangy flavor compared to a long cold proof. Monitoring the dough's progress closely is crucial with room temperature proofing sourdough bread, as its rapid pace means the window for optimal proofing is shorter and can be easily missed.
Advantages of Room Temperature Proofing
Faster Proofing Time
The most significant advantage of room temperature proofing sourdough bread is its speed. At typical kitchen temperatures (e.g., 22°C or 72°F), the shaped dough can reach optimal proofing in a matter of 2 to 4 hours, sometimes even less depending on the starter's strength, dough hydration, and specific temperature.
This rapid turnaround makes it possible to bake sourdough bread on the same day you mix the dough, which is ideal for bakers who want fresh bread relatively quickly or those who haven't planned days in advance. If you decide in the morning that you'd like sourdough for dinner, room temperature proofing makes that a realistic possibility, unlike the multi-day commitment of cold proofing.
Visual Monitoring of Dough Rise
Room temperature proofing allows for much easier visual monitoring of the dough's progress. Because the rise is relatively fast and noticeable, bakers can easily observe the dough's volume increase and assess its readiness. The dough will typically double or nearly double in size, and the surface will appear smooth and well-inflated.
While experience is still needed, the rapid changes make it more intuitive to see if the fermentation is active and progressing as expected. This direct observation is a key part of learning to bake sourdough and understanding how your starter behaves in different conditions. The "poke test," where you gently press the dough surface to see how quickly it springs back, is particularly effective and easy to judge with room temperature proofed dough due to its active state.
Risk of Over-Proofing
The primary disadvantage of room temperature proofing sourdough bread is the increased risk of over-proofing. Because fermentation happens quickly at warmer temperatures, the window of time during which the dough is perfectly proofed is relatively short. If left unchecked for too long, the yeast can consume all available sugars, and the gluten structure can weaken and collapse. Over-proofed dough will often appear bloated and may deflate when touched or scored.
Baking over-proofed dough typically results in poor oven spring, a flat loaf, and a dense or gummy crumb. This requires bakers to be attentive and monitor the dough closely, especially as the proofing time approaches its estimated end. Leaving the dough unattended for even an extra hour on a warm day can sometimes be enough to push it past its peak.
Less Flavor Complexity
Compared to a long cold proof, room temperature proofing sourdough bread generally results in a less complex flavor profile. While fermentation still produces acids and other flavor compounds, the shorter duration and warmer temperature typically favor lactic acid production over acetic acid. This results in a milder, less tangy loaf.
While some bakers prefer this less intense flavor, those seeking the deep, nuanced tang often associated with artisanal sourdough may find room temperature proofing less satisfying in this regard. The enzymatic activity, which also contributes to flavor complexity by breaking down starches, is also less prolonged than in cold fermentation. A study comparing fermentation methods might show, for example, that a 24-hour cold proof yields 3 parts lactic acid to 1 part acetic acid, while a 3-hour room temperature proof yields 5 parts lactic acid to 0.5 parts acetic acid, illustrating the shift in acid balance.
Temperature Sensitivity
Room temperature proofing is highly sensitive to ambient temperature fluctuations. A few degrees difference in kitchen temperature can significantly alter the proofing time. On a warm summer day (say, 28°C or 82°F), dough might proof in under 2 hours, while on a cooler day (18°C or 64°F), it could take 4-5 hours or longer.
This variability makes consistent results challenging unless you can maintain a stable proofing environment, such as using a proofing box or oven with the light on. Bakers must constantly adjust their proofing times based on the temperature, adding a layer of unpredictability compared to the relatively stable environment of a refrigerator. This sensitivity makes it harder to predict exactly when the dough will be ready, demanding flexibility and constant attention from the baker.
Cold Proofing vs. Room Temperature Proofing: A Detailed Comparison
Flavor Profile: Cold Proofing vs. Room Temperature Proofing
The most striking difference between cold proofing and room temperature proofing sourdough bread lies in the flavor development. Cold proofing, through its extended duration at low temperatures, encourages the production of acetic acid, resulting in a pronounced, complex tang that can have vinegar-like notes. The slow enzymatic breakdown of starches also contributes to deeper, more nuanced flavors.
Think of a rustic, intensely flavored loaf often found in traditional bakeries. For instance, a sourdough bread cold-proofed for 48 hours at 4°C might exhibit a pH drop from 5.5 to 3.8, with a significant portion of that acidity coming from acetic acid, contributing a sharp bite.
In contrast, room temperature proofing sourdough bread, with its faster fermentation at warmer temperatures, tends to produce a milder, less acidic flavor. The primary acid produced is lactic acid, which imparts a softer, yogurt-like tang. While still flavorful, the complexity is generally less pronounced than in a cold-proofed loaf.
A loaf proofed for 3 hours at 23°C might see a pH drop from 5.5 to around 4.2, with a higher ratio of lactic acid to acetic acid compared to its cold-proofed counterpart. The choice between the two methods largely depends on the baker's preference for tang level and flavor depth.
Dough Strength and Structure: Impact on Gluten Development
Both proofing methods impact dough strength, albeit differently. Cold proofing allows enzymes called proteases, present in the flour, more time to act. These enzymes break down proteins, including gluten.
While this might sound detrimental, a controlled, slow breakdown can actually improve the extensibility (stretchiness) of the dough, making it easier to shape and score. However, excessively long cold proofs (e.g., beyond 72 hours for some doughs) can weaken the gluten structure significantly, leading to a dough that spreads rather than holds its shape. The cold temperature also firms up the fats and makes the dough less sticky, improving handling just before baking.
Room temperature proofing sourdough bread, being faster, allows less time for enzymatic breakdown. The gluten structure develops and holds relatively quickly. Dough proofed at room temperature tends to be softer and more extensible than cold dough when ready to bake, but also stickier.
While the gluten network is actively inflated by rapid gas production, the risk of over-proofing at room temperature can lead to the structure collapsing if fermentation goes too far. The dough becomes slack and loses its elasticity. A properly proofed dough using either method should have a strong, elastic gluten network capable of trapping gases and achieving good oven spring.
Time Management: Balancing Proofing Time with Baking Schedule
Time management is a key differentiator. Cold proofing offers unparalleled scheduling flexibility. You can fit the multi-day process around your life, baking the loaf when it's convenient within a wide window (e.g., baking anytime from 12 to 48 hours after shaping). This is ideal for busy individuals or those who want to prepare dough in advance for weekend baking. The downside is the total time from start to finish is much longer.
Room temperature proofing sourdough bread, conversely, is much faster, allowing for same-day baking. This is perfect for spontaneous baking or when you need a loaf relatively quickly. However, it demands that the baker be present and attentive during the 2-4 hour proofing window, as over-proofing can happen rapidly. If your schedule is unpredictable or you can't dedicate a block of time to monitor the dough, room temperature proofing might be less suitable. The choice here boils down to whether you prioritize speed and same-day results (room temp) or flexibility and planning ahead (cold).
Ease of Use: Which Method is More Beginner-Friendly?
For beginners, the question of which method is easier is debatable and depends on individual circumstances and goals. Room temperature proofing sourdough bread offers immediate feedback; you can see the dough rising relatively quickly, which can be encouraging. The poke test is also easier to interpret when the dough is actively fermenting. However, the short window for optimal proofing and the risk of over-proofing can be stressful for newcomers who are still learning to judge readiness. Missing the peak can easily lead to a disappointing loaf.
Cold proofing, while requiring more patience due to the long wait, can be more forgiving regarding timing once the dough is in the fridge. The slow pace means the dough stays optimally proofed for a longer period (e.g., a window of several hours within the 24-48 hour range). The improved handling of cold dough can also make scoring and transferring easier for those new to these steps.
However, judging the initial bulk fermentation before the cold proof is still crucial and can be tricky. Many beginners find starting with room temperature proofing helpful for understanding the basics of dough fermentation before experimenting with the slower, longer cold method.
Factors Influencing Proofing Results
Sourdough Starter Activity and Strength
The health and activity level of your sourdough starter are paramount to successful proofing, regardless of whether you choose cold or room temperature proofing sourdough bread. A vigorous, well-fed starter, typically used at its peak activity (when it has roughly doubled or tripled in volume and is full of bubbles, usually 4-8 hours after feeding with a 1:1:1 ratio of starter:flour:water at room temperature), will provide the necessary microbial power to leaven the dough effectively. A weak or sluggish starter will result in slow or stalled fermentation, leading to dense dough and poor oven spring.
The ratio of starter to flour in your dough also plays a significant role. A higher percentage of starter (e.g., 20-30% of total flour weight) will accelerate fermentation, while a lower percentage (e.g., 10-15%) will slow it down. Understanding your starter's typical peak time and adjusting the amount used in your recipe are crucial steps in controlling the proofing speed and ensuring predictable results with both cold and room temperature proofing techniques. Regularly feeding and maintaining a healthy starter is foundational to consistent sourdough baking.
Dough Hydration Level
Dough hydration, which is the ratio of water to flour by weight, significantly affects dough handling and fermentation speed. Higher hydration doughs (e.g., 75% hydration or more) tend to ferment faster because the water makes the starches and proteins more accessible to the microbes. They also develop a more open crumb structure but are generally stickier and harder to handle, especially at room temperature. Cold proofing can make high-hydration doughs much easier to manage.
Lower hydration doughs (e.g., 60-65% hydration) ferment more slowly and result in a tighter crumb. They are easier to handle and shape but require longer proofing times to achieve sufficient leavening. The hydration level influences how quickly the dough expands and how it feels when proofed. For example, a 65% hydration dough might need 4 hours at 23°C to proof, while an 80% hydration dough might be ready in 2.5 hours at the same temperature when using room temperature proofing sourdough bread methods. Bakers often adjust hydration based on desired crumb structure and ease of handling.
Ambient Temperature and Humidity
As highlighted earlier, ambient temperature is a critical factor, particularly for room temperature proofing sourdough bread. A kitchen temperature of 25°C (77°F) will result in fermentation happening significantly faster than at 20°C (68°F). This variability necessitates adjusting proofing times based on the environment. Using a thermometer to check your kitchen temperature or the actual dough temperature can help predict proofing duration more accurately.
Humidity also plays a role, though perhaps less pronounced than temperature. High humidity can slightly accelerate fermentation and also affects the dough surface, keeping it moist and less likely to form a skin. Low humidity can cause the dough surface to dry out, inhibiting rise and potentially leading to a tough crust. Covering the dough properly during proofing (with plastic wrap, a damp towel, or a lidded container) is essential to maintain adequate humidity around the dough, regardless of the ambient conditions, for both cold and room temperature proofing methods.
Flour Type and Quality
The type of flour used has a substantial impact on proofing. Different flours have varying protein content and characteristics. High-protein bread flour (around 12-14% protein) develops a strong gluten network capable of trapping more gas, supporting a larger rise. Whole wheat or rye flours, while nutritious, contain enzymes that can weaken gluten and ferment faster due to higher sugar content. Dough made with a significant percentage of whole grains (e.g., 50% whole wheat) will typically proof faster than dough made solely with white bread flour, whether using room temperature proofing sourdough bread or cold proofing.
The quality of the flour also matters. Freshly milled flour can behave differently than aged flour. Organic and stone-milled flours may contain more active enzymes and microbial life, potentially influencing fermentation speed and flavor development. Understanding how your chosen flour interacts with your starter and adjusting proofing times accordingly is part of the sourdough learning curve. For instance, a strong bread flour dough might require a slightly longer proof to achieve optimal volume compared to a blend containing weaker or whole grain flours.
Room Temperature Proofing Sourdough Bread: A Step-by-Step Guide
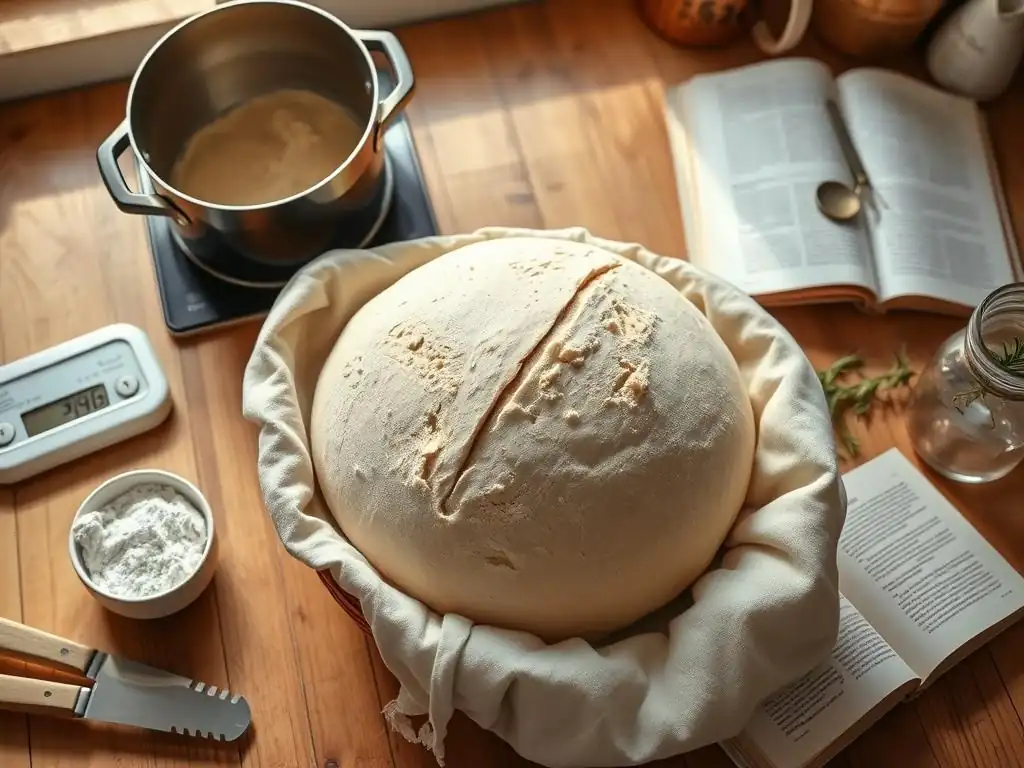
Preparing Your Sourdough Dough for Room Temperature Proofing
Once your bulk fermentation is complete and the dough has increased sufficiently in volume (often 30-60% depending on the recipe and desired outcome), gently turn the dough out onto a lightly floured surface. Divide the dough if making multiple loaves. Shape each piece into your desired form, typically a boule (round) or a batard (oval). Be careful not to degas the dough too much during shaping; the goal is to create tension on the surface while preserving the gas produced during bulk fermentation.
After shaping, place the dough seam-side up (for boules) or seam-side down (for batards) into a well-floured proofing basket (banneton) or a bowl lined with a floured linen or cotton cloth. The flour (rice flour is excellent for preventing sticking) helps prevent the dough from adhering to the basket as it expands. Cover the basket loosely with plastic wrap, a shower cap, or a clean, lightweight towel to prevent the surface from drying out while allowing the dough to breathe slightly.
Monitoring the Dough's Rise and Development
Place the covered proofing basket in a location with a stable room temperature, ideally between 20°C and 25°C (68°F-77°F). Avoid drafty spots or placing the dough directly in sunlight, which can cause uneven heating. The proofing time for room temperature proofing sourdough bread will vary significantly based on temperature, starter activity, and dough hydration, but typically ranges from 2 to 4 hours.
Monitor the dough's progress visually and by feel. The dough should increase significantly in volume, though it may not quite double, especially for high-hydration doughs or those proofed warmer. The surface should appear smooth and well-inflated. The most reliable test is the "poke test": gently press the dough with a floured finger. If the indentation springs back slowly and only partially (leaving a small indent), the dough is likely ready to bake. If it springs back immediately, it needs more time. If it doesn't spring back at all and leaves a deep, lasting indentation, it may be over-proofed.
Identifying Signs of Over-Proofing
Recognizing the signs of over-proofing is crucial when using the room temperature method due to its speed. An over-proofed dough will often appear bloated and may have lost some of the surface tension built during shaping. Instead of feeling light and airy, it might feel dense and heavy. The poke test is the most definitive indicator: if the indentation remains completely without springing back, the dough is over-proofed.
Other signs can include small bubbles appearing and potentially bursting on the surface, or the dough starting to spread out rather than holding its shape in the basket. If you gently shake the basket, the dough might jiggle excessively. While slightly over-proofed dough can sometimes still be baked, it will likely result in poor oven spring and a denser crumb structure. Catching the dough just before it reaches this stage is the goal of successful room temperature proofing sourdough bread.
Tips for Success with Room Temperature Proofing
- Know your starter: Use a starter that is active and predictable at room temperature. Feed it consistently and note how long it takes to peak at your kitchen's temperature.
- Temperature matters: Be aware of your ambient temperature. If it's warmer, anticipate a shorter proofing time (e.g., 2 hours at 25°C). If it's cooler, it will take longer (e.g., 4+ hours at 20°C). Consider using a proofing box or oven with the light on for more stable temperatures.
- Use the poke test: Don't rely solely on time. The poke test is your best indicator of readiness. Practice it to learn how your dough feels when perfectly proofed.
- Start checking early: Begin checking your dough 30-60 minutes before the estimated proofing time is up, especially if your kitchen is warm or your starter is very active.
- Handle gently: Once proofed, handle the dough very gently when transferring it to the baking vessel to avoid degassing it.
Cold Proofing Sourdough Bread: A Step-by-Step Guide
Preparing Your Sourdough Dough for Cold Proofing
Similar to room temperature proofing sourdough bread, the process begins after bulk fermentation and shaping. Shape your dough into a boule or batard, creating good surface tension. Place the shaped dough seam-side up or down into a well-floured proofing basket. Rice flour is highly recommended for its non-stick properties; dust the basket generously, ensuring the dough won't stick during the long cold rest.
Once the dough is in the basket, cover it securely. Options include using a plastic bag large enough to enclose the basket (a common and effective method), covering it tightly with plastic wrap, or using a dedicated proofing container with a lid. The key is to prevent the dough surface from drying out and forming a skin during the long refrigeration period. Proper covering also helps maintain a localized humid environment around the dough.
Properly Storing the Dough in the Refrigerator
Immediately after shaping and covering, place the proofing basket containing the dough into the refrigerator. The ideal temperature for cold proofing is between 2°C and 5°C (35°F-41°F). Ensure the refrigerator is cold enough; temperatures above 5°C may not slow fermentation sufficiently for a long proof and can lead to over-proofing in the fridge.
Place the dough in a location in the refrigerator where it won't be disturbed and where the temperature is relatively stable. The back of the fridge is often coldest and most consistent. Ensure the dough is placed on a stable shelf where it won't be accidentally knocked over. Allow sufficient space around the basket if possible to ensure even cooling.
Timing and Temperature Considerations for Cold Proofing
The duration of cold proofing is highly flexible, typically ranging from 12 hours up to 48-72 hours. The minimum time of around 12 hours is often sufficient to improve flavor and handling, but longer proofs (24-48 hours) generally yield more complex, tangy flavors and better dough structure for scoring. The optimal time depends on your desired flavor intensity and the specific characteristics of your dough and starter.
Dough temperature is crucial. It takes several hours for the dough's core temperature to drop to refrigerator temperature. Fermentation will continue at a slower pace during this cooling period. Monitoring your refrigerator's actual temperature with a separate thermometer is a good idea to ensure it's consistently within the optimal range for cold proofing sourdough bread. If your fridge is warmer, the dough will ferment faster than expected, potentially proofing fully or even over-proofing in less time.
Baking After Cold Proofing: Achieving the Perfect Crust
One of the great advantages of cold proofing is that the dough is usually baked directly from the refrigerator. The cold, firm dough is much easier to score cleanly with a lame or sharp razor blade. The cold surface also helps delay the formation of the crust in the initial stages of baking, allowing for maximum oven spring as the dough heats up and expands rapidly.
Preheat your oven and baking vessel (like a Dutch oven or baking stone) thoroughly. When ready to bake, gently invert the cold dough from the proofing basket onto a piece of parchment paper or directly into the preheated vessel. Score the dough quickly and confidently. Transfer to the oven and bake according to your recipe's instructions, typically starting with a covered period (in a Dutch oven) to trap steam for good oven spring and crust development, followed by an uncovered period to brown the crust. The cold dough benefits greatly from the initial burst of steam and high heat.
Expert Tips for Optimizing Sourdough Proofing
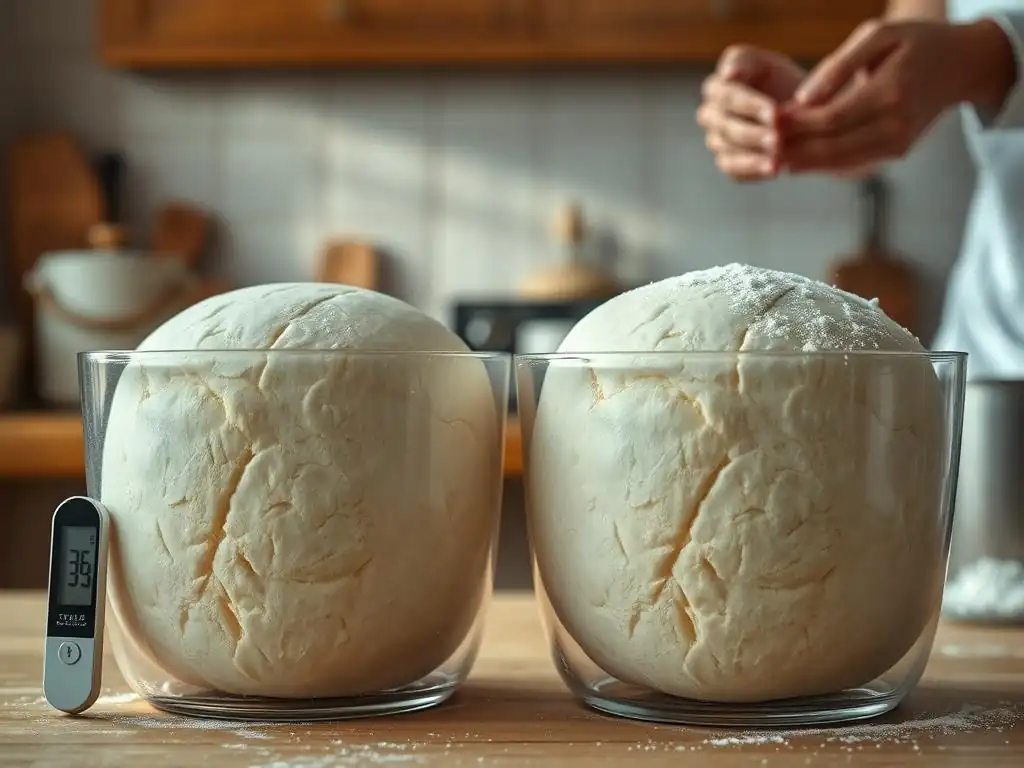
Adjusting Proofing Time Based on Environmental Conditions
Successful sourdough proofing, whether cold or room temperature proofing sourdough bread, requires constant adaptation. Develop the habit of noting your kitchen's temperature and humidity each time you bake. If it's a warm day (above 25°C), anticipate that room temperature proofing will be significantly faster, potentially cutting the expected time in half. If it's cold (below 20°C), expect it to take longer. Similarly, for cold proofing, if your refrigerator is slightly warmer than the ideal 4°C, the dough might be fully proofed closer to the 24-hour mark rather than needing 48 hours for peak flavor.
Keep a baking journal where you record the ambient temperature, dough temperature (if you measure it), starter activity, and the actual proofing time it took to reach the desired state. Note the results of the bake (oven spring, crumb, flavor). Over time, this data will help you build intuition and predict how long your dough will need to proof under various conditions, allowing you to adjust your schedule accordingly and consistently achieve well-proofed loaves.
Using a Dough Thermometer to Monitor Fermentation
While ambient temperature is important, the dough's internal temperature is a more direct indicator of fermentation speed. Using an instant-read thermometer to check the dough temperature at various stages can provide valuable insights. For room temperature proofing sourdough bread, knowing the dough is at 23°C confirms it will ferment at a certain rate, allowing you to estimate the proofing time more accurately than just knowing the room temperature.
For cold proofing, a thermometer can confirm that the dough's core has indeed cooled down to refrigerator temperature (e.g., 4°C). This is important because the dough continues to ferment relatively quickly while it is cooling down. Knowing when it has reached the target cold temperature helps you understand the true duration of the slow, cold fermentation phase. Monitoring dough temperature adds a layer of precision that can significantly improve consistency.
Enhancing Flavor with Different Flour Blends
The type of flour used doesn't just affect structure; it also heavily influences flavor development during proofing. Incorporating a percentage of whole grain flours, such as whole wheat, rye, or spelt, introduces more complex carbohydrates and enzymes that are broken down during fermentation, contributing deeper, nuttier, or tangier notes. For example, adding 10-20% rye flour to a white bread dough can significantly increase the acetic acid production, enhancing the tang, especially during a cold proof.
Experimenting with different flour blends (e.g., 80% strong bread flour, 20% whole wheat; or 90% white flour, 10% rye) and observing how they proof and taste is a great way to tailor your sourdough flavor. Remember that whole grain flours tend to ferment faster, so adjust your proofing times accordingly, particularly when using room temperature proofing sourdough bread. The specific characteristics of heirloom or locally-milled flours can also add unique flavor dimensions that develop further during the proofing process.
Troubleshooting Common Proofing Problems
Several issues can arise during proofing. If your dough isn't rising, the most common culprits are a weak starter, insufficient bulk fermentation, or a proofing environment that is too cold (for room temperature proofing sourdough bread). Ensure your starter is active and bubbly, give the dough adequate time for bulk fermentation (watching for a significant volume increase), and place the dough in a warmer spot if needed.
If your dough rises too quickly and becomes slack or collapses, it's likely over-proofed, often due to a very active starter, high ambient temperature, or simply proofing for too long. Pay closer attention to the poke test and consider reducing your proofing time or using a cooler location for room temperature proofing. For cold proofing, ensure your refrigerator is cold enough. If dough sticks to the banneton, use more flour (especially rice flour) next time and ensure the dough surface wasn't too wet before placing it in the basket. Practice and observation are key to troubleshooting effectively.
Choosing the Right Proofing Method for Your Sourdough
Consider Your Baking Schedule and Time Constraints
The most practical factor in choosing between cold and room temperature proofing sourdough bread is your schedule. If you need fresh bread today and started your dough this morning, room temperature proofing is your only option. Be prepared to monitor the dough closely during its relatively short proofing window. This method fits well if you have a dedicated block of time (e.g., 2-4 hours) to oversee the final rise before baking.
If you prefer to spread the baking process over multiple days, prepare dough in the evening and bake the next day or even later, cold proofing offers significant flexibility. It allows you to pause the fermentation and bake when it suits you, potentially over a 24-48 hour period. Consider your lifestyle and how much active time you can dedicate to the proofing phase when making your choice.
Evaluate Your Desired Flavor Profile
Your preference for sourdough tang is another major deciding factor. If you love a pronounced, complex, and slightly vinegary tang, cold proofing will likely be your preferred method. The extended, cool fermentation encourages the production of acetic acid and a wider range of flavor compounds. Many bakers aiming for that classic, deeply flavored artisanal sourdough character opt for a long cold proof.
If you prefer a milder, less acidic sourdough flavor with a softer, yogurt-like tang, room temperature proofing sourdough bread may be more suitable. The faster, warmer fermentation favors lactic acid production. This method is often chosen when a subtle sourdough note is desired, or when baking enriched doughs where a strong tang might not be appropriate. Consider what kind of flavor you want your finished loaf to have.
Experiment and Find What Works Best for You
Ultimately, the "best" proofing method is the one that consistently produces results you are happy with and fits seamlessly into your baking routine. Don't feel limited to just one method. Many experienced bakers use both cold and room temperature proofing sourdough bread depending on the recipe, their schedule, and the desired outcome. You might even experiment with a hybrid approach, starting with a short period of room temperature proofing to kickstart fermentation before moving the dough to the refrigerator.
The best way to discover your preference is through experimentation. Try proofing similar doughs side-by-side using both methods (if your schedule allows) and compare the results in terms of rise, handling, crust, crumb, and most importantly, flavor. Pay attention to how your specific starter and kitchen environment influence each method. Keep notes and adjust your process based on your observations. Happy experimenting!
Conclusion: Mastering Sourdough Proofing
The Art of Balancing Time, Temperature, and Flavor
Mastering sourdough proofing is truly an art that requires balancing the key variables of time, temperature, and the desired flavor outcome. Both cold proofing and room temperature proofing sourdough bread offer distinct paths to a baked loaf, each with its own set of advantages and challenges. Room temperature proofing provides speed and immediate visual feedback but demands close attention to avoid over-proofing and generally results in a milder tang. Cold proofing offers schedule flexibility and produces a more complex, tangy flavor profile but requires significant planning ahead and refrigerator space.
Choosing the right method, or even combining elements of both, depends on your personal preferences, schedule, and baking goals. By understanding how starter activity, dough hydration, ambient conditions, and flour type influence fermentation, and by diligently monitoring your dough's progress using tools like the poke test and thermometers, you can gain greater control over the final rise. Embrace the learning process, experiment with both methods, and discover what works best in your kitchen to consistently produce delicious, well-proofed sourdough bread that meets your desired standards for texture and flavor.
Frequently Asked Questions
What is room temperature proofing for sourdough bread?
Room temperature proofing is the process of letting your sourdough bread dough rise at ambient temperature, typically between 68-75°F, after its initial bulk fermentation. It allows the dough to further develop flavor and rise before baking.
How does room temperature proofing affect the flavor of sourdough bread compared to cold proofing?
Generally, room temperature proofing results in a tangier flavor profile and a more open crumb structure because the yeast activity is higher. Cold proofing slows down the fermentation and develops more complex flavors over a longer time.
What are the potential risks of room temperature proofing sourdough bread?
Over-proofing is a significant risk. If the dough proofs for too long at room temperature, it can collapse and become sour and unpleasant. Careful monitoring is essential.
Is room temperature proofing suitable for all sourdough recipes?
While many sourdough recipes can be proofed at room temperature, the best method depends on the recipe and your desired flavor profile. Recipes with higher hydration levels might benefit more from cold proofing.
How can I determine the ideal room temperature proofing time for my sourdough bread?
The ideal time depends on several factors, including the strength of your starter, the dough temperature, and the ambient temperature. Look for signs like a significant increase in volume and a slightly jiggly texture.
Final Reflection: The Subtle Art of Sourdough Proofing
The quest for the perfect sourdough loaf hinges on a seemingly simple choice: cold or room temperature proofing? This seemingly minor decision profoundly impacts the final flavor profile, texture, and overall experience of your bread. Understanding the nuances of each method is crucial for bakers of all levels, and the ongoing exploration of these techniques continues to shape the sourdough community.
The impact of proofing temperature extends far beyond mere technicality; it speaks to the heart of sourdough baking itself. It's a testament to the patience and precision required to coax life from simple flour and water. The best bread is made with love and time,
a wise baker once said, and this rings especially true when considering the delicate balance of fermentation and flavor development during proofing. The subtle shifts in acidity, aroma, and texture resulting from different proofing methods highlight the artistry inherent in this ancient craft.
So, reader, as you embark on your next sourdough adventure, remember the lessons learned here. Consider the subtle interplay of temperature and time, and don't be afraid to experiment. Embrace the process, savor the journey, and discover the unique flavor profile that best suits your palate and your sourdough's personality. The perfect loaf awaits – it's a matter of finding the perfect balance, and the journey of discovery is just as rewarding as the final bite.
Unlock Your Bread's Flavor Potential!
Thanks for taking the time to explore the fascinating world of bread proofing! We hope you now feel more confident in choosing the method that best suits your baking style and desired flavor profile. Ready to put your new knowledge into practice?
- Try a blind taste test: Bake the same recipe using both cold and room temperature proofing – then, invite friends to taste and vote on their favorite! This is a fun way to truly understand the impact of proofing temperature.
- Share your baking journey: Tell us about your experience with cold vs. room temperature proofing on our BakeWithEase community forum! We'd love to hear your results and tips.
- Experiment with different flours and recipes: See how proofing temperature interacts with various flour types to influence taste and texture. What surprising discoveries will you make?
So, which proofing method will you master next? What exciting bread flavors await you?