
The Pursuit of the 'Perfect' Sourdough Rye Loaf

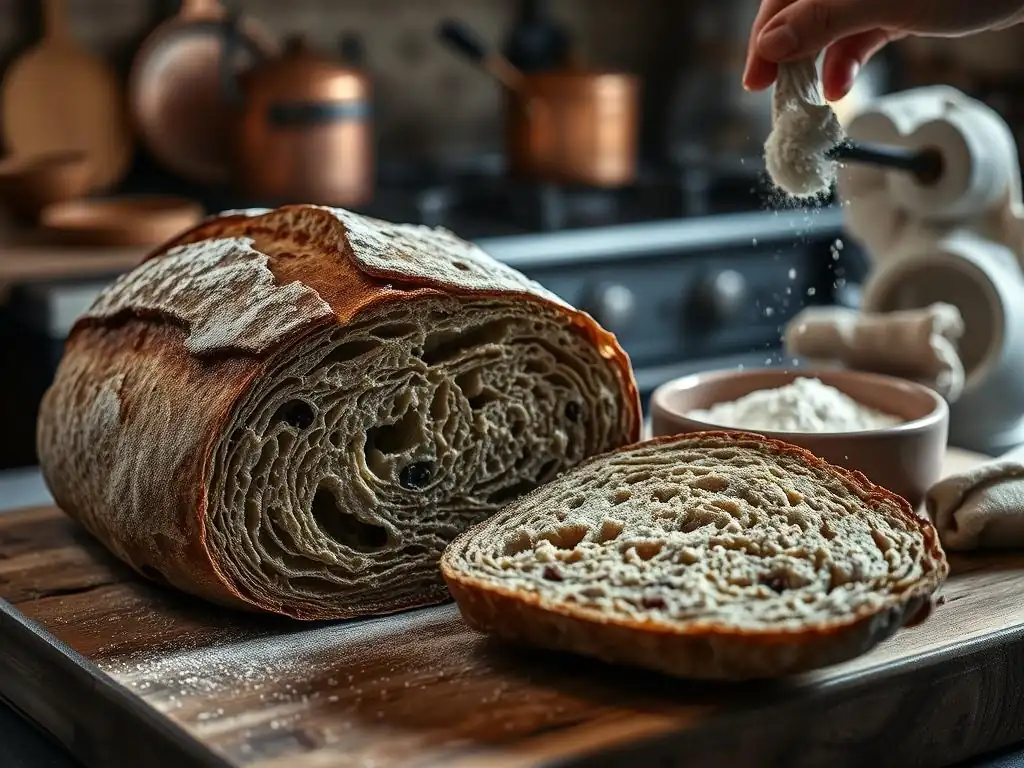
Welcome to BakeWithEase, where baking dreams become delicious realities! Ever wondered if the perfect sourdough rye recipe really exists, one that's both easy and consistently amazing? This article dives deep into the pursuit of that elusive loaf. Prepare to unlock the secrets to a deeply flavorful, beautifully textured rye sourdough that will elevate your bread baking game. Intrigued? Let's get baking!
- Introduction: Baking the Ultimate Sourdough Rye Bread at Home
- Understanding the Fundamentals: Sourdough Rye Bread Basics
-
The Perfect Sourdough Rye Recipe: A Step-by-Step Guide
- Step 1: Preparing Your Rye Sourdough Starter
- Step 2: Mixing the Dough: Achieving the Right Consistency
- Step 3: Bulk Fermentation: Developing Flavor and Structure
- Step 4: Shaping Your Sourdough Rye Loaf
- Step 5: Proofing: Knowing When Your Rye Dough is Ready
- Step 6: Baking Your Sourdough Rye to Perfection
- Troubleshooting Your Sourdough Rye: Common Problems and Solutions
- Mastering the Art: Tips and Tricks for the Best Sourdough Rye
- Variations on the Theme: Exploring Different Sourdough Rye Recipes
- Conclusion: Your Journey to Perfect Sourdough Rye
-
Frequently Asked Questions
- What makes a sourdough rye recipe "easy" according to BakeWithEase?
- What are some common problems bakers face when trying to bake a sourdough rye loaf?
- Does BakeWithEase offer step-by-step guides for baking sourdough rye?
- What kind of ingredients can I expect to find in a BakeWithEase sourdough rye recipe?
- How can BakeWithEase help me improve my sourdough rye baking skills?
- Final Reflection: The Ever-Evolving Quest for Sourdough Perfection
- Unlock Your Inner Baker: Craft the Rye Loaf of Your Dreams!
Introduction: Baking the Ultimate Sourdough Rye Bread at Home
Baking sourdough bread is a rewarding journey, and venturing into the world of rye adds a whole new dimension of flavor and texture. The deep, earthy notes of rye combined with the characteristic tang of sourdough create a loaf that is both comforting and complex.
Achieving the 'perfect' sourdough rye loaf at home is not just possible; it's a deeply satisfying endeavor that connects you with age-old baking traditions. Whether you're aiming for a dense, hearty pumpernickel-style loaf or a lighter, aromatic bread with a hint of rye, the principles remain the same, and the results can be truly spectacular.
This article will guide you through the process, demystifying the steps and sharing the secrets to baking a truly delicious sourdough rye. Forget overly complicated methods; our focus is on making the process approachable, helping you achieve that perfect sourdough rye recipe easy enough for any home baker. We'll cover everything from understanding the unique properties of rye flour to troubleshooting common issues, ensuring your path to a magnificent loaf is smooth and enjoyable.
Why Sourdough Rye? A Baker's Delight
Sourdough rye bread offers a unique sensory experience that sets it apart from wheat-only loaves. The distinct aroma that fills your kitchen while it bakes is just the beginning. Rye flour contributes a depth of flavor that is both earthy and slightly sweet, complementing the sour notes from the fermentation process beautifully. Unlike wheat, rye contains pentosans, which are complex carbohydrates that absorb a significant amount of water. This characteristic contributes to the moist crumb and slightly denser texture often associated with rye bread, making it incredibly satisfying and long-lasting.
Furthermore, baking with sourdough provides natural leavening and beneficial bacteria, contributing to a healthier, more digestible bread. The fermentation process breaks down complex starches and phytic acid, enhancing nutrient availability. While some find baking with high percentages of rye challenging due to its lower gluten content compared to wheat, understanding its properties is key to success. Mastering a perfect sourdough rye recipe easy to follow opens the door to a world of robust flavors and textures that are well worth the effort.
BakeWithEase: Your Guide to Easy Sourdough Rye Baking
At BakeWithEase, our mission is to make the art of baking accessible and enjoyable for everyone, and that includes the wonderful world of sourdough rye. We understand that sourdough, especially with less common flours like rye, can seem intimidating at first glance. That's why we break down each step into simple, manageable instructions, focusing on techniques that yield consistent results without requiring specialized equipment or years of experience. Our approach emphasizes understanding the 'why' behind each step, empowering you to adapt and troubleshoot as you gain confidence.
We believe that a truly perfect sourdough rye recipe easy to follow should not compromise on flavor or quality. Our guides are designed to help you achieve a beautiful crust, a moist and flavorful crumb, and that signature sourdough tang you crave. By providing clear instructions and helpful tips, we aim to take the guesswork out of baking, turning potential frustrations into successful loaves. Think of us as your friendly guide on your journey to mastering the simple sourdough rye recipe that will become a staple in your home.
Understanding the Fundamentals: Sourdough Rye Bread Basics
Diving into sourdough rye requires a basic understanding of how rye flour behaves differently from wheat and what essential components contribute to a great loaf. Rye flour's unique composition impacts everything from dough handling to the final texture of the bread. Getting these fundamentals right is crucial for success, especially when aiming for a perfect sourdough rye recipe easy for beginners to tackle.
What Makes Sourdough Rye Different?
The primary difference lies in the structure-forming proteins present in rye flour compared to wheat. Wheat contains glutenin and gliadin, which form gluten when hydrated and mixed. Gluten creates an elastic network that traps gases produced during fermentation, allowing wheat bread to rise significantly and develop an open, airy crumb. Rye flour does contain some similar proteins, but they do not form a strong, elastic gluten network. Instead, the structure in rye bread is largely dependent on pentosans and other non-starch polysaccharides which absorb large amounts of water and form a gel-like matrix.
This difference means rye dough is typically stickier, less elastic, and doesn't develop the same level of extensibility as wheat dough. It requires different handling techniques, often less kneading or folding, and relies more on the acid produced by the sourdough starter to help break down the pentosans and allow for some expansion. Understanding this is key to managing expectations and successfully working with rye dough to achieve a great loaf, making your pursuit of a perfect sourdough rye recipe easy and less frustrating.
Key Ingredients for a Delicious Rye Sourdough Loaf
While the star players are undoubtedly rye flour and a healthy sourdough starter, the quality of your other ingredients also significantly impacts the final bread. Good water and salt are essential. Filtered or unchlorinated water is often recommended as chlorine can potentially inhibit microbial activity in the starter and dough, although many bakers successfully use tap water. High-quality salt, such as sea salt or kosher salt, provides flavor and helps control fermentation speed and strengthens the dough structure. Avoid iodized salt, which can sometimes impart an off-flavor.
Beyond these staples, the type of rye flour you choose will dramatically affect the bread's character. Using a blend of rye and wheat flour (often bread flour or strong white flour) is common, especially in a perfect sourdough rye recipe easy for those new to rye, as the wheat gluten helps provide structure and makes the dough easier to handle. The ratio of rye to wheat can vary widely, from loaves with just 20% rye for a hint of flavor to those with 100% rye for a dense, traditional bread.
Rye Flour Varieties: Light, Medium, and Dark Rye
Rye flour is categorized based on how much of the grain kernel is included after milling. Light rye flour is milled from the inner part of the rye kernel (the endosperm) after much of the bran and germ have been removed. It is lighter in color and flavor compared to darker varieties and behaves somewhat more like wheat flour, making it a good choice for a lighter, milder rye loaf or when starting with a perfect sourdough rye recipe easy to manage. Its lower pentosan content means it absorbs less water than darker flours.
Medium rye flour contains more of the bran and germ than light rye, resulting in a darker color, stronger flavor, and higher nutritional value. It requires more water than light rye due to its higher pentosan content and contributes more significantly to the characteristic dense, moist crumb of traditional rye bread. Dark rye flour, often stone-ground, includes almost the entire rye kernel, including a large portion of the bran and germ.
It has the most intense flavor and color, the highest nutrient content, and requires the most water. Breads made with dark rye are typically very dense and hearty, perfect for robust, earthy loaves.
The Importance of a Healthy Sourdough Starter for Rye Bread
A robust and active sourdough starter is absolutely fundamental to baking a successful sourdough rye loaf. Because rye flour doesn't form a strong gluten network, the leavening power and acidic contributions of the starter are even more critical than in wheat bread. A healthy starter, teeming with active yeast and lactic acid bacteria, provides the lift needed to prevent the loaf from being excessively dense and develops the complex sour flavors characteristic of great sourdough.
To ensure your starter is ready for baking rye bread, it should be active and bubbly, ideally having doubled in size within 4-8 hours after feeding, depending on the temperature. Feeding your starter with a portion of rye flour can help it become accustomed to the flour and contribute specific microbes that thrive on rye. For a perfect sourdough rye recipe easy to execute, using a starter that is consistently active and fed with a mix of rye and wheat (or just rye) is highly recommended.
The Perfect Sourdough Rye Recipe: A Step-by-Step Guide
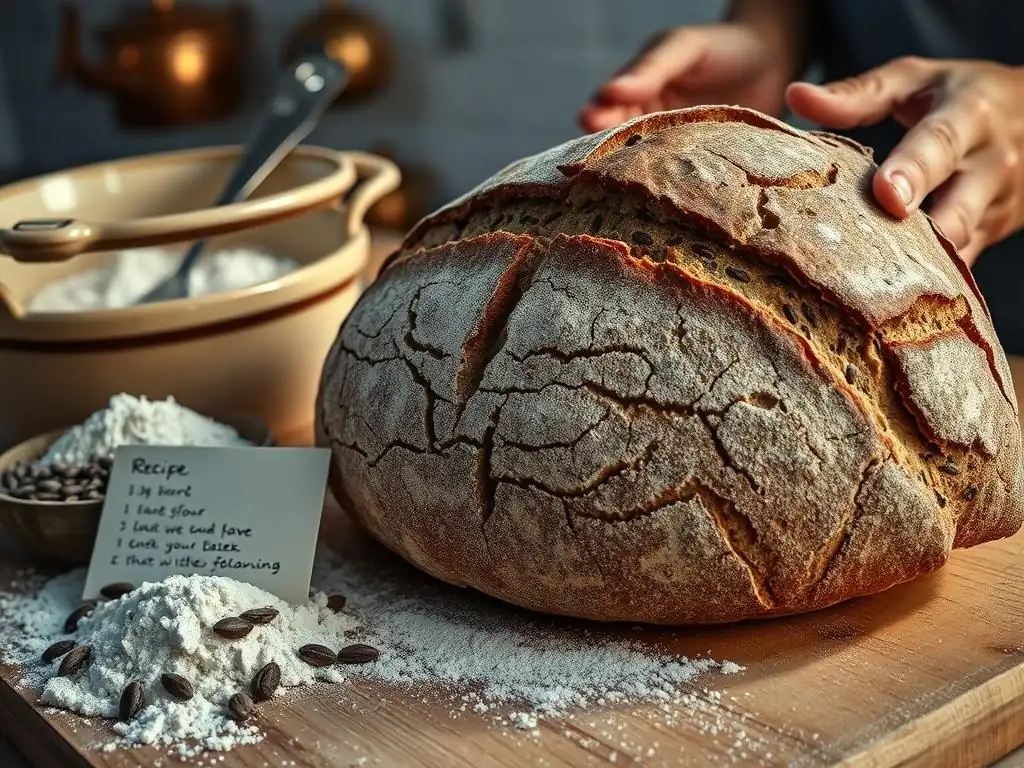
Embarking on baking your perfect sourdough rye recipe easy at home is an exciting process. This step-by-step guide breaks down the key stages, focusing on techniques suitable for home bakers working with rye dough. While exact measurements can vary based on flour types and starter hydration, the principles outlined here provide a solid foundation for success. Let's get baking!
Step 1: Preparing Your Rye Sourdough Starter
Before you even think about mixing dough, ensure your sourdough starter is vigorous and ready to work. A typical feeding ratio to prepare your starter for baking might be 1 part starter to 2 parts water and 2 parts flour (1:2:2 ratio by weight). For instance, you might take 25 grams of active starter, feed it with 50 grams of water (around 75°F or 24°C), and 50 grams of flour. Using a blend of flours that matches what you'll use in your final dough (e.g., 25g rye and 25g bread flour) can help acclimatize the starter.
Allow your starter to ferment at room temperature until it has significantly increased in volume (often doubled or more) and is bubbly and active. This typically takes anywhere from 4 to 12 hours, depending on the ambient temperature and the starter's vitality. A good indicator of readiness is when it has reached its peak or is just starting to recede slightly. Using a starter at its peak activity is vital for providing the necessary lift in a rye loaf, contributing significantly to achieving a perfect sourdough rye recipe easy to manage.
Feeding Your Starter for Optimal Rye Bread Baking
To prepare your starter specifically for a rye loaf, consider incorporating rye flour into its regular feeding routine in the days leading up to baking. For example, if you typically feed your starter only with white flour, try feeding it with a mix of 50% rye and 50% white flour for 2-3 feedings before baking day. This helps cultivate the specific microbial balance that thrives on rye and imparts characteristic flavors.
On baking day, perform the final feeding using the ratio mentioned above (e.g., 1:2:2) with the flour blend you prefer for your starter (perhaps still including some rye). Monitor its activity closely. For a perfect sourdough rye recipe easy to follow, using a starter that reliably doubles within a predictable timeframe (like 6-8 hours at room temperature around 74°F/23°C) is ideal. This consistency makes timing your bake much simpler and ensures adequate leavening power for your rye dough.
Step 2: Mixing the Dough: Achieving the Right Consistency
Mixing sourdough rye dough is different from mixing wheat dough due to rye's lower gluten content. The goal isn't to develop a strong, elastic gluten network through intense kneading, but rather to hydrate the flours thoroughly and combine the ingredients.
A typical hydration level for a sourdough rye loaf might range from 70% to 85% or even higher, depending on the percentage of rye flour used, as darker rye flours absorb more water. For a perfect sourdough rye recipe easy for beginners, starting with a blend like 40% rye and 60% bread flour at around 75% hydration is often recommended.
Combine your active sourdough starter, water, and flours in a large mixing bowl. Mix gently with a spoon or your hands until no dry flour remains. The dough will likely be quite sticky and shaggy. At this point, cover the bowl and let it rest for 20-30 minutes. This resting period, known as autolyse, allows the flour to fully hydrate before the salt is added, which is particularly beneficial for the wheat portion of the dough and helps the rye flour absorb water effectively, contributing to a better texture in your simple sourdough rye recipe.
Autolyse: Enhancing Flavor and Texture in Sourdough Rye
Autolyse is a technique where flour and water are mixed and allowed to rest before adding salt and starter. While traditionally applied to wheat doughs to kickstart gluten development, it's still beneficial when baking sourdough rye, especially in loaves containing a significant portion of wheat flour. The rest period allows enzymes in the flour (protease and amylase) to begin breaking down proteins and starches. This makes the dough more extensible and easier to handle later, and it starts the process of creating sugars that will feed the yeast.
For a sourdough rye loaf, an autolyse of 20-40 minutes is usually sufficient. After the autolyse, add your salt and the ripe sourdough starter. Incorporate these thoroughly into the dough, which might feel a bit resistant at first. You can use gentle kneading or folding in the bowl until the salt and starter are evenly distributed. The dough will remain sticky, which is normal for rye dough. This step is crucial for setting up the dough structure and flavor development for your perfect sourdough rye recipe easy to follow.
Step 3: Bulk Fermentation: Developing Flavor and Structure
Bulk fermentation, or the first rise, is where the magic happens. The starter begins to work, producing carbon dioxide that leavens the dough and organic acids that develop the characteristic sourdough flavor and help condition the rye flour. The duration of bulk fermentation depends heavily on the ambient temperature and the activity of your starter. A typical timeframe might be 3-5 hours at room temperature (around 72-78°F or 22-26°C), but it could be shorter in warmer conditions or longer if cooler.
During bulk fermentation, the dough should increase in volume, though perhaps not as dramatically as a 100% wheat loaf. Look for signs of fermentation like bubbles on the surface and along the sides of the bowl. The dough should feel lighter and slightly puffier. Performing a few sets of folds during this time helps build structure, especially when wheat flour is included in the mix, and ensures even temperature and nutrient distribution throughout the dough for your perfect sourdough rye recipe easy to manage.
Folding Techniques for a Strong Rye Sourdough
Folding is a technique used during bulk fermentation to strengthen the dough and develop structure without intensive kneading, which is particularly well-suited for stickier rye doughs. For a sourdough rye loaf, you might perform 2-4 sets of folds during the first 1-2 hours of bulk fermentation. A simple stretch and fold involves wetting your hands, grabbing one side of the dough, stretching it upwards, and folding it over the center. Repeat this process for the other three sides.
Alternatively, coil folds are also effective. Wet your hands, lift the dough from the center allowing the edges to fold underneath, and gently lower it back into the bowl. Rotate the bowl and repeat. These gentle movements help align the protein structure (if wheat is present) and build tension, contributing to a better rise and crumb structure in your simple sourdough rye recipe without overworking the delicate rye dough. Allow 30-45 minutes of rest between each set of folds.
Step 4: Shaping Your Sourdough Rye Loaf
Shaping rye dough can be a bit trickier than wheat dough because it is stickier and less elastic. The key is to work efficiently and use minimal flour to prevent a dry crust. The goal of shaping is to create tension on the surface of the dough, which helps the loaf hold its shape during proofing and baking and contributes to a good oven spring. Common shapes include a boule (round) or a batard (oval).
Lightly flour your work surface and the top of your dough. Gently scrape the dough out of the bowl using a wet or floured bench scraper. For a boule, gently pre-shape the dough into a rough ball by tucking the edges underneath.
Let it rest for 15-20 minutes (this is a short 'bench rest') to relax the dough. Then, perform the final shaping, creating surface tension by pulling the dough towards you or using a bench scraper to build tension from the sides. Place the shaped loaf seam-side up in a floured proofing basket (banneton) for your perfect sourdough rye recipe easy to proof.
Shaping Techniques for Different Rye Bread Styles
The shaping technique can influence the final shape and how the loaf expands in the oven. For a rustic boule, the final shaping aims to create a tight skin on the surface. Dust a banneton generously with rice flour (which is less likely to stick) or a mix of rice and rye flour.
Gently gather the edges of the dough and bring them to the center, pinching them together. Flip the dough over and use your hands or a bench scraper to create surface tension by rotating the dough on the counter, tucking the sides underneath. Place it seam-side up in the banneton.
For a batard, gently stretch the dough into a rectangle. Fold the top third down to the center, then fold the bottom third up over the first fold. Gently roll the dough from the top down to create a log, sealing the seam with your fingers. Create tension by gently rocking the log back and forth while applying slight pressure. Place seam-side up in an oval banneton. Mastering these techniques improves the final rise and appearance of your simple sourdough rye recipe loaf.
Step 5: Proofing: Knowing When Your Rye Dough is Ready
Proofing is the final rise before baking, and it's a critical step for achieving a well-risen loaf. The duration and temperature of proofing significantly impact the final texture and flavor. Rye doughs often proof faster than wheat doughs due to the enzymatic activity facilitated by the rye flour, so it's important to monitor the dough closely rather than relying solely on time.
You can proof your sourdough rye loaf at room temperature or in the refrigerator (cold proofing). Room temperature proofing might take 1-3 hours, depending on the temperature and starter activity. Cold proofing in the refrigerator (typically 4°C or 40°F) slows fermentation significantly and can take anywhere from 8 to 24 hours. Cold proofing develops more complex flavors and makes the dough easier to handle and score. For a perfect sourdough rye recipe easy to fit into a busy schedule, cold proofing overnight is often ideal.
The Float Test and Other Proofing Indicators
While the float test (dropping a small piece of dough into water to see if it floats) is sometimes used as an indicator of readiness, it's not foolproof and can be less reliable with rye dough due to its density. A better approach is to observe the dough's volume increase and perform the "poke test." For room temperature proofing, the dough should increase in volume by about 50-75%.
To perform the poke test, gently press a floured finger into the side of the dough about half an inch deep. If the indentation springs back immediately, the dough needs more time. If it springs back very slowly, leaving a small indentation, it's likely ready. If the indentation stays completely or springs back too much, it might be over-proofed. For cold-proofed dough, the poke test is slightly different; the indentation should spring back slowly, not fully. Trust your observation of the dough's look and feel alongside the poke test for your simple sourdough rye recipe.
Step 6: Baking Your Sourdough Rye to Perfection
Baking is the final stage where the dough transforms into a beautiful loaf with a delicious crust and soft crumb. High heat is essential for achieving good oven spring and developing the crust. Using a Dutch oven is a popular and effective method for home bakers as it mimics the environment of a professional steam-injected oven, which is particularly beneficial for sourdough.
Preheat your oven with the Dutch oven inside for at least 30-60 minutes at a high temperature, typically between 450°F and 500°F (230°C to 260°C). This ensures the Dutch oven is screaming hot. Carefully remove the hot Dutch oven, transfer your proofed dough from the banneton to parchment paper, score the loaf, and gently lower it into the Dutch oven using the parchment paper as a sling.
Cover with the lid and place back in the oven. This trapped steam is crucial in the initial phase of baking, allowing the crust to remain pliable and the loaf to expand fully before the crust sets, leading to a better rise for your perfect sourdough rye recipe easy to achieve.
Oven Temperature and Baking Time for Sourdough Rye
A common baking protocol for sourdough rye in a Dutch oven involves two stages. The first stage is baking with the lid on to trap steam, which promotes oven spring. Bake with the lid on for approximately 20-25 minutes at around 475°F (245°C). The high heat and steam allow the dough to expand before the crust hardens.
After the initial covered bake, carefully remove the lid. The loaf should have expanded and taken on some color. Reduce the oven temperature slightly, perhaps to 450°F (230°C), and continue baking for another 20-30 minutes, or until the crust is deep golden brown and the internal temperature of the loaf reaches around 200-210°F (93-99°C). The exact timing will depend on the size of your loaf and your oven. This two-stage process is key to achieving a beautiful crust and a well-baked interior in your simple sourdough rye recipe.
Using a Dutch Oven for Optimal Crust and Crumb
The Dutch oven is a game-changer for home sourdough baking, especially for rye. The sealed environment creates a burst of steam from the moisture in the dough itself. This steam keeps the surface of the loaf moist during the critical initial minutes of baking, preventing the crust from forming too early. A pliable crust allows the dough to expand maximally during oven spring, resulting in a better rise and a more open (or appropriately dense for rye) crumb structure.
Once the lid is removed, the dry heat of the oven finishes the baking process, allowing the crust to brown and crisp up beautifully. The heavy cast iron also helps conduct and retain heat efficiently, ensuring even baking. Using a Dutch oven simplifies the process of creating a bakery-quality crust at home, making it an indispensable tool for achieving the perfect sourdough rye recipe easy for home bakers to execute consistently.
Troubleshooting Your Sourdough Rye: Common Problems and Solutions
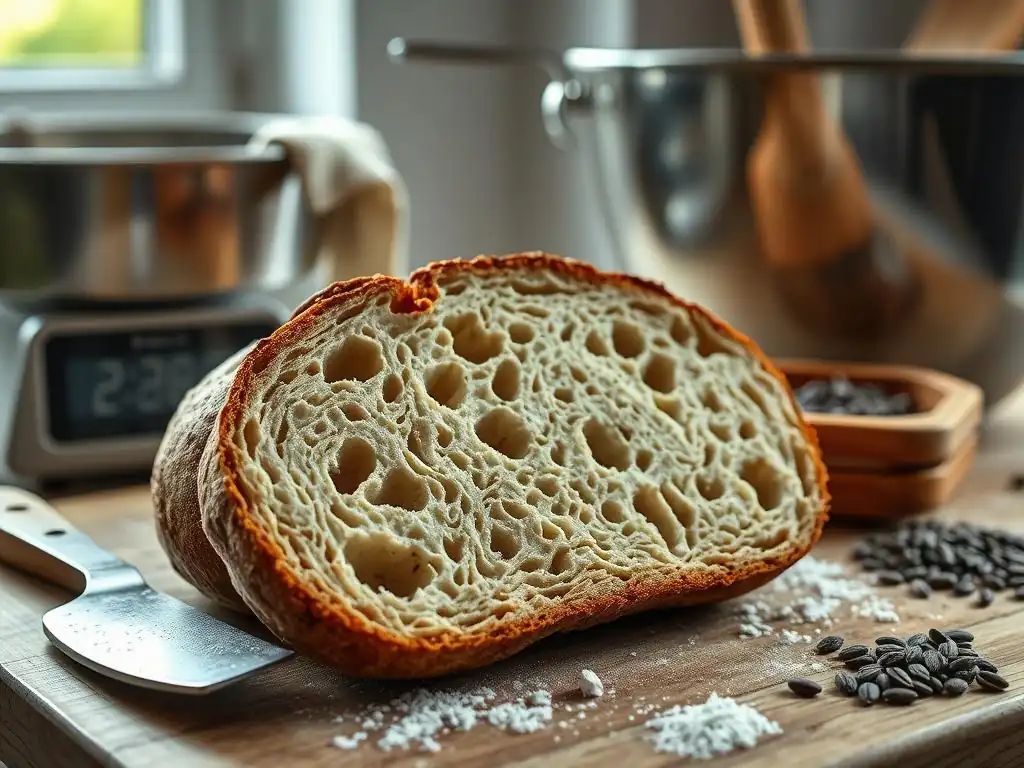
Even with a perfect sourdough rye recipe easy to follow, baking can sometimes present challenges. Understanding common issues and how to address them is part of the baking journey. Don't be discouraged by less-than-perfect loaves; each bake is a learning opportunity.
Dense and Gummy Crumb: Addressing Common Issues
A dense or gummy crumb is one of the most frequent problems encountered when baking sourdough rye, especially with high percentages of rye flour. This can be caused by several factors: insufficient fermentation (both bulk fermentation and proofing), an inactive starter, insufficient hydration for the type of rye flour used, or cutting into the loaf before it has cooled completely. Rye bread, particularly those with a high rye content, needs to cool for several hours (often 4-8 hours or even longer) before slicing, as the internal structure is still setting.
Ensure your starter is very active before mixing. Allow sufficient bulk fermentation time, looking for visual cues like increased volume and bubbles. Pay close attention during proofing – under-proofed dough will be dense, while over-proofed dough might collapse slightly during baking, also resulting in a poor crumb. Make sure your hydration level is appropriate for the type of rye flour; dark rye requires significantly more water than light rye. Finally, exercise patience and let the loaf cool completely before slicing.
Flat Loaf: Tips for Achieving a Good Rise
A flat loaf is often a symptom of insufficient leavening or poor dough structure. An inactive or weak sourdough starter is a primary culprit; if your starter isn't doubling reliably, it won't provide enough lift. Under-proofing can also lead to a flat loaf because the dough hasn't developed enough gas before hitting the oven. Conversely, significantly over-proofing can cause the dough's structure to weaken and collapse, leading to a poor rise.
Ensure your starter is at peak activity when you mix the dough. Monitor bulk fermentation and proofing carefully, aiming for the indicators discussed earlier (volume increase, poke test). For loaves containing wheat, performing adequate folds during bulk fermentation helps build structure, which is essential for holding the shape and supporting the rise.
Proper shaping techniques that create surface tension are also crucial for helping the loaf hold its form in the oven. Baking in a preheated Dutch oven provides the initial burst of steam and heat needed for good oven spring, helping you achieve a better rise in your perfect sourdough rye recipe easy bake.
Sourness Levels: Controlling the Tang in Your Rye Bread
The level of tang in sourdough rye is a matter of personal preference and can be controlled through fermentation temperature and time. Lactic acid bacteria, which produce milder lactic acid, thrive in warmer conditions (around 78-85°F or 26-30°C). Acetic acid bacteria, which produce sharper acetic acid (the main component of vinegar), are more active in cooler temperatures (around 65-72°F or 18-22°C) and during longer fermentation periods.
To achieve a milder tang in your simple sourdough rye recipe, use a very active starter, ferment the dough at slightly warmer temperatures, and aim for a shorter bulk fermentation and proofing time. Baking when the dough is just perfectly proofed, rather than pushing it to the limit, also results in less sourness.
For a more pronounced tang, use a starter that has been active for longer (past its peak), ferment the dough at cooler room temperatures, and consider a longer bulk fermentation or an extended cold proof in the refrigerator. Experimenting with these variables allows you to fine-tune the sourness to your liking.
Mastering the Art: Tips and Tricks for the Best Sourdough Rye
Beyond the basic steps, a few extra tips and tricks can elevate your sourdough rye baking from good to truly outstanding. These refinements focus on enhancing flavor, appearance, and the keeping quality of your loaf, helping you create the best perfect sourdough rye recipe easy for your palate.
Enhancing Flavor: Adding Caraway Seeds and Other Ingredients
Rye bread has a natural affinity for certain flavors. Caraway seeds are a classic addition, providing a distinct aromatic and slightly peppery note that complements the earthy rye beautifully. You can add whole caraway seeds directly to the dough during mixing, typically at a rate of 1-2% of the total flour weight. For a stronger flavor, you can lightly toast the seeds before adding them.
Other ingredients that pair well with sourdough rye include:
- Fennel seeds: Offer a slightly sweeter, licorice-like flavor.
- Coriander seeds: Provide a citrusy, aromatic note.
- Orange zest: Adds brightness, particularly good with darker, richer rye loaves.
- Molasses or honey: A touch of sweetener can soften the rye flavor and contribute to crust color. Use sparingly, perhaps 1-2% of the flour weight.
- Soaked rye berries or cracked rye: Add texture and a deeper rye flavor. Soak them in hot water overnight before adding to the dough.
Experimenting with these additions allows you to customize your simple sourdough rye recipe and discover your favorite flavor combinations.
Achieving a Beautiful Crust: Scoring Techniques for Sourdough Rye
Scoring is the art of cutting the surface of the dough just before baking. This serves several purposes: it allows the dough to expand in a controlled manner during oven spring, prevents the crust from tearing randomly, and creates a beautiful pattern on the finished loaf. For sourdough rye, especially loaves with a higher rye content, the dough is less likely to burst dramatically compared to high-gluten wheat loaves, so scoring is primarily for controlled expansion and aesthetics.
Use a very sharp blade (like a lame or razor blade) held at a slight angle. For a boule, a simple cross or a single slash down the middle works well. For a batard, one or more diagonal slashes are common. Don't cut too deeply, especially with higher rye percentages, as this can lead to a flatter loaf.
Aim for a depth of about 1/4 to 1/2 inch (0.5 - 1 cm). Practicing on dough scraps can help you get a feel for it. Proper scoring contributes significantly to the final appearance of your perfect sourdough rye recipe easy bake.
Storing Your Sourdough Rye Bread for Maximum Freshness
Proper storage is key to keeping your sourdough rye loaf fresh and delicious for as long as possible. Unlike commercial breads with preservatives, homemade sourdough relies on the natural acidity from fermentation to inhibit mold growth. However, it can still dry out.
Allow the loaf to cool completely on a wire rack before storing. Storing warm bread traps moisture and can lead to a gummy interior or mold. Once cool, the best way to store sourdough rye is at room temperature. Avoid refrigerating it, as this accelerates staling.
You can store the loaf cut-side down on a cutting board, wrap it in a clean linen towel, or place it in a paper bag. For longer storage, slice the cooled loaf and freeze the slices in an airtight bag or container. To enjoy, simply toast the frozen slices. Following these storage tips helps preserve the quality of your simple sourdough rye recipe loaf.
Variations on the Theme: Exploring Different Sourdough Rye Recipes
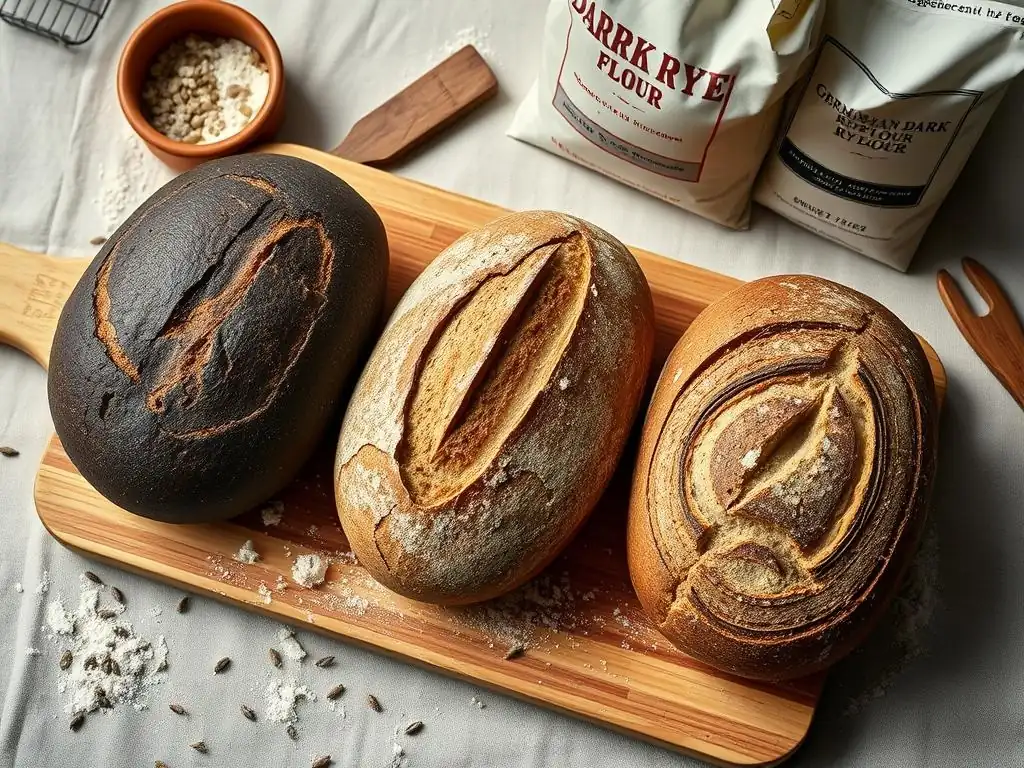
Once you've mastered a basic perfect sourdough rye recipe easy to follow, you can explore different variations by adjusting the ratio of rye to wheat flour and incorporating other ingredients. Each variation offers a unique flavor profile and texture.
Light Rye Sourdough: A Beginner-Friendly Option
A light rye sourdough typically uses a higher percentage of wheat flour (50-70%) and light rye flour (30-50%). This results in a dough that is easier to handle due to the stronger gluten network from the wheat, and a loaf with a milder rye flavor and a more open crumb structure compared to darker rye breads.
This variation is an excellent starting point for those new to baking with rye. The techniques for kneading, folding, and shaping are closer to those used for a standard wheat sourdough. A light rye sourdough is versatile and pairs well with many toppings. Hydration levels might be slightly lower than for darker rye loaves, perhaps in the 70-75% range. It's a great way to build confidence before tackling higher rye percentages and a perfect sourdough rye recipe easy to master early on.
Dark Rye Sourdough: For a Robust and Earthy Flavor
Dark rye sourdough loaves use a higher percentage of dark rye flour, often 60% or more, sometimes even 100% rye. These loaves are characterized by their intense, earthy flavor, dark color, and dense, moist crumb. They require higher hydration levels (sometimes 80-90% or more) as dark rye flour is incredibly thirsty.
Working with high-percentage dark rye dough is different; it will be very sticky and less elastic. Kneading is minimal, often just mixing until combined, and structure is built through gentle folding or simply allowing time for fermentation. These loaves benefit from longer, cooler fermentation periods to fully develop flavor and structure. They are traditionally paired with strong cheeses, cured meats, or smoked fish. Mastering a dark rye sourdough is a rewarding step for experienced bakers.
Marbled Rye Sourdough: A Visually Stunning Variation
Marbled rye sourdough, also known as swirl rye, is created by combining a light rye dough and a dark rye dough (often colored with cocoa powder or dark molasses) and gently swirling them together before proofing and baking. This creates a beautiful visual effect of contrasting colors marbled throughout the loaf.
To make marbled rye, you typically prepare two separate doughs using the same base recipe but with different flour types or colorings. For instance, one dough might use light rye and bread flour, while the other uses dark rye, a smaller amount of bread flour, and cocoa powder or dark rye extract for intense color.
After bulk fermentation, the two doughs are layered or twisted together before final shaping. The result is a loaf that is not only visually stunning but also offers a delightful blend of flavors and textures, making it a unique take on the perfect sourdough rye recipe easy to impress with.
Conclusion: Your Journey to Perfect Sourdough Rye
Baking sourdough rye is a journey filled with discovery, from understanding the unique properties of rye flour to mastering the fermentation process. While it presents its own set of challenges compared to wheat, the reward of a homemade loaf with a deep, complex flavor and satisfying texture is immeasurable. We hope this guide has provided you with the knowledge and confidence to embark on your own pursuit of the perfect sourdough rye recipe easy to follow.
Remember that baking is also an art, and results can vary based on many factors, including the flour you use, your starter's activity, and the temperature of your kitchen. Don't be afraid to experiment, learn from each bake, and adjust your process. The more you bake, the more intuitive it becomes, and soon you'll be turning out magnificent sourdough rye loaves with ease.
Enjoying the Fruits of Your Labor: Serving and Savoring Your Sourdough Rye
Once your sourdough rye loaf has emerged from the oven and cooled completely (patience is key here! ), it's time to enjoy the delicious results of your hard work. Slice into the loaf to reveal your crumb structure. Take in the wonderful aroma of baked rye and tangy sourdough.
Sourdough rye is incredibly versatile. It's fantastic simply sliced and spread with butter. It pairs beautifully with savory toppings like smoked salmon, cream cheese, avocado, cured meats, or sharp cheeses. A thick slice makes an excellent base for open-faced sandwiches. The robust flavor also holds up well in dishes like panzanella (bread salad) or as croutons for soup. Savor each bite and appreciate the unique flavor profile you've created with your simple sourdough rye recipe.
Continuing Your Sourdough Rye Baking Adventure
Mastering one perfect sourdough rye recipe easy to bake is just the beginning. There's a whole world of rye baking to explore! You can experiment with different percentages of rye flour, try incorporating whole rye berries or cracked rye for added texture, play with various seeds and spices like caraway, fennel, or coriander, or even venture into traditional European rye breads like pumpernickel or vollkornbrot.
Keep nurturing your sourdough starter, keep experimenting with techniques, and keep baking. Each loaf will teach you something new. With practice, your confidence will grow, and you'll find yourself effortlessly baking delicious, perfect sourdough rye loaves that are a testament to your skill and patience. Happy baking!
Frequently Asked Questions
What makes a sourdough rye recipe "easy" according to BakeWithEase?
An "easy" sourdough rye recipe focuses on simplified techniques and readily available ingredients, making it accessible to bakers with varying levels of experience. It avoids overly complex processes or hard-to-find flours.
What are some common problems bakers face when trying to bake a sourdough rye loaf?
Common issues include dense or gummy textures, lack of oven spring, and difficulty handling the sticky rye dough. These often stem from improper hydration or fermentation issues.
Does BakeWithEase offer step-by-step guides for baking sourdough rye?
Yes, BakeWithEase provides detailed step-by-step instructions for all recipes, including sourdough rye. These guides offer clarity and guidance at each stage of the baking process.
What kind of ingredients can I expect to find in a BakeWithEase sourdough rye recipe?
Expect to see ingredients like rye flour, bread flour, water, salt, and a sourdough starter. The recipe will likely specify types and ratios for optimal results.
How can BakeWithEase help me improve my sourdough rye baking skills?
BakeWithEase offers baking tips and techniques tailored to sourdough rye, helping you understand the nuances of working with rye flour. This includes guidance on fermentation, shaping, and baking.
Final Reflection: The Ever-Evolving Quest for Sourdough Perfection
The pursuit of the perfect sourdough rye loaf is not just about a recipe; it's a journey of understanding, patience, and ultimately, self-discovery. The seemingly simple act of baking bread reveals a complex interplay of science and art, a delicate dance between flour, water, time, and the unseen forces of wild yeasts. This journey, as detailed in this article, highlights the importance of understanding these elements to achieve consistent, delicious results.
The impact of sourdough baking extends far beyond the kitchen. It's a connection to a centuries-old tradition, a mindful practice that encourages slowing down and appreciating the process. It's a testament to the power of simple ingredients transformed by time and care. Bread is the staff of life,
they say, and in the making of sourdough, we find not just sustenance, but a profound connection to our food and ourselves. The variations in each loaf, the subtle nuances of flavor and texture, are a constant reminder that perfection is not a destination, but an ongoing evolution.
Now, I invite you to take what you've learned here and embark on your own sourdough journey. Don't be afraid to experiment, to embrace the imperfections, and to savor the process. Each loaf, regardless of its perceived "perfection," is a testament to your dedication and a delicious reward for your efforts. Remember the principles outlined in this article, but most importantly, remember to enjoy the journey. The perfect sourdough rye loaf awaits – not as a final product, but as a continuous, rewarding pursuit.
Unlock Your Inner Baker: Craft the Rye Loaf of Your Dreams!
Thanks for joining us on this sourdough rye journey! We hope you've gained valuable insights and a newfound appreciation for the art of bread making. Now it's time to put your knowledge into practice.
Here's how to take the next step:
- Bake your own rye loaf! Use the techniques we've discussed to create your perfect sourdough rye. Don't be afraid to experiment with different flours and additions.
- Share your baking journey! Post a picture of your creation on social media and tag us—we'd love to see your results!
- Explore alternative rye recipes: Dive deeper into the world of rye by researching different types of rye bread and experimenting with new flavor combinations.
What unique ingredient will you add to your next sourdough rye loaf to elevate the flavor profile?