
Easy Steps to a Beautifully Brown White Bread Crust

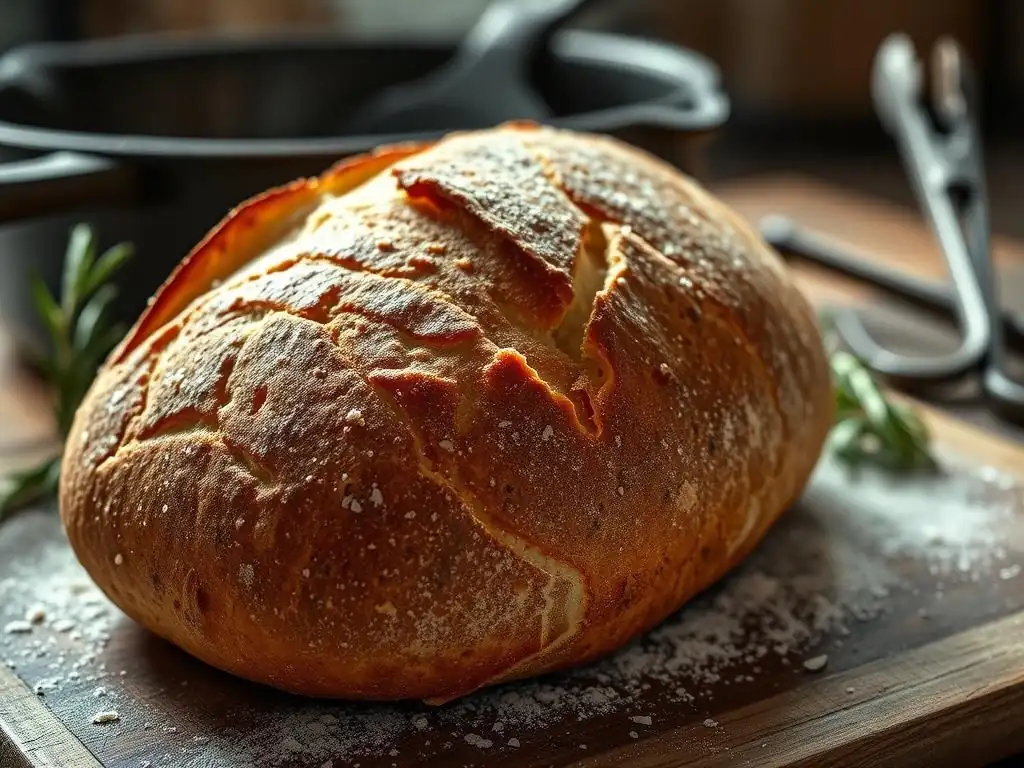
Welcome to BakeWithEase, your trusted guide to baking brilliance! Ever wondered how to achieve that perfectly browned white bread crust that whispers of bakery-fresh goodness? We're about to unlock the secrets. Get ready to transform your everyday loaf into a golden masterpiece – let's explore the simple steps to bread baking perfection!
- Introduction: Mastering Sourdough Crust Color
- Understanding the Science Behind Sourdough Bread Crust Browning
- Pre-Baking Techniques for a Browner Crust
- Baking Methods for a Beautifully Browned Crust
- Post-Baking Techniques for Enhancing Crust Appearance
- Troubleshooting Common Crust Browning Problems
- Advanced Techniques for Sourdough Crust Perfection
- Achieving Your Best Browned Sourdough Crust: Recap and Tips
- Conclusion: Enjoying Your Perfectly Browned Sourdough Bread
-
Frequently Asked Questions
- How important is the oven temperature for a perfectly browned white bread crust?
- What role does milk or egg wash play in achieving a perfectly browned white bread crust?
- Can I use sugar or honey in my white bread dough to improve crust browning?
- What are some techniques for creating steam in the oven for a better white bread crust?
- What if my white bread crust is browning too quickly?
- Final Reflection: The Golden Crust and the Art of Baking
- Unleash Your Inner Baker: Achieve that Perfect Crust!
Introduction: Mastering Sourdough Crust Color
Achieving that coveted golden-brown crust is often considered the hallmark of a successful loaf, especially when it comes to sourdough. More than just aesthetics, the color and texture of your crust significantly impact the overall flavor and eating experience. A perfectly browned white bread crust or a deep golden sourdough crust indicates proper baking temperatures and times, ensuring a crisp exterior that gives way to a soft, airy interior. It's a skill that elevates your baking from good to truly exceptional, adding depth and complexity to every slice.
This guide will take you through the essential techniques, from preparing your dough to managing your oven, that contribute to that beautiful, perfectly browned white bread crust finish on your sourdough loaves. We'll explore the science behind the browning process and provide practical tips you can implement in your home kitchen to achieve consistent, stunning results every time.
Understanding the Science Behind Sourdough Bread Crust Browning
The transformation of pale dough into a richly colored crust involves fascinating chemical reactions triggered by heat. Understanding these processes helps you control the factors that influence browning, leading to better results. Two primary reactions are at play: the Maillard reaction and caramelization.
The Maillard Reaction: Key to Crust Color and Flavor
The Maillard reaction is a complex series of chemical interactions that occur when amino acids and reducing sugars are exposed to heat. This reaction begins at temperatures above approximately 140°C (284°F) and is responsible for many of the desirable flavors and aromas in baked goods, as well as the initial stages of browning. In bread crust, the Maillard reaction creates hundreds of distinct flavor compounds, contributing to the rich, complex taste profile that complements the tangy interior of sourdough.
The availability of both amino acids (from protein in the flour) and reducing sugars (produced during fermentation) is crucial for this reaction. An active sourdough starter breaks down starches into these necessary sugars, providing the fuel for the Maillard reaction to produce that characteristic golden hue and depth of flavor in a beautifully browned crust.
Caramelization: Contributing to a Deeper, Richer Brown
As baking temperatures rise, typically above 160°C (320°F), the process of caramelization begins. This reaction involves the thermal decomposition of sugars, independent of amino acids. Caramelization contributes to the deeper brown tones and can add slightly bitter or sweet notes to the crust. While the Maillard reaction often initiates the browning, caramelization pushes the color towards richer browns and contributes to the more intense flavors found in darker crusts.
The balance between the Maillard reaction and caramelization, influenced by baking time, temperature, and sugar content, determines the final color and flavor complexity of your sourdough crust. High oven temperatures are essential to drive both reactions effectively, resulting in a crisp, flavorful, and perfectly browned white bread crust.
The Role of Acetic and Lactic Acids in Browning Sourdough Crust
Sourdough fermentation is driven by lactic acid bacteria and wild yeasts, which produce lactic acid and acetic acid. These acids play a role in the dough's flavor and structure, but they also indirectly influence crust browning. The slightly acidic environment can affect enzymatic activity within the dough, potentially influencing the breakdown of starches into simple sugars needed for the Maillard reaction.
While not a direct cause of browning like heat, the presence and balance of these acids contribute to the overall dough chemistry. For example, a longer, colder fermentation might favor acetic acid production, which some bakers believe can slightly impact sugar availability or the rate of browning compared to a warmer fermentation dominated by lactic acid. The unique acidic profile of sourdough interacts with the sugars and proteins during baking to create a crust that is both structurally sound and capable of developing a deep, satisfying color.
Pre-Baking Techniques for a Browner Crust
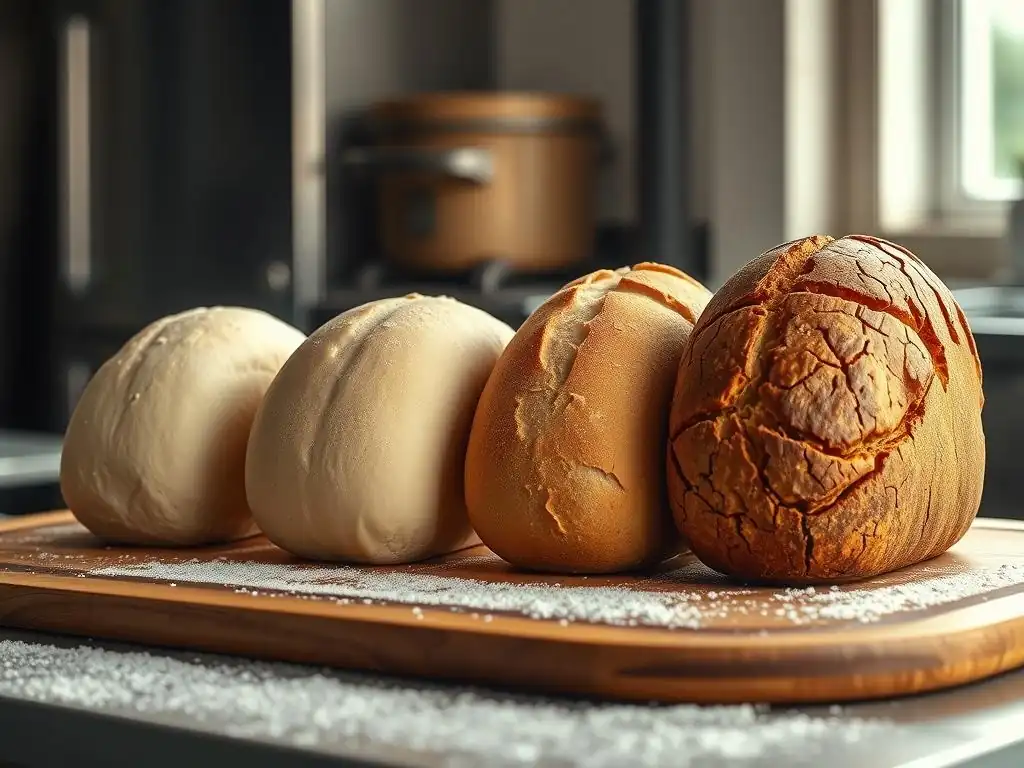
The journey to a perfectly browned white bread crust begins long before your loaf enters the oven. Several steps in the dough preparation phase are critical for setting the stage for optimal browning. These techniques focus on dough structure, sugar development, and moisture balance.
Flour Choice: Using High-Protein Flour for Crust Development
The type of flour you use significantly impacts your crust. Flours with a higher protein content, such as bread flour (typically 12-14% protein), are excellent for developing a strong gluten network. A well-developed gluten structure allows the dough to trap gases produced during fermentation and oven spring, resulting in a better rise. This robust expansion leads to a thinner, more even crust that is ideal for browning. Lower-protein flours (like cake flour) result in a weaker structure and may yield a thicker, less uniformly colored crust.
Using a high-quality bread flour provides the necessary protein for structure and contributes to the availability of amino acids needed for the Maillard reaction. While you can use blends, incorporating a significant portion of high-protein flour is a reliable step towards achieving a beautiful, perfectly browned white bread crust on your sourdough.
Starter Activity: Ensuring Sufficient Sugar Production
An active and healthy sourdough starter is paramount for successful baking, including crust development. The wild yeasts and bacteria in your starter work together to ferment the dough, consuming complex carbohydrates and producing simpler sugars, acids, and carbon dioxide. These simple sugars (like glucose and fructose) are the essential reactants for the Maillard reaction and caramelization during baking.
If your starter is weak or sluggish, it may not break down enough starches into simple sugars during fermentation. This lack of available sugars directly impacts the potential for browning, leading to a pale crust. Ensure your starter is vigorous, reliably doubling or tripling in volume within 4-6 hours after feeding, before incorporating it into your dough. A strong starter ensures adequate sugar production for a golden-brown finish.
Hydration Level: Balancing Moisture for Optimal Crust Formation
The hydration level of your dough (the ratio of water to flour) plays a crucial role in crust development. Higher hydration doughs (often 75% water or more) remain moist for a longer period in the hot oven. This extended moisture allows the dough to expand fully during oven spring before the crust sets. A crust that sets too early can restrict expansion, leading to tears or a thicker crust that doesn't brown as evenly.
While high hydration can be trickier to handle, it contributes to a thinner, crispier crust that is more receptive to browning. Conversely, very low hydration doughs might develop a crust too quickly. Finding the right balance for your skill level and desired outcome is key. A hydration level of 70-80% is common for artisan sourdough and often produces a beautifully browned white bread crust.
Cold Fermentation: Enhancing Flavor and Crust Texture
Refrigerating your dough for an extended period (cold fermentation or cold proofing), often 12 to 48 hours, is a technique widely used by sourdough bakers. This slow, cool environment allows enzymes within the dough to continue breaking down complex starches into simple sugars. While yeast activity slows significantly in the cold, enzymatic activity persists, increasing the pool of sugars available for browning reactions later.
Beyond flavor development, cold fermentation also strengthens the gluten network, contributing to better oven spring. The combination of increased sugar availability and improved structure leads to a crust that not only tastes more complex but also develops a deeper, more even, and perfectly browned white bread crust during baking.
Baking Methods for a Beautifully Browned Crust
The oven is where the magic truly happens, transforming your proofed dough into a baked loaf with a stunning crust. The conditions inside the oven – temperature, steam, and time – are critical for achieving that desired golden-brown color.
Oven Temperature: Adjusting for Sourdough's Unique Needs
Sourdough typically requires a high initial baking temperature to achieve maximum oven spring and set the crust properly. Preheating your oven to a high temperature, often between 230°C and 260°C (450°F and 500°F), is standard practice. This intense initial heat provides the necessary energy for rapid expansion and kickstarts the browning reactions (Maillard and caramelization) on the surface.
After the initial phase, where oven spring occurs and steam is present, many bakers reduce the temperature slightly, perhaps to 200°C or 220°C (400°F or 430°F). This allows the interior of the loaf to cook through without the crust burning. Using an oven thermometer is highly recommended to ensure your oven is reaching and maintaining the correct temperature, as oven thermostats can be inaccurate, directly impacting your ability to achieve a perfectly browned white bread crust.
Steam Injection: Creating a Crisp, Shiny Crust
Steam is arguably the most critical element in achieving a thin, crisp, and beautifully browned sourdough crust. In the first 15-20 minutes of baking, steam prevents the surface of the dough from drying out and forming a hard crust too quickly. This allows the dough to expand fully during oven spring without resistance, leading to a better shape and volume.
The moist environment created by steam also gelatinizes the starch on the dough's surface. This gelatinized layer becomes thin, crisp, and slightly shiny when it dries out later in the bake, providing the perfect canvas for the browning reactions to create a deep, even color. Without adequate steam, the crust forms prematurely, restricting oven spring and often resulting in a thicker, duller, and less evenly browned crust.
Creating Steam in a Home Oven: Dutch Oven vs. Water Tray Methods
Home bakers can replicate a commercial bakery's steam injection in a couple of ways:
- Dutch Oven Method: This is widely considered the most effective method for home bakers. A heavy cast iron Dutch oven, preheated along with the oven, traps the moisture released by the dough as it bakes. Place your proofed dough inside the preheated Dutch oven, cover it, and bake for the initial phase (e.g., 20 minutes at high heat). The trapped steam keeps the crust pliable. After this period, remove the lid to allow the crust to dry out and brown beautifully. This method consistently produces a fantastic, perfectly browned white bread crust.
- Water Tray Method: Place a heavy baking tray or cast iron pan on the bottom rack of your oven while it preheats. Just before you load your bread onto a baking stone or tray on a higher rack, carefully pour about a cup of boiling water into the hot tray at the bottom. Close the oven door quickly to trap the steam. Be extremely cautious when handling boiling water around a hot oven. This method provides some steam but is generally less effective and consistent than the Dutch oven method for achieving maximum crust development and browning.
Baking Time: Monitoring Internal Temperature and Color
The total baking time for a sourdough loaf typically ranges from 40 to 55 minutes, depending on the size and shape of the loaf and your oven. While time is a guideline, the most reliable indicators of doneness are the internal temperature of the bread and the color of the crust.
The internal temperature should reach between 93°C and 99°C (200°F and 210°F) for a fully baked loaf. Use an instant-read thermometer inserted into the center of the loaf. Visually, the crust should have achieved your desired level of browning – a deep golden brown or richer hue, depending on your preference. Don't be afraid of a dark crust; this is where much of the flavor resides. If the crust looks beautifully browned and the internal temperature is correct, your loaf is likely done.
Post-Baking Techniques for Enhancing Crust Appearance
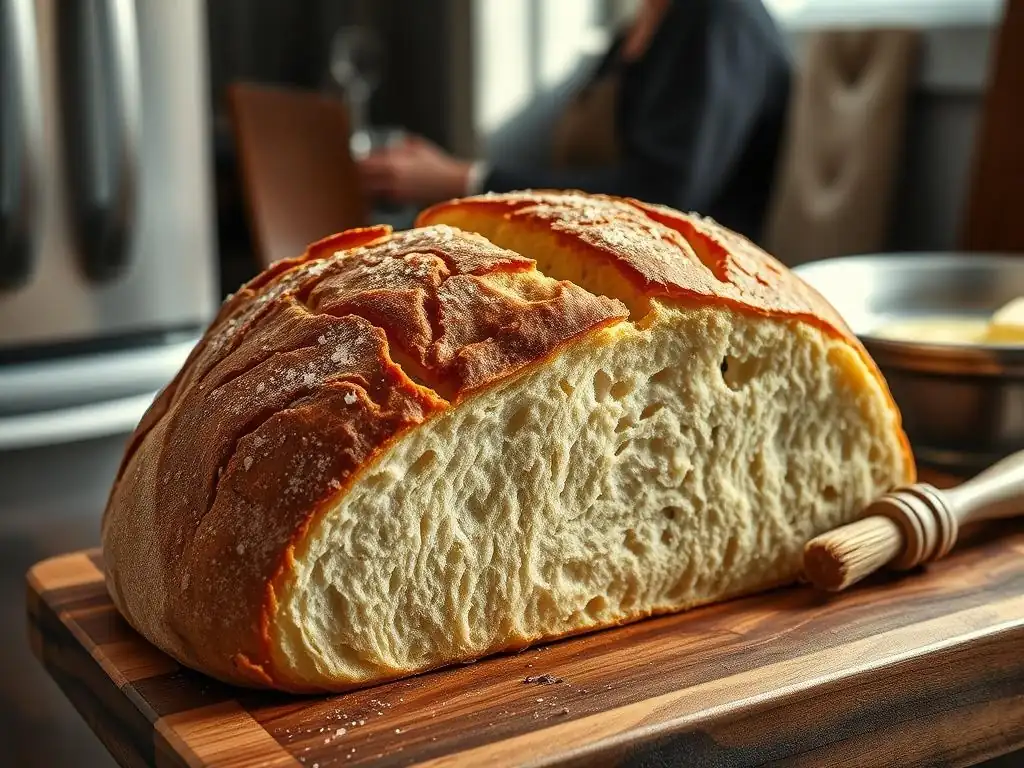
Once your beautifully browned loaf is out of the oven, a few final steps can help solidify its appearance and texture.
The Ice Bath Technique: Immediate Crust Crispness
Note: While some techniques involving rapid cooling exist for specific baked goods (like bagels), plunging a hot sourdough loaf directly into an ice bath is not a standard practice for achieving a crisp crust on a large loaf. Rapid cooling can cause the interior texture to become dense or gummy due to sudden steam condensation.
For sourdough loaves, the focus post-baking is on allowing the crust to set properly as it cools naturally.
Butter or Oil Wash: Adding Shine and Softness (Optional)
Applying a thin layer of softened butter or olive oil to the warm crust immediately after removing the bread from the oven is an optional step. This adds a lovely sheen to the crust and can slightly soften it, giving it a less brittle texture. It's a matter of personal preference and doesn't contribute to the browning itself, which is completed during the baking process. A pastry brush works well for applying a thin, even coat.
Cooling Your Bread: Allowing the Crust to Set Properly
Perhaps the most crucial post-baking step for crust development is proper cooling. Always transfer your hot loaf to a wire rack immediately after it comes out of the oven. Cooling on a rack allows air to circulate freely around the entire loaf, preventing condensation from forming on the bottom crust, which would make it soft and potentially soggy.
Allow the bread to cool completely, ideally for 1-2 hours (or even longer for very large loaves), before slicing. As the bread cools, moisture from the interior redistributes throughout the loaf, and the crust continues to set and become firm and crisp. Cutting into a hot loaf traps steam, resulting in a gummy interior and can soften the crust you worked so hard to achieve. Patience is key to a perfect crumb and a perfectly browned white bread crust.
Troubleshooting Common Crust Browning Problems
Even with the best techniques, sometimes your crust doesn't turn out exactly as planned. Here are some common issues and how to address them.
Crust is Too Pale: Causes and Solutions (Under-proofing, Low Oven Temp)
A pale crust is often a sign that the browning reactions (Maillard and caramelization) didn't occur effectively. Common causes include insufficient sugar availability in the dough (often due to under-proofing or an inactive starter), or the oven temperature being too low. If your dough hasn't fermented long enough, the enzymes haven't had sufficient time to break down starches into simple sugars.
- Solutions: Ensure your starter is active and healthy. Allow adequate time for bulk fermentation and proofing, checking for signs of readiness like increased volume and bubbles. Double-check your oven temperature with a reliable thermometer – ovens are often cooler than their settings indicate. Increase your oven temperature slightly or bake for a few extra minutes, monitoring closely. Ensure you are using sufficient steam in the initial baking phase to allow for good oven spring before the crust sets.
Crust is Burning Too Quickly: Prevention and Remedies (Lower Rack, Reduce Temp)
If your crust is turning dark mahogany or black while the interior is still undercooked, the heat is too intense or the baking time at high heat is too long. This is often caused by an oven that is too hot, placing the loaf too close to a heating element, or insufficient steam in the initial phase, causing the crust to set and burn before the inside cooks.
- Prevention: Always preheat your oven with a thermometer to verify the temperature. Avoid placing your loaf on the very bottom rack if the heating element is exposed there.
- Remedies: If the crust is browning too fast, loosely tent the loaf with aluminum foil for the remainder of the baking time. This shields the crust from direct radiant heat. You can also try moving the loaf to a lower rack or reducing the oven temperature slightly after the initial high-heat, steamy phase (e.g., after 20 minutes). Ensure you are using sufficient steam initially to delay premature crust setting.
Uneven Browning: Achieving Uniform Color (Oven Rotation)
Uneven browning, where one side of the loaf is significantly darker than the other, is almost always due to hot spots in your oven. Ovens rarely heat perfectly uniformly; certain areas are hotter than others.
- Solution: The simplest and most effective remedy is to rotate your loaf partway through the baking process. After the initial steam period (e.g., when you remove the Dutch oven lid or after the first 15-20 minutes), carefully turn the loaf 180 degrees. This ensures that all sides are exposed to the same amount of heat for roughly equal durations, promoting uniform development of that perfectly browned white bread crust.
Advanced Techniques for Sourdough Crust Perfection
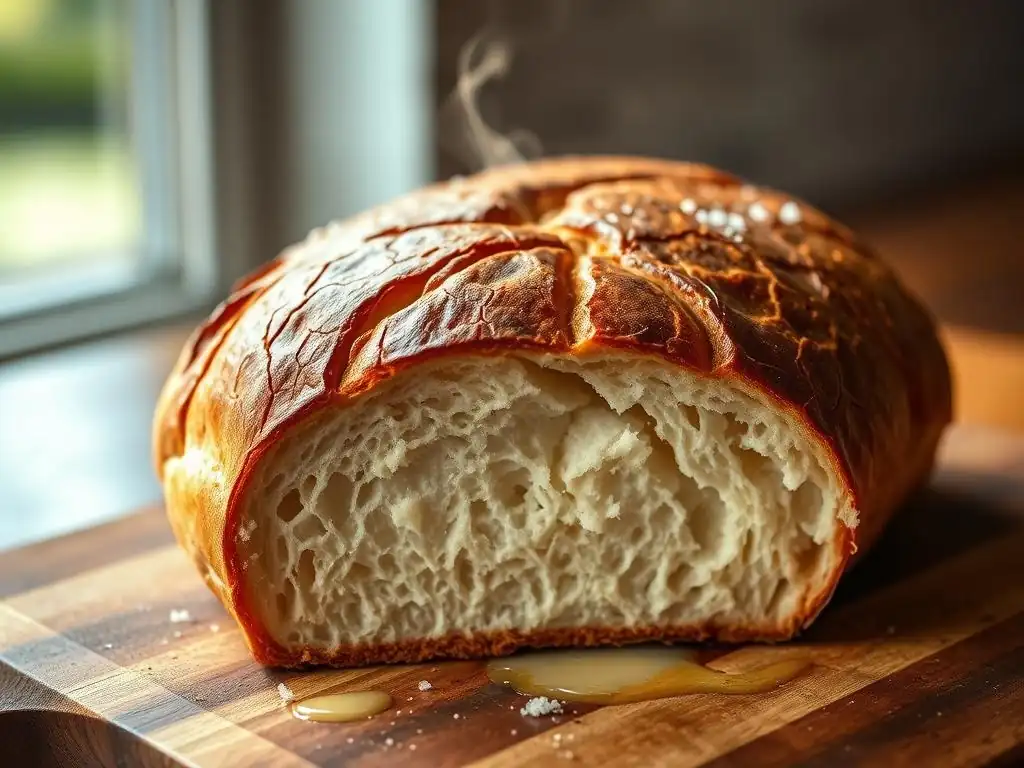
Once you've mastered the basics, you can explore techniques that further refine your sourdough crust.
Using a Dutch Oven: Achieving Maximum Steam and Crust Definition
As mentioned earlier, the Dutch oven method is a game-changer for home sourdough baking. The sealed environment creates the ideal conditions for oven spring and crust formation by trapping steam released from the dough. This results in consistently high oven spring, a thin, crisp crust, and superior browning compared to baking on an open tray with external steam methods.
Preheating a heavy cast iron Dutch oven at a high temperature (like 260°C/500°F) and baking the dough inside with the lid on for the first 20 minutes allows the dough to expand fully in a steamy sauna. Removing the lid then exposes the loaf to dry heat, allowing the crust to crisp up and develop a deep, even, and perfectly browned white bread crust.
Scoring Patterns: Influencing Crust Expansion and Appearance
Scoring, the act of cutting the surface of the dough just before baking, is both functional and artistic. Functionally, scores act as controlled vents that guide the dough's expansion during oven spring. Without scoring, the crust would tear haphazardly. Proper scoring allows for maximum, even expansion, contributing to a well-shaped loaf.
Artistically, the scoring pattern influences the final appearance of the crust. A single deep slash encourages a large "ear" to form, while multiple parallel cuts create a series of ridges. As the crust browns, these scored areas expand and separate, creating beautiful patterns and varying shades of brown that enhance the visual appeal of a perfectly browned white bread crust. Use a sharp razor blade or lame for clean cuts.
Flour Blends: Tailoring Flavor and Crust Characteristics
While high-protein white flour is excellent for a classic, crisp crust, experimenting with different flour blends can add complexity to both flavor and crust texture. Incorporating a percentage of whole wheat, rye, spelt, or other ancient grains introduces different proteins, sugars, and fiber.
For example, adding 10-20% whole wheat flour can add nutty flavors and a slightly chewier texture to the crust. However, bran particles in whole grains can sometimes interfere with gluten development and may result in a slightly less smooth or uniformly browned crust compared to 100% white flour. Experimenting with small percentages allows you to balance flavor contribution with achieving your desired perfectly browned white bread crust aesthetic.
Achieving Your Best Browned Sourdough Crust: Recap and Tips
Mastering the perfectly browned white bread crust on your sourdough loaf is a journey of practice and observation. By focusing on a few key areas, you can consistently achieve stunning results.
Key Takeaways for Baking a Golden Sourdough Loaf
- Start with an active, healthy sourdough starter to ensure sufficient sugar production.
- Use flour with adequate protein for strong gluten development and good oven spring.
- Consider a higher hydration dough (75%+) for a thinner, crispier crust that browns well.
- Utilize cold fermentation to increase sugar availability and enhance flavor.
- Bake at high temperatures (starting around 230-260°C / 450-500°F) to initiate browning reactions.
- Use ample steam in the first 15-20 minutes (Dutch oven is highly recommended) for maximum oven spring and a pliable crust.
- Monitor internal temperature (aim for 93-99°C / 200-210°F) and crust color to determine doneness.
- Cool completely on a wire rack to set the crust.
Sourdough Recipe: Implementing Browning Techniques
Let's consider a typical sourdough process and where these techniques fit:
- Mixing: Use high-protein flour. Ensure your starter is active. Adjust hydration based on your target crust texture.
- Bulk Fermentation: Allow sufficient time for the starter to develop sugars and acids.
- Cold Fermentation: Refrigerate the dough for 12-48 hours to enhance sugar development and flavor.
- Preheating: Preheat oven and Dutch oven (if using) to a high temperature (e.g., 250°C/480°F).
- Scoring & Baking (Steam Phase): Score the dough and carefully place it in the preheated Dutch oven (or onto a baking stone with steam setup). Bake with steam (lid on Dutch oven) for 20 minutes.
- Baking (Browning Phase): Remove the Dutch oven lid (or remove steam tray) and reduce oven temperature slightly (e.g., to 220°C/430°F). Continue baking for 25-30 minutes, or until the crust is a deep golden brown and the internal temperature is correct. Rotate the loaf halfway through this phase if needed for even browning.
- Cooling: Cool completely on a wire rack.
- Start with an active starter.
- Use high-protein flour.
- Explore hydration levels around 75%+.
- Implement cold fermentation.
- Preheat oven and vessel to 250°C (480°F).
- Use steam (Dutch oven recommended) for first 20 mins.
- Reduce temp to 220°C (430°F) and bake uncovered until golden brown (25-30 mins).
- Check internal temp (200-210°F / 93-99°C).
- Cool completely on a rack.
Conclusion: Enjoying Your Perfectly Browned Sourdough Bread
Achieving a beautifully browned crust on your sourdough bread is a rewarding part of the baking process. It's a visual cue of a well-baked loaf, promising a delightful contrast between the crisp exterior and the soft, flavorful interior. By understanding the science of browning and consistently applying techniques related to dough preparation, fermentation, and baking conditions—especially mastering the use of high heat and steam—you are well on your way to producing loaves with that sought-after, perfectly browned white bread crust.
Don't be discouraged by early attempts. Baking is a skill that improves with practice. Pay attention to the details: the activity of your starter, the feel of your dough, the temperature of your oven, and the visual cues of the crust as it develops. With each loaf, you'll gain confidence and precision, leading to consistently stunning results. So go forth, bake with ease, and savor the satisfaction of a perfectly baked sourdough loaf, complete with a gorgeous, golden-brown crust.
Frequently Asked Questions
How important is the oven temperature for a perfectly browned white bread crust?
Oven temperature is crucial. A slightly higher temperature, within recommended limits, encourages browning reactions and caramelization on the crust. Check your oven's accuracy, too!
What role does milk or egg wash play in achieving a perfectly browned white bread crust?
Milk or egg washes add extra protein and sugars to the surface of the dough. This accelerates the browning process during baking, resulting in a richer color.
Can I use sugar or honey in my white bread dough to improve crust browning?
Yes, adding a small amount of sugar or honey helps. These ingredients caramelize at high temperatures, enhancing the golden-brown color and adding a subtle sweetness.
What are some techniques for creating steam in the oven for a better white bread crust?
Steam helps keep the crust moist initially, allowing it to expand fully before setting. Methods include using a water-filled pan or spraying water into the oven.
What if my white bread crust is browning too quickly?
If the crust is browning too fast, reduce the oven temperature slightly or tent the bread with foil. This prevents burning while allowing the inside to fully bake.
Final Reflection: The Golden Crust and the Art of Baking
The pursuit of the perfectly browned white bread crust is more than just aesthetics; it's a testament to the mastery of baking fundamentals. A flawlessly browned crust signifies not only a visually appealing loaf but also a bread that's likely perfectly baked inside, with a delightful texture and flavor. This seemingly simple detail speaks volumes about the precision and care involved in the baking process.
The quest for that ideal golden-brown hue has captivated bakers for centuries, transcending mere culinary skill and becoming a symbol of home-baked goodness. The satisfying crackle of the crust, the aroma that fills the kitchen – these sensory experiences are deeply ingrained in our cultural memory, connecting us to traditions and the simple joys of creating something delicious from scratch. Bread is the staff of life,
they say, and a beautifully browned crust is the jewel in its crown.
Now, consider your own baking journey. What have you learned about attention to detail and the importance of precise measurements from this exploration of bread-making? Don't be afraid to experiment with different techniques and ovens, to tweak the recipe until you achieve your perfect crust. The journey to mastering the art of baking is a continuous one, filled with both triumphs and lessons learned. Embrace the process, savor the results, and share the deliciousness with those you love. The perfectly browned crust awaits!
Unleash Your Inner Baker: Achieve that Perfect Crust!
Thanks for taking the time to explore the secrets of a beautifully browned white bread crust! We hope you feel empowered to elevate your baking game. Now it's time to put your newfound knowledge into practice.
- Bake a loaf today! Use your newly acquired skills to create a stunning, crusty masterpiece. Don't be afraid to experiment with different flours or baking times – that's where the real magic happens!
- Share your baking triumph! Snap a photo of your perfectly browned loaf and post it on social media using #BakeWithEaseCrust – we'd love to see your creation!
- Explore more baking tips on our site for more bread-baking adventures. You can find more recipes on BakeWithEase.com.
Ready to transform your next loaf into a work of art? What unique ingredient will you experiment with next time?