
The Art of Proofing: Timing Yeast Fermentation for Success

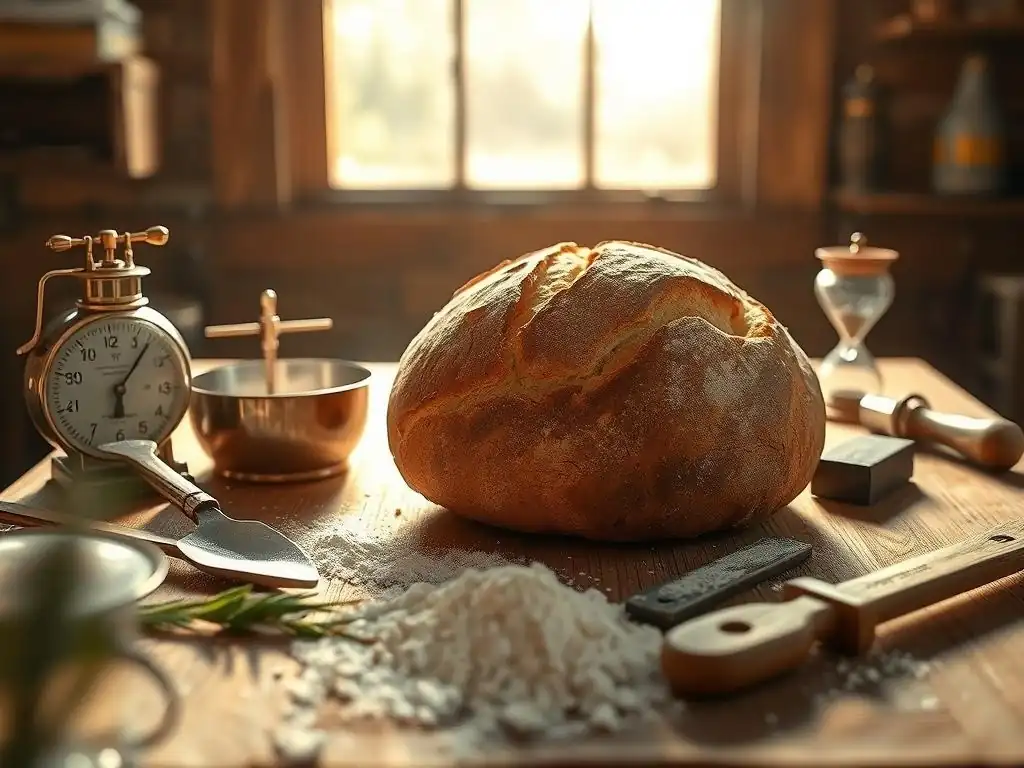
Welcome to BakeWithEase, your guide to baking brilliance! Ever wondered if you're really getting the most out of your yeast? Our latest article, "The Art of Proofing: Timing Yeast Fermentation for Success," dives deep into perfecting yeast fermentation timing, unlocking the secrets to consistently light, airy, and flavorful bakes. Curious about how to tell when your dough is just right? Let's explore the science behind the rise and transform your baking!
- Introduction to Yeast Fermentation Timing in Baking
- The Science Behind Yeast Proofing and Fermentation
- Mastering the Art of Proofing: A Step-by-Step Guide
- Troubleshooting Common Yeast Fermentation Problems
- Advanced Techniques for Perfecting Yeast Fermentation Timing
- Recipes and Examples: Applying Yeast Fermentation Timing in Practice
- Tips and Tricks for Consistent Yeast Fermentation Results
- Conclusion: Elevating Your Baking with Precise Yeast Fermentation Control
-
Frequently Asked Questions
- How crucial is timing when perfecting yeast fermentation?
- What are the visual cues that indicate my yeast fermentation is complete?
- What factors can affect the ideal yeast fermentation timing?
- Can I over-ferment my dough, and what are the consequences?
- How can I adjust fermentation timing in different environmental conditions?
- Final Reflection: Mastering the Rhythms of Yeast: A Baker's Journey
- Unleash Your Inner Baker: Perfect Proofing Every Time!
Introduction to Yeast Fermentation Timing in Baking
Why Perfect Yeast Fermentation Timing is Crucial for Baking Success
Achieving that perfect loaf of bread, a light and airy pizza crust, or tender brioche hinges significantly on one critical process: yeast fermentation. This biological reaction, where yeast consumes sugars and produces carbon dioxide and alcohol, is what gives dough its rise, structure, and complex flavor. Without proper timing, your baked goods can end up dense, heavy, flavorless, or worse, completely collapsed.
Mastering the art of proofing and perfecting yeast fermentation timing is not just a technical skill; it's the cornerstone of successful baking with yeast. It directly impacts the texture, volume, aroma, and overall palatability of your finished product, transforming simple ingredients into culinary delights.
Precise control over fermentation time allows bakers to manipulate flavor development. Longer, slower fermentation, often achieved through cold proofing in the refrigerator, allows enzymes more time to break down starches into sugars, providing more food for the yeast and contributing to a richer, more nuanced taste profile. Conversely, rushing the process can result in bread that tastes predominantly of yeast with a less developed crumb structure.
For instance, a standard white bread recipe might call for a first rise of 1-2 hours at room temperature, but a complex sourdough or a long-fermented baguette dough might ferment for 12-24 hours or even longer under controlled conditions. Understanding these timelines and how to manage them is key to consistently producing high-quality baked goods.
Understanding the Role of Yeast in Baking: A Quick Overview
Yeast, a single-celled microorganism belonging to the fungus family, is the primary leavening agent in many baked goods. Its fundamental role is to consume simple sugars present in the dough and, through a process called anaerobic respiration (fermentation), convert them into carbon dioxide gas and ethanol. The carbon dioxide gas gets trapped within the gluten network of the dough, causing it to expand and rise – this is the proofing process. The ethanol contributes to the flavor profile and largely evaporates during baking.
Beyond leavening, yeast activity also contributes significantly to the dough's structure and flavor development. Enzymes within the yeast and flour work together during fermentation to break down proteins and complex carbohydrates.
This breakdown helps to condition the gluten, making the dough more extensible and easier to shape, while also creating aromatic compounds that contribute to the characteristic smell and taste of freshly baked bread. Different types of yeast (active dry, instant, fresh, wild yeast in sourdough) behave differently and require slightly varied handling and timing considerations, further emphasizing the importance of perfecting yeast fermentation timing based on your specific recipe and ingredients.
The Science Behind Yeast Proofing and Fermentation
What Happens During Yeast Fermentation? A Scientific Explanation
Yeast fermentation is a metabolic process where yeast cells convert glucose (a simple sugar) into ethanol and carbon dioxide in the absence of oxygen. When you mix flour and water, enzymes in the flour (amylases) begin to break down complex starches into simpler sugars, including glucose and maltose. Yeast readily consumes these simple sugars. The chemical equation for this process is roughly:
As the dough rises, the developing gluten network, formed by the proteins glutenin and gliadin when flour is hydrated and kneaded, traps the carbon dioxide bubbles. This trapped gas causes the dough to expand, increasing its volume and creating the characteristic airy structure of bread. The alcohol produced contributes subtle flavors and aromas.
This process continues until the yeast runs out of readily available sugar, the gluten network becomes too weak to hold the gas, or the environmental conditions (like temperature) are no longer favorable. Effective perfecting yeast fermentation timing means allowing this process to proceed just long enough to achieve optimal rise and flavor without letting the dough collapse.
Factors Affecting Yeast Fermentation Time: Temperature, Sugar, and Hydration
Several environmental and compositional factors critically influence how quickly and effectively yeast ferments. Understanding these variables is essential for controlling the proofing process and achieving consistent results. The primary drivers are temperature, the amount of sugar available, and the dough's hydration level. Manipulating these factors allows bakers to slow down or speed up fermentation to fit their schedule and desired outcome.
Other factors also play a role, including the amount and type of yeast used, the presence of salt (which generally slows fermentation), the pH of the dough, and the strength of the flour's gluten network. For example, a rich dough containing butter, eggs, and sugar, like brioche, will ferment differently than a lean dough made only from flour, water, yeast, and salt. Paying attention to all these variables helps in perfecting yeast fermentation timing for any given recipe.
The Impact of Temperature on Yeast Activity
Temperature is arguably the most significant factor influencing the rate of yeast fermentation. Yeast is a living organism, and its metabolic activity is highly dependent on temperature. Yeast is most active in a temperature range typically between 75°F and 95°F (24°C-35°C).
Within this range, increasing the temperature generally increases the rate of fermentation; for instance, dough might double in size in 1 hour at 80°F (27°C), but take 2 hours at 70°F (21°C). Temperatures below 50°F (10°C) significantly slow down yeast activity, which is the principle behind cold fermentation in the refrigerator (often taking 12-48 hours). Temperatures above 130°F (54°C) will begin to kill the yeast, halting fermentation entirely.
Maintaining a consistent dough temperature is crucial for predictable fermentation. Drafty kitchens or placing dough on cold countertops can drastically slow the process. Many bakers use proofing boxes, warm ovens (turned off with the light on), or simply cover the dough and place it in a warm spot to ensure the temperature remains within the optimal range for the desired fermentation speed. Monitoring the ambient temperature and the dough's internal temperature (using an instant-read thermometer) can provide valuable insights for perfecting yeast fermentation timing.
How Sugar Levels Influence Fermentation
Sugar provides the primary food source for yeast. A small amount of sugar added to a recipe, or the sugars naturally present from the breakdown of starch, will fuel fermentation and promote browning and flavor in the crust. However, higher concentrations of sugar (typically above 5-10% of the flour weight, such as in sweet rolls or brioche) can actually slow down yeast activity. This happens because high sugar levels create an osmotic pressure that draws water out of the yeast cells, inhibiting their function.
In rich, sweet doughs, bakers often compensate for the inhibitory effect of sugar by using a little more yeast or allowing for longer fermentation times. It's a delicate balance: enough sugar to feed the yeast and aid browning, but not so much that it hinders the initial rise. Understanding how the sugar content of your dough affects yeast activity is key to perfecting yeast fermentation timing for different types of baked goods, from lean baguettes to sweet cinnamon rolls.
The Role of Hydration in Optimal Yeast Performance
The amount of water in the dough, or its hydration level, also impacts yeast activity and fermentation. Water is essential for dissolving sugars and other nutrients, making them accessible to the yeast cells. It also allows enzymes to break down starch into sugars and facilitates the movement of yeast within the dough. Higher hydration doughs (those with a higher percentage of water relative to flour, say 70% or more) generally ferment slightly faster than lower hydration doughs, assuming all other conditions are equal.
Water also plays a crucial role in gluten development, which is intertwined with fermentation. A well-developed gluten network is necessary to trap the carbon dioxide gas produced by the yeast. In very low hydration doughs, yeast may struggle to access nutrients efficiently, and the stiff structure can impede gas expansion.
Conversely, very high hydration doughs, while fermenting quickly, can be challenging to handle and may require different proofing techniques (like proofing in a basket) to maintain shape. Adjusting your approach to perfecting yeast fermentation timing should take into account the dough's hydration level and its impact on yeast activity and gluten structure.
Mastering the Art of Proofing: A Step-by-Step Guide
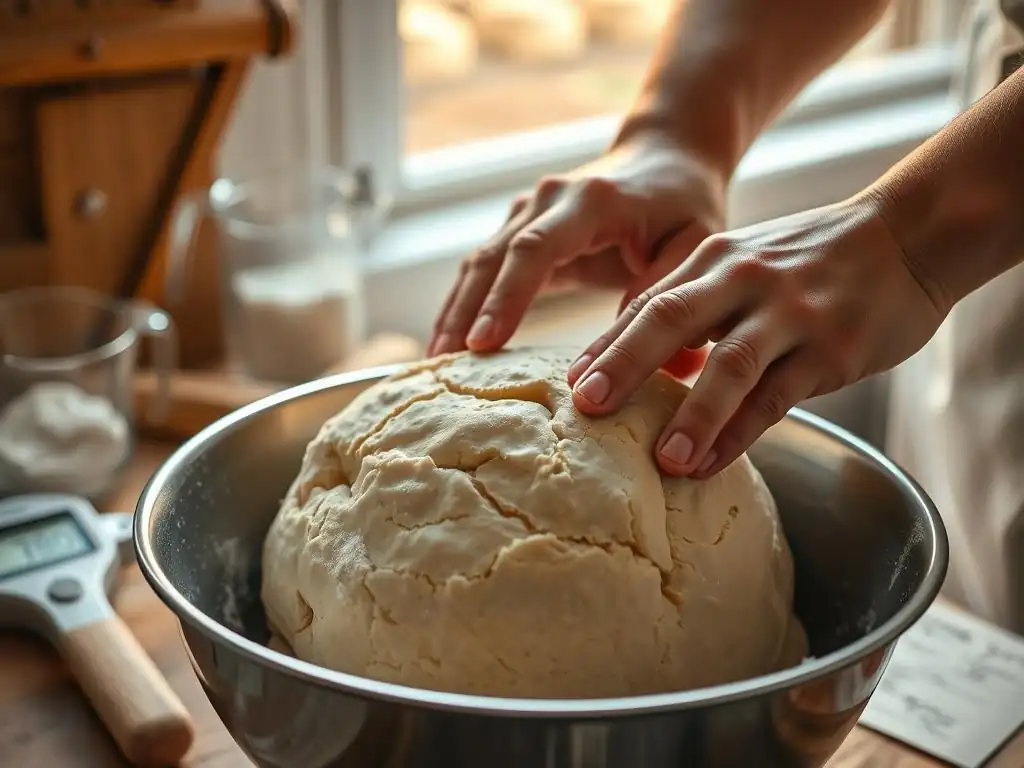
Step 1: Activating Your Yeast - Choosing the Right Method
Before yeast can work its magic, it often needs to be activated. The method depends on the type of yeast you are using. Proper activation ensures the yeast is alive and ready to ferment, setting the stage for successful proofing. Skipping this step or doing it incorrectly can lead to slow or no rise, making it a fundamental part of perfecting yeast fermentation timing.
Understanding the characteristics of each yeast type and its preferred activation method is the first practical step in controlling the fermentation process. Using old or inactive yeast, regardless of perfect proofing conditions, will result in dense, heavy dough. Always check the expiration date and store yeast properly (usually in the refrigerator or freezer) to maintain its viability.
Active Dry Yeast Activation Techniques
Active dry yeast is a popular choice for home bakers. It consists of dehydrated yeast granules that need to be rehydrated, or "bloomed," in warm liquid before being added to the rest of the ingredients. The ideal temperature for this blooming process is typically between 105°F and 115°F (40°C-46°C). Using water that is too cold won't activate the yeast, while water that is too hot can kill it.
To bloom active dry yeast, measure the required amount of warm water (or milk, as specified in the recipe) into a bowl, then sprinkle the yeast and a pinch of sugar over the top. Let it sit for 5-10 minutes. If the yeast is active, it will dissolve and the mixture will become foamy and bubbly, indicating the yeast is alive and ready to work.
If there's no activity, the yeast is likely dead and should be discarded. This simple test is crucial for verifying yeast viability before investing time and ingredients into a batch of dough, directly impacting your ability to confidently predict and thus perfect yeast fermentation timing.
Instant Dry Yeast: Direct Incorporation vs. Blooming
Instant dry yeast is processed differently than active dry yeast, allowing it to be mixed directly into the dry ingredients (flour and salt) without prior hydration. This convenience has made it a favorite for many bakers, as it simplifies the process and often leads to a slightly faster rise compared to active dry yeast. The granules are smaller and more porous, allowing for quicker absorption of liquid in the dough.
While it's designed for direct mixing, some bakers still prefer to "bloom" instant yeast, especially if they are unsure of its freshness or want to jumpstart fermentation. If blooming instant yeast, use slightly cooler water than for active dry yeast, typically between 95°F and 105°F (35°C-40°C). Blooming can give you confidence in the yeast's viability before mixing the dough. Whether you mix it directly or bloom it, ensuring your instant yeast is fresh is paramount for predictable and perfecting yeast fermentation timing.
Fresh Yeast: Understanding and Handling
Fresh yeast, also known as cake yeast or compressed yeast, is a moist block of active yeast cells. It is highly perishable and must be stored in the refrigerator and used within its relatively short shelf life, typically 1-2 weeks. Fresh yeast is often favored by professional bakers for its consistent results and ability to produce subtle flavor nuances.
Fresh yeast does not need to be bloomed in the same way as dry yeast, but it should be crumbled and dissolved in a small amount of warm liquid (around 95°F/35°C) before being added to the dough. It dissolves easily and should create a milky mixture. Because it's already moist, you'll need to account for the water content of fresh yeast in your recipe's hydration level. Its rapid activity means you'll need to be particularly attentive to dough development when perfecting yeast fermentation timing with fresh yeast.
Step 2: Creating the Ideal Environment for Yeast Fermentation
Once your dough is mixed and kneaded, providing the right environment for the yeast to thrive is crucial for successful proofing. Temperature and humidity are the two primary environmental factors you can control to optimize fermentation speed and prevent the dough from drying out. A consistent and controlled environment allows for predictable proofing times, which is essential for perfecting yeast fermentation timing.
Think of the proofing environment as a cozy home for your yeast. It needs to be warm enough for activity but not so hot that it stresses or kills the yeast, and humid enough to prevent a crust from forming on the dough surface, which would restrict its ability to rise evenly.
Maintaining Optimal Dough Temperature for Fermentation
As discussed earlier, temperature is key. For most standard doughs fermented at room temperature, aiming for a dough temperature between 75°F and 85°F (24°C-29°C) is ideal for a reasonably quick and effective rise, often taking 1-2 hours for the first proof. Colder temperatures will slow fermentation significantly (useful for flavor development via cold proofing), while warmer temperatures will speed it up.
To maintain this temperature, you can use a proofing box if you have one. Alternatively, you can place the covered dough in a turned-off oven with the oven light on (the light generates enough heat to create a warm environment, often reaching 80-90°F or 27-32°C). Another method is to place the covered dough in a microwave next to a cup of hot water.
Avoid placing dough in direct sunlight or on top of a hot appliance, as this can create inconsistent temperatures and hot spots. Monitoring the dough temperature with a thermometer can help ensure you are in the optimal range for perfecting yeast fermentation timing.
Humidity Considerations During Proofing
While temperature controls the rate of fermentation, humidity is important for preventing the surface of the dough from drying out and forming a skin. A dry skin restricts the dough's ability to expand freely and can lead to uneven rising or a tough crust. Covering the dough is the simplest way to maintain humidity.
You can cover the dough bowl or proofing basket with plastic wrap (lightly oiled to prevent sticking), a damp kitchen towel, or a tight-fitting lid. If proofing in a warm oven with the light on, placing a pan of hot water on the rack below the dough can also help create a humid environment. Maintaining adequate humidity ensures the dough surface remains pliable, allowing for maximum expansion during proofing and baking, contributing to overall success in perfecting yeast fermentation timing.
Step 3: Recognizing the Signs of Successful Yeast Fermentation
Knowing when your dough is perfectly proofed is a skill that comes with practice, but there are several reliable indicators to look for. Over-proofing can lead to dough collapse, while under-proofing results in dense bread. Learning to read these signs is crucial for perfecting yeast fermentation timing.
These visual and tactile cues are more reliable than relying solely on the clock, as fermentation times can vary based on all the factors discussed previously (temperature, ingredients, yeast activity, etc.). Always check the dough itself rather than strictly adhering to a recipe's suggested time.
Visual Cues: Dough Volume and Texture
The most obvious sign of successful fermentation is the increase in dough volume. For the first rise (bulk fermentation), dough typically doubles in size, or sometimes even triples, depending on the recipe and desired outcome. For the second rise (proofing of shaped loaves), the dough usually increases by about 50% to 100% of its shaped size. The surface of the dough should appear puffy and rounded, not tight or stretched.
As the dough ferments, its texture also changes. It becomes lighter, airier, and feels more elastic. You should see visible gas bubbles just beneath the surface, especially in higher hydration doughs. The dough should look alive and full of air. If the dough looks deflated or wrinkled, it might be over-proofed. Observing these visual transformations is a key part of perfecting yeast fermentation timing.
The Smell Test: Identifying Fermentation Aromas
A less commonly discussed but useful indicator is the smell of the fermenting dough. As yeast consumes sugars and produces ethanol, the dough develops a distinct, slightly alcoholic or yeasty aroma. A perfectly proofed dough will have a pleasant, slightly sweet, fermented smell – often described as yeasty or beer-like, but not overwhelmingly sour or unpleasant.
If the dough smells strongly acidic, vinegary, or has a harsh alcohol smell, it might be a sign of over-fermentation, especially in warmer conditions. A lack of any significant aroma could indicate slow or stalled fermentation. Trusting your nose can be a helpful additional tool when perfecting yeast fermentation timing.
The Poke Test: Gauging Dough Elasticity
The poke test is a classic method for determining if dough is properly proofed, particularly for shaped loaves before baking. To perform the poke test, lightly flour your finger and gently but firmly press it about half an inch (1-1.5 cm) into the surface of the dough. Observe how quickly the indentation springs back.
If the indentation springs back immediately and completely, the dough is likely under-proofed and needs more time. If the indentation remains fully and doesn't spring back at all, the dough is likely over-proofed and may collapse when baked. If the indentation slowly springs back only partially, leaving a small visible indent, the dough is typically perfectly proofed and ready for baking. This tactile test is one of the most reliable ways to tell if you've succeeded in perfecting yeast fermentation timing for your final proof.
Troubleshooting Common Yeast Fermentation Problems
Even experienced bakers occasionally encounter issues with yeast fermentation. Understanding common problems and their solutions is crucial for consistently good results. Most issues stem from temperature, yeast viability, or incorrect timing.
Don't be discouraged if a batch of dough doesn't rise as expected. Baking is a science, but also an art that requires observation and adaptation. Learning to troubleshoot helps you recover from mistakes and improves your understanding of the process, leading to better perfecting yeast fermentation timing in the future.
Dealing with Slow Fermentation: Possible Causes and Solutions
Slow fermentation is a common issue, resulting in dough that takes much longer than expected to rise or doesn't achieve the desired volume. This can lead to dense, heavy bread. Several factors can contribute to sluggish yeast activity.
Identifying the root cause is the first step to correcting slow fermentation. Often, a simple adjustment to the environment or ingredients can get the yeast back on track. Patient observation is key when dealing with slow dough.
Inactive or Old Yeast: Testing and Replacement
The most frequent cause of slow or no fermentation is inactive or dead yeast. Yeast is a living organism with a limited shelf life. If your yeast is past its expiration date or has been improperly stored (e.g., exposed to heat or moisture), it may no longer be viable. Using yeast that is only partially active will result in very slow, weak fermentation.
To check if your yeast is active, perform the blooming test described earlier (Step 1). If it doesn't become foamy and bubbly within 10 minutes, it's likely dead and you'll need to start over with fresh yeast. Always store active and instant dry yeast in an airtight container in the refrigerator or freezer, and fresh yeast in the refrigerator, using it by its expiration date. Ensuring you start with vigorous yeast is fundamental for perfecting yeast fermentation timing.
Temperature Issues: Correcting the Fermentation Environment
As temperature critically impacts yeast activity, a common reason for slow fermentation is a too-cold environment or dough temperature. If your kitchen is cool (below 70°F/21°C), fermentation will proceed much slower than recipes typically assume. Dough temperature is more important than ambient air temperature; a cold mixing liquid or cold flour can result in a cold dough that ferments slowly.
To speed up slow fermentation due to low temperature, move the dough to a warmer spot. Use a proofing box, a turned-off oven with the light on, or place the covered bowl in a warm (not hot) water bath. You can also gently warm the dough itself by placing the bowl near a warm appliance for a short period, being careful not to overheat it. Aim to bring the dough temperature into the 75-85°F (24-29°C) range for a faster rise. Consistent temperature control is vital for perfecting yeast fermentation timing.
Addressing Over-Fermentation: Preventing Dough Collapse
Over-fermentation, also known as over-proofing, occurs when dough is allowed to ferment for too long or in too warm an environment. The yeast consumes all available sugars, and the gluten structure, stretched to its limit by the trapped gas, begins to weaken and collapse. This results in dough that deflates easily, has a poor structure, and can produce flat, dense bread with a gummy texture and potentially overly strong, unpleasant yeasty or alcoholic flavors.
Preventing over-fermentation is often easier than fixing it. This involves monitoring your dough closely, especially in warm conditions, and using the poke test and visual cues to determine readiness rather than relying solely on time. Being vigilant is key to perfecting yeast fermentation timing.
Identifying Over-Proofed Dough
Recognizing the signs of over-proofing early can sometimes allow for intervention. An over-proofed dough will typically look significantly larger than doubled, possibly starting to spread outwards rather than rising upwards. The surface might look stretched thin or even show small bubbles bursting. When you perform the poke test, the indentation will remain completely or collapse the dough further. The dough may also smell strongly of alcohol or have a very sour aroma (though this can be desirable in sourdough).
If you notice these signs, particularly the poke test failing or the dough starting to deflate, it indicates the gluten structure is failing. Acting quickly is necessary to try and salvage the batch. Learning to spot these indicators is a crucial part of perfecting yeast fermentation timing and preventing disappointing results.
Salvaging Over-Fermented Dough: Techniques and Limitations
While it's difficult to fully recover an over-proofed dough, you can sometimes salvage it, especially if it hasn't completely collapsed. The primary goal is to re-develop the gluten structure and give the yeast access to new food sources if possible. One technique is to gently punch down the dough (or gently fold it in the bowl) to redistribute the gas and strengthen the gluten.
If the dough has completely collapsed, you can try gently re-kneading it for a minute or two to strengthen the gluten and incorporate some air, then give it a very short second rise (perhaps 15-30 minutes) before baking. However, the yeast may have consumed most of the available sugar, limiting further rise. In some cases, over-proofed dough can be repurposed for flatbreads, pizza crusts, or focaccia, where a high rise isn't as critical. Understanding these limitations is part of perfecting yeast fermentation timing – sometimes, prevention is the only true solution.
Advanced Techniques for Perfecting Yeast Fermentation Timing
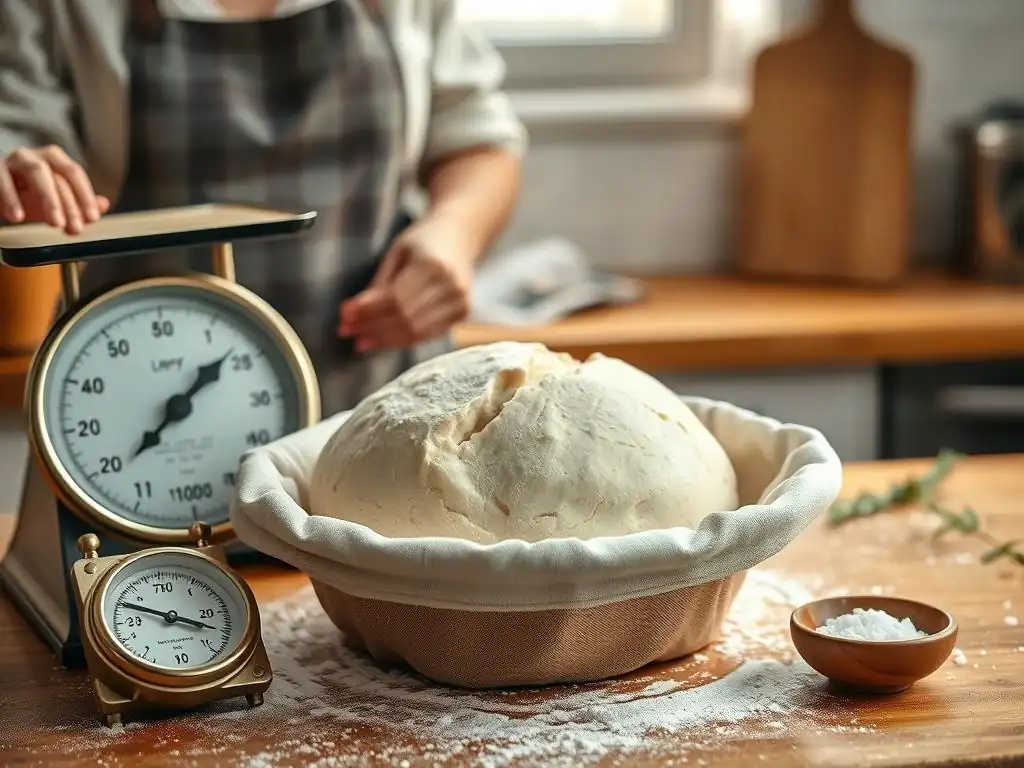
Beyond basic room-temperature proofing, several techniques allow bakers to exert greater control over fermentation time, flavor development, and scheduling. These methods are particularly useful for developing complex flavors and achieving specific bread characteristics. Incorporating these techniques expands your ability to truly master and perfect yeast fermentation timing.
These advanced approaches often involve manipulating temperature and time to achieve desired outcomes that are difficult or impossible with a single, quick room-temperature proof.
Bulk Fermentation (First Fermentation): Developing Flavor and Structure
Bulk fermentation refers to the first rise of the entire mass of dough after mixing and kneading, before it is divided and shaped. This stage is critical for developing flavor, strengthening the gluten network through natural enzyme activity, and initiating the primary rise. The duration of bulk fermentation can range from 1 hour to several hours at room temperature, or even days in the refrigerator.
During bulk fermentation, bakers often perform "folds" or "stretch and folds" every 30-60 minutes during the first part of the rise. This technique helps to strengthen the gluten, equalize the dough temperature, and redistribute nutrients for the yeast. Monitoring the dough's volume increase and texture during bulk fermentation is key; it should become visibly larger, more airy, and smoother. Perfecting yeast fermentation timing during this bulk stage lays the foundation for the final proof and the structure of the baked bread.
Proofing in the Refrigerator (Cold Fermentation): Extending Fermentation Time
Cold fermentation, or retarding the dough in the refrigerator, is a technique used to significantly slow down yeast activity. Temperatures typically between 35°F and 40°F (1°C-4°C) reduce yeast metabolism to a crawl. This extended, slow fermentation allows for greater enzyme activity, which breaks down starches into a wider range of sugars, resulting in more complex flavors and aromas in the final bread. It also strengthens the gluten structure over time and makes the dough easier to handle and score.
Cold fermentation can last anywhere from 12 hours to 72 hours or even longer, depending on the recipe and desired outcome. It also offers scheduling flexibility, allowing bakers to prepare dough one day and bake it the next. Dough fermented cold often requires a period at room temperature before baking (a process called "proofing off" or "warming up") to allow the yeast to become active again and provide the final rise before hitting the oven. This method is excellent for perfecting yeast fermentation timing to fit a busy schedule while enhancing flavor.
Using a Dough Proofer: Maintaining Precise Temperature and Humidity
For ultimate control over the proofing environment, a dedicated dough proofer is an invaluable tool. These appliances allow bakers to set and maintain precise temperature and humidity levels, eliminating the variables caused by ambient kitchen conditions. This consistency is particularly beneficial for sensitive doughs or when working in varying climates.
Dough proofers ensure that fermentation proceeds at the desired rate every time, making it much easier to predict and perfect yeast fermentation timing according to a recipe or your own preferences. They are especially useful for processes like activating sourdough starter, proofing enriched doughs that ferment slowly, or ensuring consistent results across multiple batches. While not essential for home baking, a proofer elevates the level of control available.
Recipes and Examples: Applying Yeast Fermentation Timing in Practice
Putting the principles of yeast fermentation timing into practice is the best way to learn. Here are examples of how timing is crucial in different types of recipes.
These recipes illustrate how varying fermentation times and techniques are used to achieve different textures and flavors, highlighting the importance of perfecting yeast fermentation timing for specific outcomes.
Recipe 1: Simple White Bread with Poolish
A simple white bread often uses a direct method or a preferment like a poolish. A poolish is a wet, equal-part flour and water mixture fermented with a small amount of yeast, typically for 12-16 hours at room temperature or longer in the fridge.
- Poolish Fermentation: 12-16 hours at 70°F (21°C) or 24+ hours at 40°F (4°C). The poolish should be bubbly and smell yeasty/alcoholic.
- Main Dough Bulk Fermentation: 1.5-2 hours at 75°F (24°C) after mixing the poolish with the final ingredients, with 1-2 sets of folds in the first hour. Dough should double in size.
- Final Proof: 45-60 minutes at 75°F (24°C) after shaping. Dough should be puffy and pass the poke test.
This recipe structure shows how a long, slow preferment contributes flavor, followed by a shorter, faster bulk and final proof. Perfecting yeast fermentation timing here means correctly judging the poolish's ripeness and the main dough's rise based on visual cues and the poke test.
Recipe 2: Overnight Sourdough Boule
Sourdough relies on wild yeast and bacteria for leavening and flavor, which work much slower than commercial yeast. This requires significantly longer fermentation times, often involving cold proofing.
- Levain Build/Fermentation: 6-12 hours at 75°F (24°C) until doubled and active (passes the float test).
- Autolyse: 30-60 minutes (flour and water only) to hydrate flour.
- Bulk Fermentation: 4-6 hours at 78°F (26°C), with folds every 30-60 minutes for the first 2-3 hours. Dough volume increase is typically 30-50% for sourdough in bulk. This stage is crucial for gluten development and initial leavening.
- Cold Proof (Final Proof): 12-24 hours (or longer) in the refrigerator at 38°F (3°C) after shaping and placing in a proofing basket. This develops sour flavor and makes the dough easy to score.
This example highlights how sourdough fermentation is a marathon, not a sprint. Perfecting yeast fermentation timing in sourdough means understanding the activity of your specific starter and being patient with the long bulk and cold proof stages.
Tips and Tricks for Consistent Yeast Fermentation Results

Achieving consistent results with yeast fermentation can sometimes feel challenging due to varying kitchen conditions. However, implementing a few key practices can significantly improve your success rate and help you confidently navigate the process. These practical tips are essential for anyone aiming at perfecting yeast fermentation timing.
Consistency in measurement, tracking, and observation are your best friends when working with yeast. Small changes in your routine can make a big difference in the final outcome.
Measuring Ingredients Accurately for Consistent Fermentation
Accurate ingredient measurements are foundational to predictable baking results, including yeast fermentation. Variations in flour or water amounts can significantly alter the dough's hydration and consistency, which in turn affects how yeast behaves. Using a kitchen scale for flour and other dry ingredients provides far greater accuracy than volume measurements (cups). For instance, a cup of flour can vary in weight by as much as 20% depending on how it's scooped and packed.
Precise measurement ensures your dough has the correct ratio of flour, water, yeast, salt, and sugar, creating a stable environment for the yeast to ferment predictably. This consistency in the dough composition is a fundamental step towards perfecting yeast fermentation timing from batch to batch.
Using a Kitchen Timer: Tracking Fermentation Time Precisely
While relying solely on the clock is ill-advised, a kitchen timer is still an essential tool for tracking the progress of fermentation. It helps you remember when to perform folds during bulk fermentation, when to check the dough's progress, and ensures you don't forget about your proofing dough entirely (leading to over-proofing).
Set timers for expected intervals based on your recipe and environmental conditions. For example, if your recipe suggests a 1.5-hour first rise at room temperature, set a timer for 45 minutes to check on the dough and perform folds if needed, and then another timer for the full duration, knowing you'll still need to check the visual cues and poke test before deciding it's finished. Using a timer helps manage the process and stay on track towards perfecting yeast fermentation timing.
Adapting Fermentation Time Based on Environmental Conditions
Recipes often provide fermentation times based on a typical room temperature, say 70-75°F (21-24°C). However, kitchens can be warmer or cooler depending on the season, heating/cooling systems, or even if the oven is on. A warm kitchen will speed up fermentation, while a cool kitchen will slow it down. Successful bakers learn to adapt the suggested timing based on their actual environment.
If your kitchen is significantly warmer than the recipe assumes, be prepared for the dough to proof faster and start checking for readiness sooner. If it's cooler, allow for more time. You can also use the techniques discussed earlier (like a warm oven or cold fermentation) to control the dough temperature and thus the fermentation speed. Paying attention to your environment and adjusting your expectations is crucial for perfecting yeast fermentation timing in real-world baking.
Conclusion: Elevating Your Baking with Precise Yeast Fermentation Control
Recap of Key Principles for Successful Yeast Fermentation
Mastering yeast fermentation timing is a cornerstone of successful baking. We've explored the fundamental role of yeast, the science behind fermentation, and the critical factors like temperature, sugar, and hydration that influence its speed. Understanding how to activate different types of yeast, create an optimal proofing environment, and recognize the visual, olfactory, and tactile signs of perfectly proofed dough are essential skills.
We also covered troubleshooting common issues like slow or over-fermentation and looked at advanced techniques like cold proofing and using preferments to enhance flavor and control timing. By focusing on these principles – using active yeast, controlling temperature and humidity, accurately measuring ingredients, tracking progress, and adapting to your environment – you gain the ability to influence the texture, volume, and flavor of your baked goods, truly perfecting yeast fermentation timing for consistent, delicious results.
Resources for Further Learning About Yeast and Fermentation
The world of yeast and fermentation is vast and fascinating! To continue deepening your understanding and further hone your skills in perfecting yeast fermentation timing, consider exploring resources like detailed baking science books that delve into the microbiology of yeast and the chemistry of dough. Online baking communities and forums offer opportunities to ask questions and learn from experienced bakers.
Experimenting with different recipes, yeast types, and fermentation techniques in your own kitchen is perhaps the most valuable learning experience. Try varying the proofing time slightly or experimenting with cold fermentation to observe the impact on flavor and texture. Keep a baking journal to record your observations, including ingredient temperatures, room temperature, and proofing times, noting how they correlate with the final outcome. Continuous learning and practice are key to unlocking the full potential of yeast in your baking.
Frequently Asked Questions
How crucial is timing when perfecting yeast fermentation?
Timing is absolutely critical for successful yeast fermentation. It directly impacts the final texture and flavor of your baked goods. Insufficient time leads to dense results, while over-proofing can cause collapse.
What are the visual cues that indicate my yeast fermentation is complete?
Look for a significant increase in volume (typically doubled), a slightly domed top, and a network of bubbles on the dough's surface. These are signs that the yeast has done its work.
What factors can affect the ideal yeast fermentation timing?
Several factors influence fermentation, including room temperature, the type of yeast used, and the amount of sugar in the dough. Warmer temperatures accelerate fermentation, while colder ones slow it down.
Can I over-ferment my dough, and what are the consequences?
Yes, over-fermentation can occur. It results in a sour or alcoholic taste, a weak gluten structure, and a dough that collapses easily during baking.
How can I adjust fermentation timing in different environmental conditions?
Adjust by monitoring the dough's progress closely. In warm environments, reduce the proofing time. In colder conditions, extend the proofing time and consider using a warmer location.
Final Reflection: Mastering the Rhythms of Yeast: A Baker's Journey
The precise timing of yeast fermentation is not merely a technical detail; it's the very heartbeat of successful baking. A slight miscalculation can lead to a dense loaf or a flat pizza, while perfect timing unlocks the full potential of flour, water, and yeast, resulting in airy, flavorful creations that delight the senses. This understanding, once mastered, transforms baking from a frustrating endeavor into a deeply satisfying art.
The journey of perfecting yeast fermentation timing is a continuous one, mirroring the ever-evolving nature of baking itself. Each batch presents a new set of variables – temperature fluctuations, flour hydration, even the subtle differences between yeast strains – demanding constant adaptation and learning. This process of refinement, of learning to listen to the subtle cues of the dough, is profoundly rewarding. The art of baking is not just about following recipes; it's about understanding the science behind them and developing your own intuition.
This quote perfectly encapsulates the essence of mastering yeast fermentation.
Now, consider your own baking journey. What adjustments can you make to your current process to better understand and control the timing of your yeast fermentation? Perhaps it's investing in a thermometer, meticulously tracking your environment's temperature, or simply taking the time to observe your dough more closely. Embrace the challenge, experiment with different techniques, and savor the delicious rewards of perfectly timed yeast fermentation. The journey towards mastery is as fulfilling as the final product itself.
Unleash Your Inner Baker: Perfect Proofing Every Time!
Thanks for diving into the world of perfect proofing! We hope you now feel confident in mastering this crucial baking skill. Ready to put your new knowledge into action?
- Time your next dough rise like a pro: Grab a notebook and track your fermentation times based on the conditions in your kitchen. Note the temperature, humidity, and any other observations. This personalized data will be invaluable for future bakes.
- Share your proofing success (or challenges!) with our community: Post a picture of your perfectly proofed bread on social media with #BakeWithEaseProofing – let’s inspire each other!
- Experiment with different flours and recipes: Use your new understanding of proofing to confidently explore other breads and doughs you've always wanted to try.
What unique proofing technique will you master next?