
Slow Rise Issues with Active Dry Yeast Solved

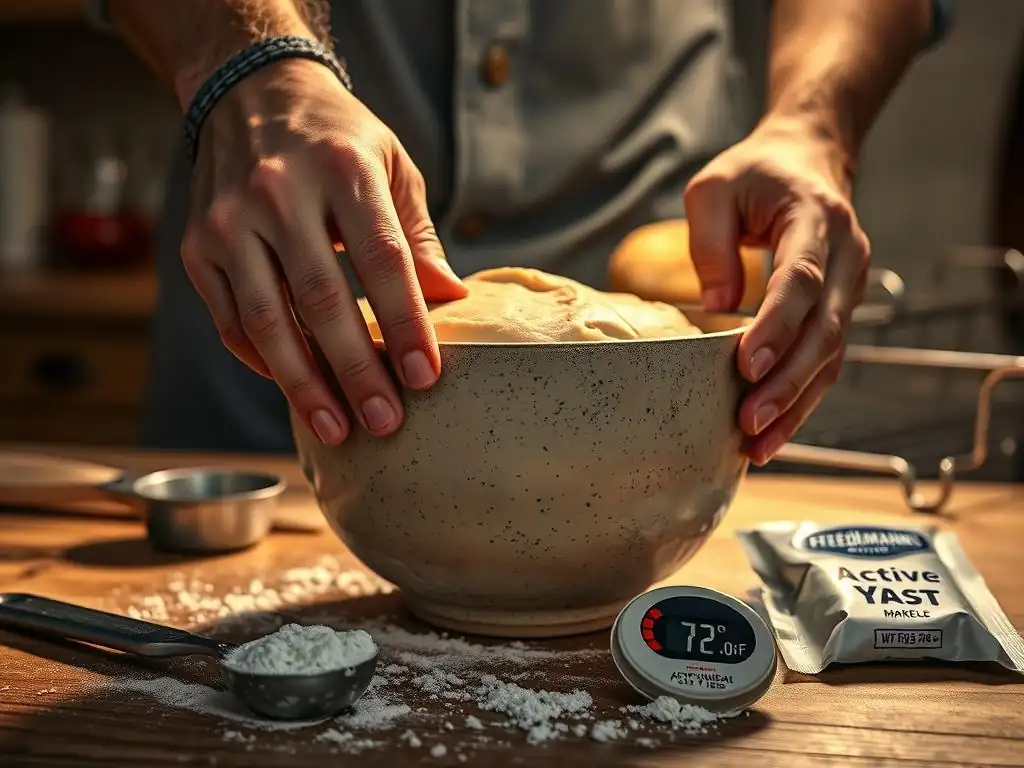
Welcome to BakeWithEase, your haven for all things baking! Ever wondered why your dough isn't rising as expected? Discover the secrets to perfectly proofing your bread with our Active Dry Yeast Troubleshooting Tips. Unlock the fluffy, flavorful breads you've always dreamed of – let's dive in and conquer those slow-rise challenges together!
- Solving Slow Rise Issues with Active Dry Yeast: A Baker's Guide
- Understanding Active Dry Yeast and Its Role in Baking
-
Troubleshooting Slow Rise with Active Dry Yeast: Common Causes
- Expired Active Dry Yeast: Checking the Expiration Date
- Inaccurate Water Temperature: Maintaining 105-115°F for Activation
- Improper Yeast Hydration: Achieving a Foamy Mixture
- Sugar and Salt Imbalance: Understanding Their Impact on Fermentation
- Dough Temperature Issues: Maintaining 75-78°F for Optimal Rising
- Active Dry Yeast Troubleshooting Tips: Step-by-Step Solutions
- Preventing Slow Rise: Proactive Measures for Successful Baking
- Active Dry Yeast Alternatives: Exploring Other Leavening Options
- Advanced Active Dry Yeast Troubleshooting: Seeking Further Assistance
- Conclusion: Mastering Active Dry Yeast for Consistent Baking Success
-
Frequently Asked Questions
- What is the most common reason for active dry yeast failing to activate properly?
- How can I test if my active dry yeast is still good before using it in a recipe?
- What temperature water is ideal for activating active dry yeast?
- What happens if I accidentally add salt directly to my active dry yeast while activating it?
- Can I use a different type of yeast, like instant yeast, if my active dry yeast isn't working?
- Final Reflection: The Enduring Power of a Perfect Rise
- Unleash Your Inner Baker: Perfect Rise, Every Time!
Solving Slow Rise Issues with Active Dry Yeast: A Baker's Guide
Understanding Active Dry Yeast and Its Role in Baking
What is Active Dry Yeast and How Does it Work?
Active dry yeast is a popular leavening agent for home bakers, consisting of dehydrated yeast granules. These granules are dormant and require rehydration in warm liquid, typically water, before being added to dough. Once activated, the yeast begins to consume sugars in the flour and other ingredients, producing carbon dioxide gas and alcohol through a process called fermentation.
The carbon dioxide gas gets trapped within the gluten structure of the dough, causing it to expand and rise. This fermentation also contributes significantly to the flavor and aroma of baked goods, particularly bread. Understanding this process is the first step in effective active dry yeast troubleshooting, as many issues stem from problems with the yeast's activation or fermentation environment.
Factors Affecting Active Dry Yeast Performance
Several factors can influence how well active dry yeast performs. Temperature is critical: the yeast needs a specific range for activation and optimal fermentation. Too cold, and it remains dormant; too hot, and it can be killed. The quality of the yeast itself, including its freshness and proper storage, also plays a huge role. Expired or improperly stored yeast loses its viability.
Other ingredients in the dough, such as sugar and salt, can also impact yeast activity. Sugar provides food for the yeast but too much can dehydrate it. Salt enhances flavor and controls fermentation rate, but excessive amounts can inhibit yeast function. The hydration level of the dough and the kneading process, which develops gluten, also affect how well the dough can capture the gas produced by the yeast, influencing the overall rise.
Troubleshooting Slow Rise with Active Dry Yeast: Common Causes
Expired Active Dry Yeast: Checking the Expiration Date
One of the most frequent reasons for slow or no rise with active dry yeast is using expired yeast. Yeast is a living organism, and like any living thing, it has a shelf life. Over time, the yeast cells die or become too weak to ferment effectively. Even if stored properly, yeast activity naturally diminishes after its expiration date.
Always check the expiration date printed on the yeast package or jar before use. If the date has passed, there's a high probability your yeast is no longer viable. Using old yeast is a common pitfall in active dry yeast troubleshooting, leading to frustration when your dough doesn't rise as expected. A simple check can save you time and ingredients.
Inaccurate Water Temperature: Maintaining 105-115°F for Activation
Active dry yeast requires rehydration in warm liquid to become active. The ideal temperature range for activating active dry yeast is typically between 105°F and 115°F (40°C to 46°C). Water that is too cold, say below 100°F (38°C), won't properly wake up the yeast cells, leading to sluggish or no activity.
Conversely, water that is too hot, above 120°F (49°C), can kill the yeast, as they are sensitive to high temperatures. Using water that feels "lukewarm" or "warm" without checking the temperature accurately is a common mistake. Precise temperature control is crucial for successful active dry yeast troubleshooting and ensuring your yeast gets off to a good start.
Improper Yeast Hydration: Achieving a Foamy Mixture
Beyond just temperature, proper hydration involves ensuring the yeast fully dissolves and activates in the warm liquid. When you add active dry yeast to warm water (with a pinch of sugar, often recommended), it should sit for 5 to 10 minutes. During this time, the granules absorb water, and the yeast cells become active.
A clear sign of healthy, active yeast is the formation of a foamy or bubbly layer on the surface of the water. This foam indicates that the yeast is alive and producing carbon dioxide. If, after 10 minutes, there is little to no foam, your yeast may be dead or inactive, pointing to an issue that needs addressing during your active dry yeast troubleshooting process.
Sugar and Salt Imbalance: Understanding Their Impact on Fermentation

Sugar and salt are common ingredients in bread recipes, but their quantities can significantly affect yeast activity. Sugar provides the food source for yeast fermentation, helping to give the yeast a boost, especially in richer doughs. However, too much sugar (e.g., in sweet rolls or brioche) can draw water out of the yeast cells through osmosis, inhibiting their activity and potentially causing a slow rise.
Salt, while essential for flavor and controlling the fermentation rate, also inhibits yeast. A small amount of salt helps regulate the rise, preventing it from being too fast, which can negatively impact flavor and texture. However, adding too much salt, or adding salt directly on top of the yeast during mixing before other ingredients are incorporated, can significantly slow down or even kill the yeast, a key point in active dry yeast troubleshooting tips.
Dough Temperature Issues: Maintaining 75-78°F for Optimal Rising
Once the yeast is active and incorporated into the dough, the temperature of the dough itself becomes important for fermentation. Yeast is most active and produces gas efficiently within a specific temperature range, typically between 75°F and 78°F (24°C to 26°C). A cooler dough temperature slows down fermentation considerably, resulting in a slow rise.
If your kitchen is cold, your dough will be cold, and the rise will be sluggish. Conversely, if the dough gets too warm, fermentation can happen too quickly, leading to off-flavors and potentially over-proofing before you're ready. Maintaining a consistent, warm environment for your dough during the rising period is a critical aspect of successful bread making and effective active dry yeast troubleshooting.
Active Dry Yeast Troubleshooting Tips: Step-by-Step Solutions
Testing Your Active Dry Yeast: The Proofing Method Explained
If you suspect your active dry yeast is the culprit behind a slow rise, the first and best step is to test its viability. This is known as "proofing" the yeast. To do this, measure out about 1/2 cup of warm water (remember, 105-115°F or 40-46°C is the target). Stir in a teaspoon of sugar (this gives the yeast something to eat) and then sprinkle the yeast granules (usually 2 1/4 teaspoons, the amount in one packet) over the surface.
Let the mixture sit undisturbed for 5 to 10 minutes. After this time, check the surface. If the yeast is alive and active, the mixture should be bubbly and have a foamy layer on top, increasing in volume slightly. If there's little to no activity, the yeast is likely dead or inactive, and you'll need a fresh batch. This simple proofing step is an essential active dry yeast troubleshooting tip that can save you from wasting ingredients on a dough that won't rise.
Adjusting Water Temperature Based on Ambient Conditions
Ensuring the initial activation water is within the correct 105-115°F range is paramount. Use an instant-read thermometer to check the temperature precisely. Don't rely on touching the water; what feels "warm" to your hand might be too cool or too hot for the yeast. The exact temperature within this range can be slightly adjusted based on your kitchen's temperature. If your kitchen is on the cooler side, aim for the higher end of the range, around 112-115°F (44-46°C).
If your kitchen is quite warm, closer to 75°F or above, you can use water closer to the lower end, like 105-108°F (40-42°C). This helps prevent the yeast from becoming too active too quickly before it's mixed with the flour. Always verify the temperature with a thermometer for reliable active dry yeast troubleshooting.
Proper Hydration Techniques for Reliable Activation
For active dry yeast, always rehydrate it in warm water before adding it to the dry ingredients. Measure the specified amount of warm water from your recipe into a bowl or measuring cup. Sprinkle the yeast over the surface and, if the recipe includes sugar, add a pinch (about 1/4 to 1/2 teaspoon) to the water as well. Stir gently once to ensure all granules get wet, then let it sit.
Allowing the yeast this dedicated time (5-10 minutes) to bloom in the warm, sugary water ensures it's fully hydrated and actively fermenting before it encounters the flour. This pre-activation step is less critical with instant dry yeast but is necessary for active dry yeast to overcome its dehydrated state effectively. Observing the foam confirms successful hydration and is a vital part of active dry yeast troubleshooting tips.
Correcting Sugar and Salt Levels for Balanced Fermentation

If your recipe calls for unusually high amounts of sugar or salt, be aware that this can slow down your rise. For sweet doughs, consider slightly increasing the yeast amount (perhaps by 1/4 to 1/2 teaspoon) to compensate for the inhibitory effect of the sugar. Ensure the sugar is fully dissolved in the liquid before adding yeast or mixing it into the dough to reduce its osmotic effect on the yeast.
Regarding salt, always add it with the flour or other dry ingredients, not directly into the warm water with the yeast during the initial proofing step. Mix the salt into the flour thoroughly before combining with the wet ingredients that contain the activated yeast. This separation prevents high concentrations of salt from directly contacting and potentially harming the yeast cells, a key strategy in active dry yeast troubleshooting.
Maintaining the Right Dough Temperature for Consistent Rising
The ideal dough temperature for the first rise (bulk fermentation) is generally between 75°F and 78°F (24°C to 26°C). To achieve and maintain this temperature, find a warm spot in your kitchen. Options include:
- Near a sunny window (but not in direct hot sun)
- In a turned-off oven with the light on (the light generates enough heat)
- On top of the refrigerator (heat rises)
- In a microwave with a cup of hot water placed alongside the dough.
If your kitchen is cold, using slightly warmer water (towards the 115°F end) initially can give the dough a warmer starting temperature. Alternatively, you can use a proofing box or a proofer setting on your oven, if available. Regularly check the dough temperature with an instant-read thermometer if you are consistently experiencing slow rises, as ambient temperature is a major variable in active dry yeast troubleshooting.
Preventing Slow Rise: Proactive Measures for Successful Baking
Storing Active Dry Yeast Properly to Extend Shelf Life
Proper storage is crucial for maintaining the viability of active dry yeast. Unopened packets or jars should be stored in a cool, dry place, away from heat and direct sunlight. Once opened, active dry yeast is best stored in an airtight container in the refrigerator or freezer. This significantly extends its shelf life compared to storing it at room temperature.
When storing in the freezer, you can use it directly from frozen; the cold doesn't harm the yeast, it just makes it dormant. However, letting it come closer to room temperature for a few minutes before proofing in warm water can sometimes yield faster activation. Proper storage is a primary preventative measure in active dry yeast troubleshooting, ensuring your yeast is potent when you need it.
Using a Thermometer for Accurate Water Temperature Measurement
Eliminate guesswork when activating active dry yeast by always using a reliable thermometer. An instant-read kitchen thermometer is an invaluable tool for any baker. Simply heat your water to the desired range (105-115°F or 40-46°C) and insert the thermometer to get an exact reading. This ensures you are creating the optimal environment for the yeast to wake up.
Consistent use of a thermometer prevents the common error of using water that is too cool or too hot, which are frequent causes of slow or failed rises. This simple step is one of the most effective active dry yeast troubleshooting tips you can implement to ensure your dough gets the best possible start.
Kneading Techniques for Gluten Development
While yeast produces the gas, the gluten network developed during kneading is what traps that gas, allowing the dough to rise. Proper kneading, whether by hand or with a stand mixer, develops the gluten strands in the flour, creating an elastic structure. An underdeveloped gluten network can lead to a poor rise, even if the yeast is active.
Knead your dough until it passes the windowpane test: pull a small piece of dough; if you can stretch it thin enough to see light through it without tearing, the gluten is well-developed. This elastic structure is essential for capturing the carbon dioxide produced by the yeast, ensuring a good volume increase during fermentation. Good kneading complements active yeast activity for a successful rise.
Controlled Fermentation: Managing Time and Temperature for Consistent Results
Successful rising isn't just about getting the yeast active; it's also about managing the fermentation process itself. This involves controlling both the time the dough rises and the temperature at which it rises. A dough that rises in a warm environment (75-78°F) will ferment faster than one rising in a cool environment (65-70°F).
Understanding your recipe's recommended rising time is important, but watching the dough is more crucial. Dough is typically ready for the next step when it has doubled in size, regardless of the clock time. Using a consistent, warm location for rising and checking the dough's progress visually helps ensure you don't cut the rise short (leading to a dense loaf) or let it go too long (risking over-proofing). Consistent management is key to avoiding slow rise issues and achieving reliable results.
Active Dry Yeast Alternatives: Exploring Other Leavening Options
Instant Dry Yeast: A Convenient and Faster-Acting Substitute
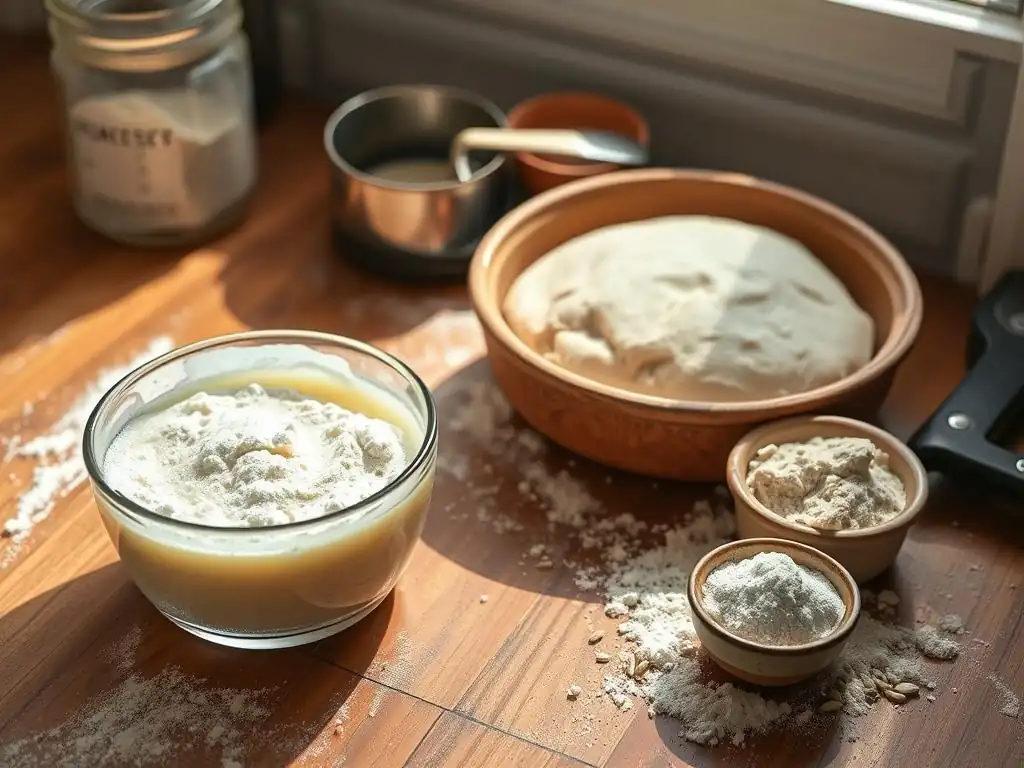
If you frequently encounter slow rise issues with active dry yeast, or simply prefer a faster method, instant dry yeast is an excellent alternative. Instant yeast granules are smaller and porous, allowing them to be added directly to the dry ingredients without prior hydration in warm water. This saves a step and often results in a slightly faster rise compared to active dry yeast.
Instant yeast is also generally more predictable and robust. While it still benefits from warm conditions, it's less sensitive to water temperature variations than active dry yeast. You can typically substitute instant dry yeast for active dry yeast in recipes using a 1:1 ratio, though some bakers slightly reduce the amount of instant yeast (e.g., use 3/4 teaspoon of instant for every 1 teaspoon of active dry).
Fresh Yeast: Understanding Its Characteristics and Usage
Fresh yeast, also known as cake yeast or compressed yeast, is another option, though less common in home baking today. It comes as a moist block of active yeast cells. Unlike dry yeasts, fresh yeast needs to be kept refrigerated and has a much shorter shelf life, typically only a couple of weeks.
Fresh yeast needs to be crumbled and dissolved in lukewarm liquid (around 85-95°F or 29-35°C) before being added to other ingredients. It provides a slightly different flavor profile that some traditional bakers prefer. You would typically use about twice the weight of fresh yeast compared to active dry yeast in a recipe (e.g., 18-20g fresh yeast for a recipe calling for 7g or 2 1/4 tsp of active dry).
Sourdough Starter: A Natural Leavening Agent
For those looking to move beyond commercial yeasts, a sourdough starter offers a natural leavening alternative. A sourdough starter is a living culture of wild yeast and bacteria (primarily Lactobacillus) that is maintained by regular feeding with flour and water. It provides leavening, develops complex flavors, and contributes to the characteristic tangy taste of sourdough bread.
Using a sourdough starter requires a different process and timeline than commercial yeast, often involving longer fermentation periods. While it presents its own set of challenges and troubleshooting (e.g., maintaining starter activity, proofing times), it offers a rewarding path for bakers interested in natural fermentation and unique flavor profiles. It's a complete shift from active dry yeast troubleshooting tips!
Advanced Active Dry Yeast Troubleshooting: Seeking Further Assistance
Dealing with Persistent Slow Rise Problems
If you've gone through all the standard active dry yeast troubleshooting tips – checked the expiration date, verified water temperature, ensured proper proofing, balanced sugar/salt, and maintained dough temperature – and still experience persistent slow rise issues, it might be time to look at other factors or seek more targeted help. Consider:
- Flour type: Very low-protein flours might not develop enough gluten to support a good rise.
- Recipe hydration: Is the dough too dry? Very stiff doughs rise slower.
- Altitude: High altitude baking requires recipe adjustments, including potentially more liquid and sometimes more yeast.
- Water quality: Highly chlorinated water can potentially harm yeast, though this is less common.
If problems continue, consider joining an online baking forum or community. Describing your exact process, ingredients, temperatures, and observations can help experienced bakers pinpoint less obvious issues. Sometimes, a small tweak in technique or ingredient handling is all that's needed.
Recognizing Signs of Over-Proofing
While this article focuses on slow rise, it's also important to recognize the opposite problem: over-proofing. This occurs when dough is allowed to rise for too long, causing the yeast to consume too much sugar and the gluten structure to weaken. Signs include:
- Dough that has risen significantly past double its original size.
- A deflated or collapsed appearance, especially if it rises then sinks.
- A strong, overly alcoholic or sour smell (beyond the pleasant aroma of fermentation).
- Dough that feels very fragile and doesn't spring back when gently poked.
Over-proofed dough often results in a loaf with poor structure, a dense texture, and sometimes a gummy interior. Knowing the signs of over-proofing is as important as active dry yeast troubleshooting for a slow rise, as both lead to less-than-ideal bread.
Adjusting Recipes for Different Climates and Altitudes
Environmental factors like temperature, humidity, and altitude significantly impact yeast activity and dough fermentation. Recipes are often written for "average" conditions (e.g., sea level, room temperature around 70°F). If you live in a very warm, humid climate, your dough will rise faster, and you might need to use cooler water initially or shorten rising times.
In cold, dry climates or at high altitudes, fermentation slows down. High altitude (typically above 3,000 feet) also involves lower atmospheric pressure, which initially makes dough rise faster, but the dryness can inhibit fermentation over time, and recipes often need adjustments like increased liquid and sometimes slightly more yeast or longer fermentation periods. Understanding your local conditions and how they affect yeast is a key part of advanced active dry yeast troubleshooting and recipe adaptation.
Conclusion: Mastering Active Dry Yeast for Consistent Baking Success
Achieving a perfect rise with active dry yeast is a fundamental skill in bread baking. While slow rise issues can be frustrating, they are almost always solvable by systematically troubleshooting the common causes: yeast viability, water temperature, proper hydration, ingredient balance, and dough temperature. By using a thermometer, storing your yeast correctly, and paying close attention to the dough's environment, you can dramatically improve your results.
Remember that baking is both an art and a science. Each batch of dough can be slightly different based on subtle variations in ingredients, environment, and technique. Embrace the process, use these active dry yeast troubleshooting tips as your guide, and don't be discouraged by occasional setbacks. With practice and attention to detail, you'll master the art of working with active dry yeast and consistently bake delicious, well-risen bread.
Frequently Asked Questions
What is the most common reason for active dry yeast failing to activate properly?
The most common reason is that the yeast is expired or not stored correctly. Active dry yeast needs to be kept in a cool, dry place to maintain its potency.
How can I test if my active dry yeast is still good before using it in a recipe?
You can perform a proofing test by dissolving the yeast in warm water with a little sugar. If it doesn't foam within 5-10 minutes, it's likely no longer viable.
What temperature water is ideal for activating active dry yeast?
The ideal water temperature is between 105-115°F (40-46°C). Water that's too hot can kill the yeast, while water that's too cold will slow down the activation process.
What happens if I accidentally add salt directly to my active dry yeast while activating it?
Salt can inhibit yeast activity. Avoid direct contact. Always add salt to the other dry ingredients of your recipe, not directly to the yeast mixture.
Can I use a different type of yeast, like instant yeast, if my active dry yeast isn't working?
Yes, you can often substitute instant yeast, but the activation process differs. Instant yeast can typically be added directly to the dry ingredients without proofing.
Final Reflection: The Enduring Power of a Perfect Rise
The seemingly simple act of baking with active dry yeast holds a surprising depth, impacting not only the texture of our bread but also our connection to a timeless culinary tradition. A perfect rise, achieved through understanding and troubleshooting the common pitfalls, is more than just a technical achievement; it's a testament to patience, precision, and the enduring magic of transforming simple ingredients into something truly delicious. This article explored the common issues bakers face with active dry yeast, offering practical solutions to ensure consistent success.
The journey of mastering yeast, for me, has been a microcosm of life itself – a process of trial and error, learning from mistakes, and ultimately finding satisfaction in the results. It's a reminder that even the smallest details can have a significant impact on the final product, mirroring the way seemingly insignificant choices in life can shape our overall experiences. The best bread is made with love and patience.
This simple statement encapsulates the essence of successful baking, and indeed, many aspects of life's endeavors.
Now, I invite you to consider your own baking experiences. What challenges have you faced with active dry yeast? What lessons have you learned? Don't be afraid to experiment, to embrace the occasional failure, and to savor the triumphs. The next time you tackle a yeast-based recipe, remember the power of understanding the process, and let the satisfying rise of your dough be a symbol of your own growth and perseverance. The perfect loaf awaits.
Unleash Your Inner Baker: Perfect Rise, Every Time!
Thanks for taking the time to learn about troubleshooting slow-rising yeast! We hope you now feel confident in tackling those frustrating doughs. Ready to put your newfound knowledge to the test?
- Bake a masterpiece! Try the recipe mentioned in the article – or experiment with your own favorite recipe now that you understand the science behind the rise.
- Share your success! Show us your perfectly risen bread on social media using #BakeWithEaseSuccess – we’d love to see it!
- Deep dive into more baking tips: Explore our other articles on yeast, bread making, and more! You might be surprised by what you discover.
So, what delicious bread are you going to bake first?