
Getting Consistent Baguette Shape: Practice Makes Perfect

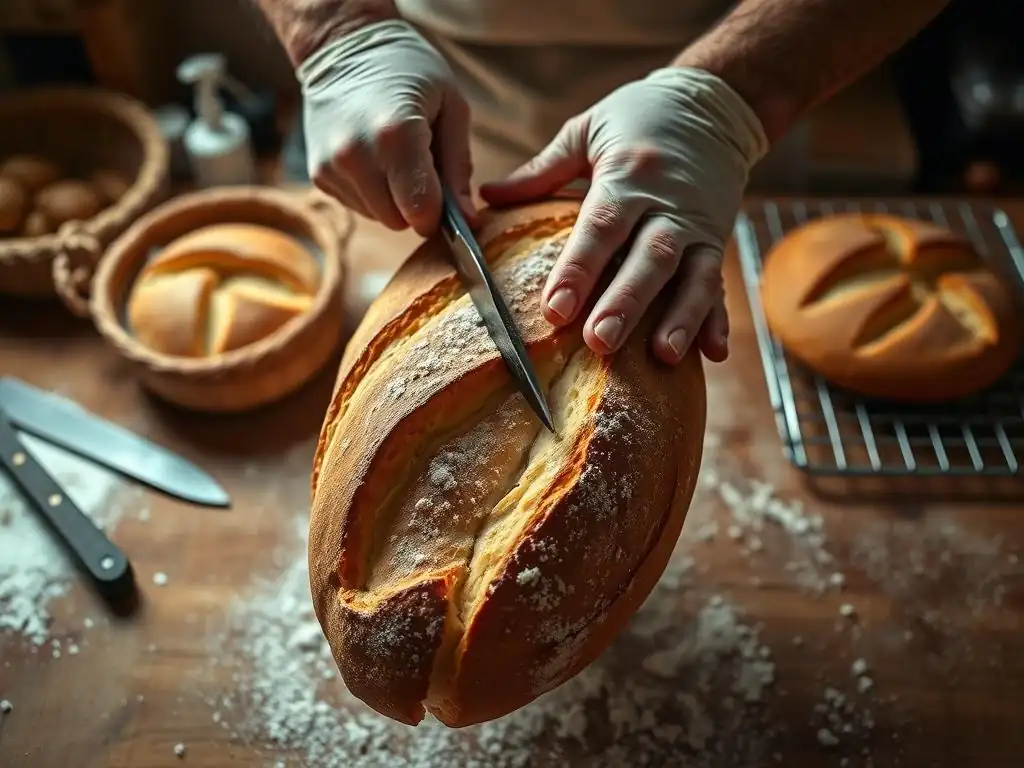
Welcome to BakeWithEase, your haven for baking success! Ever dream of consistently perfect baguettes? This week, we dive deep into the secrets of achieving a beautiful and uniform loaf. Are you ready to unlock the techniques for consistent baguette shape practice that will impress even the most discerning palates? Let's get baking!
- Achieving Consistent Baguette Shape: A Comprehensive Guide
- Mastering Baguette Shaping for Professional Results
- Why Consistent Baguette Shaping Matters
- Mastering the Fundamentals of Baguette Shaping
- Practice Drills for Consistent Baguette Shape
- Common Baguette Shaping Challenges and Solutions
- The Role of Baking Environment in Baguette Shape
- Advanced Baguette Shaping Techniques
- Beyond the Basics: Refining Your Baguette Shaping Skills
- Troubleshooting Baguette Shaping Imperfections
- Achieving Baguette Perfection: A Journey Through Practice
-
Frequently Asked Questions
- How important is practice in achieving a consistent baguette shape?
- What are some key techniques to focus on when practicing baguette shaping?
- What ingredients are most important for a successful baguette?
- How can I troubleshoot common baguette shaping problems like uneven thickness or collapsed ends?
- How often should I practice baguette shaping to see improvement?
- Final Reflection: The Enduring Pursuit of the Perfect Baguette
- Unleash Your Inner Boulanger: Perfect Baguettes Await!
Achieving Consistent Baguette Shape: A Comprehensive Guide
Mastering Baguette Shaping for Professional Results
Achieving the perfect baguette is often seen as the pinnacle of bread baking. While the crust, crumb, and flavor are paramount, the visual appeal, dictated by a consistent baguette shape, is equally important. Mastering this skill transforms your baguettes from rustic loaves into elegant, uniform pieces that bake evenly and look stunning. This guide will walk you through the techniques, practice methods, and troubleshooting tips essential for developing the muscle memory and understanding needed to consistently produce beautiful baguettes.
Why Consistent Baguette Shaping Matters
The Importance of Uniformity in Baguette Baking
Uniformity in baguette baking is crucial for several reasons, extending beyond just aesthetics. When baguettes are consistently shaped, they proof at a similar rate and, critically, bake evenly in the oven. Imagine baking several baguettes on one stone; if one is significantly thicker or shorter than another, the thicker one might underbake in the center while the thinner one scorches or dries out.
Achieving a consistent baguette shape practice ensures that each loaf receives the same heat exposure, leading to a predictable and desirable outcome across the entire batch. This uniformity is particularly important for bakers who sell their bread, as customers expect a certain standard and consistency from one purchase to the next.
Furthermore, consistent shaping contributes to a more predictable internal structure, or crumb. The tension and structure built during shaping directly influence how the dough expands during proofing and baking. An inconsistent shape often means inconsistent tension, which can result in uneven oven spring, dense spots, or large, irregular holes in the crumb rather than the desired open, airy structure characteristic of a great baguette. Therefore, focusing on achieving a consistent baguette shape practice is a foundational step toward mastering the entire process, ensuring that all the care put into dough development translates into a successful final product.
Aesthetic Appeal of Well-Shaped Baguettes
There's no denying the visual appeal of a perfectly shaped baguette. Its long, slender form, gracefully curved ends, and evenly spaced slashes are iconic. For many, this classic shape is synonymous with artisan bread quality. When baguettes are uniformly shaped, they present beautifully, whether on a cooling rack, in a bread basket, or packaged for sale. This aesthetic consistency speaks to the baker's skill and attention to detail, inviting anticipation of the delicious experience to come.
Beyond the classic shape, the consistency itself is appealing. A batch of identical baguettes laid out side-by-side is visually impressive, showcasing the baker's mastery over the craft. This uniformity isn't just for show; it reflects the control the baker has over the dough and the process. Achieving this level of consistency requires dedicated practice and refinement of technique, making the skill of consistent baguette shape practice a hallmark of a serious baker. The beauty of a well-shaped baguette is a significant part of its overall appeal, making consistent shaping a goal worth pursuing.
Achieving Even Baking with Consistent Shapes
One of the most practical benefits of achieving a consistent baguette shape is ensuring even baking. Dough is an insulator, and thicker sections take longer to heat through and cook than thinner ones. If a baguette tapers too much, the thin ends can easily overbake and become hard or burnt, while the thicker middle might still be slightly undercooked. Conversely, if one baguette in a batch is significantly larger or smaller than others, it will require a different baking time, making it difficult to bake multiple loaves simultaneously with optimal results for each.
By maintaining a uniform thickness and length across all baguettes, you create conditions where every part of every loaf bakes at the same rate. This means the crust develops uniformly, the crumb cooks perfectly from end to end, and you avoid issues like burnt tips or doughy centers. This reliability in baking outcomes is invaluable, especially when baking multiple loaves. Mastering consistent baguette shape practice directly contributes to better heat distribution and more predictable, high-quality results every time you bake.
Mastering the Fundamentals of Baguette Shaping
Dough Preparation: The Foundation of Consistent Shapes
Achieving a consistent baguette shape begins long before you start folding and rolling the dough. The quality and condition of your dough are fundamental. A dough that is properly developed, hydrated, and fermented will be much easier to shape consistently than one that is too sticky, too stiff, or lacks sufficient gluten development. Think of it as building a house; a strong foundation is essential for a stable structure. Similarly, a well-prepared dough provides the necessary structure and elasticity to hold its shape during forming, proofing, and baking.
The correct balance of ingredients and careful handling during mixing and fermentation are key. Overmixing can lead to a tough dough, while undermixing might result in a weak structure that collapses during shaping. Temperature control during fermentation is also critical; a dough that ferments too quickly might not develop sufficient strength, while one that ferments too slowly could become too acidic, affecting its handling properties. Paying close attention to these initial steps sets you up for success in achieving a consistent baguette shape practice later on.
The Right Flour for Baguettes: French T65 Flour
Traditionally, baguettes are made with French T65 flour. This flour has a specific protein content, typically around 11-12%, and a higher ash content than standard all-purpose flour. The ash content contributes to flavor and crust color, while the protein level provides sufficient gluten for structure without making the dough overly tough. Using a flour specifically suited for baguettes, or a blend that mimics its properties, is crucial for developing a dough with the right balance of extensibility (ability to stretch) and elasticity (ability to spring back).
While authentic French T65 might not be readily available everywhere, you can often achieve good results by blending different flours. For instance, a mix of high-quality bread flour (around 12-13% protein) and a small percentage of whole wheat or rye flour (for ash content and flavor) can approximate the characteristics of T65. The key is to use a flour or blend that allows for good gluten development, which is essential for creating a dough that can be stretched thin and maintain tension during the consistent baguette shape practice process.
Hydration Levels and Their Impact on Shaping
Hydration refers to the ratio of water to flour in the dough, usually expressed as a percentage of the flour weight. Baguette dough typically has a relatively high hydration, often ranging from 70% to 80% or even higher. Higher hydration doughs are generally more challenging to handle and shape, as they are stickier and more relaxed. However, they contribute significantly to an open, airy crumb and a thin, crispy crust – hallmarks of a great baguette.
Working with high hydration dough requires practice and a gentle touch. While it's tempting to reduce hydration to make shaping easier, this can compromise the final texture. Instead, focus on developing your technique for handling wet dough, perhaps by practicing with slightly lower hydration (e.g., 68-70%) initially and gradually increasing it as you gain confidence. Understanding how hydration affects dough behavior is vital for consistent baguette shape practice, as it dictates how the dough will respond to your hands and the shaping surface.
Proper Dough Fermentation for Optimal Results
Fermentation is the process where yeast consumes sugars in the dough, producing carbon dioxide gas (which makes the dough rise) and various flavor compounds. Proper fermentation is critical for both flavor and dough structure. An under-fermented dough will be dense and tight, resisting shaping and resulting in a poor crumb. An over-fermented dough can become weak, sticky, and difficult to handle, potentially collapsing during shaping or proofing.
Optimal fermentation involves balancing time and temperature. Bulk fermentation (the first rise) typically takes several hours, often with one or more folds to build strength. Proofing (the final rise after shaping) is shorter but equally important.
The dough should be well-risen but not overly gassy or fragile when you begin shaping. A correctly fermented dough will be extensible and pliable, allowing you to stretch and roll it without tearing, which is fundamental for consistent baguette shape practice. Temperature plays a huge role; fermenting at around 75-78°F (24-26°C) is common for many recipes, but cooler temperatures for longer periods can develop more complex flavors.
Essential Baguette Shaping Techniques
Mastering a few core shaping techniques is the heart of achieving a consistent baguette shape practice. These techniques are designed to degas the dough gently, build internal tension, and create the characteristic long, slender form. While there are variations, the fundamental principles involve creating a smooth surface, folding the dough to create layers and tension, and sealing the seam securely.
Developing proficiency in these steps requires repetition. Your hands need to learn how the dough feels when it has the right tension and how to manipulate it without tearing or degassing it too much. Watching videos and tutorials can be helpful, but the real learning comes from doing. Dedicating time to consistent baguette shape practice, focusing on these essential techniques, will lead to significant improvements in the uniformity and quality of your baguettes.
Pre-Shaping: Creating a Relaxed Dough
Pre-shaping is a crucial step that prepares the dough for the final shaping. After bulk fermentation, the dough is typically divided into portions for each baguette (often around 250-350 grams per baguette). Each portion is then gently shaped into a rough log or rectangle, depending on the final shaping method. The purpose is to create a relatively uniform piece that is easy to handle and allows the gluten to relax slightly before the final shaping.
To pre-shape, gently coax the dough into the desired preliminary form, using minimal flour. Allow the pre-shaped pieces to rest for about 15-30 minutes, covered, on the counter. This resting period is vital; it allows the gluten network, which was tightened during division and pre-shaping, to relax. A relaxed dough is much more pliable and easier to stretch during the final shaping, reducing the risk of tearing and helping you achieve a smoother, more consistent baguette shape. Skipping or shortening this step often leads to dough that fights back, making consistent shaping difficult.
The Tucking Method: Building Tension and Structure
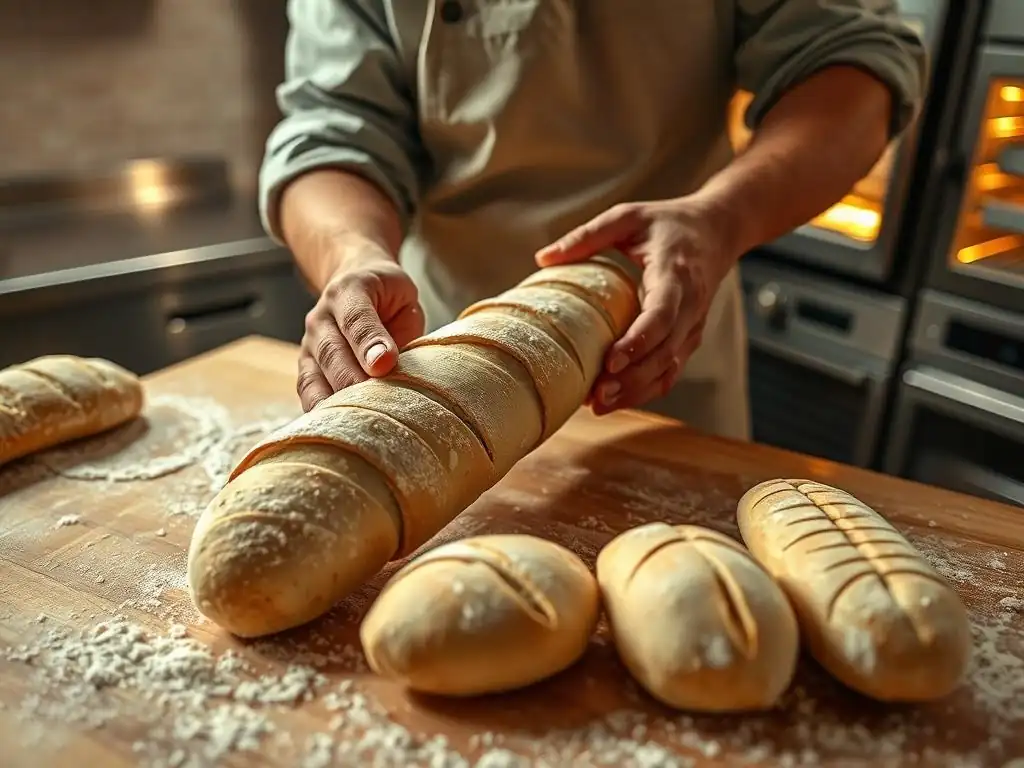
The tucking method is a common technique used during the final shaping to build tension and create the internal structure of the baguette. Starting with the pre-shaped dough (often a rough rectangle or oval), you gently fold the top edge down towards the center and press to seal it. Then, fold the dough in half lengthwise, bringing the top edge down to meet the bottom edge.
The key here is the "tucking" motion as you roll the dough away from you using the palms of your hands. With each roll, you gently pull the dough towards you with your fingertips, tucking the seam underneath and building tension on the surface. This action creates a tight skin on the outside of the baguette while developing internal layers. This tension is what helps the baguette hold its shape during proofing and baking, and it's essential for achieving a consistent baguette shape practice. The goal is a tight, smooth cylinder with a well-sealed seam along the bottom.
Elongation: Achieving the Classic Baguette Form
Once the dough has been folded and tension has been built using the tucking method, the final step is elongation. This involves gently rolling the shaped dough back and forth under your palms, starting from the center and working outwards towards the ends. The goal is to lengthen the dough to the desired baguette length (typically 16-26 inches or 40-65 cm, depending on your baking surface and preference) while maintaining the tension and uniform thickness achieved in the previous steps.
Use light, even pressure during elongation. If you press too hard, you risk degassing the dough excessively or creating thin spots. The dough should lengthen relatively easily; if it resists, it likely needs another minute or two to rest. Achieving even elongation from end to end is part of consistent baguette shape practice. Avoid creating overly thin or pointed ends unless that is a specific style you are aiming for. The final shape should be a smooth, even cylinder ready for proofing.
Practice Drills for Consistent Baguette Shape
Achieving a consistent baguette shape isn't something you master overnight. It requires deliberate practice. Just like learning a musical instrument or a sport, repetition helps build muscle memory and refine your technique. Setting aside time specifically for shaping practice, even if you're not baking a full batch, can be incredibly beneficial.
One effective way to approach this is to prepare a batch of dough specifically for practice, perhaps using a simple recipe or even slightly lower hydration initially to make handling easier. Focus solely on the shaping step, repeating the process multiple times. Pay attention to how the dough feels, the amount of tension you are building, and the uniformity of the final shape. This dedicated consistent baguette shape practice will accelerate your learning curve significantly.
Visualizing the Ideal Baguette Form
Before you even touch the dough, take a moment to visualize the shape you are aiming for. Picture a perfectly formed baguette: its uniform thickness, its graceful curve (if desired), and its smoothly tapered ends (or blunt ends, depending on style). Having a clear mental image provides a target for your hands to work towards during the shaping process.
You can look at photos of well-shaped baguettes or even keep one nearby as a reference. This visualization helps train your eye to recognize the correct proportions and tension. As you practice, compare your results to this ideal form. Where are the inconsistencies? Is one end thicker? Is the tension uneven? This visual assessment is a critical part of consistent baguette shape practice and helps you identify areas for improvement.
Repetition and Muscle Memory: Key to Consistency
The human body learns through repetition. The more you perform a physical task, the more your muscles and nervous system become attuned to the movements required. This is muscle memory, and it's fundamental to achieving a consistent baguette shape practice. The subtle adjustments in hand pressure, the angle of your fingers, and the speed of your movements become intuitive.
Aim to shape baguettes regularly, even if it's just one or two loaves a week. Over time, you'll find that the process becomes smoother and more automatic. You'll develop a feel for the dough – knowing when it has enough tension or when it needs a moment to rest. This tactile understanding, built through consistent baguette shape practice, is invaluable and cannot be learned from a book or video alone.
Using a Template: A Training Aid for Beginners
For those just starting out or struggling with consistency, using a simple template can be a helpful training aid. You can draw or print lines on parchment paper or a couche (linen cloth used for proofing) to indicate the desired length and width of your baguettes.
Place the template under your couche or shaping surface. As you shape, use the lines as a visual guide to help you achieve the target dimensions. While you won't use a template forever, it provides immediate feedback and helps train your hands and eyes to create the correct proportions. This is a practical tool to incorporate into your consistent baguette shape practice when you're focusing on achieving uniform size and length.
Common Baguette Shaping Challenges and Solutions
Even with practice, you might encounter common challenges when shaping baguettes. Identifying these issues and knowing how to address them is part of the learning process. Troubleshooting helps you refine your technique and achieve better consistency over time.
Here are some frequent problems bakers face during consistent baguette shape practice and practical solutions to overcome them:
- Tapering Issues: Baguettes ending up with significantly thinner ends than the middle.
- Air Bubbles: Large, unwanted pockets of air just under the crust or within the crumb.
- Lack of Tension: Dough feeling loose and failing to hold its shape during proofing.
- Uneven Length/Thickness: Baguettes in the same batch having different sizes.
Addressing these issues often involves revisiting the fundamental techniques and dough preparation steps.
Tapering Issues: Preventing Uneven Ends
Tapering issues, where the ends of the baguette are much thinner than the middle, are a common problem. This often happens because bakers apply more pressure to the ends during elongation or fail to distribute the dough mass evenly from the start. The result is uneven baking, with burnt ends and potentially undercooked centers.
To prevent excessive tapering during consistent baguette shape practice, focus on applying even pressure across the entire length of the dough as you roll it out. Start rolling from the center and work your way outwards, but be mindful not to press down harder on the ends. Ensure that when you divide the dough, the pieces are roughly uniform, and during pre-shaping, you create a preliminary shape that has consistent thickness from end to end. Gentle, even pressure is the key to maintaining a uniform diameter along the entire length of the baguette.
Air Bubbles: Minimizing Large Pockets
Large, irregular air bubbles just beneath the crust or within the crumb can detract from the desired open, even structure. These are often caused by trapped air pockets that weren't fully integrated or degassed during shaping, or sometimes by excessive or uneven folding. While some irregular bubbles are characteristic of artisan bread, very large, isolated ones are usually a shaping artifact.
To minimize these during your consistent baguette shape practice, ensure you gently but thoroughly degas the dough during the initial stages of shaping, particularly during pre-shaping. As you fold and roll, try to work out any large air pockets you feel. However, be careful not to over-handle the dough, which can remove too much gas and result in a dense crumb. A balance is needed: sufficient handling to create tension and remove large pockets, but gentle enough to preserve the desirable smaller bubbles that contribute to the open crumb structure.
Scoring Techniques for Optimal Oven Spring and Shape
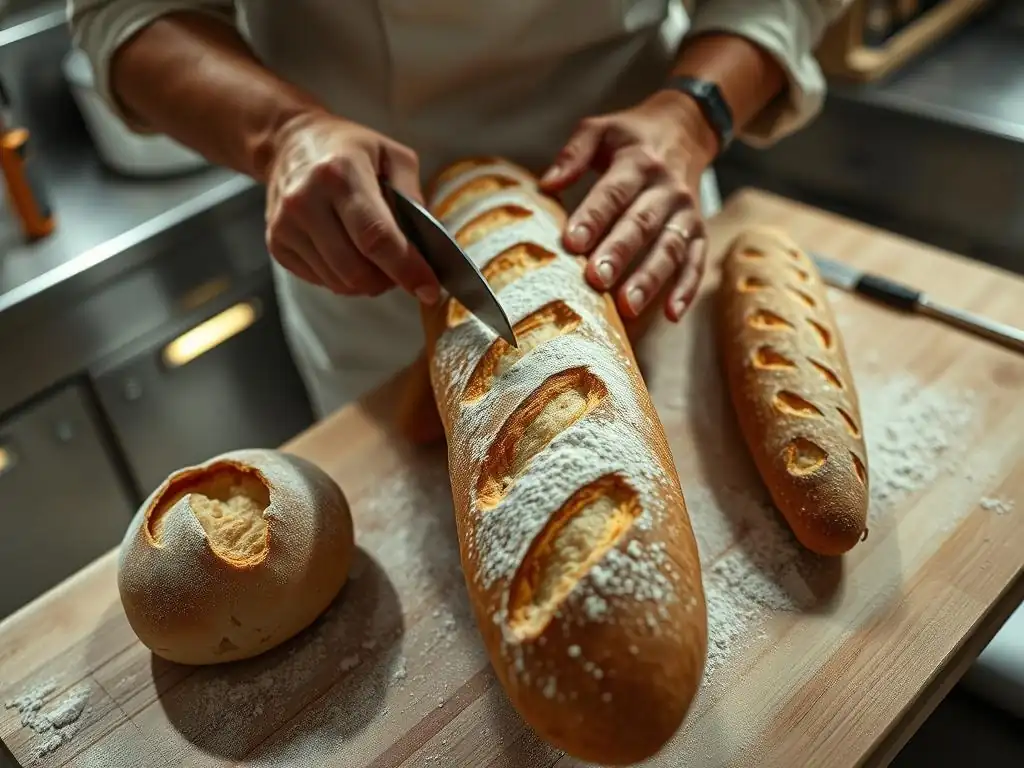
Scoring, or slashing the surface of the shaped dough just before baking, is essential for controlling oven spring and contributing to the final shape and appearance of the baguette. The cuts act as vents, allowing the dough to expand in a controlled manner in the hot oven. Without scoring, the crust would tear unpredictably. Proper scoring enhances the lift and shape of the baguette and creates the iconic "ears" along the slashes.
Mastering scoring is an integral part of consistent baguette shape practice. The angle, depth, and overlap of the cuts all influence the final result. Using a very sharp blade, like a baker's lame, is crucial for clean cuts that open beautifully. Hesitant or dull cuts can seal up during baking, preventing proper expansion.
Proper Blade Angle for Clean Incisions
The angle at which you hold the scoring blade is critical for achieving clean cuts and promoting good oven spring. For baguettes, a shallow angle, almost parallel to the surface of the dough (around 30 degrees), is typically recommended. This angle allows the blade to slice just under the surface tension of the dough, creating a flap of dough that will lift and form the "ear" as the baguette expands in the oven.
Holding the blade too perpendicular to the surface (90 degrees) will result in cuts that open flatly rather than lifting, leading to a less impressive ear and potentially less controlled expansion. Practice holding the lame at the correct shallow angle during your consistent baguette shape practice sessions, making quick, confident strokes. The goal is a clean, decisive cut that isn't too deep (which can cause the baguette to flatten) or too shallow (which might not open properly).
Scoring Patterns to Enhance Baguette Shape
The classic scoring pattern for a baguette is a series of overlapping diagonal slashes along the length of the loaf. These slashes are typically about 6-8 inches (15-20 cm) long and overlap by about one-third to one-half of their length. The number of slashes depends on the length of the baguette; a longer baguette will have more slashes.
This overlapping pattern encourages even expansion along the entire length of the baguette, contributing to a consistent shape. Each slash should start slightly before the previous one ends. Practice making these overlapping cuts with a steady hand. Consistency in the angle, length, and overlap of your slashes is key to achieving a visually appealing and functional scoring pattern that supports your consistent baguette shape practice efforts.
The Role of Baking Environment in Baguette Shape
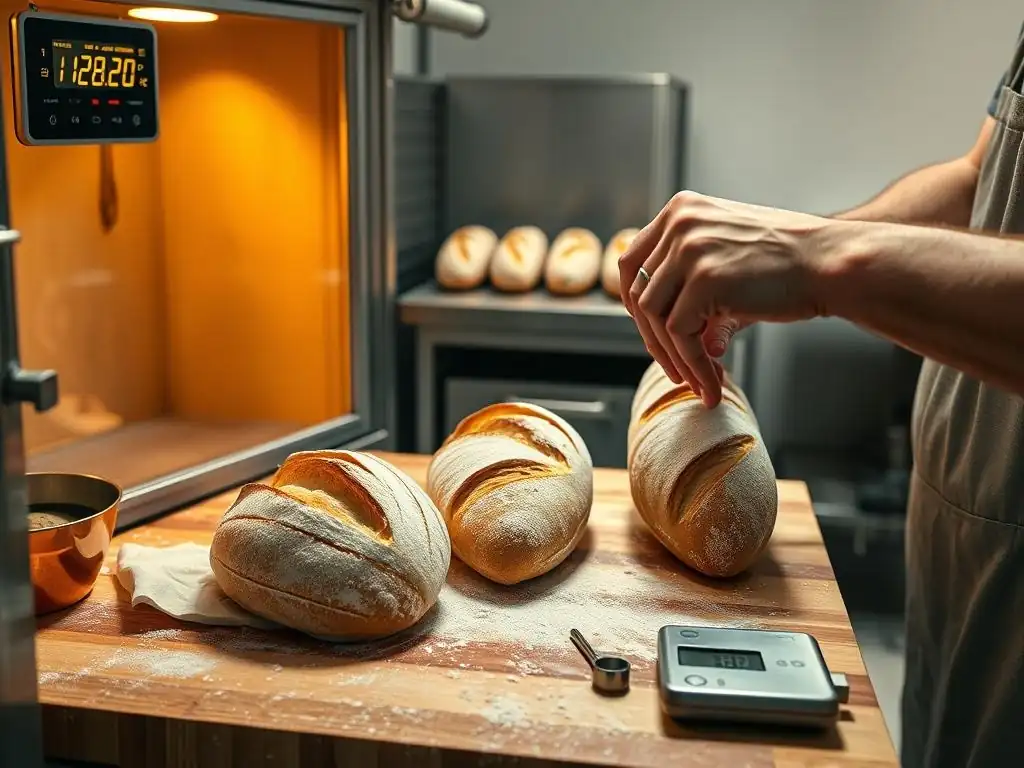
While shaping is paramount, the baking environment plays a significant role in preserving and enhancing the shaped form. The intense heat, the presence of steam, and the surface the bread bakes on all influence how the dough behaves during oven spring and crust formation. A poorly controlled baking environment can undo the careful work you put into shaping.
Understanding how these factors interact is essential for achieving the best possible outcome from your consistent baguette shape practice. Creating the right conditions in your home oven helps the baguettes hold their structure, achieve maximum volume, and develop that signature thin, crispy crust.
Oven Temperature and Humidity: Key Factors
High oven temperature, typically between 450°F and 500°F (230°C - 260°C), is necessary for proper oven spring and crust development in baguettes. The initial burst of heat causes rapid expansion of gases within the dough. Humidity, usually introduced as steam at the beginning of the bake, is equally important. Steam keeps the surface of the dough moist and pliable for the first 10-15 minutes of baking.
This moist surface prevents a crust from forming too quickly, allowing the dough to expand fully through the scores. Without sufficient steam, the crust sets prematurely, restricting oven spring and potentially leading to blowouts elsewhere on the loaf. Achieving the right balance of high heat and steam is crucial for supporting the consistent shape you've worked hard to achieve.
Baking Stones and Their Impact on Shape
Baking stones or steels provide a hot, stable surface that transfers heat efficiently to the base of the bread. This rapid heat transfer from the stone helps set the bottom crust quickly, which is important for maintaining the baguette's shape as it expands upwards. Baking directly on a cold or thin metal tray doesn't provide the same thermal mass, and the base of the baguette may not set fast enough, potentially leading to a flatter loaf.
Using a preheated baking stone or steel is highly recommended for baking baguettes. Ensure it is thoroughly preheated in the oven for at least 30-60 minutes at the target temperature. Carefully transferring the shaped baguettes onto the hot stone is part of ensuring they hold their consistent form during the crucial initial minutes of baking.
Steam Injection: Achieving a Crispy Crust and Proper Expansion
As mentioned, steam is vital during the first part of the bake. In professional deck ovens, steam is injected automatically. In a home oven, you can create steam using various methods: placing a tray of hot water at the bottom of the oven, using lava rocks or a cast iron pan with water, or using a Dutch oven or cloche (though a cloche is less common for the long shape of a baguette, specific baguette bakers exist).
The goal is to create a steamy environment for the first 10-15 minutes of baking. After this period, the steam source is removed, allowing the crust to dry out and become crispy. Effective steam injection ensures the surface remains extensible, permitting maximum expansion through the scores and contributing to the desired shape and texture. It's an essential step that complements your consistent baguette shape practice.
Advanced Baguette Shaping Techniques
Once you've mastered the fundamentals and can consistently produce well-shaped baguettes, you might explore more advanced techniques. These often involve handling higher hydration doughs, understanding dough behavior at a deeper level, or optimizing the process for baking multiple loaves.
Advancing your skills in consistent baguette shape practice comes from refining your feel for the dough and adapting your technique to different dough characteristics and baking scenarios. It's about moving from following instructions to truly understanding the 'why' behind each step.
Understanding Dough Strength and Elasticity
A deeper understanding of dough strength and elasticity is crucial for advanced shaping. Dough strength refers to its ability to resist deformation and hold its shape, primarily determined by gluten development. Elasticity is the dough's tendency to spring back to its original shape after being stretched. Baguette dough needs a good balance of both: enough strength to maintain its form, but enough extensibility (the opposite of elasticity, its ability to stretch) to be elongated without tearing.
Learning to assess your dough's strength and elasticity by feel allows you to adjust your shaping technique on the fly. If the dough is too tight (very elastic), it might need a longer rest before shaping. If it's too weak (lacking strength), you might need to be gentler during shaping to avoid collapse. Developing this tactile understanding is a key part of advancing your consistent baguette shape practice.
Working with Different Dough Hydrations
As you become more comfortable, you might experiment with higher hydration doughs (75% water or more). These doughs are trickier to handle because they are stickier and more relaxed, but they can yield an even more open, airy crumb and a thinner crust. Shaping high hydration dough requires a lighter touch, less flour on the surface, and often quicker movements to prevent sticking.
Techniques like the "stretch and fold" method during bulk fermentation become even more important for developing strength in wet doughs. Practicing consistent baguette shape practice with varying hydration levels expands your skills and allows you to achieve different textural results. It forces you to adapt your standard technique and become more intuitive in your handling.
Shaping Multiple Baguettes Efficiently
When baking for a family or selling at a market, you'll likely need to shape multiple baguettes in quick succession. Efficiency becomes important to ensure all the loaves are shaped within a reasonable timeframe, allowing them to proof together and bake at the same time. Developing a smooth workflow is key.
This might involve dividing all the dough pieces first, then pre-shaping them all, allowing them to rest, and then moving through the final shaping steps for each piece systematically. Maintaining consistent speed and technique across all loaves is part of consistent baguette shape practice when working with batches. Practicing shaping several pieces at once helps you refine your process and ensure uniformity across the entire batch.
Beyond the Basics: Refining Your Baguette Shaping Skills
Refining your baguette shaping skills is an ongoing journey. There's always more to learn and subtle improvements to be made. It involves continuous observation, experimentation, and learning from both successes and failures.
Moving beyond the basic techniques means paying closer attention to the nuances of dough behavior and how small adjustments in your handling can impact the final outcome. It's about developing a deeper connection with the dough and understanding its language.
Studying Professional Baker Techniques
Watching experienced professional bakers shape baguettes can provide valuable insights. Look for videos or workshops where bakers demonstrate their techniques. Pay attention to:
- How they handle the dough (gentle vs. firm pressure).
- How much flour they use on the surface.
- The speed and rhythm of their movements.
- How they build tension.
- How they seal the seam.
While you may not replicate their exact environment or tools, observing their methods can offer tips and tricks to incorporate into your own consistent baguette shape practice. Many professional bakers have spent years honing their skills through countless repetitions.
Experimenting with Different Shaping Styles
While the classic long, thin baguette shape is standard, there are variations (e.g., slightly shorter and wider "parisienne" loaves). Experimenting with these different styles can help you understand how shaping techniques need to adapt to achieve different forms.
You might also experiment with subtle variations within the classic shape, such as slightly rounder ends versus more tapered ones, or different levels of tension. This experimentation allows you to see firsthand how your shaping influences the final look and feel of the bread, further enhancing your consistent baguette shape practice.
Documenting Your Progress: Tracking Improvements Over Time
Keeping a baking journal can be incredibly helpful for tracking your progress in achieving a consistent baguette shape. Note details about each bake:
- Dough hydration and recipe.
- Fermentation times and temperatures.
- Observations about dough feel during shaping.
- Challenges encountered during shaping.
- Photographs of the shaped dough and the final baked baguettes.
Reviewing your notes and photos over time allows you to see how your shapes are becoming more consistent and identify what factors contributed to successful or unsuccessful shapes. This systematic approach to documentation is a powerful tool for continuous improvement in your consistent baguette shape practice.
Troubleshooting Baguette Shaping Imperfections
Even experienced bakers occasionally encounter shaping imperfections. The ability to troubleshoot and understand why something went wrong is crucial for learning and improving. Instead of getting discouraged, view imperfections as opportunities to learn.
Debugging your shaping process involves careful observation and analysis. Ask yourself specific questions about each step, from dough preparation through shaping and proofing.
Identifying the Root Cause of Shaping Problems
When a baguette doesn't turn out with the consistent shape you intended, try to identify the root cause. Was the dough too sticky to handle? Did it tear easily? Did it lack tension? Did it flatten out during proofing?
Consider factors like:
- Dough Hydration: Was it too high or too low for your comfort level?
- Gluten Development: Was the dough strong enough? Did it pass the windowpane test?
- Fermentation: Was the dough under or over-proofed before shaping?
- Handling: Were you too rough or too gentle? Did you use enough tension? Was the seam sealed properly?
- Resting Time: Was the dough sufficiently rested before final shaping?
Pinpointing the specific issue helps you make targeted adjustments in your next bake.
Adjusting Techniques Based on Results
Based on your troubleshooting, make specific adjustments to your technique in subsequent bakes. For example:
- If dough is too sticky, try using slightly more flour on the surface (but not too much!) or practicing with a lower hydration dough.
- If baguettes flatten during proofing, you might need to build more tension during shaping or ensure they are proofing in a couche with sufficient support.
- If ends are consistently thin, focus on even pressure during elongation.
- If large bubbles appear, try gentler degassing during pre-shaping.
Make one or two adjustments at a time so you can isolate their effect. This iterative process of identifying problems, adjusting techniques, and observing results is fundamental to mastering consistent baguette shape practice.
Learning from Mistakes: Embracing the Learning Curve
Every bake, whether perfect or imperfect, is a learning opportunity. Baguette shaping is a skill that improves with practice and patience. Don't expect perfection immediately. Embrace the learning curve and view mistakes as valuable lessons.
Keep practicing, be observant, and be willing to experiment. Celebrate your successes and learn from your challenges. The journey towards consistent baguette shape practice is rewarding, and each loaf brings you closer to mastering this beautiful form of bread baking.
Achieving Baguette Perfection: A Journey Through Practice
Frequently Asked Questions
How important is practice in achieving a consistent baguette shape?
Practice is absolutely crucial. Achieving a consistent baguette shape relies heavily on muscle memory and technique refinement, which only comes with repeated attempts.
What are some key techniques to focus on when practicing baguette shaping?
Focus on proper preshape, final shaping, and tension building. Understanding how to manipulate the dough is essential for creating uniform baguettes.
What ingredients are most important for a successful baguette?
While technique is paramount, using high-quality flour, proper hydration, and active yeast contribute significantly to the dough's extensibility and workability.
How can I troubleshoot common baguette shaping problems like uneven thickness or collapsed ends?
Uneven thickness often stems from inconsistent pressure during shaping. Collapsed ends might indicate insufficient tension or proofing issues.
How often should I practice baguette shaping to see improvement?
Aim for at least twice a week. Consistent, focused practice is key to developing a feel for the dough and improving your shaping skills.
Final Reflection: The Enduring Pursuit of the Perfect Baguette
The quest for a consistently perfect baguette shape is more than just a baking challenge; it's a reflection of our dedication to mastering a craft and the pursuit of excellence in any endeavor. The seemingly simple act of shaping a baguette reveals a deeper truth about precision, patience, and the iterative process of learning. The subtle nuances of dough handling, the precise folds, and the consistent tension all contribute to the final, elegant form.
The impact of this pursuit extends beyond the kitchen. The discipline required to achieve consistent results in baking mirrors the dedication needed to succeed in any field. The small, incremental improvements, the countless repetitions, and the unwavering focus on detail are all transferable skills. The difference between ordinary and extraordinary is that little extra.
This quote resonates deeply with the journey of perfecting baguette shaping; it's the accumulation of those "little extras" that elevates the ordinary to the extraordinary.
Now, consider your own pursuits. What seemingly small task, what seemingly insignificant detail, requires the same level of focus and dedication as shaping a perfect baguette? I invite you to reflect on your own "practice makes perfect" moments, to identify the areas in your life where consistent effort yields extraordinary results. Embrace the process, celebrate the small victories, and remember that the journey towards mastery is as rewarding as the destination itself. The perfectly shaped baguette is a testament to this truth, a symbol of perseverance and the beauty found in dedicated practice.
Unleash Your Inner Boulanger: Perfect Baguettes Await!
Thanks for taking the time to explore the art of baguette baking! We hope you gained valuable insights and are feeling inspired to create your own crispy, airy masterpieces. Now it's time to put your newfound knowledge into action.
- Master the baguette shape: Dedicate some time this week to practicing your shaping technique. Try making a few baguettes, focusing on achieving that perfect oval shape and consistent scoring. Even small improvements will make a big difference!
- Share your baking journey: Post a picture of your baguettes (even if they're not perfect yet!) on social media and tag us @BakeWithEase – we'd love to see your progress and celebrate your successes.
- Explore advanced techniques: Once you're comfortable with the basics, delve deeper into variations like sourdough baguettes or explore different flours.
What unique ingredient or technique will you try in your next baguette adventure?