
How to Test and Adjust Your Measuring Cups and Spoons for Accuracy

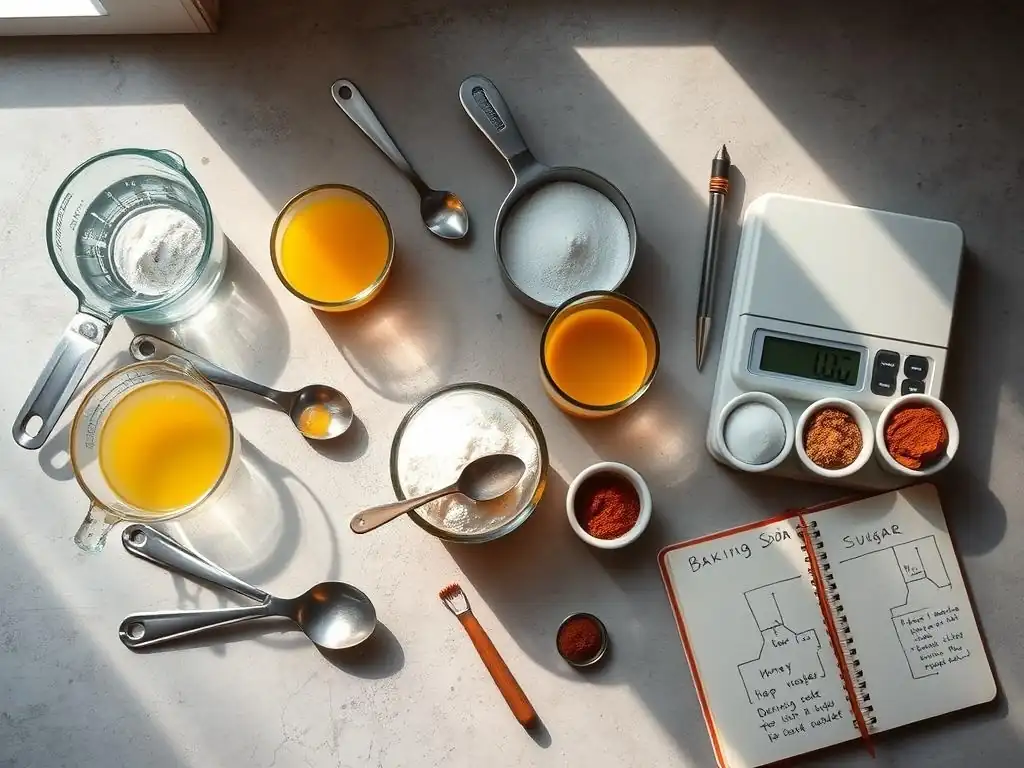
Welcome to BakeWithEase, where baking becomes a joy, not a chore! Ever wondered if your perfect recipe is failing because of something as simple as inaccurate tools? That's right, even the slightest discrepancy in your measuring cups and spoons can throw off your entire bake. Discover why precision matters and how to test and adjust your own tools for guaranteed delicious results. Read on to unlock the secrets to baking perfection, starting with the surprisingly crucial world of accurate measuring cups spoons!
- Why Accurate Measuring Matters in Baking
-
Testing Your Measuring Cups for Accuracy: A Step-by-Step Guide
- Materials Needed for Measuring Cup Testing
- Step 1: Preparing Your Measuring Cups and Water
- Step 2: Filling the Measuring Cup Correctly
- Step 3: Transferring Water to a Graduated Cylinder or Liquid Measuring Cup
- Step 4: Comparing the Measured Volume to the Marked Volume
- Step 5: Documenting Your Findings: Creating a Measurement Log
- Testing Your Measuring Spoons for Accuracy: A Detailed Process
- Adjusting Inaccurate Measuring Cups and Spoons: Practical Solutions
- Ensuring Consistent Accuracy: Best Practices for Measuring Ingredients
- Understanding Liquid vs. Dry Measuring Cups: Key Differences
- Weight Conversions vs. Volume Measurements in Baking
- Maintaining Accurate Measurements Over Time
- Conclusion: Bake with Confidence Using Accurate Measurements
-
Frequently Asked Questions
- How important is accuracy when using measuring cups and spoons in baking?
- What's the easiest way to test the accuracy of my measuring cups and spoons?
- How often should I test my measuring cups and spoons for accuracy?
- What can I do if I discover that my measuring cups and spoons are inaccurate?
- Are there any specific types of measuring cups and spoons that are generally considered more accurate?
- Final Reflection: The Importance of Accurate Measuring for Culinary Success
- Unleash Your Inner Baking Pro: Perfect Measurements, Perfect Results!
Why Accurate Measuring Matters in Baking
The Impact of Precise Measurements on Baking Success
Baking is often described as a science, and for good reason. Unlike cooking, where you can often adjust ingredients on the fly, baking relies on precise ratios and chemical reactions. Using accurate measuring cups spoons is fundamentally important because even small errors in measuring ingredients like flour, sugar, or leavening agents can significantly alter the outcome of your recipe. Too much flour, for instance, can result in a dry, dense cake or tough cookies.
Conversely, too little flour might cause a cake to collapse or cookies to spread too much. The hydration level in bread dough, determined by the precise ratio of flour to water, is critical for gluten development and the final crumb structure. An extra tablespoon of liquid or a few grams off on the flour weight can mean the difference between a perfectly chewy loaf and a sticky, unmanageable mess.
Furthermore, ingredients like baking powder and baking soda are potent leavening agents that require exact amounts to work correctly. Using too much can lead to a metallic taste or cause baked goods to rise too quickly and then fall, while too little will result in a flat, heavy product. Even seemingly minor ingredients like salt can impact flavor and texture; too much makes baked goods unpleasantly salty, while too little can leave them tasting bland.
Ensuring you have accurate measuring cups spoons means your recipes will turn out consistently, allowing you to replicate successful bakes and troubleshoot failures effectively. This precision is the foundation upon which baking mastery is built, transforming guesswork into reliable results.
Understanding Measurement Types: Volume vs. Weight
In the world of baking, ingredients are typically measured either by volume or by weight. Volume measurement uses tools like measuring cups and spoons to determine the space an ingredient occupies. This is common in many home baking recipes, especially in the United States.
However, volume measurements can be notoriously inconsistent, particularly for dry ingredients like flour. Factors such as how tightly the ingredient is packed, humidity levels, and even the type of container used can lead to significant variations. For example, a cup of flour scooped directly from the bag and leveled might weigh considerably more than a cup of flour lightly spooned into the cup and leveled, sometimes by as much as 20-30 grams.
Weight measurement, on the other hand, uses a kitchen scale to determine the mass of an ingredient. This method is far more accurate because mass is unaffected by packing density or volume variations. A gram of flour is always a gram of flour, regardless of how it's handled.
Professional bakers and serious home bakers often prefer weight measurements for critical ingredients like flour, sugar, and fats because it provides unparalleled consistency. While using accurate measuring cups spoons is vital for recipes written by volume, understanding the inherent variability of volume measurements compared to the precision of weight measurements is key to achieving consistent, reliable baking results, especially when adapting recipes or seeking professional-level outcomes.
Testing Your Measuring Cups for Accuracy: A Step-by-Step Guide
Materials Needed for Measuring Cup Testing
To accurately test your measuring cups, you will need a few common items you likely already have in your kitchen. The primary tools required are the measuring cups you wish to test, ranging from the standard 1-cup size down to smaller fractions like 1/4 cup. You will also need a significant amount of plain tap water at room temperature. Water is ideal for testing volume because its density is relatively consistent, making it a reliable substance for this purpose.
Crucially, you will need a reference tool known to be accurate. The best reference is a liquid measuring cup with clear, precise markings in both fluid ounces and milliliters, or even better, a graduated cylinder, which is specifically designed for highly accurate liquid volume measurement and is often used in scientific settings.
Ensure your reference tool has increments small enough to detect minor discrepancies in your measuring cups – markings down to 5 or 10 milliliters are ideal. Having a stable, flat surface to work on is also essential to ensure accurate readings, as tilting can affect the apparent volume of liquids.
Step 1: Preparing Your Measuring Cups and Water
Begin by ensuring all the measuring cups you plan to test are clean and completely dry. Any residual water or debris could affect the accuracy of your test. Have your water ready; room temperature water is generally easiest to work with and provides a stable density for measurement comparison. Set up your workspace on a flat, level counter or table. Arrange your measuring cups and your reference liquid measuring cup or graduated cylinder so they are easily accessible.
This initial preparation ensures a controlled environment for your test. By starting with clean, dry tools and a stable surface, you eliminate potential variables that could lead to inaccurate results during the testing process. Having everything laid out and ready before you begin pouring will streamline the process and help you focus on precise execution at each subsequent step.
Step 2: Filling the Measuring Cup Correctly
When testing a dry measuring cup for liquid volume (which is the standard way to verify volume accuracy against a known liquid standard), the correct filling technique is essential. Place the dry measuring cup on your flat surface. Slowly and carefully pour water into the measuring cup until the water level reaches the very top rim of the cup. For dry measuring cups, the top rim is the fill line.
It's important to fill the cup until the water forms a slight dome (a meniscus) just above the rim, but then level it off carefully so the water is exactly flush with the top edge. Avoid overfilling to the point where water spills over, and avoid underfilling. This technique ensures you are measuring the full volume the cup is designed to hold according to its stated capacity (e.g., 1 cup, 1/2 cup).
Step 3: Transferring Water to a Graduated Cylinder or Liquid Measuring Cup
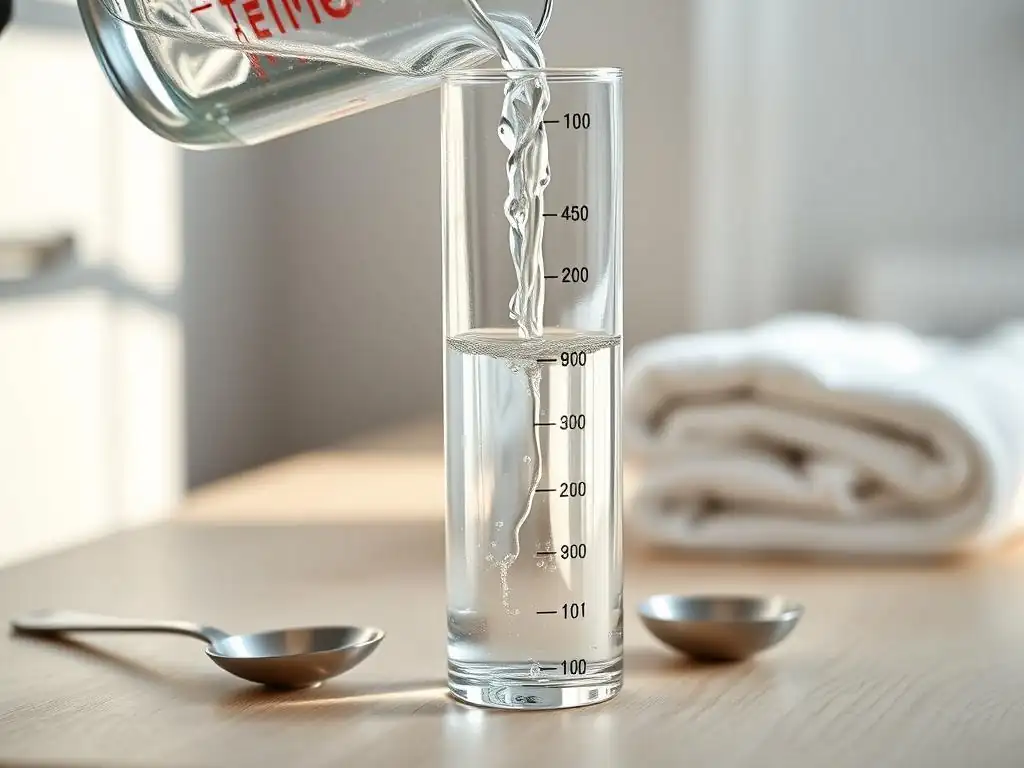
Once your dry measuring cup is filled precisely to the brim with water, carefully pour the entire contents of the measuring cup into your reference tool – either the liquid measuring cup with clear markings or the graduated cylinder. Pour slowly and steadily to minimize splashing and ensure all the liquid is transferred. Allow a few moments for the liquid to settle in the reference container.
When reading the volume in the reference tool, get down to eye level with the surface of the liquid. For water and most clear liquids, you will observe a slight curve at the surface, called a meniscus. Read the volume at the bottom of this curve. This eye-level reading is crucial for accuracy, as looking from above or below can lead to parallax error, making the volume appear higher or lower than it actually is.
Step 4: Comparing the Measured Volume to the Marked Volume
Now, compare the volume reading in your reference tool (the liquid measuring cup or graduated cylinder) to the marked volume on the dry measuring cup you just tested. A standard US customary cup is defined as 8 fluid ounces, which is equivalent to approximately 236.59 milliliters. Therefore, a 1-cup dry measuring cup should ideally hold about 237 mL of water. A 1/2 cup should hold about 118 mL, and so on.
Note the exact volume you measured in the reference tool. How close is it to the expected standard volume for that size of measuring cup? Even a difference of 10-15 milliliters in a cup measurement can impact a sensitive recipe like macarons or certain bread doughs. This comparison reveals whether your measuring cup is holding slightly more or less than its stated capacity, highlighting potential inaccuracies in your kitchen tools.
Step 5: Documenting Your Findings: Creating a Measurement Log
To keep track of the accuracy of your kitchen tools, it's highly beneficial to create a simple measurement log. Use a notebook, a spreadsheet, or even a note on your phone. For each measuring cup you test, record the size marked on the cup (e.g., 1 cup, 1/2 cup, 250 mL). Then, record the actual volume you measured when testing it with water and your reference tool (e.g., 1 cup measured 245 mL, 1/2 cup measured 115 mL).
Also, note the date of the test and perhaps the brand or material of the measuring cup. This log becomes a valuable reference. You'll know which of your accurate measuring cups spoons are truly accurate and which ones consistently measure slightly off. This information helps you decide whether a tool needs to be adjusted, replaced, or if you simply need to account for its slight inaccuracy when following recipes. Regularly updating this log will help you maintain precision over time.
Testing Your Measuring Spoons for Accuracy: A Detailed Process
Required Tools for Measuring Spoon Testing
Testing the accuracy of your measuring spoons requires a slightly different approach than testing cups, as spoons are primarily used for smaller volumes, often of potent ingredients. For this test, you will need your set of measuring spoons, including sizes like 1 tablespoon, 1 teaspoon, 1/2 teaspoon, and 1/4 teaspoon. You will also need common, granular ingredients that are easy to level, such as granulated sugar, salt, or baking powder.
The most critical tool for this test is a reliable digital kitchen scale capable of measuring in small increments, ideally down to 0.1 grams. While measuring spoons are volume tools, verifying their accuracy is best done by measuring a standard ingredient by volume and then checking its weight against known, standard weight conversions for that ingredient. You will also need a small bowl or piece of parchment paper to place on the scale to hold the ingredient being weighed.
Step 1: Leveling Dry Ingredients for Accurate Measurement
Accurate measurement with spoons, especially for dry ingredients like salt or baking powder, depends heavily on proper leveling. To test your measuring spoons, select a granular ingredient like granulated sugar. Dip the measuring spoon into the ingredient container, scooping up more than the spoon can hold.
Then, use a straight edge, such as the back of a knife or a flat spatula, to sweep across the top of the spoon, leveling off the excess ingredient. The surface of the ingredient should be perfectly flush with the rim of the spoon. This technique ensures you are measuring one level spoon, which is the standard method for dry ingredients and essential for consistent volume measurement with accurate measuring cups spoons.
Step 2: Using a Scale to Verify the Weight of Measured Ingredients
Once you have a perfectly leveled measuring spoon full of your chosen ingredient (like granulated sugar or salt), it's time to verify its accuracy using your digital scale. Place a small bowl or a piece of parchment paper on the scale and tare it (zero out the weight). Carefully tap or pour the entire contents of the leveled measuring spoon into the bowl or onto the paper on the scale.
Note the weight displayed on the scale. Repeat this process several times for the same spoon size and ingredient to ensure consistency. For example, measure a level teaspoon of salt three times and record the weight each time. This helps account for any slight variations in your leveling technique and gives you an average weight for that specific spoon and ingredient.
Step 3: Comparing Measured Weight to Standard Conversions
After weighing your leveled spoon measurements, compare the recorded weights to standard weight conversions for that ingredient. Keep in mind that these conversions are approximate and can vary slightly based on factors like crystal size, density, and humidity. However, they provide a good benchmark. For example, a standard U.S. teaspoon (tsp) of salt is often cited as weighing around 5 to 6 grams. A standard tablespoon (tbsp) of granulated sugar is typically around 12 to 15 grams.
Look up reliable charts for common ingredient weight-to-volume conversions. Compare the average weight you measured for each spoon size (e.g., your 1 tsp salt averaged 7 grams) to the standard range. This comparison will reveal if your measuring spoon is consistently measuring heavier or lighter than expected, indicating whether it holds slightly more or less volume than it should.
Step 4: Identifying and Addressing Measurement Discrepancies
Based on your comparison, you can identify discrepancies. If your 1 tsp consistently holds 7 grams of salt instead of the expected 5-6 grams, it suggests your teaspoon might be slightly larger than a standard teaspoon. If your tablespoon of sugar consistently weighs only 10 grams instead of 12-15 grams, it might be slightly smaller.
Minor discrepancies (within 10-15% of the standard weight) might be acceptable for less sensitive recipes, but larger variations indicate a potential issue with the spoon's manufacturing or shape. Document these findings in your measurement log alongside your measuring cup data. Knowing which of your accurate measuring cups spoons are consistently off allows you to decide on the next course of action, whether that's adjusting the tool or planning for replacement.
Adjusting Inaccurate Measuring Cups and Spoons: Practical Solutions
Correcting Minor Inaccuracies in Measuring Cups
If your testing reveals that a measuring cup is only slightly off – perhaps by less than 5-10% of its total volume – you might be able to live with it, especially for less precise recipes. However, for more sensitive baking, you have a couple of options. For metal measuring cups, sometimes the handle or rim can be slightly bent, subtly altering the volume. Very carefully, you might attempt to gently reshape it, but this is risky and can easily make the problem worse or damage the cup.
A more practical approach for minor inaccuracies is to simply make a note of the discrepancy in your measurement log. If your 1-cup measure consistently holds 245 mL instead of 237 mL, you know it's slightly generous. For recipes where extreme precision is needed, you can either use a different, more accurate cup or mentally adjust the amount you scoop slightly.
For example, if you need exactly 237 mL, you might fill your slightly oversized cup just below the rim based on your knowledge of its actual capacity. This method requires careful attention but saves you from needing to replace the cup immediately.
Addressing Significant Measurement Errors in Measuring Cups
When a measuring cup is significantly inaccurate – say, a 1-cup measure holds 260 mL or only 210 mL – its reliability for baking is severely compromised. Large discrepancies like these are often due to manufacturing defects or damage that cannot be easily corrected. Attempting to bend or reshape a cup with a large error is unlikely to fix the issue and could render the cup unusable.
In such cases, the most sensible solution is to retire the inaccurate cup from baking use. Relegate it to non-precision tasks like scooping pet food or measuring cleaning supplies, where the exact volume isn't critical. Relying on a cup with a significant error will lead to inconsistent baking results, making it difficult to troubleshoot recipes or achieve desired textures and flavors. Investing in a new, demonstrably accurate set of measuring cups is advisable when major inaccuracies are found.
Adjusting Measuring Spoons When Accuracy is Off
Measuring spoons, particularly metal ones, can sometimes be adjusted if they are slightly off. If your testing shows a metal spoon consistently holds slightly too much or too little, the bowl of the spoon might be slightly deformed or the handle bent in a way that impacts the bowl's shape. For minor errors, you can very gently attempt to reshape the bowl of the spoon using pliers or by carefully pressing it against a hard surface. The goal is to subtly alter the curvature of the spoon bowl.
However, this requires a delicate touch and is best attempted only with metal spoons. Plastic spoons cannot be adjusted. If the discrepancy is significant or you are uncomfortable attempting to reshape the spoon, it's often better to replace the entire set or the individual inaccurate spoon. Remember to re-test the spoon after any attempted adjustment to see if the correction was successful and measure the resulting accuracy.
When to Replace Your Measuring Tools: A Baker's Guide
Knowing when to replace your accurate measuring cups spoons is crucial for maintaining consistent baking results. You should consider replacement if:
- Your testing reveals significant, uncorrectable inaccuracies (e.g., a cup is off by more than 10-15%).
- The tools are visibly damaged, such as cracked plastic cups, bent metal spoons that can't be reshaped, or cups with warped rims.
- Markings on liquid measuring cups are faded or worn off, making accurate reading impossible.
- Handles are loose or broken.
- The material (especially plastic) shows signs of degradation, becoming brittle, discolored, or warped from heat exposure (like dishwashers).
While it might seem economical to hold onto old tools, using worn or inaccurate measuring cups spoons will inevitably lead to failed bakes and wasted ingredients, costing you more in the long run. Replacing them with a reliable set of accurate measuring cups spoons is an investment in your baking success and consistency.
Ensuring Consistent Accuracy: Best Practices for Measuring Ingredients
Tips for Using Measuring Cups Effectively
Even with accurate measuring cups spoons, proper technique is vital for consistent results, especially when measuring dry ingredients by volume. For flour, the standard recommendation is the "spoon and level" method: gently spoon the flour into the dry measuring cup until it's overflowing, then use a straight edge to sweep off the excess. Avoid scooping flour directly from the bag with the cup, as this can compact the flour and result in significantly more than the recipe intends. A cup of scooped flour can weigh 30-50 grams more than a cup measured by spooning and leveling.
For granular ingredients like sugar or salt, you can often dip and level, but ensure you are not packing the ingredient down. Brown sugar, however, is an exception; it should be firmly packed into the dry measuring cup so that it holds its shape when inverted. For liquids, always use a liquid measuring cup placed on a flat surface and read the measurement at eye level at the bottom of the meniscus. These techniques, combined with accurate measuring cups spoons, minimize human error and maximize precision.
Similar to cups, proper technique is key when using measuring spoons. For dry ingredients like spices, salt, baking powder, or baking soda, always fill the spoon and then level it off with a straight edge, just like with dry measuring cups. This ensures you're getting a consistent volume every time. Do not tap the spoon or shake it to settle the ingredient, as this can cause compaction.
For liquids measured with spoons (like vanilla extract or oils), fill the spoon carefully to the rim. It's often helpful to do this over a bowl or the ingredient container to catch any drips. Avoid measuring liquids with spoons that are still wet from a previous ingredient; dry them thoroughly first. Using accurate measuring cups spoons with these consistent techniques ensures that small but potent ingredients are added in the precise amounts required by the recipe.
Proper Storage and Care of Measuring Tools
Maintaining the accuracy of your measuring cups spoons involves not just testing and technique but also proper storage and care. Store measuring cups and spoons in a way that prevents them from being bent, crushed, or warped. Avoid storing heavy items on top of them. Keeping them organized, perhaps on a ring or in a dedicated drawer, helps maintain their shape.
Clean your measuring tools thoroughly after each use. Residue from previous ingredients can build up and subtly alter the volume the tool holds over time. While some measuring tools are dishwasher safe, repeated exposure to high heat can potentially warp plastic or affect the integrity of markings. Hand washing with warm, soapy water is often the gentlest method for preserving the accuracy and longevity of your accurate measuring cups spoons. Dry them completely before storing to prevent water spots or potential corrosion on metal tools.
Understanding Liquid vs. Dry Measuring Cups: Key Differences
How Liquid Measuring Cups Work
Liquid measuring cups are typically made of clear glass or plastic and have a spout for easy pouring. They also feature measurement markings along the side, often in ounces, cups, and milliliters. The key design difference is the space above the highest measurement line and the rim. This extra space is intentional; it allows you to fill the cup to the marked line below the rim, making it easier to transport the liquid without spilling.
When measuring liquids, you place the cup on a flat surface and pour until the liquid level reaches the desired marking. Then, you get down to eye level to read the measurement at the bottom of the meniscus. The markings on a liquid measuring cup are calibrated to account for this method, ensuring accurate volume when used correctly at eye level on a flat surface. Using a dry measuring cup for liquids makes it hard to get an accurate reading at a specific line below the rim and is prone to spills.
How Dry Measuring Cups Work
Dry measuring cups are designed differently. They are meant to be filled precisely to the rim with the ingredient, and the rim itself acts as the measurement line. They are usually sold in sets of individual cups (1 cup, 1/2 cup, 1/3 cup, 1/4 cup) and are made of metal or opaque plastic. The absence of a spout and the design intended for leveling make them unsuitable for accurately measuring liquids to specific lines below the rim.
When using dry measuring cups for dry ingredients, the standard technique involves filling the cup and leveling off the excess ingredient flush with the rim. This ensures a consistent volume based on the cup's capacity to the very top. While you could technically measure liquid by filling a dry measuring cup to the brim, it's difficult to do accurately without spilling, and the lack of intermediate markings makes measuring partial cups challenging. Using the correct type of accurate measuring cups spoons for the ingredient (liquid or dry) is fundamental to recipe success.
Weight Conversions vs. Volume Measurements in Baking
The Importance of Using a Kitchen Scale
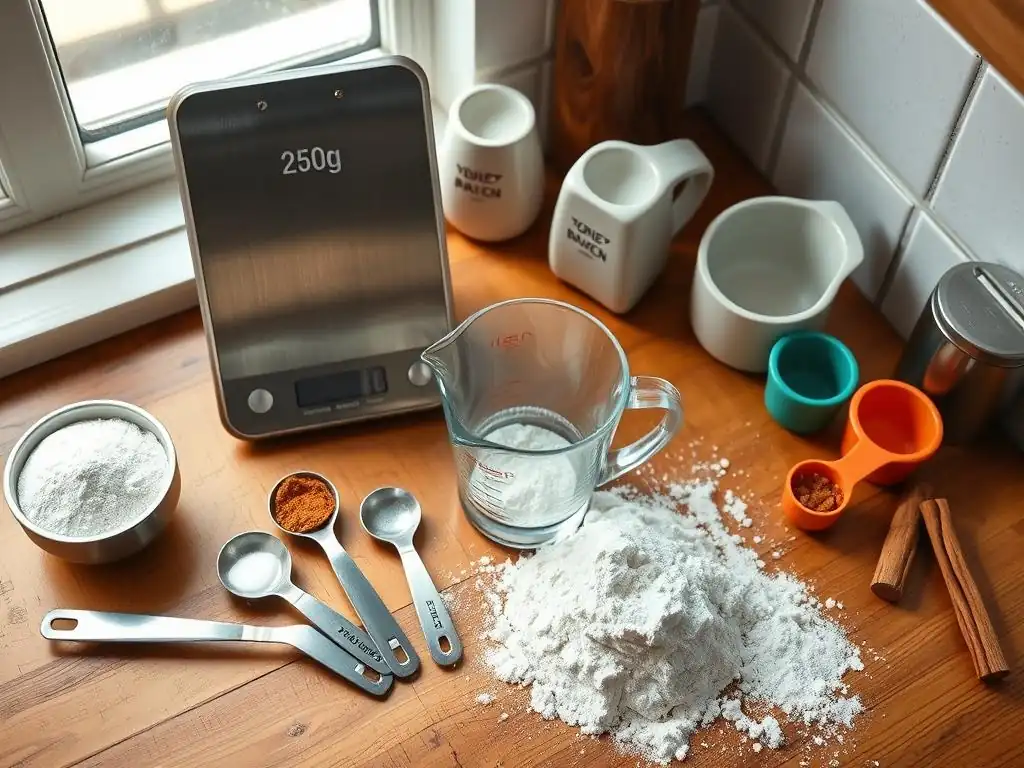
As discussed earlier, weight measurements are inherently more accurate and consistent than volume measurements, especially for dry ingredients like flour, sugar, and oats. The density of these ingredients can vary significantly based on how they are handled, leading to large variations in volume measurements. For example, a cup of all-purpose flour can weigh anywhere from 115 grams (lightly spooned) to 150 grams (heavily scooped and packed). This nearly 30% variation can drastically impact the structure and texture of baked goods.
Using a digital kitchen scale eliminates this variability. When a recipe calls for 120 grams of flour, you measure exactly 120 grams, regardless of how fluffy or compacted the flour is. This precision leads to much more reliable and repeatable baking results. Many professional recipes and serious baking resources provide ingredient amounts by weight for this very reason. While having accurate measuring cups spoons is great for volume-based recipes, using a scale elevates your baking accuracy to a new level.
Converting Recipes from Volume to Weight Measurements
If you're keen on improving your baking consistency, you can start converting your favorite volume-based recipes to weight measurements. This involves carefully measuring ingredients by volume using your accurate measuring cups spoons and simultaneously weighing them on a scale. For example, measure a cup of flour using the spoon-and-level method, weigh it, and note that a "level cup" of that specific flour type using your technique weighs, say, 125 grams. Do this for all ingredients in the recipe.
Over time, you'll build a personal conversion chart for the ingredients you commonly use and the way you typically measure them by volume. Alternatively, you can use reliable online resources that provide standard weight conversions for common baking ingredients. However, remember that even standard conversions are averages, and ingredient density can vary. The most accurate method is to test and weigh ingredients yourself or find recipes that already list ingredients by weight. Converting to weight measurements, alongside using accurate measuring cups spoons for any remaining volume needs, is a powerful step towards baking mastery.
Maintaining Accurate Measurements Over Time
Regular Calibration and Testing Schedule
The accuracy of your measuring cups spoons isn't a one-time check. Over time, tools can be exposed to heat, dropped, or simply wear out, potentially affecting their precision. It's a good practice to establish a regular schedule for testing your accurate measuring cups spoons, perhaps every 6 to 12 months, or whenever you notice inconsistencies in your baking results that you can't attribute to other factors (like oven temperature or ingredient freshness).
Refer back to your measurement log from previous tests. This allows you to track if a specific tool's accuracy is degrading. Regular testing helps you catch problems early, before they ruin multiple batches of baked goods. It reinforces the importance of using accurate measuring cups spoons and keeps you mindful of potential measurement errors.
Recognizing Signs of Wear and Tear on Measuring Tools
Beyond scheduled testing, be observant of the physical condition of your measuring tools. Signs of wear and tear can be indicators that their accuracy is compromised. For plastic cups, look for cracks, chips, discoloration, or warping, especially around the rim or base. For metal tools, check for dents, bends that won't reshape, rust, or loose handles.
Faded or scratched-off measurement markings on liquid measuring cups are also a clear sign that they need to be replaced, as you can no longer reliably read the volume. Any tool that feels flimsy, looks misshapen, or shows significant signs of age and use should be suspect and tested for accuracy. Proactively replacing worn-out or damaged accurate measuring cups spoons is key to maintaining precision in your baking kitchen.
Conclusion: Bake with Confidence Using Accurate Measurements
Mastering the art of baking relies heavily on precision, and using accurate measuring cups spoons is a fundamental step in that journey. By understanding the difference between volume and weight measurements, knowing how to properly test your tools for accuracy, and implementing best practices for measuring, you build a foundation for consistent success. Regularly checking your measuring cups and spoons ensures they are reliable workhorses in your kitchen, helping you avoid common baking pitfalls caused by inaccurate ingredient amounts.
Whether you primarily use volume or are transitioning to weight, investing time in verifying and maintaining the accuracy of your measuring tools will pay dividends in delicious, reliable results every time you bake. Bake with confidence, knowing your measurements are spot on!
Frequently Asked Questions
How important is accuracy when using measuring cups and spoons in baking?
Accuracy is absolutely crucial in baking. Inaccurate measurements can drastically affect the texture, rise, and overall outcome of your baked goods. It's the foundation of recipe success.
What's the easiest way to test the accuracy of my measuring cups and spoons?
The simplest method involves using a kitchen scale to weigh water. One milliliter of water should weigh approximately one gram. Compare the weight to the expected volume marked on your measuring tools.
How often should I test my measuring cups and spoons for accuracy?
Ideally, you should test them every 6-12 months, especially if they are frequently used or made of materials prone to wear and tear. This helps maintain consistent baking results.
What can I do if I discover that my measuring cups and spoons are inaccurate?
If they're significantly off, consider replacing them with a new, reliable set. For slight inaccuracies, you can adjust your recipes accordingly, keeping a note of the discrepancies.
Are there any specific types of measuring cups and spoons that are generally considered more accurate?
Dry measuring cups (usually metal or plastic) are generally more accurate than liquid measuring cups for dry ingredients. Look for sets with clearly marked measurements and durable construction.
Final Reflection: The Importance of Accurate Measuring for Culinary Success
In the world of cooking and baking, precision is paramount; the accuracy of our measuring cups and spoons can make or break a recipe. As we delve deeper into the art of culinary creation, we recognize that even the smallest discrepancies in measurement can lead to significant variations in taste and texture. Understanding how to test and adjust our measuring tools is not just a technical skill, but a vital step towards achieving culinary excellence.
Cooking is an expression of creativity, yet it demands a foundation of precision. The way we measure ingredients influences not only the outcome of our dishes but also our confidence in the kitchen. By ensuring our measuring tools are accurate, we empower ourselves to explore new recipes and techniques without the fear of failure. Cooking is like love; it should be entered into with abandon or not at all.
— Harriet Van Horne. This quote encapsulates the spirit of cooking, reminding us that while creativity is essential, a solid understanding of our tools enhances our culinary adventures.
As you reflect on your own cooking journey, consider the role that accurate measuring plays in your success. Take the time to test and adjust your measuring cups and spoons, and embrace the confidence that comes with knowing your tools are reliable. Let this knowledge inspire you to experiment boldly in the kitchen, transforming simple ingredients into extraordinary dishes. Your culinary creations await—make every measurement count!
Unleash Your Inner Baking Pro: Perfect Measurements, Perfect Results!
Thanks for taking the time to learn how to ensure your measuring tools deliver baking perfection! You've now got the knowledge to conquer inconsistent results and create consistently delicious treats. Ready to put your new skills into action?
- Master the art of precise measuring: Practice your newfound techniques with your next baking project. Pay close attention to the details and see the difference accurate measuring makes!
- Share your baking wins (and challenges!): Tell us about your experiences using these methods in the comments below. We love hearing your success stories and tips!
- Challenge a friend to a measuring accuracy bake-off! See who can bake the most perfectly measured cake. (Don't forget to share your results with us! ).
So, what delicious recipe will you master with your newfound precision? Let's hear it in the comments!