
Why Does My Bread Taste Like Too Much Yeast?

Welcome to BakeWithEase, your haven for baking brilliance! Ever wondered why your homemade bread sometimes carries an overpowering, almost unpleasant yeasty flavor? You're not alone. Dive into our comprehensive guide, " Why Does My Bread Taste Like Too Much Yeast?," and unlock the secrets to achieving perfectly balanced, flavorful loaves. Discover the common culprits and simple solutions that will transform your bread baking from frustrating to fantastic. Ready to banish that unwanted yeasty tang for good?
- Why Does My Bread Taste Like Too Much Yeast? Bake With Ease Troubleshooting Guide
- Understanding the Bread Yeast Flavor Problem
- Common Causes of Excessive Yeast Flavor in Bread
- Troubleshooting Your Bread Yeast Flavor Issues
- Preventing a Strong Yeast Taste in Your Bread
- Advanced Techniques for Controlling Yeast Flavor
- Conclusion: Mastering Bread Flavor and Avoiding the Yeasty Taste
- Frequently Asked Questions
- Final Reflection: The Unexpected Delights (and Disasters) of Yeast
- Unlock Your Bread's True Potential!
Why Does My Bread Taste Like Too Much Yeast? Bake With Ease Troubleshooting Guide
Understanding the Bread Yeast Flavor Problem
A common frustration for home bakers is biting into a beautiful loaf only to be met with an overpowering, sometimes unpleasant, yeasty taste. This "bread yeast flavor problem" can range from a slight off-note to a dominant, almost alcoholic flavor that detracts significantly from the bread's overall appeal. It's a clear sign that something in the fermentation or baking process hasn't gone quite right, and understanding the root causes is the first step to achieving delicious, well-balanced bread.
This guide will help you diagnose why your bread might taste too strongly of yeast and provide actionable steps to fix it. We'll explore the science behind yeast activity, common pitfalls in the baking process, and techniques to ensure your next loaf has that perfect, subtle fermentation character, free from the dreaded excessive yeast flavor. Tackling the bread yeast flavor problem is key to elevating your baking.
Identifying the Off-Putting Yeast Taste in Homemade Bread
The taste of "too much yeast" is often described as sharp, alcoholic, or even slightly bitter. It's different from the pleasant, complex flavors developed during proper fermentation. When yeast activity is excessive or uncontrolled, it can produce higher levels of byproducts like ethanol and acetaldehyde, which contribute to these undesirable flavors. Think of the difference between the rich aroma of sourdough starter and the harsh smell of fermenting fruit gone wrong – the same principle applies to yeast in bread dough.
Beyond the primary yeasty flavor, you might also notice a strong, sometimes vinegary smell from the dough during proofing, or a finished loaf that feels slightly gummy or dense despite appearing to have risen well. These are often accompanying symptoms of the underlying issue causing the bread yeast flavor problem. Recognizing these signs early can help you adjust your process before the loaf is even baked.
The Impact of Yeast on Bread Flavor
Yeast is essential for leavening bread, creating the airy texture we love, but its role in flavor development is equally critical. During fermentation, yeast consumes sugars in the flour and produces carbon dioxide (for rise) and ethanol, along with a host of other aromatic compounds. These compounds are what give properly fermented bread its depth of flavor, aroma, and slight tang.
However, the balance is delicate. If yeast is too active, used in excessive amounts, or allowed to ferment for too long under warm conditions, it can produce an overabundance of certain compounds while failing to develop others. This imbalance leads to the strong, one-dimensional yeast flavor that signals a bread yeast flavor problem. The goal is to encourage yeast activity that builds complex flavors, not just rapid leavening.
Common Causes of Excessive Yeast Flavor in Bread
Several factors can contribute to an overly yeasty taste in your homemade bread. Understanding these common culprits is crucial for diagnosing and fixing the bread yeast flavor problem in your baking. It often comes down to issues with yeast quantity, fermentation time, or baking temperature.
Pinpointing the exact cause might require a bit of experimentation, as these factors can interact with each other. For instance, using slightly too much yeast might not be an issue if proofing time is carefully controlled, but combined with over-proofing, it almost guarantees a strong yeast flavor. Let's break down the most frequent reasons behind this common baking challenge.
Over-Proofing: A Key Culprit in Yeasty Bread
Over-proofing occurs when dough ferments for too long or at too high a temperature. Yeast consumes most of the available sugars during this extended period, leading to exhaustion and the production of off-flavors, particularly ethanol and acetic acid. The dough often becomes overly puffy, fragile, and may even start to collapse.
A prime example is dough left to proof overnight at room temperature when the recipe intended a shorter, warmer proof. The yeast works overtime, exhausting its food source and producing a sour, alcoholic smell. This excessive fermentation directly contributes to a pronounced, unpleasant yeast flavor in the final baked loaf, a classic manifestation of the bread yeast flavor problem.
How Over-Proofing Affects Bread's Flavor Profile
When dough over-proofs, the initial pleasant, slightly sweet aroma of fermentation gives way to a sharp, alcoholic, or even vinegary smell. This is because the yeast has moved past its peak flavor-producing phase and is now primarily generating less desirable metabolic byproducts. The complex, nuanced flavors that develop during optimal fermentation are lost or masked by these harsh notes.
Furthermore, over-proofed dough often lacks the necessary structure to hold its shape during baking. It may collapse in the oven (poor oven spring), resulting in a dense, heavy crumb. This lack of proper structure, combined with the off-flavors from excessive fermentation, creates a loaf that is not only texturally disappointing but also has a strong, lingering yeasty aftertaste, highlighting the bread yeast flavor problem.
Using Too Much Yeast in Your Bread Recipe
Simply adding too much yeast to your dough is a straightforward cause of a strong yeast flavor. More yeast means faster fermentation. While this might seem appealing for a quicker rise, it rushes the process, preventing the slow development of complex flavors and increasing the production of harsh-tasting byproducts in a shorter time.
For instance, a standard recipe for a lean bread might call for about 1-2% instant yeast relative to the flour weight (e.g., 5-10g of yeast for 500g of flour). Using double that amount will cause the dough to rise very quickly, but the resulting bread is much more likely to have a pronounced, unpleasant yeast flavor. This is one of the most direct ways to encounter the bread yeast flavor problem.
The Right Yeast-to-Flour Ratio for Optimal Flavor
Finding the optimal yeast-to-flour ratio is crucial for balanced flavor and proper leavening. This ratio varies depending on the type of yeast, the recipe (lean vs. enriched dough), the desired proofing time, and the temperature. As a general guideline for instant yeast in a standard loaf baked the same day, using around 1.5% of the flour weight is a common starting point (e.g., 7.5g for 500g flour). Active dry yeast often requires slightly more, maybe 2-2.5%, because some yeast cells are inactive, and it needs activation first.
Recipes designed for longer, slower fermentation (like overnight proofs in the refrigerator) will use significantly less yeast, sometimes as little as 0.1-0.5% instant yeast by flour weight. Using the amount specified for a quick rise in a slow fermentation recipe will definitely lead to a bread yeast flavor problem. Always check the recipe's intent regarding fermentation time and adjust yeast quantity accordingly, or use a reliable scale for accuracy.
Insufficient Baking Time: Leaving Behind a Yeasty Aftertaste
If bread is not baked thoroughly, residual yeast cells within the crumb may not be completely killed off, and fermentation byproducts like ethanol might not fully evaporate. This can leave a raw, doughy texture in the center and contribute to a lingering, unpleasant yeastiness, another facet of the bread yeast flavor problem.
Think of undercooked cake or brownies – they often have a raw flour or baking soda taste. Similarly, underbaked bread can retain flavors associated with uncooked dough and active yeast, even if the crust looks done. Proper baking is essential to complete the process initiated during fermentation and eliminate undesirable flavors.
Ensuring Proper Internal Temperature for Delicious Bread
The most reliable way to ensure bread is thoroughly baked is to check its internal temperature. For most lean bread (like sourdough or baguettes), a fully baked loaf should reach an internal temperature of 200-210°F (93-99°C). Enriched doughs (containing eggs, milk, or sugar) may need slightly higher temperatures, around 190-200°F (88-93°C), as the added ingredients affect the crumb structure.
Using an instant-read thermometer is highly recommended. Insert it into the thickest part of the loaf, avoiding any large air pockets. If the temperature is below the target range, continue baking for a few more minutes and check again. This simple step helps prevent the raw, yeasty interior that contributes to the bread yeast flavor problem.
Type of Yeast Used and Its Impact on Flavor
While all commercial baker's yeast (Saccharomyces cerevisiae) performs the same basic function, different types can have subtle differences in flavor profile, especially when used in varying quantities or fermentation conditions. Fresh yeast is often praised for producing clean, subtle flavors, while active dry and instant yeast are more convenient and widely used.
The crucial factor is often the quantity needed and how quickly they work. Instant yeast is designed to be highly active and rapid, which can contribute to a stronger yeast flavor if not managed properly. Understanding the characteristics of each type helps in selecting the best one for your desired outcome and avoiding the bread yeast flavor problem.
Comparing Different Yeast Varieties: Fresh, Active Dry, and Instant
- Fresh Yeast: Also known as cake yeast, it's a moist block containing active yeast cells. It's highly perishable and typically used in commercial settings or by experienced home bakers. It's often measured by weight. A common substitution ratio is 3 parts fresh yeast to 1 part active dry or instant yeast by weight (e.g., 30g fresh yeast substitutes 10g instant yeast). It tends to produce a clean, less pronounced yeast flavor compared to dry yeasts when used correctly.
- Active Dry Yeast: This is granular yeast that needs to be proofed (activated) in warm liquid before being added to the dough. The granules contain inactive yeast cells surrounded by a protective layer. It's less active than instant yeast and generally requires a longer rise time. Using it in place of instant yeast without adjusting quantity or proofing time can sometimes lead to a milder yeast flavor, but mis-measuring can still cause the bread yeast flavor problem.
- Instant Yeast: Also called rapid-rise or quick-rise yeast, it's dried yeast that doesn't require proofing and can be mixed directly with dry ingredients. It's processed to be more active than active dry yeast, leading to faster rises. While convenient, its rapid activity means it's easier to over-proof dough, potentially contributing more quickly to the bread yeast flavor problem if not used precisely. It's typically used in slightly smaller quantities than active dry yeast.
Troubleshooting Your Bread Yeast Flavor Issues
If you've identified a strong yeast taste in your bread, don't despair! Troubleshooting involves adjusting specific steps in your process based on the likely cause. By making small, targeted changes, you can significantly improve your bread's flavor profile and banish the bread yeast flavor problem.
Focus on one or two adjustments at a time so you can isolate which change made the difference. Keep notes on your process – temperature, times, measurements – as this data is invaluable for refining your technique and consistently producing delicious bread.
Adjusting Your Proofing Time for Better Bread Flavor
If over-proofing is suspected, shorten your proofing time or reduce the proofing temperature. Instead of relying solely on the clock, pay close attention to the visual and tactile cues of the dough. A dough that is ready to bake should be visibly larger (often doubled or nearly doubled, depending on the recipe), feel airy, and retain an indentation when gently poked with a finger, but it shouldn't collapse completely.
For example, if your recipe suggests proofing for 1-1.5 hours at room temperature and your bread tastes yeasty, try reducing the time to 50-60 minutes or proofing in a slightly cooler spot in your kitchen. Alternatively, consider a slower, colder proof in the refrigerator overnight, which develops more complex flavors and is less prone to over-proofing off-flavors, helping to solve the bread yeast flavor problem.
Visual Cues for Properly Proofed Dough
- The Poke Test: Gently press a floured finger into the dough about half an inch deep.
- If the indentation springs back immediately, the dough is under-proofed.
- If the indentation slowly springs back halfway, the dough is likely properly proofed.
- If the indentation remains fully or mostly indented and doesn't spring back, the dough is likely over-proofed.
- Size and Appearance: The dough should have significantly increased in volume, appearing puffy and aerated. The surface should look smooth and taut (if shaped), not stretched thin or bubbly to the point of tearing.
- Feel: Properly proofed dough feels light and airy when you handle it gently. Over-proofed dough can feel very fragile and may deflate easily.
Measuring Yeast Accurately: Avoiding Excess
Using too much yeast is a straightforward fix: measure accurately. Relying on volume measurements (teaspoons or tablespoons) for yeast can be imprecise, as the density of yeast granules can vary. A kitchen scale is the most accurate tool for measuring yeast by weight, which is the standard in professional baking and many modern recipes.
If a recipe calls for 1 teaspoon of instant yeast, for example, this typically weighs around 3-3.5 grams. Using a scale ensures you add precisely the amount intended, minimizing the risk of rapid, flavor-compromising fermentation that contributes to the bread yeast flavor problem.
Tips for Precise Yeast Measurement
- Use a Digital Scale: Weighing your yeast is significantly more accurate than using measuring spoons. Even small scales designed for spices or jewelry can work for tiny amounts of yeast.
- Zero Out Your Container: Place your measuring container (a small bowl or cup) on the scale and press the "tare" or "zero" button before adding the yeast.
- Measure Dry Yeast Directly: For instant or active dry yeast, scoop it lightly into your measuring container or spoon and level it off if using volume, but weighing is always preferable.
- Handle Fresh Yeast Carefully: Fresh yeast should always be measured by weight. It crumbles easily, so accurate weighing is essential.
Baking Your Bread Thoroughly: Eliminating Raw Dough and Yeastiness
Ensure your oven is accurately preheated and bake your bread for the full time specified in the recipe, or longer if necessary, until it reaches the correct internal temperature. Ovens can be inaccurate, so using an oven thermometer is a good idea. If the crust is browning too quickly before the inside is done, you can lightly tent the loaf with foil for the last portion of the baking time.
A loaf that sounds hollow when tapped on the bottom is a traditional sign of doneness, but checking the internal temperature is the most reliable method to avoid an underbaked, yeasty interior and solve that aspect of the bread yeast flavor problem.
Checking for Doneness: The Tap Test and Internal Temperature
- The Tap Test: Carefully remove the loaf from the oven (use oven mitts!) and turn it upside down. Tap the bottom crust firmly with your knuckles. A properly baked loaf should sound hollow. This is a good indicator but not foolproof, especially for larger or enriched loaves.
- Internal Temperature: As mentioned earlier, use an instant-read thermometer inserted into the center of the loaf. Aim for 200-210°F (93-99°C) for lean breads and 190-200°F (88-93°C) for enriched breads. This is the most reliable way to confirm the interior is fully cooked and free of raw dough or residual yeastiness.
Choosing the Right Yeast for Your Recipe
While you can often substitute yeast types, understanding their characteristics helps. If you consistently get a strong yeast flavor using instant yeast in a recipe, you might try switching to active dry yeast (remembering to proof it and potentially allowing a slightly longer rise) or even fresh yeast if available. This can sometimes lead to a cleaner, less aggressive fermentation profile.
Conversely, if a recipe specifically calls for instant yeast for a quick rise, using active dry yeast might result in an under-risen loaf, but it's less likely to cause a bread yeast flavor problem due to over-proofing unless the fermentation is exceptionally long. Match the yeast type to the recipe's intended fermentation speed and flavor profile.
Understanding the Nuances of Different Yeast Types
Beyond speed, there are subtle differences. Some bakers feel fresh yeast imparts the best flavor, though it's less convenient. Active dry yeast is a reliable workhorse. Instant yeast is convenient for quick recipes but requires careful monitoring to prevent over-proofing and the associated bread yeast flavor problem. Some specialty yeasts exist too, like osmotolerant yeast for very sweet doughs, but for standard breads, the main three are key. Experimenting with different types in your go-to recipe can reveal subtle flavor differences.
Preventing a Strong Yeast Taste in Your Bread
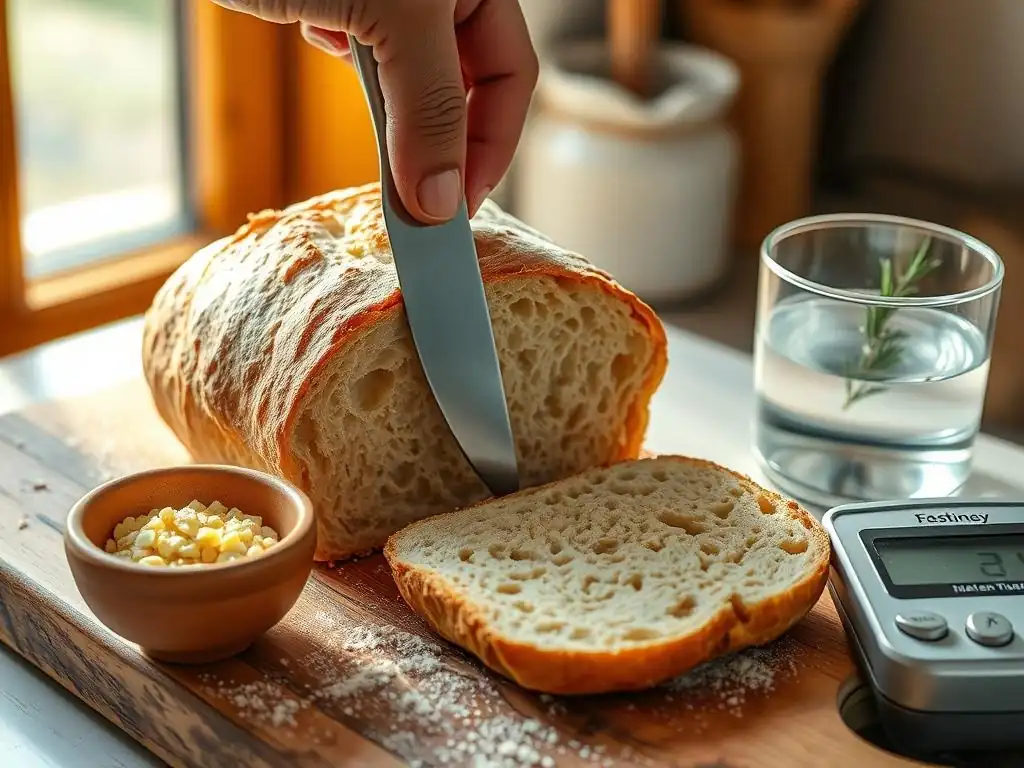
Prevention is key to consistently baking bread free from the bread yeast flavor problem. By optimizing your fermentation conditions and understanding how other ingredients interact with yeast, you can encourage the development of desirable flavors and minimize off-notes.
This involves more than just measuring yeast correctly; it's about controlling the environment in which the yeast works and balancing its contribution with other flavor components in your recipe.
Optimizing Fermentation for Flavor Development
Flavor in bread develops over time, primarily during fermentation. Slower, cooler fermentation generally produces more complex and desirable flavors compared to rapid, warm fermentation. This is because different metabolic pathways are favored at different temperatures, leading to a wider array of aromatic compounds being produced by the yeast and beneficial bacteria (especially in sourdough or doughs with pre-ferments).
Consider incorporating a period of cold fermentation in the refrigerator. Even a few hours can significantly improve flavor, and overnight or longer ferments are common practice for developing deep, nuanced tastes while minimizing the harsh notes associated with the bread yeast flavor problem.
The Role of Temperature in Yeast Activity
Temperature is a critical factor controlling yeast activity.
- Warm temperatures (75-85°F / 24-29°C): Yeast is highly active, leading to rapid rising. This is good for a quick turnaround but less ideal for complex flavor development. It also increases the risk of over-proofing and the bread yeast flavor problem.
- Room temperature (68-72°F / 20-22°C): A balanced temperature for many recipes, allowing for a reasonable rise time and decent flavor development.
- Cool temperatures (40-50°F / 4-10°C): Yeast activity is significantly slowed down. This is ideal for long, slow fermentation (retarding), which maximizes flavor complexity and minimizes the production of harsh, yeasty notes.
Enhancing Bread Flavor with Other Ingredients
Salt, sugar, and even flour type play a role in balancing and enhancing bread flavor. Salt doesn't just season the bread; it also helps control yeast activity, slowing it down slightly for better flavor development. Too little salt can lead to a bland taste and potentially contribute indirectly to a perceived bread yeast flavor problem if the yeast notes are not balanced.
Sugar, while food for yeast, also adds sweetness and aids in crust browning. Using the right type and amount of flour can also impact flavor; whole wheat or rye flours introduce different flavor compounds that can complement or mask yeast notes.
Balancing Yeast Flavor with Salt, Sugar, and Other Flavor Enhancers
- Salt: Ensure you are using the correct amount of salt (typically 1.8-2.2% of the flour weight). Don't reduce salt excessively, as it's vital for flavor and yeast control.
- Sugar: While sugar feeds yeast, excessive sugar can also contribute to a strong fermentation flavor if not balanced with other ingredients and proper proofing.
- Fat (Butter, Oil): Fats can soften the crumb and carry flavors, potentially mellowing a strong yeast taste.
- Diastatic Malt Powder: A small amount (0.5-1% of flour weight) provides enzymes that break down starch into sugars, aiding fermentation and crust browning, which can contribute to overall better flavor balance.
Storing Yeast Properly to Maintain Freshness
Expired or improperly stored yeast can lose viability. While this usually results in dough that doesn't rise, yeast that is partially active but not vigorous can sometimes produce off-flavors as it struggles to ferment. Storing yeast correctly ensures it performs as expected, contributing positively to flavor rather than causing a bread yeast flavor problem.
Always check the expiration date on your yeast package. Once opened, dry yeast should be stored in an airtight container in the refrigerator or freezer to maintain its potency. Fresh yeast must be kept refrigerated and used within its short lifespan.
Ensuring Yeast Viability for Consistent Results
To test if your active dry or instant yeast is still viable:
- Warm a small amount of water (around 105-115°F / 40-46°C) - about 1/4 cup.
- Stir in a pinch of sugar.
- Sprinkle about 1 teaspoon of yeast over the water (no need to stir instant yeast in).
- Wait 5-10 minutes. If the yeast is alive, it will bloom, forming a foamy layer on the surface. If there's no activity, the yeast is dead and should be discarded. This simple test can save you from a failed loaf and potential bread yeast flavor problems caused by weak yeast.
Advanced Techniques for Controlling Yeast Flavor
For bakers looking to go beyond the basics and develop truly exceptional bread flavor, incorporating pre-ferments or using cold fermentation (retarding) are powerful techniques. These methods extend the fermentation process and encourage the development of complex flavors that naturally overshadow any potential harsh yeast notes, effectively preventing the bread yeast flavor problem at a deeper level.
These techniques require a bit more planning and time but are incredibly rewarding in terms of the depth and nuance they bring to your bread.
Using a Pre-Ferment (Poolish or Biga) to Develop Complex Flavors
A pre-ferment is a portion of flour, water, and a small amount of yeast mixed ahead of time and allowed to ferment for several hours or overnight before being added to the main dough. Common types include poolish (equal parts flour and water, very wet) and biga (lower hydration, stiffer dough). The long, slow fermentation of the pre-ferment develops a wide range of aromatic compounds and organic acids.
When the pre-ferment is added to the final dough, it inoculates it with active yeast and, more importantly, a wealth of flavor precursors. This allows the main dough fermentation to be shorter and less prone to developing the off-flavors associated with the bread yeast flavor problem, as much of the flavor work has already been done.
How Pre-Fermen ts Reduce Yeasty Tastes
Pre-ferments allow a small amount of yeast (or wild yeast in a sourdough starter) to work on a limited amount of flour and water over an extended period. This slow activity promotes the formation of beneficial acids and complex flavor compounds that wouldn't develop in a rapid bulk fermentation.
By the time the pre-ferment is added to the final dough, the main yeast growth phase is managed, and the dominant flavors come from the desirable byproducts of the pre-ferment's long fermentation, rather than the quick ethanol production of a fast main dough rise. This effectively masks or prevents the harsh taste of excessive yeast activity.
Retarding Dough in the Refrigerator for Enhanced Flavor
Retarding, or cold fermentation, involves placing the dough in the refrigerator (typically 38-45°F / 3-7°C) for a prolonged period, often 12-72 hours. The cold temperature dramatically slows yeast activity but allows enzymes in the flour to break down starches into sugars, providing a slow, steady food source for the yeast and other beneficial microbes.
This slow, cold process is ideal for developing complex flavors and improving dough structure. It's a staple technique in artisan bread making. The extended fermentation time allows subtle flavors to deepen and mature, resulting in bread with a more nuanced taste and aroma, effectively minimizing the likelihood of a bread yeast flavor problem.
Cold Fermentation and Its Impact on Bread Flavor
During cold fermentation, yeast activity is slowed, reducing the rapid production of ethanol that can lead to a strong yeast taste. Simultaneously, enzymatic activity continues, breaking down complex carbohydrates into simpler sugars. This not only provides a sustained food source for the yeast but also contributes to better crust browning during baking. Organic acids, which provide desirable tang and complexity (especially in sourdough or doughs with pre-ferments), also develop more prominently in the cold. The result is a loaf with a richer, more balanced flavor profile that is far less likely to suffer from an overpowering yeast taste.
Conclusion: Mastering Bread Flavor and Avoiding the Yeasty Taste
Encountering the bread yeast flavor problem in your baking can be discouraging, but it's a common hurdle that is easily overcome with a little knowledge and practice. By understanding the role of yeast, paying attention to proofing times and temperatures, measuring ingredients accurately, and ensuring proper baking, you can significantly improve the quality and flavor of your homemade bread.
Remember that baking is a process of continuous learning and adjustment. Don't be afraid to experiment with different techniques, like using pre-ferments or cold fermentation, to find what works best for you and your environment. With these tips and a bit of patience, you'll be well on your way to baking loaves with perfectly balanced flavor, free from that unwelcome strong yeast taste, and truly master the art of baking with ease.
Frequently Asked Questions
What causes bread to taste like too much yeast?
Bread can taste overly yeasty due to excessive yeast used in the recipe or insufficient fermentation time. Adjusting these factors can improve flavor.
How can I reduce the yeast flavor in my bread?
To minimize the yeast flavor, you can use less yeast or allow the dough to ferment longer, which enhances the overall taste by allowing other flavors to develop.
What is the role of fermentation in bread making?
Fermentation is crucial in bread-making as it not only helps the dough rise but also develops its flavor profile. Longer fermentation can lead to a more complex taste.
Should I use instant yeast or active dry yeast to avoid yeast flavor?
Both instant yeast and active dry yeast can be used effectively. The choice depends on your preference, but proper measurement and fermentation are key to avoiding a strong yeast flavor.
Can adding ingredients affect yeast flavor?
Yes, adding ingredients like sugar, salt, or fats can help balance the yeast flavor. These ingredients enhance the overall taste and texture of the bread.
Final Reflection: The Unexpected Delights (and Disasters) of Yeast
The subtle art of bread baking, often romanticized, hinges on a surprisingly volatile ingredient: yeast. A seemingly minor imbalance can transform a hopeful loaf into a yeasty nightmare, a stark reminder that even the simplest recipes demand precision and understanding. This isn't just about avoiding a bitter taste; it's about mastering the fundamental chemistry that brings life to our bread.
The quest for the perfect loaf has been a journey of discovery, not just for me, but for bakers throughout history. The delicate balance between yeast activity and other ingredients underscores the interconnectedness of the baking process. Bread is the staff of life,
they say, and indeed, the quality of that staff depends on a deep understanding of its components. This exploration into yeast's role has highlighted the importance of patience, attention to detail, and the acceptance that not every bake will be perfect. It's in those imperfections, however, that we truly learn.
Now, I invite you to consider your own baking experiences. Have you encountered the bitter sting of excessive yeast? What adjustments did you make? More importantly, what have you learned from those successes and failures? The next time you approach a bread recipe, remember the delicate dance of yeast, and approach it with a renewed sense of curiosity and respect. The reward, a perfectly risen, deliciously flavorful loaf, is well worth the effort.
Unlock Your Bread's True Potential!
Thanks for taking the time to explore the mysteries of yeasty bread! We hope you now have a better understanding of what might be causing that off-flavor. Ready to take your baking to the next level?
- Master the art of yeast activation: Practice your yeast techniques with a simple recipe this weekend—it's the cornerstone of perfect bread!
- Share your baking journey: Tell us about your bread-making experiences in the comments below – we love hearing your tips and tricks (even the mishaps! ).
- Experiment with different flours: Explore how various flours affect yeast activity and overall bread flavor; you might discover a new favorite!
What unique flavor profile will you create in your next loaf?