
The Science Behind Perfect Chocolate Chip Cookie Spreading

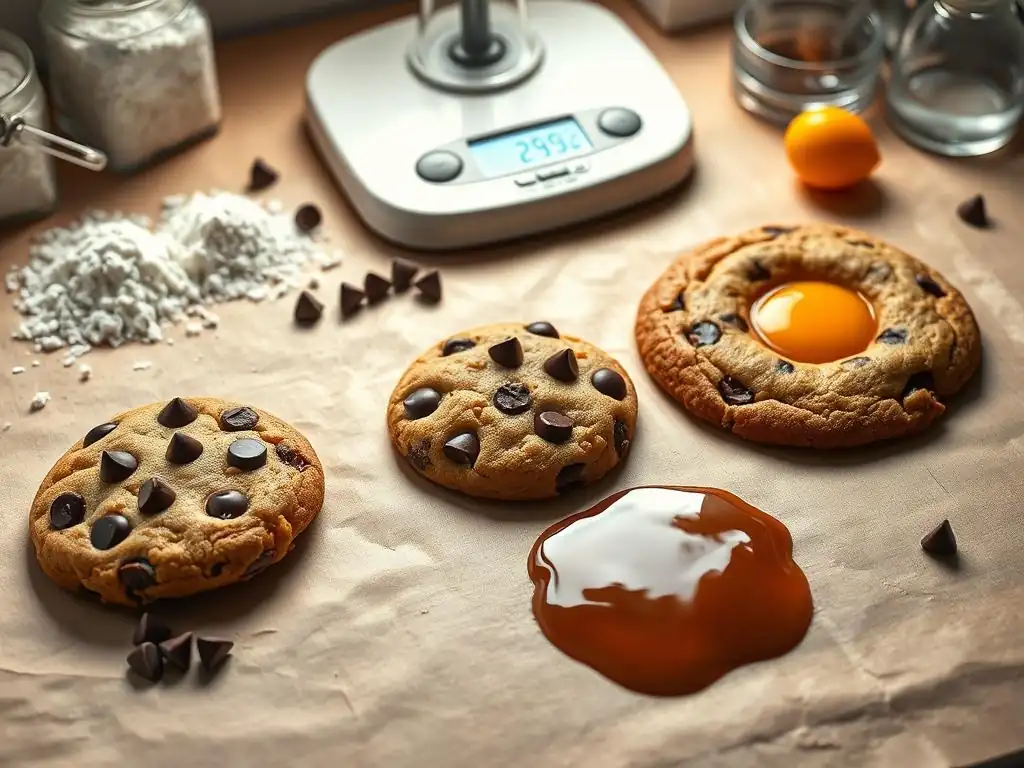
Welcome to BakeWithEase, where we demystify the delicious world of baking! Ever wondered why your chocolate chip cookies spread too much (or not enough)? In this article, we dive deep into the science behind perfect chocolate chip cookie spreading, uncovering the secrets to achieving that ideal balance of chewy and crisp. Prepare to unravel the mysteries of fats, sugars, and temperatures, and transform your baking game forever. Ready to bake the perfect cookie? Let's get started!
- The Science Behind Perfect Chocolate Chip Cookie Spreading: Bake the Ideal Cookie
- Introduction: Achieving the Perfect Spread in Chocolate Chip Cookies
- Understanding the Key Ingredients Affecting Cookie Spread
- The Impact of Baking Techniques on Chocolate Chip Cookie Spread
- Controlling Cookie Spread: Troubleshooting and Solutions
- Advanced Techniques for Perfect Chocolate Chip Cookie Spreading
- Recipe: BakeWithEase's Guaranteed Perfect Spreading Chocolate Chip Cookies
- Frequently Asked Questions
- Final Reflection: The Enduring Allure of the Perfectly Spread Cookie
- Unlock Your Perfect Cookie: Master the Spread!
Baking a batch of chocolate chip cookies seems simple, yet achieving that perfect chocolate chip cookie spreading can feel like a delicate dance between art and science. Some cookies spread into thin, crispy discs, while others remain thick and dense. Understanding the factors that influence how your cookie dough behaves in the heat of the oven is key to consistent, delicious results every time. This guide from BakeWithEase delves into the core principles that dictate cookie spread.
The journey to the perfect chocolate chip cookie involves more than just mixing ingredients; it's about understanding how heat interacts with flour, sugar, butter, and eggs. Each element plays a distinct role in the dough's structure and its ability to relax and spread during baking. By mastering these interactions, you gain control over the final texture and appearance, moving from unpredictable outcomes to reliably achieving that ideal balance of chewy center and slightly crisp edge, defined by just the right amount of spread.
The degree to which a chocolate chip cookie spreads significantly impacts its final texture and overall appeal. A cookie that spreads too much often becomes uniformly thin and crispy, lacking a soft, chewy interior. Conversely, a cookie that doesn't spread enough remains thick and cakey, sometimes even doughy in the center, missing that classic slightly flattened shape. The perfect chocolate chip cookie spreading results in a cookie with a lovely balance: a slightly crisp edge formed by controlled spread, transitioning into a soft, yielding center where the chocolate chips melt beautifully.
Beyond texture, spread also dictates the cookie's appearance. A well-spread cookie has that inviting, rustic look with slightly crinkled edges. It looks like a classic homemade treat. Achieving this visual standard is part of the satisfaction of baking. For many bakers, the ideal spread is a benchmark of a successful chocolate chip cookie, signifying that the ingredients were balanced and the baking process was executed correctly. It's not just about taste, but about creating a cookie that looks as good as it tastes, embodying the comforting appeal of this beloved dessert.
Welcome to BakeWithEase's comprehensive look at the science behind cookie spreading! We're breaking down the complex interactions that happen in your dough and oven into easy-to-understand concepts. Our goal is to equip you with the knowledge to not just follow a recipe, but to truly understand why certain steps are taken and how they influence the perfect chocolate chip cookie spreading. We'll explore the fundamental role of each ingredient and the critical impact of your baking techniques.
This guide is designed for bakers of all levels. Whether you're a beginner frustrated by unpredictable results or an experienced baker looking to fine-tune your technique, understanding the science is empowering. We'll cover everything from the hidden power of flour and sugar ratios to the often-underestimated importance of dough temperature and oven calibration. By the end, you'll have a toolkit of knowledge to troubleshoot common issues and consistently bake chocolate chip cookies with that coveted, ideal spread.
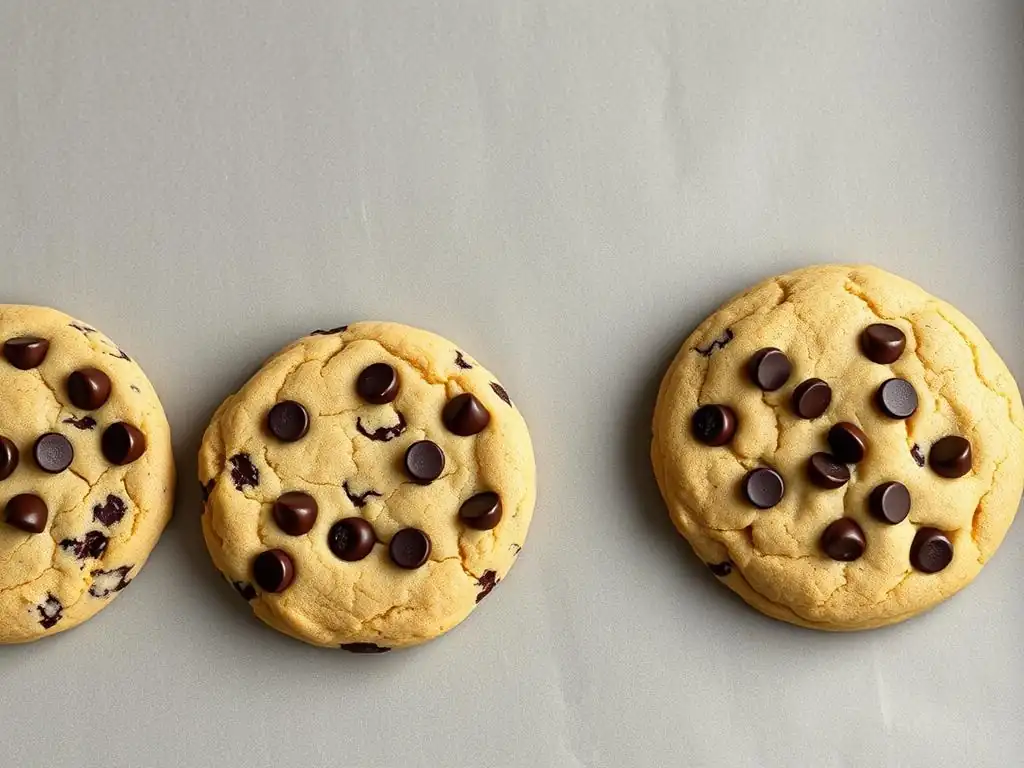
Every ingredient in your chocolate chip cookie recipe plays a specific role in structure, flavor, and, crucially, spread. Think of them as a team, each contributing to the final outcome. The balance and interaction between flour, sugar, butter, and eggs are fundamental to controlling how much your cookies flatten and spread in the oven. Understanding these roles is the first step towards achieving perfect chocolate chip cookie spreading.
Let's dive into the individual contributions of these core ingredients. We'll look at how variations in type, amount, and even preparation can dramatically alter the structure of your dough and, consequently, the shape and texture of your baked cookies. This foundational knowledge is essential for anyone looking to master the art of cookie baking and reliably produce cookies with the desired spread.
Flour provides the structural framework for cookies. Its protein content, primarily gluten, forms a network that holds the cookie together. The amount and type of flour used directly impact how much structure the dough has before baking and how resistant it is to spreading when heated. A higher protein flour or too much flour can create a stiffer dough that spreads less, resulting in thicker cookies, while less flour or a lower protein flour can lead to excessive spreading.
The starch in flour also absorbs moisture and gelatinizes during baking, contributing to the cookie's internal structure. The interaction between flour and liquid in the dough dictates the initial consistency. A dough with a higher flour-to-liquid ratio will be stiffer and spread less, while a wetter dough will spread more easily. This balance is critical for controlling the perfect chocolate chip cookie spreading.
Gluten Development and Its Impact on Cookie Texture
Gluten is formed when proteins in flour (glutenin and gliadin) combine with liquid and are agitated (like during mixing). In bread making, gluten development is crucial for creating an elastic structure. In cookies, however, excessive gluten development is often undesirable as it can lead to tough cookies. Minimal mixing after adding flour is generally recommended to limit gluten formation.
The extent of gluten development also affects spread. A dough with more developed gluten will be stronger and more resistant to spreading in the oven, resulting in thicker cookies. A dough with less gluten development will be more tender and prone to spreading. For a tender, slightly chewy cookie with good spread, minimizing mixing once the flour is added is a key technique. Aim for just mixing until the flour streaks disappear.
Choosing the Right Flour for Your Desired Spread
The type of flour significantly impacts cookie spread. All-purpose flour, typically containing 10-12% protein, is the standard for most chocolate chip cookie recipes. It provides a good balance of structure and tenderness. Using a lower protein flour like cake flour (around 8% protein) will result in a more tender cookie that tends to spread more due to less structural resistance from gluten.
Conversely, using a higher protein flour like bread flour (12-14% protein) will yield a chewier cookie that spreads less because of stronger gluten development potential. Some recipes even call for a blend of flours to achieve a specific texture and spread. For consistent perfect chocolate chip cookie spreading with a classic texture, sticking to standard all-purpose flour is usually the most reliable approach, but experimenting with other types can help you achieve different results.
Sugar's Influence: Sweetness and Spread Control
Sugar does more than just sweeten cookies; it plays a vital role in their structure, texture, and, importantly, spread. Sugar is hygroscopic, meaning it attracts and holds onto moisture. This helps keep cookies soft and moist over time. During baking, sugar melts at relatively low temperatures, contributing to the dough's ability to spread before the structure sets.
The ratio of sugar to other ingredients, as well as the type of sugar used, significantly affects the final cookie. Recipes with a higher sugar content tend to spread more because the sugar melts and thins the dough early in the baking process. This early melting allows the cookie to flatten out before the flour and eggs set the structure.
Granulated Sugar vs. Brown Sugar: A Spreading Showdown
Most classic chocolate chip cookie recipes use a combination of granulated sugar and brown sugar. Granulated sugar contributes to crispness and spread. It melts cleanly and helps the cookie edges flatten and crisp up. Brown sugar, which contains molasses, is more hygroscopic than granulated sugar and contributes moisture, chewiness, and a richer flavor.
Using more granulated sugar relative to brown sugar will generally result in a crispier cookie that spreads more. A higher proportion of brown sugar will lead to a chewier, softer cookie that spreads slightly less due to the added moisture and the structural contribution of the molasses. The balance between these two sugars is key to controlling both texture and achieving the perfect chocolate chip cookie spreading. For instance, a 1:1 ratio is common for a balanced cookie, while a 2:1 ratio of granulated to brown sugar might yield a crispier, wider cookie.
The Science of Sugar Crystallization in Cookies
As cookies bake and cool, the melted sugar undergoes a process called crystallization. This involves the dissolved sugar molecules re-forming into a solid, crystalline structure. This process contributes to the cookie's crispness, particularly at the edges where moisture evaporates more quickly.
The rate and extent of sugar crystallization are influenced by the type of sugar, baking temperature, and cooling process. Granulated sugar crystallizes more readily than brown sugar due to its purer sucrose content. This difference contributes to the distinct textures provided by each sugar type. Understanding this process helps explain why cookies become crispier as they cool and why recipes with more granulated sugar tend to be crispier and spread more widely.
Butter's Crucial Contribution: Flavor and Spread
Butter is arguably the most important fat in chocolate chip cookies, providing rich flavor and contributing significantly to texture and spread. Butter is an emulsion of fat, water, and milk solids. As butter melts in the oven, the water content turns to steam, which helps leaven the cookie slightly, while the fat lubricates the dough, allowing it to spread.
The state of the butter when it's incorporated into the dough has a dramatic effect on the final outcome. Cold, softened, or melted butter will all interact differently with the other ingredients and behave uniquely in the oven. This is one of the most controllable variables when aiming for perfect chocolate chip cookie spreading.
Melted Butter vs. Softened Butter: The Spread Difference
Using melted butter in chocolate chip cookies typically results in cookies that spread more widely and are chewier. When butter is melted, the water and fat components separate. When added to the dough, the fat coats the flour proteins more effectively, inhibiting gluten development and creating a more tender structure that spreads easily. The lack of air pockets (which are creamed into dough with softened butter) also contributes to a denser, chewier texture.
Creaming softened butter with sugar incorporates air into the dough. This aeration provides lift during baking, resulting in thicker, puffier cookies that spread less. The fat in softened butter is still solid enough to hold shape initially in the oven before melting, allowing the cookie structure to set partially before significant spreading occurs. For cookies with moderate spread and a softer center, using softened butter is preferred.
Butter Temperature and Its Impact on Cookie Dough Consistency
The temperature of your butter when you start mixing is critical. "Softened" butter usually means butter that has been left at room temperature (around 20-22°C or 68-72°F) until it's pliable but still holds its shape – you should be able to indent it easily with your finger. If butter is too cold, it won't cream properly with sugar, leading to a dense dough and less spread.
If butter is too warm or greasy, it won't hold air when creamed with sugar, resulting in a flat, greasy cookie that spreads excessively. Using butter that is just the right softness is essential for creating a dough with the proper structure and consistency to achieve the perfect chocolate chip cookie spreading. This is why many recipes specify "room temperature butter" and caution against using melted butter unless explicitly called for.
Egg's Binding Power and Spreading Potential
Eggs serve multiple functions in cookie dough: they bind ingredients together, contribute moisture, add richness, and aid in leavening. The proteins in eggs coagulate (set) when heated, providing structure to the cookie. The fat in egg yolks also contributes to tenderness and richness.
The number of eggs used and whether you use whole eggs, yolks, or whites can influence the cookie's structure and spread. More eggs generally lead to a chewier, more cake-like cookie with slightly less spread due to the increased binding power and protein content.
Whole Eggs vs. Egg Yolks: Controlling Cookie Chewiness and Spread
Using whole eggs provides a balance of protein and fat, contributing to both structure and tenderness. The egg whites contain more protein and less fat; incorporating extra whites can lead to a crispier, flatter cookie with more spread as the protein structure is less rich and more prone to expanding outwards before setting.
Egg yolks, on the other hand, are rich in fat and emulsifiers (like lecithin). Using extra egg yolks results in a richer, more tender, and chewier cookie that spreads less. The fat content inhibits gluten development and creates a softer crumb, while the emulsifiers help create a smoother dough. To achieve the perfect chocolate chip cookie spreading with a rich, chewy center, some recipes call for an extra egg yolk.
Egg Emulsification and Its Effect on Cookie Dough
Eggs act as emulsifiers, helping to bind the fat and water components in the dough together. This creates a more stable and cohesive dough structure. Properly emulsified dough is smoother and less likely to separate.
The emulsification process, particularly when creaming softened butter and sugar with eggs, helps create a uniform mixture. This uniformity ensures that the fat is evenly dispersed, which contributes to consistent melting and spreading in the oven. A well-emulsified dough is less likely to result in uneven spreading or greasy spots in the final cookie.
Beyond the ingredients themselves, the way you handle the dough and the conditions under which you bake can dramatically alter cookie spread. Techniques like chilling the dough, the temperature of your oven, and even the baking time all play critical roles in determining how much your cookies flatten and set. Mastering these techniques is just as important as getting the ingredient ratios right for achieving perfect chocolate chip cookie spreading.
Let's explore how these various baking techniques influence the behavior of your cookie dough in the oven. Small adjustments in temperature or timing can lead to significant differences in the final texture and appearance of your cookies. Understanding the 'why' behind these techniques empowers you to troubleshoot and adapt recipes to your specific oven and desired outcome.
The Importance of Dough Temperature: Chilling for Controlled Spreading
Chilling cookie dough is a widely recommended step for a reason: it significantly impacts texture and spread. Cold dough holds its shape longer when it enters a hot oven. This delay in spreading allows the edges of the cookie to set slightly before the center fully warms up and the butter melts.
The result of chilling is often a thicker cookie with less overall spread, a chewier center, and sometimes enhanced flavor as the ingredients meld over time. Skipping the chilling step typically leads to cookies that spread much more rapidly and widely, often resulting in thinner, crispier cookies. For controlled, perfect chocolate chip cookie spreading, chilling is a non-negotiable step for many bakers.
Why Chilling Cookie Dough Works: Slowing Down the Spread
When cold cookie dough is placed in a hot oven, the butter is solid and the dough is firm. This initial structure resists the immediate urge to spread. As the oven heat penetrates the dough, the edges warm up and the butter begins to melt first. This allows the edges to spread slightly and set. Meanwhile, the center of the cookie remains colder, delaying its spread.
This differential melting and setting creates a cookie with thicker centers and slightly thinner, crispier edges – the hallmark of many beloved chocolate chip cookies. Chilling essentially buys the cookie dough time in the oven, allowing structure to develop at the edges before the entire mass collapses and spreads excessively. Some recipes call for chilling for as little as 30 minutes, while others recommend 24-72 hours for maximum flavor development and spread control.
Optimal Dough Chilling Time for Perfect Cookies
The optimal chilling time depends on the recipe and desired result. A minimum of 30 minutes in the refrigerator is often enough to firm up the dough and reduce excessive spread compared to baking room-temperature dough. For more significant effects on texture and flavor, chilling for 24 to 48 hours is often recommended. During longer chills, the flour hydrates more fully, the sugars break down slightly, and the flavors deepen.
Experimentation is key here. Chilling for 1-2 hours might provide a good balance of convenience and controlled spread. Chilling overnight often yields a cookie with noticeably better texture and spread. Dough chilled for too long (e.g., several days) might become too firm and require a few minutes at room temperature before scooping. For consistently perfect chocolate chip cookie spreading, aim for at least a 2-hour chill or follow specific recipe instructions.
Oven temperature is a critical factor influencing how quickly cookies spread and set. A properly calibrated oven baking at the correct temperature is essential for predictable results. If the oven is too hot, the outside of the cookie sets too quickly before the butter has fully melted and the dough has had a chance to spread adequately, resulting in thicker cookies.
If the oven is too cool, the butter melts and the dough spreads excessively before the structure sets, leading to thin, flat cookies. The recommended temperature range for most chocolate chip cookies is typically 175°C to 190°C (350°F to 375°F). Baking at 175°C (350°F) often results in slightly more spread and a softer texture than baking at 190°C (375°F), which tends to yield thicker, chewier cookies.
How Oven Temperature Affects Cookie Rising and Flattening
When cookie dough enters a hot oven, several things happen simultaneously. The butter melts, allowing the dough to relax and spread. Leavening agents (like baking soda) produce gas, causing the cookie to rise slightly. The proteins in the eggs and flour begin to coagulate and set, forming the cookie's structure.
In a hot oven (e.g., 190°C/375°F), the outer edges set quickly. This limits how much the cookie can spread horizontally while encouraging upward rise from leavening. In a cooler oven (e.g., 175°C/350°F), the butter melts and the dough spreads for a longer period before the edges set, resulting in a flatter cookie. For achieving perfect chocolate chip cookie spreading, ensure your oven temperature is accurate.
Calibrating Your Oven for Consistent Cookie Results
Oven thermostats can be notoriously inaccurate, often varying by as much as 10-25°C (20-50°F) from the set temperature. This variance can significantly impact cookie spread and baking time. Using an inexpensive oven thermometer placed inside your oven is the best way to check its accuracy.
If your oven consistently runs hot or cool, you can adjust the temperature setting accordingly or consider having it calibrated professionally. Knowing your oven's true temperature allows you to make informed decisions about baking time and temperature settings, leading to more consistent and reliable perfect chocolate chip cookie spreading results batch after batch. For example, if your oven runs 15°C cool, you might set it to 190°C to achieve an actual temperature of 175°C.
Baking time is closely linked to oven temperature and the desired cookie texture. It determines how much moisture evaporates from the cookie and how much the proteins and starches set. Under-baking leaves more moisture in the cookie, resulting in a softer, chewier center, while over-baking removes too much moisture, leading to a dry, hard cookie.
The baking time also influences the extent of browning, which contributes to flavor development through the Maillard reaction and caramelization. For perfect chocolate chip cookie spreading and texture, it's crucial to bake just until the cookies are set around the edges but still appear slightly soft and underdone in the center.
Achieving the Perfect Balance: Avoiding Over-Baking and Under-Baking
The ideal baking time for chocolate chip cookies is often a narrow window, typically 8-12 minutes depending on size, recipe, and oven. Baking for too short a time results in cookies that are too soft or even raw in the center and may collapse upon cooling. Baking for too long leads to uniformly hard, dry cookies that lack the desired chewy interior.
Aiming for that sweet spot ensures the edges are golden brown and set, providing structure, while the center remains slightly pale and soft, retaining moisture for chewiness. This balance is key to achieving not just the right texture but also maintaining the perfect chocolate chip cookie spreading profile that sets during the latter part of the bake.
Visual Cues for Perfectly Baked Chocolate Chip Cookies
Learning to recognize when your cookies are done by sight is more reliable than relying solely on a timer, as ovens vary. Look for the edges of the cookies to be set and lightly golden brown. The centers should still appear slightly soft, puffy, and maybe even a little glossy. They might look underdone, but they will continue to cook slightly from residual heat as they cool on the baking sheet.
Cookies that are uniformly golden brown across the entire surface are likely over-baked. Cookies that haven't spread much and still look like raw dough mounds need more time. Recognizing these visual cues is a skill that comes with practice but is essential for consistently baking cookies with the desired texture and perfect chocolate chip cookie spreading.

Even with the best recipe, sometimes cookies don't spread as expected. They might spread too much, becoming thin and crispy, or not enough, remaining thick and cakey. Troubleshooting these issues requires understanding the potential causes and knowing how to adjust your technique or even the dough itself. Don't worry, achieving perfect chocolate chip cookie spreading is a skill you can develop!
This section addresses common problems with cookie spread and provides practical solutions. By identifying what might have gone wrong, you can make targeted adjustments in your next batch or even attempt to salvage the current one.
Too Much Spreading: Identifying the Causes and Fixing the Dough
Excessive spreading is a common problem. It often results in cookies that are uniformly thin, brittle, and sometimes greasy. The primary culprits usually involve issues with fat temperature, ingredient ratios, or dough temperature before baking.
- Possible Causes:
- Butter was too soft or melted.
- Too much sugar (especially granulated).
- Too little flour.
- Dough was too warm when scooped/baked (not chilled enough).
- Oven temperature is too low.
- Too much leavening (especially baking soda).
If your cookies are spreading too much, consider which of these factors might be at play. A simple dough that's too warm is often the easiest fix.
Adjusting Ingredients to Reduce Excessive Spreading
If you consistently experience excessive spreading with a recipe, you might need to adjust the ingredient balance slightly for perfect chocolate chip cookie spreading. Increasing the flour amount by a couple of tablespoons per standard batch can provide more structure to resist spreading. Reducing the amount of sugar, particularly granulated sugar, can also help, as less melting sugar means less lubrication for spread.
Another adjustment is the fat type or state. Using softened butter instead of melted, or even substituting a portion of the butter with shortening (which has a higher melting point) can significantly reduce spread. However, altering fat can also change flavor and texture, so do this cautiously.
Techniques to Prevent Over-Spreading
The most effective technique to prevent over-spreading is properly chilling your dough. As discussed earlier, cold dough spreads less. Aim for at least 2 hours in the refrigerator, or even better, overnight. Ensuring your butter is at the correct 'softened' temperature (not melted or greasy) when creaming with sugar is also vital.
Checking and calibrating your oven temperature is another key step. If your oven runs cool, cookies will spread more before setting. Increase the oven temperature slightly if you suspect this is the issue (e.g., from 175°C/350°F to 180-185°C/360-365°F). Scooping uniform-sized cookies also helps them bake evenly and control spread.
Cookies that don't spread enough result in thick, often cakey or even raw-in-the-center results. This issue is typically caused by dough that is too stiff, either from too much flour, too little fat or liquid, or improper mixing.
- Possible Causes:
- Too much flour.
- Too little butter or liquid.
- Butter was too cold when mixed.
- Excessive mixing after adding flour (too much gluten development).
- Dough was too cold (chilled for too long).
- Oven temperature is too high.
- Too little leavening.
Identifying which factor is causing your cookies to remain too thick is the first step toward achieving perfect chocolate chip cookie spreading.
Tips for Promoting Spreading in Stiff Cookie Dough
If your dough seems too stiff, even before baking, it's a sign it might not spread enough. Ensure you are measuring your flour correctly (using the spoon-and-level method rather than scooping directly from the bag, which can compact flour). If the dough is very crumbly, you might need to add a tiny bit more liquid (like a teaspoon of milk or a bit more softened butter) to bring it together.
If your dough was chilled for a very long time (more than 48 hours), allowing it to sit at room temperature for 10-15 minutes before scooping can help it relax slightly and encourage spreading. Baking on a warm or unlined baking sheet (rather than parchment or silicone) can also promote slightly more spread by allowing the bottom of the cookie to heat up faster.
Adding Moisture to Encourage Spread
Sometimes, a dough is simply too dry, leading to insufficient spread. This could be due to inaccurate measurement, differences in flour absorption, or environmental factors (like very dry air). If your dough is excessively stiff, adding a small amount of liquid can help.
Start by adding just a teaspoon or two of milk, cream, or even melted butter (carefully measured) to the dough and mixing until just combined. Be careful not to add too much, as this can lead to excessive spreading or a greasy texture. This small adjustment can provide the necessary moisture to allow the dough to relax and spread correctly in the oven, helping you achieve closer to perfect chocolate chip cookie spreading.
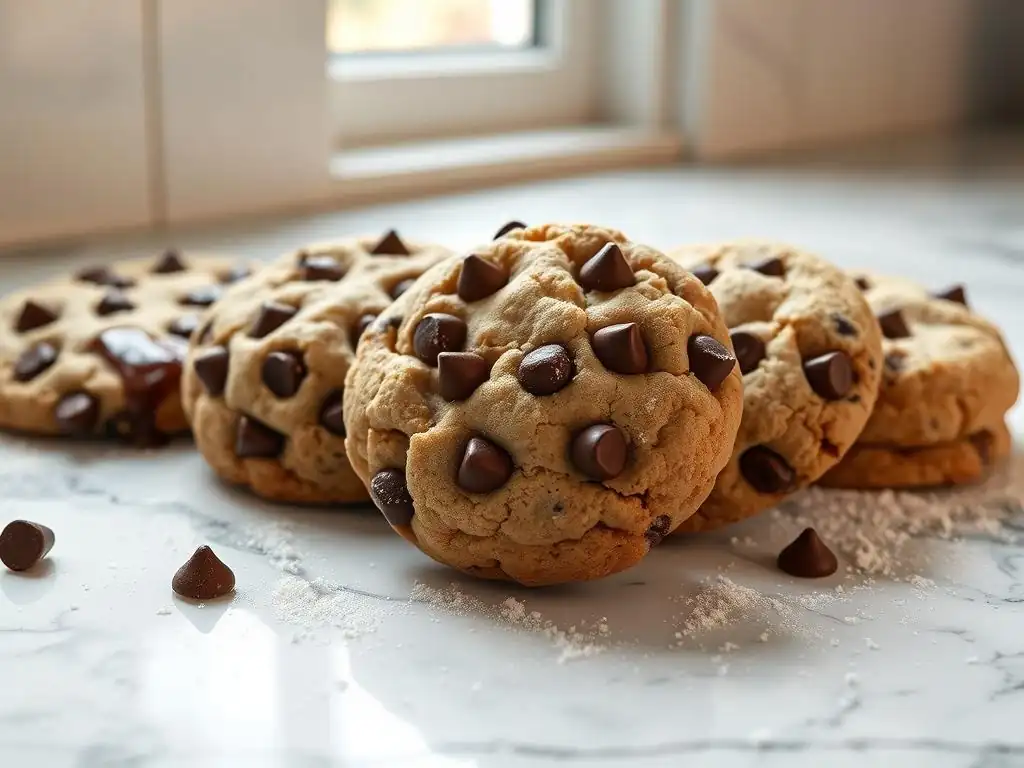
Once you understand the basics of how ingredients and techniques influence cookie spread, you can explore more advanced methods to fine-tune your results. This involves experimenting with different fats, adjusting leavening agents, and even considering the type of chocolate used. These techniques allow for greater control and customization to achieve your absolute perfect chocolate chip cookie spreading and texture.
Let's delve into how substituting ingredients or making precise adjustments to leavening can further refine your cookie baking skills. These methods build upon the foundational knowledge and open up possibilities for creating cookies with specific characteristics.
Exploring Different Fats: Shortening, Coconut Oil, and Their Impact
While butter is traditional and provides unmatched flavor, experimenting with other fats can alter cookie spread and texture. Shortening, a hydrogenated vegetable oil, has a higher melting point than butter (around 45-49°C or 115-120°F compared to butter's 30-35°C or 86-95°F). This higher melting point means cookies made with shortening spread less than those made with butter alone, resulting in thicker, puffier cookies. Shortening also inhibits gluten development more effectively than butter, leading to a very tender crumb.
Coconut oil is another alternative. Refined coconut oil has a neutral flavor and melts at a similar temperature to butter (around 24°C or 76°F, but varies). Cookies made with coconut oil tend to spread significantly, similar to or even more than those made with melted butter, and can have a slightly crispier texture. Using a blend of butter and shortening (e.g., 50/50) is a common technique to achieve a balance of flavor, tenderness, and controlled spread, aiming for that perfect chocolate chip cookie spreading.
The Role of Leavening Agents: Baking Soda vs. Baking Powder
Most chocolate chip cookie recipes use baking soda, sometimes in combination with baking powder. Baking soda requires an acid (like brown sugar or molasses) to react and produce carbon dioxide gas, which provides lift. Baking powder contains both an acid and a base and reacts when mixed with liquid and again when heated.
Baking soda contributes to spread and browning. Its reaction helps the cookie flatten out and encourages caramelization due to the alkaline environment it creates. Baking powder, on the other hand, primarily provides upward lift, resulting in thicker, puffier cookies with less spread. Using baking soda alone or primarily baking soda will generally result in more spread compared to recipes that use a significant amount of baking powder.
Adjusting Leavening for Optimal Cookie Texture
The type and amount of leavening agent used significantly impacts the final texture and spread. A recipe using only baking soda will typically yield a thinner, chewier, and browner cookie with more spread. A recipe using only baking powder will produce a thicker, cakier cookie with less spread.
Recipes often use a combination (e.g., 1 teaspoon baking soda and 1/2 teaspoon baking powder per batch). This combination aims for a balance: the baking soda promotes some spread and chewiness, while the baking powder provides a bit of lift for a softer interior. Experimenting with the ratio of baking soda to baking powder is a way to fine-tune the perfect chocolate chip cookie spreading and texture profile. For instance, increasing baking soda slightly can encourage more spread and chewiness.
Experimenting with Different Chocolate Types and Their Effect on Spread
While not a primary driver of dough spread, the type and form of chocolate used can influence the appearance of spread and the cookie's overall structure. Using chocolate chips that hold their shape during baking will result in distinct pockets of chocolate within the cookie structure. Using chopped chocolate, which melts more readily, can cause the melted chocolate to pool and spread slightly, potentially contributing to a slightly thinner cookie profile where the chocolate is located.
The size and density of the chocolate pieces also matter. Large, heavy chunks might cause the dough to spread more in certain areas or even collapse slightly. Using miniature chips or smaller chopped pieces can lead to more uniform spreading. While the science here is less about the dough's intrinsic spread and more about the inclusions' behavior, considering the chocolate type is part of optimizing the final cookie appearance and texture alongside achieving perfect chocolate chip cookie spreading.
Ready to put this knowledge into practice? This BakeWithEase recipe is designed to consistently deliver chocolate chip cookies with that sought-after perfect chocolate chip cookie spreading – slightly crisp edges, a chewy center, and beautiful ripples. We've balanced the ingredients and techniques based on the science we've discussed.
This recipe utilizes a combination of softened butter and a specific sugar ratio, along with a crucial chilling step, to control spread and develop flavor. Follow these steps carefully, and you'll be well on your way to baking your ideal chocolate chip cookies.
Here's what you'll need for a batch of cookies with excellent spread and texture:
- 225g (1 cup) unsalted butter, softened to room temperature
- 150g (3/4 cup) granulated sugar
- 175g (3/4 cup, packed) light brown sugar
- 2 large eggs
- 1 teaspoon vanilla extract
- 280g (2 1/4 cups) all-purpose flour
- 1 teaspoon baking soda
- 1/2 teaspoon salt
- 300g (approx. 1 3/4 cups) chocolate chips (a mix of milk and semi-sweet works well)
Task list:
- Gather all ingredients.
- Ensure butter is properly softened.
- Pre-measure all dry ingredients.
Step-by-Step Baking Instructions
Follow these steps precisely for best results and perfect chocolate chip cookie spreading:
- In a large bowl, cream the softened butter with both the granulated and brown sugars using an electric mixer on medium speed until light and fluffy, about 3-4 minutes. Scrape down the sides of the bowl.
- Beat in the eggs one at a time, mixing well after each addition. Stir in the vanilla extract.
- In a separate medium bowl, whisk together the flour, baking soda, and salt.
- Gradually add the dry ingredients to the wet ingredients, mixing on low speed just until just combined. Do not overmix. A few streaks of flour are okay.
- Stir in the chocolate chips using a spoon or spatula.
- Cover the dough tightly and refrigerate for at least 2 hours, or preferably 24-48 hours. This chilling step is crucial for controlled spread.
- Preheat your oven to 175°C (350°F). Line baking sheets with parchment paper.
- Scoop rounded tablespoons of dough (about 30-40g each) onto the prepared baking sheets, leaving about 5-7 cm (2-3 inches) between cookies to allow for spread.
- Bake for 10-12 minutes, or until the edges are golden brown and set, and the centers still look slightly soft and underdone.
- Let the cookies cool on the baking sheets for 5-10 minutes before transferring them to a wire rack to cool completely.
Baking Temperature: 175°C (350°F)
Baking Time: 10-12 minutes
Dough Chilling: Minimum 2 hours (Recommended 24-48 hours)
Yields: Approx. 24-30 cookies
Tips for Achieving Consistent Results Every Time
Consistency is key to reliably achieving perfect chocolate chip cookie spreading.
- Use a kitchen scale: Measuring ingredients by weight, especially flour, is far more accurate than volume and helps ensure consistent dough consistency batch to batch. 280g of flour is more reliable than 2 1/4 cups.
- Properly soften butter: Butter that is too cold won't cream correctly; butter that is too warm will lead to greasy, flat cookies. Aim for pliable but not melted.
- Don't skip chilling: This is the single most effective step in this recipe for controlling spread and enhancing flavor.
- Know your oven: Use an oven thermometer to ensure your oven is heating accurately. Adjust temperature or baking time as needed based on your oven's quirks.
- Don't overmix: Overmixing after adding flour develops gluten, leading to tougher cookies that spread less.
- Use a cookie scoop: This ensures uniform cookie size, which leads to more consistent baking time and spread across the batch.
By paying attention to these details and understanding the science behind them, you can consistently bake chocolate chip cookies with the perfect chocolate chip cookie spreading and the ideal balance of texture and flavor. Happy baking!
Frequently Asked Questions
The most common reason is using too much butter or butter that is too warm. This causes the dough to melt and spread rapidly in the oven.
High sugar content, especially brown sugar, contributes to spreading. Brown sugar is hygroscopic, meaning it attracts moisture, leading to a wetter dough that spreads more.
Flour provides structure. Using too little flour results in a weaker gluten network, making it difficult for the cookie to hold its shape, leading to excessive spread.
Yes! Chilling the dough solidifies the fats, which slows down the melting process in the oven. This gives the cookie time to set before it spreads too much, resulting in a thicker cookie.
What oven temperature is best for preventing excessive spread?
Baking at a slightly higher temperature (within the recommended range) can help the cookies set more quickly. This helps create structure before the fats melt completely, limiting spread.
The quest for the perfect chocolate chip cookie, a seemingly simple pursuit, reveals a surprisingly complex interplay of science and artistry. Understanding the science behind spreading allows us to move beyond mere luck and embrace a level of control that elevates the humble cookie to a culinary masterpiece. This isn't just about achieving a visually appealing cookie; it's about unlocking the potential for a truly exceptional texture and flavor experience.
The journey to understand cookie spreading has been a fascinating one, highlighting the subtle yet significant impact of seemingly minor ingredients and baking techniques. It's a testament to the power of observation and experimentation, a process that mirrors the evolution of culinary practices throughout history. The perfect spread isn't just about aesthetics; it's a reflection of our desire for precision and mastery over the simplest of pleasures. The best things in life are simple, but not easy.
This quote perfectly encapsulates the challenge and reward of perfecting the chocolate chip cookie.
Now, consider your own baking journey. What have you learned about the delicate balance of ingredients and techniques? Don't be afraid to experiment, to adjust recipes based on your own observations and preferences. The pursuit of the perfect spread is an ongoing process, a journey of discovery that rewards patience and a willingness to embrace both success and failure. Each batch, each experiment, brings you closer to understanding the science and the art of creating your own ideal chocolate chip cookie. Embrace the challenge, and savor the delicious results.
Thanks for joining us on this delicious journey into the science of the perfect chocolate chip cookie! We hope you gained valuable insights into achieving that golden, crispy-edged, perfectly soft center. Ready to put your new knowledge to the test?
- Bake a batch using your newfound knowledge! Experiment with different flours, chilling times, or baking temperatures to see how they impact the spread. Document your results – you might discover your new favorite cookie recipe!
- Share your cookie creations and results with us on social media! Use #BakeWithEasePerfectCookie to connect with other baking enthusiasts and inspire others.
- Leave a comment below: What's your biggest cookie baking challenge?
Ready to create your ultimate chocolate chip cookie? Let's hear your baking plans!