
Troubleshooting Common Issues When Baking with Artisan Flours

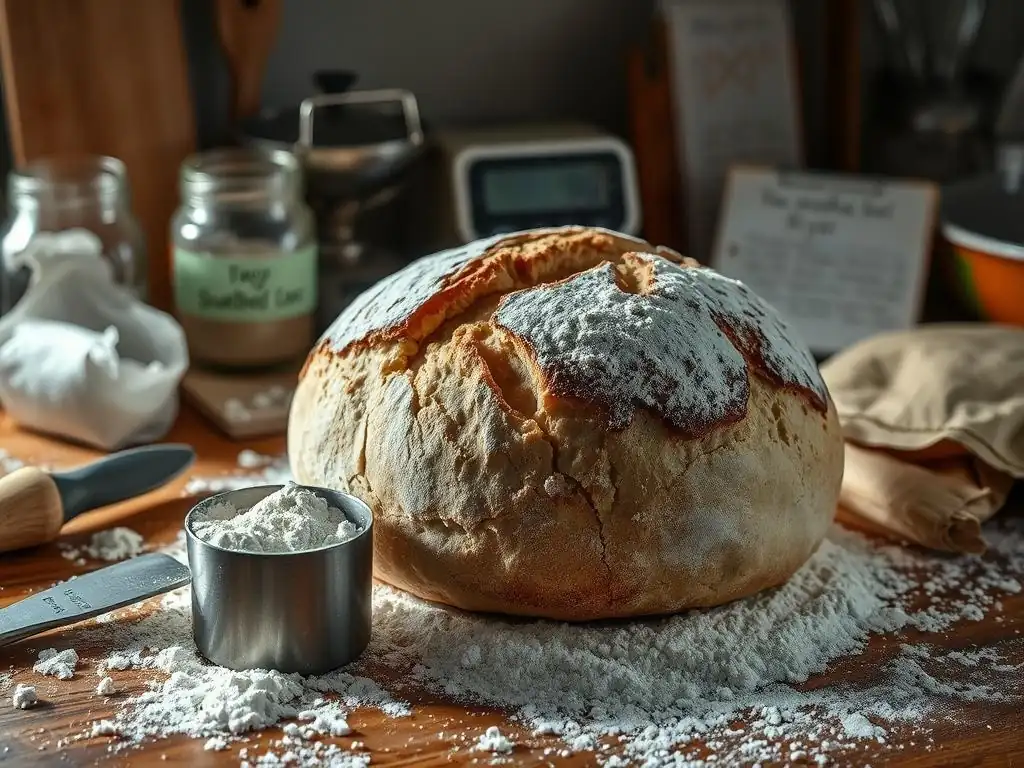
Welcome to BakeWithEase, your trusted guide to the delightful world of baking! Are you ready to unlock the full potential of artisan flours but keep encountering unexpected challenges? This comprehensive guide dives deep into common artisan flour baking problems, offering practical solutions and expert tips to help you achieve baking perfection. Curious how to overcome a gummy crumb or a dense loaf? Let's explore!
- Troubleshooting Common Issues When Baking with Whole Wheat Flour: A BakeWithEase Guide
- Understanding Whole Wheat Flour Baking Problems & Solutions
- Problem 1: Dough Too Sticky or Wet When Using Whole Wheat Flour
- Problem 2: Dense, Heavy Bread After Baking with Whole Wheat Flour
- Problem 3: Flat, Spreading Loaf with Whole Wheat Flour
- Problem 4: Crumbly Texture When Baking with Whole Wheat Flour
- Problem 5: Inconsistent Results When Using Whole Wheat Flour
-
Frequently Asked Questions
- What are some common problems bakers face when using artisan flours?
- How do artisan flours differ from all-purpose flour, and why does this matter?
- My bread dough made with artisan flour is too sticky. What should I do?
- How can I improve the texture of my baked goods when using artisan flour?
- Where can I find reliable recipes specifically designed for artisan flours?
- Final Reflection: The Enduring Allure of Artisan Flour, and the Joy of Baking Through Challenges
- Unlock Your Baking Potential: Master Artisan Flours Today!
Troubleshooting Common Issues When Baking with Whole Wheat Flour: A BakeWithEase Guide
Understanding Whole Wheat Flour Baking Problems & Solutions
Baking with whole wheat flour can be incredibly rewarding, bringing rich flavor and nutritional benefits to your loaves and pastries. However, many bakers encounter specific Artisan flour baking problems when transitioning from all-purpose flour, and whole wheat is a prime example. Its unique composition presents distinct challenges that can lead to frustrating results like dense loaves or sticky dough. Understanding why these issues occur is the first step to mastering whole wheat baking.
Fortunately, most common whole wheat flour baking challenges have straightforward solutions. By adjusting techniques, understanding the flour's properties, and paying close attention to the process, you can consistently produce delicious, beautifully textured baked goods. This guide breaks down the most frequent hurdles and provides practical, friendly advice to overcome them, turning potential Artisan flour baking problems into baking successes.
Why Whole Wheat Flour Can Be Tricky: A Beginner's Guide
Whole wheat flour differs significantly from refined white flour because it includes all parts of the wheat kernel: the bran, germ, and endosperm. Standard white flour is primarily just the endosperm. This inclusion of bran and germ is where many of the baking challenges arise. The bran flakes are sharp and can actually cut the developing gluten strands, inhibiting the strong network needed for a good rise. The germ contains fats that can also interfere with gluten formation and can potentially reduce shelf life slightly.
Furthermore, whole wheat flour typically absorbs water differently than white flour, often requiring more hydration but also having a tendency to become excessively sticky if not handled correctly. The presence of more fiber and protein (though not always gluten-forming protein) means the dough behaves differently during kneading, proofing, and baking. Navigating these differences is key to avoiding common Artisan flour baking problems specific to whole wheat.
Common Baking Challenges with Whole Wheat Flour
Bakers frequently encounter a few recurring issues when working with whole wheat flour. One of the most common is dough that feels overly sticky and difficult to handle, unlike the smooth, elastic dough often achieved with white flour. Another major hurdle is producing bread that is dense and heavy rather than light and airy, a direct result of the challenges bran poses to gluten development.
Other typical Artisan flour baking problems with whole wheat include loaves that spread out flatly instead of holding their shape and rising upwards, and bread with a crumbly or dry texture. Inconsistent results from one bake to the next can also be frustrating. Each of these problems stems from the unique characteristics of whole wheat flour and requires specific adjustments in technique or recipe to overcome.
Problem 1: Dough Too Sticky or Wet When Using Whole Wheat Flour
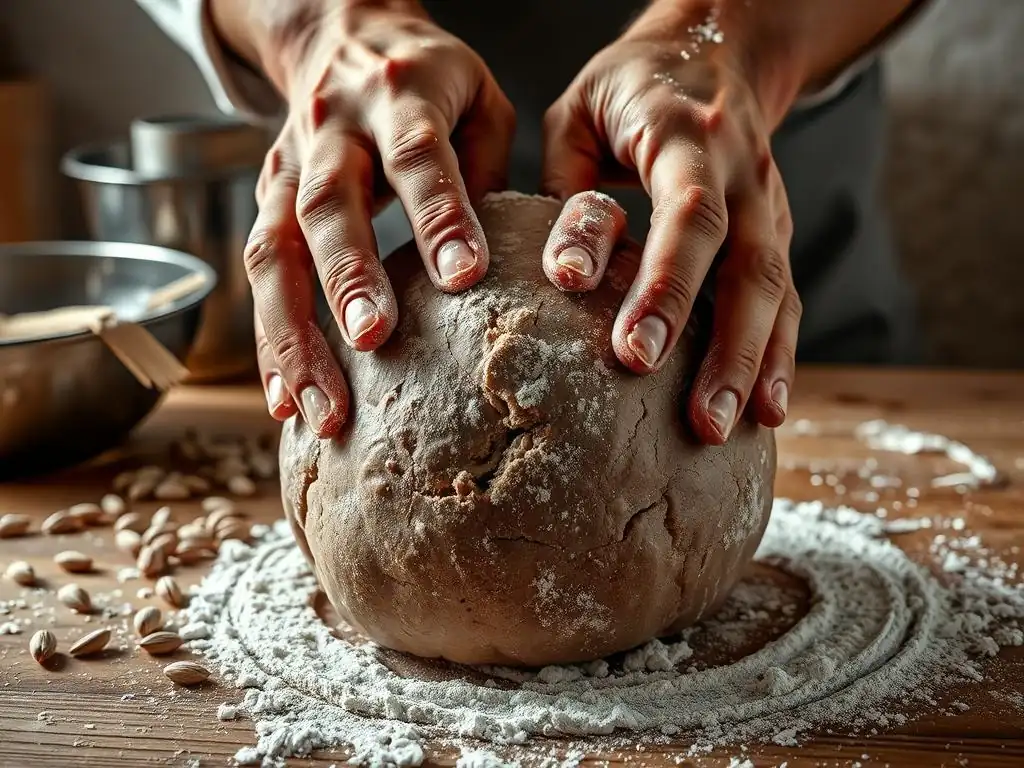
Experiencing excessively sticky dough is perhaps the most common frustration for bakers new to whole wheat flour. You might follow a recipe precisely, yet end up with a messy, unmanageable mass that sticks everywhere. This isn't necessarily a mistake on your part, but rather a characteristic behavior of whole wheat due to its composition and how it interacts with water.
Understanding the underlying reasons behind this stickiness is the first step to learning how to manage it effectively. It's not just about adding more flour; often, it requires a more nuanced approach to hydration, mixing, and handling. Addressing this common Artisan flour baking problem is crucial for enjoying the process of baking with whole wheat.
Causes of Excessively Sticky Dough with Whole Wheat Flour
Several factors contribute to the stickiness of whole wheat dough compared to white dough. The high fiber content, particularly the bran, plays a significant role in how the flour absorbs and holds onto water. While whole wheat often requires more total water, the bran also absorbs water more slowly initially, and then releases it during mixing and handling, leading to a feeling of excessive wetness.
Another key factor is simply the visual difference. Whole wheat dough, even when properly hydrated, tends to look and feel less smooth and more shaggy or sticky than white dough due to the visible bran particles interrupting the smooth surface. What might seem "too sticky" based on white flour experience could actually be the correct hydration level for whole wheat to achieve a good crumb structure later.
High Bran Content in Whole Wheat Flour Recipes
The bran in whole wheat flour is hygroscopic, meaning it loves to absorb water. However, it doesn't contribute to gluten development. When you mix dough, the bran particles compete with the gluten-forming proteins (glutenin and gliadin) for the available water. Initially, the bran might absorb a lot, but as mixing progresses and the gluten network starts to form, the bran can release some of that water, making the dough feel wetter than anticipated.
Moreover, the physical structure of the bran particles, being sharp and jagged, can interfere with the formation of a smooth, cohesive dough. They break up the developing gluten network, preventing the dough from becoming as smooth and non-sticky as white flour dough at similar hydration levels. This inherent characteristic contributes significantly to the perceived stickiness and is a major source of Artisan flour baking problems related to handling.
Incorrect Flour-to-Water Ratio: Measuring Mistakes
While whole wheat flour generally requires more water than white flour (sometimes 75-85% hydration or even higher for rustic breads), using too much water relative to the flour is a surefire way to end up with a sticky, unmanageable dough. Measuring flour by volume (cups) is notoriously inaccurate because flour can pack down differently. A cup of sifted flour weighs less than a cup scooped directly from the bag.
Using a kitchen scale to measure ingredients by weight provides far greater accuracy and consistency, which is crucial when dealing with the variable absorption rates of different flours, especially whole wheat. For instance, 1 cup of whole wheat flour can weigh anywhere from 100g to 130g depending on how it's measured, while 240g of water is always 240g. Small errors in measurement are a frequent cause of Artisan flour baking problems like overly wet dough.
Whole Wheat Flour's Unique Absorption Rate
Whole wheat flour absorbs water more slowly than white flour. When you first mix the dough, it might seem dry, tempting you to add more water. However, given time, the bran and germ will continue to hydrate. If you add too much water upfront based on the initial feel, the dough will become excessively sticky as the hydration catches up. This is why techniques like autolyse (mixing just flour and water and letting it rest) are particularly beneficial for whole wheat, allowing the flour to fully hydrate before salt and yeast are added.
The absorption rate also varies depending on the specific type of whole wheat flour, the milling process, and even the humidity of your kitchen. For example, finely ground whole wheat might hydrate differently than coarsely ground flour. Recognizing that whole wheat's hydration is a process, not an instant event, helps manage the stickiness and mitigate common Artisan flour baking problems.
Solutions for Managing Sticky Dough with Whole Wheat Flour
Managing sticky whole wheat dough is less about eliminating stickiness entirely and more about learning to work with it. Accepting that whole wheat dough will likely be stickier than white dough is the first step. Then, employing specific techniques can make it much more manageable and lead to better bread outcomes.
These solutions often involve careful hydration control, strategic mixing, and using the right tools. By implementing these tips, you can turn a potentially frustrating experience with sticky dough into a successful part of your whole wheat baking journey, effectively solving a common set of Artisan flour baking problems.
Reducing Hydration: A Step-by-Step Approach
If your whole wheat dough is consistently too sticky to handle comfortably, start by slightly reducing the amount of water in your recipe. Instead of adding all the water at once, hold back about 5-10% of the total liquid. Add most of the water initially, mix, and then gradually add the reserved water only if the dough seems too dry after a few minutes of mixing.
Pay attention to how the dough feels rather than strictly adhering to a percentage, especially when starting with a new whole wheat flour. A hydration level that works for one brand or type of whole wheat might be too high for another. This gradual approach allows you to feel how the dough is developing and avoid the initial over-hydration that causes significant Artisan flour baking problems.
Adding Flour Gradually: The "Feel" Test
While it's generally best to avoid adding large amounts of extra flour during kneading, a very small amount can be added if the dough is truly unmanageable. However, add it sparingly, a tablespoon at a time, and work it in completely before considering adding more. The goal isn't to make the dough completely non-sticky, but to make it workable.
A better approach than adding flour to the dough is to lightly flour your hands and your work surface. Use just enough flour to prevent sticking, not so much that it gets incorporated into the dough and changes the hydration significantly. Learning the "feel" of properly hydrated whole wheat dough takes practice; it will be tackier than white dough but should still develop some structure.
Using a Dough Scraper: Essential Tool for Sticky Dough
A bench scraper (also called a dough scraper) is an indispensable tool when working with sticky whole wheat dough. It allows you to gather and turn the dough without getting it stuck all over your hands. You can use it to lift sticky dough from the work surface and fold it over itself during kneading or stretching and folding.
Keeping the scraper slightly damp or floured can also help. Instead of trying to manhandle the sticky dough with your hands, rely on the scraper to do the heavy lifting, scraping it off the surface and folding it back onto itself. This technique is essential for managing the inherent stickiness and is a key method for tackling this aspect of Artisan flour baking problems.
Recommended Dough Scraper: OXO Good Grips Multi-purpose Scraper & Cutter
The OXO Good Grips Multi-purpose Scraper & Cutter is a popular choice among bakers for its comfortable, non-slip handle and sturdy stainless steel blade. Its wide blade is perfect for scooping and transferring dough, as well as for scraping sticky residue from your work surface.
This tool makes working with high-hydration or sticky doughs, like those made with whole wheat flour, much more manageable. It helps you keep your hands cleaner and allows you to perform kneading and shaping tasks more efficiently, directly addressing the handling difficulties associated with common Artisan flour baking problems.
Problem 2: Dense, Heavy Bread After Baking with Whole Wheat Flour
One of the most disheartening Artisan flour baking problems is pulling a whole wheat loaf out of the oven only to find it's heavy, dense, and brick-like inside, lacking the open, airy crumb you hoped for. This is a very common outcome for novice whole wheat bakers and is usually a result of issues related to gluten development, fermentation (proofing), or mixing technique.
Achieving a light and airy crumb with whole wheat flour requires overcoming the challenges posed by the bran and germ to the gluten network. It involves understanding how to encourage gluten development and how to properly proof the dough to build structure and volume before baking.
Why Whole Wheat Flour Might Result in Dense Bread
The primary reason whole wheat bread can turn out dense is the interference of the bran particles with the gluten network. Gluten is what traps the gases produced by yeast, causing the dough to rise and create an open crumb. The sharp edges of the bran can cut the delicate gluten strands as they form during mixing and kneading, preventing the development of a strong, elastic network capable of holding onto those gases effectively.
Additionally, under-proofing or over-proofing can lead to dense results. Under-proofing means the dough hasn't had enough time for the yeast to produce sufficient gas to lighten the loaf. Over-proofing, on the other hand, means the gluten structure that did develop has weakened and collapsed, leading to a lack of oven spring and a dense texture. These factors are central to many Artisan flour baking problems with whole wheat.
Insufficient Gluten Development in Whole Wheat Flour
Developing sufficient gluten is harder with whole wheat flour than with white flour because of the bran and germ interrupting the protein network. While whole wheat flour often contains more protein than white flour (sometimes 13-14% compared to 10-12% for all-purpose), not all of this protein is gluten-forming. The presence of non-gluten proteins and the physical interference of the bran mean that the gluten network is inherently weaker or less continuous than in white flour dough.
This means that whole wheat dough often requires more gentle handling or different mixing techniques to coax the gluten into forming a robust structure capable of trapping gas. Simply kneading for the same amount of time as white dough might not be sufficient, leading to a weak structure that collapses during baking and results in a dense crumb, a classic example of Artisan flour baking problems.
Lack of Proper Proofing: Time and Temperature Matters
Proofing is the fermentation period where yeast produces carbon dioxide gas, causing the dough to rise. With whole wheat dough, proofing can be tricky. The dough might not show as dramatic a rise as white dough because of the compromised gluten structure. Under-proofing is common because bakers might expect a doubling in size, which whole wheat dough doesn't always achieve before it's ready. Dough that hasn't proofed enough won't have sufficient gas built up for a good rise in the oven, leading to a dense crumb.
Conversely, over-proofing is also a risk. If the dough proofs for too long or at too high a temperature, the yeast can exhaust its food source, and the developed gluten structure can weaken and collapse. This leads to a loaf that might look puffy before baking but deflates in the oven, resulting in a dense texture. Finding the sweet spot for proofing is vital to avoid this common Artisan flour baking problem.
Over-Mixing or Under-Mixing Whole Wheat Flour Dough
Mixing whole wheat dough requires a balance. Under-mixing won't allow sufficient gluten to develop, resulting in a weak structure and dense bread. Over-mixing, however, can be even more detrimental with whole wheat. Because the bran is constantly cutting the gluten strands, excessive mixing can actually break down the limited gluten structure that has formed, leading to a slack, difficult-to-handle dough that won't hold its shape or rise properly.
Unlike white dough which can often withstand extended machine kneading, whole wheat dough benefits from gentler techniques like the autolyse method followed by shorter mixing or a series of stretch-and-folds. Paying attention to the dough's texture and elasticity is more important than sticking to a rigid mixing time to avoid this common Artisan flour baking problem.
How to Achieve Light and Airy Bread with Whole Wheat Flour
Achieving a light and airy crumb with whole wheat flour is entirely possible with the right techniques. It involves focusing on maximizing gluten development despite the challenges posed by the bran, and ensuring the dough is properly fermented and handled throughout the process.
These methods often take a little more time or attention than baking with only white flour, but the results are well worth the effort. Mastering these techniques is key to overcoming density issues and producing beautiful loaves, addressing significant Artisan flour baking problems head-on.
The Importance of Autolyse: Resting the Dough
The autolyse technique involves mixing just the flour and water from the recipe and letting the mixture rest for 20-60 minutes before adding salt, yeast, or starter. This resting period allows the flour to fully hydrate and gives the gluten-forming proteins time to begin developing on their own without the interference of salt (which tightens gluten) or yeast activity.
For whole wheat flour, autolyse is particularly beneficial because it gives the bran time to soften as it absorbs water. Softened bran is less likely to cut the developing gluten strands during subsequent mixing or kneading. This technique significantly improves dough extensibility and makes gluten development easier, directly combating a major cause of dense whole wheat bread and reducing Artisan flour baking problems.
Kneading Techniques for Gluten Development: Windowpane Test
Whole wheat dough often benefits more from gentle, intermittent kneading or stretching and folding rather than aggressive, continuous kneading, especially in a stand mixer. A stand mixer can easily overwork whole wheat dough, breaking down the gluten. Manual kneading or a series of stretch-and-folds (where you wet your hands, grab a side of the dough, stretch it up, and fold it over the center, repeating around the dough several times) performed every 30-60 minutes during the bulk fermentation is often more effective.
You can test for sufficient gluten development using the "windowpane test." Take a small piece of dough and gently stretch it between your fingers. If you can stretch it thin enough to see light through it without it tearing, the gluten is well-developed. Whole wheat dough might not form as strong a windowpane as white dough, but it should still show some ability to stretch. This test helps you gauge if you've adequately addressed the gluten development aspect of Artisan flour baking problems.
Proofing Tips for Whole Wheat Flour Breads: Warm and Humid Environment
Proofing whole wheat dough requires attention to time and temperature. A warm, humid environment helps the dough rise effectively. An ideal temperature is typically between 75-80°F (24-27°C). You can create a humid environment by placing a damp towel over the dough or proofing it in a turned-off oven with a pan of hot water on the rack below.
Monitor the dough, but don't rely solely on it doubling in size, as whole wheat might not achieve this. Instead, use the "poke test": gently press your finger into the dough. If the indentation springs back very slowly or only partially, the dough is likely ready. If it springs back immediately, it needs more time (under-proofed). If the indentation remains completely, it might be slightly over-proofed, but might still be salvageable if caught early. Proper proofing is critical to avoid dense bread and is a common area for Artisan flour baking problems.
Recommended Proofer: Brod & Taylor Folding Proofer
For consistent proofing results, especially with whole wheat dough which can be sensitive to temperature fluctuations, a dedicated proofer like the Brod & Taylor Folding Proofer is invaluable. This device creates a controlled, warm, and humid environment perfect for fermentation.
It folds flat for easy storage and can also be used for making yogurt or tempering chocolate. By providing a stable proofing environment, it helps ensure your whole wheat dough reaches the optimal proofing stage before baking, significantly reducing the risk of the density issues that are common Artisan flour baking problems.
Problem 3: Flat, Spreading Loaf with Whole Wheat Flour
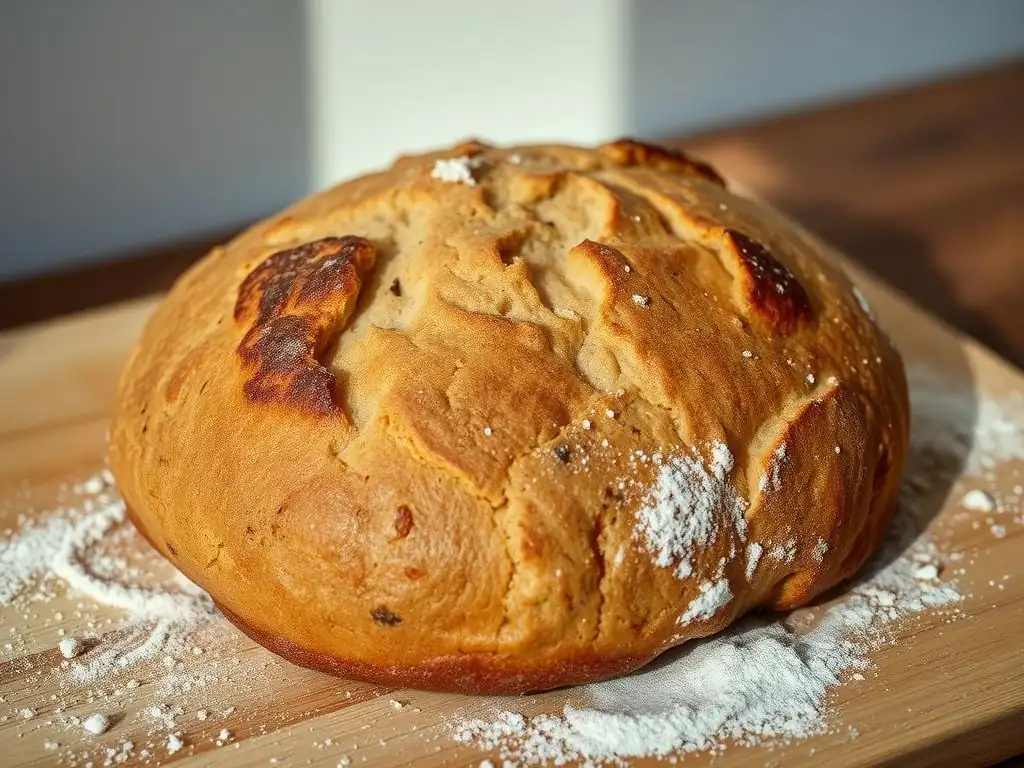
A loaf that spreads outwards rather than rising upwards during baking is another common and disheartening Artisan flour baking problem encountered with whole wheat flour. Instead of a beautifully domed loaf, you get a wide, relatively flat disc. This indicates that the dough lacked the structural integrity needed to hold its shape against gravity and the expansive forces of oven spring.
This issue is closely related to gluten development and proofing but also involves factors like shaping technique and baking temperature. Addressing the root causes is essential for achieving good loaf height and a desirable shape with your whole wheat breads.
Understanding Why Whole Wheat Flour Bread Loaves Flatten
The primary reason whole wheat loaves flatten is a weak gluten structure. As discussed earlier, the bran interferes with gluten development, making it harder to build a strong, elastic network that can support the dough's weight and trap gas effectively. If the gluten is too weak, the dough will simply relax and spread during the final proof and in the initial stages of baking before the crust sets.
Over-proofing also contributes significantly to flattening. If the dough proofs for too long, the gluten structure can break down, losing its elasticity and ability to hold gas. When placed in the hot oven, this weakened structure collapses instead of expanding upwards, leading to a flat loaf. Addressing these structural weaknesses is key to overcoming this Artisan flour baking problem.
Weak Gluten Structure in Whole Wheat Flour
As mentioned, the bran and germ in whole wheat flour impede the formation of a strong, cohesive gluten network. Even with proper mixing and kneading, the gluten in whole wheat dough may not be as robust as in white flour dough. This weaker structure has less elasticity and less ability to resist the forces that cause dough to spread.
This means that whole wheat dough requires careful handling to preserve the structure developed during mixing and proofing. Techniques that build tension and structure, like proper shaping and using proofing baskets, become even more critical to counteract the inherent weakness and prevent this common Artisan flour baking problem.
Over-Proofing: The Dough Collapses
Over-proofing is a frequent culprit behind flat whole wheat loaves. When dough proofs for too long, the yeast consumes most of the available sugars, and its activity slows down or stops. More importantly, the enzymes present in the flour and yeast start to break down the gluten structure. The dough becomes overly relaxed and loses its tension.
When an over-proofed loaf is placed in the hot oven, the initial burst of oven spring is either minimal or causes the already weakened structure to fail completely, leading to collapse and a flat shape. Monitoring proofing carefully and learning the signs of proper proofing (the poke test) are vital to avoid this significant Artisan flour baking problem.
Insufficient Oven Spring: Baking Temperature Issues
Oven spring is the final, rapid expansion of the dough in the first 10-15 minutes of baking, caused by trapped gases expanding rapidly in the heat and the final burst of yeast activity before it dies. A hot oven is crucial for good oven spring. If the oven isn't hot enough, the crust sets too slowly, and the dough spreads outwards before the structure is fixed by the heat.
Baking whole wheat bread at a high initial temperature helps to quickly set the crust and provides the necessary thermal shock for maximum oven spring, propelling the loaf upwards. Using a preheated baking surface like a baking stone or steel also contributes to better oven spring by transferring heat efficiently to the base of the loaf. Insufficient oven spring is a direct cause of flatness and a common Artisan flour baking problem.
Achieving Optimal Loaf Height and Shape with Whole Wheat Flour
To prevent your whole wheat loaves from spreading and achieve good height, focus on techniques that support the dough's structure and maximize oven spring. This involves careful shaping, providing external support during proofing, and baking in a very hot oven.
By implementing these strategies, you can give your whole wheat dough the best chance to hold its shape and rise beautifully, effectively addressing this set of Artisan flour baking problems.
Using a Banneton Basket: Providing Support During Proofing
A banneton (or proofing basket) is an excellent tool for giving whole wheat dough support during its final proofing stage. The basket holds the dough's shape as it expands, preventing it from spreading outwards prematurely. This encourages the dough to build vertical structure.
Lining the banneton with a well-floured linen liner or dusting the cane basket generously with rice flour prevents sticking. Once proofed, the dough is gently inverted onto a baking surface. The tension and shape held by the banneton during proofing help the loaf maintain its structure when it hits the hot oven, leading to better height and shape. This is a simple yet effective way to combat a common Artisan flour baking problem.
Recommended Banneton: Saint Germain Bakery Round Banneton Proofing Basket
The Saint Germain Bakery Round Banneton Proofing Basket is a popular choice for round loaves (boules). Made from natural cane, it helps wick away a small amount of surface moisture from the dough, contributing to a nice crust.
Using a banneton like this provides the necessary external support for the dough during its final rise, giving it a chance to build vertical structure rather than spreading. This is a crucial step in achieving good height and shape with whole wheat bread and a key solution to this Artisan flour baking problem.
Scoring Techniques for Oven Spring: Creating Weak Points
Scoring (cutting the surface of the dough just before baking) isn't just for aesthetics; it serves a critical structural purpose. As the dough experiences oven spring, it needs to expand. If the crust has already started to set, the expansion will be uneven or restricted, potentially causing blowouts in unintended places or restricting vertical rise.
Scoring creates controlled "weak points" on the surface. As the dough expands, it opens up along these cuts, allowing the loaf to rise upwards in a controlled manner. Different scoring patterns can influence the final shape and how the loaf opens. A deep, single score or a few parallel scores are common for encouraging vertical rise in whole wheat loaves, mitigating the flatness aspect of Artisan flour baking problems.
Baking at High Temperatures: The Importance of a Hot Oven
Baking whole wheat bread in a very hot oven, typically preheated to 450-500°F (230-260°C), is crucial for achieving good oven spring and preventing flatness. The high heat causes rapid expansion of gases within the dough before the crust fully sets, pushing the loaf upwards.
Baking on a preheated baking stone or steel further enhances this effect by providing intense heat from below. Using a Dutch oven or creating steam in the oven during the first part of baking also helps keep the crust pliable longer, allowing for maximum expansion before the crust hardens. Ensuring your oven is fully preheated to the correct temperature is a fundamental step in avoiding this common Artisan flour baking problem.
Recommended Oven Thermometer: Taylor Precision Products Oven Thermometer
An oven's internal thermostat can often be inaccurate, sometimes by as much as 50°F or more. Relying on an inaccurate oven temperature can lead to poor oven spring and flat loaves, contributing to Artisan flour baking problems.
Using an inexpensive, independent oven thermometer, like the Taylor Precision Products Oven Thermometer, allows you to verify that your oven is reaching and maintaining the correct temperature. This simple tool ensures you're baking at the optimal heat for maximum oven spring and consistent results with your whole wheat bread.
Problem 4: Crumbly Texture When Baking with Whole Wheat Flour
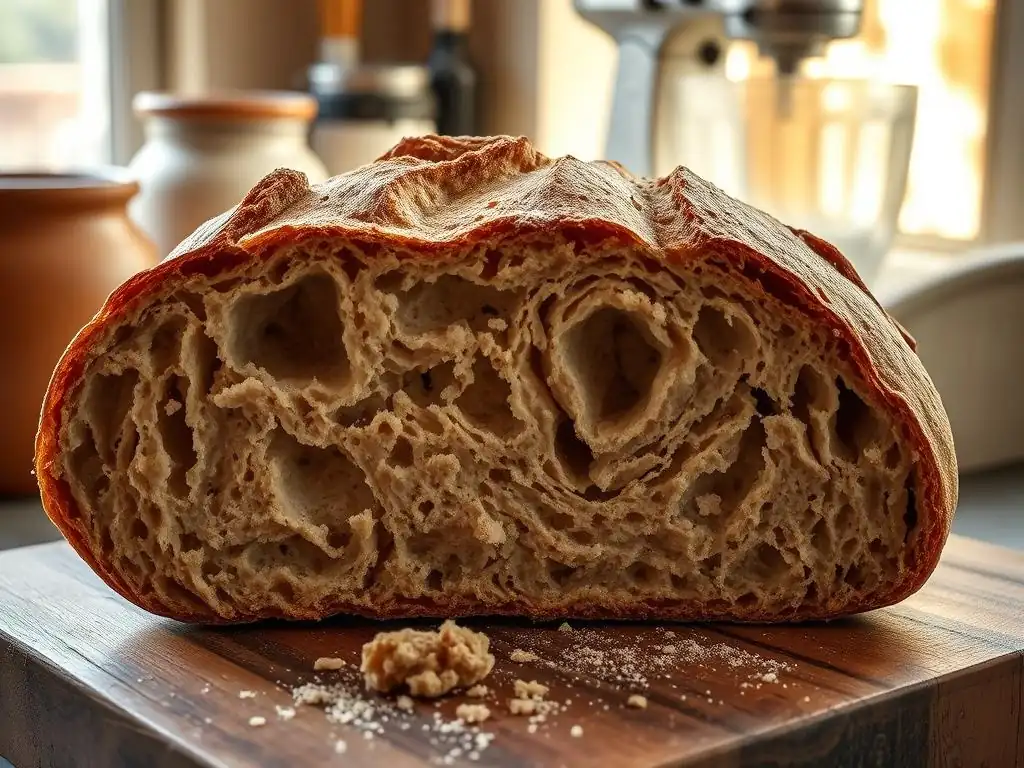
Another common Artisan flour baking problem with whole wheat is a crumbly texture. Instead of a moist, cohesive crumb that holds together when sliced, the bread falls apart easily. This issue is frustrating because it affects both the eating experience and the practicality of slicing and serving the bread.
A crumbly texture usually points to issues with hydration, baking time, or insufficient gluten development. Correcting these factors is essential for achieving a pleasant, well-structured crumb in your whole wheat loaves.
Diagnosing Crumbly Bread Made with Whole Wheat Flour
Crumbly whole wheat bread often indicates that the dough was too dry or was over-baked. Whole wheat flour requires adequate hydration, and if the dough doesn't have enough water, the resulting bread will be dry and prone to crumbling. Similarly, baking the bread for too long or at too high a temperature without proper internal temperature checks can dry out the crumb.
Insufficient mixing or kneading can also contribute to crumbliness. If the gluten network hasn't developed sufficiently, it won't be able to hold the crumb structure together, leading to a fragile texture that breaks apart easily. Understanding these potential causes is key to solving this type of Artisan flour baking problem.
Too Much Flour or Not Enough Water
This is arguably the most frequent cause of crumbly whole wheat bread. If you added too much flour during mixing or kneading (perhaps trying to combat stickiness) or didn't add enough water according to the recipe or the flour's absorption needs, the dough will be too dry. This lack of sufficient moisture carries through to the baked loaf, resulting in a dry, crumbly texture.
Whole wheat flour typically needs more water than white flour, sometimes significantly more (e.g., 70-85% hydration is common for many whole wheat recipes, meaning 70-85g of water per 100g of flour). Using precise measurements, preferably by weight, is crucial to ensure the correct flour-to-water ratio and avoid this common Artisan flour baking problem.
Over-Baking: Drying Out the Bread
Baking the bread for too long or at too high a temperature can evaporate too much moisture from the loaf, resulting in a dry, crumbly crumb. While the crust should be well-developed, the interior needs to retain moisture for a pleasant texture.
Relying solely on visual cues or the baking time listed in a recipe can be misleading, as oven performance varies. The most reliable way to determine if bread is properly baked without drying out the crumb is to check its internal temperature.
Insufficient Mixing: Uneven Gluten Development
If the dough wasn't mixed or kneaded enough, the gluten network won't be adequately developed or evenly distributed throughout the loaf. A weak or patchy gluten structure cannot effectively hold the crumb together, leading to a fragile texture that crumbles easily when sliced or handled.
Ensuring that the dough passes the windowpane test (or shows good extensibility and elasticity if a full windowpane isn't achievable with your whole wheat flour) is a good indicator that sufficient gluten development has occurred. This helps prevent the lack of structural integrity that causes this common Artisan flour baking problem.
Getting the Perfect Crumb Structure with Whole Wheat Flour
Achieving a moist, cohesive crumb with whole wheat flour requires attention to hydration, mixing, and baking completion. By focusing on these areas, you can significantly improve the texture of your whole wheat loaves and eliminate crumbliness.
These techniques ensure the dough has enough moisture, the structure is well-developed, and the bread is baked just right. Mastering these steps is key to overcoming crumbly texture and other related Artisan flour baking problems.
Precise Measuring: Using a Kitchen Scale
Using a digital kitchen scale to measure both flour and water by weight is the most accurate way to ensure you have the correct hydration level for your whole wheat dough. This eliminates the variability associated with volume measurements (cups) and helps you consistently hit the target hydration specified in a recipe or determined through experimentation with your specific flour.
For example, a recipe might call for 500g of whole wheat flour and 375g of water for 75% hydration. Weighing these amounts precisely ensures you are starting with the intended hydration, a critical factor in preventing dry, crumbly bread and avoiding this fundamental Artisan flour baking problem.
Baking Time and Temperature: Monitoring Internal Temperature
To avoid over-baking and drying out the crumb, bake your whole wheat bread until it reaches an internal temperature of 200-210°F (93-99°C) when measured with an instant-read thermometer inserted into the center of the loaf. The baking time listed in a recipe should be treated as a guideline, not a strict rule.
Once the bread reaches this internal temperature, it is fully baked and the starches have gelled sufficiently to create a stable crumb structure that won't be crumbly. This ensures the crust is golden and the interior is properly cooked without becoming dry. Checking the internal temperature is the most reliable method to prevent over-baking and the resulting crumbly texture, solving a major Artisan flour baking problem.
Cooling the Bread Properly: Preventing Moisture Loss
Allowing the bread to cool completely on a wire rack before slicing is absolutely essential for developing the final crumb structure and preventing crumbliness. As the bread cools, moisture redistributes evenly throughout the loaf. Slicing into a hot loaf allows steam (moisture) to escape rapidly, leading to a drier, gummier, and potentially crumbly texture.
Cooling on a wire rack allows air circulation around the entire loaf, preventing the bottom crust from becoming soggy from trapped steam. While it's tempting to slice into a warm loaf, waiting 1-2 hours (or longer for larger loaves) will result in a much better texture and flavor, effectively preventing a common cause of crumbly bread and related Artisan flour baking problems.
Recommended Kitchen Scale: Escali Primo Digital Kitchen Scale
The Escali Primo Digital Kitchen Scale is a popular and reliable choice for home bakers. It's accurate, easy to use, and can weigh up to 11 pounds (5000 grams). Measuring ingredients by weight, especially flour and water, is fundamental to achieving consistent results and proper hydration with whole wheat dough.
Using a scale like the Escali Primo ensures precise ingredient ratios, which is the first step in preventing common issues like sticky dough or crumbly bread, directly addressing foundational Artisan flour baking problems.
Problem 5: Inconsistent Results When Using Whole Wheat Flour
One of the most frustrating aspects of baking with whole wheat flour for many is inconsistency. One week you might bake a beautiful, airy loaf, and the next, using the same recipe and technique, you get a dense or flat result. This unpredictability is a common source of Artisan flour baking problems and can make mastering whole wheat feel elusive.
Inconsistency often stems from factors outside the core recipe itself, such as variations in ingredients, environmental conditions, or slight differences in technique that aren't accounted for. Identifying and controlling these variables is key to achieving reliable results batch after batch.
Why Whole Wheat Flour Baking Can Be Unpredictable
The inherent variability of whole wheat flour itself is a major contributor to inconsistent results. Unlike highly refined white flours which are processed to be very consistent, whole wheat flour retains natural components (bran, germ) that can vary depending on the wheat variety, the growing season, and even the specific milling process. This variability affects everything from protein content and absorption rate to enzyme activity.
Furthermore, baking is a science influenced by environmental factors. Temperature and humidity in your kitchen can fluctuate significantly throughout the year or even day-to-day, impacting fermentation speed and dough hydration. These external factors, combined with flour variability, make whole wheat baking seem unpredictable and contribute to Artisan flour baking problems.
Variations in Flour Quality: Seasonality and Milling Processes
Whole wheat flour is a natural product, and its characteristics can change. The protein content, starch quality, and moisture level of the wheat kernel can vary depending on the year's harvest (seasonality) and the region where it was grown. Different mills also use slightly different processes (e.g., roller milled vs. stone-ground, sifted vs. unsifted whole wheat), which affects particle size and the distribution of bran and germ.
These variations directly impact how the flour absorbs water and how the gluten develops. A recipe that works perfectly with one bag of whole wheat flour might need slight adjustments (like adding a little more or less water) when you open a new bag from a different batch or brand. Recognizing and adapting to this natural variability is crucial for consistent results and navigating Artisan flour baking problems.
Environmental Factors: Temperature and Humidity
The temperature and humidity in your kitchen significantly affect dough fermentation. Yeast activity is highly sensitive to temperature; warmer conditions speed up proofing, while cooler conditions slow it down. High humidity can make dough feel stickier and potentially affect crust development. Low humidity can cause dough to dry out on the surface during proofing if not covered properly.
Attempting to follow strict proofing times (e.g., "proof for 1 hour") without considering the ambient temperature will lead to inconsistent results. A dough that takes 1 hour to proof at 78°F (26°C) might take 2 hours or more at 70°F (21°C). Learning to read the dough itself (using the poke test, observing its size and feel) rather than relying solely on the clock is essential for consistency when dealing with fluctuating environments and common Artisan flour baking problems.
Recipe Adjustments: Adapting to Different Whole Wheat Flours
Because whole wheat flours vary, a recipe might need slight adjustments when using a different type than the one specified or used by the recipe developer. For example, a recipe developed using a high-protein hard red whole wheat might require less water or a longer kneading time than if you use a softer white whole wheat flour.
Being prepared to make minor adjustments, particularly to hydration, based on how the dough feels is part of the process. Start with the recipe's hydration but be ready to add a tiny bit more water if the dough seems too stiff or a touch less if it's overly slack or sticky. This adaptability helps ensure consistent dough consistency regardless of minor flour variations, addressing a key aspect of Artisan flour baking problems.
Ensuring Consistent Baking Success with Whole Wheat Flour
Achieving consistent success with whole wheat baking involves minimizing the impact of variables and developing a deeper understanding of your ingredients and environment. It requires a bit more observation and responsiveness than baking with highly standardized flours.
By controlling what you can and carefully observing the dough throughout the process, you can dramatically improve the reliability of your whole wheat bakes, turning unpredictable results into consistent successes and effectively solving Artisan flour baking problems.
Sourcing High-Quality Whole Wheat Flour: King Arthur Baking Company
Starting with high-quality, reliable whole wheat flour is the first step towards consistency. Brands known for rigorous testing and consistent product specifications can help reduce the variability that leads to unpredictable results.
King Arthur Baking Company is widely regarded for the quality and consistency of their flours, including their whole wheat options. While variations can still occur, using a trusted brand provides a more stable starting point for your baking, reducing one major source of Artisan flour baking problems. Their flours are typically milled to precise specifications, offering more predictable performance.
Controlling Temperature and Humidity: Creating a Stable Baking Environment
While you can't control the weather, you can create a more stable environment for your dough. Use a proofer (like the Brod & Taylor mentioned earlier) or find a warm spot in your house (like a turned-off oven with the light on) for proofing. During bulk fermentation, cover the dough tightly with plastic wrap or a reusable cover to prevent it from drying out, especially in low humidity.
Being aware of your kitchen's ambient temperature is also helpful. If it's colder, allow more time for proofing; if it's warmer, proofing will be faster. Adjusting proofing times based on dough activity rather than strictly following recipe times is key to consistency, directly mitigating environmental contributions to Artisan flour baking problems.
Documenting Your Baking Process: Tracking Results and Adjustments
Keeping a baking journal is an excellent way to identify patterns and improve consistency. For each bake, note the recipe used, the type/brand of whole wheat flour, the hydration level, mixing times, bulk fermentation time and temperature, proofing time and temperature, and baking time and temperature. Crucially, record the outcome (e.g., "slightly dense," "perfect rise," "a bit crumbly") and any adjustments you made.
Over time, this log will reveal what works best with specific flours in your environment and help you understand how minor changes impact the final result. It turns unpredictable Artisan flour baking problems into learning opportunities and provides concrete data for making informed adjustments in future bakes.
Consider a Baking Journal: Leuchtturm1917 Notebook
A simple notebook, like a Leuchtturm1917 Notebook, can serve as a dedicated baking journal. Its durable cover and quality paper make it suitable for kitchen use.
Using a physical journal or a digital equivalent to meticulously record your baking process and results is a powerful tool for achieving consistent success with whole wheat flour. It transforms the trial-and-error process into a structured learning experience, helping you systematically overcome Artisan flour baking problems and refine your techniques.
Frequently Asked Questions
What are some common problems bakers face when using artisan flours?
Artisan flours can be challenging due to their unique protein content and water absorption rates, leading to issues like dense textures or sticky dough. Understanding these differences is key.
How do artisan flours differ from all-purpose flour, and why does this matter?
Artisan flours often have a higher protein content and more bran, impacting gluten development and hydration. This results in different baking properties compared to refined all-purpose flour.
My bread dough made with artisan flour is too sticky. What should I do?
A sticky dough likely indicates too much hydration or underdeveloped gluten. Try reducing the water slightly in your next batch or kneading for a longer period.
How can I improve the texture of my baked goods when using artisan flour?
Experiment with different hydration levels and kneading techniques. Consider adding ingredients like vital wheat gluten to boost gluten strength for a better crumb.
Where can I find reliable recipes specifically designed for artisan flours?
BakeWithEase.com offers a range of simple recipes and step-by-step guides tailored for artisan flours. You can also find resources from reputable baking blogs and cookbooks focused on these flours.
Final Reflection: The Enduring Allure of Artisan Flour, and the Joy of Baking Through Challenges
The pursuit of perfect artisan bread, pastry, or cake is a journey fraught with delightful surprises and frustrating setbacks. Mastering the nuances of baking with artisan flours requires patience, understanding, and a willingness to embrace the unexpected. This article has explored some of the most common pitfalls, offering solutions to help bakers navigate the unique characteristics of these specialty flours.
The shift towards artisan flours reflects a growing appreciation for the taste, texture, and nutritional value of locally sourced, traditionally milled grains. This movement, however, necessitates a deeper understanding of baking principles and a willingness to adapt techniques. The subtle variations in protein content, moisture absorption, and overall behavior of these flours demand a more hands-on approach, rewarding the baker with a truly unique and satisfying outcome. The best bread is made with love, patience, and a willingness to learn from your mistakes.
- (A quote you could add here from a baker or baking book).
Now, armed with a better understanding of the challenges and solutions presented, I invite you to embrace the adventure of baking with artisan flours. Don't be discouraged by initial setbacks; instead, view them as opportunities to learn and refine your skills. Experiment with different flours, techniques, and recipes, and savor the unique character each one brings to your baking. The journey itself, with its triumphs and tribulations, is part of the rewarding experience of creating something delicious and meaningful with your own hands.
Unlock Your Baking Potential: Master Artisan Flours Today!
Thanks for taking the time to explore the wonderful world of artisan flours! You've now learned valuable techniques to overcome common baking challenges. Ready to put your new knowledge into practice?
- Bake your dream loaf: Try a recipe using one of the artisan flours discussed – we're confident you'll see a delicious difference! Remember to adjust hydration as needed.
- Share your baking journey: Post a photo of your creation on social media and tag us! Let's inspire each other.
- Dive deeper: Explore our comprehensive flour guide on the BakeWithEase website for even more tips and tricks. (This will be a link on the actual website).
What unique flavor profile will you create with your next artisan flour bake?