
Troubleshooting AgarAgar: Getting the Ideal Firmness Every Time

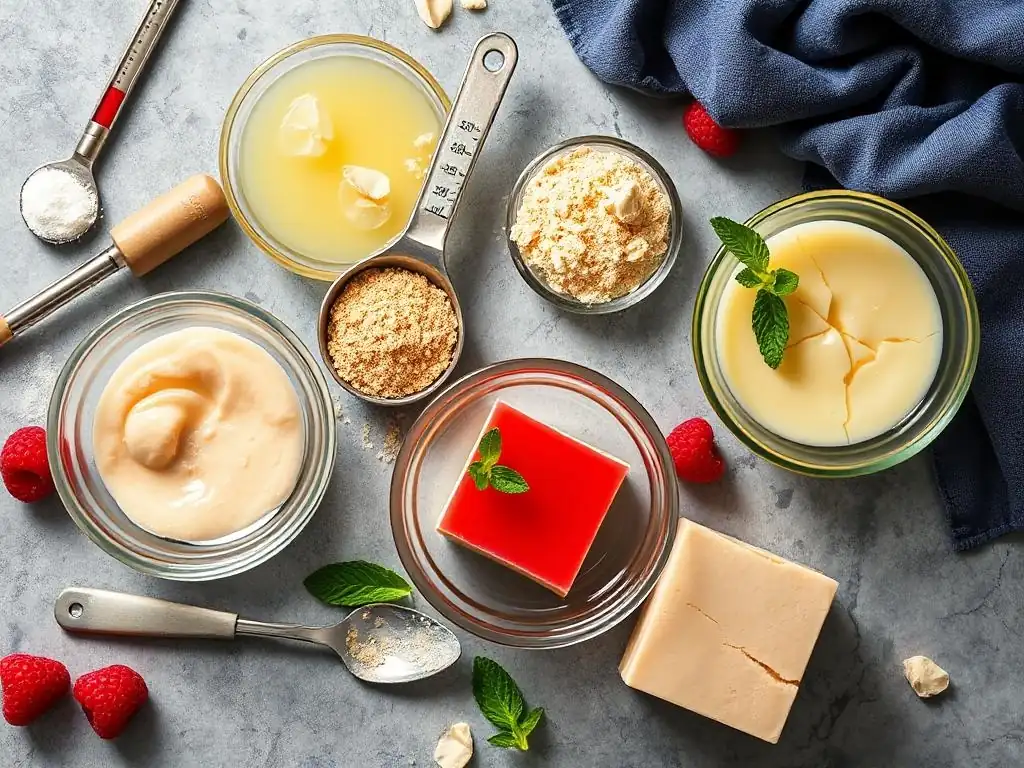
Welcome to BakeWithEase, your haven for conquering all things baking! Ever wrestled with agar agar and its elusive setting point? You're not alone! Dive into our guide, "Troubleshooting AgarAgar: Getting the Ideal Firmness Every Time," where we unlock the secrets to achieving perfect texture, every single time. Ready to transform your desserts from frustrating flops to stunning successes? Let's get baking!
- Troubleshooting Agar Agar: Achieving Perfect Firmness for Vegan Desserts | BakeWithEase.com
- Common Agar Agar Setting Issues and Their Solutions
- Mastering Agar Agar: Tips and Tricks for Consistent Results
- Recipe Adjustments for Optimal Agar Agar Setting
- Troubleshooting Specific Agar Agar Recipes
- Achieving the Ideal Agar Agar Firmness: A Summary
-
Frequently Asked Questions
- What exactly is agar-agar, and why is it used in baking?
- What are some common causes of agar-agar not setting properly?
- How long should I boil agar-agar for optimal setting?
- Can I re-melt and re-set agar-agar if it doesn't set the first time?
- What are some tips for achieving a consistent and smooth texture with agar-agar?
- Final Reflection: Mastering the Art of Agar-Agar
- Unlock Your Agar-Agar Mastery!
Troubleshooting Agar Agar: Achieving Perfect Firmness for Vegan Desserts | BakeWithEase.com
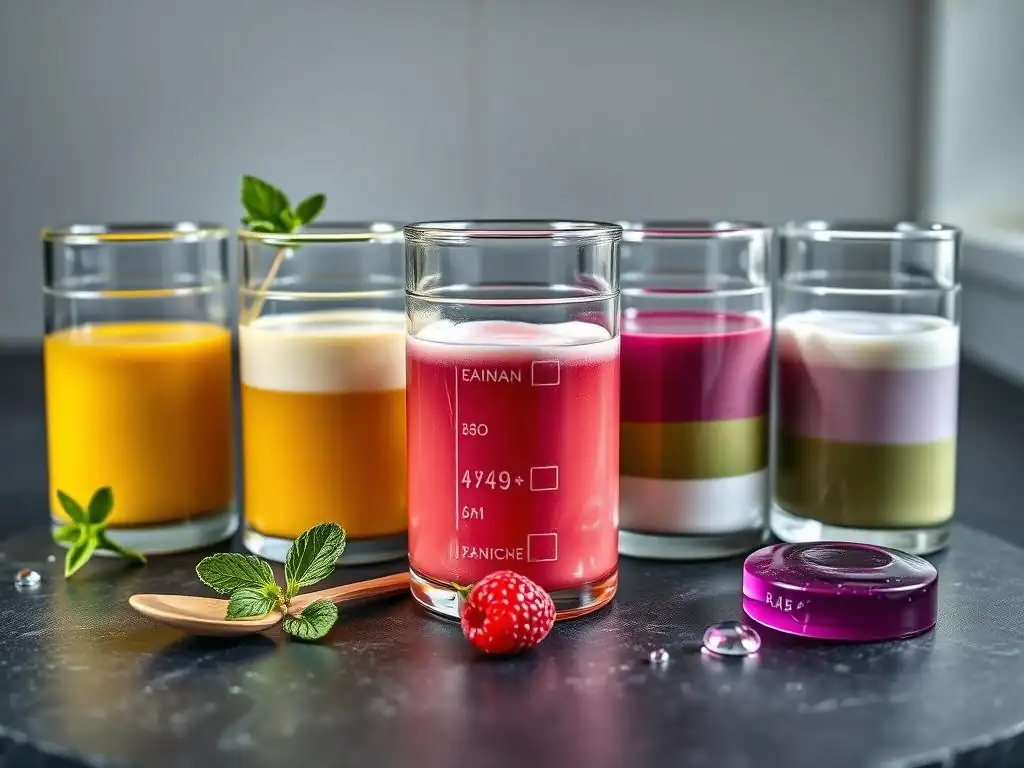
What is Agar Agar and How Does it Work in Vegan Desserts?
Agar agar is a plant-based gelling agent derived from red algae. It's a popular and effective substitute for gelatin in vegan and vegetarian cooking and baking. Unlike gelatin, which is protein-based and derived from animal collagen, agar agar is primarily composed of polysaccharides, specifically agarose and agaropectin.
This difference in composition means agar agar behaves quite differently when setting, requiring boiling temperatures to dissolve fully and setting firmly at room temperature or slightly cooler, rather than needing refrigeration to set like gelatin. Its neutral taste and color make it versatile for a wide range of desserts, from firm jellies to creamy puddings and cake fillings.
In vegan desserts, agar agar provides structure and stability. It's crucial for achieving textures that mimic traditional gelatin-based dishes, such as panna cotta, mousses, and fruit jellies. The amount of agar agar used dictates the final firmness: more agar agar results in a firmer, sometimes brittle texture, while less yields a softer, more delicate gel.
Understanding this relationship is fundamental to avoiding common Agar agar setting issues and achieving the desired consistency in your plant-based creations. Its ability to set outside of refrigeration also makes it useful for items that need to hold their shape at room temperature for a period.
The Science Behind Agar Agar Gelation: Understanding the Process
The magic of agar agar lies in its ability to form a robust gel network upon cooling. When agar agar powder or flakes are heated in a liquid to near boiling (typically 185°F to 200°F or 85°C to 93°C), the polysaccharide molecules disperse and hydrate. As the mixture reaches boiling and is simmered briefly, these molecules fully dissolve into the liquid.
This high temperature is essential to break down the complex structure of the agar agar and allow it to integrate uniformly into the liquid base. Simply whisking it into warm liquid is insufficient for proper dissolution, which is a common cause of Agar agar setting issues.
Once the dissolved agar agar mixture begins to cool, the polysaccharide chains start to re-associate and form a rigid three-dimensional network, trapping the liquid within its structure. This gelation process typically begins rapidly as the temperature drops, often starting to set even before reaching full room temperature (around 104°F to 122°F or 40°C to 50°C).
The gel becomes fully firm once it reaches room temperature or is chilled in the refrigerator. Unlike gelatin, which melts easily, agar agar gels are heat-stable and will only melt again if reheated to high temperatures, usually above 185°F (85°C), making them more resilient in warmer environments.
Factors Influencing Agar Agar's Setting Ability
Several factors significantly influence how well agar agar sets and the final texture of the gel. The most critical factor is the concentration of agar agar relative to the liquid volume. Using too little agar agar is perhaps the most frequent cause of Agar agar setting issues, resulting in a weak or non-setting gel.
Conversely, too much leads to an overly firm, sometimes brittle or rubbery texture. A typical starting point is about 1 teaspoon (2 grams) of agar agar powder per cup (250ml) of liquid for a medium-firm gel, but this can vary based on the brand and desired consistency.
Acidity is another major factor. Highly acidic ingredients like lemon juice, lime juice, vinegar, or certain fruits (kiwi, pineapple, citrus) can weaken agar agar's gelling power. When working with acidic liquids, you often need to increase the amount of agar agar slightly to compensate, or in some cases, modify the preparation method, such as adding the acidic component only after the agar agar has dissolved and slightly cooled.
Sugar can also have a subtle effect; while not as impactful as acidity, large amounts of sugar can sometimes slightly soften the final gel structure. Ensuring the agar agar is fully dissolved through proper heating and simmering is paramount; undissolved particles will not contribute to the gel network and can lead to a weak or grainy set, contributing to Agar agar setting issues.
Common Agar Agar Setting Issues and Their Solutions
Problem 1: Agar Agar Not Setting Properly
Identifying the Root Cause of Weak Agar Agar Gels
A weak or non-setting agar agar gel is a frustratingly common Agar agar setting issue, often leaving your vegan dessert as a liquid puddle instead of a firm treat. The primary suspect is usually insufficient agar agar concentration relative to the amount of liquid used. Different brands of agar agar powder or flakes can have varying strengths, and relying solely on a standard recipe might not account for these differences.
Another major cause is insufficient heating; agar agar must be brought to a boil and simmered for at least 1-2 minutes (longer for flakes) to ensure the polysaccharides fully dissolve. If the mixture wasn't heated enough, the gelling agents won't activate, leading to a failure to set properly.
Other culprits include the presence of acidic ingredients, which, as mentioned, can significantly weaken the gel. Adding acidic components too early in the process or not compensating with extra agar agar can prevent a firm set. High-fat ingredients, like coconut cream, while often used in vegan desserts, can sometimes interfere with the gelling process if the agar agar isn't fully dispersed within the liquid phase before adding the fat. Lastly, using expired or improperly stored agar agar might also lead to reduced gelling strength, resulting in Agar agar setting issues you didn't anticipate.
Solution: Adjusting Agar Agar Concentration for Desired Firmness
The most direct solution to a weak agar agar gel is to adjust the concentration in future attempts or, if possible, reheat and add more agar agar to the current batch. For a typical medium-firm gel suitable for panna cotta or a stable pudding, a ratio of about 1 teaspoon (around 2 grams) of agar agar powder per 1 cup (250ml) of liquid is a good starting point. If your mixture didn't set, try increasing this to 1.5 teaspoons per cup.
For firmer gels, like those needed for stand-alone jellies or layered desserts, you might need 2 teaspoons or more per cup. Flakes are less concentrated than powder, so you'll typically need 2-3 times the amount of flakes compared to powder.
To fix a batch that hasn't set: Gently reheat the mixture, stirring constantly, until it reaches a boil. While stirring, dissolve a small amount of additional agar agar powder (start with 1/4 to 1/2 teaspoon per cup of original liquid volume) in a small amount of cold liquid, then whisk this slurry into the boiling mixture. Simmer for another 1-2 minutes to ensure the new agar agar is fully dissolved.
Pour back into your mold or dish and allow to cool and set. This adjustment directly addresses the insufficient gelling agent issue, resolving common Agar agar setting issues related to concentration.
Solution: Proper Hydration and Dissolving Techniques for Agar Agar
Ensuring your agar agar is properly hydrated and dissolved is fundamental to achieving a successful set and preventing Agar agar setting issues like weak gels or grainy textures. Agar agar powder should ideally be whisked into cold or room temperature liquid first to prevent clumping before heating. This allows the powder to disperse evenly. Agar agar flakes can be soaked in liquid for 5-10 minutes before heating, though this isn't strictly necessary for powder.
After whisking into the cold liquid, the mixture must be heated and brought to a rolling boil. Once boiling, reduce the heat slightly to a simmer and continue to whisk or stir for at least 1-2 minutes for powder, or 5-10 minutes for flakes, until you're confident that the agar agar has completely dissolved. There should be no visible granules or flakes remaining when you lift the spoon or whisk.
Insufficient simmering time is a frequent cause of Agar agar setting issues, as the gelling molecules don't fully activate. This crucial step guarantees the agar agar is ready to form a strong gel network upon cooling.
Problem 2: Agar Agar Setting Too Firm
Recognizing Overly Firm Agar Agar Gels
An overly firm agar agar gel is another common outcome of Agar agar setting issues. Instead of a delicate, melt-in-your-mouth texture, you end up with something that can feel rubbery, brittle, or even somewhat hard and bouncy. This is particularly noticeable in desserts meant to be creamy, like vegan panna cotta or pudding, where a soft, smooth set is desired.
The gel might snap rather than yield gently when cut or scooped. While a very firm set might be intentional for certain applications like layered jellies or molds that need to hold complex shapes, it's often undesirable for standard desserts and indicates an imbalance in the recipe.
The most obvious sign is the texture itself after the mixture has fully cooled and set. If it feels excessively solid, doesn't yield under light pressure, or has a noticeably rigid structure that doesn't resemble a soft gel, you've likely used too much agar agar. This issue highlights the importance of precise measurement and understanding the specific gelling strength of the agar agar brand you are using, as variations exist. Over-firmness is a direct result of an excessive concentration of the gelling agent.
Solution: Reducing Agar Agar Concentration for a Softer Set
The primary solution for an overly firm agar agar gel is to reduce the amount of agar agar used relative to the liquid in your recipe. If your previous attempt resulted in a rubbery texture using, for example, 2 teaspoons of powder per cup of liquid, try reducing it to 1.5 teaspoons or even 1 teaspoon for a significantly softer set. For a very delicate, almost melt-away gel, like a light vegan jelly or a soft pudding, you might need as little as 0.5 to 0.75 teaspoons per cup.
It's helpful to make notes of the amount of agar agar you use for specific recipes and the resulting texture. This allows you to fine-tune the concentration in subsequent batches. Remember that agar agar flakes are less potent than powder; if you're using flakes and getting an overly firm result, reduce the amount of flakes accordingly (e.g., if you used 2 tablespoons of flakes per cup, try 1.5 tablespoons). Careful measurement is key to avoiding this specific Agar agar setting issue and achieving the perfect delicate texture.
Solution: Balancing Agar Agar with Other Ingredients
Beyond simply reducing the agar agar quantity, balancing it with other ingredients can also help achieve a softer texture or mask slight firmness. Incorporating ingredients that contribute to creaminess, such as full-fat coconut milk, cashew cream, silken tofu, or vegan yogurt, can provide a richer mouthfeel that complements the gel structure. While these ingredients don't prevent the agar agar from setting, they add body and fat, which can make the overall dessert feel less brittle and more luxurious.
For example, in a vegan panna cotta, using a higher proportion of rich coconut cream compared to water or plant milk, while still using the appropriate reduced amount of agar agar, will result in a creamier, less purely gel-like texture. Similarly, incorporating pureed fruit or vegetable bases (like pumpkin puree in a vegan pie filling) adds solids and moisture that can soften the agar agar's rigid set. Experimenting with the ratio of agar agar to the combined liquid and creamy/solid components allows for fine-tuning the final texture and mitigating Agar agar setting issues related to excessive firmness.
Problem 3: Grainy or Cloudy Agar Agar Gels
Identifying the Causes of Grainy Agar Agar Texture
A grainy or gritty texture in your set agar agar dessert is a definite sign of Agar agar setting issues related to incomplete dissolution. This happens when the agar agar powder or flakes do not fully dissolve in the hot liquid before the mixture cools and gels. Instead of forming a uniform gel network, undissolved particles remain suspended within the gel, creating a gritty mouthfeel. This is often caused by not heating the mixture sufficiently or not simmering it long enough to allow the agar agar molecules to fully disperse and hydrate.
Another potential cause is adding the agar agar directly to hot or boiling liquid without whisking it in first while cold or room temperature. This can cause the powder to clump instantly, forming small pockets that are difficult for the heat to penetrate and dissolve fully, leading to persistent Agar agar setting issues with texture. Using a very high concentration of agar agar can also sometimes contribute to a less smooth texture, although this is less common than incomplete dissolution.
Solution: Proper Mixing and Dissolving Techniques to Avoid Graininess
To prevent grainy texture and resolve this common Agar agar setting issue, proper mixing and dissolving techniques are paramount. Always start by whisking the agar agar powder into a small amount of cold or room temperature liquid from your recipe before heating the rest of the liquid. This helps to disperse the powder and prevents clumping when it hits the heat. Once the agar agar is suspended in the cold liquid, add this slurry to the main volume of liquid in your pot.
Heat the mixture gradually, whisking constantly, bringing it to a full boil. Once boiling, reduce the heat to a simmer and continue to whisk or stir for the recommended time – typically 1-2 minutes for powder, or 5-10 minutes for flakes. You should see the liquid clear and the agar agar particles disappear as they dissolve. Don't rush this step; sufficient simmering time is essential to ensure complete dissolution and a smooth, grain-free gel, effectively preventing this common Agar agar setting issue.
Solution: Filtering Agar Agar Mixtures for a Smooth Finish
Even with careful heating and stirring, sometimes tiny undissolved particles or impurities can remain, leading to a slightly cloudy or less-than-perfectly-smooth texture. A simple technique to ensure a crystal-clear and smooth gel is to strain the agar agar mixture before pouring it into your molds or serving dishes.
Once the agar agar has been fully dissolved by simmering and the mixture is ready to be poured, carefully strain it through a fine-mesh sieve. This process removes any remaining undissolved bits, clumps, or other small particles that could compromise the final texture and appearance. While this step might seem extra, it's particularly useful for recipes where clarity and smoothness are key, such as fruit jellies or clear layers in a dessert, helping to guarantee a perfect result free from Agar agar setting issues related to texture.
Problem 4: Agar Agar Setting Too Quickly or Prematurely
Understanding Rapid Agar Agar Gelation
Agar agar has a relatively high setting temperature compared to gelatin. It begins to gel as it cools, often starting to set as the temperature drops below 122°F (50°C) and becoming quite firm by the time it reaches room temperature (around 104°F or 40°C).
This rapid gelation can sometimes be a source of Agar agar setting issues, particularly if you are working with a large batch, trying to create layers, or incorporating other ingredients after the agar agar has dissolved. If you don't work quickly, the mixture can start to set in the pot or measuring cup before you get it into its final mold, leading to uneven textures, lumps, or difficulty pouring.
This rapid setting property is inherent to agar agar's chemical structure. Unlike gelatin, which requires significant chilling to set, agar agar sets readily at warmer temperatures. While this is advantageous for some applications (like desserts that need to hold shape at room temperature), it requires bakers to be prepared and efficient once the agar agar mixture is ready. Understanding this characteristic helps anticipate and avoid Agar agar setting issues related to premature gelation.
Solution: Working Quickly and Efficiently with Agar Agar
Given agar agar's tendency to set quickly as it cools, efficiency is key once the agar agar has been fully dissolved by simmering. Have all your molds, dishes, and any additional ingredients (like fruit pieces or flavoring extracts that are added after heating) ready and within reach before you start heating the agar agar mixture. As soon as the simmering is complete and you've removed the pot from the heat, pour the mixture into your prepared molds or dishes immediately.
If you need to stir in other ingredients like flavorings or colors that can be added at the end, do so swiftly and efficiently. Avoid letting the mixture sit and cool in the pot, as it will begin to thicken and set, making it difficult to pour smoothly and potentially resulting in an uneven or lumpy final product. Working quickly is a crucial skill to master when using agar agar to prevent frustrating Agar agar setting issues caused by premature gelation.
Solution: Controlling Temperature to Prevent Premature Setting
Controlling the temperature of the agar agar mixture is another strategy to manage its rapid setting. Once the agar agar is fully dissolved through boiling and simmering, keep the mixture warm if you need a few extra moments before pouring. You can do this by placing the pot in a warm water bath (not hot enough to cook, but warm enough to prevent rapid cooling) if you anticipate needing a bit more time, perhaps for layering a dessert.
However, be cautious not to keep the mixture hot for too long, as prolonged high heat can potentially slightly weaken the gel strength over time, although this is less common than issues from insufficient heating. For layered desserts, allow the first layer to set just enough to support the next (it doesn't need to be fully firm), then gently warm the mixture for the next layer if it has started to thicken, being careful not to re-boil it excessively.
Maintaining the mixture slightly above its setting temperature range (e.g., keeping it around 130-140°F or 55-60°C if possible) can buy you valuable time, helping to circumvent Agar agar setting issues related to working speed.
Mastering Agar Agar: Tips and Tricks for Consistent Results
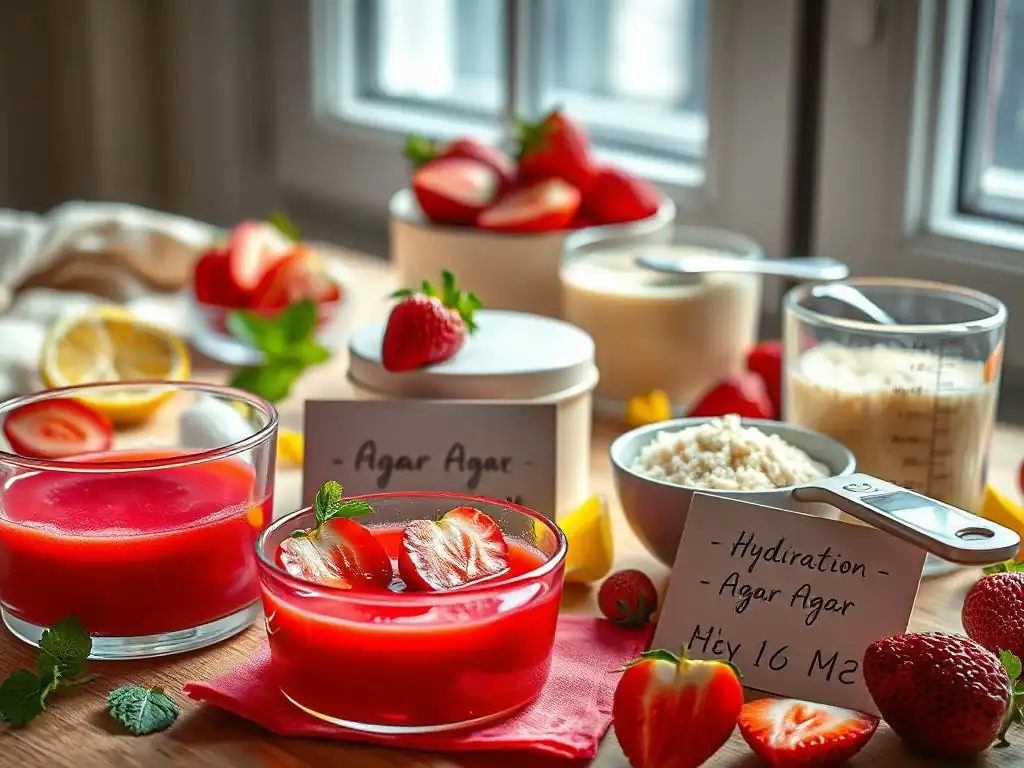
Measuring Agar Agar Accurately for Reliable Setting
Accurate measurement is perhaps the single most important factor in ensuring consistent agar agar setting results and avoiding common Agar agar setting issues. Because the difference between a perfect set, a weak gel, and a rubbery mess can be as little as half a teaspoon of powder, using precise measurements is crucial. While volume measurements (teaspoons, tablespoons) are common in recipes, they can be inconsistent depending on how densely the powder is packed.
For the most reliable results, especially if you are encountering Agar agar setting issues, use a digital kitchen scale to measure your agar agar powder or flakes by weight. Agar agar powder typically weighs around 2 grams per teaspoon, but this can vary slightly by brand. Referencing the manufacturer's recommendations on the packaging, if available, is also helpful. Once you find a ratio (grams per ml or grams per cup) that works for a specific recipe and desired firmness using your brand of agar agar, note it down. This precise approach minimizes variability and leads to predictable outcomes.
The Importance of Water Quality for Agar Agar Gelation
While less commonly discussed than concentration or acidity, the quality of the water or liquid base used can potentially influence agar agar gelation, though its impact is generally minor compared to other factors. Hard water, which contains a high concentration of minerals like calcium and magnesium, theoretically could slightly affect the interaction of agar agar molecules, though significant Agar agar setting issues directly attributable to hard water are rare in typical kitchen use.
More relevant might be the presence of other substances in the liquid, such as high levels of salts or certain proteins (though less likely in vegan bases unless using specific protein powders). For most home baking, tap water is perfectly adequate. If you live in an area with extremely hard water or are working on a very sensitive recipe, using filtered or distilled water could be considered, but for the vast majority of applications, focusing on accurate measurement, proper heating, and managing acidity will resolve most Agar agar setting issues.
Testing Agar Agar Setting Strength Before Adding to Your Recipe
A clever trick to avoid Agar agar setting issues and confirm you've used the correct concentration and dissolved it properly is to perform a quick test before committing the entire batch. While the mixture is still hot after simmering, carefully spoon a very small amount (about a teaspoon or two) into a cold spoon or a small dish that has been placed in the refrigerator or freezer for a few minutes.
Within a minute or two, the small amount of liquid should cool rapidly. If your agar agar concentration is correct and it's properly dissolved, this small sample should set into a firm gel relatively quickly. If it remains liquid or sets very weakly, you know you need to add more agar agar and re-boil the mixture before pouring the main batch. This simple test acts as a crucial quality control step, saving you from a potential batch failure and helping troubleshoot Agar agar setting issues proactively.
Storing Agar Agar Properly to Maintain its Gelling Power
Like many pantry staples, agar agar can lose some of its potency over time if not stored correctly. Exposure to moisture and air can degrade the polysaccharides responsible for its gelling ability, leading to weakened results and unexpected Agar agar setting issues. To maintain its full strength, store agar agar powder or flakes in an airtight container in a cool, dry place, away from direct sunlight.
Humidity is a particular enemy, so avoid storing it above the stove or near other sources of steam. Properly stored agar agar can last for several years, but if you have a package that's been open for a very long time or wasn't sealed well, its gelling power might be diminished. If you suspect your agar agar might be old or compromised, it's wise to perform the quick setting test mentioned above before using it in a recipe to avoid frustrating Agar agar setting issues.
Recipe Adjustments for Optimal Agar Agar Setting
Adjusting Liquid Ratios for Different Agar Agar Strengths
Recipes often provide a starting point for agar agar, but the exact amount needed can vary based on the desired firmness and the brand of agar agar used, as their gelling strengths differ. If a recipe calls for 1 teaspoon of agar agar powder per cup of liquid for a medium set, and you find your brand yields a firmer gel, you'll need to adjust the liquid ratio upwards in future attempts to achieve the intended texture. For instance, use 1.1 or 1.2 cups of liquid for that same teaspoon of agar agar powder.
Conversely, if your brand seems weaker, you might need to slightly reduce the liquid ratio (e.g., use 0.9 cups per teaspoon) or, more commonly, increase the agar agar amount slightly per standard liquid volume. Paying attention to the results you get with your specific ingredients and adjusting the liquid volume or agar agar quantity accordingly is key to mastering agar agar and avoiding common Agar agar setting issues related to inconsistent strength. Keeping notes on these adjustments will help you replicate perfect results.
Considering Acidity Levels When Working with Agar Agar
Acidity is a significant factor that weakens agar agar's gel strength. If your recipe includes acidic ingredients like fruit juices (lemon, orange, pineapple, kiwi), vinegar, or even certain types of plant-based yogurts, you will likely need to use more agar agar than you would with a neutral liquid like water or plain plant milk. For moderately acidic liquids, increasing the agar agar powder by about 25-50% might be necessary. For highly acidic mixtures, you might need to double the standard amount.
Another strategy when dealing with acidity is to add the acidic component after the agar agar has been fully dissolved by boiling and the mixture has cooled slightly, but before it begins to set. This minimizes the time the agar agar is exposed to high heat and acidity simultaneously, which is particularly detrimental to its gelling power.
For example, in a lemon-flavored vegan jelly, dissolve the agar agar in water and sugar, boil, then remove from heat, let cool for a minute or two, and whisk in the lemon juice before pouring. Ignoring acidity levels is a frequent cause of Agar agar setting issues.
Understanding How Sugar Affects Agar Agar Gelation
While not as impactful as acidity, sugar can influence the final texture of agar agar gels. High concentrations of sugar tend to result in a slightly softer, less brittle gel compared to unsweetened gels made with the same amount of agar agar. The sugar molecules interfere slightly with the formation of the agar agar network, leading to a more tender set.
If you are adapting a recipe or creating your own and notice that increasing the sugar content results in a slightly weaker set than desired, you may need to marginally increase the agar agar concentration to compensate. Conversely, if you are significantly reducing the sugar in a recipe, the agar agar gel might become firmer, and you might need to slightly decrease the agar agar amount to maintain the original texture. Being aware of this subtle interaction helps in fine-tuning recipes and preventing unexpected Agar agar setting issues when adjusting sweetness.
Troubleshooting Specific Agar Agar Recipes
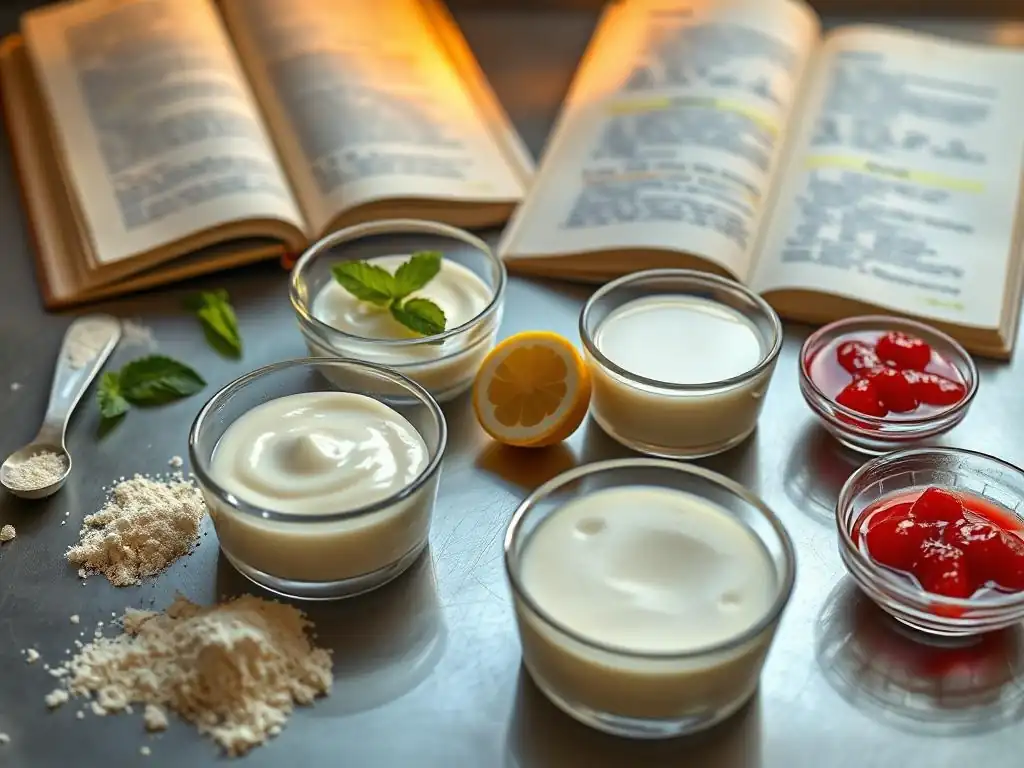
Troubleshooting Vegan Panna Cotta with Agar Agar
Vegan panna cotta is a classic dessert where agar agar is used to achieve a delicate, creamy set. Common Agar agar setting issues here include it being too firm and rubbery (most common) or not setting at all. If your panna cotta is too firm, you've likely used too much agar agar.
For a soft, wobbly panna cotta, aim for a lower concentration, perhaps starting around 0.75 to 1 teaspoon of agar agar powder per cup of total liquid/cream base. Ensure you are using full-fat coconut milk or a rich vegan cream for the best texture, as the fat contributes significantly to the desired creaminess, counteracting the agar agar's potential for brittleness.
If your vegan panna cotta didn't set, the usual suspects are insufficient agar agar, not boiling/simmering long enough to dissolve the agar agar, or adding acidic flavorings (like fruit purees or citrus extracts) too early. Make sure to whisk the agar agar into the cold liquid/cream, bring it to a full boil, and simmer for at least 1-2 minutes. If adding acidic elements, stir them in after removing the mixture from the heat and letting it cool slightly. Reheating and adding a bit more agar agar is usually possible if it fails to set initially.
Troubleshooting Fruit Jelly with Agar Agar
Agar agar is excellent for making vegan fruit jellies, offering a clear and firm set that holds shape well, even at room temperature. Agar agar setting issues in fruit jellies often relate to firmness (too soft or too hard) or clarity (cloudy). For a firm, sliceable jelly, you might need 1.5 to 2 teaspoons of agar agar powder per cup of liquid. If it's too soft, increase the agar agar slightly; if too firm, decrease it next time.
Cloudiness can result from undissolved agar agar or from using pulpy fruit juice without straining. Ensure you fully dissolve the agar agar by boiling and simmering. If using juice with pulp, consider straining the final mixture through a fine sieve before pouring into molds for maximum clarity. Remember that acidic fruit juices require more agar agar to set firmly, so adjust the amount accordingly, especially with citrus or tropical fruits.
Troubleshooting Vegan Cheesecake with Agar Agar
In vegan cheesecakes, agar agar is often used in combination with other ingredients like cashews, coconut cream, or tofu to provide structure to the filling without baking. Agar agar setting issues here typically manifest as a filling that doesn't hold its shape when sliced or one that is too rubbery. Achieving the right balance is key. Agar agar provides the primary gelling power, but the other ingredients contribute body and creaminess.
If the cheesecake filling is too soft, you may not have used enough agar agar for the total volume of the filling ingredients. Consider the total liquid content from things like plant milk, lemon juice (acidity! ), and moisture from soaked cashews or tofu when calculating the agar agar needed.
If it's too rubbery, you've likely used too much agar agar relative to the creamy base ingredients. Ensure the agar agar is fully dissolved in a small amount of liquid (like plant milk) by boiling before blending it into the main filling mixture. Blending thoroughly after adding the agar agar mixture helps create a smooth, uniform texture, avoiding grainy Agar agar setting issues in the filling.
Achieving the Ideal Agar Agar Firmness: A Summary
Key Takeaways for Consistent Agar Agar Results
Achieving the perfect agar agar set consistently boils down to a few key principles. First and foremost, accurate measurement is critical; use a scale if possible and note the amount of agar agar (by weight or precise volume) per volume of liquid that works for your desired texture and brand. Second, proper dissolution is non-negotiable; always whisk agar agar into cold liquid first, then bring it to a full boil and simmer for the recommended time (1-2 mins for powder, 5-10 mins for flakes) to ensure it's completely dissolved, preventing grainy texture and weak sets.
Third, understand the impact of other ingredients, especially acidity and sugar. Acidic ingredients weaken the gel, requiring more agar agar or careful timing of addition. High sugar can slightly soften the gel. Fourth, work efficiently once the agar agar is dissolved due to its rapid setting temperature.
Have everything ready before you start heating. Finally, don't be afraid to test and adjust; perform the quick setting test with a small sample before committing the whole batch, and keep notes on your successes and failures to refine your technique over time. By mastering these points, you can confidently troubleshoot Agar agar setting issues and create beautiful, perfectly set vegan desserts.
Resources for Further Learning About Agar Agar in Vegan Baking
To deepen your understanding of working with agar agar and continue troubleshooting Agar agar setting issues, explore reliable vegan baking cookbooks that feature agar agar extensively. Many experienced vegan bakers share their tested ratios and techniques for specific applications like cheesecakes, panna cottas, and fruit tarts. Online vegan recipe blogs and baking websites are also excellent resources, offering detailed guides and troubleshooting tips for various agar agar-based desserts.
Additionally, look for scientific or culinary resources that explain the chemistry of hydrocolloids like agar agar in more detail. Understanding why it behaves the way it does (its molecular structure, interaction with heat and other substances) can provide valuable insight into resolving complex Agar agar setting issues. Experimentation in your own kitchen, trying different ratios and techniques, combined with learning from reliable sources, will ultimately build your expertise in using this versatile plant-based gelling agent.
Frequently Asked Questions
What exactly is agar-agar, and why is it used in baking?
Agar-agar is a vegetarian gelling agent derived from seaweed. It's used as an alternative to gelatin to provide structure and firmness in desserts, sauces, and other baked goods.
What are some common causes of agar-agar not setting properly?
Insufficient agar-agar is a primary culprit. Other factors include incorrect ratios of agar-agar to liquid, and not boiling the mixture long enough to fully activate its gelling properties.
How long should I boil agar-agar for optimal setting?
Typically, agar-agar needs to be boiled for 3-5 minutes to fully dissolve and activate its gelling properties. Make sure to stir constantly during boiling to prevent burning.
Can I re-melt and re-set agar-agar if it doesn't set the first time?
Yes, you can usually re-melt and re-set agar-agar. Simply reheat the mixture until it melts completely, and then add a bit more agar-agar (about 1/4 teaspoon per cup of liquid) before re-setting.
What are some tips for achieving a consistent and smooth texture with agar-agar?
Ensure the agar-agar is fully dissolved before cooling. Strain the mixture through a fine-mesh sieve to remove any undissolved particles. Also, avoid acidic ingredients as they can interfere with the gelling process.
Final Reflection: Mastering the Art of Agar-Agar
The quest for perfectly set agar-agar is far more than a culinary pursuit; it's a testament to understanding the delicate balance between science and artistry in the kitchen. From the initial bloom to the final firmness, each step in the process holds the key to success, and troubleshooting those inevitable setbacks is crucial for achieving consistent results. This understanding translates directly to a deeper appreciation for the complexities of food preparation and the rewarding satisfaction of mastering a challenging technique.
The journey of working with agar-agar has highlighted the importance of precision and patience in cooking. It's a reminder that even seemingly simple ingredients can yield unpredictable results if not treated with respect and attention to detail. The best things in life are worth waiting for,
and this certainly applies to achieving the perfect set with agar-agar. The subtle nuances in texture, from a delicate jiggle to a firm hold, are a testament to the careful control of temperature and ingredient ratios.
Now, it's your turn to experiment! Don't be discouraged by initial failures; embrace them as learning opportunities. Remember the tips and tricks discussed in this article, and most importantly, trust your senses. With practice and a keen eye for detail, you'll soon be crafting stunning, perfectly set agar-agar creations, whether it's a silky smooth panna cotta or a vibrant, firm jelly. The journey to mastering agar-agar is a rewarding one—embrace the challenge and enjoy the delicious results!
Unlock Your Agar-Agar Mastery!
Thanks for diving into the world of agar-agar with us! We hope you now feel confident in tackling this versatile ingredient. Ready to put your new knowledge into practice?
- Experiment with different ratios: Try adjusting the agar-agar to liquid ratio in your favorite recipe to achieve your perfect firmness. This is the key to unlocking your unique agar-agar creations!
- Share your agar-agar adventures! Show us your successes (and even your "oops" moments) on social media using #AgarAgarAdventures.
- Leave a comment below: What’s your biggest agar-agar challenge, and how do you plan to overcome it?
What innovative agar-agar dish will you create next?