
Your First Step into Edible Isomalt Art: Creating Clear Decorations

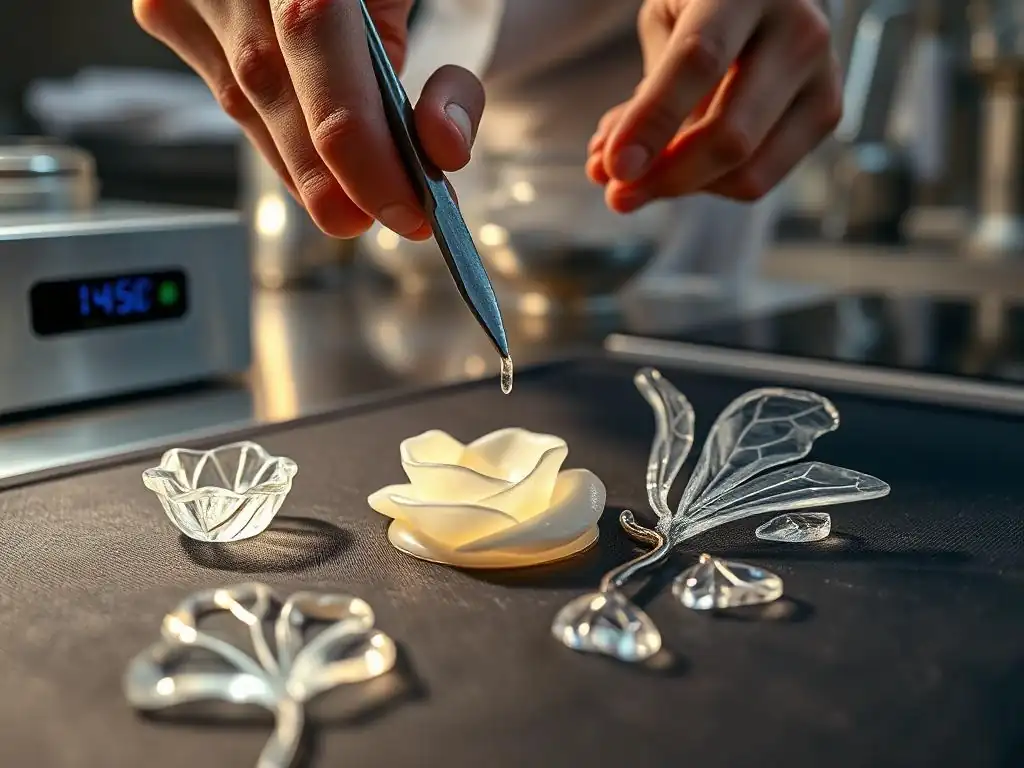
Welcome to BakeWithEase, where baking becomes an adventure! Ever dreamed of crafting dazzling, glass-like decorations for your desserts? This guide unveils the secrets of Isomalt art, starting with a beginner-friendly tutorial that will have you creating stunning, clear embellishments in no time. Curious to see how simple it is to transform sugar into edible masterpieces? Dive in and unlock your artistic potential!
- Creating Edible Sugar Decorations: A Beginner's Guide to Isomalt Art
- Introduction to Isomalt for Cake Decorating
- Essential Tools and Materials for Starting with Isomalt Art
- Step-by-Step Guide: Creating Clear Isomalt Decorations
- Troubleshooting Common Problems in Isomalt Art
- Ideas for Simple Clear Isomalt Decorations
- Storing Isomalt Decorations for Longevity
- Advancing Your Isomalt Skills: Exploring More Complex Techniques
- Conclusion: Embrace the Art of Isomalt
-
Frequently Asked Questions
- What exactly is isomalt art, and why should I try it?
- Is isomalt difficult to work with for a beginner?
- What are the key ingredients and equipment needed for this beginner isomalt tutorial?
- What safety precautions should I take when working with melted isomalt?
- How long will my isomalt decorations last, and how should I store them?
- Final Reflection: The Sweetness of Discovery in Isomalt Art
- Unleash Your Inner Candy Artist: Master Edible Isomalt!
Creating Edible Sugar Decorations: A Beginner's Guide to Isomalt Art
Introduction to Isomalt for Cake Decorating
When venturing into the world of advanced cake decorating, you'll inevitably encounter materials that allow for stunning, glass-like effects. Isomalt is one such material, a versatile sugar substitute that opens up a realm of creative possibilities far beyond traditional sugar work. Unlike regular sugar, which can be finicky and prone to crystallization, isomalt offers greater stability and clarity, making it a favorite for creating everything from delicate sugar jewels to impressive structural pieces. This guide serves as your initial foray, your Isomalt art beginner tutorial, to mastering clear isomalt decorations.
What is Isomalt and Its Advantages in Cake Decorating?
Isomalt is a sugar alcohol derived from sucrose. It's less sweet than table sugar and, more importantly for cake decorating, it's significantly less hygroscopic – meaning it absorbs less moisture from the air. This property is crucial because moisture is the enemy of traditional sugar decorations, often causing them to become sticky, cloudy, or even collapse. Isomalt melts at a higher temperature than sugar, typically around 320°F to 330°F (160°C to 165°C), giving you more working time before it starts to cool and harden.
The primary advantage of isomalt in cake decorating is its ability to remain crystal clear when melted and cooled, resembling glass or ice. This clarity is difficult to achieve consistently with boiled sugar. Furthermore, isomalt is less likely to crystallize during the melting process, a common frustration with sugar syrup. This reliability allows decorators, even beginners, to achieve smooth, transparent finishes ideal for creating realistic edible gems, water effects, or stunning window features on cakes. Its durability also means decorations are less fragile than those made from traditional sugar, offering more resilience during assembly and transport.
Benefits of Incorporating Isomalt Art into Cake Design
Incorporating isomalt art into your cake designs elevates them from simple baked goods to edible works of art. The visual impact of clear or colored isomalt pieces is striking, adding a touch of elegance, fantasy, or modernity depending on the design. Imagine a cake decorated with shimmering, clear isomalt shards that catch the light like ice crystals, or cupcakes topped with vibrant, jewel-toned isomalt gems. These elements provide texture, dimension, and a professional finish that can transform an ordinary cake into a showstopper.
Beyond aesthetics, the stability of isomalt decorations is a major benefit. A cake decorated with isomalt pieces is more likely to withstand varying humidity levels compared to one adorned with boiled sugar decorations, which can quickly degrade. This reliability is particularly important for cakes prepared in advance or transported to different locations. Learning basic isomalt art techniques gives you the power to create durable, beautiful embellishments that maintain their integrity and appearance, making your cakes not just beautiful but also robust. It's a skill that significantly expands your decorating repertoire.
Essential Tools and Materials for Starting with Isomalt Art
Embarking on your isomalt art beginner tutorial requires more than just isomalt itself. Working with molten sugar substitutes at high temperatures necessitates specific tools and a strong emphasis on safety. Having the right equipment ensures a smoother process and, most importantly, helps prevent accidents. Think of this section as your checklist before you even turn on the heat.
Safety Precautions When Working with Hot Isomalt
Working with isomalt involves temperatures exceeding 300°F (150°C), which can cause severe burns upon contact with skin. Safety is paramount and should be your absolute top priority. Always wear heat-resistant gloves designed for candy making or handling hot materials. These gloves should cover your hands and wrists. It's also advisable to wear long sleeves and closed-toe shoes to protect yourself from potential splashes. Avoid loose clothing that could catch on equipment.
Ensure your workspace is clean, dry, and free from distractions. Have a bowl of ice water or a burn gel kit readily available in case of accidental contact. If isomalt does come into contact with your skin, immediately submerge the affected area in cold water or apply the burn gel. Do not try to wipe it off, as this will spread the hot material and worsen the burn. Working with hot isomalt requires your full attention and respect for the material's temperature.
Required Tools for Working with Isomalt: A Beginner's Checklist
To get started with isomalt art, you'll need a few key tools. These items are essential for safely melting, shaping, and handling the material.
- Heavy-bottomed saucepan: Helps distribute heat evenly and prevent scorching.
- Candy thermometer: Crucial for monitoring the exact temperature of the melting isomalt. Digital thermometers offer quick, accurate readings.
- Silicone mats: Isomalt will not stick to silicone, making these essential for pouring, shaping, and cooling. Parchment paper is not a substitute as isomalt can stick.
- Silicone molds: Provide an easy way to create consistent shapes like gems, diamonds, or other decorative elements.
- Heat-resistant gloves: Absolutely necessary for protecting your hands from high temperatures.
- Pouring spout or lip: Some saucepans have these, or you can use a separate heat-resistant pouring container. Makes pouring safer and more controlled.
- Offset spatula or heat-resistant tool: Useful for gently nudging or shaping the isomalt on the mat. Avoid plastic tools that can melt.
Having these tools ready before you begin will make the process of creating isomalt decorations much more manageable and safe for a beginner.
Different Types of Isomalt: Granules, Sticks, and Pre-Cooked
Isomalt is commonly available in several forms, each with slightly different uses and melting properties. Understanding the types will help you choose the best one for your project.
The most common form is isomalt granules. This is raw isomalt that requires melting, often with a small amount of water, to reach the correct temperature for working. Granules are typically the most cost-effective option and offer the most control over the melting process, making them a good starting point for learning the basics of isomalt art. You can purchase them in bulk, such as a 1-pound or 5-pound bag.
Isomalt sticks are essentially pre-cooked isomalt that has been formed into rods or sticks. They are convenient for melting smaller amounts, often directly in a silicone melting pot or even a microwave-safe container (with extreme caution and proper technique, as microwave heating can be uneven). Sticks are sometimes pre-colored, which saves a step.
While more expensive per ounce than granules, they can be easier for quick, small projects or color tests for a beginner. Pre-cooked isomalt also comes in larger chunks or sheets and melts very quickly, often used by professionals for speed or specific techniques like blowing or pulling sugar. For a beginner focusing on clear poured decorations, granules offer the best value and learning experience regarding temperature control.
Step-by-Step Guide: Creating Clear Isomalt Decorations
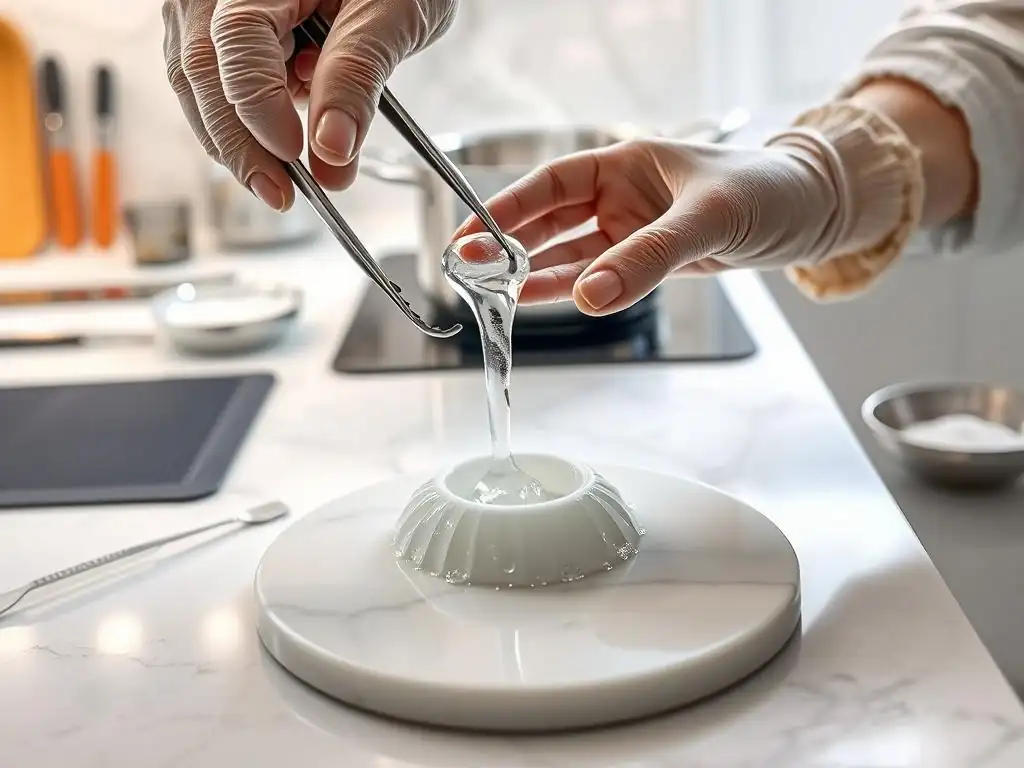
Now that you understand the basics and have your tools ready, let's walk through the process of creating beautiful, clear isomalt decorations. This step-by-step guide focuses on simple pouring techniques perfect for an Isomalt art beginner tutorial.
Step 1: Preparing Isomalt for Melting
Begin by measuring the desired amount of isomalt granules. A typical batch might use 1 cup (approximately 225 grams) of isomalt. Place the granules in your heavy-bottomed saucepan. For optimal clarity and to help the isomalt reach the correct temperature evenly, many decorators add a small amount of distilled water – often just 1/4 cup (60 ml) per cup of isomalt, or sometimes even less, just enough to wet the granules. Some pure isomalt products are designed to be melted without water, so always check the manufacturer's instructions on the packaging.
Swirl the pan gently to ensure all the granules are moistened if using water. Avoid stirring with a utensil at this stage, as introducing foreign particles or undissolved crystals can lead to crystallization later. Place the pan on your stovetop over medium heat. Attach your candy thermometer to the side of the pan, ensuring the tip is submerged in the isomalt but not touching the bottom of the pan.
Step 2: Safely and Effectively Melting Isomalt
Turn the heat to medium and let the isomalt and water mixture heat gradually. The water will boil off first, and then the isomalt will begin to melt. Watch the temperature carefully on your candy thermometer. As the temperature rises, the isomalt will become liquid and clear. Do not stir the isomalt once it begins to melt. Stirring can introduce air bubbles and trigger crystallization, resulting in cloudy or grainy isomalt instead of the clear, smooth finish you want for isomalt art.
Continue heating until the isomalt reaches a temperature of 320°F to 330°F (160°C to 165°C). This temperature range ensures that any remaining water has evaporated and the isomalt is properly melted and ready for working. Reaching at least 320°F is crucial for preventing crystallization later. Once the isomalt is completely melted and has reached the target temperature, carefully remove the saucepan from the heat. Allow it to sit for a minute or two to let any large bubbles dissipate slightly.
Step 3: Coloring Isomalt (Optional)
If you wish to color your isomalt decorations, this is the stage to do it. You will need gel or powder food coloring specifically designed for candy or oil-based applications. Standard water-based food coloring can cause the isomalt to become cloudy or seize.
Add a very small amount of coloring to the melted isomalt off the heat. Remember that colors intensify as the isomalt cools. Start with just a tiny drop or a speck of powder. Swirl the pan gently to incorporate the color, or use a heat-resistant tool to stir minimally. If you need a deeper color, add more coloring incrementally, swirling or stirring briefly each time. Be cautious not to overmix, as this can introduce air bubbles. For this guide on clear isomalt decorations, you can skip this step entirely and proceed with the clear liquid.
Step 4: Pouring and Shaping Clear Isomalt Decorations
Once your isomalt is melted, clear (or colored, if desired), and has cooled slightly off the heat (ideally between 280°F - 300°F or 140°C - 150°C for safer handling while still pliable), you are ready to pour and shape your decorations. Ensure you are wearing your heat-resistant gloves.
Using Silicone Molds for Creating Isomalt Shapes
Silicone molds are excellent for beginners as they provide defined shapes and are easy to use. Place your silicone molds on a flat, heat-resistant surface covered with a silicone mat. Carefully pour the melted isomalt into the cavities of the molds. Pour slowly and steadily from your heat-resistant pouring container or saucepan with a spout.
Fill the molds just to the top. If bubbles appear on the surface, you can gently wave a heat gun over the mold briefly (keep it moving!) or use a toothpick to carefully pop them. Do not touch the hot isomalt. Let the filled molds sit undisturbed on the silicone mat.
Freeform Techniques for Shaping Molten Isomalt
For a more organic look, you can create freeform shapes directly on a silicone mat. Carefully pour puddles, lines, or abstract designs onto the mat. You can tilt the mat slightly to encourage the isomalt to spread in a certain direction. As the isomalt cools slightly but is still warm and pliable (around 250°F - 275°F or 120°C - 135°C), you can use a heat-resistant tool like an offset spatula to gently push or pull the edges to refine the shape.
For creating shards or "ice" pieces, simply pour a thin, uneven layer of isomalt onto the silicone mat. Once it cools completely, you can break it into pieces. For more controlled shapes like discs, pour a circular puddle. For geometric shapes, you might pour against straight-edged silicone rulers placed on the mat. Always wear your heat-resistant gloves when working near the warm isomalt.
Step 5: Cooling and Handling Finished Isomalt Decorations
After pouring, allow the isomalt decorations to cool completely and harden on the silicone mat or in the molds. This can take anywhere from 15 minutes to an hour or more, depending on the size and thickness of the pieces and the ambient temperature. Do not touch the isomalt until it is completely cool to the touch. Trying to move or handle it while it's still warm can distort the shape or cause it to break.
Once fully cooled and hard, carefully peel the isomalt pieces off the silicone mat or gently demold them from the silicone molds. Handle the finished decorations with clean, gloved hands or fingertips to avoid leaving fingerprints, which can dull the surface. If fingerprints do occur, they can sometimes be polished away gently with a soft, lint-free cloth, but prevention is easier. Your clear isomalt decorations are now ready to be used!
Troubleshooting Common Problems in Isomalt Art
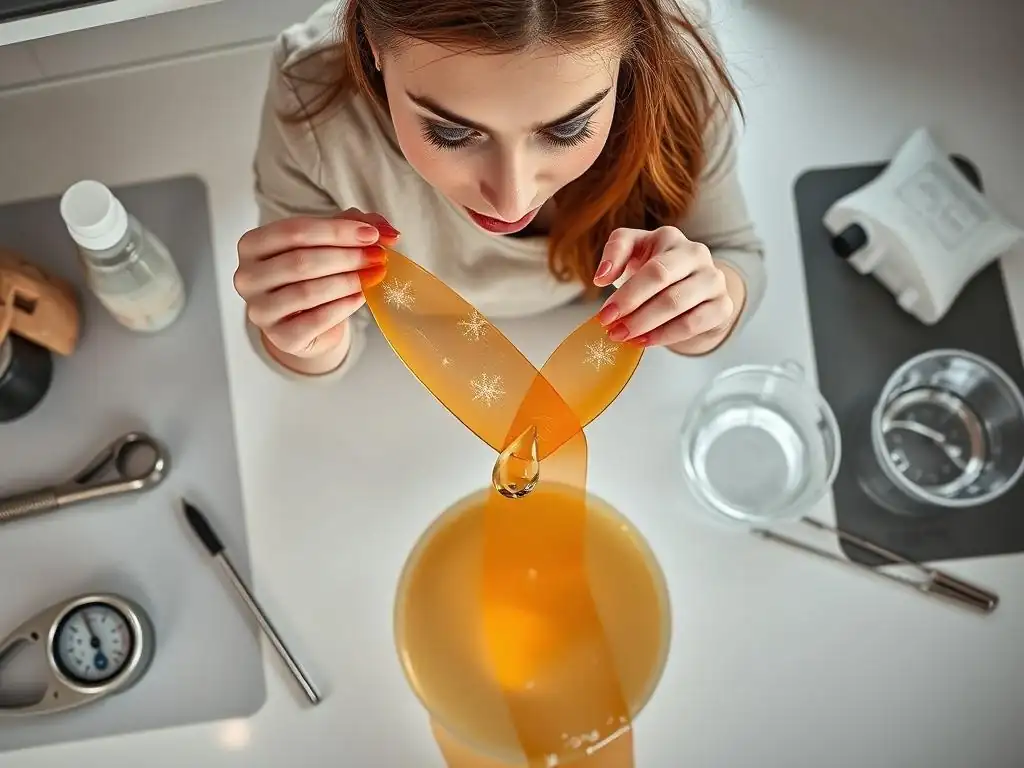
As you practice your isomalt art beginner tutorial, you may encounter a few common issues. Don't be discouraged; most problems have simple explanations and solutions.
Eliminating Bubbles in Isomalt
Air bubbles are a frequent challenge when working with isomalt, especially for beginners. They can make your clear decorations look cloudy or imperfect. The primary cause is incorporating air during the melting or pouring process. To minimize bubbles, avoid stirring the isomalt while it melts. Let it melt undisturbed.
After removing the melted isomalt from the heat, let it sit for a few minutes. This rest period allows larger bubbles to rise to the surface and dissipate. You can also gently skim any remaining bubbles off the surface with a heat-resistant spoon before pouring. When pouring into molds, pour slowly and steadily from a slight height; the thin stream helps break up bubbles. Tapping the filled mold gently on the counter can help trapped bubbles rise. For surfaces, a quick pass with a heat gun (kept moving!) can pop surface bubbles.
Preventing Crystallization in Isomalt Decorations
Crystallization is another common issue where the isomalt becomes grainy or opaque instead of staying clear. This happens when sugar crystals are introduced into the melting process. Causes include stirring the isomalt while it's melting, not reaching a high enough temperature (below 320°F/160°C), or having tiny sugar particles on your tools or in your pan.
To prevent crystallization, ensure your saucepan and tools are spotlessly clean before you start. Avoid stirring the isomalt once it begins to melt; rely on swirling the pan gently if needed. Always use a candy thermometer to confirm you reach the correct temperature range (320°F - 330°F). Reaching this temperature helps dissolve any potential seed crystals. If your isomalt does crystallize, you may be able to reheat it slowly, but it might not regain its original clarity. Starting with fresh, pure isomalt granules in a clean pan is your best defense against crystallization in your isomalt art.
Addressing Cloudy or Opaque Isomalt
If your finished isomalt decorations are cloudy or opaque instead of beautifully clear, several factors could be the cause. High humidity is a major culprit; isomalt, while less hygroscopic than sugar, can still absorb moisture from the air, especially as it cools, leading to a cloudy finish. Working in a low-humidity environment is ideal.
Another reason for cloudiness can be not reaching a sufficiently high temperature during melting (below 320°F/160°C), which can leave residual moisture or undissolved components. Ensure your thermometer is accurate and you hit the target temperature. Improper cooling can also play a role; rapid cooling or placing hot isomalt in a cold environment can sometimes shock it into opacity.
Letting it cool gradually at room temperature on a silicone mat is usually best. If a finished piece is slightly cloudy due to fingerprints or minor surface issues, you can sometimes restore some clarity by gently polishing it with a lint-free cloth or briefly waving a heat gun over the surface (very quickly and carefully! ).
Ideas for Simple Clear Isomalt Decorations
Now that you've learned the fundamental techniques in this Isomalt art beginner tutorial, let's explore some easy and impactful ways to use clear isomalt to decorate your cakes and cupcakes.
Creating Isomalt Shards and Crystals
One of the simplest yet most dramatic uses of clear isomalt is creating shards or crystal-like pieces. These are perfect for adding height, texture, and a touch of drama to a cake, mimicking ice, glass, or even geological formations.
To make shards, simply pour a relatively thin layer (about 1/8 to 1/4 inch thick) of clear melted isomalt onto a silicone mat. You can pour it in an abstract shape or a more uniform rectangle. Let it cool completely until it is hard and brittle. Once fully cooled, you can carefully break the sheet into pieces of varying sizes and shapes. Wear gloves or handle carefully, as the edges can be sharp. You can create tall, jagged pieces or smaller, irregular "crystal" fragments. Arrange these on your cake to create striking visual effects.
Making Clear Isomalt Discs and Geometric Shapes
Using silicone molds is an effortless way to produce consistent, professional-looking clear isomalt decorations in specific shapes. Silicone gem molds are very popular and allow you to create edible diamonds, emeralds, or other jewel shapes.
Simply pour the melted clear isomalt into the cavities of your silicone molds, following the pouring technique described earlier to minimize bubbles. For simple clear discs, you can use circular molds or even pour small, controlled puddles directly onto a silicone mat. Ensure the surface is level so the discs are uniform in thickness. Geometric molds like squares, triangles, or hexagons also work well. Once cooled and demolded, these shapes can be used individually or combined to create intricate patterns on cakes.
Incorporating Isomalt Decorations into Cakes and Cupcakes
Attaching your finished clear isomalt decorations to cakes and cupcakes requires a secure method. For heavier pieces, a small amount of melted isomalt can act as a strong edible "glue." Heat a tiny amount of isomalt in a heat-safe container (like a silicone melting pot) until just melted. Apply a small dab to the back of the isomalt decoration using a toothpick or heat-resistant tool and quickly attach it to the cake or frosting. Hold it in place for a few seconds until the isomalt sets.
For lighter pieces or decorations being placed on buttercream, a stiff royal icing can also work well. Apply a dot or line of royal icing to the back of the isomalt piece and press it gently onto the cake. Ensure the royal icing is stiff enough to hold the weight. For cupcakes, smaller isomalt gems or shards can be placed directly onto frosting or secured with a tiny dot of royal icing. Position the pieces strategically to catch the light and enhance your design.
Storing Isomalt Decorations for Longevity
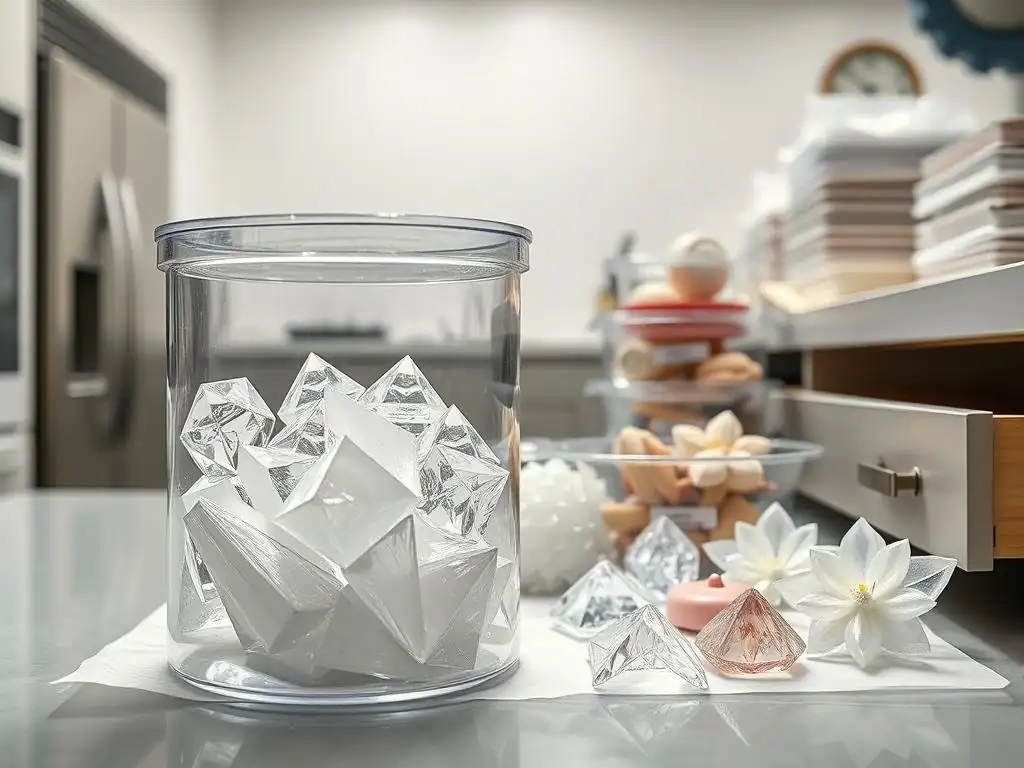
Proper storage is key to preserving the clarity and appearance of your isomalt art, especially given its susceptibility to moisture.
Best Practices for Preserving Isomalt Art
Because isomalt is hygroscopic, it will absorb moisture from the air over time, causing it to become sticky and cloudy. To prevent this, finished isomalt decorations must be stored in a completely airtight container. Plastic storage containers with tight-fitting lids or sealed food storage bags work well.
To further protect against humidity, include a desiccant packet (like the small silica gel packets found in shoe boxes or electronics packaging – ensure they are food-safe if possible, or at least not in direct contact with the isomalt) inside the airtight container with your isomalt pieces. These packets absorb moisture from the air within the container. Store the container in a cool, dry place at room temperature, away from direct sunlight or heat sources.
Avoid storing isomalt decorations in the refrigerator or freezer, as temperature fluctuations and condensation can introduce moisture and cause them to degrade quickly. Stored correctly, clear isomalt decorations can last for many weeks or even months.
Advancing Your Isomalt Skills: Exploring More Complex Techniques
Mastering the basics of pouring clear isomalt decorations is a fantastic first step. As you gain confidence with this Isomalt art beginner tutorial, you might be inspired to explore more complex and impressive techniques.
Creating Isomalt Spheres and Bowls
Moving beyond flat shapes, you can learn to create three-dimensional isomalt structures like spheres and bowls. Creating a sphere often involves melting isomalt and pouring it into specialized sphere molds or using a sugar-blowing technique with a pump (which requires significant practice).
To create a simple isomalt bowl, you can pour melted isomalt over the inverted outside of a heat-resistant, oiled bowl or dome mold placed on a silicone mat. As the isomalt cools and hardens, it will take the shape of the bowl. Once completely cool, you can carefully lift the isomalt shell off the mold. These bowls can be used as decorative elements or even filled with treats. These techniques require more practice and temperature control than simple pouring, but they showcase the incredible versatility of isomalt art.
Resources for Continued Learning and Skill Development in Isomalt Art
The world of isomalt art is vast and exciting. Once you've mastered this Isomalt art beginner tutorial on clear decorations, there are many avenues for continued learning.
- Online Tutorials and Videos: Platforms like YouTube and various cake decorating websites offer countless tutorials demonstrating more advanced techniques like pulling sugar into ribbons or flowers, blowing sugar spheres, or creating intricate sculptures. Visual learning is very effective for sugar work.
- Books: Dedicated books on sugar art and cake decorating often feature detailed chapters or entire sections on working with isomalt, providing step-by-step instructions and project ideas.
- Classes and Workshops: If available in your area, in-person classes or workshops taught by experienced sugar artists can provide hands-on guidance and feedback, which is invaluable for complex techniques. Online courses are also available.
Exploring these resources will help you refine your skills, learn new applications for isomalt, and continue to push the boundaries of your edible art.
Conclusion: Embrace the Art of Isomalt
Taking your first step into edible Isomalt art by learning to create clear decorations opens up a world of dazzling possibilities for your cakes and confections. While working with hot sugar requires careful attention to safety, the techniques themselves are accessible to beginners with the right tools and guidance. From sparkling gems to dramatic shards, clear isomalt pieces add a touch of professional flair and visual excitement that is hard to achieve with other mediums.
Embracing isomalt art means adding a powerful tool to your cake decorating arsenal. It allows you to create durable, beautiful, and unique elements that will impress anyone who sees them. Don't be afraid to experiment with simple shapes and techniques initially. Practice makes perfect, and each successful piece will build your confidence to try more elaborate designs. This Isomalt art beginner tutorial has provided you with the foundational knowledge; now it's time to put on your gloves, heat up that isomalt, and start creating your own edible masterpieces.
Key Takeaways from This Beginner's Guide to Isomalt Art
Here are the essential points to remember as you begin your journey with isomalt art:
- Safety is paramount: Always wear heat-resistant gloves and take precautions when working with hot isomalt (300°F+).
- Use the right tools: A candy thermometer, silicone mats, and appropriate molds are crucial for success.
- Isomalt granules are a great starting point for beginners learning to melt.
- Melt isomalt slowly and avoid stirring to prevent crystallization. Aim for 320°F-330°F (160°C-165°C).
- Pour isomalt once it has cooled slightly (280°F-300°F) for easier handling.
- Silicone molds and freeform pouring on silicone mats are simple shaping techniques.
- Allow decorations to cool completely before handling.
- Common issues like bubbles, crystallization, and cloudiness can be prevented with proper technique and temperature control.
- Store finished isomalt decorations in airtight containers with desiccant packets to protect them from humidity.
- Start simple with shards, gems, and discs before exploring more advanced techniques.
- Practice and continued learning are key to mastering isomalt art.
This Isomalt art beginner tutorial has equipped you with the knowledge to begin creating stunning clear decorations. Enjoy the process and the beautiful results!
Frequently Asked Questions
What exactly is isomalt art, and why should I try it?
Isomalt art involves using melted isomalt sugar to create edible decorations. It's a fun way to add stunning, clear, and unique touches to cakes and desserts.
Is isomalt difficult to work with for a beginner?
While it requires some practice, isomalt is manageable for beginners. This tutorial focuses on simple techniques and provides easy-to-follow instructions to get you started.
What are the key ingredients and equipment needed for this beginner isomalt tutorial?
You'll primarily need isomalt granules, food coloring (optional), a silicone mat, and a heat source like a silicone mold or a small saucepan for melting. Exact ingredients are found in the tutorial.
What safety precautions should I take when working with melted isomalt?
Melted isomalt is extremely hot and can cause burns. Always wear heat-resistant gloves, work in a well-ventilated area, and keep children away from the working surface.
How long will my isomalt decorations last, and how should I store them?
Isomalt decorations can last for weeks if stored properly. Keep them in an airtight container with desiccant packets to prevent them from absorbing moisture and becoming sticky.
Final Reflection: The Sweetness of Discovery in Isomalt Art
The delicate art of crafting edible isomalt creations is more than just a culinary skill; it's a gateway to boundless creativity. This tutorial aimed to demystify the process for beginners, providing a foundational understanding of isomalt's properties and techniques for creating stunning, clear decorations. The accessibility of this medium, once considered daunting, is now within reach, opening up a world of possibilities for aspiring artists.
The journey into isomalt artistry is a deeply rewarding one, mirroring the transformative power of mastering a new skill. The precision required, the delicate balance of heat and timing, and the sheer visual impact of the final product all contribute to a sense of accomplishment that extends beyond the kitchen. As I've explored this craft, I've been reminded of the quote by Vincent van Gogh: I dream my painting, and then I paint my dream.
This perfectly encapsulates the process of envisioning a design and then meticulously bringing it to life using isomalt, transforming a simple idea into a breathtaking edible masterpiece.
Now, it's your turn. Don't be intimidated by the seemingly complex nature of isomalt. Take the first step, experiment with the techniques outlined in this tutorial, and let your imagination run wild. Embrace the challenges, celebrate the successes, and most importantly, enjoy the sweet journey of discovery that awaits you in the world of edible isomalt art. The possibilities are as limitless as your creativity.
Unleash Your Inner Candy Artist: Master Edible Isomalt!
Thanks for exploring the world of edible isomalt with us! You've now unlocked the potential to create stunning, crystal-clear decorations that will elevate your baking to the next level. Ready to take the plunge?
- Craft your first isomalt masterpiece: Start small! Try making simple shapes or shards using the techniques we outlined. Even a small success is a huge win.
- Share your creation: Show off your gorgeous isomalt work on social media using #BakeWithEaseIsomalt. Let's inspire each other!
- Experiment with colors and flavors: Don't be afraid to get creative! What unique isomalt designs will you dream up?
What's your first isomalt project going to be? Let us know in the comments below!