
From Fondant to Fabulous: Advanced Cake Covering & Decorating

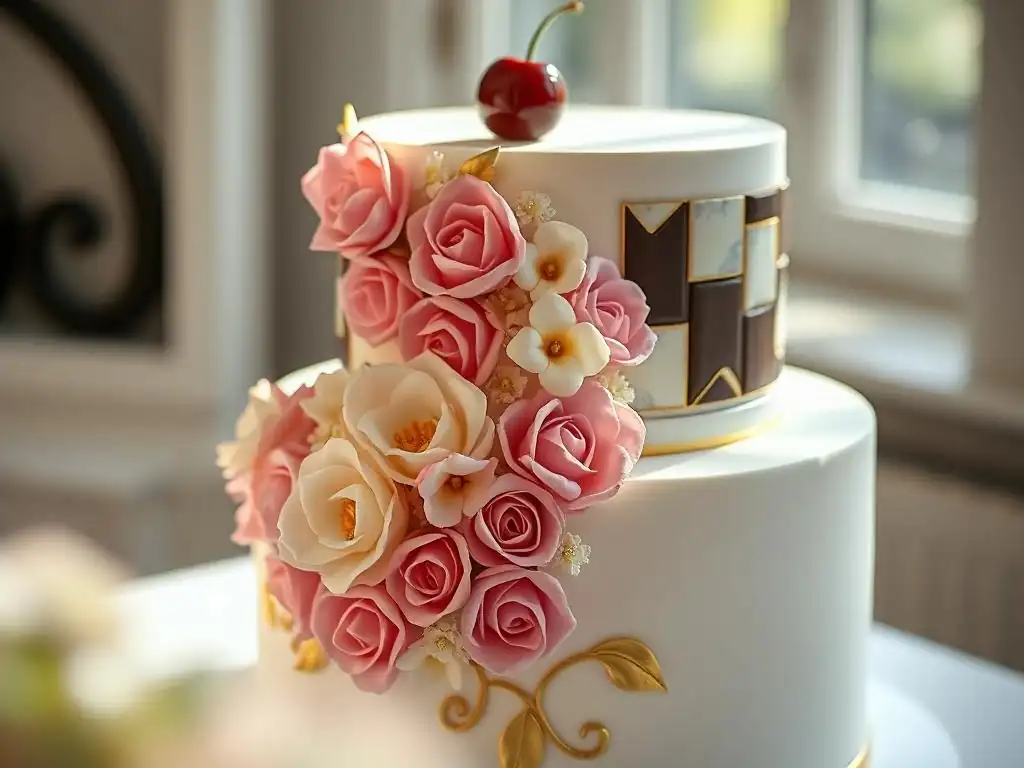
Welcome to BakeWithEase, your trusted companion on your baking journey! Are you ready to elevate your cake creations to the next level? Dive into our latest article, "From Fondant to Fabulous: Advanced Cake Covering & Decorating," where we unlock the secrets to advanced cake decorating techniques. Discover the professional tips and tricks that will transform your cakes into edible masterpieces, leaving your friends and family in awe. What’s the key to achieving that flawless fondant finish? Let's find out!
- Advanced Cake Decorating Techniques
- Mastering Advanced Cake Decorating Techniques at BakeWithEase
- Achieving a Flawless Fondant Finish: The Foundation for Advanced Decoration
- Advanced Fondant Techniques: Sculpting & Modeling
- Royal Icing Mastery: Intricate Piping and Design
- Exploring Alternative Cake Covering Methods Beyond Fondant
- Airbrushing Techniques for Cake Decorating: Adding Depth and Dimension
- Working with Sugar Paste: Creating Edible Decorations
- Advanced Cake Decorating Tools and Equipment: A Comprehensive Overview
- Cake Decorating Safety and Hygiene: Best Practices
- Inspiration and Resources for Advanced Cake Decorating Projects
- Conclusion: Elevate Your Cakes with Advanced Decorating Skills.
-
Frequently Asked Questions
- What are some key differences between covering a cake with buttercream versus fondant?
- What tools are essential for advanced cake decorating with fondant?
- How can I prevent fondant from tearing or cracking when covering a cake?
- What are some techniques for creating realistic textures on fondant cakes?
- How do I achieve vibrant and consistent colors when tinting fondant?
- Final Reflection: The Enduring Allure of the Perfectly Iced Cake
- Unleash Your Inner Cake Artist!
Advanced Cake Decorating Techniques
Mastering Advanced Cake Decorating Techniques at BakeWithEase
Why Go Beyond Basic Cake Decorating?
Basic cake decorating techniques, such as simple swirls of buttercream or scattered sprinkles, are wonderful for everyday treats and building confidence. However, they often have limitations when you envision creating truly personalized, intricate, or show-stopping cakes for significant milestones like weddings, milestone birthdays, or anniversaries. Moving beyond the basics allows you to transform a simple baked good into a work of edible art that can capture specific themes, personalities, or aesthetics with stunning detail and precision. It's about pushing creative boundaries and achieving a level of finish that truly impresses.
Learning advanced cake decorating techniques isn't just about technical skill; it's about unlocking new levels of artistic expression. Imagine crafting a cake that looks like a designer handbag, a beloved cartoon character, or features delicate sugar flowers that appear almost real. These are the possibilities that open up when you delve into advanced methods.
It offers immense personal satisfaction in mastering challenging skills and can even open doors to professional opportunities, whether selling custom cakes or teaching others the craft. For example, a wedding cake featuring intricate royal icing piping or realistic sugar roses might command a significantly higher price point and admiration than one with simple buttercream waves.
Defining Advanced Cake Decorating Techniques
Advanced cake decorating techniques involve skills that require greater precision, specialized tools, and often more time and practice to master compared to beginner methods. These techniques move beyond simply applying frosting and involve shaping, sculpting, intricate piping, and using specialized mediums like fondant, sugar paste (gum paste), royal icing, and even airbrushing. They often require a deep understanding of the materials and how they react to different conditions, as well as patience and attention to detail.
Think of advanced techniques as building upon foundational skills. While a beginner might pipe simple borders, someone employing advanced cake decorating techniques might create complex lace patterns with royal icing, sculpt multi-dimensional figures from fondant, or achieve flawless, mirror-like finishes with ganache. These methods frequently involve multiple stages, such as preparing a cake for fondant, rolling and applying the fondant smoothly, then adding intricate details like hand-painted designs or delicate sugar flowers. Mastery comes from consistent practice, learning from mistakes, and understanding the nuances of each medium.
Achieving a Flawless Fondant Finish: The Foundation for Advanced Decoration
Preparing Your Cake for Fondant: Essential Steps
Achieving a flawless fondant finish begins long before the fondant is even unrolled. The cake itself must be properly prepared. After baking, ensure your cake layers are completely cooled, ideally chilled, as warm cake is too fragile and prone to crumbling. Level the tops of the cakes using a cake leveler or serrated knife for a flat surface.
The next crucial step is applying a crumb coat. This is a thin layer of buttercream or ganache applied all over the cake to trap any loose crumbs and create a smooth base. A typical crumb coat might be just 1/8 inch thick.
Once the crumb coat is applied, chill the cake in the refrigerator for at least 20-30 minutes until the coating is firm. For truly sharp edges, especially on square cakes, apply a second, slightly thicker layer of frosting or ganache and use a bench scraper or specialized fondant smoother to create perfectly straight sides and sharp corners. This process might involve applying frosting, smoothing, chilling, and repeating until the desired sharp edge is achieved. A perfectly smooth and sharp base is non-negotiable for a professional-looking fondant covering when executing advanced cake decorating techniques.
Choosing the Right Fondant for Your Project
Not all fondants are created equal, and selecting the right one is key to successful advanced cake decorating techniques. Ready-made fondants vary significantly in taste, texture, and workability. Some are softer and more elastic, ideal for covering cakes smoothly, while others are firmer and better suited for modeling or sculpting. Brands like Satin Ice or Massa Ticino are popular choices among professionals due to their quality and consistency, though availability and personal preference play a large role. Consider taste as well; some fondants are sweeter or have a distinct flavor.
The specific project you are undertaking should guide your fondant choice. For simply covering a cake, a pliable, easy-to-roll fondant is best. If you plan to sculpt figures or create delicate structures, you'll need a firmer fondant or one specifically marketed as "modeling fondant." Alternatively, you can transform standard fondant into modeling paste by kneading in a small amount of CMC or tylose powder (approximately 1-2 teaspoons per pound of fondant), which helps it hold its shape and dry firmer. Humidity can also affect your choice, as some fondants handle moisture better than others.
The Smooth Fondant Application Technique: A Step-by-Step Guide
Applying fondant smoothly requires practice and patience. Begin by kneading your chosen fondant until it is pliable and free of cracks. Lightly dust your work surface and rolling pin with cornstarch or powdered sugar to prevent sticking. Roll the fondant evenly, aiming for a thickness of about 1/8 inch (around 3mm). Roll it large enough to generously cover your cake, measuring the top diameter plus twice the height of the cake.
Carefully lift the rolled fondant. A common method is to drape it over your rolling pin and then unroll it over the center of your chilled, prepared cake. Gently smooth the top surface of the cake with your hands or a fondant smoother, starting from the center and working outwards to remove air bubbles.
Then, work your way down the sides, lifting and easing the fondant against the cake while simultaneously smoothing with your other hand or a smoother. Use a sharp knife or pizza cutter to trim away the excess fondant around the base. For advanced cake decorating techniques, using two smoothers simultaneously (one on top, one on the side) helps achieve extra sharp edges.
Troubleshooting Common Fondant Problems: Cracking, Tearing, and Bubbles
Even experienced decorators encounter fondant issues. Cracking often occurs if the fondant is too dry, not kneaded enough, rolled too thin, or stretched excessively during application. To fix dry fondant, knead in a tiny amount of vegetable shortening or glycerin. If it cracks while rolling, gather, knead, and re-roll slightly thicker. Small tears can sometimes be repaired by gently rubbing the edges together with a tiny bit of water and smoothing.
Air bubbles are another frequent problem, caused by trapped air during application or gasses released from the cake. The best way to deal with bubbles is to carefully prick them with a sharp, food-safe pin or scribe at an angle. Gently smooth the air out towards the hole. For persistent bubbles, you may need to prick multiple times. Preventing bubbles starts with a smooth crumb coat and carefully easing the fondant onto the cake without trapping air pockets. Mastery of advanced cake decorating techniques involves knowing how to anticipate and fix these common issues.
Advanced Fondant Techniques: Sculpting & Modeling
Introduction to Fondant Sculpting: Tools and Materials
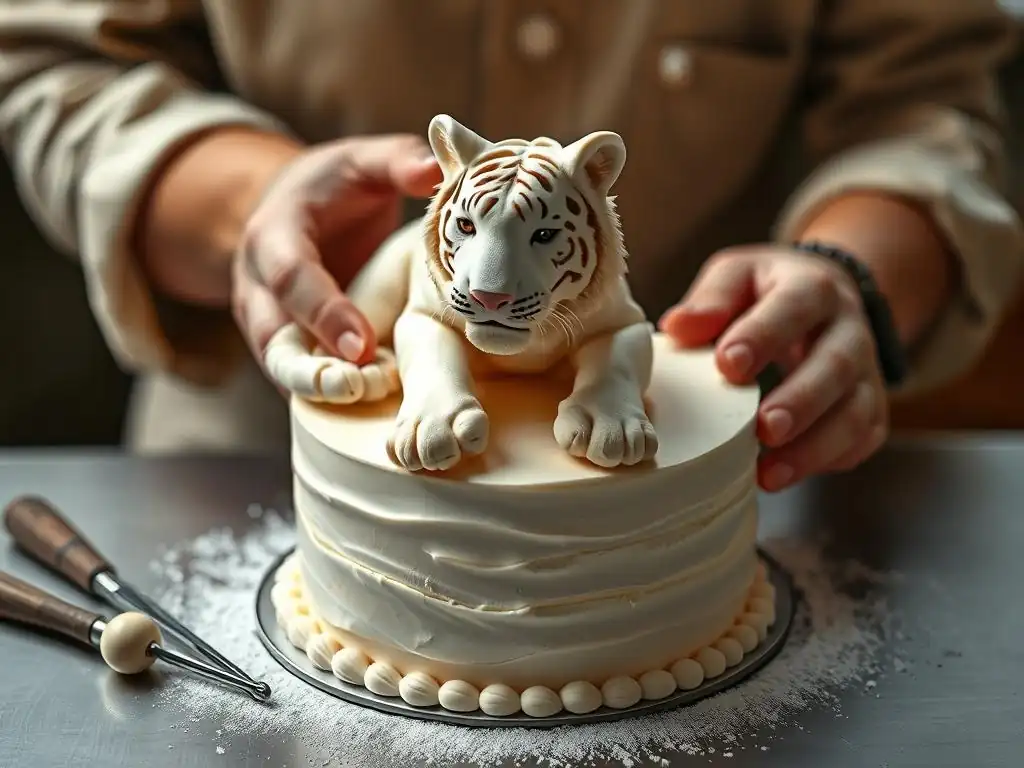
Fondant sculpting is a key skill in advanced cake decorating techniques, allowing you to create three-dimensional elements like figures, animals, or complex structural decorations. The right tools are essential. Basic modeling tools, often found in sets, include items like a ball tool (for hollowing and shaping petals), a shell tool (for creating textures), a knife tool (for cutting and marking), and various pointed or flat tools. You'll also need a non-stick surface or silicone mat, a small non-stick rolling pin, and cornstarch or powdered sugar to prevent sticking.
The primary material is modeling fondant or fondant mixed with a strengthening agent like CMC or tylose powder. This modification makes the fondant firmer, less prone to stretching, and allows it to dry harder, which is crucial for sculpted pieces to hold their shape. You'll also need edible glue (a mix of CMC powder and water works well) to join pieces together, and food coloring gels or pastes to color the fondant. For complex structures, internal supports like food-safe floral wire or skewers may be necessary.
Creating Basic Fondant Shapes: Spheres, Cylinders, and Cones
Mastering basic shapes is the foundation of fondant sculpting. To create a smooth sphere, take a piece of well-kneaded modeling fondant and roll it between your palms in a circular motion, applying gentle, even pressure until it forms a perfect ball with no cracks. Ensure the fondant is warm and pliable from kneading before starting.
From a sphere, you can easily form cylinders and cones. To make a cylinder, roll the sphere into a log shape by rolling it back and forth under your palm on a flat surface, applying even pressure across the length. To create a cone, start with a sphere or a piece of fondant rolled into a short cylinder, then apply more pressure to one end while rolling back and forth, tapering it to a point. Practicing these fundamental shapes until they are smooth and consistent is vital before attempting more complex sculpted elements in advanced cake decorating techniques.
Modeling Realistic Flowers with Fondant: A Detailed Tutorial
Modeling realistic sugar flowers is one of the most admired advanced cake decorating techniques. Let's outline a simple rose. Start with modeling fondant colored to your desired shade, mixed with CMC powder. Roll tiny balls for the center bud and slightly larger balls for petals. Roll the center ball into a cone shape. For petals, flatten each ball thinly, especially thinning the edges using a ball tool on a foam pad to give them a delicate, lifelike appearance.
Attach the first flattened petal around the cone bud, wrapping it tightly. For subsequent petals, attach them around the bud, overlapping each previous petal by about one-third. Gently shape the petals outwards to mimic a blooming rose. Use edible glue sparingly to secure each petal layer. As you add layers, make the petals slightly larger and attach them lower down the bud. Allow the flower to dry completely on a foam former or drying rack for 12-24 hours, or longer depending on size and humidity, before handling or placing on the cake.
Sculpting Intricate Figures and Characters: Tips and Tricks
Sculpting intricate figures or characters requires planning, patience, and a good understanding of form. Start by sketching your figure to plan proportions and pose. For larger or standing figures, internal support is often necessary; food-safe wire or wooden skewers can provide a stable armature. Build the figure in stages, allowing individual parts (like legs, torso, head) to firm up slightly before assembly to prevent distortion.
Use small amounts of fondant for details. Tools are essential for creating facial features, hands, feet, and clothing textures. A pointed tool can create nostrils, a knife tool can define fingers, and a ball tool can create eye sockets. For realistic texture, use modeling tools or texture mats (e.g., for hair or fabric).
After sculpting, edible dusts or paints can be used to add shading, highlights, and realistic coloring, bringing the figure to life. Remember to allow adequate drying time, which can be several days for complex pieces, before placing them on the cake. This is a challenging but rewarding area of advanced cake decorating techniques.
Royal Icing Mastery: Intricate Piping and Design
Royal Icing Recipes for Different Cake Decorating Applications
Royal icing is a classic medium for advanced cake decorating techniques, drying to a hard, smooth finish perfect for piping intricate details, writing, and creating structural elements. The consistency of your royal icing is paramount and depends on the application.
For piping outlines, writing, or creating details that need to hold sharp peaks (like shells or stars), you need a stiff consistency. This is achieved by using less water in your recipe; a common starting point is 1 lb of powdered sugar to about 3 tablespoons of meringue powder and gradually adding water (around 6-8 tablespoons) until stiff peaks form when the whisk is lifted.
For filling in areas (flooding) or creating softer piped details like scrolls, you need medium or flood consistency. Medium consistency falls between stiff and flood and is good for slightly softer piping work. Flood consistency is achieved by adding more water, drop by drop, until the icing runs smoothly but a line drawn through it disappears within 10-15 seconds. Having different bowls of royal icing prepared to the correct consistency is key for complex piped designs.
Mastering Piping Techniques: Lines, Dots, and Scrolls
Mastering basic piping control is fundamental to advanced cake decorating techniques using royal icing. Hold the piping bag correctly, allowing the icing to flow freely while applying even pressure. For lines, hold the tip slightly above the surface and let the icing fall onto the cake, guiding the bag smoothly. Stop squeezing and pull away quickly to end the line cleanly.
For dots, touch the tip to the surface, squeeze gently until the dot is the desired size, stop squeezing, and pull the bag straight up. For scrolls, start by applying pressure to create the thickest part of the 'C' or 'S' shape, then gradually release pressure as you curve the line. Practice on parchment paper is crucial until you can pipe consistent lines, uniform dots, and smooth scrolls with ease. Precision in these basic movements is the building block for more elaborate royal icing work.
Creating Lace and Delicate Designs with Royal Icing
Creating delicate lace patterns is a hallmark of advanced cake decorating techniques with royal icing. This often involves "run-out" or "floodwork" techniques. First, pipe the outline of your lace design onto a piece of parchment paper or a silicone mat using stiff consistency royal icing. Allow this outline to dry for 30-60 minutes until it is firm to the touch.
Next, using flood consistency royal icing (tinted if desired), carefully fill in the outlined sections. Use a scribe or toothpick to gently guide the icing into corners and pop any air bubbles. Allow the flooded pieces to dry completely, which can take 24-48 hours depending on size and humidity. Once fully dry and brittle, the lace pieces can be carefully peeled off the paper/mat and attached to the cake surface with a small dot of stiff royal icing. For 3D lace, dry the pieces over curved forms like rolling pins or bowls.
Advanced Royal Icing Techniques: Brush Embroidery and Over-Piping
Brush embroidery is an elegant advanced royal icing technique that creates a delicate, stitched look. Pipe an outline for a design element, such as a petal or leaf, onto the cake surface with medium consistency royal icing. While the icing is still wet, use a small, clean, slightly damp food-safe brush to gently pull or feather the icing inwards from the outline towards the center of the design element. Work on small sections at a time before the icing crusts over.
Over-piping, also known as pressure piping or raised piping, creates dimensional designs. Pipe your desired design onto the cake surface with stiff royal icing. Allow this layer to dry completely. Then, pipe the exact same design directly on top of the first dried layer. This builds height and creates a raised effect. This process can be repeated multiple times to achieve significant dimension. Both brush embroidery and over-piping require a steady hand and meticulous control, showcasing true mastery of advanced cake decorating techniques.
Exploring Alternative Cake Covering Methods Beyond Fondant
Ganache Glazing: Achieving a Professional, Smooth Finish
While fondant is popular, advanced cake decorating techniques also embrace other covering methods. Ganache glazing provides a luxurious, smooth, and often shinier finish, particularly with dark chocolate. To achieve a pourable ganache glaze, the ratio of chocolate to cream is crucial – typically more cream than a filling ganache. For dark chocolate, a ratio of 1 part chocolate to 1 part heavy cream (by weight) is common; for white chocolate, it might be 1 part chocolate to 2 or 2.5 parts cream.
Heat the cream just to a simmer, then pour it over finely chopped chocolate. Let it sit for a few minutes to melt the chocolate, then stir gently from the center outwards until completely smooth and emulsified. Allow the ganache to cool to the correct pouring temperature, usually lukewarm (around 85-90°F or 30-32°C). Place your chilled, crumb-coated cake on a wire rack over a baking sheet.
Pour the ganache generously over the center of the cake, letting it flow down the sides. Use an offset spatula or bench scraper to gently smooth the top or encourage drips, but avoid overworking it. The result is a sleek, professional glaze.
Buttercream Techniques for Textured Finishes: Palette Knife and Piping
Buttercream, the classic cake covering, can also be used in advanced cake decorating techniques to create stunning textured finishes that go beyond simple smoothness. The palette knife technique involves applying a layer of buttercream and then using an offset spatula or palette knife to create various textures. This could be rustic swirls, smooth horizontal or vertical strokes, abstract waves, or even geometric patterns by scraping away excess frosting. The key is confident, deliberate strokes.
Piping techniques offer another way to texture a buttercream cake. Using different piping tips, you can cover the entire surface with consistent patterns. A large round tip can create smooth vertical or horizontal stripes. Star tips (open or closed) can be used to pipe rows of shells, rosettes, or stars covering the cake. A basketweave tip creates a woven texture. Mastery lies in applying even pressure and maintaining consistent spacing and size of the piped elements across the entire cake surface.
Naked Cakes: Decorating with Fresh Fruit and Minimal Frosting
Naked cakes represent a trend in advanced cake decorating techniques that focuses on a more rustic, minimalist aesthetic. Instead of being fully covered, the cake layers and often the filling are visible, with only a very thin "scrape" coat of frosting applied to the sides (a "semi-naked" cake) or sometimes just frosting between the layers. The appeal lies in showcasing the cake itself and achieving a natural, effortless look.
Decoration for naked cakes relies heavily on fresh elements. Fresh berries (strawberries, raspberries, blueberries), figs, or slices of citrus are popular choices, artfully arranged on the top or spilling down the sides. Fresh flowers (ensuring they are food-safe varieties, often inserted with protective barriers like floral picks or straws) and edible leaves or herbs like mint or rosemary add organic beauty. A simple dusting of powdered sugar can finish the look. This style requires precision in baking and leveling the cake layers, as they are clearly visible.
Airbrushing Techniques for Cake Decorating: Adding Depth and Dimension
Choosing the Right Airbrush and Compressor
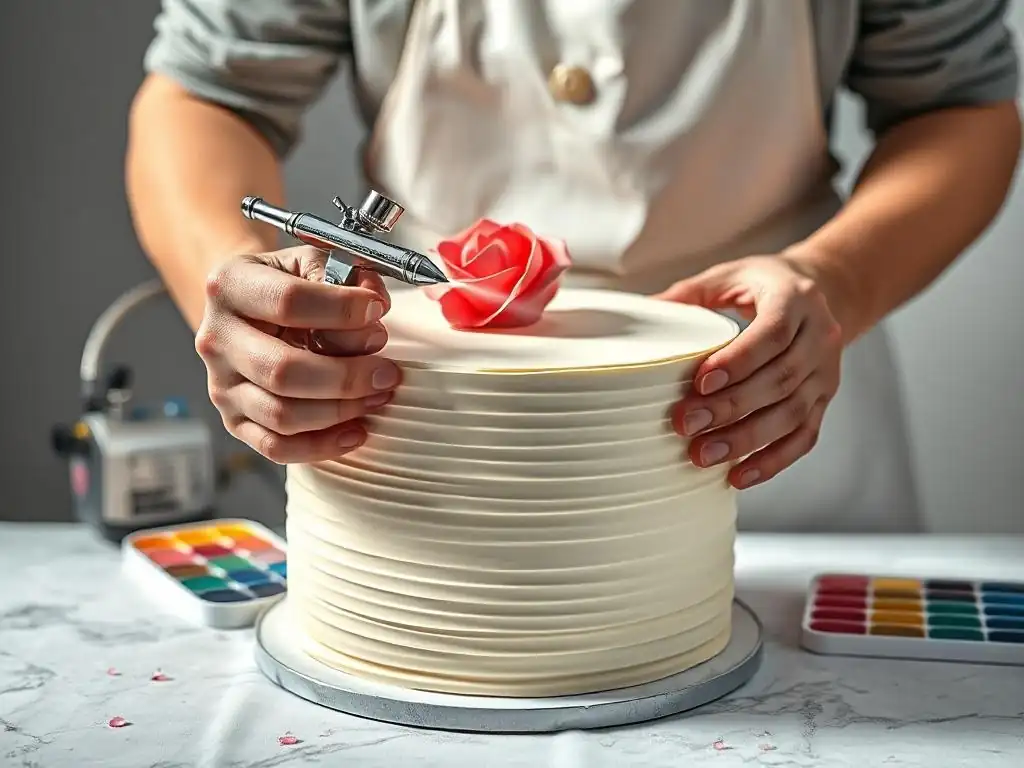
Airbrushing allows for applying thin layers of edible color, creating smooth gradients, shading, and realistic effects, making it a valuable skill in advanced cake decorating techniques. For detailed cake work, a dual-action airbrush is generally recommended over a single-action one. A dual-action airbrush allows you to control both the airflow (by pressing down on the trigger) and the amount of color released (by pulling back on the trigger), offering much greater control over shading and fine lines. Gravity-feed airbrushes, where the color cup is on top, are common for cake decorating as they use gravity to feed the color.
You will also need an air compressor to provide a consistent flow of air. Compressors vary in size, noise level, and features. Look for a compressor designed for airbrushing with adjustable pressure (measured in PSI - pounds per square inch), as different techniques require different pressures. A pressure range of 15-30 PSI is typical for most cake applications. Consider noise levels if you'll be working indoors frequently. Ensure the compressor has a moisture trap to prevent water from spraying onto your cake.
Basic Airbrushing Techniques: Gradations and Shading
Before airbrushing your cake, practice on paper towels or a dummy cake. Fill the airbrush cup with diluted edible airbrush color. Hold the airbrush perpendicular to the surface, usually 4-8 inches away, depending on the desired effect. Press down on the trigger for air, then pull back slightly for color. Move the airbrush smoothly across the surface.
To create a smooth color gradation (ombre), start spraying off the edge of the cake with light pressure, then move onto the cake surface while gradually increasing pressure or slowing your movement to deposit more color. For shading, apply color subtly around details, edges, or specific areas to create the illusion of depth and dimension. Use a lighter hand and potentially a lower PSI for delicate shading. Building up color with multiple light passes is better than applying one heavy layer, which can cause drips or oversaturation.
Creating Custom Colors and Effects with Airbrushing
Airbrushing allows for a vast palette of colors. While ready-to-use airbrush colors are available, you can also create custom shades by mixing colors directly in the airbrush cup or in a separate container before adding them. Remember to use food-safe airbrush colors and mix them to the correct consistency for spraying (usually quite thin). Experiment with primary colors to create secondary and tertiary hues.
Beyond solid colors and gradients, airbrushing can create various effects. Spattering can be achieved by reducing the pressure or quickly pulling back the trigger. Applying different colors onto a slightly wet surface can create marbled effects. You can also mix edible pearl dusts or glitters with a clear edible alcohol or extract (like lemon extract or vodka) and airbrush them for shimmering or metallic finishes. Airbrushing expands the artistic possibilities significantly in advanced cake decorating techniques.
Stenciling and Freehand Airbrushing Techniques for Cakes
Stenciling is a precise way to apply patterns or designs using an airbrush. Place a food-safe stencil firmly against the surface of your cake (a fondant-covered cake works best for stenciling). Use low air pressure and apply the airbrush color in light, even coats, holding the airbrush perpendicular to the stencil. Avoid spraying too heavily, as this can cause the color to bleed under the stencil. Remove the stencil carefully once the color is applied. Different stencil materials and designs offer varied looks.
Freehand airbrushing requires a high level of skill and control, typically using a dual-action airbrush. You can lightly sketch a design onto the cake surface with a food-grade marker as a guide. Then, use the airbrush to carefully trace lines, fill in areas, and add details. Varying the pressure and distance allows for creating fine lines and broader strokes. Mastering freehand airbrushing requires significant practice to achieve smooth, controlled results, but it allows for truly unique and artistic expressions within advanced cake decorating techniques.
Working with Sugar Paste: Creating Edible Decorations
Understanding Sugar Paste vs. Fondant
Sugar paste, often called gum paste or pastillage, is similar to fondant but has key differences that make it ideal for creating delicate, firm edible decorations. The main difference lies in the addition of gum tragacanth or CMC/tylose powder during its making. This ingredient gives sugar paste much greater elasticity when worked and allows it to dry very hard and brittle, unlike fondant which remains relatively soft and flexible.
Fondant is primarily used for covering cakes because it is soft, easy to roll thinly over large surfaces, and remains pliable enough not to crack when the cake is cut. Sugar paste, on the other hand, is too brittle when dry to cover a whole cake. Its strength and ability to hold shape upon drying make it perfect for creating free-standing, intricate elements like realistic flowers, delicate leaves, bows that stand up, or sculpted figures that need to be rigid. Understanding which medium to use for which application is fundamental to advanced cake decorating techniques.
Making Sugar Flowers: A Detailed Guide
Creating realistic sugar flowers is a pinnacle of advanced cake decorating techniques with sugar paste. Begin with colored sugar paste, kneaded until smooth and pliable. Roll it out incredibly thinly, ideally using a pasta machine on a thin setting (e.g., setting 6 or 7 on many machines) for uniform thickness, or a rolling pin. Use flower cutters or templates to cut out petal shapes.
Using a ball tool on a foam pad, thin the edges of each petal, giving them a delicate, natural look. If using wires, insert a thin food-safe floral wire into the base of the petal, securing it with a tiny dot of edible glue. Shape the petals using various tools and techniques (e.g., cupping, frilling).
Assemble the flower petal by petal around a central bud or wired stamen, using edible glue to attach. Place the assembled flower or individual petals on flower formers, drying racks, or crumpled paper towels to dry completely, which can take 1-3 days depending on the climate and size of the flower.
Creating Realistic Leaves and Berries with Sugar Paste
Sugar paste is also excellent for crafting realistic leaves and berries to complement sugar flowers or stand alone as decorations. For leaves, roll green sugar paste thinly. Use leaf cutters or a sharp knife to cut out leaf shapes.
To add realism, press the leaf onto a veiner (a silicone mold designed to imprint leaf textures) or use a modeling tool to hand-score veins onto the surface. If needed, insert a thin green-covered floral wire into the base of the leaf. Shape the leaf naturally by bending or curving it and allow it to dry completely, often on a curved surface.
For berries, roll small pieces of colored sugar paste into spheres. For raspberries, roll tiny individual spheres and attach them together onto a cone base, or use a tool to imprint the segmented texture onto a single piece. For strawberries, shape a red cone and use a scribe or toothpick to create indentations for seeds. Dusting dried berries and leaves with edible colored dusts (e.g., red dust for strawberries, green for leaves) adds depth and realism.
Assembling Sugar Flower Arrangements for Cakes
Once your sugar flowers, leaves, and berries are completely dry, the final step is assembling them into stunning arrangements on your cake. Plan the layout of your arrangement beforehand. If your flowers and leaves are wired, you can group them together using floral tape onto larger, thicker wires or into food-safe floral picks. Ensure any wires entering the cake are properly taped and inserted into protective straws or picks for hygiene and safety.
To attach the arrangement to the cake (typically covered in fondant or firm ganache), insert the wired picks into the desired positions on the cake. For individual non-wired sugar pieces, use a small amount of stiff royal icing or melted chocolate as "glue" to adhere them directly to the cake surface. Build your arrangement layer by layer, placing larger elements first and then filling in with smaller flowers, leaves, and berries to create a full, natural-looking display. This final assembly showcases the culmination of many advanced cake decorating techniques.
Advanced Cake Decorating Tools and Equipment: A Comprehensive Overview
Must-Have Tools for Fondant Work
Working with fondant efficiently and effectively requires specific tools. For rolling, a large, non-stick rolling pin (like one made of plastic or silicone) is essential, paired with a large non-stick mat or a surface dusted with cornstarch or powdered sugar. You'll need a sharp craft knife or scalpel specifically dedicated to cake decorating for clean cuts, along with various sizes of circle or shape cutters.
For smoothing and shaping, at least two fondant smoothers are crucial – one for the top and one for the sides to achieve sharp edges. A pizza cutter or rotary cutter is useful for trimming excess fondant cleanly around the base of the cake. A set of basic modeling tools will help you shape fondant, create textures, and sculpt details. Depending on your projects, consider investing in tools like an extruder (for making ropes or hair) or crimpers (for decorative edges).
Essential Piping Tips and Nozzles for Royal Icing
A collection of piping tips (also called nozzles) is vital for advanced cake decorating techniques using royal icing or buttercream. You'll need a range of round tips (sizes 1-3 for fine details and writing, sizes 4-8 for dots and outlines), various open and closed star tips (for borders, swirls, and textures), and leaf tips. Having multiple tips of the same size is often helpful when working with different colors.
In addition to tips, you'll need piping bags (disposable plastic bags are convenient) and couplers, which allow you to change piping tips on a bag without changing the icing color. A tip cleaning brush is also useful for removing dried icing. For more specialized advanced cake decorating techniques, consider tips like basketweave tips, ruffle tips, or petal tips (used for creating flowers directly from buttercream or royal icing).
Airbrushing Equipment: Choosing the Right Tools for Your Needs
As discussed earlier, airbrushing equipment includes the airbrush gun and the compressor. For advanced work, a dual-action gravity-feed airbrush with different needle/nozzle sizes (e.g., a fine 0.2mm for details and a slightly larger 0.5mm for coverage) offers versatility. Look for a gun that is easy to clean.
The compressor should be designed for airbrushing, offering adjustable pressure (PSI) and ideally being relatively quiet. Ensure it has a moisture trap to protect your work. You will also need an air hose to connect the gun to the compressor, and a dedicated cleaning kit (small brushes, cleaning solution) is essential for maintaining your equipment and preventing clogs. A small holder or stand for your airbrush is also helpful.
Other Useful Tools: Molds, Cutters, and Texture Mats
Beyond the basics, several other tools can enhance advanced cake decorating techniques. Silicone molds are incredibly useful for quickly and consistently creating intricate shapes like pearls, chains, cameos, or complex border designs from fondant or sugar paste.
Plunger cutters (also known as ejector cutters) are great for making repetitive shapes like small flowers or leaves, often with built-in veins or details that are ejected with a spring mechanism. Texture mats, made of silicone or plastic, can be pressed onto rolled fondant or sugar paste to imprint patterns like wood grain, knit textures, or geometric designs, adding instant visual interest to your cake coverings or decorations.
Cake Decorating Safety and Hygiene: Best Practices
Maintaining a Clean and Organized Workspace
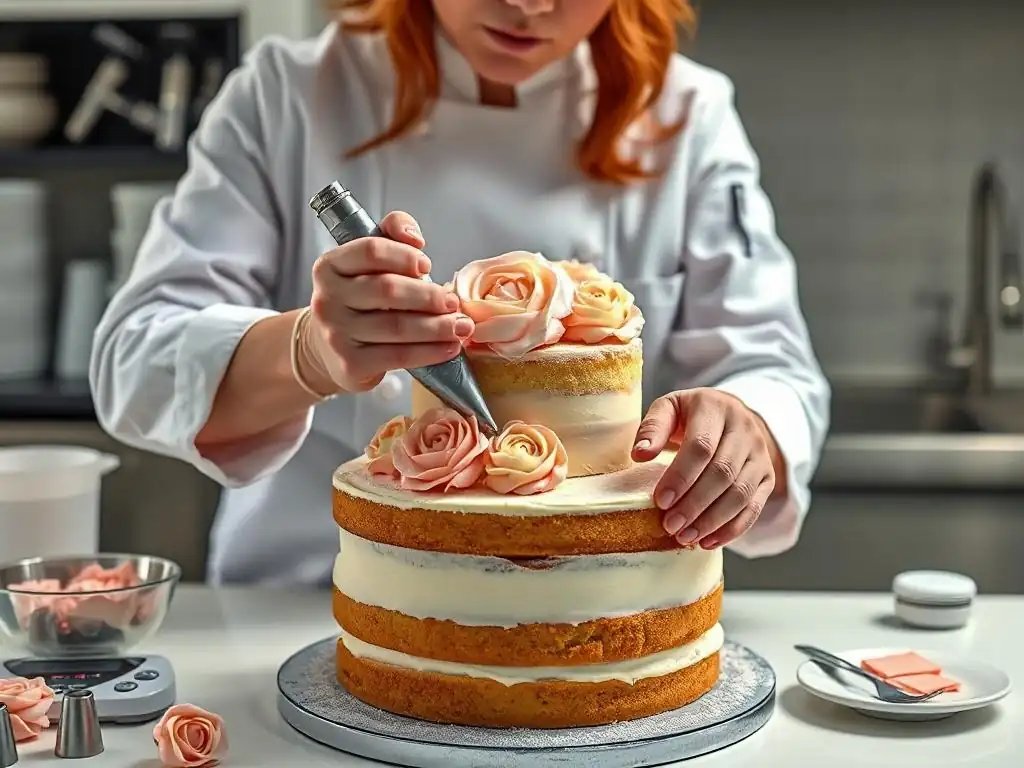
Food safety and hygiene are paramount when practicing advanced cake decorating techniques, as you are creating edible art. Always start with a thoroughly cleaned and sanitized workspace. This includes countertops, mixers, and any surfaces that will come into contact with ingredients or finished decorations. Wash your hands thoroughly with soap and water before beginning work and frequently throughout the process.
Keep your workspace organized to prevent cross-contamination and make working more efficient. Clear away unused ingredients or tools. Have separate containers for different colors of icing or fondant. Cleaning up spills immediately prevents messes and potential hazards. By maintaining a pristine environment, you ensure that your beautiful creations are also safe to eat.
Food Safety Considerations When Working with Edible Decorations
Ensure all ingredients used in your advanced cake decorating techniques are food-grade and intended for consumption. This includes food colors, dusts, glitters, and any specialized ingredients like meringue powder or CMC powder. Purchase these from reputable suppliers. Pay attention to ingredient storage requirements (e.g., some need refrigeration after opening).
If your design incorporates non-edible elements for support or decoration (such as floral wires, dowels, plastic toppers, or fresh flowers that aren't food-safe varieties), they must be properly barrier protected. Insert wires into food-safe floral picks or plastic straws before placing them into the cake. Clearly communicate to the recipient if any parts of the decoration are not edible and should be removed before serving.
Properly Storing Decorated Cakes
Storing a decorated cake correctly is crucial to preserve its appearance and safety, especially when using advanced cake decorating techniques involving sensitive materials. Cakes covered in fondant are generally best stored at cool room temperature (around 68-72°F or 20-22°C) in a sturdy cake box, away from direct sunlight or heat sources. Refrigeration can cause condensation on fondant when the cake is brought out, potentially leading to spotting or melting decorations, unless the filling requires chilling.
Cakes decorated with buttercream or royal icing may require refrigeration depending on the ingredients used (e.g., dairy-based buttercream). Store them in an airtight container or cake box to prevent drying out or absorbing odors. Royal icing decorations, being brittle when dry, should be handled with extreme care during storage and transport. Sometimes, creating and storing delicate royal icing or sugar paste pieces separately until just before display is the safest option.
Inspiration and Resources for Advanced Cake Decorating Projects
Online Cake Decorating Tutorials and Courses
The digital age offers a wealth of resources for learning advanced cake decorating techniques. Platforms like YouTube host countless free tutorials covering everything from basic fondant smoothing to complex sugar flower making and airbrushing. For more structured learning, consider online courses offered by professional decorators or via educational platforms like Skillshare or dedicated online cake academies.
These online resources provide step-by-step visual guidance, which is invaluable for mastering intricate techniques. You can learn at your own pace, rewatch sections, and often interact with instructors or a community of fellow learners. While free content is abundant, paid courses often offer more in-depth knowledge, personalized feedback, and cover advanced cake decorating techniques in a more comprehensive manner, sometimes including printable guides or templates.
Cake Decorating Books and Magazines
For those who prefer learning from print, a vast array of cake decorating books and magazines are available. Books by renowned cake artists often serve as comprehensive guides to specific advanced cake decorating techniques, such as sugar flower artistry, figure modeling, or royal icing piping. A good book might feature dozens of detailed tutorials and hundreds of inspiring photographs.
Magazines dedicated to cake decorating are excellent for staying current with trends, seasonal designs, and discovering new products or techniques. They often include tutorials for specific projects, interviews with decorators, and galleries of impressive cakes showcasing various advanced cake decorating techniques. Both books and magazines provide tangible inspiration and detailed instructions that you can reference repeatedly in your creative journey.
Finding Inspiration for Cake Designs
Finding inspiration is a continuous process for anyone practicing advanced cake decorating techniques. Online galleries and social media platforms like Pinterest and Instagram are visual treasure troves. Searching hashtags like #advancedcakedecorating, #sugarart, #fondantsculpting, or #royalicing allows you to discover incredible work and see how techniques are applied in innovative ways. Websites like BakeWithEase.com and others dedicated to baking and decorating also feature galleries and ideas.
Look beyond the world of cakes for unique inspiration. Architecture, fashion design, textiles, nature, fine art, and even everyday objects can spark ideas for colors, textures, patterns, or structural elements in your cake designs. Keep a sketchpad or a digital mood board to collect ideas. Combining inspiration from different sources can lead to truly original and stunning applications of advanced cake decorating techniques.
Conclusion: Elevate Your Cakes with Advanced Decorating Skills.
Embarking on the journey into advanced cake decorating techniques opens up a world of creative possibilities, transforming simple baked goods into breathtaking works of edible art. From achieving that perfectly smooth fondant finish and sculpting intricate figures to mastering the delicate art of royal icing piping and adding depth with airbrushing, these skills allow you to bring even the most ambitious cake designs to life.
While demanding patience and practice, the ability to create realistic sugar flowers, execute complex textures with buttercream, or design elegant naked cakes offers immense satisfaction and the potential to create unforgettable centerpieces for any celebration. By utilizing the right tools, practicing diligently, prioritizing food safety, and continuously seeking inspiration, you can confidently elevate your cakes and share your beautiful, delicious creations with the world, truly mastering the art of advanced cake decorating techniques.
Frequently Asked Questions
What are some key differences between covering a cake with buttercream versus fondant?
Buttercream provides a softer, more traditional finish, while fondant offers a smooth, almost porcelain-like surface. Fondant also allows for more intricate 3D modeling and designs.
What tools are essential for advanced cake decorating with fondant?
Essential tools include a rolling pin, smoothing tools (like smoothers and palette knives), and modeling tools for shaping and adding details. A turntable is also very helpful.
How can I prevent fondant from tearing or cracking when covering a cake?
Knead the fondant well to make it pliable, and ensure the cake's surface is perfectly smooth with a thin layer of buttercream or ganache. Use a powdered sugar duster on your work surface to prevent sticking.
What are some techniques for creating realistic textures on fondant cakes?
Use tools like impression mats, texture rollers, or even household items to create patterns. You can also use edible paints and dusts to add depth and realism.
How do I achieve vibrant and consistent colors when tinting fondant?
Use gel food coloring as it's more concentrated and won't alter the fondant's consistency. Add color gradually and knead thoroughly to ensure an even distribution of pigment.
Final Reflection: The Enduring Allure of the Perfectly Iced Cake
The art of advanced cake decorating isn't merely about aesthetics; it's about the creation of edible masterpieces that evoke emotion and celebrate life's special moments. In a world increasingly dominated by digital experiences, the tangible beauty of a meticulously crafted cake remains a powerful and enduring symbol of artistry, skill, and heartfelt celebration. The techniques explored in this article – from flawlessly smooth fondant application to intricate piping and stunning sugar flower creation – represent a commitment to excellence that resonates far beyond the kitchen.
The journey from a simple cake to a breathtaking confection is a testament to the power of dedication and practice. This pursuit of perfection, however, extends beyond the individual baker; it reflects a broader cultural appreciation for craftsmanship and the enduring human desire to create beauty. The details are not the details. They make the design.
– Charles Eames. This quote perfectly encapsulates the importance of mastering the seemingly small, intricate techniques that elevate a cake from good to extraordinary. The impact of these skills extends beyond personal satisfaction; they can lead to entrepreneurial opportunities, community engagement through cake-making classes, and the simple joy of sharing beautifully crafted treats with loved ones.
Now, consider your own creative journey. What techniques resonated most with you? Which challenges did you find most rewarding to overcome? Perhaps this article has sparked a new passion, or ignited a desire to refine existing skills. Don't be afraid to experiment, to push your boundaries, and to embrace the inherent beauty of imperfection within the pursuit of perfection. The world awaits your next edible masterpiece – go forth and create!
Unleash Your Inner Cake Artist!
Thanks for joining us on this delicious journey into the world of advanced cake decorating! We hope you've gained valuable insights and inspiration to elevate your baking skills. Now it's time to put your newfound knowledge into practice.
- Master a new technique: Try one of the advanced frosting methods discussed – perhaps the perfect buttercream swirl or a stunning ombre effect. Share your results with us!
- Experiment with unique designs: Explore different textures and colors using edible glitter, airbrushing, or even fresh flowers. Let your creativity bloom!
- Join our baking community: Head over to our forum (not linked here per instructions) and share your cake creations, ask questions, and connect with fellow baking enthusiasts. Let's learn from each other!
Ready to transform your next cake into a masterpiece? What unique design will you try first?