
Piping Meringue: Create Stunning Decorations from Simple Swirls to Intricate Designs

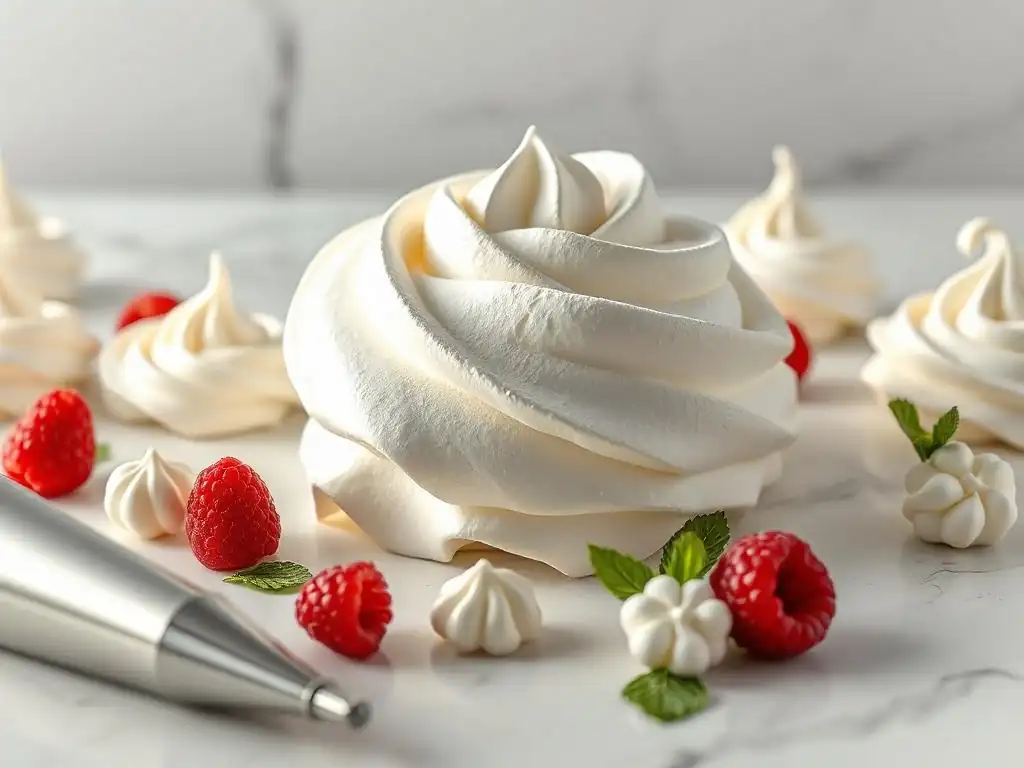
Welcome to BakeWithEase, your trusted companion on your baking journey! Ever dreamt of creating those breathtaking meringue decorations you see on magazine covers? Get ready to elevate your desserts! This article dives deep into the secrets of perfecting meringue swirl decorations, unlocking the techniques to transform simple ingredients into edible art. Are you ready to master the art of meringue piping and leave your guests in awe? Let's begin!
- Perfecting Meringue Swirls Decorations: A BakeWithEase Guide to Meringue Mastery
- Introduction to Meringue Piping: Elevate Your Baking with Stunning Decorations
- Essential Tools and Equipment for Meringue Piping Success
- Mastering the Meringue Recipe for Piping: Key Ingredients and Techniques
- Simple Meringue Piping Techniques for Beginners: Building a Foundation
- Intermediate Meringue Piping Techniques: Expanding Your Decorative Repertoire
- Advanced Meringue Piping Techniques: Achieving Intricate and Detailed Designs
- Baking and Storing Your Meringue Decorations: Ensuring Longevity and Quality
- Troubleshooting Meringue Piping Problems: Common Mistakes and Solutions
- Inspiration and Ideas for Meringue Swirls and Decorations
- Conclusion: Embrace the Art of Meringue Piping and Elevate Your Baking
-
Frequently Asked Questions
- How can I ensure my meringue holds its shape when piping?
- What type of meringue is best for piping decorations?
- What piping tips are best for creating different meringue swirl decorations?
- How do I prevent my meringue from cracking during baking?
- Can I add color to my meringue for decorative purposes?
- Final Reflection: The Enduring Allure of the Perfect Meringue Swirl
- Unleash Your Inner Pastry Artist: Master the Art of Piping
Perfecting Meringue Swirls Decorations: A BakeWithEase Guide to Meringue Mastery
Introduction to Meringue Piping: Elevate Your Baking with Stunning Decorations
Why Master Meringue Piping Techniques? From Simple Swirls to Intricate Designs
Mastering the art of meringue piping opens up a world of creative possibilities in your baking. It allows you to transform simple desserts into visually stunning creations, adding elegance and texture that can't be achieved with other mediums.
Whether you're aiming for classic, perfectly formed meringue swirls on a lemon meringue pie or crafting delicate, intricate decorations for a celebratory cake, piping provides the control and precision needed to bring your vision to life. Beyond aesthetics, properly piped and baked meringue offers a delightful contrast in texture – a crisp, airy shell giving way to a soft, sometimes chewy, interior.
Developing your skills in piping meringue swirls decorations and other shapes is a rewarding process. It allows you to personalize your baked goods, making them truly unique. Imagine presenting cupcakes topped with vibrant, colorful meringue rosettes or a tart adorned with a sophisticated piped border. These techniques are not just for advanced bakers; with a little practice and the right guidance, even beginners can achieve impressive results. It's about understanding the meringue itself and how to handle it effectively through a piping bag.
A Brief Overview of Meringue Types Suitable for Piping (Italian, Swiss, French)
There are three primary types of meringue, each offering distinct characteristics suitable for perfecting meringue swirls decorations and other piped elements. French meringue, the simplest, is made by whipping egg whites and gradually adding granulated sugar. It's the least stable and best used immediately or gently baked at a very low temperature. While it can be piped for delicate, quick-baking items like meringue kisses, it's less ideal for complex, stable structures due to its fragility.
Swiss meringue is made by heating egg whites and sugar over a double boiler until the sugar dissolves, then whipping until cool and stiff. This process creates a more stable, glossy meringue that holds its shape exceptionally well, making it excellent for piping detailed designs, borders, and swirls that require definition. Italian meringue is made by slowly pouring hot sugar syrup (cooked to the soft-ball stage, around 240°F or 115°C) into whipping egg whites, then continuing to whip until cool and stiff.
It is the most stable and safest to use raw (as it's cooked by the hot syrup), making it perfect for piping on pies or tarts that will be torched, or for creating robust, defined meringue decorations that need to hold up. For most intricate piping, Swiss or Italian meringue are often preferred due to their stability.
Essential Tools and Equipment for Meringue Piping Success
Piping Bags and Nozzles: Choosing the Right Tools for Different Effects
Selecting the appropriate piping bags and nozzles is fundamental to perfecting meringue swirls decorations and any other piped design. Piping bags come in various materials, including disposable plastic, reusable silicone, and sturdy canvas. Disposable bags are convenient for easy cleanup, while reusable options are more environmentally friendly and durable. For meringue, which can be quite stiff, a strong bag is essential to prevent bursting under pressure. Sizes range from small ones for fine details to large ones for covering significant areas quickly.
Nozzles, also known as piping tips, are available in countless shapes and sizes, each producing a different effect. Common types include round tips (for dots, lines, and smooth swirls), star tips (open or closed, for star shapes, rosettes, and textured swirls), petal tips (for flowers and ruffles), and leaf tips. For bold meringue swirls, a large open star tip like the Wilton 1M or Ateco 826 is a popular choice. For smaller details or fine lines, smaller round tips work well. Investing in a basic set of varied tips will significantly expand your meringue decorating capabilities.
Turntables and Parchment Paper: Supporting Your Meringue Decorating Workflow
A cake turntable is an invaluable tool when piping meringue borders or swirls around a cake or tart. It allows you to smoothly rotate the dessert while keeping your piping hand steady, resulting in even, continuous designs. This is particularly helpful when creating a consistent shell border or a decorative rope effect around the base or top edge of a confection. The ability to turn the work smoothly reduces awkward positioning and helps maintain uniform pressure and angle while piping.
Parchment paper is crucial when piping individual meringue decorations that will be baked separately, such as meringue kisses, mushrooms, or complex shapes. Piping directly onto parchment laid on a baking sheet ensures that the delicate meringue doesn't stick and can be easily transferred after baking and cooling. You can even draw templates on the underside of the parchment to guide your piping for consistent shapes and sizes, which is especially useful when perfecting meringue swirls decorations meant to be uniform.
Meringue Stabilizers: Ensuring Stiff Peaks and Lasting Decorations
While proper whipping techniques are key to achieving stiff peaks, adding stabilizers can provide an extra layer of security, particularly in humid conditions or when working with delicate meringue types. Cream of tartar is a common acidic stabilizer used in French meringue; just a pinch (about 1/8 teaspoon per two egg whites) helps strengthen the protein structure of the egg whites, resulting in a more stable foam that holds its shape better for piping. Lemon juice or white vinegar can serve a similar purpose.
Another stabilizer often used, particularly in recipes designed for piping and baking, is cornstarch. A small amount (perhaps 1-2 teaspoons per cup of sugar used) can be whisked into the sugar before adding it to the egg whites. Cornstarch helps absorb moisture and contributes to a more stable, less fragile baked meringue that is less prone to weeping (releasing liquid). Using stabilizers, especially when perfecting meringue swirls decorations that need to hold intricate shapes before and after baking, can significantly improve your success rate.
Mastering the Meringue Recipe for Piping: Key Ingredients and Techniques
Achieving Stiff Peaks: A Step-by-Step Guide to Perfect Meringue Consistency
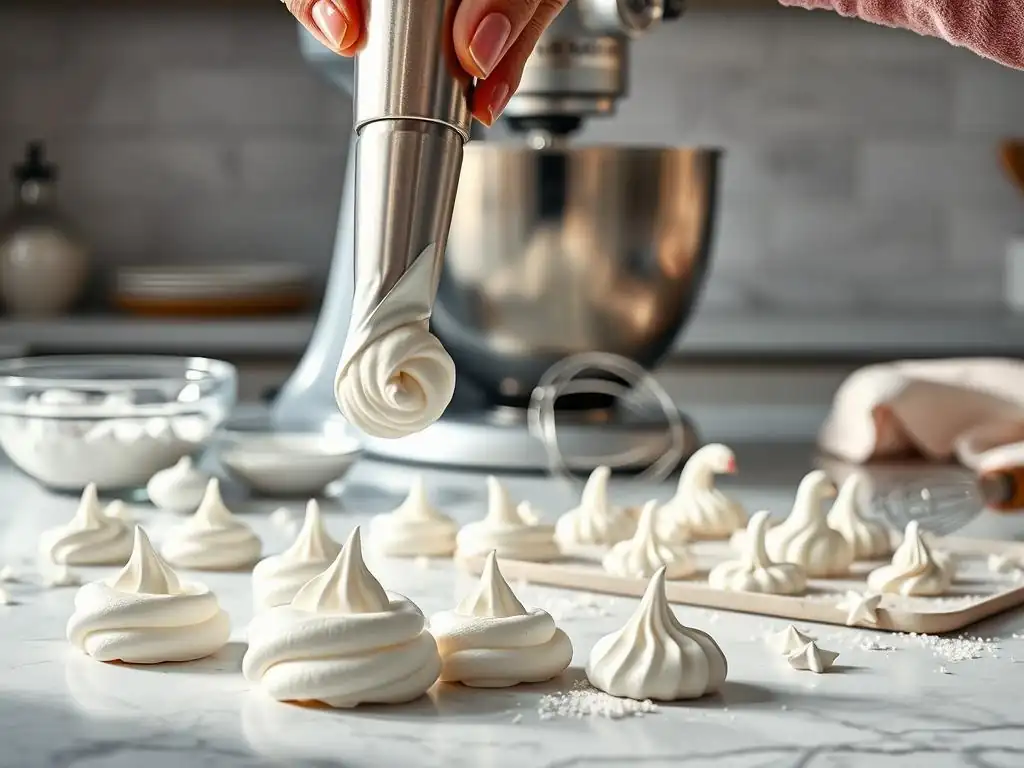
The foundation of successful meringue piping lies in achieving the correct consistency – specifically, stiff, glossy peaks. Start with clean, grease-free equipment; even a tiny amount of fat can prevent egg whites from whipping properly. Use room temperature egg whites, as they whip to a greater volume than cold ones. Begin whipping the egg whites on medium speed until they become foamy and opaque.
Gradually add the sugar, a tablespoon at a time, while continuing to whip. This slow addition allows the sugar to dissolve properly into the egg whites, which is crucial for a smooth, glossy, and stable meringue. Increase the speed to high and whip until the meringue is thick, shiny, and forms stiff peaks.
You should be able to turn the bowl upside down without the meringue sliding out, and when you lift the whisk, the peaks should stand straight up without drooping. Overbeating can cause the meringue to become grainy or break, so stop as soon as stiff peaks are achieved.
Incorporating Flavors and Colors: Enhancing Your Meringue Decorations
Adding flavor and color to your meringue allows you to customize your meringue swirls decorations and make them visually appealing and delicious. Extracts, such as vanilla, almond, or peppermint, should be added towards the end of the whipping process, after the sugar has been fully incorporated and stiff peaks are forming. Add them sparingly, typically just 1/4 to 1/2 teaspoon per large batch of meringue, as too much liquid can destabilize the foam.
For coloring meringue, gel food colorings are highly recommended over liquid ones. Gel colors are concentrated and require only a tiny amount (often just a drop or two) to achieve vibrant hues without adding excess moisture that could compromise the meringue's structure. Add the color after the meringue has reached stiff peaks and gently fold or whip on low speed until the color is evenly distributed. For marbled or striped effects, you can paint stripes of gel color inside the piping bag before filling it with plain meringue.
Troubleshooting Common Meringue Issues: Preventing Soft Peaks and Weeping
Several issues can arise when making meringue, but most are preventable. If your egg whites aren't whipping to stiff peaks, the most common culprits are grease contamination in the bowl or on the whisk, adding sugar too quickly, or using cold egg whites. Ensure all equipment is scrupulously clean and dry, add sugar gradually, and use room temperature eggs. Humidity can also make achieving stiff peaks difficult; using a stabilizer like cream of tartar can help counteract this.
Weeping, where liquid pools at the base of baked meringue decorations, is often caused by undissolved sugar or under-baking. Ensure the sugar is fully dissolved by rubbing a small amount of meringue between your fingers – it should feel smooth, not gritty. Baking meringue low and slow for a sufficient time dries it out thoroughly, reducing the likelihood of weeping. Storing baked meringue in an airtight container away from humidity is also crucial for prevention.
Simple Meringue Piping Techniques for Beginners: Building a Foundation
The Basic Swirl: Mastering the Classic Meringue Decoration
The basic swirl is perhaps the most iconic and fundamental meringue piping technique, essential for perfecting meringue swirls decorations on cupcakes, pies, and individual cookies. To execute a classic swirl using a large star tip (like a 1M), fill your piping bag with meringue, pushing it down to eliminate air bubbles. Hold the bag directly above your surface (a cupcake, tart, or parchment paper). Start piping in the center, applying steady, even pressure.
Pipe outwards in a circular motion, following the edge of the surface. As you reach the starting point, gently lift the bag while decreasing pressure to create a peak at the top of the swirl. Practice maintaining consistent pressure to ensure an even thickness throughout the swirl. This technique forms a beautiful, dimensional decoration that is both simple and elegant.
Creating Meringue Kisses: A Simple and Elegant Design
Meringue kisses are delightful, bite-sized treats that are easy for beginners to pipe and bake. Using a star tip or a round tip, hold the piping bag perpendicular to the parchment-lined baking sheet. Apply steady pressure to pipe a small dollop of meringue. As you finish, quickly lift the bag straight up while releasing pressure to create a little peak or a rounded top, depending on the tip used.
Keep the size and shape of the kisses consistent for even baking. These simple dots of meringue bake into light, airy cookies that are perfect for snacking, decorating cakes, or adding to dessert platters. Baking them at a very low temperature (around 200°F or 90°C) for an extended time, like 60-90 minutes, dries them out completely, resulting in a crisp texture.
Piping Meringue Ropes and Borders: Adding Texture and Dimension
Piping ropes and borders adds a professional finish and texture to the edges of cakes, tarts, and other desserts. A simple rope border can be created using a large round tip. Hold the bag at a consistent angle (often around 45 degrees) relative to the surface edge. Pipe a short line of meringue, then overlap the end of that line with the beginning of the next, creating a continuous, twisted rope effect as you move along the edge.
For a textured border, a star tip is ideal. You can pipe a continuous line of stars, overlapping them slightly, or pipe individual shells that build upon each other to form a decorative edge. Practice maintaining steady pressure and angle to ensure the border is uniform in size and appearance around the entire dessert. These borders frame your creation and add visual interest.
Intermediate Meringue Piping Techniques: Expanding Your Decorative Repertoire
Rosettes and Flowers: Creating Delicate and Beautiful Meringue Blooms
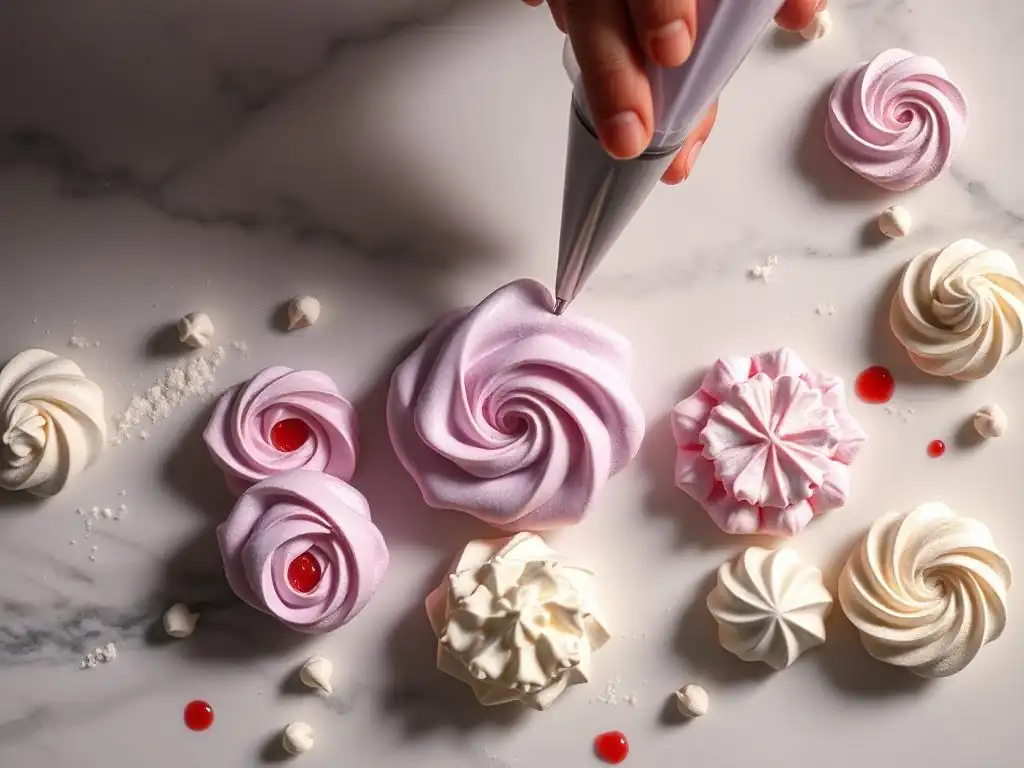
Moving beyond basic swirls, piping rosettes and simple flowers allows for more intricate and artistic meringue swirls decorations. Rosettes are typically created with a closed or open star tip. Hold the bag perpendicular to your surface. Start in the center of where you want the rosette and pipe in a continuous circular motion, moving outwards slightly, then spiraling back inwards to finish in the center. Release pressure as you complete the circle. Practice varying the size and tightness of the spiral.
Simple meringue flowers can be piped using various techniques. Petal tips can be used to create layered blooms, while small star tips can pipe clusters of tiny stars that resemble blossoms. You can also pipe a central dot with a round tip and then pipe small dots or lines around it to form petals. These techniques add a delicate, floral touch to cakes and cupcakes.
Shell Borders and Scrolls: Adding Sophistication to Your Designs
Shell borders are a classic, elegant way to finish the edge of a cake or pie, offering a more refined look than a simple rope. Using a star tip, hold the bag at an angle (around 45 degrees). Pipe a short, fat stroke of meringue, applying consistent pressure. As you release pressure and pull the bag away, allow the meringue to trail off into a tail. For the next shell, start with the fat end slightly overlapping the tail of the previous shell. Repeat this process, building up a continuous, scalloped border.
Scrolls add flowing, decorative elements to the sides or top of a cake. These are typically piped with a round tip or a small star tip. Practice piping S-shapes or C-shapes freehand or using a template. Scrolls can be simple single lines or more elaborate, overlapping designs. They add a touch of grace and sophistication to your meringue decorations.
Meringue Leaves and Feathers: Replicating Natural Elements
Creating natural elements like leaves and feathers with meringue adds a realistic and artistic dimension to your decorations. A dedicated leaf tip is designed to produce realistic leaf shapes; it has a V-shaped opening. Hold the tip with the point facing outwards. Apply pressure to pipe the base of the leaf, then lessen pressure as you pull the bag away, allowing the meringue to form the point of the leaf. A slight back-and-forth wiggle as you pipe can add a central vein texture.
Feathers can be created using a small round or star tip and manipulating the meringue after piping. Pipe a line or shape, then use a toothpick or scribe tool to gently drag through the meringue before it crusts over, creating delicate feather-like striations. These techniques require a steady hand and practice to achieve natural-looking results, enhancing your ability in perfecting meringue swirls decorations and complementary elements.
Advanced Meringue Piping Techniques: Achieving Intricate and Detailed Designs
Creating Complex Meringue Patterns: From Geometric Shapes to Freehand Designs
For those seeking to push the boundaries of meringue piping, creating complex patterns offers a significant challenge and reward. This can involve piping intricate geometric designs, such as lattices, basketweaves, or symmetrical mandalas, often using templates drawn on parchment paper beneath. Achieving clean lines and consistent spacing requires precision, steady pressure, and careful planning.
Alternatively, advanced decorators can explore freehand designs, allowing for artistic expression and unique creations. This might involve piping delicate lace-like patterns, abstract swirls, or personalized motifs directly onto a cake or onto parchment for baking. These techniques demand significant practice and control over the piping bag to execute fine details and maintain shape.
Piping Meringue Animals and Characters: Bringing Your Creations to Life
Meringue can be sculpted and piped into charming animals and characters, adding a whimsical touch to desserts, especially for children's parties. This often involves piping basic shapes (like spheres for heads, logs for bodies) and then adding details like ears, eyes, and limbs using smaller tips. Sometimes, different colored meringues are used for specific features.
For example, piping small white meringue ghosts for Halloween cupcakes involves a few simple swirls and then using a tiny amount of black meringue or melted chocolate for eyes. More complex characters might require piping multiple layers or using a combination of piping and shaping tools. This technique truly brings your meringue swirls decorations to life in delightful ways.
Using Multiple Colors in Meringue Piping: Achieving Stunning Visual Effects
Incorporating multiple colors simultaneously elevates the visual impact of your meringue piping. One popular technique is the striped bag method: use a small brush to paint vertical stripes of gel food coloring (two or more colors) inside the piping bag before filling it with plain meringue. As you pipe, the meringue will pick up the colors, creating beautiful, vibrant stripes or marbled effects in your swirls or stars.
Another approach is to prepare separate batches of meringue in different colors and load them into the same piping bag side-by-side (using a coupler and multiple bags or simply layering them carefully). Piping with this method results in swirls or shapes that feature distinct bands of color. This technique is fantastic for creating rainbow effects, gradient swirls, or multi-colored rosettes, adding dynamic flair to your perfected meringue swirls decorations.
Baking and Storing Your Meringue Decorations: Ensuring Longevity and Quality
Proper Baking Temperatures and Times for Meringue Decorations
Baking meringue decorations isn't like baking cookies or cakes; it's more about drying them out than cooking them. The key is low temperature and slow baking. Preheat your oven to a very low temperature, typically between 200°F and 250°F (90°C to 120°C). Place your parchment-lined baking sheets with piped meringue inside.
Bake for an extended period, usually from 1 to 2 hours, depending on the size and thickness of your decorations. Smaller meringue kisses might only take 60-75 minutes, while larger swirls or shapes could require 90 minutes or more. The meringue should feel firm and dry to the touch and should lift easily from the parchment paper. It should remain white or only turn a very pale cream color; browning indicates the temperature is too high. Turn off the oven and often leave the meringues inside to cool completely, which helps prevent cracking.
Cooling and Storing Meringue Decorations: Preventing Softening and Sticking
Allowing meringue decorations to cool completely and correctly is vital for maintaining their crisp texture and preventing them from sticking to the parchment. After baking, turn off the oven and leave the meringues inside with the oven door slightly ajar (using a wooden spoon) for at least an hour, or until the oven is completely cool. This slow cooling process helps dry them out further and reduces the risk of sudden temperature changes causing cracks.
Once fully cooled, meringue is highly susceptible to moisture. Store baked meringue decorations immediately in an airtight container at room temperature. Avoid refrigeration, as the humid environment can cause them to soften and become sticky or chewy. Stored properly away from humidity, baked meringue decorations can remain crisp for several weeks.
Using Meringue Decorations on Cakes, Cupcakes, and Other Desserts
Baked meringue decorations are versatile and can be used to adorn a variety of desserts. For cakes and cupcakes, they can be attached using a small dab of frosting, melted chocolate, or royal icing. Place them gently on top or around the sides just before serving to maintain their crispness. A cake covered in delicately piped and baked meringue kisses presents a stunning visual effect.
Freshly piped meringue (especially Italian or Swiss) can be used as a topping for pies, tarts, or baked Alaska. After piping swirls or designs directly onto the dessert, you can use a kitchen torch to lightly brown the peaks for a beautiful caramelized finish. This adds a different texture and flavor dimension compared to baked meringue decorations.
Troubleshooting Meringue Piping Problems: Common Mistakes and Solutions
Addressing Clogged Nozzles and Uneven Piping
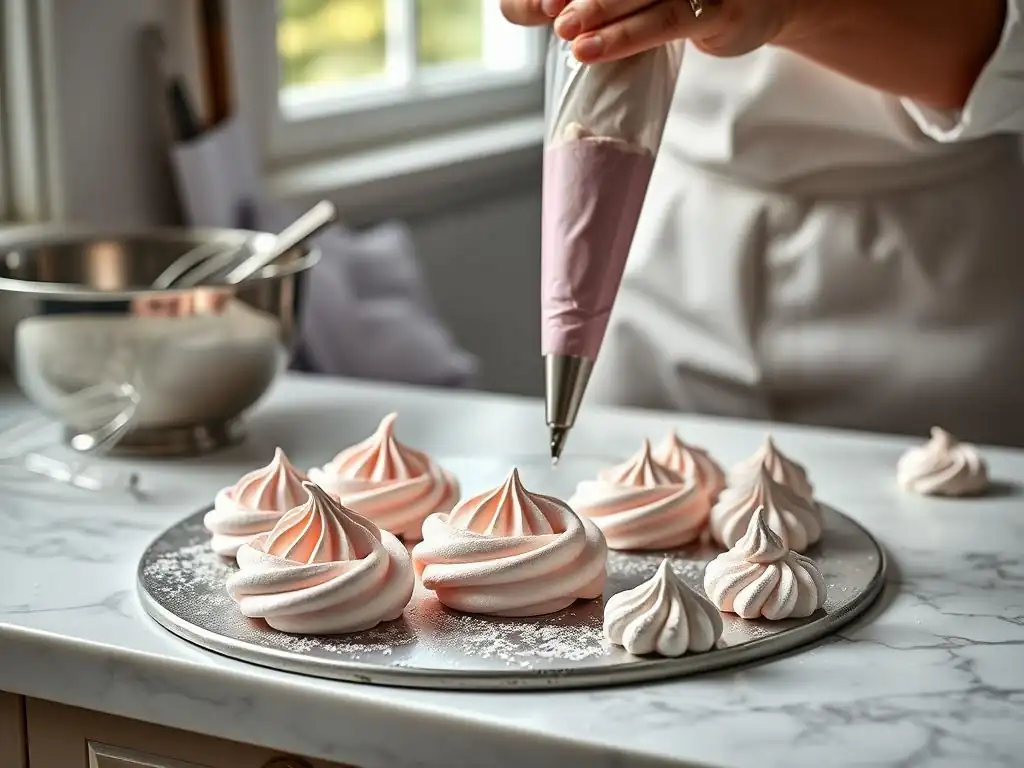
Clogged nozzles and uneven piping are frustrating issues that can disrupt your decorating flow. A nozzle typically gets clogged if the meringue is not smooth (perhaps due to undissolved sugar or overbeating), if there are air bubbles trapped in the piping bag, or if the tip opening is too small for the consistency of the meringue or any additions (like small sprinkles). Ensure your meringue is perfectly smooth before filling the bag.
To prevent air bubbles, fill the piping bag carefully, pushing the meringue down and twisting the top closed. If a clog occurs, try squeezing the bag firmly to dislodge it or carefully use a toothpick to clear the opening. Uneven piping usually results from inconsistent pressure on the bag. Practice applying steady, even pressure from start to finish of each piped element to achieve uniform thickness and shape, essential for perfecting meringue swirls decorations.
Preventing Meringue from Spreading or Losing Shape
Meringue spreading or losing its defined shape before or during baking is usually a sign that the meringue is not stiff enough or contains too much moisture. Ensure you've whipped your egg whites to firm, stiff peaks that hold their shape when the whisk is lifted. Using a stable meringue type like Swiss or Italian often helps prevent spreading, as they are more robust than French meringue.
Also, ensure your baking surface is clean and dry. While parchment paper is ideal, if using a reusable non-stick mat, ensure it's grease-free. Baking at the correct low temperature is also key; if the oven is too hot, the meringue might soften and spread before it has a chance to dry out and stabilize.
Fixing Broken or Cracked Meringue Decorations
Despite best efforts, baked meringue decorations can sometimes break or crack, especially if they are thin or handled roughly. For minor cracks or if a piece breaks off, you can often use a small amount of royal icing or melted white chocolate as an edible 'glue' to piece them back together. Apply a tiny amount to the broken edges and gently hold them in place until the adhesive sets.
Prevention is the best strategy, however. Ensure proper cooling in the oven to minimize thermal shock. Handle the delicate baked meringues with care when transferring or storing them. Store them in a container with layers separated by parchment paper to prevent them from knocking into each other. If a decoration is severely broken, it might be best to simply use it as a meringue crumble or discard it, and pipe a new one.
Inspiration and Ideas for Meringue Swirls and Decorations
Showcasing Stunning Meringue Decoration Examples: Cakes, Cupcakes, and More
The possibilities for using meringue decorations are vast and inspiring. Imagine a classic lemon tart topped with billowy, perfectly torched Italian meringue swirls that create dramatic peaks and valleys. Picture a wedding cake adorned with delicate, baked Swiss meringue rosettes and intricate piped lace patterns. Cupcakes can be transformed into miniature works of art with vibrant, multi-colored meringue swirls or charming meringue animal toppers like little white ghosts for Halloween or fluffy sheep.
Beyond traditional desserts, baked meringue shapes can be used to garnish plated desserts in restaurants, adding height and texture. They can be piped into festive shapes for holidays, such as miniature Christmas trees, snowflakes, or hearts. Exploring images and examples online or in baking books can provide endless ideas for perfecting meringue swirls decorations and incorporating them into your own creations.
Creative Meringue Piping Projects: From Birthday Cakes to Holiday Treats
Meringue piping is perfect for adding a personal touch to special occasion baking. For a child's birthday cake, you could pipe meringue shapes based on their favorite animals or characters, perhaps using different colors. A winter-themed cake could feature piped meringue snowflakes and icicles. Holiday treats like gingerbread houses can be decorated with piped meringue "snow" or festive shapes.
Consider piping individual meringue cookies in fun shapes or colors to give as edible gifts. Layering different flavored meringues (e.g., peppermint and chocolate) can add another dimension. The creative use of meringue swirls decorations is limited only by your imagination and willingness to experiment with shapes, colors, and combinations.
Resources for Further Learning: Books, Websites, and Online Courses for Meringue Mastery
To continue honing your meringue piping skills and perfecting meringue swirls decorations, many resources are available. Baking books dedicated to cakes, pastries, or confectionery often include detailed sections on meringue techniques and recipes. Websites like BakeWithEase.com offer step-by-step guides and tips.
Online baking communities and forums provide platforms to ask questions and share experiences. Additionally, numerous online courses, both free and paid, offer video tutorials and structured lessons that can guide you through basic to advanced meringue techniques. Exploring these resources can provide new inspiration, troubleshoot specific issues, and help you master the art of meringue.
Conclusion: Embrace the Art of Meringue Piping and Elevate Your Baking
The Joy of Creating Beautiful and Delicious Meringue Decorations
There is immense satisfaction in creating something beautiful and delicious with your own hands. Mastering meringue piping, from simple swirls to complex designs, offers a unique avenue for artistic expression in the kitchen. The transformation of humble egg whites and sugar into elegant, airy, and flavorful decorations is truly magical. The crisp texture and sweet taste of properly made and baked meringue add a delightful contrast to cakes, tarts, and other desserts.
Whether you are perfecting meringue swirls decorations for a family gathering or attempting intricate designs for a special celebration, the process is a rewarding journey of skill development and creativity. Each successful swirl, rosette, or detailed shape is a testament to your growing mastery of this delicate craft.
Continue Your Baking Journey with BakeWithEase: More Meringue Mastery Tips and Techniques
Piping meringue is just one facet of the vast and wonderful world of baking. As you continue to explore and refine your skills in creating stunning meringue swirls decorations and other piped elements, remember that practice is key. Don't be discouraged by initial challenges; every attempt is a learning opportunity.
BakeWithEase is here to support your baking journey, offering a wealth of simple recipes, techniques, and tips for bakers of all levels. We encourage you to continue exploring our resources for more advanced baking techniques, including further insights into meringue mastery and how to incorporate these beautiful decorations into an array of delicious desserts. Happy piping!
Frequently Asked Questions
How can I ensure my meringue holds its shape when piping?
The key is a stiff peak meringue. This is achieved by whipping the egg whites to the correct consistency and adding sugar gradually. A stable meringue will hold its shape beautifully.
What type of meringue is best for piping decorations?
While Italian and Swiss meringues are more stable, a French meringue can work well if properly made and baked. The key is to ensure it is fully cooked through to prevent weeping.
What piping tips are best for creating different meringue swirl decorations?
Different piping tips create different effects. A star tip is excellent for classic swirls, while a round tip is perfect for smooth, delicate lines. Experiment to find your favorites!
How do I prevent my meringue from cracking during baking?
Bake at a very low temperature for a long time to dry the meringue without browning. Avoid rapid temperature changes.
Can I add color to my meringue for decorative purposes?
Yes! Use gel food coloring for the best results. Liquid food coloring can alter the consistency of the meringue, making it less stable.
Final Reflection: The Enduring Allure of the Perfect Meringue Swirl
The art of piping meringue is more than just a culinary skill; it's a testament to the power of precision and creativity in the kitchen. From delicate kisses to elaborate rosettes, the seemingly simple meringue transforms into a canvas for artistic expression, a delicious detail that elevates any dessert. This enduring technique continues to captivate bakers of all levels, proving that even the most basic ingredients can yield extraordinary results.
The journey of mastering meringue swirls has been a deeply rewarding one, revealing not only the technical aspects of piping but also the importance of patience and practice. The subtle nuances of pressure, angle, and consistency are key to achieving that perfect swirl, a lesson that extends far beyond the baking world. As the renowned pastry chef, Pierre Hermé, once said, Pastry is a science, but it's also an art. It's about precision, but it's also about passion.
This quote perfectly encapsulates the spirit of meringue piping – a blend of technical skill and artistic flair.
Now, it's your turn to explore the endless possibilities of meringue artistry. Don't be afraid to experiment with different piping tips, nozzles, and techniques. Embrace the imperfections, learn from each attempt, and most importantly, have fun! The journey to perfecting your meringue swirls is a rewarding one, filled with delicious discoveries and the satisfaction of creating something beautiful and delectable. Let your creativity flow, and watch your desserts transform into edible masterpieces.
Unleash Your Inner Pastry Artist: Master the Art of Piping
Thanks for joining us on this delicious journey into the world of meringue piping! We hope you've gained the confidence to create stunning decorations for your cakes and desserts. Ready to put your new skills to the test?
- Try your hand at a new piping technique: Challenge yourself to recreate one of the designs from the article, or experiment with a completely new swirl or pattern. Don't be afraid to get creative!
- Share your meringue masterpieces: Show us your piped creations! Post a picture on social media and tag us – we'd love to see your baking triumphs. Use #BakeWithEaseMeringue
- Explore advanced meringue techniques: Dive deeper into the world of meringue by researching different types of meringue or advanced piping methods. The possibilities are endless!
What unique meringue design will you create next?