
Beyond Basic: Advanced Meringue Techniques to Take Your Baking Further

Welcome to BakeWithEase, where we believe everyone can create extraordinary treats! Are you ready to elevate your baking game? This week, we're diving deep into perfecting meringue stability techniques baking, moving beyond the basics to unlock a world of airy, decadent desserts. Discover the secrets to flawlessly stable meringues and prepare to amaze your friends and family. Curious how to achieve that perfect glossy peak? Let's get started!
- Beyond Basic: Advanced Meringue Techniques to Elevate Your Baking
- Mastering Advanced Meringue Baking
-
Understanding Meringue Types: A Foundation for Advanced Techniques
- Italian Meringue: The Stable and Silky Choice for Buttercream and Baked Alaskas
- Swiss Meringue: Smoothness and Versatility for Pavlovas and Meringue Cookies
- French Meringue: Lightness and Airiness (Ideal for Simple Cookies, Requires Careful Handling)
- Choosing the Right Meringue Type for Specific Baking Projects: A Comprehensive Guide
- Perfecting Meringue Stability Techniques
-
Advanced Meringue Techniques for Enhanced Baking
- Meringue Kisses: Achieving Perfect Shape and Texture with Piping Techniques
- Meringue Buttercream: A Smooth and Stable Frosting for Cakes and Cupcakes
- Baked Alaska: A Showstopping Dessert with Meringue and Contrasting Temperatures
- Meringue-Topped Pies: Preventing Weeping and Achieving Golden-Brown Perfection
-
Flavor Infusions: Taking Your Meringue to the Next Level
- Incorporating Extracts and Zests into Meringue: Flavor Combinations and Techniques
- Adding Chocolate and Nut Pastes for Richness: Achieving a Smooth and Even Texture
- Using Spices to Complement Meringue's Sweetness: Cinnamon, Nutmeg, and Cardamom
- Creating Savory Meringues: Exploring Unexpected Flavors with Herbs and Spices
-
Troubleshooting Common Meringue Problems
- Addressing Weeping Meringue: Causes and Solutions for a Dry Finish
- Preventing a Grainy Texture in Meringue: Understanding Sugar Dissolution
- Correcting a Collapsed Meringue: Rescue Techniques and Prevention Strategies
- Identifying and Fixing Over-Beaten Meringue: Recognizing the Signs and Adjusting Technique
-
Tips and Tricks for Meringue Mastery
- Using Cream of Tartar for Meringue Stability: Understanding its Role and Proper Usage
- The Importance of Clean Equipment for Meringue: Preventing Fat Contamination
- Achieving a Glossy Meringue: The Secret Ingredient: Lemon Juice
- Properly Storing Meringue-Based Desserts: Maintaining Texture and Preventing Softening
- Advanced Meringue Baking Recipes to Try at Home
- Conclusion: Embracing the Art of Advanced Meringue Baking
-
Frequently Asked Questions
- What are some common reasons for meringue failure, and how can I avoid them?
- How does the type of sugar used affect meringue stability?
- What advanced techniques can I use to stabilize my meringue, especially in humid environments?
- Can different types of meringue (Italian, French, Swiss) be used interchangeably in recipes?
- What role does temperature play in achieving the perfect meringue?
- Final Reflection: Mastering the Art of the Meringue
- Unlock Your Meringue Mastery: Elevate Your Baking Today!
Beyond Basic: Advanced Meringue Techniques to Elevate Your Baking
Mastering Advanced Meringue Baking
Elevating Your Meringue Skills: Achieving Professional Results
Moving beyond simple meringue cookies opens up a world of sophisticated desserts. Perfecting meringue stability techniques in baking is crucial for achieving the glossy, stable peaks required for everything from delicate French macarons to towering Italian meringue buttercreams. This involves a deeper understanding of the science behind egg whites and sugar, temperature control, and handling techniques that differ significantly from basic recipes. A baker aiming for professional results must pay meticulous attention to detail, recognizing the subtle cues that indicate the meringue is developing correctly, whether it's the sheen of the peaks or the temperature of the mixture.
Achieving professional-level meringue also requires mastering various methods—French, Swiss, and Italian—each suited for different applications and offering unique textures and stability. For instance, Italian meringue, made by whisking hot sugar syrup into egg whites, is renowned for its incredible stability and smooth texture, making it ideal for structural uses like topping baked Alaska or stabilizing buttercream.
Swiss meringue, heated over a double boiler before whipping, offers a lovely smooth consistency perfect for pavlovas or meringue cookies that hold their shape beautifully. Understanding these nuances is key to selecting the right technique for your desired outcome, ensuring your baked goods consistently impress.
Why Master Advanced Meringue Techniques? Stability, Texture, and Versatility
Mastering advanced meringue techniques is paramount for bakers looking to expand their repertoire and tackle more complex recipes. The primary benefits lie in enhanced stability, superior texture, and incredible versatility. A stable meringue won't weep or collapse, which is vital for desserts like lemon meringue pie or frostings that need to hold their form at room temperature. Achieving this stability often involves precise sugar ratios and temperature control, which are hallmarks of advanced methods like Italian or Swiss meringue. Without proper technique, delicate structures can deflate, and textures can become gummy or grainy, ruining the final product.
Furthermore, advanced techniques allow for a wider range of textures, from the crisp shell and soft interior of a perfect pavlova to the light, airy structure of a stable buttercream. This textural variety adds depth and complexity to baked goods. The versatility of meringue is also unlocked; it's not just for cookies or pie toppings. It can be folded into mousses, used as a base for soufflés, or even incorporated into savory dishes. Perfecting meringue stability techniques in baking empowers you to confidently experiment with these applications, transforming humble egg whites into extraordinary culinary creations.
Understanding Meringue Types: A Foundation for Advanced Techniques
Italian Meringue: The Stable and Silky Choice for Buttercream and Baked Alaskas
Italian meringue is often considered the most stable of the three main types, thanks to the unique method of incorporating hot sugar syrup into whipped egg whites. This process not only cooks the egg whites, making them safe to consume raw, but also creates a strong, stable protein structure capable of holding significant weight and heat. The syrup, typically heated to 115-121°C (240-250°F), is slowly drizzled into the whipping egg whites while the mixer is running, essentially 'tempering' them. This results in a remarkably smooth, glossy, and incredibly stable meringue.
This inherent stability makes Italian meringue the go-to choice for applications where structure and heat resistance are crucial. It's the foundational element of many classic buttercreams, yielding a light yet stable frosting that pipes beautifully and holds up well at room temperature. It's also essential for desserts like Baked Alaska, where a layer of meringue is quickly browned under intense heat without melting the ice cream beneath.
The hot syrup method ensures the meringue sets almost instantly on the exterior when heated, providing insulation. Perfecting meringue stability techniques baking, particularly the Italian method, is a game-changer for these demanding recipes.
Swiss meringue is created by gently heating egg whites and sugar together over a double boiler (bain-marie) until the sugar is dissolved and the mixture reaches a specific temperature, typically around 60-70°C (140-160°F). This heating process partially cooks the egg whites, making them safer and creating a more stable base for whipping compared to French meringue. Once the sugar is fully dissolved and the mixture is warm, it's transferred to a mixer and whipped until cool, glossy, and stiff peaks form. This results in a beautifully smooth, dense, and stable meringue.
The smoothness and stability of Swiss meringue make it incredibly versatile. It's the traditional base for many meringue cookies, which hold their piped shapes well during baking and develop a lovely crisp exterior. It's also excellent for pavlovas, yielding a shell that is crisp on the outside and delightfully chewy within. Swiss meringue is robust enough to be used as a frosting or filling, though it's less stable than Italian meringue for very warm conditions. Mastering the gentle heating and whipping process is key to perfecting meringue stability techniques baking with the Swiss method.
French meringue is the simplest and most basic form, made by gradually whipping granulated sugar into raw egg whites until stiff, glossy peaks form. Because the egg whites are not heated, this meringue is the least stable of the three types and is generally best used for recipes where it will be baked immediately at a low temperature for a prolonged period, allowing it to dry out and crisp up. Its structure is more fragile than Swiss or Italian meringue, making it prone to weeping or collapsing if not handled correctly or used promptly.
Despite its lower stability, French meringue excels in providing incredible lightness and airiness. It's perfect for simple meringue cookies (often called 'kisses') or for folding into light mousses or soufflés before baking. However, achieving good results requires careful technique: the sugar must be added slowly to allow it to dissolve, and the egg whites must be whipped to the correct consistency. While perhaps not the focus when perfecting meringue stability techniques baking for complex structures, understanding French meringue provides a fundamental understanding of egg white denaturation and sugar incorporation.
Choosing the Right Meringue Type for Specific Baking Projects: A Comprehensive Guide
Selecting the appropriate meringue type is critical for the success of your baking project. The desired stability, texture, and application dictate the best choice. For instance, if you need a frosting that can be piped into intricate designs and hold up at room temperature, Italian meringue buttercream is the superior option due to its unparalleled stability. For a classic lemon meringue pie topping that requires browning under a broiler without melting the filling, Italian meringue is also ideal for its heat resistance and ability to set quickly on the exterior.
- For stable frostings, structural elements (like Baked Alaska), or bases for mousses: Italian Meringue is the top choice.
- For crisp meringue cookies, pavlova shells, or smooth, pipeable frostings: Swiss Meringue is highly recommended.
- For light, airy cookies baked until crisp, or for folding into soufflés/mousses before baking: French Meringue is suitable, provided it's used immediately and baked properly.
Understanding the strengths and weaknesses of each type is fundamental to perfecting meringue stability techniques baking for different applications. Consider the moisture content of the filling (for pies), the need for uncooked meringue (for mousses), or the required structural integrity (for layered desserts) when making your decision.
Perfecting Meringue Stability Techniques
Achieving Optimal Meringue Stability: Key Factors and Best Practices
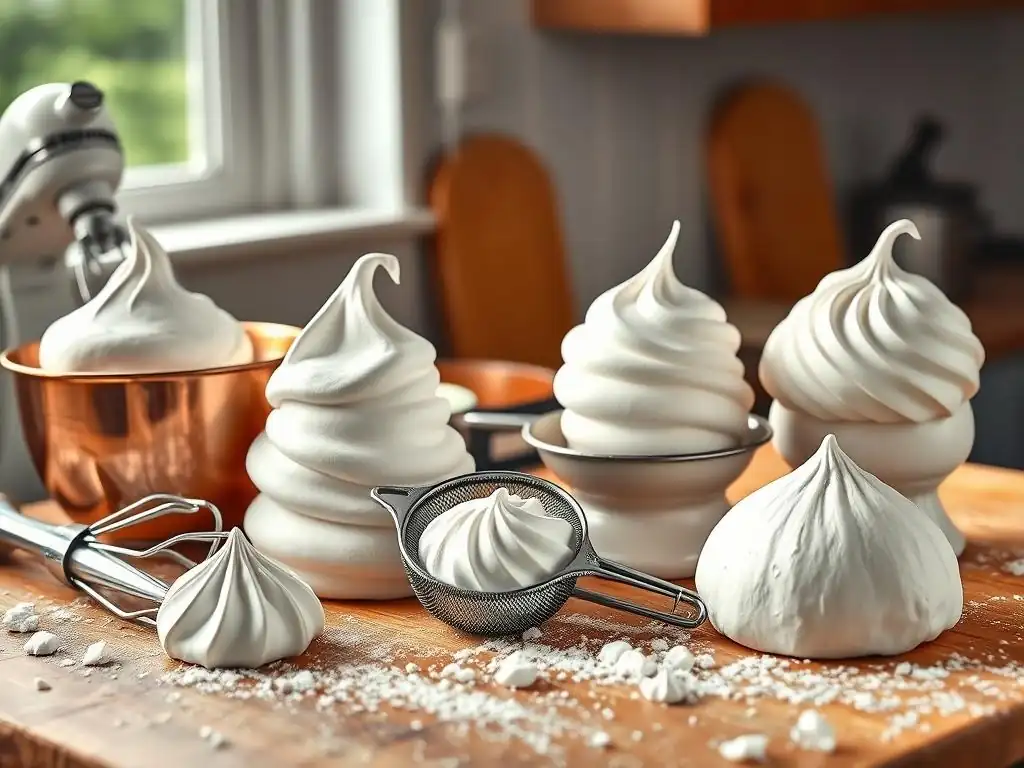
Achieving optimal meringue stability is the cornerstone of advanced meringue baking. Several factors influence how well your meringue holds its shape, resists weeping, and maintains its texture. The quality of the egg whites, the ratio and type of sugar used, the method of sugar incorporation, temperature control, and even the humidity of your environment all play significant roles. Starting with fresh, room-temperature egg whites free from any trace of fat is paramount. A single drop of egg yolk or grease can prevent the egg whites from whipping properly, resulting in a weak, unstable foam.
Beyond the ingredients, meticulous technique is essential. For Swiss and Italian meringues, ensuring the sugar is fully dissolved before whipping is crucial; undissolved sugar can lead to a grainy texture and weeping. The speed and duration of whipping also matter – over-whipping can cause the protein structure to break down, leading to separation, while under-whipping results in a weak, unstable foam. Perfecting meringue stability techniques baking involves a careful balance of these elements, paying close attention to the visual cues – the sheen, the peak formation, and the overall body of the meringue.
The Role of Sugar in Meringue Stability: Understanding Sugar Ratios
Sugar is not just for sweetness in meringue; it's a critical structural component. As egg whites are whipped, proteins unwind and form a network that traps air. Sugar helps to stabilize this protein network by coating the protein molecules, preventing them from collapsing or separating. It also absorbs moisture, which is particularly important for preventing weeping in baked meringues. The ratio of sugar to egg white significantly impacts the final texture and stability. A higher sugar ratio generally results in a denser, more stable, and less prone-to-weeping meringue, while a lower ratio yields a lighter, more fragile structure.
For French meringue, the sugar is typically added gradually after the egg whites have reached soft peaks, usually at a ratio of about 50g to 100g of sugar per large egg white (approx. 30g). Swiss meringue often uses a higher ratio, sometimes 100-120g sugar per egg white, heated together before whipping.
Italian meringue involves cooking a syrup with a much higher concentration of sugar, often 200-250g sugar per egg white, which is then incorporated into the whites. This high sugar content, combined with the heat from the syrup, is why Italian meringue is the most stable. Perfecting meringue stability techniques baking often means experimenting with sugar ratios within standard guidelines to find the balance that works best for a specific application and environmental conditions.
Temperature Control: Critical for Meringue Success at Every Stage
Temperature control is a non-negotiable aspect of perfecting meringue stability techniques baking. Starting with room-temperature egg whites (around 20-24°C / 68-75°F) allows the proteins to whip up to their maximum volume more easily than cold eggs. For Swiss meringue, heating the egg white and sugar mixture to the correct temperature (typically 60-70°C / 140-160°F) is vital to dissolve the sugar and partially cook the egg whites, enhancing stability and safety. Overheating can scramble the eggs, while underheating won't dissolve the sugar properly.
In Italian meringue, the temperature of the sugar syrup is the most critical factor, usually reaching the soft-ball stage (115-121°C / 240-250°F). This high temperature is necessary to cook the egg whites as the syrup is added and create a robust, stable structure. Baking temperature is also crucial for meringue cookies and pavlovas; low and slow heat (often 90-120°C / 195-250°F) is used to dry out the meringue without browning it too quickly, preventing cracks and ensuring it becomes crisp throughout. Drastic temperature changes, like opening the oven door too soon, can cause delicate meringues to collapse.
Mastering Humidity: Strategies for Baking Meringue in Humid Environments
Humidity is arguably the biggest nemesis of meringue, particularly baked meringues like cookies or pavlovas. Sugar is hygroscopic, meaning it readily absorbs moisture from the air. In a humid environment, baked meringues can quickly turn sticky, soft, or even weep as the sugar draws in atmospheric moisture. Perfecting meringue stability techniques baking in high humidity requires specific strategies to combat this challenge. One common approach is to increase the sugar ratio slightly in the recipe, as more sugar can absorb more moisture before the meringue becomes noticeably affected.
Baking technique also plays a crucial role in humid conditions. Bake meringues at the lowest possible temperature for a longer duration to ensure they are thoroughly dried out. Once baked, turn off the oven and leave the meringues inside to cool completely with the door slightly ajar.
This allows them to dry further and cool gradually without being exposed to humid air immediately. Properly storing baked meringues in airtight containers with a desiccant packet (like silica gel, food-grade) can also help maintain their crispness. Avoiding baking meringue on very rainy or humid days is often the simplest strategy if possible.
Advanced Meringue Techniques for Enhanced Baking
Meringue Kisses: Achieving Perfect Shape and Texture with Piping Techniques
Meringue kisses are classic treats that showcase the potential of meringue when piped and baked correctly. Achieving uniform size, crisp texture, and defined shapes requires careful technique. Using a stable meringue, like Swiss or a slightly higher-sugar French meringue, is the first step. The meringue should be whipped to firm, glossy peaks that hold their shape when piped. The consistency should be smooth enough to flow through a piping tip but stiff enough not to spread excessively.
Piping technique is key. Use a sturdy piping bag fitted with your desired tip (a simple round tip or a star tip are popular). Fill the bag without overfilling it, expelling any air bubbles. When piping onto a baking sheet lined with parchment paper or a silicone mat, apply even pressure and lift the bag cleanly to create defined peaks.
Baking at a low temperature (around 100-110°C / 210-230°F) for a considerable time (often 60-90 minutes or longer, depending on size) is essential to dry them out completely. Allowing them to cool inside the turned-off oven prevents cracking and ensures crispness. Perfecting meringue stability techniques baking for kisses means focusing on consistent piping and slow, thorough drying.
Meringue Buttercream: A Smooth and Stable Frosting for Cakes and Cupcakes
Meringue buttercreams, primarily Swiss and Italian, are highly prized for their silky smooth texture, less cloying sweetness compared to American buttercream, and excellent stability for decorating. Italian meringue buttercream is often considered the most stable, made by whisking soft butter into cooled Italian meringue. The hot sugar syrup used in the meringue structure creates a robust framework that emulsifies beautifully with the added butter, resulting in a light, airy, yet incredibly stable frosting that pipes sharply and holds its shape well, even in warmer conditions.
Swiss meringue buttercream follows a similar principle, incorporating softened butter into cooled Swiss meringue. While slightly less stable than its Italian counterpart in very warm temperatures, it is still far more stable than French meringue or American buttercream for piping and layering cakes. The key to both is incorporating the butter gradually and beating until a smooth, cohesive emulsion forms. If it looks curdled, continue beating – it often comes together. Perfecting meringue stability techniques baking in the context of buttercream involves mastering the meringue base first and then correctly emulsifying the butter.
Baked Alaska: A Showstopping Dessert with Meringue and Contrasting Temperatures
Baked Alaska is a dramatic dessert that highlights the insulating properties of meringue and the power of brief, intense heat. It typically consists of a cake base, a layer of ice cream, all encased in a thick layer of Italian meringue. The magic lies in the meringue's ability to brown quickly under a broiler or with a kitchen torch without melting the ice cream beneath. This is primarily due to the low moisture content of the meringue's exterior once heated and its ability to trap air, acting as an insulator.
Creating a successful Baked Alaska requires a very stable meringue, and Italian meringue is the standard choice. The hot sugar syrup cooks the egg whites thoroughly, creating a dense, stable foam that forms a protective crust instantly when exposed to high heat. The meringue should be applied thickly and sealed completely around the cake and ice cream to prevent any gaps where heat could penetrate.
Freezing the entire assembly until the meringue is very firm before the final browning step is also crucial. Perfecting meringue stability techniques baking for Baked Alaska is about building a robust, insulating layer that can withstand a brief blast of heat.
Meringue-Topped Pies: Preventing Weeping and Achieving Golden-Brown Perfection
Meringue-topped pies, like the classic lemon meringue pie, are notorious for the challenge of preventing the meringue from weeping (exuding liquid) or shrinking away from the crust. Weeping occurs when the sugar in the meringue draws moisture out, often due to undercooking, insufficient sugar, or rapid cooling. Achieving a beautiful golden-brown finish without overcooking the filling beneath requires a specific approach.
Using a stable meringue, such as Swiss or a slightly higher-sugar French meringue, can help. Applying the meringue while the pie filling is still hot helps to 'set' the bottom layer of the meringue, reducing the likelihood of weeping at the interface. Ensure the meringue completely covers the filling and is sealed to the edge of the crust to prevent shrinkage. Browning is typically done quickly under a broiler or with a torch.
For the broiler method, watch it constantly, as it browns in seconds. Cooling the pie gradually at room temperature, rather than refrigerating it immediately, can also help minimize weeping. Perfecting meringue stability techniques baking for pies involves careful application, proper sealing, and controlled cooling.
Flavor Infusions: Taking Your Meringue to the Next Level
Incorporating Extracts and Zests into Meringue: Flavor Combinations and Techniques
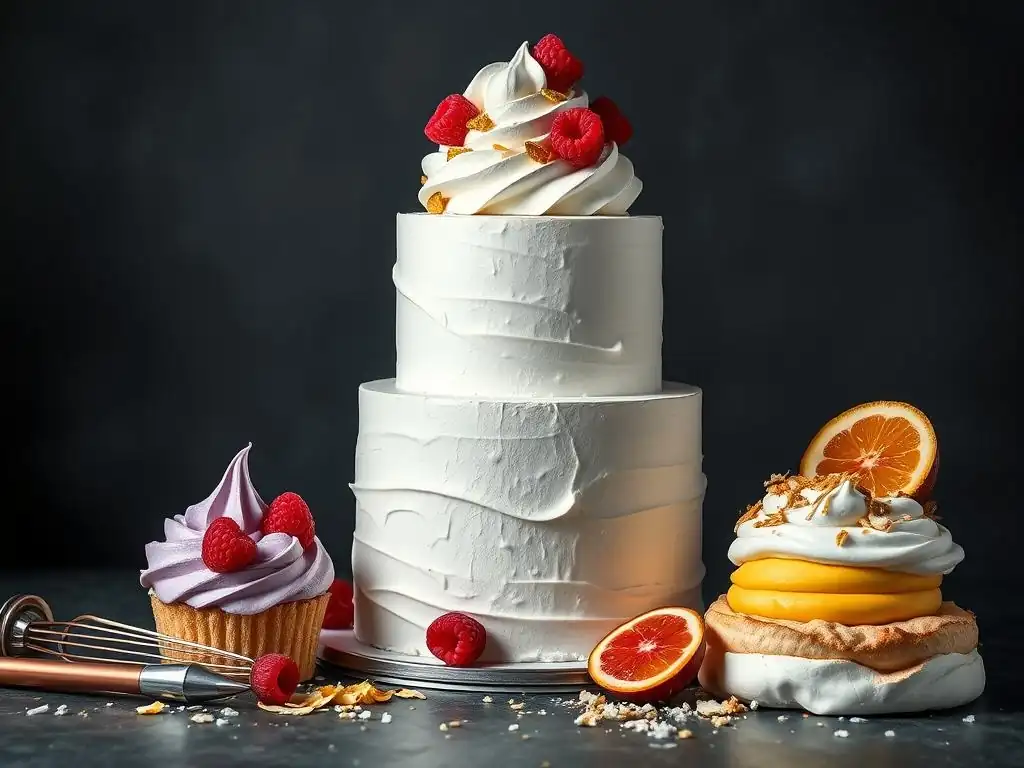
Beyond the simple sweetness of sugar, meringue serves as a wonderful canvas for flavor. Extracts and citrus zests are popular additions, adding depth and complexity. Vanilla extract is a classic, enhancing the basic flavor.
Other extracts like almond, peppermint, or lemon can transform the meringue into something entirely different. For example, a few drops of peppermint extract can turn meringue kisses into festive treats, while lemon extract complements a lemon meringue pie. These should be added towards the end of the whipping process, after stiff peaks have formed, to ensure the alcohol in the extract doesn't interfere with the foam structure.
Citrus zests, such as lemon, lime, or orange, offer a bright, aromatic punch. The oils in the zest provide intense flavor. Zest should be finely grated to avoid large pieces and can be gently folded in at the very end.
Consider pairings like lemon zest with French meringue for light cookies or orange zest in a Swiss meringue for a pavlova. The amount used should be balanced – too much extract can destabilize the meringue, while too much zest can affect texture. Perfecting meringue stability techniques baking while adding flavor means incorporating these elements carefully and at the right stage.
Adding Chocolate and Nut Pastes for Richness: Achieving a Smooth and Even Texture
For richer, more indulgent flavors, chocolate or nut pastes can be incorporated into meringue. Melted and slightly cooled chocolate can be gently folded into a stable meringue, like Italian or Swiss, to create chocolate meringue cookies or a chocolate meringue buttercream. The key is to use good quality chocolate and ensure it's not too hot, which could melt the meringue structure. Folding should be done carefully to avoid deflating the meringue. A ratio of about 50-100g of melted chocolate per batch made with 3-4 egg whites is a good starting point.
Nut pastes, such as pistachio, almond, or hazelnut paste, offer a creamy texture and intense flavor. These can be folded into meringue similarly to chocolate. Ensure the paste is smooth and free of large chunks. Incorporating pastes adds weight and moisture, so this works best with inherently stable meringues like Italian or Swiss. These additions are fantastic for creating flavored meringue cookies or enriching meringue buttercreams. Perfecting meringue stability techniques baking with these additions requires careful folding to maintain airiness while distributing the flavor evenly.
Using Spices to Complement Meringue's Sweetness: Cinnamon, Nutmeg, and Cardamom
Spices offer a warm, aromatic contrast to the sweetness of meringue. Ground spices like cinnamon, nutmeg, ginger, or cardamom can be added to the sugar before whipping or gently folded into the finished meringue. Adding spices to the sugar helps distribute them evenly and allows their flavors to infuse. For example, a pinch of cinnamon and nutmeg in French meringue cookies is delightful, especially for holiday baking. Cardamom can add an exotic twist to a Swiss meringue used for a pavlova base.
Whole spices, like vanilla beans, can also be used. Scrape the seeds from half a vanilla bean and whip them directly into the egg whites from the start for intense vanilla flavor distributed throughout. Alternatively, the vanilla bean can be infused into the sugar syrup for Italian meringue. Be mindful of the quantity of ground spices, as too much can make the meringue gritty or overly strong in flavor. Perfecting meringue stability techniques baking with spices involves ensuring even distribution without compromising the meringue's smooth texture.
Creating Savory Meringues: Exploring Unexpected Flavors with Herbs and Spices
Meringue doesn't have to be exclusively sweet. Savory meringues are a fascinating exploration, offering unexpected uses for this versatile technique. Instead of sugar, finely grated hard cheeses like Parmesan or finely ground nuts can be incorporated into egg whites whipped to stiff peaks. Herbs like chives, rosemary, or thyme, finely chopped, can also be folded in. A pinch of salt is often added to help stabilize the egg whites and enhance the savory flavors.
These savory meringues are typically baked at a low temperature until crisp, similar to sweet meringues. They can serve as unique garnishes for soups, toppings for gratins, or even as light, cheesy snacks. For instance, whipping egg whites with grated Parmesan cheese and a pinch of cayenne pepper creates cheesy meringue bites. Perfecting meringue stability techniques baking for savory applications involves understanding how alternative ingredients like cheese or nuts affect the foam structure compared to sugar, often requiring slightly different ratios and careful handling.
Troubleshooting Common Meringue Problems
Addressing Weeping Meringue: Causes and Solutions for a Dry Finish
Weeping meringue, where liquid beads appear on the surface or around the base, is a frustrating problem often encountered with baked meringues, particularly on pies. The primary cause is usually undissolved sugar or undercooking, which leaves residual moisture in the meringue. Rapid cooling can also contribute, causing condensation. To address this, ensure all sugar is completely dissolved before whipping (essential for Swiss and Italian methods, and achieved by adding sugar slowly for French).
For baked meringues, bake them at a low temperature until they are thoroughly dried out, not just set. The baking time is more about drying than cooking. For meringue-topped pies, applying the meringue to a hot filling helps set the base and reduce weeping. Sealing the meringue to the crust edge is also vital. Cooling the finished pie gradually at room temperature is preferable to immediate refrigeration. Perfecting meringue stability techniques baking requires proactive measures to prevent weeping by ensuring proper sugar dissolution and thorough drying.
Preventing a Grainy Texture in Meringue: Understanding Sugar Dissolution
A grainy texture in meringue is almost always a sign that the sugar has not fully dissolved into the egg whites. In French meringue, this happens if the sugar is added too quickly or if the whipping time after adding sugar is insufficient. The sugar crystals remain intact within the foam, resulting in a gritty mouthfeel. For Swiss and Italian meringues, graininess indicates that the initial heating step (Swiss) or the sugar syrup temperature (Italian) wasn't sufficient to dissolve all the sugar crystals before whipping.
To prevent graininess in French meringue, add the sugar gradually, spoonful by spoonful, allowing each addition to dissolve before adding the next, and continue whipping until the meringue is smooth and glossy. For Swiss meringue, rub a small amount of the heated mixture between your fingers to check for any sugar crystals before removing it from the heat and whipping. For Italian meringue, ensure your sugar syrup reaches the correct temperature range (115-121°C / 240-250°F), as this high temperature guarantees sugar dissolution. Proper sugar management is fundamental to perfecting meringue stability techniques baking for a smooth result.
Correcting a Collapsed Meringue: Rescue Techniques and Prevention Strategies
A collapsed meringue, where the whipped foam deflates and becomes liquidy, can occur for several reasons, most commonly due to fat contamination, under-whipping, or over-whipping. A single trace of egg yolk or grease on equipment can prevent the egg whites from forming a stable foam in the first place. Under-whipping means the protein structure hasn't fully developed to hold the air. Over-whipping can cause the protein bonds to break down, leading to separation and collapse.
Unfortunately, once a meringue has truly collapsed due to fat contamination, it cannot be rescued; the egg whites will never whip properly. If it's due to under-whipping, you might be able to continue whipping, but be cautious not to overdo it. If it's slightly separated from over-whipping, sometimes gently folding it by hand can help bring it back slightly, but it won't regain its original volume or stability.
Prevention is key: ensure all equipment is spotlessly clean and free of grease, whip egg whites to the correct peak stage (soft, medium, or stiff as required by the recipe), and avoid over-whipping, which can turn the meringue grainy and then collapsed. Perfecting meringue stability techniques baking relies heavily on preventing these issues from the outset.
Identifying and Fixing Over-Beaten Meringue: Recognizing the Signs and Adjusting Technique
Over-beaten meringue is a common issue, particularly with French meringue. It occurs when the egg whites are whipped beyond the stiff, glossy peak stage. The signs include the meringue losing its smooth, shiny appearance and becoming dull, grainy, and curdled-looking. The peaks might look very stiff but also dry and brittle. If whipping continues further, the protein structure can break down entirely, leading to separation and eventual collapse (as discussed above).
Once meringue is over-beaten to the grainy stage, it's difficult to fully recover its smooth texture. You can sometimes gently fold it by hand for a moment to try and bring it back slightly, but it won't be as smooth or stable as properly whipped meringue. If it hasn't separated completely, it might still be usable for simple baked items like cookies, but it won't be ideal for applications requiring smoothness or fine piping.
The best fix is prevention: stop whipping as soon as stiff, glossy peaks are achieved. Pay close attention during the final stages of whipping, as the transition from perfect peaks to over-beaten can happen quickly, especially with powerful stand mixers. Perfecting meringue stability techniques baking involves recognizing the visual cues of properly whipped meringue.
Tips and Tricks for Meringue Mastery
Using Cream of Tartar for Meringue Stability: Understanding its Role and Proper Usage
Cream of tartar (potassium bitartrate) is an acidic salt often added to egg whites to enhance meringue stability. Its role is to help the egg white proteins denature and unfold more easily, allowing them to trap air more effectively and form a stronger, more stable foam. It also helps prevent the proteins from bonding too tightly and becoming brittle, which can lead to over-whipping. A pinch of cream of tartar (typically about 1/8 teaspoon per two large egg whites) is usually added at the beginning of the whipping process, before any sugar is introduced.
While not strictly necessary for all meringues, especially stable ones like Italian, cream of tartar provides an extra layer of insurance, particularly when making French meringue or when working with less-than-perfect conditions. It contributes to a whiter, more voluminous, and more stable meringue that is less likely to weep or collapse. However, using too much can impart a slightly metallic taste. Its proper usage is a simple yet effective trick for perfecting meringue stability techniques baking.
The Importance of Clean Equipment for Meringue: Preventing Fat Contamination
One of the most critical rules in meringue making, regardless of the type, is ensuring all equipment is scrupulously clean and completely free of any grease or fat. Egg whites are highly sensitive to fat; even a minuscule trace can prevent the proteins from whipping up properly, resulting in a weak, flat, or completely failed meringue. This includes the mixing bowl (glass or metal are preferred over plastic, which can retain grease), the whisk attachment, and any spatulas or tools used.
Wash all equipment thoroughly with hot, soapy water, rinse well, and dry completely before use. Some bakers even go a step further and wipe down the bowl and whisk with a little lemon juice or vinegar before starting, as the acidity helps cut any residual grease. Preventing fat contamination is a fundamental step in perfecting meringue stability techniques baking; without it, success is highly unlikely.
Achieving a Glossy Meringue: The Secret Ingredient: Lemon Juice
While cream of tartar is a common addition for stability, a small amount of acid, such as lemon juice or white vinegar, also contributes to a beautiful, glossy meringue. Similar to cream of tartar, the acid helps to stabilize the protein structure, allowing the meringue to whip up smoothly and develop a lovely sheen. A few drops (about 1/4 teaspoon per two large egg whites) added at the beginning of whipping can make a noticeable difference in the final texture and appearance.
The acidity helps the sugar dissolve more effectively and prevents crystallization, which can lead to a grainy or dull meringue. The result is a stable, smooth, and beautifully glossy foam that holds peaks wonderfully and looks professional. Using a little acid is a simple yet effective trick for perfecting meringue stability techniques baking, enhancing both the structure and the visual appeal.
Properly Storing Meringue-Based Desserts: Maintaining Texture and Preventing Softening
Proper storage is essential for maintaining the crisp texture of baked meringues and the stability of meringue-based desserts. Baked meringue cookies or pavlova shells are highly susceptible to absorbing moisture from the air. They should be stored in an airtight container at room temperature once completely cooled. Avoid refrigerating them, as the humid environment of a refrigerator will cause them to become sticky and soft very quickly. Adding a food-grade desiccant packet to the container can help absorb excess moisture.
Meringue-topped pies or desserts like Baked Alaska that contain fillings should be stored according to the filling's requirements (often refrigerated). However, the meringue topping on a pie is still prone to weeping or softening over time in the refrigerator. These desserts are best enjoyed the day they are made. Italian or Swiss meringue buttercreams, once made, can be stored in the refrigerator for several days and re-whipped to restore their texture before use. Understanding the meringue's sensitivity to moisture is key to perfecting meringue stability techniques baking and enjoying your creations at their best.
Advanced Meringue Baking Recipes to Try at Home
Recipe: Perfect Italian Meringue Buttercream for Cake Decorating: A Step-by-Step Guide
- Yields: Enough for a two-layer 8-inch cake or 24 cupcakes
- Prep time: 20 minutes
- Cook time: 10 minutes
- Chill time: 30 minutes (optional)
Ingredients:
- 4 large egg whites (approx. 120g)
- 250g granulated sugar
- 75ml water
- 340g unsalted butter, softened but still cool, cut into cubes
- 1 tsp vanilla extract
- Pinch of salt
Equipment:
- Stand mixer with whisk attachment
- Candy thermometer
- Small saucepan
Instructions:
- Separate the egg whites carefully, ensuring no yolk is present. Place them in the clean, dry bowl of a stand mixer.
- Combine the granulated sugar and water in a small saucepan. Heat over medium heat, stirring until the sugar dissolves. Stop stirring once it boils.
- Insert a candy thermometer and continue to cook the syrup without stirring until it reaches 115°C (240°F).
- While the syrup cooks, start whipping the egg whites on medium speed until they reach soft peaks. Add a pinch of salt.
- Once the syrup reaches 115°C (240°F), increase the mixer speed to high. Carefully and slowly, in a thin stream, pour the hot syrup down the side of the mixing bowl into the whipping egg whites. Avoid pouring the syrup directly onto the whisk.
- Continue whipping on high speed until the meringue is very thick, glossy, and has cooled completely. This can take 10-15 minutes or more. The bowl should feel cool to the touch. Perfecting meringue stability techniques baking this step ensures a robust base.
- Reduce the mixer speed to medium-low. Add the softened butter cubes one at a time, waiting until each cube is incorporated before adding the next. The mixture may look curdled or broken at this stage – this is normal. Keep mixing.
- Once all the butter is added, increase the speed to medium-high and whip until the buttercream comes together into a smooth, fluffy, and stable frosting. This can take several minutes. Add vanilla extract and mix briefly.
- If the buttercream is too soft, chill the bowl for 10-15 minutes and whip again. If too stiff, warm the bowl gently with a torch or warm towel and whip again. Use immediately or store in the refrigerator.
Recipe: Individual Baked Alaskas with Homemade Ice Cream: A Festive Dessert
- Yields: 4-6 individual servings
- Prep time: 45 minutes (plus ice cream freezing time)
- Freeze time: 2-3 hours
- Broil/Torch time: 1-2 minutes
Ingredients:
- 4-6 slices of sponge cake or pound cake (approx. 1cm thick), cut into circles slightly larger than your ice cream scoops
- 4-6 scoops of your favorite homemade or store-bought ice cream
- For the Italian Meringue:
- 3 large egg whites (approx. 90g)
- 180g granulated sugar
- 50ml water
- 1/4 tsp cream of tartar (optional, for extra stability)
Equipment:
- Baking sheet lined with parchment paper
- Candy thermometer
- Stand mixer or hand mixer
- Kitchen torch or oven broiler
Instructions:
- Place the cake slices on the prepared baking sheet. Top each cake slice with a scoop of ice cream.
- Place the assembled cake and ice cream portions in the freezer for at least 2-3 hours, or until the ice cream is very firm. This is crucial for preventing melting during browning.
- Prepare the Italian meringue: Combine sugar and water in a small saucepan. Heat, stirring until sugar dissolves, then boil without stirring until it reaches 115°C (240°F). Add cream of tartar to egg whites in a clean mixer bowl and whip on medium speed until soft peaks form while the syrup cooks.
- Once the syrup reaches 115°C (240°F), increase mixer speed to high. Carefully pour hot syrup in a thin stream down the side of the bowl into the whipping egg whites.
- Continue whipping on high speed until the meringue is very thick, glossy, and has cooled completely (bowl feels cool). Perfecting meringue stability techniques baking here creates the insulating layer.
- Working quickly, remove the frozen cake/ice cream assemblies from the freezer. Cover each completely with the Italian meringue, ensuring the meringue seals to the cake base all around. You can pipe or spread the meringue decoratively.
- Return the meringued assemblies to the freezer for at least 30 minutes, or until the meringue is firm to the touch.
- Just before serving, brown the meringue using a kitchen torch or by placing the baking sheet under a preheated broiler for 1-2 minutes. Watch constantly as it browns very quickly.
- Serve immediately to enjoy the contrast of hot meringue and frozen ice cream.
Recipe: Lemon Meringue Pie with a Foolproof Meringue Topping: A Classic with a Modern Twist
- Yields: 1 standard 9-inch pie
- Prep time: 30 minutes (plus chilling)
- Cook time: 20-25 minutes (for filling and crust), 10-15 minutes (for meringue)
- Cooling time: Several hours
Ingredients:
- 1 pre-baked 9-inch pie crust, cooled
- For the Lemon Filling: (Use your favorite recipe, ensuring it's thick and stable)
- Example: 150g sugar, 60g cornstarch, 1/4 tsp salt, 4 large egg yolks, 360ml water, 120ml fresh lemon juice, 50g butter, 1 tsp lemon zest. Cook until thick.
- For the Swiss Meringue Topping:
- 4 large egg whites (approx. 120g)
- 200g granulated sugar
- 1/2 tsp cream of tartar (optional)
- Pinch of salt
Equipment:
- Double boiler setup (saucepan with simmering water and a heatproof bowl)
- Stand mixer or hand mixer
- Kitchen torch or oven broiler
Instructions:
- Prepare your lemon filling according to your recipe. While the filling is still hot, pour it into the pre-baked pie crust. This helps 'set' the bottom of the meringue and reduce weeping.
- Prepare the Swiss meringue topping: Combine egg whites, sugar, cream of tartar (if using), and salt in the heatproof bowl set over a saucepan of simmering water (ensure the bottom of the bowl doesn't touch the water).
- Whisk constantly until the sugar is completely dissolved and the mixture reaches 65-70°C (150-160°F). Rub a small amount between your fingers to check for grittiness.
- Remove the bowl from the heat and transfer the mixture to a stand mixer (or use a hand mixer). Whip on high speed until the meringue is very thick, glossy, and has cooled completely (bowl feels cool), forming stiff peaks. Perfecting meringue stability techniques baking the Swiss method ensures a smooth, pipeable topping.
- Spoon or pipe the warm meringue onto the hot lemon filling, ensuring it completely covers the filling and touches the edge of the crust all around. This prevents shrinkage. Create decorative peaks using the back of a spoon or a piping bag.
- Brown the meringue using a kitchen torch or by placing the pie under a preheated broiler for 1-2 minutes until golden brown. Watch carefully.
- Let the pie cool completely at room temperature for several hours before slicing. Avoid refrigerating immediately, as this can encourage weeping.
Conclusion: Embracing the Art of Advanced Meringue Baking
Mastering advanced meringue techniques is a rewarding endeavor that elevates your baking skills significantly. By understanding the nuances of Italian, Swiss, and French methods, the crucial role of sugar and temperature, and strategies for combating challenges like humidity and weeping, you unlock the potential to create stunning, stable, and delicious meringue-based desserts.
Perfecting meringue stability techniques baking is not just about following recipes; it's about developing an intuition for the delicate balance required to transform simple egg whites into impressive culinary creations. Embrace the learning process, practice patience, and soon you'll be crafting meringues that are not only beautiful to behold but also delightful to eat, showcasing perfect texture and structure every time.
Frequently Asked Questions
What are some common reasons for meringue failure, and how can I avoid them?
Meringue failure often stems from fat contamination or improper whipping. Ensure your bowl and whisk are scrupulously clean and avoid over-whipping, which can lead to a dry, crumbly texture.
How does the type of sugar used affect meringue stability?
Granulated sugar is typically used. Caster sugar dissolves more easily, creating a smoother, more stable meringue, but granulated works too.
What advanced techniques can I use to stabilize my meringue, especially in humid environments?
A Swiss meringue, cooked over a double boiler, provides superior stability. Adding cream of tartar or a cornstarch slurry can also help prevent weeping.
Can different types of meringue (Italian, French, Swiss) be used interchangeably in recipes?
No, the different types of meringue have distinct properties and are not always interchangeable. The choice depends on the desired texture, stability, and application (e.g., Italian for frostings, French for cookies).
What role does temperature play in achieving the perfect meringue?
Temperature is crucial. Egg whites whip best at room temperature, and the sugar should be added gradually once soft peaks form. Using a thermometer for Swiss and Italian meringues is essential for safety and texture.
Final Reflection: Mastering the Art of the Meringue
The pursuit of the perfect meringue is more than just a baking challenge; it's a testament to the power of precision and understanding. The techniques explored in this article—from precise sugar incorporation to mastering the whip and understanding humidity's impact—are not just about achieving aesthetically pleasing peaks; they're about unlocking a deeper understanding of fundamental baking principles applicable far beyond the meringue itself. This knowledge translates directly into improved consistency and success across a wide range of baked goods.
The journey of perfecting meringue stability has profoundly impacted my own baking journey, shifting my perspective from simply following recipes to truly understanding the why behind each step. It's a journey of constant learning and refinement, a dance between science and artistry. As the renowned pastry chef, Pierre Hermé, once said, Baking is a science, but it's also an art. It's about precision, but it's also about passion.
This perfectly encapsulates the delicate balance required to achieve truly exceptional meringues, and indeed, exceptional baking in general.
Now, it's your turn. Don't just settle for acceptable meringues; strive for mastery. Experiment with the techniques outlined here, paying close attention to the subtle nuances of each step. Embrace the challenges, learn from your mistakes, and most importantly, enjoy the process. The journey to perfecting your meringue technique is a rewarding one, filled with delicious discoveries and the satisfaction of creating something truly beautiful and delicious. The skills you gain will not only elevate your meringue game but will also serve as a solid foundation for countless other baking adventures.
Unlock Your Meringue Mastery: Elevate Your Baking Today!
Thanks for taking the time to explore the world of advanced meringue techniques! We hope you've gained valuable insights and inspiration to create truly stunning baked goods. Ready to put your newfound knowledge into practice?
- Whip up your dream meringue: Try one of the advanced techniques discussed – perhaps the Italian method for extra stability, or the Swiss method for a glossy finish. Share your results with us!
- Experiment with flavors and colors: Add extracts, cocoa powder, or natural food coloring to personalize your meringues. What unique combination will you create?
- Challenge yourself: Try incorporating your perfect meringue into a new recipe – perhaps a pavlova, macarons, or even a meringue-based ice cream.
What innovative meringue creation will you bake next?