
Casting Sugar: Making Edible Jewels and GlassLike Elements

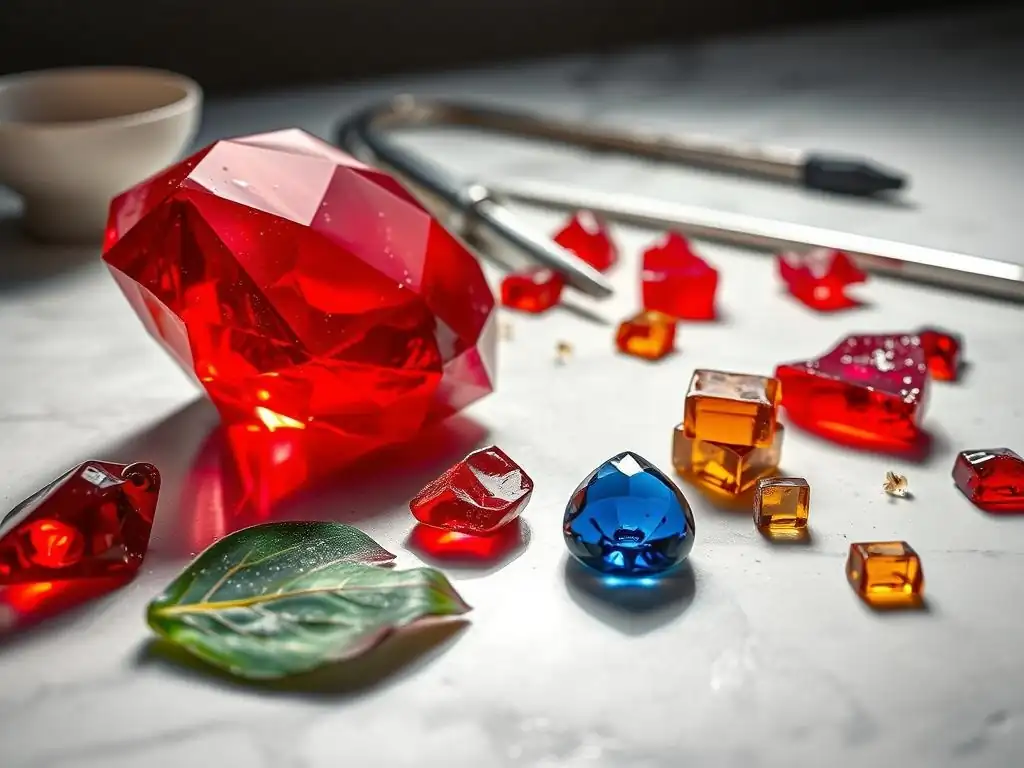
Welcome to BakeWithEase, where the ordinary transforms into the extraordinary! Ever dreamt of crafting shimmering, edible jewels to adorn your desserts? Then prepare to be amazed. This guide dives deep into the fascinating world of edible sugar glass recipes, unlocking the secrets to creating breathtaking, glass-like elements that will elevate your baking to a whole new level. Intrigued? Let's begin casting sugar!
- Introduction to Edible Sugar Glass Recipes: Creating Stunning Sugar Jewels and Glasslike Decorations
- Essential Ingredients for Casting Sugar: Key Components of Edible Sugar Glass
- Tools and Equipment Needed for Sugar Casting and Making Edible Jewels
-
Step-by-Step Guide to Making Edible Sugar Glass and Sugar Jewels
- Preparing the Sugar Mixture: Ratios and Heating Techniques for Clear Sugar Glass
- Monitoring Sugar Temperature: Achieving the Hard Crack Stage for Durable Sugar Decorations
- Pouring and Molding the Sugar: Techniques to Avoid Crystallization and Bubbles
- Cooling and Handling Sugar Glass: Tips for Perfect Transparent Edible Jewels
- Creative Applications of Edible Sugar Glass in Baking and Pastry Art
- Troubleshooting Common Issues in Edible Sugar Glass Recipes
- Variations and Advanced Techniques in Sugar Casting for Edible Decorations
- Conclusion: Mastering Edible Sugar Glass Recipes for Stunning Baking Decorations
- Frequently Asked Questions
- Final Reflection: The Enduring Allure of Edible Art
- Unleash Your Inner Sugar Artist: Craft Stunning Edible Gems!
Introduction to Edible Sugar Glass Recipes: Creating Stunning Sugar Jewels and Glasslike Decorations
Mastering the art of sugar work opens up a world of dazzling possibilities in baking. Among the most captivating techniques is sugar casting, which allows you to transform simple sugar into stunning, transparent elements that resemble glass or precious jewels. These creations, often referred to as edible sugar glass, can elevate cakes, pastries, and desserts from delightful treats to true works of edible art.
Whether you're aiming for a dramatic "shattered glass" effect, delicate gemstone-like embellishments, or vibrant stained-glass windows for a gingerbread house, understanding the fundamentals of edible sugar glass recipes is your key to success. This guide will walk you through the process, from essential ingredients and tools to casting techniques, troubleshooting, and creative applications, empowering you to craft your own edible masterpieces.
What Is Sugar Casting and Its Role in Advanced Baking Techniques
Sugar casting is a confectionery technique where sugar is heated to a high temperature, typically the hard crack stage, and then poured into molds or onto surfaces to cool and solidify into desired shapes. At these high temperatures, the sugar syrup undergoes complex chemical changes, primarily the breakdown of sucrose into glucose and fructose, which helps prevent crystallization and results in a clear, glass-like texture upon cooling. This process is fundamental in creating hard candies, lollipops, and, of course, the beautiful, transparent pieces known as edible sugar glass.
In advanced baking, sugar casting is a crucial skill for creating intricate and visually striking decorations. Unlike fondant or gum paste, which offer opaque or translucent finishes, sugar glass provides a unique transparency and brilliance that can mimic real glass, ice, or gemstones. It allows bakers to add dimension, light, and a touch of theatrical flair to their creations. From gravity-defying sugar shards erupting from a cake to delicate, colorful sugar jewels adorning cupcakes, mastering edible sugar glass recipes expands the decorator's palette significantly, enabling the creation of truly showstopping desserts that capture attention.
The Appeal of Edible Sugar Glass in Cake and Pastry Decorations
The allure of edible sugar glass lies in its stunning visual impact and versatility. Its transparency and reflective surface catch the light beautifully, adding a sophisticated shimmer and depth to baked goods. Imagine a cake decorated with what appears to be shards of ice or scattered diamonds – this dramatic effect is easily achievable with edible sugar glass recipes. The ability to tint the sugar with vibrant food colorings means you can create sugar "gems" in any hue imaginable, matching party themes or adding pops of intense color to a dessert tableau.
Furthermore, edible sugar glass offers interesting textural contrast. While visually hard and brittle, it melts delightfully in the mouth, providing a pleasant counterpoint to softer cake or pastry textures. This combination of visual spectacle and unexpected mouthfeel makes sugar glass decorations particularly memorable. For special occasions like weddings, birthdays, or themed events, custom-cast sugar elements like initials, numbers, or specific shapes can personalize a dessert, making it truly unique. The ability to create bespoke, dazzling decorations using relatively simple edible sugar glass recipes makes this technique a favorite among professional bakers and ambitious home decorators alike.
Essential Ingredients for Casting Sugar: Key Components of Edible Sugar Glass
Creating successful edible sugar glass relies on a precise combination of ingredients that work together to achieve clarity, stability, and a desirable texture. While the core ingredient is sugar, other components play vital roles in preventing common issues like crystallization and ensuring the final product is hard, brittle, and transparent. Understanding the function of each ingredient is key to mastering edible sugar glass recipes and consistently producing beautiful results.
Types of Sugar Used in Sugar Glass Recipes: Granulated, Caster, and Isomalt Variants
The most common sugar used in basic edible sugar glass recipes is standard granulated sugar (also known as table sugar). This is refined sucrose and is readily available. Its fine crystals dissolve easily when heated with liquid. For slightly faster dissolving, caster sugar (superfine sugar) can be used, though it's not strictly necessary for successful sugar glass. However, the primary drawback of sucrose-based sugar glass is its tendency to become sticky or cloudy in humid environments, as it is hygroscopic (absorbs moisture from the air).
For greater stability and resistance to humidity, many professional bakers prefer using Isomalt. Isomalt is a sugar substitute derived from beet sugar, but it's a polyol, not a simple sugar like sucrose. It is much less hygroscopic than sucrose, making it ideal for decorations that need to hold up in varying atmospheric conditions or for display pieces.
While slightly more expensive and requiring higher temperatures to melt (around 320-340°F or 160-170°C), Isomalt produces exceptionally clear, stable sugar glass that is less prone to clouding or stickiness over time. Many advanced edible sugar glass recipes specifically call for Isomalt for these reasons.
Role of Corn Syrup and Water in Achieving Perfect Sugar Casting
Corn syrup is a critical ingredient in most traditional edible sugar glass recipes using granulated sugar. It acts as an interfering agent, helping to prevent the formation of sugar crystals as the syrup cools. When sucrose is heated, it can easily recrystallize, turning the mixture opaque and grainy rather than clear and glass-like.
The glucose and dextrose in corn syrup disrupt this crystallization process, ensuring the sugar cools into a smooth, amorphous solid – the desired glass-like texture. A typical ratio might involve sugar, corn syrup, and water, often around 2 parts sugar, 1 part corn syrup, and 1 part water by weight or volume, though specific edible sugar glass recipes may vary slightly.
Water is essential for dissolving the sugar initially. When sugar is heated dry, it caramelizes unevenly and can burn quickly. Adding water allows the sugar crystals to dissolve completely before the mixture is heated to high temperatures. As the syrup heats, the water evaporates, concentrating the sugar solution. Once the water has evaporated and the sugar reaches the necessary high temperature (hard crack stage, 300-310°F or 149-154°C for sucrose), it becomes stable enough to cool into a solid glass. Using just enough water to dissolve the sugar is important; too much water will prolong the cooking time significantly.
Optional Additives: Food Coloring, Flavoring, and Edible Glitter for Decorative Effects
Once the base sugar syrup is cooked, optional additives can be incorporated to enhance the visual and sometimes the flavor profile of the edible sugar glass. Food coloring is the most common additive, allowing you to tint the clear sugar glass into vibrant hues. Gel or powder food colorings are preferred over liquid colors, as they are more concentrated and add less water back into the mixture, which could potentially cause issues.
Colors should be added after the syrup reaches its final temperature, just before pouring, and stirred in carefully to avoid creating bubbles. A tiny drop of gel color can create intense shades.
Flavorings can also be added, although this is less common for purely decorative pieces and more for items meant to be eaten, like lollipops. Clear, oil-based flavorings work best, as water-based extracts can cause the sugar to seize or cloud. Add flavorings at the same time as color.
Edible glitter or dusts can be swirled into the cooling sugar or sprinkled onto the surface just after pouring for added sparkle. For a truly dazzling effect, edible gold leaf or silver leaf can be pressed onto the surface of the sugar glass once it's slightly cooled but still pliable. These decorative elements allow for endless creativity when working with edible sugar glass recipes.
Tools and Equipment Needed for Sugar Casting and Making Edible Jewels
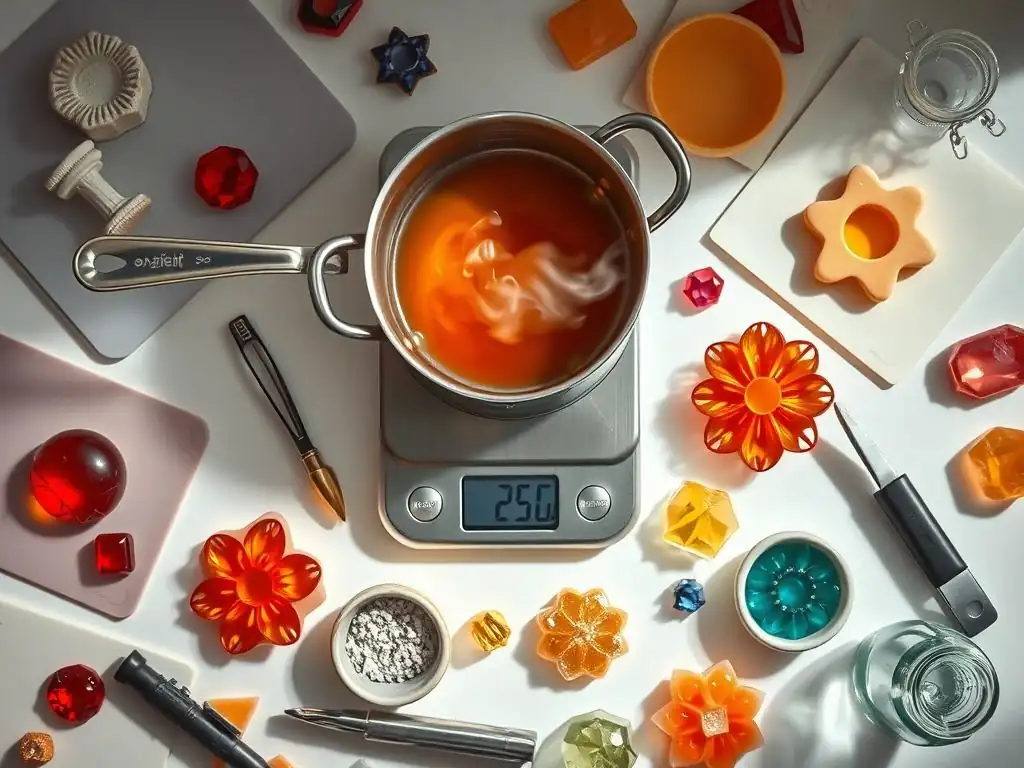
Working with hot sugar requires specific tools and a focus on safety. Having the right equipment ensures you can accurately monitor temperatures, handle the molten sugar safely, and achieve the desired shapes and finishes for your edible sugar glass creations. Investing in a few key items will make the process much smoother and more successful.
Choosing the Right Heatproof Molds and Silicone Forms for Sugar Glass
To create specific shapes for your edible sugar glass, you will need heatproof molds. Silicone molds are incredibly popular for sugar casting because of their flexibility, which makes demolding the cooled sugar glass much easier. Look for food-grade silicone molds designed for candy or chocolate making. They come in countless shapes, from geometric patterns and shards to intricate jewel and gem designs. Silicone can withstand the high temperatures of molten sugar (well over 350°F or 175°C).
Alternatively, you can use metal molds, but these must be properly prepared. Metal molds should be lightly greased with a neutral oil or sprayed with non-stick spray to prevent the sugar from sticking. Glass or ceramic dishes can also be used, provided they are heatproof, but demolding might be more challenging. For simple flat sheets or "shattered glass" effects, pouring the sugar directly onto a silicone mat or parchment paper laid on a flat, heatproof surface works perfectly. Ensure any mold or surface you use can safely handle temperatures exceeding 300°F (150°C).
Essential Kitchen Tools: Candy Thermometer, Silicone Mats, and Heat-Resistant Utensils
A reliable candy thermometer is perhaps the most crucial tool for making edible sugar glass. Achieving the correct temperature, specifically the hard crack stage (300-310°F / 149-154°C for sucrose, slightly higher for Isomalt), is absolutely vital for the sugar to cool into a hard, brittle, glass-like state. Too low a temperature will result in sticky or soft sugar. Digital thermometers offer quick, accurate readings, while traditional glass thermometers are also effective. Ensure the thermometer is calibrated and the bulb is fully submerged in the syrup without touching the bottom of the pan.
Silicone mats (like Silpat) are invaluable. They provide a non-stick surface for pouring sugar glass directly to create flat sheets, shards, or freeform shapes. Sugar peels off cooled silicone mats effortlessly.
You will also need a heavy-bottomed saucepan, preferably stainless steel, as this helps distribute heat evenly and reduces the risk of scorching the sugar. Heat-resistant spatulas (silicone is ideal) or metal spoons are needed for stirring before the syrup boils and for carefully adding color, but minimize stirring once the sugar is boiling to prevent crystallization. A heat gun can be useful for melting the surface of cooled sugar glass to smooth imperfections or attach pieces.
Safety Equipment and Precautions When Working with Hot Sugar
Working with sugar heated to over 300°F (150°C) is inherently dangerous, as molten sugar can cause severe burns. Safety must be the top priority. Always wear long sleeves and closed-toe shoes to protect your skin. Keep a bowl of ice water nearby – not to treat burns (running under cold water is better for immediate first aid), but to quickly cool a drop of sugar off your finger if you accidentally touch it. However, the best approach is to avoid touching the hot sugar altogether.
Use heat-resistant gloves when handling the hot pan or pouring the sugar. Ensure your workspace is clear and free of distractions, especially pets or children. Never leave heating sugar unattended, even for a moment, as it can change temperature very rapidly once it nears the hard crack stage. Have all your molds and pouring surfaces ready before you start heating the sugar, as the window for pouring once the temperature is reached is relatively short. Handle cooled sugar glass carefully, as edges can be sharp. Taking these precautions seriously is essential for safely creating beautiful edible sugar glass recipes.
Step-by-Step Guide to Making Edible Sugar Glass and Sugar Jewels
Making edible sugar glass might seem intimidating due to the high temperatures involved, but by following a precise process and paying close attention to detail, you can achieve stunning results. The key steps involve careful preparation of the mixture, accurate temperature monitoring, controlled pouring, and proper cooling.
Preparing the Sugar Mixture: Ratios and Heating Techniques for Clear Sugar Glass
Start by combining your sugar, corn syrup (if using sucrose), and water in a clean, heavy-bottomed saucepan. A common ratio for a basic edible sugar glass recipe is approximately 2 parts granulated sugar, 1 part light corn syrup, and 1 part water. For example, 2 cups sugar, 1 cup corn syrup, and 1 cup water.
Stir the mixture gently over low heat only until the sugar is completely dissolved. It's crucial to ensure every sugar crystal is dissolved at this stage. You can use a wet pastry brush to wash down any sugar crystals clinging to the sides of the pan above the liquid level, as these can act as seeds for crystallization later.
Once the sugar is dissolved, increase the heat to medium-high. Stop stirring at this point. Stirring while the syrup is boiling can introduce air bubbles and encourage crystallization. Allow the mixture to boil vigorously. The mixture will become clear as it heats. Keep a close eye on the thermometer as the temperature rises. The goal is to reach the hard crack stage for durable, non-sticky edible sugar glass.
Monitoring Sugar Temperature: Achieving the Hard Crack Stage for Durable Sugar Decorations
Accurate temperature monitoring is the most critical step in creating successful edible sugar glass. You need to heat the sugar syrup to the "hard crack" stage, which typically falls between 300°F and 310°F (149°C and 154°C) when using sucrose. At this temperature range, the sugar concentration is extremely high (around 99%), and when a small amount of the syrup is dropped into cold water, it forms brittle threads that break easily – hence "hard crack."
Using a reliable candy thermometer, watch the temperature climb steadily. It will rise quickly once it passes the soft ball and firm ball stages (around 240-250°F). Once the thermometer reads 300°F (149°C), remove the pan from the heat immediately.
The temperature may continue to rise slightly off the heat, so removing it at the lower end of the hard crack range is often advisable, especially for beginners or if your thermometer reads high. Overheating past 310°F (154°C) can cause the sugar to caramelize and turn yellow or brown, losing its desired clarity. Cooking to the correct temperature ensures your edible sugar glass is hard and stable.
Pouring and Molding the Sugar: Techniques to Avoid Crystallization and Bubbles
Once the sugar syrup reaches the hard crack stage and is removed from the heat, you have a limited window before it starts to thicken. If adding color or flavor, do so now, stirring in gently but quickly. Pour the hot sugar carefully and steadily into your prepared molds or onto silicone mats. Avoid scraping the bottom or sides of the pan, as this can introduce cooler, potentially crystallized sugar into your pour, leading to cloudiness. Pour from a moderate height to minimize bubbles, but not so high that the stream breaks repeatedly.
For molds, fill them completely but avoid overfilling. For "shattered glass," pour the sugar onto a silicone mat in an uneven layer. For flat sheets, pour into a designated area or mold with edges. If bubbles appear on the surface after pouring, you can gently wave a heat gun over them from a distance to pop them, but be careful not to overheat the sugar. Work relatively quickly, as the sugar will begin to cool and set within minutes. Handle the hot pan and pouring with extreme caution using heat-resistant gloves.
Cooling and Handling Sugar Glass: Tips for Perfect Transparent Edible Jewels
After pouring, allow the sugar glass to cool completely and undisturbed. Do not touch or move the molds or poured sugar until it is fully set and cool to the touch. Depending on the size and thickness of your pieces and the room temperature, this can take anywhere from 30 minutes to an hour or more. Rushing the cooling process or attempting to move the sugar while it's still warm can result in distortion, breakage, or a loss of clarity.
Once fully cooled and hard, carefully demold the sugar glass. If using silicone molds, they are flexible enough to simply peel away from the hardened sugar. For metal molds, you might need to gently loosen the edges. If pouring on a silicone mat, the sugar shards or sheets should lift off easily.
Handle the cooled edible sugar glass gently, as it is brittle and can break. If pieces are too large or need shaping, you can carefully snap them or use a sharp, heavy knife (like a cleaver) with a swift, firm press (not a sawing motion) to break larger pieces into smaller shards. Store finished pieces properly to maintain their clarity and texture.
Creative Applications of Edible Sugar Glass in Baking and Pastry Art
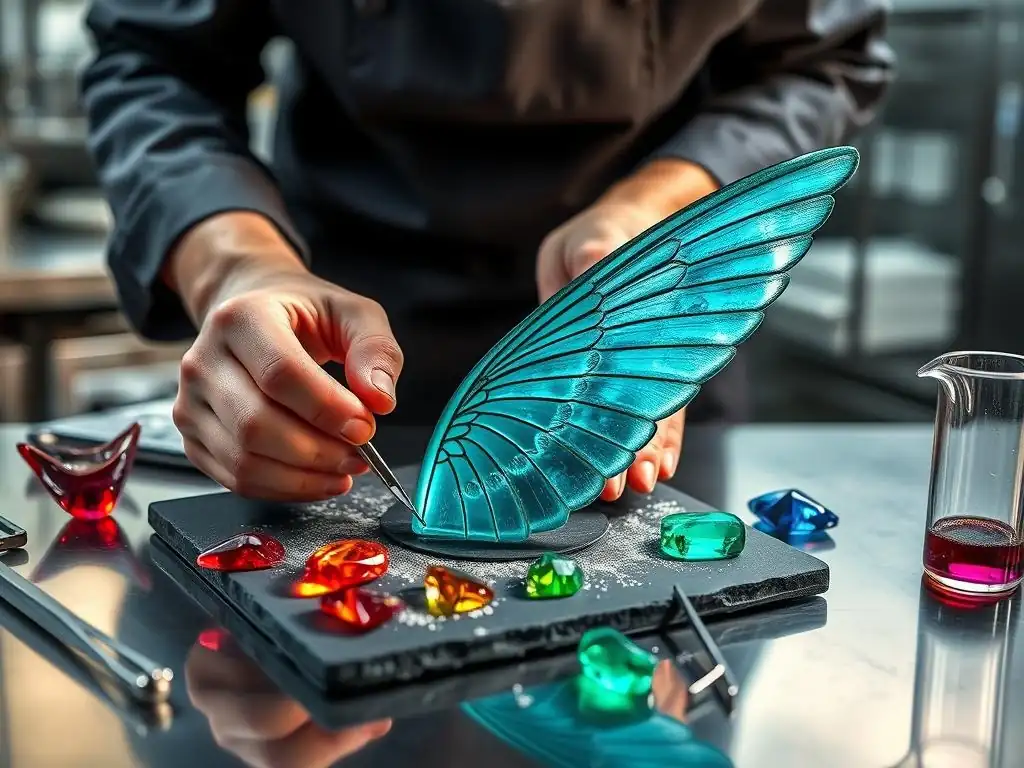
Edible sugar glass is not just a technique; it's a medium for artistic expression in baking. Its unique properties allow for a wide range of creative applications, from subtle accents to dramatic centerpieces. Incorporating sugar glass can instantly elevate the visual appeal of cakes, cookies, and pastries, making them truly unforgettable.
Decorating Cakes with Sugar Glass: Techniques for Elegant and Dramatic Effects
Cakes offer perhaps the most dramatic canvas for edible sugar glass. One popular application is the "shattered glass" effect, where clear or tinted sugar shards are strategically placed on top of or around a cake, often over a red "blood" layer for a spooky or dramatic look, but equally striking in clear or blue tones for an ice or water theme. Simply pour sugar onto a silicone mat and break it into pieces once cool. These shards can be pressed into frosting or attached with a dab of melted sugar or royal icing.
For more elegant designs, cast sugar jewels or geometric shapes can be arranged on the cake surface, around the base, or used as toppers. Imagine a wedding cake adorned with clear sugar "diamonds" or a birthday cake featuring vibrant sugar "emeralds" and "rubies."
Sugar glass can also be used to create delicate structures like sugar sails, windows for gingerbread houses, or even abstract sculptural elements that appear to defy gravity. A heat gun can be used to slightly melt the edges of pieces to join them together or smooth cut surfaces, adding a professional finish to your edible sugar glass recipes creations.
Sugar glass isn't limited to cakes; it can add a touch of sparkle and sophistication to smaller baked goods like cookies, cupcakes, and tarts. Cast sugar jewels or small geometric shapes can be used as decorative elements on top of frosted cupcakes or pressed gently into the surface of cookies or tarts before baking (ensure the sugar is stable at baking temperatures, Isomalt is often better here, or add after baking).
A particularly charming application is creating "stained glass" cookies. Cut a shape out of the center of cookie dough, fill the cavity with crushed hard candy or small pieces of colored sugar glass, and bake. As the cookie bakes, the sugar melts and fills the hole, cooling into a transparent, colored window. While traditional stained glass cookies often use crushed store-bought hard candy, mastering edible sugar glass recipes allows you to create custom colors and clarity for your cookie windows, adding a truly bespoke touch to your holiday or special occasion baking.
Using Edible Sugar Glass Elements for Centerpieces and Showstopper Desserts
Beyond individual cakes and pastries, edible sugar glass can be used to create large-scale showstopper dessert centerpieces. Imagine a dessert table featuring a sculpture made entirely of cast sugar, perhaps an ice castle, a crystal garden, or an abstract modern piece. Large sheets of sugar glass can be used to create transparent walls, platforms, or backdrops for dessert displays.
Pulled or blown sugar (more advanced techniques often using Isomalt) can be combined with cast sugar elements to create complex, multi-dimensional pieces. For example, a cast sugar base could support delicate blown sugar spheres or pulled sugar ribbons. These types of elaborate sugar work require significant practice and specialized equipment but demonstrate the incredible artistic potential of heated sugar. While ambitious, even using large, well-executed cast sugar elements as part of a dessert display can transform a simple table into a breathtaking focal point, all thanks to the versatility offered by edible sugar glass recipes.
Troubleshooting Common Issues in Edible Sugar Glass Recipes
Even with precise measurements and careful technique, issues can sometimes arise when working with hot sugar. Understanding common problems and their causes is key to successfully troubleshooting and perfecting your edible sugar glass recipes. Don't get discouraged by initial setbacks; practice and patience are your best allies.
Preventing Cloudiness and Crystallization in Sugar Glass Casting
Cloudiness is a frequent issue, often caused by crystallization. Crystallization happens when sugar molecules reform into crystals rather than remaining in an amorphous, glass-like state. This can be triggered by undissolved sugar crystals on the sides of the pan, stirring the syrup while it's boiling, or impurities in the sugar or water. To prevent it, ensure all sugar is dissolved before boiling, use a wet pastry brush to clean down the sides of the pan, and avoid stirring once boiling begins. Using corn syrup in sucrose-based recipes is a primary method to inhibit crystallization.
Cloudiness can also occur if the sugar is cooked at too high a humidity level or if the final product is exposed to moisture. Isomalt is significantly less prone to clouding from humidity than sucrose. If using sucrose, try cooking on a low-humidity day. Air bubbles trapped during pouring can also contribute to a cloudy appearance; pouring slowly and steadily helps minimize these. If you end up with a cloudy batch, unfortunately, you cannot usually fix it; the best approach is to start over, paying extra attention to the initial dissolving and avoiding stirring while boiling.
Fixing Sticky or Soft Sugar Decorations: Causes and Solutions
Sticky or soft sugar glass is almost always a result of not reaching a high enough temperature. If the sugar syrup does not reach the hard crack stage (300-310°F / 149-154°C for sucrose), it will retain too much moisture and will not set hard and brittle. Instead, it will remain chewy, sticky, or become soft over time, especially in humid conditions. Ensure your candy thermometer is accurate and that you are cooking the sugar to the correct temperature range. Remember to remove the pan from the heat immediately upon reaching temperature, as it can darken quickly if overheated.
Humidity is another major factor. Sucrose-based sugar glass absorbs moisture from the air, causing it to become sticky. This is why Isomalt is often preferred for display pieces, as it is much more resistant to humidity. If your sucrose sugar glass becomes sticky after cooling, unfortunately, there's no easy fix. For future batches, consider using Isomalt or storing the finished pieces in an airtight container with silica packets to absorb moisture, although this is not a foolproof solution for long-term display in humid environments.
Handling Breakage and Storage Tips for Sugar Glass Elements
Sugar glass is inherently brittle and can break easily. This is part of its charm for effects like "shattered glass," but frustrating when trying to create specific shapes. Handle cooled sugar glass gently. When demolding, be patient and peel the mold away carefully. If pieces break unexpectedly, sometimes they can be "glued" back together using a tiny amount of melted sugar glass (reheat scraps carefully) or by briefly melting the edges with a heat gun and pressing them together.
Proper storage is crucial, especially for sucrose-based edible sugar glass recipes. Humidity is the enemy. Once completely cooled, store sugar glass pieces immediately in an airtight container. Layer them between sheets of parchment paper to prevent sticking and breakage.
Adding food-grade silica gel packets (the small packets found in shoe boxes or food packaging) to the container can help absorb moisture and prolong the life and clarity of sucrose sugar glass. Store the container in a cool, dry place. Avoid refrigeration, as condensation can cause stickiness and clouding. Isomalt sugar glass is much more forgiving and can often be stored in an airtight container without silica, but a cool, dry environment is still best.
Variations and Advanced Techniques in Sugar Casting for Edible Decorations
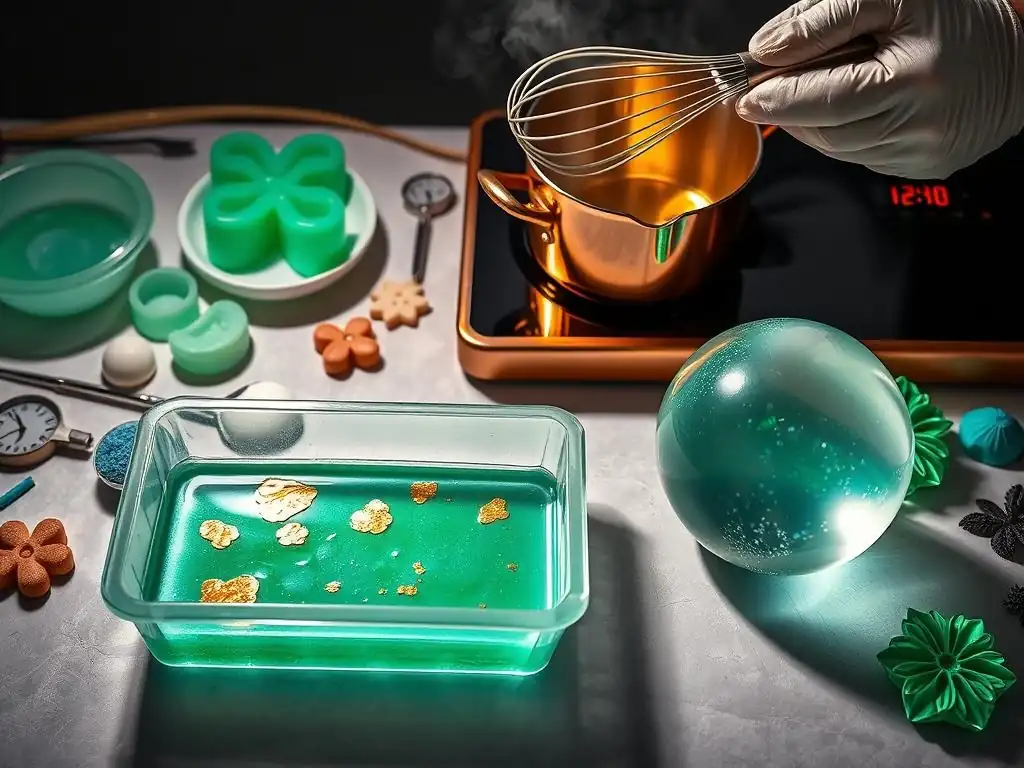
Once you've mastered the basics of edible sugar glass recipes, you can explore variations and more advanced techniques to create increasingly complex and stunning sugar decorations. These methods build upon the fundamental principles of heating and shaping sugar but introduce new levels of artistry and control.
Using Isomalt for More Stable and Versatile Sugar Glass Creations
As mentioned, Isomalt is a game-changer for sugar work, especially for pieces that need to be displayed for extended periods or in environments with fluctuating humidity. While slightly more expensive than granulated sugar, its resistance to crystallization and moisture absorption makes it ideal for professional-looking, durable edible sugar glass. Working with Isomalt is similar to working with sucrose, but it melts at a slightly higher temperature (around 320-340°F / 160-170°C) and cools faster.
Isomalt is often sold in granular or pre-cooked nib form. The nibs are simply melted directly (often with a tiny amount of water, like a tablespoon per pound, or even dry in some cases) without needing corn syrup. This can simplify the cooking process for some edible sugar glass recipes. Isomalt's superior clarity and stability make it the preferred choice for intricate cast pieces, sugar sculptures, and elements that require structural integrity. It allows for more precise work and less worry about the finished pieces degrading due to humidity.
Adding Color and Texture: Marbling, Airbrushing, and Edible Paints on Sugar Glass
Beyond simply stirring in food coloring, you can add dynamic visual effects to your edible sugar glass. To create a marbled effect, add drops of different colored food coloring to the molten sugar just before pouring. Swirl it gently with a toothpick or skewer once or twice – overmixing will blend the colors completely. Pour the slightly swirled sugar into your mold or onto the mat.
Once the sugar glass is cooled and hardened, you can add surface decorations. Airbrushing with edible food colors is an excellent way to add gradients, shading, or opaque designs onto the transparent surface. Use stencils for precise patterns.
Edible paints (created by mixing edible dusts or gel colors with a clear alcohol like vodka or lemon extract) can be brushed onto the surface to add details, highlights, or solid color areas. Edible metallic dusts can also be dry-brushed or mixed with alcohol for a shimmering effect, transforming plain sugar glass into convincing edible "metal" accents or sparkling jewels. These techniques add layers of detail and artistry to basic edible sugar glass recipes.
Combining Sugar Glass with Other Sugar Work Techniques: Pulled and Blown Sugar Art
For truly advanced sugar artistry, cast sugar glass elements can be combined with pulled and blown sugar techniques. Pulled sugar involves heating sugar syrup (often Isomalt or a specific pulling sugar recipe) to a pliable stage, then pulling and folding it repeatedly with gloved hands to incorporate air and create an opaque, satiny finish. This is used to make ribbons, bows, flowers, and other delicate structures.
Blown sugar involves inflating a ball of pliable sugar using a pump or by blowing air through a tube inserted into the sugar mass, much like glassblowing. This creates delicate, hollow shapes like spheres, fruits, or abstract forms.
While complex, combining the transparency and rigidity of cast edible sugar glass (used for bases, platforms, or solid elements) with the airy elegance of pulled and blown sugar (used for decorative accents or figures) allows for the creation of breathtaking, multi-technique sugar sculptures that are the pinnacle of sugar art. Mastering edible sugar glass recipes is often the first step on this exciting advanced baking journey.
Conclusion: Mastering Edible Sugar Glass Recipes for Stunning Baking Decorations
Embarking on the journey of sugar casting is a rewarding step for any baker looking to elevate their decorative skills. Edible sugar glass recipes offer a unique way to add brilliance, transparency, and dramatic flair to cakes, pastries, and desserts. From simple shards to intricate jewels and structural elements, the possibilities are vast and limited only by your imagination and willingness to experiment. While working with hot sugar requires caution and precision, the results – dazzling, glass-like edible decorations – are well worth the effort.
Recap of Key Tips for Successful Sugar Casting and Edible Jewels
To consistently achieve beautiful, clear, and stable edible sugar glass, remember these key tips:
- Use a heavy-bottomed pan and ensure all sugar is dissolved before boiling.
- Avoid stirring the syrup once it's boiling to prevent crystallization.
- Use a reliable candy thermometer and cook the sugar precisely to the hard crack stage (300-310°F / 149-154°C for sucrose).
- Remove the pan from heat immediately upon reaching temperature.
- Add color and flavor carefully just before pouring.
- Pour steadily into prepared molds or onto silicone mats, avoiding scraping the pan.
- Allow the sugar glass to cool completely and undisturbed before handling.
- Handle cooled pieces gently, as they are brittle.
- Store finished pieces in an airtight container, ideally with silica packets, especially if using sucrose. Consider Isomalt for greater stability.
Encouragement to Experiment and Innovate with Sugar Glass in Your Baking Projects.
Now that you understand the fundamentals of edible sugar glass recipes, it's time to get creative! Don't be afraid to experiment with different colors, mold shapes, and applications. Try combining sugar glass with other decorative elements like frosting, edible dusts, or even pulled sugar. Think about how the transparency and texture of sugar glass can enhance the overall design of your baked goods.
Perhaps create a broken mirror effect, design a sugar geode, or craft delicate sugar butterfly wings. Each attempt is a learning opportunity, bringing you closer to mastering this beautiful technique. So gather your ingredients, prepare your workspace, and start casting your own edible jewels – your baking projects are about to sparkle!
Frequently Asked Questions
How difficult is it to make edible sugar glass?
Edible sugar glass can be tricky for beginners, requiring precise temperature control and careful handling of hot sugar. However, with practice and patience, it becomes manageable.
What are the key ingredients needed for edible sugar glass?
The basic ingredients are usually sugar, corn syrup, and water. Food coloring can be added for desired effects.
How do I prevent my sugar glass from becoming cloudy?
Cloudiness is often caused by overcooking or the presence of impurities. Using a clean pot and following temperature guidelines closely can help.
Can I reuse sugar glass that has broken or not turned out perfectly?
Unfortunately, reheating already cooked sugar glass is not recommended. It can crystallize and become unusable.
What are some creative ways to use edible sugar glass in baking?
Edible sugar glass can be used to create stunning decorative elements like shards, jewels, or windows for cakes, cookies, and other pastries.
Final Reflection: The Enduring Allure of Edible Art
The art of crafting edible sugar glass, once a niche skill, is experiencing a vibrant resurgence, driven by the increasing demand for visually stunning and innovative culinary creations. From intricate cake decorations to mesmerizing cocktail garnishes, the ability to transform simple sugar into breathtaking, jewel-like elements is captivating both professional pastry chefs and enthusiastic home bakers alike. This enduring appeal speaks to a deeper human desire to elevate the everyday, to transform the functional into the beautiful.
The impact of this edible artistry extends beyond mere aesthetics; it represents a powerful fusion of science and art. The precise control required to achieve the desired texture and clarity reflects a dedication to mastering a delicate process. It's a testament to the transformative power of ingredients, showcasing how something as commonplace as sugar can be elevated into a medium for artistic expression. The most beautiful things are those that happen when you least expect them.
This sentiment perfectly encapsulates the surprising joy and satisfaction derived from successfully creating these edible gems.
Consider the possibilities: Imagine the delight of surprising loved ones with a cake adorned with shimmering sugar glass shards, or the elegance of a cocktail rimmed with delicate sugar crystals. You, too, can unlock this creative potential. Don't be intimidated by the seemingly complex techniques; with patience and practice, you can master the art of casting sugar and bring a touch of edible magic to your culinary creations. Embrace the challenge, experiment with different colors and shapes, and discover the immense satisfaction of transforming simple ingredients into works of art.
Unleash Your Inner Sugar Artist: Craft Stunning Edible Gems!
Thanks for joining us on this sugary adventure! You've learned amazing techniques for creating breathtaking edible jewels and glass-like elements – now it's time to put your newfound skills to the test.
Here's how to take your sugar artistry to the next level:
- Master your first sugar jewel: Choose your favorite recipe from the article and create a small batch to practice your technique. Don't be afraid to experiment with colors and shapes!
- Share your creations: Show off your edible masterpieces on social media using #BakeWithEaseSugarGems and inspire others!
- Explore new textures: Try incorporating different flavorings or experimenting with unique molds to create even more stunning pieces.
Ready to transform your baking from delicious to dazzling? What unique design will you create first?