
Creating Realistic Fondant & Gum Paste Figures for Cake Toppers


Welcome to BakeWithEase, your ultimate guide to baking brilliance! Ever dreamt of crafting cake toppers that are astonishingly lifelike? This guide delves into the secrets of creating realistic fondant & gum paste figures, an advanced technique that will elevate your cake decorating skills to a whole new level. Discover the intricate details and expert tips that transform simple ingredients into edible works of art – are you ready to unlock the magic of sculpting with sugar?
- Sculpting Realistic Cake Toppers
- Introduction
- Essential Tools and Materials
- Preparing Your Medium
- Sculpting Techniques
- Painting and Dusting
- Assembly and Securing
- Troubleshooting
- Project Ideas
- Preservation and Storage
-
Frequently Asked Questions
- How do fondant and gum paste differ, and why is that difference important for creating realistic figures?
- What are some essential tools for sculpting realistic fondant and gum paste figures?
- What are some common mistakes beginners make when crafting fondant/gum paste figures, and how can they be avoided?
- How do you achieve realistic skin tones and textures on fondant and gum paste figures?
- Can I use pre-made fondant and gum paste, or is it better to make them from scratch for realistic figures?
- Final Reflection: Sculpting Dreams in Sugar
- Unleash Your Inner Cake Artist: Craft Stunning Figures!
Sculpting Realistic Cake Toppers
Introduction
The Appeal of Edible Cake Art
Edible cake art has transformed from simple frosting swirls to intricate, gravity-defying sculptures. The ability to create lifelike figures, animals, or objects directly on a cake adds a deeply personal and often breathtaking touch to celebrations. Imagine a birthday cake topped with a miniature, realistic replica of the guest of honor's beloved pet, or a wedding cake featuring detailed figures of the couple themselves. These realistic fondant gum paste figures elevate a simple dessert into a memorable centerpiece, capturing moments and personalities in sugar.
Beyond the visual spectacle, crafting realistic fondant gum paste figures is a rewarding creative process. It combines artistic skill with the tactile pleasure of working with edible mediums. Each figure presents a unique challenge, pushing bakers and decorators to learn new techniques in sculpting, coloring, and assembly. The detail achievable with these sugar mediums allows for incredibly lifelike results, making the final reveal a moment of delight for both the creator and the recipient.
Fondant and Gum Paste: Ideal Mediums
Fondant and gum paste are the go-to materials for crafting realistic fondant gum paste figures due to their unique properties. Fondant, primarily made of sugar, water, and gum tragacanth or gelatin, is soft, pliable, and excellent for covering cakes smoothly. However, its softness makes it less suitable for intricate, standalone structures that need to hold shape and dry firmly.
Gum paste, also known as pastillage or sugar paste, contains more gum tragacanth or CMC powder (cellulose gum). This higher gum content gives it superior elasticity and the ability to dry much harder and faster than fondant. It can be rolled incredibly thin without tearing, making it perfect for delicate elements like flower petals or fine details.
For sculpting realistic fondant gum paste figures, a blend of fondant and gum paste is often preferred. This combination leverages the pliability of fondant for ease of sculpting larger shapes while benefiting from the strength and faster drying time of gum paste for stability and detail retention. A common starting ratio is 50/50, though this can be adjusted based on humidity and desired drying speed.
Essential Tools and Materials
Sculpting Tool Essentials
Having the right tools is crucial for achieving detail and realism in your realistic fondant gum paste figures. While you can start with basic kitchen items, specialized sugar sculpting tools offer precision and ease.
- Ball Tools: These come in various sizes and are used for shaping, cupping, and thinning edges, particularly useful for creating sockets or rounded features.
- Veining Tools: Designed to add realistic texture like wrinkles, veins, or muscle definition.
- Dresden Tool (or Leaf Tool): Features a sharp, angled edge for cutting, shaping, and marking details like mouths or eyelids.
- Needle Tool (or Scriber): Essential for fine details, poking holes, or creating texture like fur or hair.
- Palette Knives and Spatulas: Small offset spatulas are useful for lifting and moving delicate pieces, while palette knives can help with smoothing or applying edible glue.
- Modeling Sticks: Various shapes and sizes for general shaping, indenting, and blending.
Beyond these, a smooth, non-stick work surface (like a silicone mat or a surface lightly dusted with cornstarch/powdered sugar) and a sharp craft knife or scalpel are indispensable for clean cuts and precise shaping.
Choosing Fondant and Gum Paste
Selecting quality fondant and gum paste is paramount for successful realistic fondant gum paste figures. Not all brands are created equal; some are too soft, too sticky, or dry too quickly to allow sufficient working time.
For fondant, look for a brand known for its elasticity and smooth texture, one that doesn't crack easily when rolled or manipulated. While pre-made fondant is convenient, some decorators prefer making their own for specific textures or flavors. When choosing gum paste, prioritize elasticity and drying speed.
A good gum paste should stretch thin without tearing and dry relatively quickly to a firm, stable state. Many decorators find that combining commercial fondant with a good quality commercial gum paste, or adding CMC powder to fondant, offers the best balance for sculpting. Experimenting with different brands or ratios is often necessary to find what works best in your climate and for your specific project.
Coloring, Glue, and Dusting Powders
Coloring your sugar mediums correctly is vital for achieving realistic tones. Use high-quality gel or paste food colors, as liquid colors can alter the consistency of fondant or gum paste. Start with small amounts and gradually add more until you reach the desired shade. For realistic skin tones or animal fur, layering colors or using dusting powders is often more effective than trying to achieve the exact shade through kneading alone.
Edible glue is essential for attaching different parts of your realistic fondant gum paste figures securely. A simple edible glue can be made by dissolving a tiny amount of gum paste or CMC powder in warm water. A little goes a long way; too much glue can ooze out and mar the surface.
For fine details or blending seams, a bit of water or clear alcohol (like vodka, which evaporates quickly) can also act as a temporary adhesive. Edible dusting powders, also known as petal dusts or luster dusts, are applied dry with soft brushes after the figure has dried. They are used for shading, adding depth, highlights, and realistic color variation, bringing your realistic fondant gum paste figures to life.
Preparing Your Medium
Kneading and Coloring Fondant
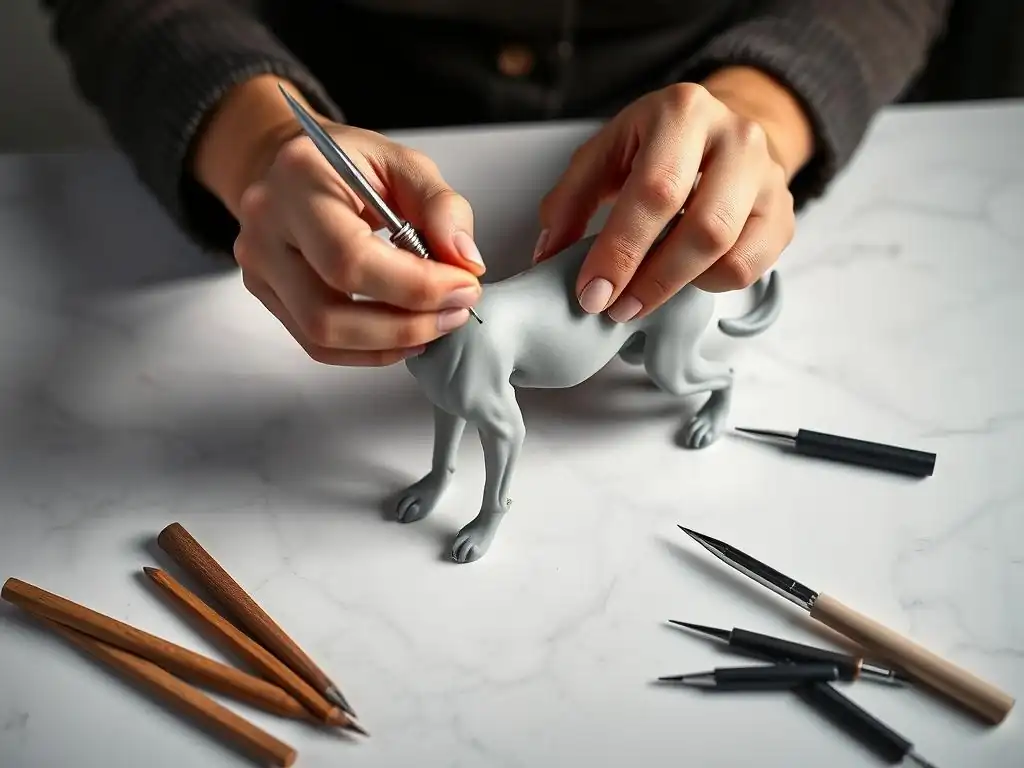
Proper preparation of your fondant is the first step to success when creating realistic fondant gum paste figures. Before coloring or sculpting, the fondant must be thoroughly kneaded. Kneading warms the sugar paste, making it more pliable and less prone to cracking. Take a portion of fondant and work it between your hands, folding and pressing until it is smooth and elastic. It should feel soft and workable, like playdough, but not sticky.
Once the fondant is pliable, you can incorporate gel or paste food coloring. Use a toothpick to add a small amount of color to the center of the kneaded fondant. Fold the fondant over the color and begin kneading again, distributing the color evenly. Wear gloves to avoid staining your hands. Continue kneading and adding color incrementally until you achieve the desired base shade. For marbled effects or subtle variations, you can stop kneading before the color is perfectly uniform.
Combining Fondant and Gum Paste
Combining fondant and gum paste is a common technique to create a medium that is easier to sculpt than pure gum paste but dries faster and firmer than pure fondant, ideal for realistic fondant gum paste figures. The ratio can vary, but a 50/50 mix is a good starting point. Take equal parts of kneaded fondant and gum paste.
Knead the two together thoroughly until they are uniformly mixed and the consistency is smooth and consistent throughout. This blend will have the elasticity of gum paste, allowing you to roll it thin and create delicate details, but will be softer and have a slightly longer working time than pure gum paste, making it easier to shape larger forms without it drying too quickly. Adjust the ratio based on the complexity of your figure and the ambient humidity – more gum paste for faster drying or high humidity, less for more working time.
Storage Best Practices
Proper storage of unused fondant, gum paste, or their blend is essential to prevent them from drying out and becoming unusable. Air is the enemy of these sugar pastes.
Immediately after use, wrap any leftover material tightly in plastic wrap, pressing out as much air as possible. Then, place the wrapped ball into a re-sealable plastic bag or an airtight container. Store at room temperature in a cool, dry place, away from direct sunlight or heat sources, which can cause the sugar to break down or the material to sweat.
Do not refrigerate or freeze unless specifically instructed by the product manufacturer, as this can sometimes affect texture. Properly stored, your sugar paste should remain pliable for several weeks or even months, ready for your next project creating realistic fondant gum paste figures.
Sculpting Techniques
Anatomy and Proportions
Understanding basic anatomy and proportions is fundamental to creating realistic fondant gum paste figures, whether human, animal, or even inanimate objects with organic shapes. Even a stylized figure benefits from underlying structural knowledge. For human figures, studying basic skeletal and muscular forms helps inform how limbs bend, how torsos twist, and where joints are located. Proportions, such as the head being roughly 1/8th the total height of an adult figure, or the eyes being positioned in the middle of the head, are crucial starting points.
For animal figures, observe real-life examples or anatomical diagrams. Note the relative size of the head to the body, the length and thickness of limbs, the shape of the torso, and how features like ears, tails, and snouts attach and are proportioned. Don't just sculpt a generic shape; think about the specific breed or type of animal you are trying to represent. Even seemingly simple objects like fruits or vegetables have specific curves, textures, and proportions that make them recognizable. Taking the time to reference real-world examples dramatically improves the realism of your realistic fondant gum paste figures.
Basic Techniques
Mastering basic sculpting techniques is the foundation for creating realistic fondant gum paste figures. These simple actions form the building blocks for more complex shapes.
- Rolling: Creating smooth, even sheets or logs of sugar paste.
- Shaping: Using your hands or tools to form basic shapes like balls, cones, cylinders, or ovals.
- Pinching: Gently squeezing the paste to create points or edges.
- Smoothing: Using your fingers, a smoother tool, or even a bit of cornstarch/powdered sugar to eliminate fingerprints and imperfections.
- Blending: Attaching two pieces and smoothing the seam together so it appears seamless.
- Cutting: Using a sharp knife or scalpel for clean, precise cuts.
Practice these basic techniques repeatedly until they feel intuitive. Start with simple shapes before attempting complex figures. For example, practice rolling a perfect sphere, then elongating it into an oval, then pinching one end to create a teardrop shape. These foundational skills are essential for building more detailed and realistic forms.
Advanced Techniques
Once comfortable with the basics, you can move on to advanced techniques that add realism to your realistic fondant gum paste figures. These involve more detailed manipulation and specialized tool use.
- Modeling Muscles and Bone Structure: Understanding where muscles bulge or bones protrude allows you to sculpt more convincing forms rather than just smooth shapes. Use modeling tools to create subtle undulations under the "skin."
- Creating Folds and Wrinkles: Use veining tools or the edge of a Dresden tool to create natural-looking folds in clothing or wrinkles on skin (for older figures or animals).
- Undercutting: Removing sugar paste from underneath features (like eyelids, lips, or folds of skin) to create shadows and depth, making the features stand out more prominently.
- Adding Texture: Using various tools (needle tool for fur, textured mats for fabric, etc.) to apply surface texture after the main form is sculpted.
- Armatures: For complex or dynamic poses, using internal support structures (like floral wire or spaghetti) allows you to position limbs or bodies in ways that sugar paste alone might not support while drying.
Mastering these techniques requires practice and patience, often involving layering sugar paste and refining shapes over time. Observing real-life subjects or high-quality sculptures can provide inspiration and guidance.
Facial Features
Sculpting realistic facial features is often the most challenging but rewarding aspect of creating realistic fondant gum paste figures, as the face is where personality and expression reside. Precision and attention to detail are paramount.
Start with a basic head shape, usually an oval or sphere, depending on the character. Use a ball tool to gently indent eye sockets. Build up the nose by adding a small piece of sugar paste and shaping it, or by sculpting it directly from the main head mass. The mouth can be a simple indentation made with a Dresden tool, or built up with small pieces for lips.
Pay close attention to the subtle curves and planes of the face. Reference photos are invaluable here. Even slight adjustments in the angle or size of a feature can dramatically change the expression and likeness.
Eyes, Noses, and Mouths
Eyes are often called the windows to the soul, and sculpting them realistically is key. For simple figures, small balls of white sugar paste can form the whites, with smaller circles of color for irises and tiny dots of black for pupils. For more realism, sculpt eyelids that slightly cover the top of the eye.
The nose varies greatly by subject; it can be a simple rounded shape for cartoon figures or intricately sculpted with nostrils and a bridge for realistic portraits. The mouth's shape dictates expression – a gentle curve for a smile, a straight line for neutral, or downturned for a frown. Adding small pieces for upper and lower lips and using a tool to define the philtrum (the groove above the upper lip) adds realism.
Fine Details: Texture
Adding texture to facial features takes them from smooth shapes to lifelike forms. Use a needle tool or the tip of a knife to gently create fine lines around the eyes (crow's feet) or subtle wrinkles on the forehead, appropriate for the figure's age. For noses, you can add texture to suggest pores, especially on the tip.
The texture of lips is unique; you can use a tool to create fine vertical lines. Remember that less is often more; subtle texture is usually more convincing than heavy-handed application. This attention to tiny details significantly enhances the realism of your realistic fondant gum paste figures.
Bodies and Limbs
Sculpting the body and limbs provides the structure and pose for your realistic fondant gum paste figures. Start with the torso, the core of the figure, then add legs and arms.
Think about the relative size and shape of each part based on your reference. Bodies aren't just cylinders; they have curves, tapers, and variations in thickness. Limbs have joints – knees, elbows, wrists, ankles – that define how they bend. Use basic shapes like balls, cones, and cylinders, then refine them by smoothing, pinching, and blending. For example, a leg might start as a cylinder, but you'll shape it to show definition in the thigh and calf, tapering towards the ankle. Ensure the proportions of the limbs are correct relative to the torso and head.
Shapes and Poses
The pose of your realistic fondant gum paste figure conveys movement and personality. Will the figure be standing, sitting, running, or holding something? Sketching out the pose beforehand can be very helpful. Sculpt the body and limbs in sections if necessary, allowing parts to firm up slightly before assembling them in the desired pose. Consider the figure's center of gravity; dynamic poses might require internal support structures (armatures) to prevent sagging as the sugar paste dries. Sculpting limbs slightly bent or angled adds dynamism compared to straight, static limbs.
Secure Attachment
Attaching limbs and heads to the body, or hands to wrists, requires a secure method to prevent parts from breaking off. Edible glue is the primary adhesive. Apply a thin layer to both surfaces being joined. For stronger bonds, especially for heavier parts or precarious angles, insert a support (like a piece of dry spaghetti, a cocktail stick, or floral wire - ensure it's food-safe or clearly marked as non-edible if left exposed) into one piece before joining.
Push the support into the corresponding piece. Smooth the seam around the joint using a modeling tool or your finger, perhaps with a tiny bit of water or glue, to blend the parts seamlessly and reinforce the attachment point. Allow adequate drying time in the desired pose.
Painting and Dusting
Edible Paints and Dusting Powders
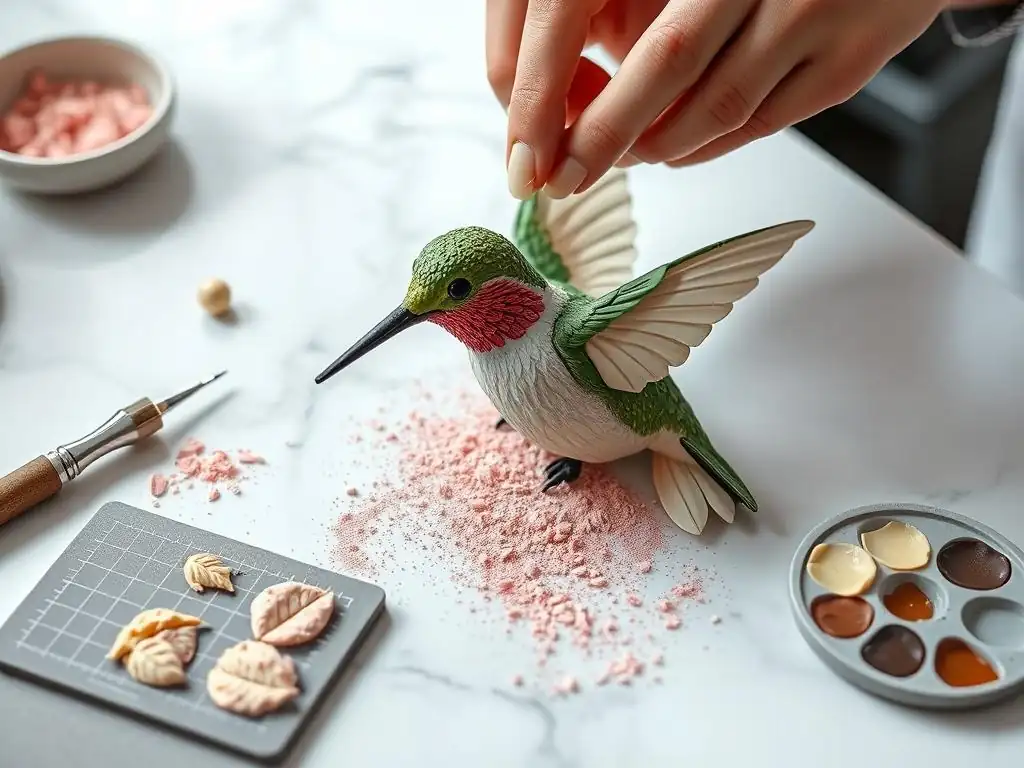
Once your realistic fondant gum paste figures are sculpted and sufficiently dry (usually firm enough to handle without distorting), you can move on to coloring techniques beyond kneading in color. Edible paints and dusting powders are crucial for adding depth, shading, highlights, and realistic tones that are difficult to achieve with solid colored paste alone.
Edible paints are typically made by mixing edible gel/paste colors or specially designed edible paints with a liquid medium like clear alcohol (vodka or edible alcohol) or lemon extract. The alcohol evaporates quickly, leaving the color behind without making the sugar paste sticky or dissolving it. Dusting powders, like petal dusts or luster dusts, are fine colored powders applied dry with soft brushes. Petal dusts are matte and excellent for natural shading and blush tones, while luster dusts add shimmer and highlights. Using both techniques allows for complex, layered coloring that enhances realism.
Painting Techniques
Painting on your realistic fondant gum paste figures allows for fine details and controlled color application. Use fine-tipped brushes for details like eyes, eyebrows, or patterns on clothing.
Dilute your edible color with alcohol to the desired consistency – like watercolor for washes or thicker for opaque lines. Apply paint in thin layers, allowing each layer to dry before adding the next, similar to traditional painting. This prevents pooling and allows for building up color gradually. Painting eyes is particularly impactful; add a white highlight dot to the pupil after the base colors are dry to make the eyes look wet and alive. You can also use edible paints for details like freckles, tattoos, or intricate patterns on clothing or accessories.
Dry Dusting Techniques
Dry dusting with edible powders is perhaps the most effective way to add soft shading, blush, and depth to realistic fondant gum paste figures. Use clean, dry, soft brushes specifically for food use.
Dip the brush tip into the dusting powder, tap off any excess, and apply the color in thin layers using circular motions or light strokes. Build up the color gradually. Use darker shades in recessed areas (like eye sockets, under the chin, between fingers) to create shadows and define form. Use lighter shades or luster dusts on raised areas (cheekbones, bridge of the nose, knuckles) for highlights.
For skin tones, layer different shades of pink, brown, and yellow dusts to create realistic undertones. For animal fur, use varying shades of brown, black, or grey dusts, following the direction of the fur. Dusting provides a soft, natural look that is hard to achieve with paint alone, significantly enhancing the realism of your figures.
Assembly and Securing
Attaching to the Cake
Once your realistic fondant gum paste figures are fully sculpted, colored, and dry, the final step is attaching them securely to the cake. The method depends on the size and weight of the figure and the surface of the cake.
For smaller, lighter figures on a fondant-covered cake, a dab of royal icing or melted chocolate can work as an adhesive. Press the figure gently into place and hold for a few seconds until it feels secure. For heavier figures, especially on buttercream, a more robust method is needed.
You can insert skewers or food-safe dowels into the base of the figure while sculpting (ensuring they are long enough to extend into the cake). Once dry, these supports are pushed into the cake, providing stability. On a buttercream cake, you might need to clear away some buttercream where the figure will sit or place a small disk of fondant first for a stable base.
Support Structures
For tall, slender, or figures in dynamic poses, internal and external support structures are vital to prevent collapse or sagging. As mentioned, internal armatures (wire, spaghetti, dowels) built into the figure during sculpting provide core stability.
When placing figures on the cake, especially multi-tiered cakes, consider external support. A heavy figure placed directly on a lower tier without support can cause the tier to collapse. Use food-safe dowels inserted into the lower cake tier, cut flush with the surface, to bear the weight of the figure or the cake board it's attached to.
For figures with limbs extended or delicate parts, temporary external supports (like blocks of styrofoam or crumpled paper towels covered in plastic wrap) can be used while the figure dries on the cake, then carefully removed before display. Planning your supports is as important as the sculpting itself for successful realistic fondant gum paste figures.
Final Touches
After assembly and securing, add any last-minute details or touch-ups to your realistic fondant gum paste figures. This might involve adding a final layer of dusting powder for extra shading, painting small highlights, or attaching tiny accessories like buttons or jewelry using edible glue.
Check for any seams that might have become visible during handling and touch them up with a little water or glue and a modeling tool. Ensure all support structures are hidden or seamlessly integrated. Give the figures a final look-over under the lighting where the cake will be displayed to catch any areas needing adjustment. These final touches polish your work and enhance the overall realism and presentation of your realistic fondant gum paste figures.
Troubleshooting
Cracking and Drying
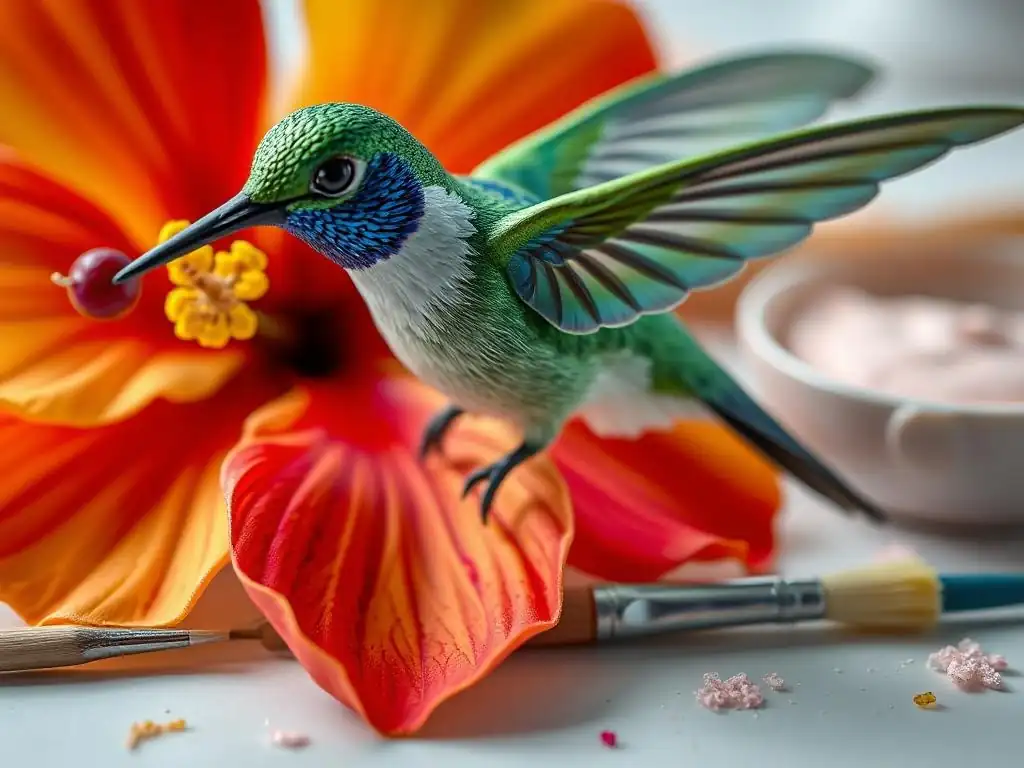
Cracking is a common issue when working with fondant and gum paste, especially when sculpting realistic fondant gum paste figures. It often occurs when the material is too dry or hasn't been kneaded enough. If your sugar paste feels stiff or crumbles when you try to shape it, it's too dry.
To revive dry paste, knead in a tiny amount of vegetable shortening or a few drops of sugar syrup (made by boiling sugar and water). Be cautious not to add too much, which can make it greasy or sticky. Cracking during sculpting can also happen if you stretch the paste too thin in certain areas without adequate support or if the surface is drying while you're still working on the inside.
Work efficiently, especially in dry environments. If a crack appears on a sculpted piece, you can try to gently smooth it out with a slightly damp finger or a modeling tool, or apply a tiny amount of fresh paste and blend it in.
Sagging and Warping
Sagging and warping occur when sculpted realistic fondant gum paste figures don't dry properly or lack sufficient support. This is particularly problematic for figures with extended limbs, thin sections, or those in dynamic poses. It happens because the weight of the sugar paste causes it to deform before it has fully hardened.
To prevent sagging, ensure your sugar paste blend (fondant/gum paste) has enough gum paste to dry firmly. Allow pieces to dry flat on a non-stick surface or supported by foam blocks or crumpled foil in the desired shape. For complex figures or poses, incorporate internal supports (armatures) during sculpting. Ensure figures are completely dry before moving or attaching them to the cake. Drying time varies significantly based on humidity and the size/thickness of the figure; it can take anywhere from 24 hours to several days.
Fixing Imperfections
Imperfections are inevitable when sculpting realistic fondant gum paste figures, but many can be fixed. Minor cracks can often be smoothed over as described above. Fingerprints or small dents can be gently buffed out with a smooth tool or a finger lightly dusted with cornstarch.
If a piece breaks off (like a finger or an ear), you can usually reattach it using edible glue. Apply glue to both broken surfaces and hold them together firmly until the glue starts to set. You can often blend the seam with a tool. For larger breaks or structural issues, you might need to reinforce the join with a small piece of wire or spaghetti hidden within the sugar paste. Dusting powders are excellent for camouflaging minor surface imperfections after the figure is dry, as they draw the eye with color and shading.
Project Ideas
Baby Elephant Cake Topper
A baby elephant is a popular choice for creating realistic fondant gum paste figures, often used for baby showers or first birthdays. Their rounded, soft features are forgiving, yet allow for lovely realistic details.
Start with a large ball for the body and a slightly smaller ball for the head. Shape the body into a gentle oval. Attach the head, blending the neck seam smoothly. Roll four short, thick cylinders for legs and attach them to the body, giving them a slight bend at the knee/elbow joint.
Sculpt the trunk as a tapered cylinder, bending it into a playful pose. For the ears, roll the paste thinly and cut out two large ear shapes; cup them gently with a ball tool before attaching them to the sides of the head. Add a small tail and use a needle tool to create subtle skin texture, like wrinkles around the joints or eyes. Dusting with grey and pink powders adds depth and realism.
Realistic Rose Cake Topper
While not a figure, a realistic rose is a classic example of intricate sugar work using techniques applicable to realistic fondant gum paste figures, particularly thin rolling, shaping, and assembly.
Use gum paste or a high-gum paste blend rolled incredibly thin. Cut out multiple petal shapes using a rose cutter or freehand. Soften the edges of each petal using a ball tool on a foam pad, creating a natural, ruffled look. Start building the rose by wrapping a few small petals tightly around a cone-shaped center (the bud).
Then, layer larger petals around the bud, overlapping them and gently shaping them to open outwards. Use edible glue sparingly to attach each petal. Allow the rose to dry upside down in a former or cup to help the petals hold their shape. Once dry, dust the petals with shades of pink, red, or yellow petal dust, and green dust on the calyx (the leaf-like structure at the base) for added realism.
Miniature Dog Cake Topper
Creating a miniature realistic dog cake topper is a delightful challenge, requiring attention to breed-specific features and proportions.
Start by deciding on the breed, as a poodle's structure differs greatly from a bulldog's. Build the body and head using basic shapes (ovals, cylinders) scaled appropriately for the specific dog. Pay attention to the length of the snout, the shape and set of the ears, and the length of the legs. Use modeling tools to define muscle structure or rolls of fat depending on the breed.
Sculpt the tail in a typical pose for that breed. Once the basic form is assembled and firm, add texture. Use a needle tool for fur, varying the length and direction of the strokes. Dusting powders are essential for creating realistic fur color variations, shading, and details around the eyes and nose.
Preservation and Storage
Longevity
Realistic fondant gum paste figures, when properly made and dried, can last for a very long time, often years. Because they are made primarily of sugar, which is a preservative, and they are dried hard, they are not prone to spoilage in the way that moist cakes or fillings are.
The key to their longevity is complete drying and protection from moisture and pests. Once fully hardened, the sugar structure is stable. While they remain technically edible for a long period, their primary purpose after a cake is served is often as a keepsake. Over time, colors might fade slightly if exposed to light, and the sugar can become brittle. However, structurally, they can endure as a memento if stored correctly.
Safe Storage Practices
To preserve your realistic fondant gum paste figures as keepsakes, proper storage is crucial. The main enemies are humidity, light, dust, and physical damage.
Ensure the figures are completely dry before storing; they should be hard to the touch all the way through. Place the dried figures in an airtight container. Avoid storing them in areas with high humidity, like a kitchen or basement. Adding a food-safe desiccant packet (like those found in food packaging) to the container can help absorb any residual moisture.
Store the container in a cool, dry place away from direct sunlight, which can cause colors to fade. Handle the figures carefully, as they can be fragile once dry. By following these steps, your beautiful realistic fondant gum paste figures can be cherished as memories for years to come.
Frequently Asked Questions
How do fondant and gum paste differ, and why is that difference important for creating realistic figures?
Fondant is more pliable and softer, ideal for covering cakes, while gum paste dries harder and faster. This difference is important as gum paste is better suited for detailed, structural elements in figures.
What are some essential tools for sculpting realistic fondant and gum paste figures?
Essential tools include sculpting tools (like ball tools and veiners), a rolling pin, edible glue, and food coloring. These tools enable precise shaping, adding texture and detail, and achieving realistic color.
What are some common mistakes beginners make when crafting fondant/gum paste figures, and how can they be avoided?
Common mistakes include using too much fondant (resulting in sagging), insufficient drying time, and not using proper support. Avoiding these requires using gum paste for structural parts, allowing adequate drying time, and using toothpicks or wires for support.
How do you achieve realistic skin tones and textures on fondant and gum paste figures?
Realistic skin tones are achieved by blending various shades of edible gel food coloring. Textures are added using sculpting tools or impression mats, mimicking skin pores and wrinkles for a lifelike appearance.
Can I use pre-made fondant and gum paste, or is it better to make them from scratch for realistic figures?
While pre-made fondant and gum paste are convenient, making them from scratch allows for better control over ingredients and consistency. This can be particularly helpful when aiming for specific textures and qualities needed for realistic figures.
Final Reflection: Sculpting Dreams in Sugar
The art of creating realistic fondant and gum paste figures is more than just a hobby; it's a testament to the enduring power of human creativity and the ability to transform simple ingredients into breathtaking works of art. In a world increasingly dominated by digital imagery, the tactile nature of this craft offers a unique and deeply satisfying counterpoint, allowing for a tangible connection to the artistry involved. The detailed techniques explored in this article, from achieving lifelike skin tones to mastering delicate facial features, are not merely instructions; they are keys to unlocking a world of imaginative expression.
The impact of this craft extends beyond the individual cake topper; it speaks to a broader cultural appreciation for handcrafted artistry and the enduring appeal of personalized, meaningful gifts. The meticulous detail involved resonates with a growing desire for authenticity and unique experiences. The details are not the details. They make the design.
– Charles Eames. This quote perfectly encapsulates the essence of creating realistic figures – the seemingly small details are what elevate a simple figure into a captivating masterpiece, reflecting the time, skill, and passion poured into its creation.
Now, it's your turn. Consider the possibilities. Perhaps you'll be inspired to try your hand at sculpting a miniature portrait of a loved one, or maybe you'll embark on a more ambitious project, creating a fantastical creature or a beloved character from a favorite story. Regardless of your skill level, remember that the journey of learning is as rewarding as the final product. Embrace the challenges, celebrate the small victories, and let your creativity bloom. The world awaits your unique creations, sculpted in sugar.
Unleash Your Inner Cake Artist: Craft Stunning Figures!
Thanks for taking the time to explore the world of realistic fondant and gum paste figures! You've now unlocked the secrets to creating truly breathtaking cake toppers. Ready to put your new skills to the test?
- Craft your masterpiece: Begin sculpting your dream figure today! Gather your supplies and try out the techniques you just learned. Don't be afraid to experiment!
- Share your creation: Show off your amazing cake topper on social media using #BakeWithEaseFigures – we'd love to see your results!
- Join our community: Head over to our forums to connect with other bakers and share tips and tricks. Let's inspire each other!
What unique character will you bring to life on your next cake?