
Getting Rid of Dullness: How to Achieve Glossy Tempered Chocolate.

Welcome to BakeWithEase, your partner in creating delicious baked goods! Ever wondered how to achieve that professional, mirror-like shine on your chocolates? This time, we're diving into the secrets behind a truly stunning dessert finish. Intrigued by the idea of mastering the glossy tempered chocolate recipe? Read on to unlock the secrets to a perfectly tempered, brilliantly shiny chocolate that will elevate your creations to the next level. Discover the difference between a dull coating and a mesmerizing glaze!
- Achieving a Perfect Shine: Tempering Chocolate for Professional Results
- Introduction: Unveiling the Secrets to Perfectly Tempered, Glossy Chocolate
- Understanding Chocolate Tempering: The Science Behind the Shine
- Step-by-Step Guide: Tempering Chocolate Using Various Methods
- Troubleshooting Common Chocolate Tempering Problems
- Tips for Working with Tempered Chocolate
- Glossy Tempered Chocolate Recipe: Applying Tempering Techniques
- Beyond the Basics: Exploring Different Types of Chocolate for Tempering
- Conclusion: Mastering the Art of Glossy Tempered Chocolate
-
Frequently Asked Questions
- What exactly is tempered chocolate, and why is it important for achieving a glossy finish?
- What are some common mistakes that lead to dull, untempered chocolate?
- The "BakeWithEase" article mentions "seeding." What does that mean in the context of tempering chocolate?
- What types of chocolate are best suited for achieving a glossy tempered finish, as recommended by BakeWithEase?
- If I don't have a thermometer, can I still temper chocolate and achieve a glossy finish using the techniques described on BakeWithEase?
- Final Reflection: The Enduring Allure of Glossy Tempered Chocolate
- Unleash Your Inner Chocolatier Today!
Achieving a Perfect Shine: Tempering Chocolate for Professional Results
Introduction: Unveiling the Secrets to Perfectly Tempered, Glossy Chocolate
Tempering chocolate might sound like a daunting task reserved for professional chocolatiers, but mastering this technique is the key to unlocking truly beautiful and stable chocolate confections right in your own kitchen. It's the difference between chocolate that's dull, crumbly, and melts quickly in your hands, and chocolate that boasts a stunning, glossy finish, a satisfying snap when broken, and a smooth melt-in-your-mouth texture. This guide will walk you through the essential steps and science behind achieving that coveted shine, ensuring your homemade treats look as impressive as they taste.
Getting rid of dullness and achieving a perfect, glossy tempered chocolate is all about controlling the crystallization of cocoa butter. When chocolate is simply melted and allowed to cool naturally, the cocoa butter fat crystals form in an unstable, random structure. This results in a matte finish, a soft texture, and often leads to "bloom," those unsightly white streaks or patches that appear over time. Tempering, on the other hand, encourages the cocoa butter to crystallize into a specific, stable structure, giving you that desirable gloss, snap, and resistance to melting at room temperature.
Why Tempering Chocolate is Essential for Professional-Looking Confections
Tempering is fundamentally about controlling the crystal structure of the cocoa butter within the chocolate. When chocolate is heated and then cooled improperly, the cocoa butter molecules solidify into various unstable forms.
These unstable forms lead to a soft, crumbly texture, a dull appearance, and are prone to separating and causing fat bloom, which is when cocoa butter rises to the surface, creating a white, dusty layer. Properly tempered chocolate, however, has cocoa butter crystals primarily in a stable structure known as Beta crystal (specifically Form V), which melts at a higher temperature, around 90-94°F (32-34°C), closer to body temperature, resulting in that desirable mouthfeel and resistance to melting in your hand.
Beyond the aesthetic appeal of a beautiful shine, tempered chocolate offers crucial functional benefits for confectionery making. It contracts slightly as it cools, making it ideal for molding as it easily releases from the mold, leaving a crisp, clean shape. Dipped items, like truffles or strawberries, will have a thin, firm coating that sets quickly and doesn't stick to packaging. Without tempering, these applications would be messy, the chocolate wouldn't hold its shape well, and the final product would lack the professional finish and stability expected of high-quality chocolate work.
The Significance of Gloss and Snap in High-Quality Chocolate
The visual gloss and the audible snap are two primary indicators of well-tempered chocolate, signaling its structural integrity and proper crystallization. The high reflectivity of the surface, the gloss, comes from the smooth, uniform arrangement of the stable Beta crystals. Think of it like polishing a surface; the smoother and more orderly the microscopic structure, the more light it reflects directly back to your eye, creating that mirror-like shine. A dull surface, conversely, indicates a chaotic arrangement of unstable crystals that scatter light randomly.
The satisfying "snap" you hear when breaking a piece of high-quality chocolate is a direct result of the stable, tightly packed Beta crystal structure. This crystalline matrix provides rigidity and strength to the chocolate. When you break it, the fracture propagates cleanly along these stable crystal boundaries, producing that crisp sound and a clean break.
Poorly tempered or untempered chocolate, with its disorganized and unstable crystal forms, will typically bend or crumble rather than snap cleanly, lacking that hallmark of professional quality. Mastering the art of achieving glossy tempered chocolate recipe results relies heavily on understanding and controlling these physical properties.
Understanding Chocolate Tempering: The Science Behind the Shine
Tempering is not just a technique; it's a controlled process that manipulates the crystallization of cocoa butter, the fat component in chocolate. Cocoa butter is unique because it can crystallize into several different forms, or polymorphs, each with a different melting point and stability. Understanding these crystal forms is fundamental to achieving that desired glossy tempered chocolate recipe outcome.
When chocolate is melted, all these crystal forms disappear, and the cocoa butter is in a liquid state. As it cools, the cocoa butter molecules want to solidify, and the goal of tempering is to guide them into forming primarily one specific type of crystal.
The process involves carefully heating the chocolate to eliminate all existing crystals, cooling it to a specific temperature range where the desired stable crystals begin to form, and then gently reheating it slightly to eliminate any unstable crystals that might have also formed while leaving the stable ones intact. This precise temperature control and manipulation of crystal formation are what give tempered chocolate its desirable properties: a beautiful shine, a firm texture with a clean snap, resistance to melting at room temperature, and contraction upon cooling for easy molding.
It's a delicate balance, but one that is achievable with practice and attention to detail.
Cocoa Butter Polymorphism: The Key to Stability and Gloss
Cocoa butter exhibits polymorphism, meaning it can crystallize into six different forms, labeled Forms I through VI. These forms differ in their molecular arrangement, melting points, and stability. Form I is the least stable, melting around 62°F (16.5°C), while Form VI is the most stable, melting around 97°F (36°C), but it forms very slowly over time, often associated with bloom.
The unstable forms (I, II, III, IV) result in soft, crumbly chocolate with a dull appearance and are prone to bloom. For instance, Form III melts around 78°F (25.5°C) and is relatively easy to form but lacks stability and gloss.
The key to achieving glossy tempered chocolate recipe results lies in promoting the formation of Form V crystals. This crystal form is relatively stable, melts in the desired range of 90-94°F (32-34°C), and is responsible for the chocolate's snap, smooth texture, and high gloss.
Tempering techniques are designed to create conditions where Form V crystals are the primary ones that nucleate and grow as the chocolate cools. This involves cooling the liquid chocolate to a temperature where Form V crystals can form, often by introducing existing Form V crystals (seeding) or by manipulating the temperature and agitation to encourage their formation, while avoiding the formation of less desirable crystal forms.
The Importance of Beta Crystals (Form V) for Desired Texture and Appearance
Beta crystals, specifically Form V, are the heroes of tempered chocolate. They are the most desirable crystal structure because they provide the ideal combination of properties: stability at room temperature, a clean melt slightly below body temperature (creating that smooth mouthfeel), a firm texture with a satisfying snap when broken, and a highly reflective surface that results in a brilliant gloss. Without a sufficient proportion of Form V crystals, the chocolate will be soft, sticky, dull, and prone to developing fat bloom.
When you properly temper chocolate, you are essentially guiding the cocoa butter molecules to align themselves predominantly into this Form V structure. This is why temperature control is so critical in tempering. Melting the chocolate too high destroys all crystal forms, and cooling too quickly or too slowly can favor the formation of less stable forms.
The tempering process aims to cool the chocolate into a specific temperature range where Form V crystals are most likely to nucleate and grow, while other, less stable forms are discouraged or melted out during the final slight reheating step. Achieving a high percentage of Form V crystals, often cited as ideally over 70% of the total crystalline structure, is the goal for a perfect glossy tempered chocolate recipe outcome.
Step-by-Step Guide: Tempering Chocolate Using Various Methods
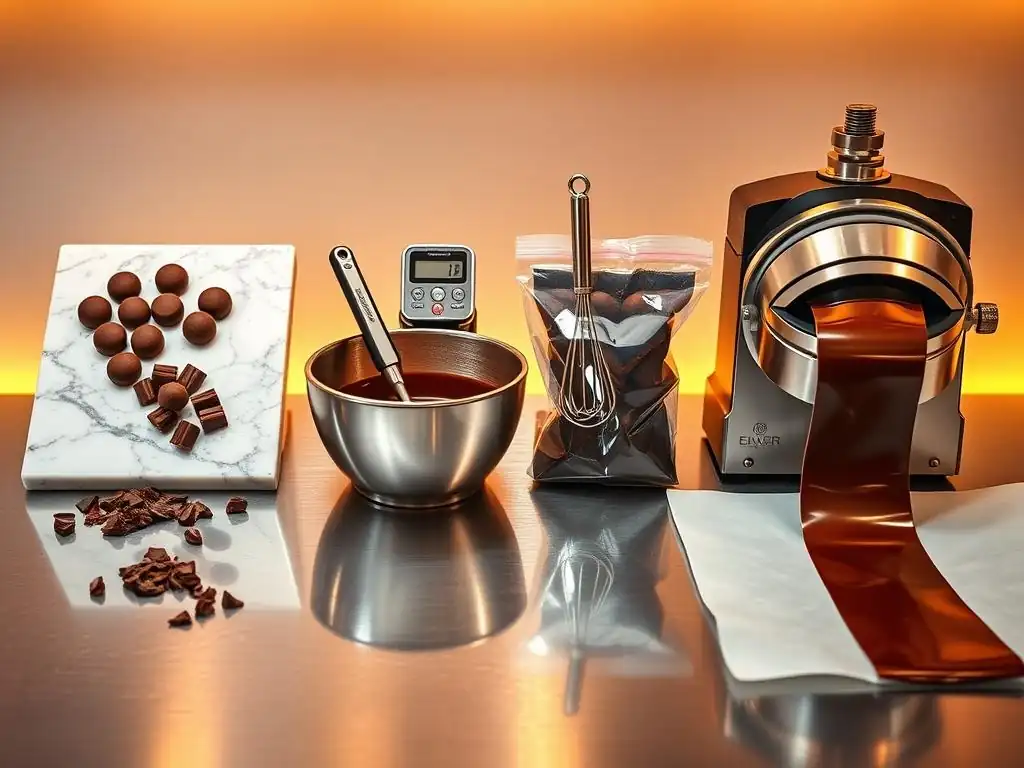
Tempering can be approached in several ways, each with its own advantages. The goal remains the same: to create a stable crystal structure in the cocoa butter for a glossy finish and firm snap. Here we'll cover three popular methods: seed tempering, microwave tempering, and tablier (marble slab) tempering. While the specific steps and temperatures vary slightly depending on the type of chocolate (dark, milk, white), the underlying principle of melting, cooling while encouraging stable crystal formation, and slightly reheating remains constant.
Before starting any method, ensure you have high-quality chocolate (couverture is best due to higher cocoa butter content) and the necessary tools, primarily an accurate thermometer. Chop the chocolate finely and evenly; smaller pieces melt more consistently. Work in a clean, dry environment, as moisture is the enemy of melted chocolate. Remember that achieving a perfect glossy tempered chocolate recipe result often takes practice, so don't be discouraged if your first attempt isn't flawless.
Method 1: Seed Tempering - The Traditional Approach
Seed tempering is one of the most reliable methods for achieving a good temper, especially for moderate amounts of chocolate. It involves melting the majority of your chocolate and then adding finely chopped, untempered chocolate (the "seed") to it as it cools. The seed chocolate already contains stable Form V crystals, which act as templates, encouraging the liquid cocoa butter to crystallize into the desired form as the mixture cools and is stirred. This method is relatively straightforward and effective for dark, milk, and white chocolate, provided you use accurate temperatures and good quality seed chocolate.
This technique is favored by many because it's less prone to overcooling than some other methods and provides a visual cue (the melting of the seed chocolate) for progress. For example, if you start with 1 pound (about 450g) of dark chocolate, you might melt 3/4 of it and use the remaining 1/4 as seed. The precise amount of seed can be adjusted based on the ambient temperature and how quickly you need the chocolate to cool. Consistent stirring throughout the cooling phase is crucial to distribute the seed crystals evenly and promote uniform crystallization throughout the entire batch.
Step 1: Melting the Chocolate - Achieving the Optimal Starting Temperature
Begin by chopping about three-quarters of your total chocolate weight into small, uniform pieces. Place the chopped chocolate in a dry, heatproof bowl set over a saucepan of barely simmering water (a bain-marie). Ensure the bottom of the bowl does not touch the water. The gentle heat from the steam will melt the chocolate gradually and evenly. Stir occasionally with a dry spatula.
Continue heating and stirring until the chocolate is completely melted and reaches its target melting temperature. For dark chocolate, this is typically around 115-120°F (46-49°C). For milk and white chocolate, which are more sensitive to heat and contain milk solids and sugar that can scorch, the initial melting temperature is lower, usually 105-110°F (40-43°C). Reaching this initial temperature ensures all existing cocoa butter crystals, including unstable ones, are fully melted.
Step 2: Seeding with Untempered Chocolate - Introducing Beta Crystals
Once the chocolate is fully melted and at its target initial temperature, remove the bowl from the bain-marie and wipe the bottom dry to prevent any water from dripping into the chocolate. Immediately add the remaining one-quarter of your finely chopped, untempered chocolate (the "seed") to the melted chocolate in the bowl. The seed chocolate should be at room temperature and finely chopped to help it melt smoothly.
Stir the mixture continuously. The goal here is twofold: the added seed chocolate will help cool down the melted chocolate, and the stable Beta (Form V) crystals present in the seed chocolate will act as nucleation sites, encouraging the liquid cocoa butter in the melted chocolate to crystallize into the desired stable form as the temperature drops. Keep stirring until the seed chocolate begins to melt and the temperature of the mixture starts to decrease significantly.
Step 3: Stirring and Monitoring - Promoting Proper Crystal Formation
Continue stirring the chocolate vigorously and constantly after adding the seed. The stirring is critical for several reasons: it helps distribute the melting seed chocolate evenly, ensures uniform cooling throughout the mass, and promotes the formation and dispersion of the desired stable Form V crystals. As you stir, the temperature of the chocolate will continue to drop.
Monitor the temperature carefully with your thermometer. The target cooling temperature for seed tempering is typically around 88-90°F (31-32°C) for dark chocolate, and 86-88°F (30-31°C) for milk and white chocolate. This is the temperature range where Form V crystals are most likely to form and propagate. Continue stirring until the temperature reaches the lower end of this range and most, if not all, of the seed chocolate has melted. If some seed pieces remain, they can be removed, or you can continue stirring gently until they melt, ensuring you don't overcool.
Step 4: Testing the Temper - Evaluating Gloss, Snap, and Set Time
Once the chocolate has reached the target cooling temperature and feels slightly thickened, it's time to test if it's properly tempered. Dip the tip of a clean knife, a spoon, or a piece of parchment paper into the chocolate. Shake off any excess and place the test piece aside at room temperature (ideally around 68-72°F or 20-22°C).
A properly tempered chocolate sample should begin to set within 3-5 minutes and should be completely firm within 10 minutes. As it sets, it should develop a smooth, even surface with a noticeable gloss. Once fully set, it should snap cleanly when broken.
If the chocolate remains soft, sets slowly, or has a dull or streaky appearance, it is not properly tempered and will need to be re-melted and tempered again. If it sets too quickly and becomes stiff in the bowl, it may be slightly over-crystallized (too many Form V crystals), and you may need to warm it very slightly to return it to working consistency.
Method 2: Microwave Tempering - A Convenient and Efficient Technique
Microwave tempering is often hailed as one of the easiest methods for beginners and suitable for smaller quantities of chocolate, making it great for quick dipping projects. It relies on heating the chocolate in short bursts to gradually melt it while leaving some stable crystals intact, effectively using the unmelted chocolate pieces as the "seed." This method requires careful attention to prevent overheating, which would destroy all the necessary crystal structures.
This technique is particularly useful when you only need a cup or two of tempered chocolate for decorating or coating a few items. For instance, tempering 6 ounces (about 170g) of chocolate in the microwave is much faster and less cumbersome than setting up a bain-marie for such a small amount. The key is to melt the chocolate just enough so that a significant portion is liquid, but there are still solid pieces remaining, which serve as the critical seed for proper crystallization upon stirring.
Step 1: Precise Melting in the Microwave - Avoiding Overheating and Burning
Start by finely chopping your chocolate and placing it in a microwave-safe bowl. Use high-quality chocolate, preferably couverture. Begin microwaving the chocolate on medium power (around 50%) in 30-second intervals. After each interval, remove the bowl and stir the chocolate thoroughly, even if it doesn't look like it's melting much at first. The residual heat will continue to melt the chocolate as you stir.
As the chocolate starts to melt, reduce the microwave time to 15-second intervals, and then even down to 10-second or 5-second bursts as more chocolate melts. Stir diligently after every interval. The goal is to melt the chocolate gradually until about 70-80% is liquid, with small, solid pieces still remaining.
Do not microwave until the chocolate is fully liquid; those solid pieces are essential for providing the seed crystals needed for tempering. For dark chocolate, you're aiming for a temperature around 115-120°F (46-49°C) initially before adding seed, but in this method, you stop heating when it's mostly melted with solids remaining, usually around 100-105°F (38-40°C) or even slightly lower.
Step 2: Introducing Seed Chocolate (Optional) - Enhancing Stability
While the core microwave method relies on the unmelted pieces as seed, some find adding a small amount of extra finely chopped seed chocolate at this stage can enhance the stability of the temper, especially if you accidentally melted a bit too much initially. If you choose to do this, once the chocolate is mostly melted with some solid pieces remaining, stir in an additional tablespoon or two of finely chopped untempered chocolate.
Stir continuously until the temperature drops and the added seed (if used) melts into the mixture. This step helps ensure there are enough stable Form V crystals present to guide the crystallization process as the chocolate cools further through stirring. The amount of additional seed needed is usually small, perhaps 5-10% of the total weight, and it helps to quickly bring the overall temperature down into the working range.
Step 3: Stirring and Cooling - Reaching the Ideal Working Temperature
Once you have reached the point where most of the chocolate is melted but solid pieces remain, remove the bowl from the microwave entirely. Stir the chocolate continuously and vigorously. The stirring helps the remaining solid pieces melt from the residual heat while also distributing the stable crystals throughout the liquid chocolate and promoting cooling.
Continue stirring and monitoring the temperature with your thermometer. You are aiming to cool the chocolate down to its working temperature range: 88-90°F (31-32°C) for dark chocolate, and 86-88°F (30-31°C) for milk and white chocolate. As you stir, the chocolate will cool and thicken slightly. Once it reaches the target temperature and all or most of the solid pieces have melted into a smooth, homogeneous consistency, it is ready to be tested.
Step 4: Testing Your Microwave Tempered Chocolate
Just like with seed tempering, testing is crucial to confirm you've achieved a proper temper. Dip the tip of a clean utensil or a piece of parchment paper into the chocolate, letting the excess drip off. Place this test piece aside at room temperature (ideally 68-72°F or 20-22°C).
Observe the test piece. Properly microwave-tempered chocolate should start to set and become visibly matte around the edges within 3-5 minutes. It should be firm and glossy within 10 minutes. When fully set, it should snap cleanly. If it remains soft, dull, or takes significantly longer to set (e.g., 20-30 minutes or more), it is not in temper and will need to be re-melted and re-tempered using the same microwave method, being extra careful not to overheat in the initial melting phase. This test is the final confirmation for your glossy tempered chocolate recipe success.
Method 3: Tablier Tempering (Marble Slab Tempering) - For Larger Batches and Controlled Cooling
Tablier tempering, often called marble slab tempering, is a classic technique favored by professional chocolatiers for its ability to quickly and effectively cool and crystallize larger quantities of chocolate. It involves pouring melted chocolate onto a cool surface, typically a marble or granite slab, and working it with a spatula or scraper to rapidly cool it while promoting the formation of stable crystals. This method requires a bit more physical effort and a suitable cool surface, but it offers excellent control over the cooling process.
This technique is particularly effective for achieving a high percentage of Form V crystals relatively quickly, resulting in a very stable temper. For example, tempering several pounds (a kilogram or more) of chocolate for coating a large batch of confections is efficiently done on a marble slab. The large, cool surface area allows heat to dissipate rapidly, and the constant movement and scraping of the chocolate ensure that it cools uniformly and that stable crystals are distributed throughout the mass, preventing localized overcooling or undertempering.
Step 1: Melting Chocolate Over a Bain-Marie
Begin by melting your chocolate using the bain-marie method, as described in Step 1 of Seed Tempering. Chop the chocolate finely and place it in a dry bowl over a pot of barely simmering water, ensuring the bowl doesn't touch the water. Stir gently until the chocolate is completely melted and reaches the target initial temperature: 115-120°F (46-49°C) for dark chocolate, or 105-110°F (40-43°C) for milk and white chocolate.
Once fully melted and at the correct temperature, carefully remove the bowl from the bain-marie and wipe the bottom dry to prevent any water contamination. The goal here is to have a completely liquid, crystal-free starting point before moving to the cooling phase on the slab. Having the chocolate at the right initial temperature is crucial for dissolving any residual crystals from the manufacturing process.
Step 2: Pouring onto a Marble Slab - Cooling and Crystallizing
Pour about two-thirds to three-quarters of the melted chocolate directly onto a clean, dry, cool marble or granite slab. Keep the remaining one-third to one-quarter of the melted chocolate in the bowl; this will be used later to warm the chocolate slightly back up to its working temperature. The marble slab should ideally be at room temperature, around 68-72°F (20-22°C).
Using a metal scraper and/or a palette knife, immediately begin working the chocolate on the slab. Spread it out thinly, then scrape it back together into a pile. Repeat this spreading and scraping motion continuously. The large, cool surface area of the marble will rapidly draw heat out of the chocolate, causing it to cool quickly and begin to crystallize. The constant movement ensures even cooling and promotes the formation of stable Form V crystals.
Step 3: Working the Chocolate - Promoting Smoothness and Gloss
Continue working the chocolate on the marble slab, spreading and scraping it until it visibly thickens and starts to become opaque, losing some of its initial liquid sheen. This thickening indicates that stable Form V crystals are forming. You should be able to feel it becoming more viscous under your scraper. The temperature of the chocolate on the slab will drop rapidly during this process.
Use your thermometer to monitor the temperature of the chocolate on the slab. For dark chocolate, you're aiming to cool it down to approximately 81-82°F (27-28°C). For milk and white chocolate, the target cooling temperature on the slab is slightly lower, around 79-80°F (26-27°C). This lower temperature range on the slab encourages significant crystallization. Keep working the chocolate until it reaches the target temperature and has a pudding-like consistency.
Step 4: Returning to the Bowl and Maintaining Temperature
Once the chocolate on the slab has reached the target cooling temperature and thickened, use your scraper to quickly gather it all up and return it to the bowl containing the remaining melted chocolate that you set aside earlier. This warmer chocolate will gently raise the temperature of the now heavily crystallized chocolate from the slab.
Stir the mixture in the bowl thoroughly and continuously. The goal is to melt out any unstable crystals (Forms I-IV) that might have formed during the rapid cooling on the slab while leaving the stable Form V crystals intact. Stir until the mixture is smooth and reaches its final working temperature: 88-90°F (31-32°C) for dark chocolate, and 86-88°F (30-31°C) for milk and white chocolate.
Once the chocolate is smooth and within the working temperature range, perform a temper test as described previously. If it sets properly with gloss and snap, it's ready to use for your glossy tempered chocolate recipe applications.
Troubleshooting Common Chocolate Tempering Problems
Even with careful attention to temperature and technique, tempering can sometimes go awry. Understanding common problems and their causes can help you identify what went wrong and how to fix it or prevent it from happening in the future. Don't be discouraged by setbacks; troubleshooting is a normal part of mastering any baking or confectionery skill, including achieving that perfect glossy tempered chocolate.
Common issues include chocolate that sets improperly, develops dullness or streaks, or exhibits bloom. These problems almost always relate back to the crystallization of cocoa butter – either it didn't crystallize into the stable Form V, or unstable forms were allowed to dominate. By recognizing the symptoms, you can often diagnose the underlying issue and take corrective action, sometimes even salvaging a batch that didn't temper correctly the first time.
Dull or Streaky Chocolate: Identifying the Causes and Prevention
Dull or streaky chocolate is a clear sign that the chocolate was not properly tempered. The dullness indicates that the cocoa butter did not crystallize predominantly into the stable, reflective Form V structure. Instead, it likely solidified into a mixture of unstable crystal forms that scatter light, resulting in a matte finish. Streaks, often lighter in color, can also be caused by uneven crystallization or temperature fluctuations during cooling and setting. For example, if chocolate cools too slowly, unstable crystals are more likely to form.
Prevention involves ensuring accurate temperature control throughout the tempering process, using the correct method for the quantity of chocolate, and stirring adequately to promote even cooling and crystal distribution. If your chocolate turns out dull or streaky, it means the temper failed. The solution is to re-melt the chocolate completely, ensuring it reaches the initial high temperature (115-120°F for dark, 105-110°F for milk/white) to destroy all existing crystal forms, and then re-temper it carefully using your chosen method, paying close attention to the cooling and working temperatures.
Bloom on Chocolate: Understanding Fat and Sugar Bloom Formation
Bloom appears as grayish-white patches or streaks on the surface of chocolate and is a common consequence of improper tempering or poor storage. There are two types: fat bloom and sugar bloom. Fat bloom is the most common and occurs when unstable cocoa butter crystals melt (often due to temperature fluctuations, like moving chocolate from a cool pantry to a warm room) and then recrystallize on the surface in an unstable form (often Form IV or VI), creating a dusty or streaky appearance. This happens readily if the chocolate wasn't properly tempered to begin with.
Sugar bloom occurs when moisture comes into contact with the chocolate's surface. The moisture dissolves tiny sugar crystals, and as the moisture evaporates, the sugar recrystallizes on the surface in larger, visible crystals, giving a dry, powdery, or gritty look. This can happen if chocolate is stored in a humid environment or moved directly from a cold refrigerator to warmer air, causing condensation.
While bloomed chocolate is usually still safe to eat, its texture and appearance are compromised. Proper tempering (to prevent fat bloom) and storing chocolate in a cool, dry, stable temperature environment (ideally 60-68°F or 15-20°C, with low humidity below 50%) are key to prevention.
Chocolate Setting Too Slowly or Too Quickly: Achieving Optimal Crystallization
Chocolate that sets too slowly is another indicator of improper tempering, specifically a lack of sufficient stable Form V crystals. If the chocolate remains liquid or pliable for a long time after being applied (e.g., more than 10-15 minutes at room temperature), it means the cocoa butter hasn't formed the strong, stable crystalline structure needed for quick setting and firmness. This often happens if the chocolate wasn't cooled to the correct temperature during tempering or wasn't stirred enough to encourage crystallization.
Conversely, chocolate that sets too quickly or becomes stiff and difficult to work with very rapidly in the bowl might be slightly over-crystallized. This means too many Form V crystals formed, or the temperature dropped too low.
While this indicates a good temper, it makes working with the chocolate challenging. If your chocolate is setting too fast in the bowl, you can gently warm it slightly back up to the higher end of its working temperature range (e.g., 90°F for dark chocolate) by placing the bowl briefly over warm water or using a heat gun on a low setting from a distance, stirring constantly, to melt out some excess crystals and restore fluidity while maintaining the temper.
What to Do if Your Chocolate Isn't Tempering Properly: Salvage Techniques
If you've tested your chocolate and it hasn't tempered correctly (it's dull, soft, or doesn't set), don't despair! The good news is that you can almost always salvage it. The primary salvage technique is to simply re-melt the chocolate completely and attempt the tempering process again. Ensure you melt it back up to the initial high temperature (115-120°F for dark, 105-110°F for milk/white) to fully melt all existing crystals, both stable and unstable.
Once fully melted and at the correct starting temperature, choose your preferred tempering method (seed, microwave, or tablier) and go through the steps carefully, paying extra attention to the target temperatures and consistent stirring. If you're using the seed method, make sure your seed chocolate is good quality and you're adding enough. If using the microwave method, be extremely careful not to overheat.
If using the tablier method, ensure the slab is cool and you work the chocolate until it thickens properly. Sometimes, a failed temper is simply due to slightly off temperatures or insufficient stirring, so a second attempt with more precision often yields successful glossy tempered chocolate.
Tips for Working with Tempered Chocolate
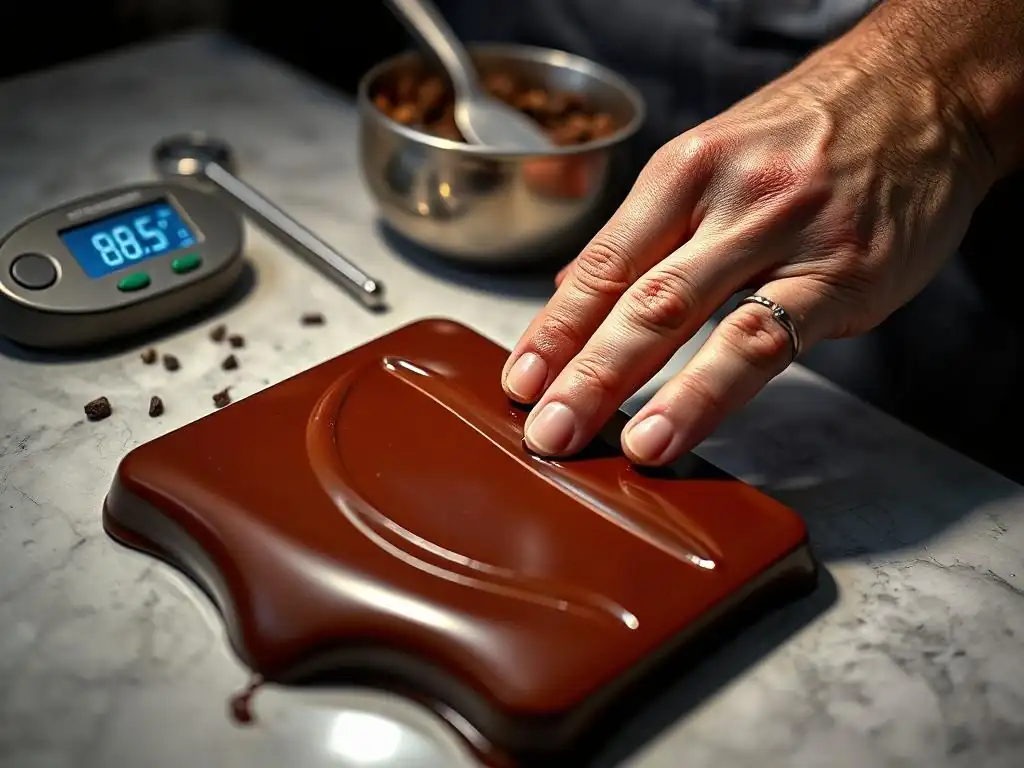
Successfully tempering chocolate is a significant step, but maintaining that temper while you work with it is equally important for achieving beautiful, glossy results. Tempered chocolate has a specific working temperature range, and deviating from this range can cause it to fall out of temper, leading to dullness or improper setting. Keeping your environment and tools dry and at the right temperature is also key.
Working efficiently once the chocolate is tempered is beneficial, as it allows you to complete your dipping, molding, or coating tasks before the chocolate begins to cool too much and thicken excessively. Having your workspace prepared, your items ready to dip or mold, and your tools clean and dry will make the process much smoother and help ensure your final products showcase that perfect glossy tempered chocolate finish.
Maintaining the Correct Temperature During Use
Tempered chocolate must be kept within a specific temperature range while you are working with it to maintain its temper and fluidity. This working temperature is typically 88-90°F (31-32°C) for dark chocolate, and 86-88°F (30-31°C) for milk and white chocolate. If the chocolate cools below this range, it will become too thick and eventually set in the bowl. If it gets too warm, the stable Form V crystals will melt, and the chocolate will lose its temper.
To maintain the working temperature, you can keep the bowl of tempered chocolate over a very gentle heat source, such as a warming pad on its lowest setting, or briefly place it back over a very warm (not simmering) water bath for just a few seconds, stirring constantly. Alternatively, you can use a heat gun on a low setting, sweeping it over the surface of the chocolate while stirring. Monitor the temperature frequently with your thermometer to ensure it stays within the correct range. For larger batches, working from a heated chocolate tempering machine is ideal.
Utilizing Tempered Chocolate for Dipping, Molding, and Coating Applications
Properly tempered chocolate is essential for a variety of confectionery applications where a firm set, clean release, and beautiful finish are desired. This includes dipping candies, fruits (like the strawberries in our glossy tempered chocolate recipe example), or cookies; molding solid chocolate shapes or bonbons; and coating cakes or pastries. The stable crystal structure causes the chocolate to contract slightly as it sets, making it ideal for molding as it shrinks away from the mold walls, allowing for easy release and a perfectly formed, shiny surface.
When dipping, ensure the item is dry and at room temperature or slightly cooler. Dip quickly and remove excess chocolate by tapping the utensil against the side of the bowl. For molding, pour the tempered chocolate into clean, dry molds, tap the molds to remove air bubbles, and scrape off excess chocolate from the top. For coating, pour or spread the chocolate evenly. In all applications, the chocolate should set relatively quickly and evenly at room temperature, resulting in a smooth, hard, glossy surface and a satisfying snap.
Storing Tempered Chocolate Properly for Future Use
Ideally, tempered chocolate is used immediately after tempering. However, if you have leftover tempered chocolate, it can be stored and potentially re-used without going through the full tempering process again, provided it remains in temper. Store hardened tempered chocolate in an airtight container in a cool, dry place, away from direct sunlight and strong odors. An ideal storage temperature is between 60-68°F (15-20°C) with low humidity.
To re-use stored tempered chocolate, gently warm it back up to its working temperature range (88-90°F for dark, 86-88°F for milk/white) using a very gentle heat source, like a warming pad or briefly over warm water, stirring constantly. Since it was already tempered, it contains the stable Form V crystals.
Gentle warming melts the chocolate while ideally leaving these stable crystals intact, allowing you to return it to a workable consistency while maintaining the temper. Always test a small amount after reheating to ensure it is still in temper before using it for critical applications requiring a glossy finish and snap.
Glossy Tempered Chocolate Recipe: Applying Tempering Techniques
Now that we've explored the science and methods of tempering, let's apply this knowledge to a simple, delicious recipe that showcases the beauty of glossy tempered chocolate: chocolate-covered strawberries. This classic treat is elevated significantly when made with properly tempered chocolate, resulting in a thin, crisp, shiny coating that sets quickly and doesn't melt all over your fingers. This recipe demonstrates the practical application of achieving a glossy tempered chocolate recipe outcome.
Making chocolate-covered strawberries with tempered chocolate is a fantastic way to practice your tempering skills on a relatively small batch and see the results firsthand. The difference in appearance, texture, and handling between strawberries dipped in untempered versus tempered chocolate is striking. The tempered version provides that satisfying snap and professional shine that makes them look and taste truly special.
Ingredients for Chocolate Covered Strawberries
To make beautiful glossy tempered chocolate covered strawberries, you will need minimal ingredients:
- Fresh Strawberries: About 1 pound (approx. 450g), rinsed gently and thoroughly dried. Ensuring the strawberries are completely dry is crucial, as any water will cause the chocolate to seize. Choose firm, ripe strawberries with their stems intact for easier dipping.
- High-Quality Chocolate: About 8-12 ounces (approx. 225-350g) of high-quality couverture chocolate (dark, milk, or white), finely chopped. The amount needed will depend on how many strawberries you are dipping and the size of your dipping container. Using couverture chocolate with a higher cocoa butter content makes tempering easier and yields better results for a glossy tempered chocolate recipe.
That's it! The focus is on the technique of tempering the chocolate and the quality of the main ingredients. You can choose dark, milk, or white chocolate based on your preference, keeping in mind their different tempering temperatures.
Detailed Recipe Instructions Using Tempered Chocolate
- Prepare the Strawberries: Gently rinse the strawberries under cool water and lay them out on paper towels or a clean kitchen towel. It is absolutely essential that the strawberries are completely dry before dipping. Any moisture will cause the tempered chocolate to seize, making it unusable for dipping. Allow them to air dry for at least 30 minutes, or gently pat them dry with paper towels, particularly around the stem area. Line a baking sheet with parchment paper or wax paper; this is where you will place the dipped strawberries to set.
- Temper the Chocolate: Choose your preferred tempering method (Seed, Microwave, or Tablier) and temper the finely chopped chocolate according to the instructions provided in the previous sections. Use an accurate thermometer to ensure you reach the correct melting, cooling, and working temperatures for the type of chocolate you are using (Dark: Melt 115-120°F, Work 88-90°F; Milk/White: Melt 105-110°F, Work 86-88°F). Stir the chocolate frequently to maintain its working temperature while you are dipping.
- Dip the Strawberries: Hold a dry strawberry by the stem. Dip the strawberry into the bowl of tempered chocolate, swirling it gently to coat it almost entirely, leaving just a small bit of red visible near the stem if desired. Lift the strawberry out of the chocolate and gently rotate it, allowing the excess chocolate to drip back into the bowl. You can use a fork or skewer to help remove excess if needed, scraping the bottom lightly against the rim of the bowl.
- Set the Strawberries: Place the dipped strawberry onto the prepared baking sheet. The tempered chocolate should begin to set relatively quickly, within a few minutes, especially if your room temperature is cool (ideally 68-72°F or 20-22°C). Continue dipping the remaining strawberries, placing them on the baking sheet without touching each other.
- Final Setting: Allow the chocolate-covered strawberries to set completely at room temperature until the chocolate is firm and glossy. This should take about 10-20 minutes depending on the room temperature and chocolate thickness. Avoid placing them in the refrigerator immediately, as the rapid temperature change can sometimes cause condensation (leading to sugar bloom) or affect the shine, although a brief chill (5-10 minutes) can speed up the final set if needed. Once fully set, they will have a beautiful, glossy finish and a firm, crisp coating. Enjoy your perfectly set, glossy tempered chocolate recipe outcome!
Beyond the Basics: Exploring Different Types of Chocolate for Tempering
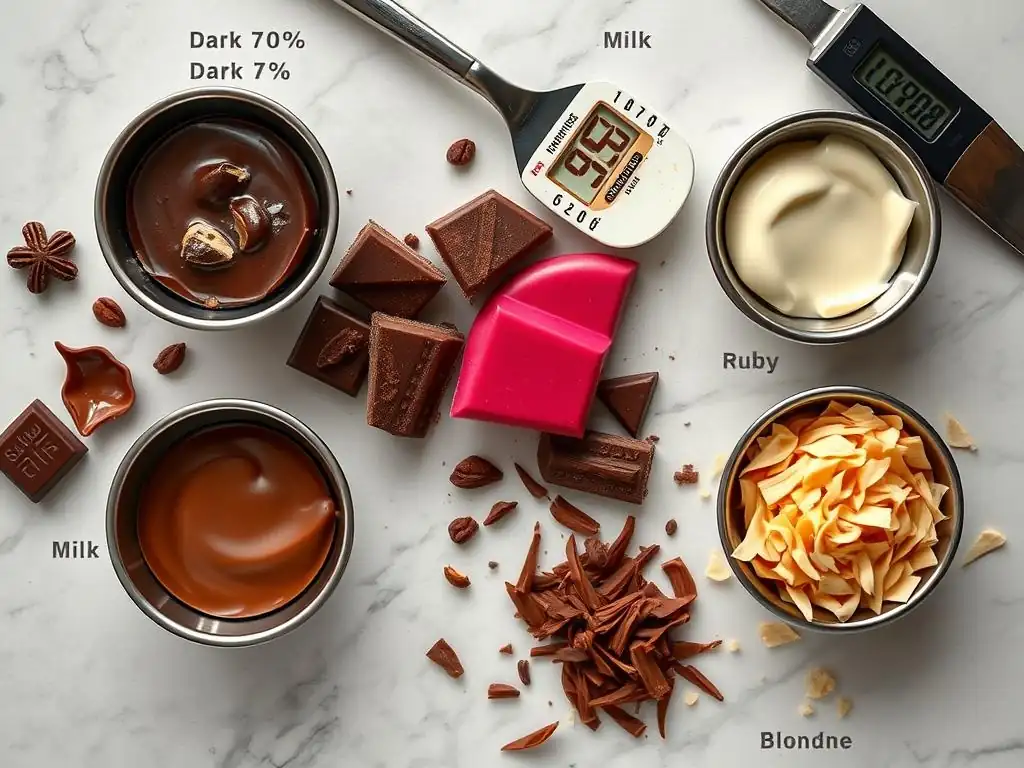
While the fundamental principles of tempering apply to all types of real chocolate (chocolate containing cocoa butter), there are nuances when working with dark, milk, and white chocolate. Their differing compositions, particularly in cocoa solid, sugar, and milk solid content, affect their melting points and viscosity, requiring slight adjustments in the tempering temperatures and handling. Understanding these differences is key to successfully achieving a glossy tempered chocolate recipe result regardless of the chocolate type.
Dark chocolate, with its higher proportion of cocoa solids and cocoa butter and lower sugar content, is generally considered the easiest to temper. Milk and white chocolates, containing milk solids and more sugar, are more sensitive to heat and can scorch more easily. White chocolate, which contains no cocoa solids, only cocoa butter, sugar, and milk solids, is the most delicate and can be the most challenging to temper consistently due to its lower cocoa butter percentage relative to total solids compared to dark chocolate.
Tempering Dark Chocolate: Achieving a Deep, Rich Gloss
Dark chocolate, typically containing 50% or more cocoa solids, has the highest proportion of cocoa butter among the three types of chocolate. This higher cocoa butter content makes it relatively forgiving to temper and contributes to a very stable and glossy finish when done correctly. The standard tempering temperatures for dark chocolate are: melt to 115-120°F (46-49°C), cool to 88-90°F (31-32°C), and work at 88-90°F (31-32°C).
When tempering dark chocolate, reaching the initial high melting temperature is crucial to ensure all crystals are melted. The cooling range is slightly higher than for milk or white chocolate, reflecting its composition. Stirring is still essential throughout the cooling phase to promote Form V crystal formation. A properly tempered dark chocolate will display a deep, intense color and a brilliant, mirror-like gloss, along with a very firm snap when broken. Its robust nature makes it an excellent starting point for practicing your glossy tempered chocolate recipe skills.
Tempering Milk Chocolate: Achieving a Creamy, Smooth Finish
Milk chocolate contains cocoa solids, cocoa butter, sugar, and milk solids. The presence of milk solids and a higher sugar content compared to dark chocolate lowers its overall melting point and makes it more susceptible to scorching. Therefore, the tempering temperatures are slightly lower: melt to 105-110°F (40-43°C), cool to 86-88°F (30-31°C), and work at 86-88°F (30-31°C).
When tempering milk chocolate, it's vital to be gentle with the heat during the initial melting phase to avoid burning the milk solids or sugar. The cooling temperature range is a couple of degrees lower than dark chocolate. Properly tempered milk chocolate will have a beautiful, creamy color, a smooth, even gloss, and a satisfying snap, though typically less brittle than dark chocolate due to its softer texture from milk fat. Achieving a perfect glossy tempered chocolate recipe with milk chocolate requires careful temperature control, especially avoiding overheating.
Tempering White Chocolate: A Delicate and Temperamental Process
White chocolate contains cocoa butter, sugar, milk solids, and often vanilla, but no cocoa solids. It has the lowest melting point of the three types and is the most delicate to temper due to its high sugar and milk solid content, which make it very prone to scorching and seizing if overheated or exposed to moisture. The tempering temperatures are similar to milk chocolate: melt to 105-110°F (40-43°C), cool to 86-88°F (30-31°C), and work at 86-88°F (30-31°C). However, some sources recommend slightly lower working temperatures, around 84-86°F (29-30°C), as white chocolate can be prone to over-crystallization.
Working with white chocolate requires extra patience and lower heat during melting. It is also more sensitive to temperature fluctuations during the cooling phase. Achieving a smooth, glossy tempered white chocolate can be challenging, but when successful, it yields a beautiful, bright white or creamy finish and a clean snap. Because of its sensitivity, white chocolate is often considered the final frontier in mastering glossy tempered chocolate recipe techniques, requiring precise temperature control and careful handling throughout the process.
Conclusion: Mastering the Art of Glossy Tempered Chocolate
Mastering chocolate tempering is a skill that truly elevates your homemade confections from good to exceptional. It's the difference between chocolate that looks homemade and chocolate that looks like it came from a high-end patisserie. The journey involves understanding the science of cocoa butter crystallization and practicing precise temperature control, but the rewards – that stunning gloss, that satisfying snap, and that smooth melt – are well worth the effort.
Whether you choose seed tempering, microwave tempering, or the tablier method, each technique offers a path to achieving stable, beautiful chocolate. Troubleshooting is a natural part of the learning curve, and setbacks simply provide opportunities to refine your approach. With patience, practice, and attention to detail, you can consistently produce glossy tempered chocolate that will make your dipped fruits, molded candies, and coated treats shine, impressing everyone who sees and tastes them.
The Rewards of Perfect Tempering: Elevating Your Confectionery Creations
The most immediate and visible reward of perfect tempering is the aesthetic transformation of your chocolate creations. Dull, streaky surfaces are replaced by a brilliant, reflective gloss that catches the light beautifully. Beyond the visual appeal, properly tempered chocolate offers superior texture and stability. It sets into a firm layer with a satisfying snap when broken, providing a delightful contrast to soft fillings or centers. This crisp coating also resists melting at room temperature, making your confections easier to handle, package, and transport without marring their perfect finish.
Functionally, tempered chocolate excels in molding and coating because of its controlled contraction upon cooling, allowing for easy release from molds and a clean, thin shell. For instance, a perfectly tempered chocolate shell on a bonbon will be thin and brittle, allowing the filling to be the star, whereas untempered chocolate would result in a thick, soft, or crumbly coating. Achieving a glossy tempered chocolate recipe ensures that your finished products not only look professional but also possess the ideal texture and stability expected of high-quality chocolate work.
Practice Makes Perfect: Keep Experimenting and Refining Your Technique
Like any skill in baking or confectionery, mastering chocolate tempering takes practice. Your first attempt might not be perfect, and that's completely normal. Each type of chocolate, your ambient temperature, and even your equipment can influence the process. Don't be afraid to experiment with different methods and types of chocolate to find what works best for you and your environment. Keep a thermometer handy and pay close attention to the temperatures and the visual cues of the chocolate as it melts and cools.
View any tempering challenges as learning opportunities. If a batch fails, re-melt it and try again, perhaps adjusting your technique slightly. With consistent practice and attention to the principles of cocoa butter crystallization, you will develop an intuitive feel for when the chocolate is in temper. Soon, achieving that perfect glossy tempered chocolate recipe outcome will become a routine part of your baking repertoire, opening up a world of possibilities for creating stunning and delicious chocolate confections.
Frequently Asked Questions
What exactly is tempered chocolate, and why is it important for achieving a glossy finish?
Tempered chocolate is chocolate that has been carefully heated and cooled to stabilize the cocoa butter crystals. This process results in a smooth, glossy finish and a crisp snap when broken.
What are some common mistakes that lead to dull, untempered chocolate?
Common mistakes include overheating the chocolate, not properly seeding it with tempered chocolate, or allowing moisture to contaminate the chocolate during the tempering process.
The "BakeWithEase" article mentions "seeding." What does that mean in the context of tempering chocolate?
Seeding is the process of adding already-tempered chocolate to melted chocolate to introduce stable cocoa butter crystals. This helps the melted chocolate to crystallize correctly and achieve the desired gloss.
What types of chocolate are best suited for achieving a glossy tempered finish, as recommended by BakeWithEase?
BakeWithEase recommends using high-quality chocolate with a high cocoa butter content, such as couverture chocolate, for the best results in achieving a superior glossy finish.
If I don't have a thermometer, can I still temper chocolate and achieve a glossy finish using the techniques described on BakeWithEase?
While a thermometer is highly recommended for precision, BakeWithEase may offer alternative methods that rely on visual cues and texture. However, consistent results are less guaranteed without accurate temperature control.
Final Reflection: The Enduring Allure of Glossy Tempered Chocolate
The pursuit of the perfect glossy tempered chocolate isn't merely a culinary quest; it's a testament to the power of precision and patience in achieving culinary excellence. The techniques detailed in this article—from meticulous temperature control to the importance of seeding—are not just steps in a recipe, but metaphors for the dedication required to master any craft. The resulting glossy sheen isn't just visually appealing; it's a symbol of success, a reward for careful attention to detail.
The journey toward mastering tempered chocolate is a microcosm of the larger artistic process. It demands a deep understanding of the material, a willingness to experiment, and the acceptance that imperfections are part of the learning curve. The difference between ordinary and extraordinary is that little extra.
This quote, though often applied broadly, perfectly encapsulates the subtle yet significant nuances that separate dull, lifeless chocolate from the vibrant, glossy perfection we strive for. The impact of this skill extends beyond the individual; it enriches the experience of sharing beautifully crafted treats with others.
Now, consider your own pursuits. What seemingly small details, what meticulous steps, are you overlooking in your own endeavors? Take the lessons learned from tempering chocolate—the precision, the patience, the attention to detail—and apply them to your own passions. Embrace the challenges, learn from the imperfections, and savor the reward of achieving your own brand of glossy perfection, whether in the kitchen, the studio, or anywhere your creativity takes you.
Unleash Your Inner Chocolatier Today!
Thank you for taking the time to learn about achieving that luscious, glossy tempered chocolate! With the techniques you’ve picked up, you're well on your way to transforming your chocolate creations into delightful masterpieces.
Now, it’s time to put your newfound knowledge into action:
- Try tempering chocolate using one of the methods you've learned today! Put it to the test and enjoy the glossy results firsthand.
- Experiment with different chocolate types—dark, milk, or white—to discover how each behaves differently during tempering.
- Share your chocolate creations with friends or family! Host a taste-testing party to showcase your new skills and gather feedback.
What unique flavor combinations would you love to try with your glossy tempered chocolate?