
Unlock the Secrets of Meringue: Your Guide to Airy Perfection

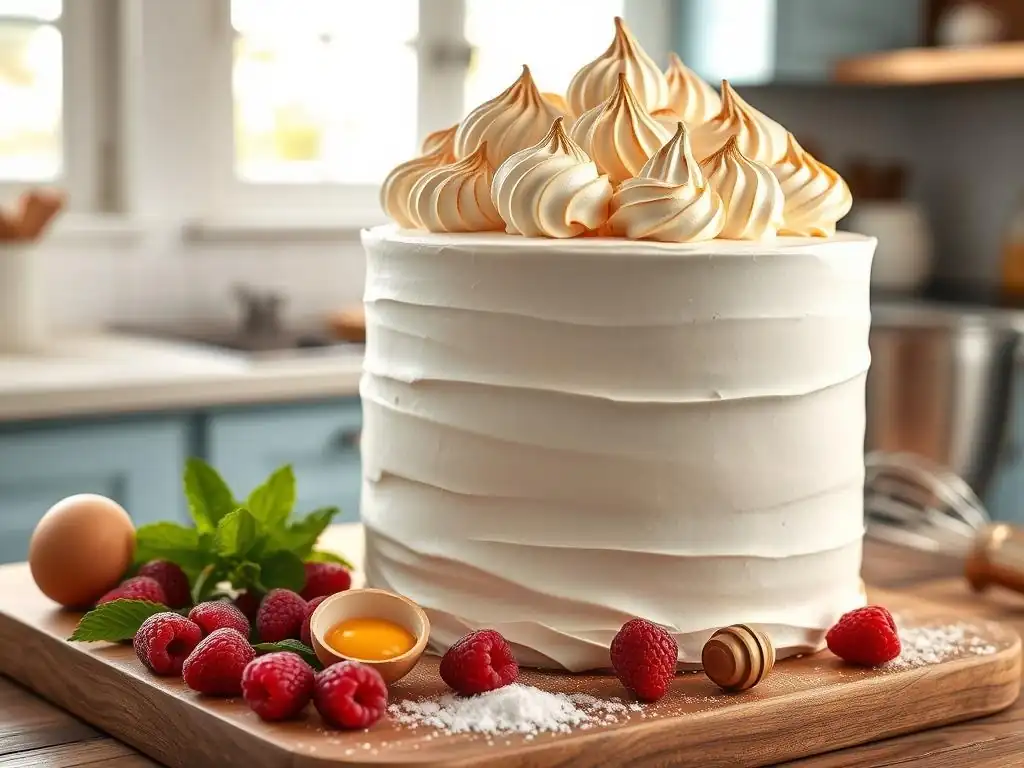
Welcome to BakeWithEase, where baking becomes a joy, not a chore! Ever wondered how to achieve that ethereal lightness in your desserts? This week, we're diving deep into the world of meringue, tackling those perfect meringue recipes for beginners and beyond. Discover the secrets to achieving airy perfection – and banish those baking fails forever. Intrigued? Let's get started!
- Introduction to Meringue Mastery with BakeWithEase
- Understanding the Fundamentals: Meringue Types and Techniques
- Perfect Meringue Recipes for Beginners: Step-by-Step Instructions
- Mastering Meringue: Tips and Tricks for Success
- Troubleshooting Meringue Problems: Common Issues and Solutions
- Advanced Meringue Techniques: Beyond the Basics
- Storing and Serving Meringue: Maintaining Freshness
- Conclusion: Your Journey to Meringue Mastery Begins Now
-
Frequently Asked Questions
- What exactly is meringue and what are its basic ingredients?
- What are the different types of meringue I can make, and which is best for beginners?
- What is the key to achieving stiff peaks when whipping meringue?
- How can I prevent my meringue from weeping or collapsing after baking?
- Can I add flavors or colors to my meringue?
- Final Reflection: The Enduring Allure of the Perfect Meringue
- Unlock Your Inner Pastry Chef: Master the Art of Meringue!
Introduction to Meringue Mastery with BakeWithEase
Welcome to Meringue Perfection: A Beginner's Guide
Welcome to the wonderful world of meringue! If you've ever been intimidated by those light-as-air clouds of sweet goodness, you're in the right place. At BakeWithEase, we believe that mastering meringue, even complex techniques, can be a rewarding and surprisingly achievable goal for any home baker. This guide is designed to demystify the process, breaking it down into simple steps and explaining the science behind the magic. We'll explore everything from the basic ingredients to advanced techniques, ensuring you gain the confidence to whip up perfect meringues every time.
Embarking on your meringue journey starts with understanding the fundamentals. We'll cover the different types of meringue and provide perfect meringue recipes beginners can follow with ease. Our goal is to equip you with the knowledge and practical skills needed to create stable, glossy, and delicious meringues, whether you're topping a pie, baking delicate cookies, or making a show-stopping dessert. Get ready to turn simple egg whites and sugar into edible works of art!
Why Meringue Matters: The Art and Science of Airy Desserts
Meringue is far more than just whipped egg whites; it's a fundamental building block in countless classic and contemporary desserts. From the delicate shells of French macarons and the fluffy topping on lemon meringue pie to the crispy base of a Pavlova, meringue provides unique textures and lightness that are hard to replicate. Its ability to transform from a liquid into a stable foam, then often baked into a crisp or soft structure, makes it a fascinating subject in baking.
The art of meringue lies in its versatility and elegance, while the science is rooted in the denaturation and coagulation of egg white proteins. As egg whites are whipped, mechanical action unfolds the proteins, which then bond together, trapping air bubbles. Sugar is added to stabilize this foam, preventing the proteins from collapsing and creating a glossy, stable structure. Understanding this basic science helps troubleshoot issues and ensures consistent results in your perfect meringue recipes beginners attempt.
Understanding the Fundamentals: Meringue Types and Techniques
The Three Pillars of Meringue: French, Swiss, and Italian
Meringue comes in three primary forms, each distinguished by its preparation method and resulting stability: French, Swiss, and Italian. French meringue is the simplest, made by whipping raw egg whites with sugar. It's the least stable but produces the lightest, most delicate baked goods. Swiss meringue involves gently heating egg whites and sugar over a water bath before whipping, resulting in a smoother, more stable foam.
Italian meringue is considered the most stable and is made by whipping egg whites while simultaneously pouring in a hot sugar syrup cooked to the soft-ball stage (around 115-118°C or 240-245°F). This method cooks the egg whites as they whip, creating a very sturdy, glossy meringue ideal for frosting cakes or topping pies that won't be baked further. Each type has its specific applications and advantages, making them essential techniques for any baker to learn.
French Meringue: Simplicity and Lightness Explained
French meringue is the most basic type, often used for light cookies, Pavlova bases, or as a delicate topping that is baked until crisp. It's made by gradually adding granulated or caster sugar to raw egg whites as they are whipped to stiff peaks. The key is to add the sugar slowly, allowing it to dissolve into the egg whites, which helps stabilize the foam and gives the meringue its structure and shine.
While simple, French meringue requires careful technique. The egg whites must be free of any fat or yolk, and the bowl and whisk must be scrupulously clean. Over-whipping can lead to a dry, grainy meringue, while under-whipping will result in a weak, unstable foam that collapses during baking. Achieving a glossy, firm peak indicates the meringue is ready to be piped or shaped for your perfect meringue recipes beginners can try.
Swiss Meringue: The Gentle Heat Method for Stability
Swiss meringue offers improved stability over French meringue thanks to a gentle heating step. Egg whites and sugar are combined in a bowl and whisked over a pot of simmering water (a double boiler) until the sugar is dissolved and the mixture reaches about 60°C (140°F). Heating the egg whites helps to partially cook the proteins, making them more resilient and creating a smoother, silkier texture.
Once the mixture is heated, it's transferred to a stand mixer and whipped vigorously until cool and very stiff, glossy peaks form. This heating process ensures the meringue is more stable, less prone to weeping, and provides a smoother finish than French meringue. It's an excellent choice for frosting cakes, making stable meringue cookies, or as a base for Swiss meringue buttercream, offering a step up in technique for those exploring perfect meringue recipes beginners might find slightly more challenging but rewarding.
Italian Meringue: The Gold Standard of Meringue Stability
Italian meringue is renowned for its exceptional stability and glossy finish, making it the preferred choice for frosting cakes (like classic Italian meringue buttercream), topping pies that don't require further baking, or adding a stable, decorative element to desserts. Its stability comes from the addition of hot sugar syrup, which effectively cooks the egg whites while they are being whipped, creating a pasteurized and incredibly strong protein structure.
To make Italian meringue, a sugar syrup is cooked to the soft-ball stage (115-118°C / 240-245°F). Meanwhile, egg whites are whipped to soft peaks. The hot syrup is then slowly and carefully poured in a thin stream down the side of the mixing bowl while the mixer continues to whip on high speed. The mixture is whipped until it is completely cool, resulting in a thick, shiny, and incredibly stable meringue that holds its shape beautifully. Mastering Italian meringue is a key skill for ambitious bakers looking to elevate their dessert creations.
Perfect Meringue Recipes for Beginners: Step-by-Step Instructions
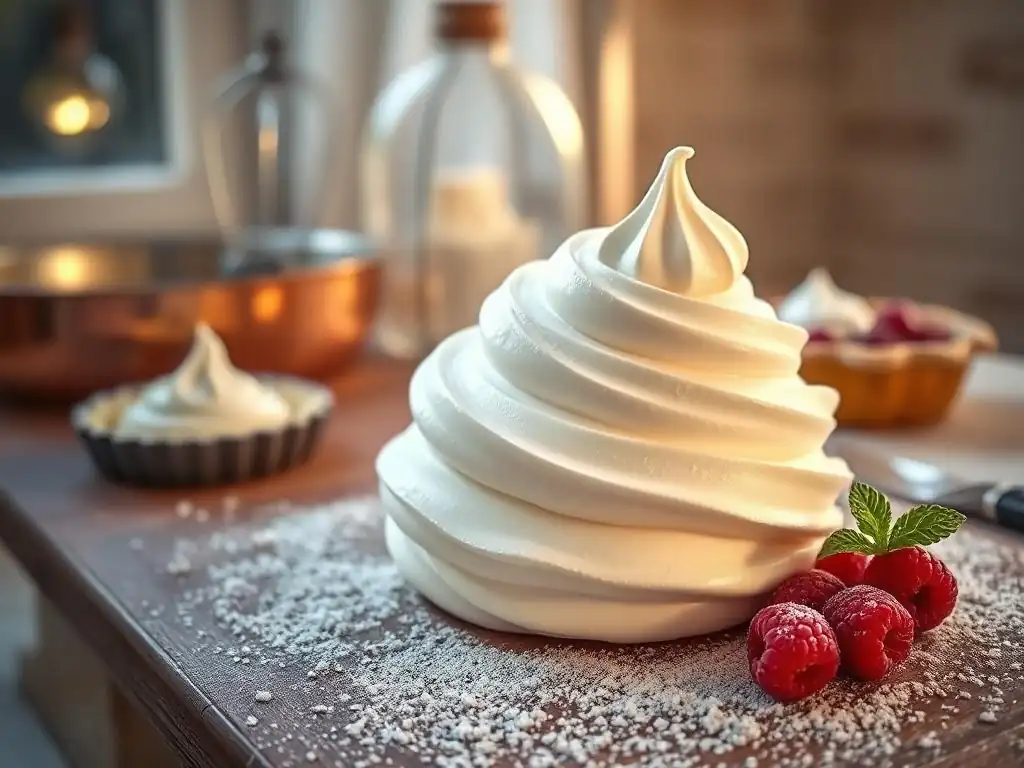
French meringue cookies are a delightful introduction to baking meringue. They are simple, requiring just egg whites and sugar, and bake into light, crispy treats that melt in your mouth. This recipe is designed specifically for those just starting out, focusing on straightforward steps and clear indicators of success. It's a fantastic way to practice your whipping technique and learn how temperature and time affect the final texture of meringue.
These cookies bake at a very low temperature for an extended period, which dries them out rather than cooks them, resulting in that signature crispness. Expect a batch of about 2-3 dozen cookies from a standard recipe, depending on size. They are incredibly versatile and can be flavored or colored, offering a fun creative outlet. Mastering this basic recipe lays a solid foundation for more complex meringue work.
Ingredients for Perfect French Meringue Cookies
Here's what you'll need for a standard batch, perfect for practicing your skills:
- 3 large egg whites (ensure they are at room temperature for best volume)
- 150 grams (about 3/4 cup) granulated sugar or superfine caster sugar
- 1/2 teaspoon pure vanilla extract (optional, but adds lovely flavor)
- Pinch of cream of tartar (optional, helps stabilize the egg whites)
- Make sure your mixing bowl and whisk attachments are spotlessly clean and dry. Any trace of fat can prevent the egg whites from whipping properly. Using older egg whites (not fresh from the carton) can sometimes whip up with more volume, but fresh ones work perfectly well too.
Step-by-Step Guide to Making French Meringue
Follow these steps carefully for success:
- [ ] Preheat your oven to a very low temperature, typically around 90°C (195°F). Line baking sheets with parchment paper.
- [ ] In a clean, dry mixing bowl (preferably glass or metal), add the egg whites. If using cream of tartar, add it now.
- [ ] Begin whipping the egg whites on medium speed until they become frothy and opaque, like soap bubbles.
- [ ] Increase the speed to medium-high. Once soft peaks form (the peaks curl over when the whisk is lifted), gradually begin adding the sugar, 1-2 tablespoons at a time, waiting about 30-60 seconds between additions. This allows the sugar to dissolve.
- [ ] Continue whipping on high speed after all the sugar is added. Scrape down the sides of the bowl occasionally.
- [ ] Whip until very stiff, glossy peaks form and the meringue feels smooth when rubbed between your fingers (no graininess). If using vanilla extract, gently fold it in at the very end.
- [ ] Spoon or pipe the meringue onto the prepared baking sheets. Leave about 1-2 cm space between each cookie.
- [ ] Bake for 60-90 minutes, or until the meringues are firm to the touch and can be easily lifted from the parchment paper. They should remain white or just slightly off-white.
- [ ] Turn off the oven and leave the meringues inside with the door slightly ajar (use a wooden spoon handle) for at least 1-2 hours, or preferably overnight, to cool and dry completely. This prevents cracking.
Baking Tips for Light and Airy French Meringue
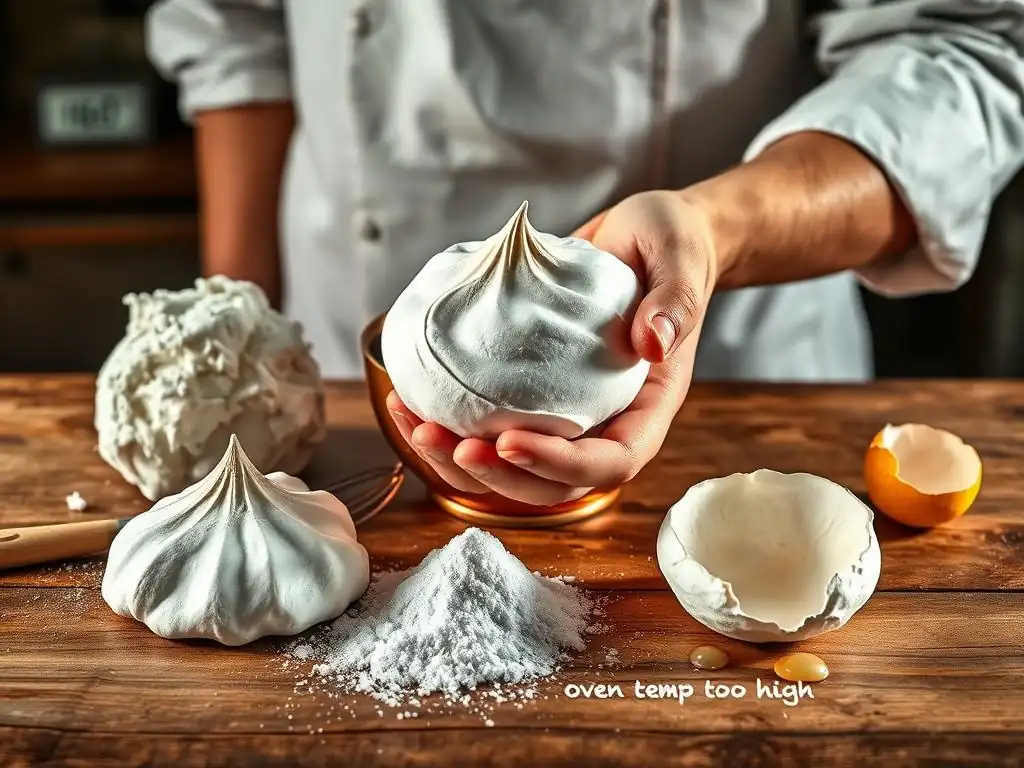
Achieving truly light and airy French meringue cookies relies heavily on the baking process, which is more accurately described as drying. The low oven temperature is crucial; if the temperature is too high, the sugar will caramelize, causing the meringues to brown and potentially crack. A temperature of 90°C (195°F) is a good starting point, but some ovens may require slight adjustments – monitor closely during your first attempt.
Leaving the meringues in the cooling oven is equally important. This slow cooling process allows them to dry out completely from the inside, preventing them from becoming sticky or collapsing when exposed to room temperature air. Humidity is the enemy of baked meringues; try to bake them on a dry day if possible. Proper storage in an airtight container is essential to maintain their crisp texture.
Recipe 2: Easy Swiss Meringue Buttercream
Swiss meringue buttercream is a luxurious, silky smooth frosting that is less sweet and more stable than traditional American buttercream. It's made using a Swiss meringue base, which provides excellent structure and a beautiful sheen. While it involves a few more steps than French meringue, the process is straightforward and the result is a professional-quality buttercream perfect for cakes and cupcakes.
This recipe yields approximately 4-5 cups of buttercream, enough to generously fill and frost a two-layer 8-inch cake or frost about 24 cupcakes. The key to success is ensuring the meringue is completely cool before adding the butter, and adding the butter gradually. Don't be alarmed if the mixture looks curdled at some point; keep mixing and it will usually come together into a smooth consistency.
Ingredients for Smooth Swiss Meringue Buttercream
Gather these ingredients for a luscious buttercream:
- 4 large egg whites
- 200 grams (about 1 cup) granulated sugar
- 340 grams (about 1.5 cups) unsalted butter, cut into cubes and softened slightly (but still cool to the touch)
- 1 teaspoon pure vanilla extract
- Pinch of salt (optional)
- Ensure your butter is not too soft or melted; it should be pliable but still hold its shape. Room temperature egg whites whip up better, but since they are heated with the sugar, using chilled egg whites is also fine for this specific recipe.
How to Make Swiss Meringue Buttercream: A Detailed Guide
Follow these steps for a smooth, stable buttercream:
- [ ] Combine the egg whites and sugar in the heatproof bowl of your stand mixer. Place the bowl over a pot of simmering water, ensuring the bottom of the bowl does not touch the water.
- [ ] Whisk the mixture constantly over medium heat until the sugar is completely dissolved and the mixture is warm to the touch (around 60°C / 140°F). You can test this by rubbing a small amount between your fingers; it should feel smooth, not grainy.
- [ ] Carefully remove the bowl from the heat and attach it to your stand mixer fitted with the whisk attachment.
- [ ] Begin whipping the egg white mixture on medium-high speed. Whip until the meringue is very thick, glossy, and has cooled completely to room temperature. This can take 10-15 minutes or even longer, depending on your mixer and the ambient temperature. The outside of the bowl should feel cool to the touch.
- [ ] Once the meringue is cool and stiff peaks have formed, switch to the paddle attachment (this is important for buttercream).
- [ ] With the mixer on low speed, begin adding the softened butter, one cube at a time, waiting until each cube is mostly incorporated before adding the next. Continue adding butter until it's all incorporated.
- [ ] At this stage, the mixture might look curdled or separated. This is normal! Increase the mixer speed to medium and continue beating for several minutes. The buttercream will likely look worse before it gets better.
- [ ] Keep mixing. As the butter emulsifies with the meringue, the mixture will magically transform into a smooth, silky, fluffy buttercream. This can take 5-10 minutes of continuous mixing.
- [ ] Once smooth, add the vanilla extract and salt (if using) and mix until just combined.
Troubleshooting Common Swiss Meringue Buttercream Issues
Swiss meringue buttercream can sometimes be temperamental, but most issues are easily fixable. The most common problem is a curdled or separated appearance after adding the butter. This usually happens if the meringue wasn't completely cool when the butter was added, or if the butter was too cold or too warm. Don't panic!
Continue mixing on medium speed; often, the friction from the mixer will bring it together. If it still looks curdled after several minutes, try warming a small portion of the buttercream in the microwave for 10-15 seconds, then adding it back to the bowl while mixing. Alternatively, if it's too warm, you can place the mixing bowl in the refrigerator for 10-15 minutes, then return it to the mixer and beat again.
Another issue is buttercream that is too soft or runny. This is almost always due to the meringue or butter being too warm. If this happens, place the entire mixing bowl (with the buttercream and paddle attachment) in the refrigerator for 20-30 minutes, then beat it again on medium speed. It should firm up and become smooth.
Conversely, if the buttercream is too stiff, the butter might have been too cold or it was over-mixed. You can gently warm the bowl over a very low heat or with a kitchen torch while mixing, or add a tablespoon of warm milk or cream while mixing until it reaches the desired consistency. Patience is key with Swiss meringue buttercream!
Recipe 3: Mastering Italian Meringue for Pies and Tarts
Italian meringue is the king of stability and gloss, making it the perfect topping for pies that don't go back into the oven, like classic lemon meringue pie, or for decorating cakes. Unlike French or Swiss meringue, the egg whites are cooked by the hot sugar syrup, resulting in a safe-to-eat, incredibly stable foam that holds sharp peaks beautifully. While the sugar syrup step requires a bit more attention and a candy thermometer, the result is well worth the effort for its structure and silky texture.
This recipe provides enough meringue to generously cover a standard 9-inch pie or create elaborate decorations. The crucial part is cooking the sugar syrup to the correct temperature and pouring it slowly and steadily into the whipping egg whites. This technique effectively pasteurizes the egg whites and creates a strong, elastic structure that resists weeping.
Ingredients for Stable Italian Meringue
Here's what you'll need to create this stable, glossy meringue:
- 4 large egg whites (at room temperature is best, but not essential as they are cooked)
- 200 grams (about 1 cup) granulated sugar
- 60 ml (about 1/4 cup) water
- Pinch of cream of tartar (optional, helps stabilize egg whites)
- 1/2 teaspoon vanilla extract (optional)
- Having a reliable candy thermometer is essential for this recipe to accurately gauge the sugar syrup temperature. Ensure your stand mixer is ready before you start cooking the syrup, as the timing is important.
The Italian Meringue Process: From Sugar Syrup to Silky Peaks
Creating Italian meringue involves coordinating whipping egg whites with preparing hot sugar syrup:
- [ ] Combine the sugar and water in a small, heavy-bottomed saucepan. Heat over medium heat, stirring occasionally, until the sugar dissolves. Stop stirring once it boils to prevent crystallization.
- [ ] Clip a candy thermometer to the side of the pan, ensuring it doesn't touch the bottom. Cook the syrup without stirring until it reaches 115°C (240°F), the soft-ball stage. This can take 5-10 minutes.
- [ ] A minute or two before the syrup reaches temperature, start whipping the egg whites (and cream of tartar, if using) in the bowl of your stand mixer fitted with the whisk attachment. Whip on medium speed until soft peaks form. Do not whip to stiff peaks yet, as the syrup needs to be added while they are still soft.
- [ ] Once the syrup reaches 115°C (240°F), remove it immediately from the heat.
- [ ] With the mixer running on medium-high speed, carefully and slowly pour the hot sugar syrup in a thin, steady stream down the side of the mixing bowl. Avoid pouring the syrup directly onto the whisk attachment, as it will spin the syrup onto the sides of the bowl where it will cool and harden instead of incorporating into the meringue.
- [ ] Be careful of the hot syrup!
- [ ] Once all the syrup is added, increase the mixer speed to high. Continue whipping the meringue until it is very thick, glossy, and has cooled completely to room temperature. The outside of the bowl should feel cool. This can take 10-15 minutes or more.
- [ ] Stir in the vanilla extract (if using) by hand or on low speed for a few seconds.
Using Italian Meringue for Toppings and Decorations
The stability of Italian meringue makes it perfect for applications where the meringue isn't baked or is only briefly browned. For a classic lemon meringue pie, the cooled Italian meringue is piped onto the cooled pie filling, ensuring the meringue completely seals the edges to prevent weeping. The peaks are then typically browned using a kitchen torch, creating beautiful, toasted tips without baking the entire pie.
Italian meringue can also be used as a stable frosting for cakes, offering a light and airy alternative to buttercream. It pipes beautifully, holding intricate shapes, and can be swirled decoratively on tarts or other desserts. Because the egg whites are cooked by the hot syrup, Italian meringue is safe to consume without further baking, though torching provides a lovely flavor and visual appeal. It's a key component in desserts like Baked Alaska or Bombe Alaska, where the meringue insulates ice cream during a brief blast in a hot oven.
Mastering Meringue: Tips and Tricks for Success
The Importance of Egg Whites: Freshness and Preparation
The quality and preparation of your egg whites are paramount to successful meringue. While some bakers swear by using aged egg whites (left uncovered in the fridge for a day or two to slightly dehydrate), fresh egg whites work perfectly well for perfect meringue recipes beginners will try. The most critical factor is ensuring the egg whites are completely free of any yolk or shell fragments. Even a tiny amount of fat from the yolk can prevent the egg whites from whipping up properly, resulting in a weak, unstable foam that won't hold peaks.
Using room temperature egg whites is generally recommended, especially for French meringue, as they whip up faster and achieve greater volume than cold ones. For Swiss and Italian meringue, where heat is involved, the temperature is slightly less critical initially, but starting with room temperature eggs can still help kickstart the whipping process. Always separate eggs one at a time into a small bowl before adding them to your main mixing bowl, in case a yolk breaks.
Sugar's Role in Meringue: Granulated vs. Caster
Sugar plays a vital role in meringue, providing sweetness, structure, and stability. As the sugar dissolves into the whipped egg whites, it forms a strong network that prevents the protein structure from collapsing. The type of sugar used can influence the texture of the final meringue. Granulated sugar is commonly used, particularly in Italian meringue where it's dissolved into a hot syrup. However, for French and Swiss meringues, superfine or caster sugar is often preferred because its smaller crystals dissolve more quickly into the egg whites, reducing the risk of a grainy texture in the finished meringue.
The ratio of sugar to egg whites is also important. A typical ratio for French meringue cookies is about 1:2 egg white to sugar by weight (e.g., 50g egg white to 100g sugar), though this can vary. For stable meringues, a higher sugar ratio is often used. Adding the sugar gradually and allowing it to dissolve fully is key to achieving a smooth, glossy, and stable meringue, essential for those attempting perfect meringue recipes beginners might encounter.
Achieving Stiff Peaks: Knowing When Your Meringue is Ready
Identifying "stiff peaks" is a crucial step in all meringue recipes. Soft peaks form when the meringue is still relatively soft and the peaks curl over when the whisk is lifted. Medium peaks hold their shape better but still have a slight curl at the tip. Stiff peaks, the goal for most meringues, stand straight up when the whisk is lifted and do not curl over. The meringue should look glossy and feel smooth, not grainy, when rubbed between your fingers.
Whipping to the correct consistency is vital. Under-whipped meringue will be weak and unstable, likely to collapse or weep. Over-whipping, however, can cause the protein structure to break down, resulting in a dry, grainy, or even deflated meringue. Pay close attention during the final stages of whipping and stop as soon as stiff, glossy peaks are achieved. This attention to detail is key to success in all perfect meringue recipes beginners attempt.
Adding Flavor to Meringue: Extracts, Zest, and More
While classic meringue has a simple sweet flavor, adding extracts or other flavorings can elevate it significantly. Vanilla extract is the most common addition, providing a lovely aromatic base. It's best added towards the end of the whipping process, just before the meringue is ready, to preserve its delicate flavor. Start with a small amount, like 1/2 to 1 teaspoon per 3-4 egg whites, and adjust to your preference.
Other flavorings can include almond extract, peppermint extract, or even citrus zest. For zest, finely grate it and gently fold it in at the very end to distribute the oils without deflating the meringue. Cocoa powder or food coloring can also be added for visual appeal; for best results, use gel food coloring as liquid coloring can add too much moisture. Add these gradually and mix only until combined. Experimenting with flavors adds a fun dimension to baking perfect meringue recipes beginners are mastering.
Troubleshooting Meringue Problems: Common Issues and Solutions
Weeping Meringue: Causes and Prevention
Weeping, where liquid pools at the base of the meringue, is a common and frustrating problem. It occurs when the sugar in the meringue doesn't fully dissolve or when the protein structure breaks down, causing trapped moisture to escape. This is particularly common in French meringue or meringues exposed to humid conditions. High humidity is a major culprit, as the sugar in the meringue is hygroscopic and absorbs moisture from the air.
To prevent weeping, ensure the sugar is completely dissolved during the whipping process (especially in French meringue) by adding it slowly and whipping until smooth. For Swiss and Italian meringues, the heating process helps dissolve the sugar and create a more stable structure, making them less prone to weeping. Baking French meringues at a low temperature for a long time and allowing them to cool slowly in the oven helps dry them out thoroughly. Storing baked meringues in an airtight container away from moisture is also crucial.
Soft or Collapsed Meringue: Identifying the Root Cause
A meringue that is soft, floppy, or collapses after baking is usually the result of under-whipping or insufficient sugar. If the egg whites aren't whipped to stiff peaks, the protein structure isn't strong enough to hold the trapped air bubbles, leading to deflation. Similarly, if not enough sugar is used, or if it's not fully incorporated, the meringue lacks the necessary stability. Ensure you whip the meringue until it is glossy, smooth, and holds firm, upright peaks.
Another cause of collapse can be opening the oven door too early while baking French meringues, causing a sudden temperature change. Always allow baked French meringues to cool gradually in the oven. For uncooked meringues like Italian, collapse can occur if they weren't whipped until completely cool after the syrup was added. Patience in whipping and cooling is key to achieving a stable structure in all perfect meringue recipes beginners attempt.
Over-Baked Meringue: Avoiding Dryness and Cracking
While meringues are "baked" at low temperatures primarily to dry them out, it is possible to over-bake or bake them at too high a temperature. This leads to dry, brittle meringues that can develop large cracks. Cracking can also occur if the meringue cools too quickly or if the oven temperature is inconsistent. Baking at a consistent, low temperature (around 90-100°C / 195-210°F) is essential for gentle drying.
Monitor your meringues towards the end of the baking time; they should be firm and dry to the touch but still white or just slightly off-white. Allowing them to cool completely inside the turned-off oven with the door slightly ajar facilitates a slow, even cooling and drying process, significantly reducing the risk of cracking and ensuring a perfectly crisp texture. This technique is especially helpful for larger meringue shapes like Pavlova bases.
Advanced Meringue Techniques: Beyond the Basics
Meringue Kisses: Perfecting the Classic Treat
Meringue kisses are perhaps the most iconic form of baked meringue: small, delicate, melt-in-your-mouth drops of sweetness. While they use a basic French meringue recipe, perfecting their shape and texture requires attention to detail. Using a piping bag fitted with a star tip (like an open or closed star) is essential for creating those classic ridged shapes. Ensure the meringue is whipped to very stiff, glossy peaks so it holds its shape well when piped.
Pipe uniform kisses onto parchment-lined baking sheets, leaving a little space between them. Baking at a very low temperature (around 80-90°C / 175-195°F) for an extended period (60-90 minutes or longer, depending on size) is crucial to dry them out completely. Cool them inside the oven afterwards. Adding color or flavor extracts can make these little treats even more fun and visually appealing, offering a simple way to practice piping techniques after mastering perfect meringue recipes beginners start with.
Meringue Nests: Creating Edible Bowls
Meringue nests are beautiful, edible containers, typically made from French or Swiss meringue, and baked until crisp. They are often filled with whipped cream, fruit, or curd, most famously in a Pavlova. Creating nests involves piping a base disc of meringue, then piping layers of meringue around the edge to build up the sides, forming a bowl-like shape. A large star tip works well for creating textured nests.
The baking process is similar to meringue cookies – low and slow drying. The size and thickness of the nest will determine the baking time, which can range from 60 minutes for small nests to 2-3 hours for a large Pavlova base. The goal is a crisp exterior with a slightly chewy interior (especially characteristic of Pavlova). Cool completely in the oven before filling, as the moisture from the filling can cause them to soften quickly.
Baked Alaska: The Ultimate Meringue-Topped Dessert
Baked Alaska is a show-stopping dessert that combines layers of cake and ice cream, all encased in a thick layer of Italian meringue and briefly browned. This dessert showcases the insulating properties of meringue; when briefly exposed to high heat (either a hot oven or a kitchen torch), the meringue quickly toasts and caramelizes on the outside, while the trapped air within acts as an insulator, keeping the ice cream frozen.
Creating a successful Baked Alaska requires a stable Italian meringue, as it needs to hold its shape and protect the ice cream. The process involves layering cake and hard-frozen ice cream in a dome shape, freezing it solid, then covering it completely with a thick layer of Italian meringue, ensuring no gaps. It's then briefly placed in a very hot oven (around 230-250°C / 450-475°F) for just a few minutes, or torched, until the meringue is beautifully browned. It's a dramatic and delicious application of advanced meringue technique.
Storing and Serving Meringue: Maintaining Freshness
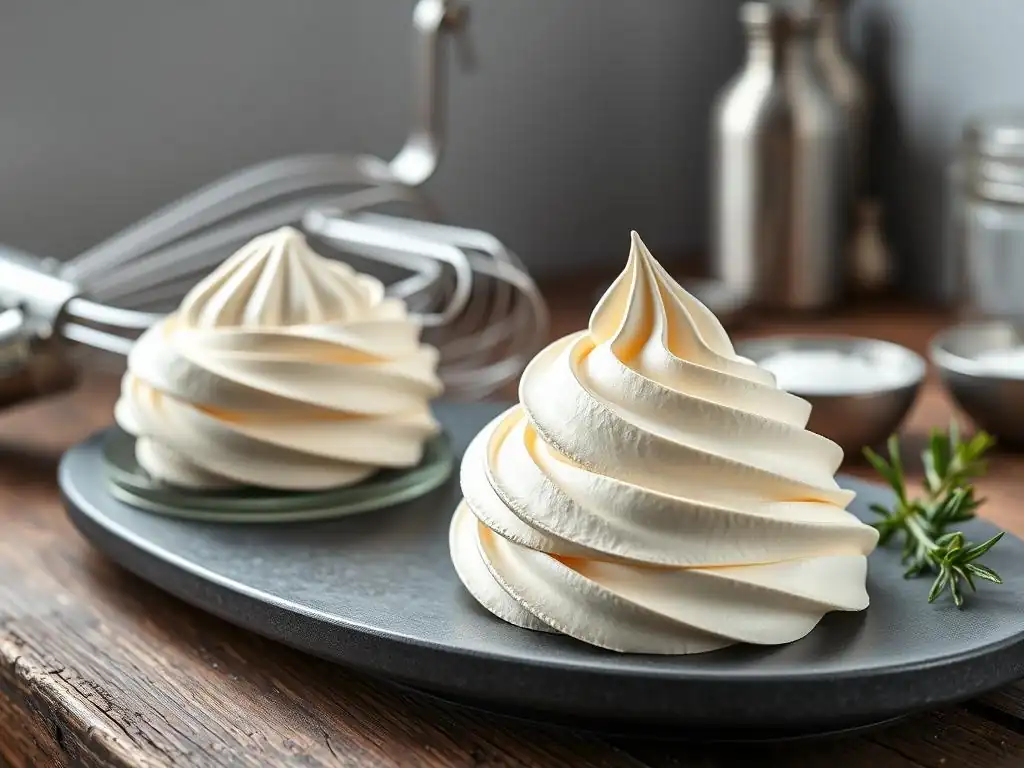
Baked meringues, especially French meringue cookies, are highly susceptible to moisture. Proper storage is essential to keep them crisp and prevent them from becoming sticky or chewy. Once completely cooled and dried, store meringue cookies in an airtight container at room temperature. Avoid storing them in the refrigerator, as the humid environment can quickly ruin their texture.
Ensure the container is truly airtight. Layering the cookies carefully with parchment paper can help prevent breakage. If you live in a particularly humid climate, adding a desiccant packet (like those found in packaging for dried goods) to the container can help absorb excess moisture. Properly stored, baked meringue cookies can remain crisp for up to 1-2 weeks, making them a great make-ahead treat.
Freezing Meringue: What Works and What Doesn't
While baked meringue cookies can sometimes be frozen, the results are often inconsistent, and they may lose some of their crispness upon thawing. It's generally not recommended for delicate French meringues. However, uncooked meringues, particularly Swiss and Italian meringue, can often be frozen successfully for later use in buttercreams or other applications.
To freeze uncooked Swiss or Italian meringue, transfer it to an airtight container or freezer bag, pressing out as much air as possible. It can be frozen for up to 1-2 months. To use, thaw it overnight in the refrigerator, then re-whip it briefly in a stand mixer to restore its texture and volume. Swiss meringue buttercream also freezes very well; thaw and re-whip before using. Baked meringues are best enjoyed fresh or stored at room temperature.
Serving Suggestions: Pairing Meringue with Complementary Flavors
Meringue's light, sweet profile pairs wonderfully with a variety of flavors and textures. Baked meringue cookies are delicious on their own, but also make lovely garnishes for cakes, cupcakes, or ice cream. Crushed meringue can be folded into whipped cream (creating Eton Mess) or used as a crispy topping.
Larger meringue bases, like Pavlova nests, are traditionally filled with whipped cream and fresh fruits, especially berries, which provide a lovely contrast in texture and tartness to the sweet meringue. Italian meringue is a classic pairing with tart fillings like lemon curd or lime pie, where its sweetness balances the acidity. Consider pairing meringue with chocolate, coffee, or nuts for different flavor combinations. Experiment with different pairings to find your favorite way to enjoy the airy perfection of meringue.
Conclusion: Your Journey to Meringue Mastery Begins Now
Embrace the Art of Meringue: A Rewarding Baking Adventure
You've now explored the fascinating world of meringue, from the simple elegance of French meringue to the robust stability of Italian. We've walked through perfect meringue recipes beginners can confidently tackle and discussed essential tips for success and troubleshooting common issues. Meringue might seem delicate, but with understanding and practice, it becomes a versatile tool in your baking repertoire.
Embracing the art of meringue is a rewarding adventure. Each type offers unique possibilities, whether you're crafting delicate cookies, luxurious buttercreams, or dramatic pie toppings. Don't be discouraged by initial challenges; even experienced bakers encounter meringue mishaps. With patience, attention to detail, and the knowledge gained from this guide, you are well on your way to mastering this airy perfection.
Keep Baking with Ease: Explore More Advanced Baking Techniques
Your journey into advanced baking techniques doesn't end with meringue. BakeWithEase is your partner in exploring new skills and creating delicious desserts. Having built a solid foundation with meringue, you're ready to take on other exciting challenges, from intricate pastry work to complex layered cakes.
Continue practicing these perfect meringue recipes beginners have learned, refine your technique, and then look for ways to incorporate meringue into more elaborate creations. Explore our other guides on BakeWithEase.com to further expand your baking knowledge and confidence. Happy baking!
Frequently Asked Questions
What exactly is meringue and what are its basic ingredients?
Meringue is a light and airy dessert topping or base made primarily from egg whites and sugar. A touch of acid, like cream of tartar, is sometimes added for stability.
What are the different types of meringue I can make, and which is best for beginners?
The three main types are French, Italian, and Swiss. French meringue is the simplest and best for beginners as it involves whipping raw egg whites with sugar.
What is the key to achieving stiff peaks when whipping meringue?
Ensuring your bowl and whisk are completely clean and free of grease is crucial. Also, using room temperature egg whites helps them whip up more easily and hold their shape.
How can I prevent my meringue from weeping or collapsing after baking?
Properly baking the meringue at a low temperature for a long time is essential to dry it out completely. Avoid overbaking and allow it to cool completely in the oven.
Can I add flavors or colors to my meringue?
Yes, you can! Add extracts like vanilla or almond, or gel food coloring sparingly after the meringue has reached stiff peaks to avoid deflating it.
Final Reflection: The Enduring Allure of the Perfect Meringue
The pursuit of the perfect meringue is more than just a culinary quest; it's a journey into the delicate balance of science and artistry. Mastering this seemingly simple confection unlocks a world of culinary possibilities, from elegant pavlovas to whimsical macarons, proving that even the most delicate creations can be achieved with patience and precision. This enduring appeal speaks to our innate desire for beauty and the satisfaction of creating something truly exquisite.
The journey to meringue mastery, for me, has been one of both frustration and immense reward. The subtle shifts in texture, the ethereal lightness achieved through careful technique – these are the details that elevate a simple meringue into something truly special. It's a process that mirrors life itself, demanding attention to detail and a willingness to learn from both successes and failures. The best things in life are worth waiting for,
and a perfectly formed meringue is a testament to this truth.
Now, it's your turn. Don't be intimidated by the seemingly complex process. Armed with the knowledge and techniques shared in this guide, you have the power to create your own airy masterpieces. Embrace the challenge, experiment with different flavors and techniques, and discover the joy of transforming simple ingredients into something truly magical. The perfect meringue awaits – dare to unlock its secrets.
Unlock Your Inner Pastry Chef: Master the Art of Meringue!
Thanks for joining us on this delicious journey into the world of meringue! We hope you now feel confident and inspired to create airy, delightful treats. Ready to put your newfound knowledge to the test?
- Whipp up your own masterpiece! Try your hand at making the perfect meringue using the techniques we’ve outlined – the results will be worth it!
- Share your creations! We'd love to see your meringue magic on social media. Tag us and inspire others!
- Explore our other baking guides for even more recipe inspiration. You might discover your next favorite dessert!
What unique flavor combination will you explore in your next meringue adventure?