
Making Edible Glue & Adhesives for Strong Decorations

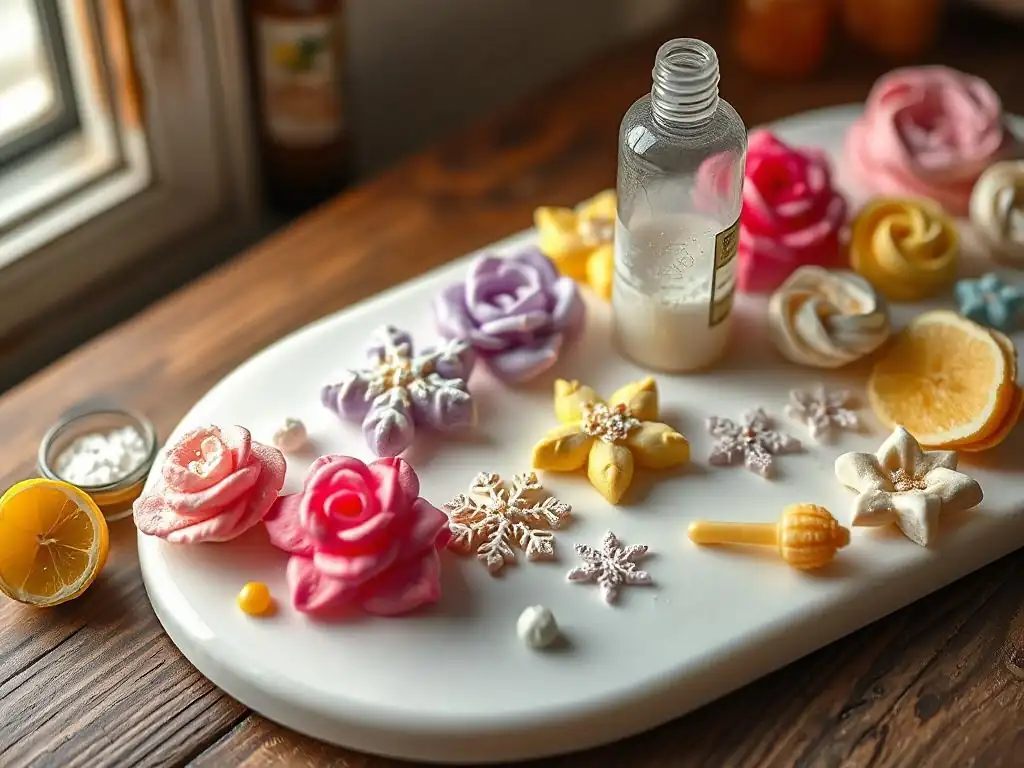
Welcome to BakeWithEase, your haven for all things baking! Ever struggled to keep those delicate sugar flowers perfectly perched on your cake? Or perhaps you've dreamt of creating intricate gingerbread structures that defy gravity? Then you've come to the right place. Today, we're diving into the secrets of crafting your own edible glue for decorations. Master this essential technique, and unlock a whole new world of possibilities for your baked creations. Read on to discover how to make food-safe adhesives that are strong, reliable, and, of course, delicious!
- Mastering Edible Adhesives for Cake Decorating
- Understanding Edible Adhesives
- Recipes for Homemade Edible Adhesives
- Applying Edible Adhesives
- Storing Edible Adhesives
- Working with Fondant and Gumpaste
- Alternative Edible Adhesives
- Tips for Stronger Cake Decorations
- Conclusion
- Frequently Asked Questions
- Final Reflection: The Sweet Science of Edible Adhesives
- Unleash Your Inner Artisan: Craft Amazing Edible Adhesives!
Mastering Edible Adhesives for Cake Decorating
Understanding Edible Adhesives
What are Edible Adhesives and Why Use Them?
Edible adhesives are substances specifically designed to safely bind edible cake decorations together or attach them to the cake surface. Unlike craft glues or standard adhesives, these products are made from food-grade ingredients, ensuring that the entire decorated creation remains safe to consume.
The primary purpose of using edible glue for decorations is to achieve structural integrity and aesthetic precision in cake design, allowing delicate sugar flowers, intricate fondant details, or sculpted gumpaste figures to stay firmly in place without collapsing or falling off. Using a reliable edible adhesive is crucial for professional-looking results, preventing the frustration of decorations shifting or detaching before or during an event.
Beyond simply sticking things together, edible adhesives play a vital role in creating complex 3D sugar art. They allow bakers and decorators to build up layers, attach small components like petals or leaves, and secure heavier elements like fondant figurines onto tiers. The specific type of edible glue for decorations chosen often depends on the weight and material of the piece being attached, the desired drying time, and the environmental conditions (like humidity). A good understanding of these different adhesives is fundamental for anyone looking to advance their cake decorating skills and achieve stable, durable, and beautiful sugar work.
The Role of Edible Adhesives in Cake Design
Edible adhesives are the hidden heroes of intricate cake design, providing the necessary bond to transform simple sugarpaste, fondant, or gumpaste into stunning edible art. They enable decorators to bring detailed visions to life, from attaching intricate lace patterns cut from wafer paper to securing delicate sugar pearls onto a buttercream swirl. Without effective edible glue for decorations, many advanced techniques, such as creating gravity-defying structures or assembling multi-component sugar flowers petal by petal, would be impossible. The strength and drying speed of the adhesive directly impact the complexity and stability of the final design.
Furthermore, the strategic application of edible adhesives is key to achieving clean, professional finishes. An effective edible glue for decorations should dry clear and strong, leaving no visible residue or discoloration that could detract from the beauty of the piece.
Decorators must learn not only how to make or choose the right adhesive but also how much to use and where to apply it to ensure a secure bond without messy overflow. Mastering the use of these edible bonds is a significant step in elevating cake decoration from a hobby to an art form, allowing for greater creativity and structural ambition in designs.
Different Types of Edible Adhesives
The world of edible adhesives offers several options, each with unique properties suited for different applications. One of the most common is Tylose glue (also known as CMC glue), made from a powder that thickens water, creating a strong, clear adhesive ideal for sugarpaste, fondant, and gumpaste.
Royal icing, a mixture of powdered sugar, egg whites (or meringue powder), and water, hardens firmly and is excellent for attaching heavier decorations or creating structural support, though it dries opaque. Sugar glue, a simple syrup cooked to a sticky consistency, is quick to make and works well for lighter applications like attaching sprinkles or small details, but it can be prone to moisture issues.
- Tylose/CMC Glue: Strong, dries clear, flexible when dry, good for fondant/gumpaste.
- Royal Icing: Very strong, dries hard and opaque, good for heavy decorations or structural elements.
- Sugar Glue: Quick, inexpensive, good for light elements, can be affected by humidity.
- Melted Chocolate: Excellent for bonding chocolate pieces or attaching decorations to chocolate coatings.
- Piping Gel: Less adhesive than others, useful for light elements or creating a sticky base.
Understanding the characteristics of each type of edible glue for decorations allows decorators to select the best option for the specific task at hand, ensuring the decorations remain secure and the cake looks its best.
Recipes for Homemade Edible Adhesives
Recipe 1: Tylose Glue
Ingredients for Tylose Glue
Making your own Tylose glue is straightforward and requires minimal ingredients. The primary component is Tylose powder, also known as CMC powder (Carboxymethyl Cellulose). This food-grade powder is a thickening agent commonly used in baking and confectionery.
You will also need lukewarm water. The ratio of Tylose powder to water is crucial for achieving the right consistency – too little powder results in a weak, watery glue, while too much creates a thick, unmanageable paste. A common starting point is about 1/4 teaspoon of Tylose powder per 2 tablespoons of lukewarm water, though this can be adjusted based on desired thickness.
To prepare Tylose glue, you will need:
- 1/4 teaspoon food-grade Tylose powder (or CMC powder)
- 2 tablespoons lukewarm water
- A small airtight container for storage
Ensure your Tylose powder is specifically labelled as food-grade and suitable for use in confectionery. The water should be lukewarm to help the powder dissolve more easily without clumping. Using a clean, small container is important for mixing and storing the glue, preventing contamination and ensuring its longevity.
Step-by-Step Instructions for Making Tylose Glue
Creating Tylose glue is a simple process that takes just a few minutes. Begin by adding the lukewarm water to your small airtight container. Next, sprinkle the 1/4 teaspoon of Tylose powder evenly over the surface of the water. Avoid dumping it all in one spot, as this can cause clumping. Once the powder is added, seal the container tightly.
Shake the container vigorously for about 30 seconds to help distribute the powder through the water. After shaking, let the mixture sit undisturbed for approximately 10-15 minutes. During this time, the Tylose powder will absorb the water and begin to thicken, transforming the liquid into a gel-like edible glue.
If the mixture is too thick after resting, you can add a tiny amount more water (a few drops at a time) and shake again. If it's too thin for your needs, you can sprinkle in a very small amount more Tylose powder, shake, and let it rest again. The ideal consistency is similar to runny honey or a thick syrup – it should coat the back of a spoon but still be pourable.
Tips for Perfecting Tylose Glue
Achieving the perfect consistency for your Tylose glue is key to its effectiveness as an edible glue for decorations. Start with the recommended ratio, but don't be afraid to adjust slightly based on the specific brand of Tylose powder, as absorption rates can vary. If you encounter stubborn clumps after resting, you can gently stir the mixture with a small spoon or toothpick, but shaking is usually sufficient.
For tasks requiring a stronger bond or working with heavier decorations, you can increase the ratio of Tylose powder slightly, aiming for a thicker consistency. Conversely, for delicate work or attaching very light pieces, a thinner glue might be preferable.
Always make Tylose glue slightly in advance of when you need it, as it requires resting time to fully thicken. It's best to make small batches as needed, as its shelf life is limited, even when refrigerated. Store any leftover glue in a sealed container in the refrigerator; it can usually last for 1-2 weeks. Before using refrigerated glue, allow it to come to room temperature, as the cold can make it thicker and harder to apply. If it seems too thick after refrigeration, you can add a drop or two of water and stir gently.
Recipe 2: Royal Icing Adhesive
Royal Icing: A Strong Adhesive for Decorations
Royal icing is renowned in the cake decorating world not just for its ability to create intricate piping designs but also for its exceptional strength as an edible adhesive. When dried, royal icing hardens into a solid, durable bond, making it ideal for attaching heavier sugar decorations, constructing gingerbread houses, or securing structural elements on a cake.
Its opaqueness means it's not suitable for applications where a clear bond is needed, but for attaching items like gumpaste figures, royal icing flowers, or hard candy pieces directly onto a firm surface like fondant or a crusted buttercream, it is incredibly effective.
The strength of royal icing comes from the rapid hardening of the powdered sugar and protein (from egg whites or meringue powder). As the water evaporates, the sugar crystals form a rigid structure. This makes it a reliable edible glue for decorations that require significant hold, such as attaching a large gumpaste bow or securing a multi-layered sugar flower to the side of a cake. However, its rigidity also means it's not suitable for attaching decorations to soft surfaces like fresh buttercream, as the buttercream can't support the hard bond and might bulge or crack.
How to Prepare Royal Icing for Adhesive Use
While royal icing can be made from scratch using fresh egg whites, many decorators prefer using meringue powder due to safety concerns regarding raw eggs and the consistency it provides. A standard recipe for adhesive-strength royal icing typically involves mixing powdered sugar with meringue powder and just enough water to create a thick, toothpaste-like consistency. This is significantly thicker than the consistency used for piping fine details or flooding cookies.
A common ratio is approximately 4 cups of powdered sugar to 3 tablespoons of meringue powder, mixed with about 1/2 cup of water. You'll need an electric mixer (stand mixer or hand mixer) to beat the ingredients together until stiff peaks form – this usually takes 5-10 minutes on medium-high speed. The icing should be very stiff; when you lift the beaters, the peaks should stand straight up without drooping.
If it's too thin, add more powdered sugar; if too thick, add water a drop at a time. For use as an edible glue for decorations, this stiff consistency is crucial for maximum bonding power. Store unused royal icing in an airtight container with a damp cloth or plastic wrap pressed directly onto the surface to prevent it from hardening.
Drying Time Considerations for Royal Icing
The drying time for royal icing used as an edible adhesive can vary significantly depending on several factors, including humidity levels, temperature, and the thickness of the application. In a dry environment, thin applications might crust over in 15-30 minutes and be relatively solid within a few hours. However, for a strong, load-bearing bond, especially when attaching heavier items, the royal icing needs to dry completely, which can take anywhere from 8 to 24 hours, sometimes even longer for very thick applications or in high humidity.
It is essential to allow sufficient drying time before moving a cake with royal icing-attached decorations or stacking tiers. Placing the cake in front of a fan can help speed up the drying process, but avoid placing it in an overly humid area, which can prevent the icing from hardening properly or even cause it to soften. When using royal icing as an edible glue for decorations, patience is key; rushing the drying process can result in decorations detaching or structures collapsing.
Recipe 3: Sugar Glue
Quick and Easy Sugar Glue
Sugar glue is perhaps the simplest homemade edible adhesive, requiring just two basic ingredients: sugar and water. It's essentially a thick sugar syrup. This quick and easy method makes it a convenient option when you need a small amount of edible glue for decorations in a pinch and don't have specialized ingredients like Tylose powder or meringue powder on hand. To make it, you combine equal parts granulated sugar and water in a small saucepan and heat it gently, stirring until the sugar is completely dissolved.
Once dissolved, you continue to heat the syrup without stirring until it thickens slightly, reaching a consistency similar to thin corn syrup. This typically happens just before it reaches the soft-ball candy stage, around 220-230°F (104-110°C). Be careful not to cook it too long, or it will become too hard or even caramelize. Once it reaches the desired consistency, remove it from the heat and let it cool slightly before use. It will thicken further as it cools. This process usually takes less than 10 minutes from start to finish, making it a very fast edible glue for decorations.
Best Applications for Sugar Glue
Sugar glue is best suited for light-duty applications on cakes, particularly for attaching small, lightweight decorations. It works well for sticking edible glitter, sprinkles, dragées (sugar pearls), or very thin pieces of fondant or wafer paper onto a fondant or gumpaste surface. Because it's clear and dries relatively quickly on the surface, it's good for adding sparkle or fine details.
- Attaching sprinkles and glitter
- Securing small sugar pearls or dragées
- Bonding thin pieces of wafer paper
- Lightly adhering small, flat fondant cutouts
Think of sugar glue as a temporary or light-hold edible glue for decorations. It provides enough stickiness for small elements that don't bear weight or require significant structural support. Its simplicity and speed make it a handy alternative for quick fixes or adding sparkle.
Limitations of Sugar Glue
Despite its ease of preparation, sugar glue has significant limitations as an edible adhesive. Its primary drawback is its susceptibility to moisture. High humidity or moisture from the cake itself (like condensation on a chilled cake) can cause the sugar glue to soften or even re-dissolve, leading to decorations falling off. This makes it unreliable for outdoor events on humid days or for decorations that need to remain secure for extended periods.
Furthermore, sugar glue does not provide a strong bond suitable for heavier decorations like gumpaste figures, large flowers, or multi-layered fondant pieces. It lacks the structural integrity of Tylose glue or royal icing. While it dries clear, it can sometimes leave a slightly sticky residue if applied too thickly, which can attract dust or moisture. Therefore, while convenient for minor applications, sugar glue is generally not the go-to edible glue for decorations requiring a robust and durable bond.
Applying Edible Adhesives
Preparing Decorations for Gluing
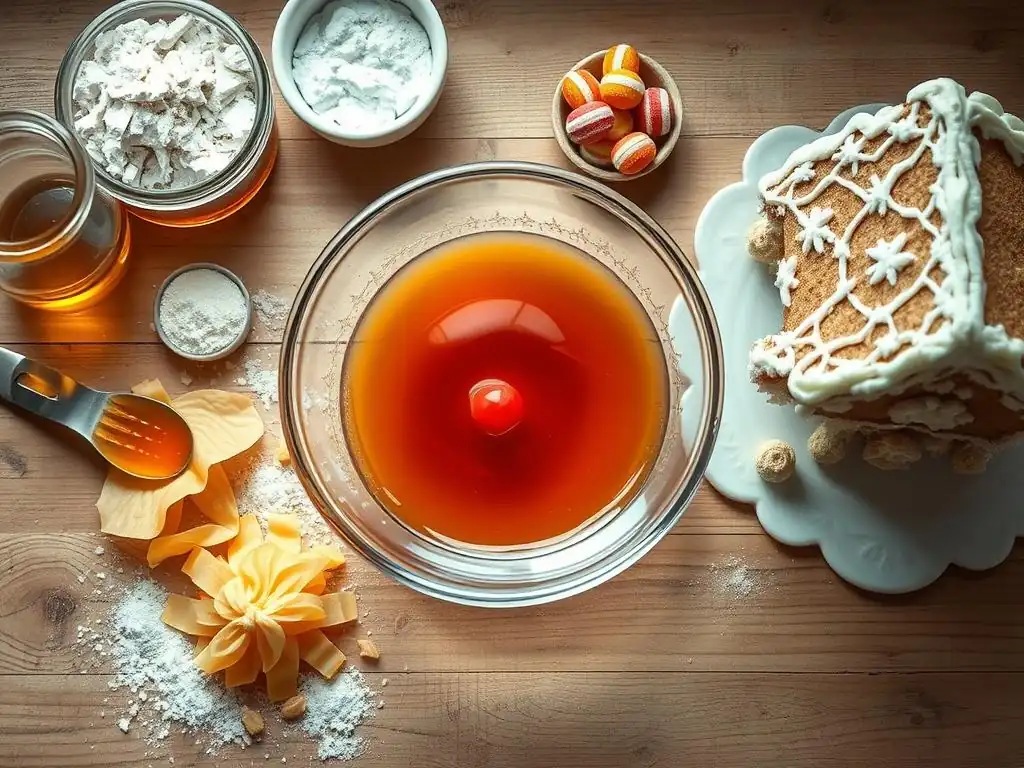
Proper preparation of your edible decorations is crucial for ensuring that the edible glue for decorations creates a strong and lasting bond. Decorations, whether made from fondant, gumpaste, modeling chocolate, or wafer paper, should be completely dry or at least firm enough to handle without distorting. Attempting to glue soft or wet pieces can lead to smudging, deformation, or a weak attachment. For gumpaste flowers or figures, allow sufficient drying time, often 24 hours or more depending on size and complexity, before attempting to glue components together or attach them to the cake.
The surface where the decoration will be attached should also be prepared. If adhering to fondant, ensure the surface is smooth and free of excess powdered sugar or cornstarch, which can act as a barrier. For attaching to buttercream, a crusted buttercream is preferable to a soft one, providing a firmer base for the adhesive to grip. Sometimes, lightly brushing the back of the decoration or the cake surface with a tiny amount of water before applying the edible glue for decorations can help activate the sugar in the decoration and improve adhesion, especially with fondant or gumpaste.
Application Techniques
The technique used to apply edible glue for decorations is just as important as the glue itself. The goal is to use just enough adhesive to create a strong bond without excess squeezing out and causing a mess. For delicate work or small amounts of Tylose glue or sugar glue, a fine-tipped paintbrush is ideal.
Dip the brush into the glue, wipe off any excess on the side of the container, and apply a thin, even layer to the back of the decoration or the specific points of contact on the cake. For attaching pieces together (like petals), apply glue to the area that will overlap.
For royal icing, which is thicker, a small spatula, piping bag with a fine tip, or even a toothpick can be used. Apply a small dollop or line of icing where needed. When attaching decorations to the side of a cake, it's often helpful to apply the edible glue for decorations to the back of the decoration rather than the cake itself, especially if working on a vertical surface, as this gives you more control and prevents drips on the cake.
Press the decoration gently but firmly into place and hold for a few seconds to allow the initial bond to form. For heavier items, you may need to use temporary supports (like crumpled paper towels or pieces of foam) until the adhesive dries completely.
Troubleshooting Common Problems
Even with careful preparation, you might encounter issues when using edible glue for decorations. Knowing how to troubleshoot common problems can save your design.
Dealing with Runny Adhesive
If your homemade edible glue (like Tylose or sugar glue) is too runny, it won't hold decorations effectively and can create messy drips.
- Tylose Glue: If it's too thin, you likely need more Tylose powder. Sprinkle a tiny amount more powder into the mixture, shake, and let it rest for another 10-15 minutes to thicken. Be patient; adding too much powder at once can result in clumps or an overly thick paste.
- Sugar Glue: If it's too thin, you didn't cook it long enough. Gently reheat it in a saucepan until it reaches the desired slightly thickened syrup consistency. Be careful not to overheat.
- Royal Icing: If it's too thin (more like flooding consistency), add more sifted powdered sugar and beat again until stiff peaks form.
Using a runny edible glue for decorations will inevitably lead to frustration and unstable attachments. Always test the consistency before application.
Ensuring Decorations Stay Secure
If decorations are falling off, the issue could be the adhesive's strength, consistency, application, or insufficient drying time.
- Check Adhesive Type: Are you using a strong enough edible glue for decorations for the weight of the piece? Sugar glue is not suitable for heavy gumpaste figures; use Tylose glue or royal icing instead.
- Check Consistency: Was the adhesive thick enough? Runny adhesive provides a weak bond.
- Application: Did you apply enough adhesive to the contact points? Was the surface clean and dry (or properly prepared)?
- Drying Time: Did you allow sufficient time for the adhesive to dry completely? For royal icing and Tylose glue, this can take several hours, especially for heavy pieces. Use temporary supports if needed.
- Surface Issues: Is the surface you're attaching to stable? Fresh, soft buttercream is not a good base for rigid royal icing bonds.
Sometimes, simply reapplying a stronger adhesive or providing support while it dries is necessary to secure a decoration that is coming loose.
Removing Excess Adhesive
Accidentally applying too much edible glue for decorations can leave visible marks or sticky residue.
- Tylose Glue: While it dries clear, excess can leave a shiny patch. If wet, gently blot with a clean, dry brush or a piece of paper towel. If dry, it's harder to remove without damaging the surrounding area. You might try gently scraping it with a sharp, dry craft knife or scalpel blade at a very low angle, but this requires a steady hand.
- Royal Icing: Excess royal icing will dry hard and opaque. It's best to remove it immediately while wet using a damp brush or cotton swab. Once dry, it's very difficult to remove without damaging the cake's surface. Carefully chipping away with a sharp tool might work on a firm fondant surface, but it's risky.
- Sugar Glue: Excess sugar glue will dry sticky. If wet, wipe gently with a barely damp cloth. If dry, it can often be softened with a tiny amount of water and blotted away, but too much water will spread the stickiness.
Prevention is the best strategy – use a fine brush and apply only a small amount of edible glue for decorations precisely where needed.
Storing Edible Adhesives
Proper Storage Techniques
Storing your edible glue for decorations correctly is essential to maintain its effectiveness and extend its shelf life. Each type of adhesive has specific storage requirements.
- Tylose Glue: Store homemade Tylose glue in a small, airtight container in the refrigerator. This prevents bacterial growth and keeps it from drying out. Ensure the lid is tightly sealed.
- Royal Icing: Royal icing crusts over very quickly when exposed to air. Store it in an airtight container with a piece of plastic wrap pressed directly onto the surface of the icing before sealing the lid. This prevents a crust from forming. It can be stored at cool room temperature for a few days or in the refrigerator for longer.
- Sugar Glue: Due to its simple sugar and water composition, sugar glue is prone to crystallizing or developing mold. It is best made fresh as needed. If you have a small amount leftover, store it in a sealed container at room temperature for a day or two, but be aware it might crystallize. Refrigeration can sometimes encourage crystallization.
- Commercial Edible Glues: Follow the manufacturer's instructions, but typically they should be stored in a cool, dry place with the cap tightly sealed. Refrigeration is often not required unless specified.
Proper storage ensures your edible glue for decorations is ready to use and maintains its adhesive properties.
Shelf Life
The shelf life of edible adhesives varies considerably depending on the type and whether it's homemade or commercial.
- Homemade Tylose Glue: When stored properly in the refrigerator, homemade Tylose glue typically lasts for 1 to 2 weeks. After this time, it may start to smell off or show signs of spoilage.
- Homemade Royal Icing: Royal icing made with meringue powder can last for several weeks at cool room temperature or in the refrigerator if stored airtight. If made with fresh egg whites, its shelf life is much shorter, perhaps only a few days in the refrigerator, due to food safety concerns.
- Homemade Sugar Glue: This has the shortest shelf life, ideally used within a day or two of making. It is highly susceptible to crystallization and microbial growth.
- Commercial Edible Glues: These often contain preservatives and have a much longer shelf life, usually several months or even up to a year, when stored according to the manufacturer's instructions. Always check the best-before date on the packaging.
Regardless of the type, always inspect your edible glue for decorations before use for any signs of spoilage.
Recognizing Spoiled Adhesive
It is crucial to be able to identify when your edible glue for decorations is no longer safe or effective to use. Using spoiled adhesive can compromise the taste and safety of your cake.
Signs of spoilage include:
- Off Smell: Any sour, moldy, or unusual odor is a clear indicator that the adhesive is spoiled.
- Discoloration: Changes in color, such as yellowing, darkening, or the appearance of colored spots (which could be mold), mean it should be discarded.
- Visible Mold: Any fuzzy or discolored patches, no matter how small, indicate mold growth.
- Change in Consistency (beyond expected thickening/thinning): While Tylose glue thickens and thins with temperature, unexpected changes like becoming excessively watery, lumpy (not just clumps of powder), or separating can be signs of spoilage. Sugar glue might become cloudy.
- Bubbles or Fermentation: The presence of bubbles or a frothy appearance could indicate fermentation.
If you are in doubt about whether your edible glue for decorations is still good, it is always safest to err on the side of caution and make a fresh batch.
Working with Fondant and Gumpaste
Adhering Fondant Decorations
Fondant is a popular medium for cake decorating, used for covering cakes smoothly and creating various decorations like cutouts, shapes, and simple figures. Attaching these fondant decorations requires a suitable edible adhesive. For most fondant-to-fondant or fondant-to-cake attachments, a thin application of edible glue for decorations, such as Tylose glue or commercial edible glue, works best.
Water can also be used for very light, flat pieces being applied to a fondant-covered cake, as the water slightly melts the surface sugar, creating a sticky bond. However, water is less reliable than a dedicated edible glue, especially for anything with a bit of weight or applied vertically.
When attaching fondant cutouts to a fondant-covered cake, apply a small amount of Tylose glue to the back of the cutout using a fine brush. Position the cutout carefully on the cake and gently press it into place, smoothing out any air bubbles.
For larger or heavier fondant pieces, use slightly more glue and hold the piece in place for a moment while the initial tack develops. If attaching fondant decorations to a buttercream-covered cake, use royal icing or melted chocolate (if compatible with the flavour) for a stronger bond, as Tylose glue may not adhere well to the soft surface.
Using Adhesive for Gumpaste Flowers and Figures
Gumpaste is firmer and dries harder than fondant, making it ideal for creating delicate sugar flowers, intricate figures, and structural decorations. Due to its brittle nature when dry and the often multi-component structure of gumpaste creations, a strong edible adhesive is essential for assembly and attachment. Tylose glue is the most commonly used edible glue for decorations made from gumpaste, as it provides a strong, clear bond that remains slightly flexible when dry, reducing the risk of brittle pieces snapping off.
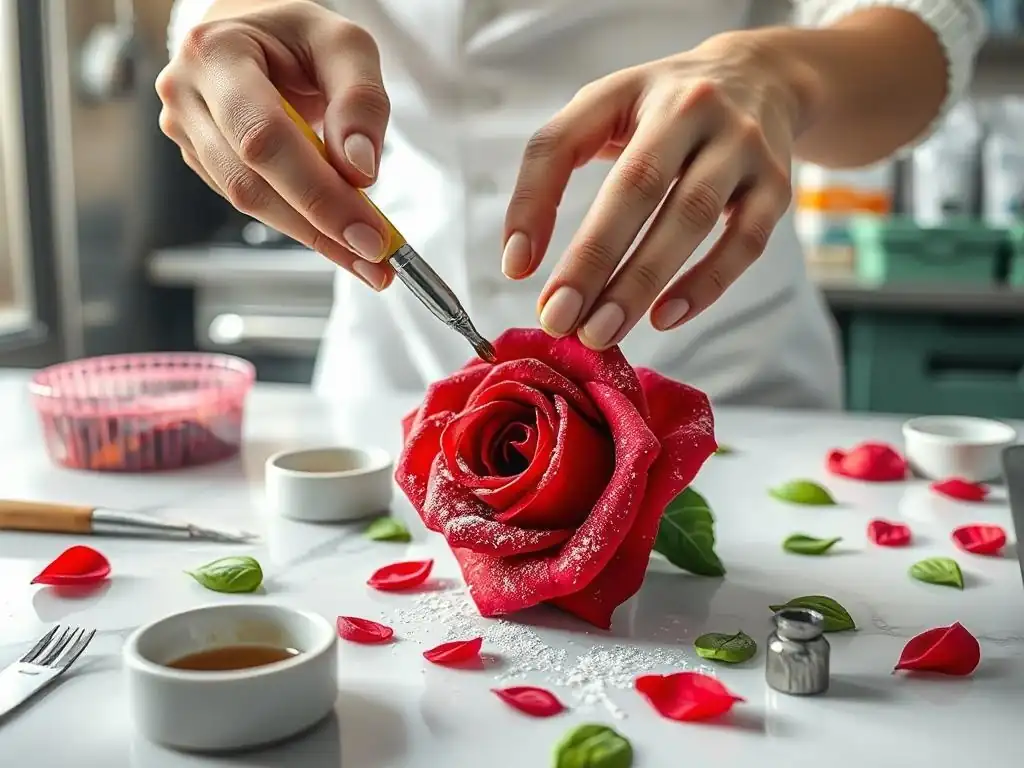
When assembling gumpaste flowers, apply a tiny amount of Tylose glue to the base of petals or leaves where they will attach to the center or wire. Use tweezers or a small tool for precision. Hold the pieces together briefly until the glue starts to set.
For attaching finished gumpaste flowers or figures to a cake, apply Tylose glue to the contact points on the decoration or the cake. For heavier items, especially on the side of a cake, use royal icing for its superior strength and rigidity. You may also need to insert internal supports (like food-safe wires or dowels) into the decoration and secure them into the cake for added stability, using edible glue for decorations to help secure the base of the decoration to the cake surface.
Creating Strong Bonds Between Sugar Pieces
Whether working with fondant, gumpaste, or modeling chocolate, creating strong bonds between individual sugar pieces is fundamental to building stable decorations. The choice of edible glue for decorations depends on the material and the required strength. For joining two pieces of fondant, Tylose glue is usually sufficient. Apply a thin layer to one surface, press the pieces together, and hold. For gumpaste, Tylose glue is also the preferred choice for assembling components like limbs on a figure or petals on a flower.
When joining modeling chocolate pieces, melted modeling chocolate of the same color or clear piping gel can work well. For attaching different types of sugar media together, like a gumpaste flower onto a fondant-covered cake, Tylose glue is versatile. If attaching something heavy made of gumpaste or modeling chocolate to a firm surface like a cake board or a structural element within the cake, royal icing provides the strongest, most rigid bond. Always apply pressure after applying the edible glue for decorations and allow adequate drying time, especially for structural joints, to ensure the strongest possible connection.
Alternative Edible Adhesives
Using Melted Chocolate
Melted chocolate is an excellent and flavorful edible adhesive, particularly useful when working with chocolate decorations or attaching elements to a chocolate-covered cake. Both tempered chocolate and melted candy melts (compound chocolate) can be used. Melted chocolate provides a strong, fast-setting bond as it cools and solidifies. It's ideal for assembling chocolate figures, attaching chocolate shards or curls to a cake, or securing other decorations onto a chocolate ganache or melted chocolate coating.
To use melted chocolate as an edible glue for decorations, simply melt a small amount of the appropriate chocolate (dark, milk, white, or candy melts). Apply a small amount to the contact point using a toothpick, small spoon, or piping bag. Press the pieces together and hold for a few seconds until the chocolate cools and sets. Be mindful that using chocolate as glue introduces that flavor profile, which may not be desirable for all cake designs. Also, ensure the temperature of the cake surface is not too warm, which could prevent the chocolate from setting properly.
Employing Piping Gel
Piping gel is a clear, jelly-like substance made from corn syrup, sugar, and gelling agents. While it's primarily used for piping messages, creating glaze effects, or stabilizing whipped cream, it can also function as a very mild edible adhesive. Piping gel provides a sticky surface rather than a strong bond, making it suitable only for attaching extremely lightweight decorations.
It works reasonably well for sticking sprinkles, edible glitter, or very thin wafer paper cutouts onto a dry surface. Apply a very thin layer of piping gel using a brush. Its main advantage as an edible glue for decorations is its clarity and ease of use straight from the container. However, it offers very little structural support and is not reliable for anything heavier than a few sugar pearls. It also remains somewhat soft and sticky, which can be a disadvantage.
Other Natural Adhesives
Beyond the common options, a few other natural, food-based substances can serve as edible glue for decorations in specific circumstances. A simple example is using a tiny dab of frosting or buttercream. While not as strong as dedicated adhesives, a small amount of stiff buttercream can temporarily hold very light items like sprinkles or small candies in place, especially if attaching them to a buttercream surface. However, it remains soft and is not reliable for anything significant.
Another option, particularly in traditional baking, is using egg white. A light brush of egg white can help adhere edible glitter or gold leaf to a dry surface, acting as a very weak edible glue for decorations as it dries and becomes slightly tacky.
For attaching larger pieces to gingerbread or certain cookies, a thick glaze made from powdered sugar and milk or lemon juice can sometimes work, drying to a hard, opaque finish similar to thin royal icing, but it lacks the strength for serious cake decoration. These methods are generally less reliable and versatile than Tylose glue or royal icing but can be useful in specific, simple contexts.
Tips for Stronger Cake Decorations
Strengthening Adhesive for Heavy Decorations
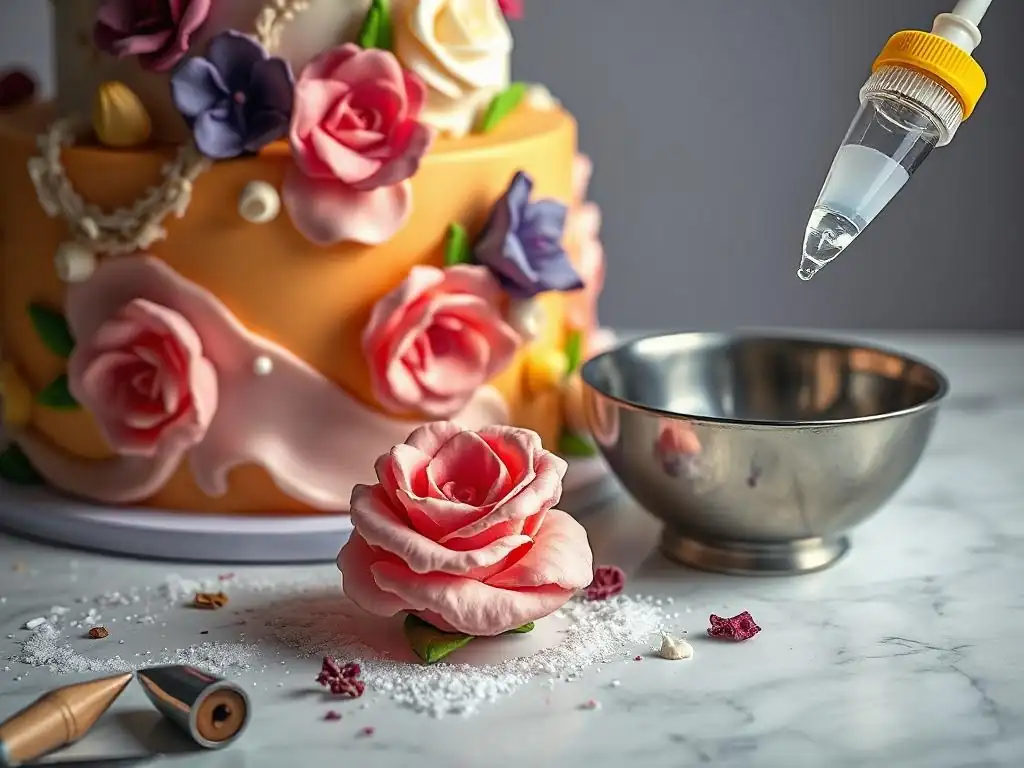
When attaching heavy edible decorations, such as large gumpaste figures, multi-tiered sugar flowers, or structural elements, the standard consistency of edible glue for decorations might not be sufficient. To achieve a stronger bond with Tylose glue, increase the ratio of Tylose powder to water slightly to create a thicker, more concentrated paste. This thicker glue will provide a more robust connection. For the strongest possible bond, especially on vertical surfaces or for items requiring structural support, royal icing is often the best choice. Ensure the royal icing is mixed to a very stiff consistency, like toothpaste.
Applying the adhesive correctly is also key to maximizing strength. Apply the edible glue for decorations generously but without creating excessive overflow, covering all the contact points between the decoration and the cake or between components of the decoration itself. For very heavy items, consider using multiple points of adhesion rather than just one central spot. Always provide temporary support for the decoration until the adhesive is completely dry and set. This might involve propping it up with foam blocks, crumpled paper towels, or securing it with pins (removed later, of course) while the edible glue for decorations hardens.
Reinforcing Attachments for Stability
For decorations that need to withstand handling, transport, or simply the test of gravity over time, reinforcing the attachment is crucial. Beyond using a strong edible glue for decorations, consider internal support structures. Food-safe wires can be inserted into gumpaste flowers or figures and then pushed into the cake, providing an anchor. Dowels or cake supports can be used to support the weight of heavy decorations placed on top of a cake tier.
When attaching items to the side of a cake, especially large or heavy ones, edible glue alone may not be enough. You might need to create a small, flat area on the cake surface for better contact or even insert a discreet support like a piece of dried gumpaste or floral wire into the cake for the decoration to rest on while the edible glue for decorations dries.
For multi-component decorations, ensure each joint is securely glued and fully dry before attaching the entire piece to the cake. Sometimes, chilling the cake slightly after attaching decorations can help the adhesive set faster, particularly with royal icing or chocolate.
Securing Large Gumpaste Flowers with Wire
Large gumpaste flowers, while stunning, can be heavy and delicate. Securing them properly to a cake requires more than just edible glue for decorations. The most common and effective method involves using food-safe floral wires. Wires are inserted into the base of the flower during its construction. Once the flower is dry, these wires act as stems that can be inserted directly into the cake.
To attach a wired gumpaste flower, first determine its placement on the cake. If inserting into a fondant-covered cake, make a small pilot hole using a skewer or toothpick to avoid cracking the fondant. Dip the end of the wire(s) into a little melted chocolate or royal icing (this acts as a barrier and helps secure the wire in the cake) and gently push them into the cake.
The wires provide the primary support, bearing the weight of the flower, while a small amount of edible glue for decorations (like Tylose glue or royal icing) applied to the base of the flower where it meets the cake surface helps keep it flush and prevents it from wiggling. Ensure the wires are food-safe and positioned such that they can be easily removed before serving the cake.
Conclusion
Achieving Professional-Looking Decorations
Mastering the use of edible glue for decorations is a fundamental step towards achieving professional-looking results in cake design. The ability to securely attach delicate sugar flowers, intricate fondant details, and sculpted figures transforms a simple cake into a work of art.
By understanding the different types of edible adhesives available – from versatile Tylose glue and strong royal icing to quick sugar glue and alternative options like melted chocolate – decorators can select the most appropriate bond for each specific task. Proper application techniques, using just the right amount of adhesive and providing necessary support, ensure that decorations stay firmly in place, maintaining the integrity and beauty of the design from creation to presentation.
Troubleshooting common issues, such as runny glue or decorations that won't stick, becomes much easier with a solid understanding of how each adhesive behaves. Learning to store these edible bonds correctly prolongs their usability and effectiveness. Ultimately, the skillful application of edible glue for decorations allows for greater creativity and complexity in sugar work, enabling bakers to confidently tackle ambitious designs that delight and impress. It’s a small detail in the grand scheme of cake decorating, but one that makes a significant difference in the finished product's stability, appearance, and overall success.
Elevating Cake Design with Secure Sugar Work
Secure sugar work, made possible by the effective use of edible glue for decorations, is key to elevating cake design beyond simple frosting. It allows decorators to add dimension, intricate detail, and realistic elements that capture attention. Whether it's a cascade of wafer paper flowers, a gravity-defying fondant sculpture, or delicate gumpaste lace, the reliability of the adhesive ensures that these elements remain flawless. Investing time in learning how to make, use, and troubleshoot different edible adhesives is an investment in the quality and professionalism of your cake creations.
From assembling multi-petaled roses that hold their shape to securing figures that look like they're standing effortlessly on the cake, the right edible glue provides the necessary foundation. Combining strong adhesives with smart structural techniques, like using wires or internal supports, opens up a world of possibilities for complex and impressive designs. Embrace the power of edible glue for decorations – it's the invisible force that holds your edible art together, allowing you to push the boundaries of creativity and deliver stunning, stable cakes every time.
Frequently Asked Questions
What is edible glue and why is it used in baking?
Edible glue is a sticky substance made from edible ingredients that helps in attaching decorations to cakes and pastries. It’s essential for creating beautiful and strong decorations.
How can I make edible glue at home?
You can make edible glue using simple ingredients like water and powdered sugar or corn syrup. Mix them until you achieve a smooth consistency suitable for application.
What are the best types of decorations to use with edible glue?
Edible glue works well with a variety of decorations, including fondant, gum paste, and edible glitter. It ensures that these elements stay securely attached to your baked creations.
Is edible glue safe to use for all types of baked goods?
Yes, edible glue is safe for all types of baked goods as it is made from food-safe ingredients. It enhances the appearance of cakes and pastries while being completely edible.
How should I store leftover edible glue?
Leftover edible glue should be stored in an airtight container in a cool, dry place. This will help maintain its consistency and prevent it from drying out.
Final Reflection: The Sweet Science of Edible Adhesives
The art of edible decoration is experiencing a renaissance, and at its heart lies the unsung hero: edible glue. No longer a simple afterthought, the creation of strong, reliable, and aesthetically pleasing edible adhesives is crucial for crafting stunning and intricate designs on cakes, cookies, and more. This newfound focus on quality edible glue elevates the entire process, transforming simple decorations into edible masterpieces.
The exploration of edible adhesives has profoundly impacted the world of baking and cake decorating, moving beyond simple royal icing to encompass a wider range of techniques and ingredients. This journey into the science of stickiness has shown me the incredible creativity and ingenuity of bakers and artists who constantly push the boundaries of what's possible. The details are not the details. They make the design.
– Charles Eames. This quote perfectly encapsulates the importance of a strong, reliable edible adhesive in achieving a truly exceptional final product. The subtle yet crucial role of the glue underscores the importance of mastering even the seemingly minor aspects of a craft.
Now, it's your turn to experiment! Don't be afraid to explore different recipes and techniques to find the perfect edible glue for your unique style and creations. Consider the nuances of each ingredient, the desired consistency, and the specific application. Embrace the process of experimentation, for it is through trial and error that true mastery is achieved. The world of edible artistry awaits your unique touch, and with the right adhesive, your creations will truly shine.
Unleash Your Inner Artisan: Craft Amazing Edible Adhesives!
Thanks for exploring the world of edible glue with us! You've now unlocked the secret to creating truly stunning, structurally sound decorations. Ready to put your newfound knowledge into practice?
- Create your first edible glue masterpiece: Choose your favorite recipe from the article and get crafting! Experiment with different consistencies and ingredients to discover your perfect formula.
- Share your creations: Show us your edible glue magic! Tag us on social media with your photos – we’d love to see what you've made.
- Explore advanced techniques: Dive deeper into the world of edible bonding by researching different types of sugars and starches to create unique adhesive properties.
What incredible edible creations will you build today?