
Simple Techniques for Painted Cookies: Adding Artistic Flair

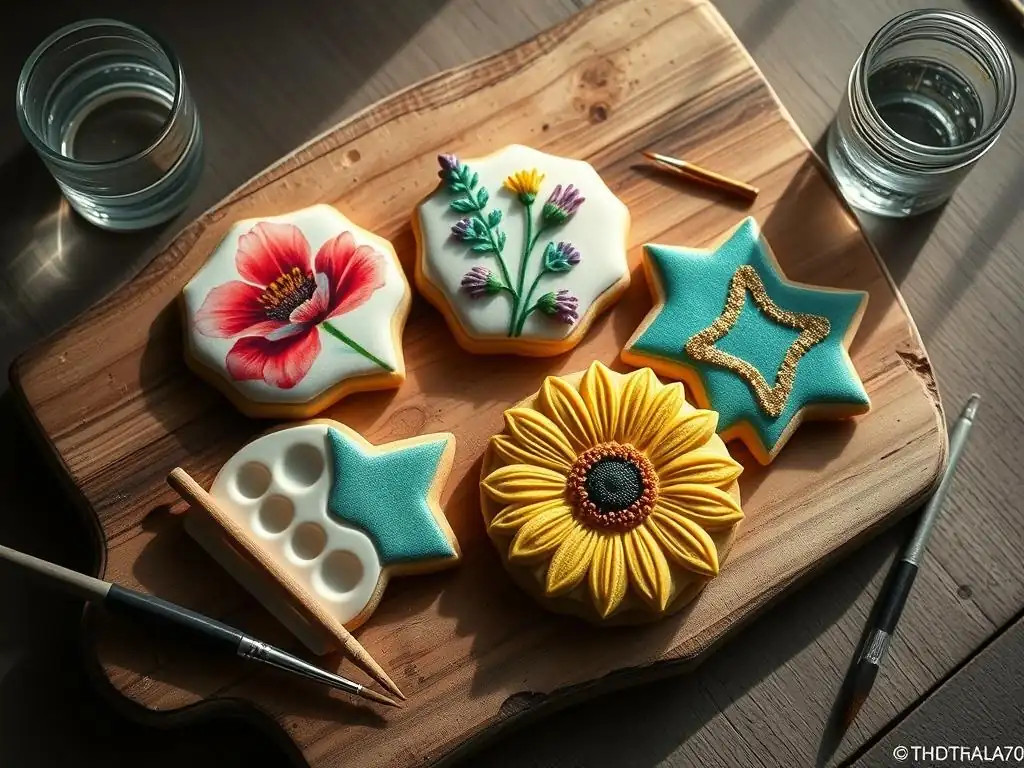
Welcome to BakeWithEase, where unleashing your inner artist in the kitchen just got easier! Ever dreamt of creating stunning, hand-painted cookies that look too good to eat? This week, we're diving into easy painted cookie techniques that will transform your baking into edible masterpieces. Discover the secrets to achieving professional-looking results with simple tools and readily available ingredients. But which painting method is right for you? Keep reading to unlock your cookie-decorating potential and add a touch of artistic flair to your next batch!
- Simple Techniques for Painted Cookies: Adding Artistic Flair to Your Bakes
- Introduction to Easy Painted Cookie Techniques
- Getting Started: Essential Supplies for Cookie Painting
- Technique 1: Wet-on-Wet Cookie Painting for Beginners
- Technique 2: Dry-Brushing for Textured Cookie Designs
- Technique 3: Stenciling on Cookies for Precise Designs
- Technique 4: Hand-Painting Details on Cookies: Fine Lines and Shading
- Advanced Cookie Painting Tips and Tricks
- Inspiration: Painted Cookie Design Ideas
- Cleaning and Storing Your Cookie Painting Supplies
- Conclusion: Unleash Your Creativity with Easy Painted Cookie Techniques
-
Frequently Asked Questions
- How can I ensure my royal icing is the right consistency for painting on cookies?
- What are some easy tools I can use for painting detailed designs on cookies?
- What type of food coloring works best for painting on royal icing?
- Can I paint on cookies that have already been baked and decorated with a base layer of royal icing?
- How do I prevent the colors from bleeding when painting different colors next to each other on my cookies?
- Final Reflection: Embracing Creativity Through Easy Painted Cookie Techniques
- Unleash Your Inner Cookie Artist!
Moving beyond traditional sprinkles and simple piping can feel daunting, but incorporating paint into your cookie decorating opens up a whole new world of artistic possibilities. These easy painted cookie techniques allow bakers of all skill levels to transform simple sugar cookies into stunning edible art pieces.
You don't need to be a professional artist to get started; a few basic supplies and a little practice are all it takes to add intricate details, vibrant colors, and unique textures that will impress everyone. It's a fantastic way to personalize cookies for special occasions or simply unleash your creative side in the kitchen.
Learning simple cookie painting methods is a gradual process, building from foundational techniques to more advanced detailing. Starting with basic flooding using royal icing provides a smooth canvas, and then applying food-safe paints allows for layering and depth that's difficult to achieve with icing alone. Whether you're aiming for delicate floral patterns, bold geometric shapes, or realistic portraits, these beginner-friendly painting techniques offer a flexible medium. Many bakers find that once they start exploring easy painted cookie techniques, their creativity blossoms, leading to entirely new design concepts and a deeper appreciation for edible art.
Painted cookies offer a level of sophistication and detail that can truly elevate your baked goods from delicious treats to edible masterpieces. Unlike thick layers of icing, paint allows for subtle shading, fine lines, and intricate patterns that provide a refined finish. This makes them perfect for elegant events like weddings, baby showers, or upscale parties where presentation is key. The ability to blend colors seamlessly and create delicate gradients adds a dimension that traditional decorating methods often cannot replicate.
Furthermore, using easy painted cookie techniques allows for incredible personalization. You can match specific color palettes, incorporate detailed logos or monograms, or even paint miniature portraits onto cookies. This level of customization is highly sought after and adds significant value to your baked creations. The process itself can also be incredibly therapeutic and enjoyable, offering a creative outlet that combines the satisfaction of baking with the joy of painting. The resulting cookies are not just desserts; they are conversation starters and memorable works of art.
The ideal base for painted cookies is a sturdy sugar cookie that holds its shape during baking and provides a smooth, flat surface for decorating. A classic cut-out sugar cookie recipe works wonderfully, but the key is ensuring it doesn't spread too much in the oven. Look for recipes specifically designed for cut-out cookies, often containing a higher ratio of flour to fat or requiring chilling the dough before baking. Once baked and completely cooled, these cookies offer a stable foundation for your artistic endeavors.
Before you begin painting, the cookie must be covered with a smooth, dry layer of royal icing. This provides the non-porous canvas needed for the food-safe paints to adhere and blend properly. The royal icing should be flooded smoothly and allowed to dry completely, which can take anywhere from 6 to 12 hours depending on humidity levels. Achieving a perfectly smooth flood is crucial, as any bumps or imperfections will show through the paint. This prepared, iced cookie is the essential starting point for all easy painted cookie techniques.
Food-Safe Paints: Choosing Gel Food Colors and Edible Markers
When it comes to painting cookies, you are essentially using diluted food coloring as your paint. The most popular and effective choice is high-quality gel food colors. These are highly concentrated, water-based colors that produce vibrant hues and are easy to dilute with a liquid medium like vodka, clear vanilla extract, or even water (though alcohol dries faster).
You'll need a palette (a small ceramic plate or plastic lid works fine) to mix and dilute your colors, just like traditional painting. Start with small amounts of color and add the liquid medium drop by drop until you achieve the desired consistency – usually like thin watercolor paint.
Edible markers are another fantastic tool, especially for adding fine lines, outlines, or details before or after painting. They are essentially pens filled with food-grade ink. While not used for broad washes like diluted gel colors, they are perfect for adding text, outlines, or small dots. Using a combination of diluted gel colors for larger areas and edible markers for detail work is a common approach in many easy painted cookie techniques. Always ensure any coloring product you use is specifically labeled as food-safe and intended for edible applications.
Essential Brushes and Tools: Fine-Tip Brushes and Palette Knives
Just like any painting project, the right brushes are critical for achieving beautiful results on cookies. You'll need a variety of small, fine-tip brushes. Synthetic brushes are often preferred as they are easy to clean and maintain their shape.
A basic set including round brushes in sizes 0, 1, and 2 is a great starting point for detail work and fine lines. Larger flat brushes (size 4 or 6) can be useful for applying washes of color over larger areas or for techniques like dry brushing. It's important to dedicate a set of brushes solely for food use to avoid contamination.
Beyond brushes, a few other tools can be helpful. A small palette knife or toothpick is useful for transferring small amounts of gel color from the jar to your mixing palette. Small cups of clean water or alcohol are necessary for diluting colors and rinsing brushes between colors. Paper towels or a clean cloth are essential for drying brushes and wiping up any spills. Having these simple tools organized and ready before you start will make learning easy painted cookie techniques much smoother and more enjoyable.
Preparing Your Royal Icing for Wet-on-Wet Technique
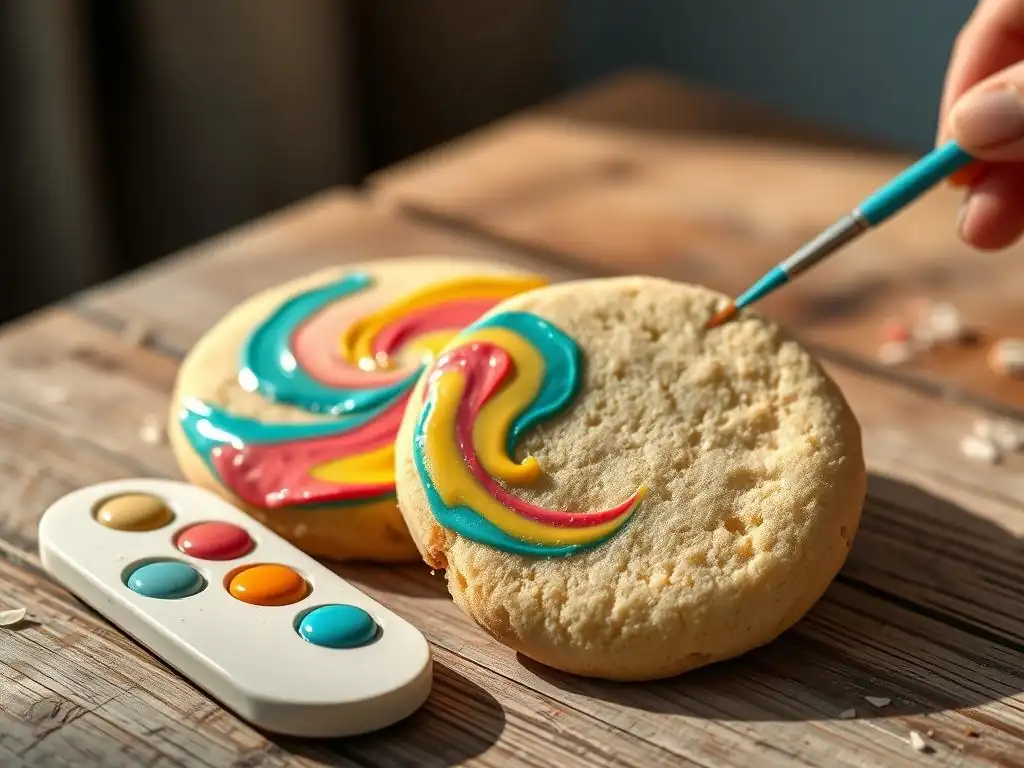
The wet-on-wet technique actually involves painting into wet royal icing, rather than onto a dry surface. This requires two different consistencies of royal icing. The base layer, which covers the cookie, should be a flood consistency – thin enough to spread smoothly and self-level, but not so thin that it runs off the edge (think honey consistency). You'll need enough of this to cover all the cookies you plan to decorate.
The "paint" in this technique is simply royal icing of a slightly thicker consistency, colored with gel food colors. This second icing should be a piping consistency, similar to toothpaste, which holds its shape when piped but is still soft enough to sink slightly into the wet base layer. You will color small amounts of this piping icing in the colors you want to use for your design. Having these two consistencies ready simultaneously is key, as you must work quickly while the base layer is still wet to execute this specific easy painted cookie technique.
Here is a basic walkthrough of the wet-on-wet method:
- Flood your cookie with the flood-consistency royal icing. Use a scribe tool or toothpick to gently spread the icing to the edges and pop any air bubbles.
- Immediately, while the flood icing is still wet, pipe or drop small amounts of the colored piping-consistency icing onto the wet base in your desired pattern (dots, lines, swirls).
- Using a scribe tool or toothpick, gently drag through the wet icing layers to marble or swirl the colors together. For example, drag a tool from the center of a dot outwards to create a heart shape, or drag through parallel lines to create a feathered effect.
- Continue manipulating the icing until you achieve your desired look. Work relatively quickly, as the base icing will start to set.
- Leave the cookie undisturbed on a flat surface to dry completely, typically 12-24 hours, until the surface is hard.
This simple cookie painting method creates beautiful, seamless designs where the colors blend softly into each other as they dry together.
Tips for Avoiding Common Wet-on-Wet Mistakes
One of the most common challenges with the wet-on-wet technique is the timing. If you wait too long after flooding the base layer, a skin will start to form, and the piped icing will sit on top rather than sinking and blending. To avoid this, prepare all your colored piping icings before you start flooding your cookies, so they are ready to go immediately. Work on one cookie at a time if you are just starting out, or flood a small batch (say, 5-10 cookies) if you can work quickly.
Another potential issue is using icing consistencies that are too similar. If the piping icing is too thin, it will spread too much and lose definition. If the flood icing is too thick, the piped icing won't sink in properly. Practice with small test batches of icing to find the right consistencies before committing to a large batch of cookies. Also, be gentle when dragging your tool through the icing; too much pressure can scratch the cookie surface underneath or create uneven lines. Mastering these nuances is key to successful easy painted cookie techniques using the wet-on-wet method.
Dry-brushing is an easy painted cookie technique borrowed directly from traditional painting and is excellent for adding texture, depth, and a slightly distressed or aged look to your cookies. Unlike wet painting, where brushes are loaded with diluted color, dry-brushing uses a minimal amount of paint on a relatively dry brush. This technique allows you to lightly deposit color onto the surface, highlighting textures or creating subtle gradients and shadows. It's particularly effective for replicating surfaces like wood grain, stone, fabric, or even adding a rosy blush to a character's cheeks.
To prepare for dry-brushing, your royal icing base must be completely dry and hard. You'll also need a flat brush or a stiff-bristled round brush, and your food-safe paint (diluted gel color) should be slightly thicker than for wet painting – more like acrylic paint consistency, or you can use undiluted edible dusts.
The magic happens by dipping just the very tip of the brush into the color, then wiping almost all of it off onto a paper towel. What's left on the brush is the minimal amount needed to create a dry, scratchy stroke that catches on the surface texture, or applies a very thin, buildable layer of color.
Mastering the Dry-Brush Technique: A Detailed Walkthrough
Follow these steps to practice dry-brushing:
- Ensure your iced cookie is fully dry and hard.
- Dip the tip of your chosen brush into your food-safe paint or edible dust.
- Wipe almost all of the paint off onto a clean paper towel. You want the brush to feel almost dry when you test it on the paper towel.
- Lightly brush the cookie surface using short, quick strokes. For texture like wood grain, use strokes in one direction. For a subtle blush, use a soft, circular motion.
- Build the color up gradually. It's easier to add more color than to remove it. Start with a very light application and add layers until you achieve the desired intensity and texture.
- Experiment with different brush types and pressures to see how they affect the result.
This simple cookie painting method allows for incredible control over color placement and intensity, making it ideal for adding realistic touches.
Dry-brushing is incredibly versatile for adding unique finishes using easy painted cookie techniques. One popular application is creating a rustic wood grain effect on cookies shaped like signs or planks; use a brown or grey paint and long, sweeping strokes with a flat brush. For a stone or concrete look, use various shades of grey and black, applying them with a stippling or random brushing motion.
You can also use dry-brushing to add soft shading around the edges of shapes or to create a vintage, aged look on designs like antique keys or frames. Applying a light dry brush of pink or red can give characters a natural flush on their cheeks. For floral designs, dry-brushing can add subtle color variations to petals or create a fuzzy texture for leaves. Experimenting with different colors and brush strokes will reveal the many possibilities this easy painted cookie technique offers for adding visual interest and realism.
Stenciling is a fantastic easy painted cookie technique for achieving precise, repeatable patterns and intricate designs without needing advanced freehand painting skills. Stencils are thin sheets, usually made of food-grade plastic, with designs cut out of them. When placed over a cookie and colored applied over the top, the color only transfers through the cut-out areas, leaving a clean, defined pattern. This method is perfect for geometric patterns, detailed lace designs, logos, or adding backgrounds to cookies.
To use stencils effectively, your iced cookie base must be perfectly dry and smooth. Any bumps or unevenness can cause the color to seep under the stencil. You can apply color through a stencil using several mediums: diluted food-safe paint (thicker consistency than for hand-painting), edible dusts, or even royal icing (though paint or dusts are more common for fine details). The key is to use a minimal amount of your coloring medium and apply it carefully to prevent bleeding under the stencil, making this one of the more controlled easy painted cookie techniques.
How to Secure and Use Stencils Effectively
Securing the stencil firmly against the cookie is the most crucial step to prevent your color from bleeding underneath and ruining the crisp lines of the design. The simplest method is to hold the stencil down firmly with one hand while applying the color with the other. For more complex designs or if you're doing a large batch, consider using stencil holders or magnets on a metal baking sheet to keep the stencil in place. A light misting of edible adhesive spray on the back of the stencil (use sparingly!) can also help it stick to the dry icing.
Once the stencil is secure, apply your color. If using diluted food paint, use a sponge or a stiff brush (like a stencil brush) and apply the color with a light dabbing or swirling motion, working from the outside of the cut-out design inwards. Use very little paint at a time.
If using edible dusts, use a dry brush to gently brush the dust over the stencil. For both methods, lift the stencil straight up carefully once the color is applied to avoid smudging. Practice on a piece of paper towel first to get a feel for the right amount of color and pressure.
Stenciling Techniques for Sharp, Clean Lines
Achieving sharp, clean lines with stenciling requires attention to detail and careful application. As mentioned, securing the stencil tightly is paramount. Using the correct consistency of your coloring medium is also vital. Paint that is too thin is more likely to bleed. Edible dusts are generally less prone to bleeding but can require more layers to build up color intensity. Applying the color with a dabbing motion (like using a sponge) rather than a sweeping stroke helps push the color down rather than under the stencil edges.
Another tip for perfect stenciling in easy painted cookie techniques is to scrape off any excess paint or dust from your brush or sponge before applying it to the stencil. You want just enough color to transfer through the cut-outs. If using multiple colors on one stencil, allow one color to dry slightly before applying the next if the colors are adjacent. With practice, you'll find stenciling is a fast and effective way to add professional-looking patterns and details to your painted cookies.
Achieving Fine Details with a Steady Hand
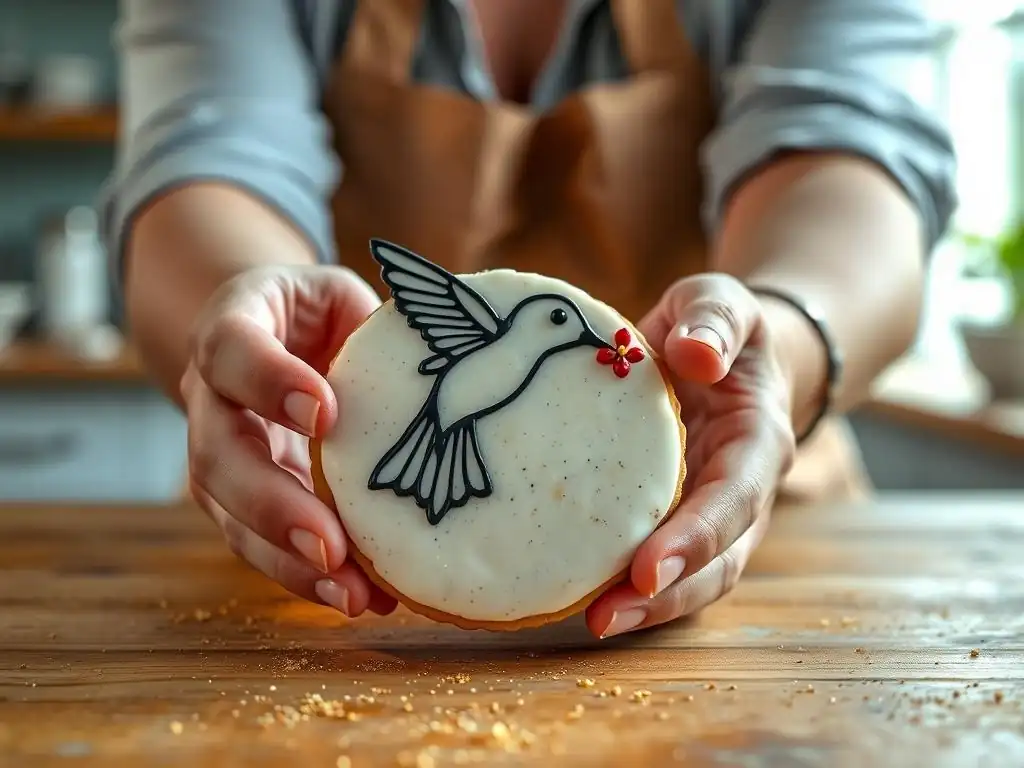
Once you have a base layer of dry royal icing (or a stenciled design), hand-painting allows you to add intricate details, outlines, and personalized touches that bring your cookie art to life. This is where fine-tip brushes truly shine. Using diluted food-safe gel colors, you can paint delicate lines for outlines, add small dots for patterns, or create tiny elements like eyes, mouths, or floral accents. The key here is using a very fine brush (sizes 000, 00, or 0 are excellent for this) and properly diluted paint – it should flow smoothly off the brush without being watery.
Holding the brush correctly and finding a comfortable position are essential for achieving a steady hand. Rest your painting hand on the table or use the pinky finger of your painting hand to brace against the cookie surface for stability. Practice drawing straight lines and curves on a piece of paper towel with your diluted paint to get a feel for the brush and paint consistency. Start with simpler designs and gradually work up to more complex details as your confidence grows with this easy painted cookie technique.
Shading Techniques for Added Depth and Dimension
Adding shading is a powerful way to give your painted cookie designs depth and make them look more realistic or dynamic. Shading involves applying lighter or darker tones of a color to suggest light sources and form. You can achieve shading by using different dilutions of the same color (more diluted for highlights, less for shadows) or by mixing a small amount of black, grey, or a complementary color into your base color.
Apply shading with a slightly damp brush using a very small amount of paint. For soft shading, like on petals or fabric folds, use a gentle back-and-forth motion or a light stippling. For sharper shadows, apply a slightly more concentrated line of color and then quickly use a clean, damp brush to soften and blend the edge. Practice observing how light falls on objects to understand where highlights and shadows would naturally occur. Mastering shading is a step towards more advanced easy painted cookie techniques, significantly enhancing the visual impact of your designs.
Practice Exercises for Improving Hand-Painting Skills
Improving your hand-painting skills on cookies, like any art form, requires practice. Start with basic exercises on dry iced cookies or even fondant-covered dummy cookies. Practice drawing straight lines, curves, circles, and dots repeatedly using your fine-tip brush and diluted paint. Try varying the pressure to see how it affects the line thickness.
Once comfortable with basic shapes, move on to simple patterns like stripes, polka dots, or checkerboards. Then, try tracing simple images or outlines onto the dry icing with an edible marker before painting within the lines. Practice simple shading on basic shapes like spheres or cubes to understand how to create form. Dedicating even just 15-20 minutes a few times a week to these easy painted cookie technique exercises will significantly improve your brush control and confidence.
Achieving seamless color blends is key to creating professional-looking painted cookies, especially for effects like gradients, sunsets, or realistic textures. This requires working relatively quickly while the paint is still wet on the cookie surface. Apply your initial colors side-by-side, making sure they touch. Then, using a clean, slightly damp brush, gently feather the edges where the colors meet, moving the brush back and forth across the boundary. Use minimal pressure and rinse and dry your brush frequently to keep it clean and prevent muddying the colors.
For larger areas or softer blends, you can use a slightly larger, soft brush and a very light touch. You can also use a technique called "glazing," applying very thin, transparent layers of diluted color over each other once the previous layer is dry. This builds up color intensity gradually and allows for subtle shifts in hue. Experimenting with different levels of paint dilution and brush types will help you discover the best methods for blending within your easy painted cookie techniques repertoire.
Even with careful planning, you might encounter issues when painting cookies. One common problem is the paint soaking into the royal icing, leaving a dull or patchy finish. This usually happens if the royal icing wasn't fully dry or if the paint is too watery. Ensure icing is completely hard (allow 12+ hours) and use a slightly less diluted paint. If the paint beads up on the surface, there might be residual grease or moisture; ensure your cookies and icing are completely dry and handle them carefully.
Smudging is another frustration, especially when layering details. Allow each layer of paint to dry completely before adding the next. This can take anywhere from a few minutes for thin lines to an hour or more for washes, depending on paint dilution and humidity. If you make a mistake on a dry layer, you can sometimes gently lift off small areas of paint with a clean, damp brush or a cotton swab before it fully sets, but this requires a light touch. Persistence and learning from each attempt are part of mastering easy painted cookie techniques.
Once your painted cookies are completely dry (including all paint layers), you might want to seal them to protect the artwork and provide a slight sheen. The most common method is to use an edible glaze or varnish. These products are food-safe and typically applied with a soft brush or airbrush in a thin, even layer. An edible glaze can help prevent the paint from smudging if the cookies are handled or stacked.
Alternatively, simply allowing the painted cookies to dry fully provides a relatively durable finish, especially if stored properly. If not using a glaze, handle painted cookies with care and package them individually in cellophane bags to prevent them from rubbing against each other. While not strictly necessary for consumption, sealing can add a professional touch and extra protection, preserving the beautiful results of your easy painted cookie techniques.
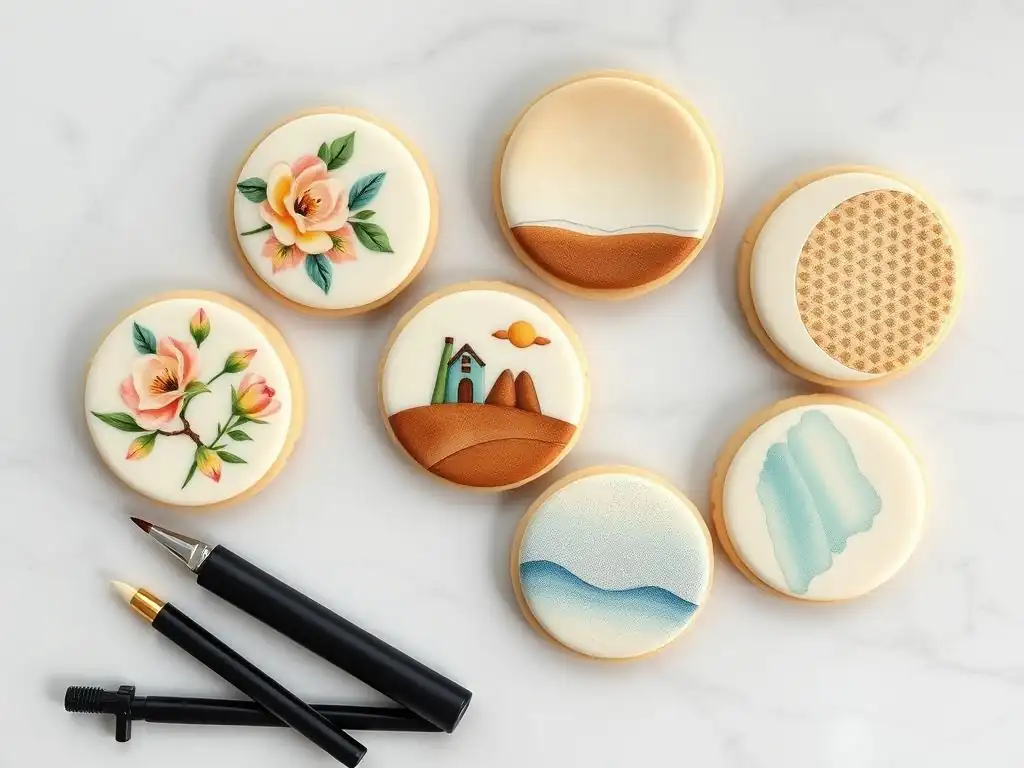
Holidays are a fantastic opportunity to showcase your easy painted cookie techniques! For Christmas, paint intricate snowflake patterns, festive scenes like Santa's sleigh against a starry sky, or add detailed holly and berries to wreath-shaped cookies. Easter cookies can feature beautifully painted eggs, bunnies with softly shaded fur, or delicate spring flowers.
Halloween allows for spooky fun with painted spiderwebs, detailed monster faces, or eerie graveyard scenes. For Valentine's Day, paint realistic roses, delicate lace patterns, or personalized messages on heart-shaped cookies. Seasonal cookies are also popular; think painted autumn leaves, summer beach scenes, or spring blossoms. The possibilities are endless for applying simple cookie painting methods to capture the spirit of any holiday.
Nature provides endless inspiration for stunning painted cookies. Floral designs are particularly popular, ranging from simple wildflowers painted with a wet-on-wet technique to highly detailed roses or peonies created with hand-painting and shading. You can paint lush green leaves with dry-brushing for texture, or create delicate vines and tendrils with a fine-tip brush.
Beyond flowers, consider painting birds with detailed feathers, butterflies with intricate wing patterns, or realistic depictions of fruits and vegetables on cookies shaped accordingly. Landscapes, from serene forests to vibrant gardens, can also be translated onto cookies using a combination of blending and detailing techniques. These easy painted cookie techniques allow you to bring the beauty of the natural world to your edible art.
Painting cookies is an excellent way to recreate beloved characters from movies, books, or cartoons. Start by outlining the character's basic shape and features with a fine edible marker, then fill in the areas with diluted food paints, using different consistencies for blocking in color versus adding details. Shading can add dimension to faces and clothing.
For complex characters, break down the design into smaller, manageable sections. Use stencils for logos or repeating elements if needed. Practice painting facial features like eyes and mouths separately to build confidence. While recreating characters can be challenging, the step-by-step nature of easy painted cookie techniques, starting with outlines and layering colors, makes it achievable and incredibly rewarding when you see your favorite characters come to life in edible form.
Proper Care for Your Brushes and Tools
Properly cleaning and caring for your food-safe brushes and tools is essential for their longevity and to ensure hygiene. Immediately after use, rinse your brushes thoroughly in clean water (or alcohol if you used it as a diluent) to remove all traces of food coloring. Swirl the brush gently in the water and press it against the bottom of the container to help release pigment from near the ferrule (the metal part connecting the bristles to the handle).
Once rinsed, wash the brushes gently with a mild soap specifically designed for art brushes or a gentle dish soap. Lather and rinse until no color or soap residue remains. Reshape the bristles with your fingers and lay the brushes flat or hang them upside down to dry completely before storing. Never store brushes bristle-up in a container while they are still wet, as this can damage the shape. Taking these steps ensures your tools are clean and ready for your next session of easy painted cookie techniques.
Storing Food-Safe Paints for Longevity
Storing your food-safe gel colors and edible dusts correctly will help maintain their quality and extend their shelf life. Keep gel colors tightly capped to prevent them from drying out. Store them in a cool, dry place away from direct sunlight. While refrigeration isn't strictly necessary for most gel colors, maintaining a consistent room temperature is ideal.
Edible dusts should also be kept tightly sealed, as they can absorb moisture from the air, which can cause clumping. Store dusts separately from strong odors, as they can sometimes absorb smells. Always use clean, dry tools when taking color from the containers to avoid introducing moisture or contaminants. Following these simple storage guidelines ensures your colors remain vibrant and usable for many future easy painted cookie techniques projects.
As we've explored, transforming simple cookies into stunning edible art is entirely achievable with easy painted cookie techniques. From the smooth blends of wet-on-wet to the textured finishes of dry-brushing, the precision of stenciling, and the intricate details of hand-painting, these methods offer a wide range of possibilities for creative expression. What starts as a basic sugar cookie becomes a blank canvas awaiting your personal touch.
The journey of learning these simple cookie painting methods is rewarding, allowing you to add unique flair to your bakes for any occasion. It encourages experimentation with color, texture, and design, pushing the boundaries of traditional cookie decorating. Don't be afraid to start simple, practice regularly, and gradually incorporate more complex techniques as you gain confidence. The satisfaction of creating a beautiful, hand-painted cookie is immense.
While this article focused on brush-based easy painted cookie techniques, the world of cookie painting extends further. Airbrushing is a more advanced method that uses a small air compressor and airbrush gun to spray a fine mist of edible paint onto the cookie surface. This technique allows for incredibly smooth gradients, quick coverage of large areas, and the creation of photo-realistic effects.
Learning airbrushing requires a different set of tools and skills compared to brush painting, but it's a natural progression for those looking to expand their edible art capabilities. It's often used in conjunction with stencils for sharp lines or freehand for soft, blended backgrounds. While perhaps not categorized under "easy painted cookie techniques" for beginners, it's an exciting area to explore once you've mastered the fundamentals of brush-based painting and are ready for new challenges in turning your cookies into breathtaking works of art.
Frequently Asked Questions
The ideal consistency is often referred to as "flood consistency," meaning it should be thin enough to spread smoothly but thick enough to hold its shape. Test it by piping a line; it should smooth out in about 10-15 seconds.
Fine-tipped food-safe paintbrushes are essential. You can also use toothpicks for extremely fine details or edible markers for outlining.
What type of food coloring works best for painting on royal icing?
Gel food coloring is generally recommended as it's highly concentrated and won't thin out your royal icing too much. Liquid food coloring can sometimes make the icing too runny.
Yes, absolutely! In fact, it's best to paint on cookies that have a completely dry base layer of royal icing. This provides a stable and smooth surface for your artwork.
Allow each color to dry completely before applying the next color to prevent bleeding. You can also use a fan to speed up the drying process.
In a world where culinary arts are increasingly celebrated, the ability to create visually stunning treats has never been more relevant. The techniques discussed in this article not only elevate the humble cookie but also empower individuals to express their creativity in delicious ways. As we navigate a culture that values both aesthetics and flavor, mastering easy painted cookie techniques can transform our baking endeavors into a form of personal expression and joy.
The impact of these artistic cookie techniques extends beyond the kitchen; they foster connection and celebration in our social lives. Baking and decorating cookies can become a shared experience, bringing friends and family together to create lasting memories. As we engage in this creative process, we invite others to join us in the joy of making something beautiful. > “Creativity takes courage.” – Henri Matisse. This sentiment resonates deeply as we explore how the simple act of painting cookies can inspire us to embrace our artistic sides, regardless of our skill levels.
As you reflect on the techniques shared in this article, I encourage you to take a moment to envision how you can incorporate these practices into your own life. Whether you’re hosting a gathering, celebrating a special occasion, or simply indulging in a personal project, let your creativity shine through your painted cookies. Remember, each brushstroke is a step toward not only enhancing your baking skills but also enriching your connections with others. So grab your supplies, unleash your imagination, and start creating edible art that brings joy to both you and those around you!
Thanks for joining us on this delicious journey into painted cookie artistry! We hope you’ve gained some inspiration and new techniques to elevate your baking game. Now it's time to put your newfound skills to the test!
- Dive into your first masterpiece: Grab your supplies and try one of the techniques we discussed. Don't be afraid to experiment with colors and designs! Even a small, simple attempt is a huge step towards creating something beautiful.
- Share your creations: Show off your painted cookie pride on social media! Use #BakeWithEasePaintedCookies to connect with other aspiring cookie artists and inspire others.
- Explore our other baking guides: Find more creative inspiration and handy tips on BakeWithEase.com for even more baking adventures.
What unique design will you create with your painted cookies? Let us know in the comments below!