
Shaping Mini Baguettes: Technique and Timing

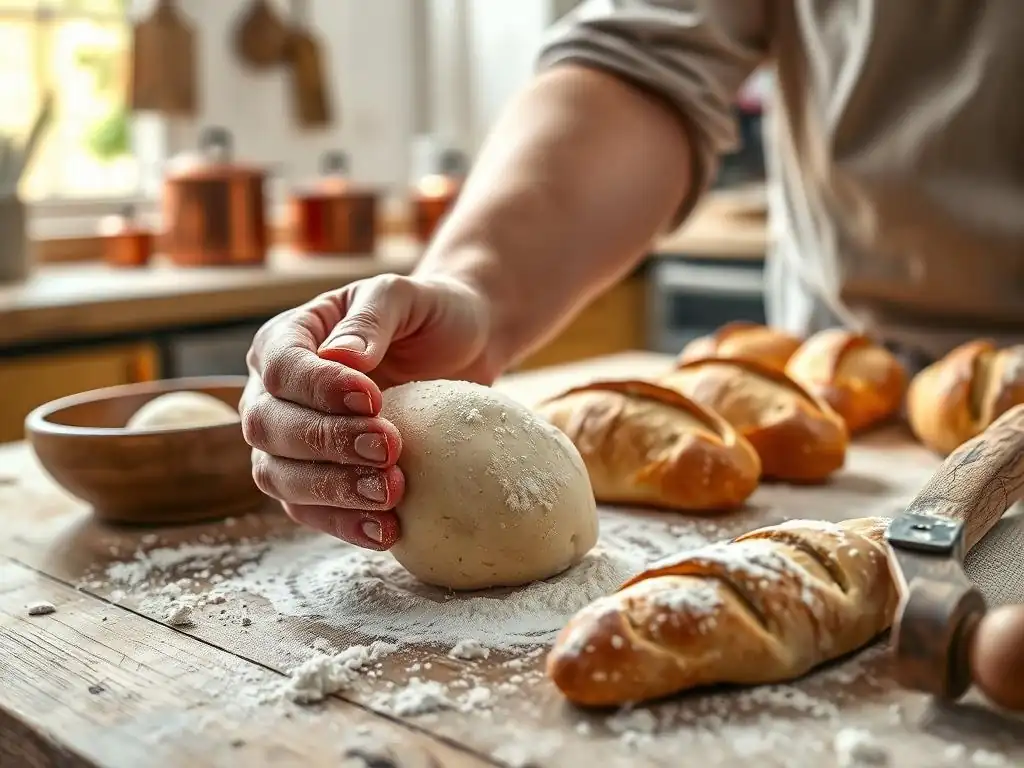
Welcome to BakeWithEase, where baking mastery is within your reach! Ever dreamed of crafting perfectly formed, crusty mini baguettes? You're in the right place. Our Mini Baguette Shaping Tutorial unveils the secrets to achieving that signature baguette shape, regardless of your experience. Dive in and discover the technique and timing that will transform your bread baking, leaving you with delectable, bakery-worthy results. What are the critical nuances that elevate a simple dough into a professional-looking baguette? Let's find out!
- Shaping Baguettes: A Baker's Guide to Perfect Form and Texture
- Introduction to Baguette Shaping: Mastering the Fundamentals
- Essential Equipment and Ingredients for Baguettes
- Preparing the Dough for Baguette Shaping
- Step-by-Step Baguette Shaping Tutorial
- Mastering Baguette Shaping: Tips and Tricks
- Proofing Shaped Baguettes
- Scoring Baguettes for Perfect Oven Spring
- Baking Baguettes to Golden Perfection
- Cooling and Storing Your Homemade Baguettes
- Troubleshooting Common Baguette Shaping Issues
- Baguette Shaping Variations and Recipes
- Conclusion: Mastering the Art of Baguette Shaping
- Frequently Asked Questions
- Final Reflection: The Art and Soul of the Mini Baguette
- Unleash Your Inner Boulanger: Bake Perfect Mini Baguettes!
Shaping Baguettes: A Baker's Guide to Perfect Form and Texture
Introduction to Baguette Shaping: Mastering the Fundamentals
Why Learn to Shape Baguettes?
Learning the proper techniques for shaping baguettes is a fundamental skill that elevates your bread baking from simple loaves to impressive, artisan-style creations. The shape of a baguette isn't just for aesthetics; it significantly impacts the final texture, contributing to that iconic crispy crust and open, airy interior.
Mastering the shaping process ensures even baking and allows for the development of a beautiful, elongated form that is both traditional and functional. Whether you're aiming for classic full-sized baguettes or tackling a mini baguette shaping tutorial, understanding the mechanics of dough manipulation is crucial for success and consistency in your baking endeavors.
Furthermore, efficient shaping minimizes stress on the dough, preserving the delicate gas bubbles created during fermentation. This is particularly important when working with high-hydration doughs, which can be challenging but yield superior texture. A well-shaped baguette holds its structure during proofing and baking, resulting in better oven spring and a more desirable crumb structure. Think of it as the final sculpting step before the magic happens in the oven; getting it right makes all the difference in achieving bakery-quality results right in your own kitchen.
The Art of the Perfect Baguette
The perfect baguette is a symphony of contrasts: a crackling, thin crust giving way to a light, open, and irregular crumb. Achieving this balance is an art form developed through practice and attention to detail at every stage, not least during the shaping phase. The classic French baguette, for instance, typically weighs around 250-300 grams and measures roughly 60-70 cm in length, though regional variations exist. The distinctive scoring pattern also plays a vital role, guiding the expansion of the loaf during baking and contributing to the rustic appearance and structure.
Beyond the technical aspects, the art lies in understanding the dough itself – its hydration, gluten development, and temperature. A dough that is properly developed and rested will be pliable and responsive to shaping, allowing you to create tension without tearing it. This skill transforms a simple mixture of flour, water, salt, and yeast into a culinary icon. Even when scaling down for a mini baguette shaping tutorial, the principles remain the same: gentle handling, building tension, and creating a consistent form that will bake beautifully.
Essential Equipment and Ingredients for Baguettes
Gathering Your Baking Tools
Having the right tools on hand makes the baguette shaping process significantly smoother and more successful. A digital kitchen scale is indispensable for accurate ingredient measurement, ensuring consistent results batch after batch. For handling the sticky dough often used for baguettes, a bench scraper (or dough scraper) is essential for dividing and manipulating the dough without adding excessive flour. You'll also need a proofing surface; a baker's couche (a piece of linen canvas) is traditional and excellent for supporting the shaped baguettes and preventing them from sticking together as they proof.
Other useful tools include a baking stone or steel, which helps create a hot, even surface for baking and promotes good oven spring, and a peel for transferring the shaped loaves onto the hot surface. Finally, a sharp scoring blade, known as a lame, is crucial for making clean, precise cuts just before baking. While you can use a sharp knife, a lame held at a low angle provides the best control for achieving the signature baguette scores.
Key Ingredients for Authentic Baguettes
The simplicity of the baguette ingredient list means that the quality of each component is paramount. High-protein bread flour is typically preferred as it develops strong gluten networks necessary to support the elongated structure and open crumb. Look for flour with a protein content of 12% or higher if possible. Water is not just for hydration; it activates the gluten and yeast. Baguette doughs often have high hydration levels, sometimes 70-80% or even higher relative to the flour weight, contributing to the moist, open crumb.
Salt is vital for flavor and also helps control yeast activity and strengthens the gluten structure. Use a good quality non-iodized salt like sea salt or kosher salt. Finally, yeast (active dry, instant, or fresh) is responsible for leavening the dough.
Some traditional or artisan recipes might use a preferment like a poolish or levain (sourdough starter) in addition to or instead of commercial yeast, adding complexity and depth of flavor. Ensuring these four basic ingredients are of good quality sets the foundation for a truly authentic baguette, whether you're making standard size or following a mini baguette shaping tutorial.
Preparing the Dough for Baguette Shaping
Achieving the Right Dough Consistency
Before you even think about shaping, the dough needs to be properly developed. This means achieving a consistency where the gluten is strong and elastic, capable of holding its shape and trapping gases. For baguettes, which often use high hydration, the dough will likely be quite wet and sticky initially.
Techniques like autolyse (mixing flour and water and letting it rest before adding salt and yeast) and stretch and folds during the bulk fermentation phase are crucial for developing gluten without intensive kneading. Aim for a dough that passes the "windowpane test," meaning you can gently stretch a small piece until it's thin enough to see light through without tearing.
The ideal consistency is one that is extensible enough to be shaped without excessive force but has enough underlying tension to maintain its form. If the dough is too weak, it will spread out during proofing and baking. If it's too tight or underdeveloped, it will resist shaping and likely tear. This balance is developed over the bulk fermentation period, where enzymes break down starches and gluten structures strengthen.
The Importance of Bulk Fermentation for Baguettes
Bulk fermentation, the first rise of the dough before dividing and shaping, is arguably the most critical stage for flavor development and dough structure in baguettes. During this period, typically lasting from 2 to 4 hours at room temperature (around 70-75°F or 21-24°C) or significantly longer under refrigeration (12-24 hours), yeast produces carbon dioxide, causing the dough to rise, while beneficial bacteria (like lactic acid bacteria, especially if using a preferment or sourdough) produce organic acids that contribute to the characteristic tangy flavor.
Proper bulk fermentation also allows the gluten network to relax and become more extensible, making the dough easier to shape later on. Over-fermenting can lead to a weak dough that collapses during shaping or proofing, while under-fermenting results in a tight, difficult-to-shape dough and a less flavorful bread. Observing the dough – looking for a significant increase in volume (often doubled), a slightly domed surface, and visible gas bubbles – is key to knowing when bulk fermentation is complete and the dough is ready for shaping, preparing it for a successful mini baguette shaping tutorial or standard size process.
Step-by-Step Baguette Shaping Tutorial
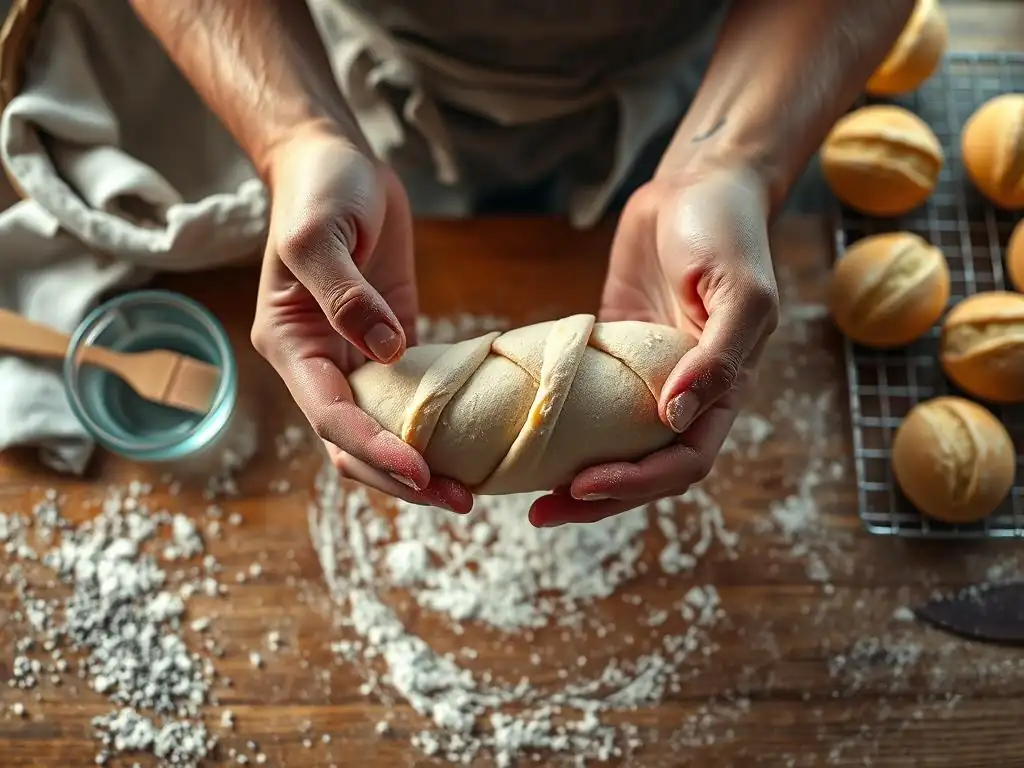
Dividing the Dough: Creating Individual Portions
Once your bulk fermentation is complete, it's time to divide the dough into individual portions for shaping. Gently turn the dough out onto a lightly floured or wet surface (depending on hydration). Use a bench scraper to carefully cut the dough into pieces of the desired weight. For standard baguettes, this is typically between 250 and 300 grams per loaf. If you're following a mini baguette shaping tutorial, you might aim for portions between 100 and 150 grams. Try to make clean cuts rather than tearing the dough, and handle the pieces gently to minimize degassing.
The goal here is to divide the dough with minimal disturbance to the structure that developed during bulk fermentation. Resist the urge to knead or aggressively handle the dough pieces. Simply divide them and move them aside, ready for the next step. Consistency in weight is important for uniform baking, so use your scale for accuracy. For example, if you have 1 kg of dough and want 4 standard baguettes, each piece should weigh approximately 250g.
Pre-Shaping: Forming Round Dough Balls (Boules)
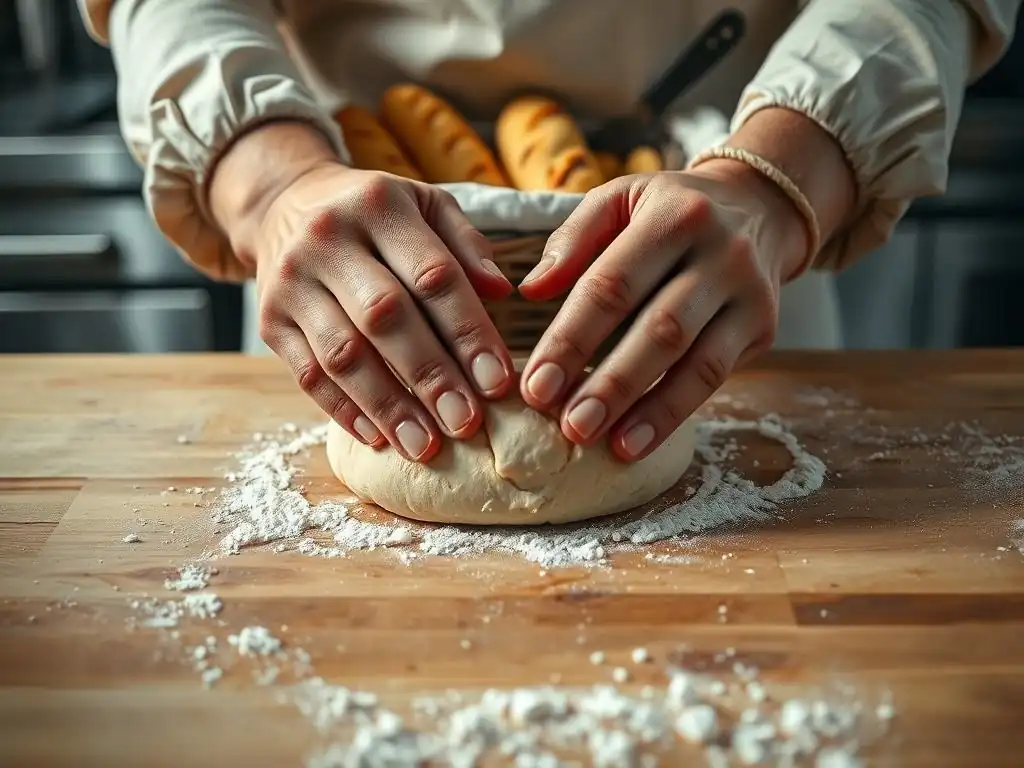
Pre-shaping is a quick intermediate step that helps build initial tension and makes the final shaping much easier. For baguettes, the most common pre-shape is a gentle round (boule). Take a divided piece of dough, pull the edges towards the center, and gently cup it with your hand while moving it in a circular motion on a clean, unfloured surface. This action creates a smooth, taut surface on top and gathers the seam underneath.
The purpose of this step is to create a consistent shape and surface tension in each piece before the final elongation. This allows the gluten to start organizing itself. Don't worry about making perfect rounds; the goal is just to create a somewhat taut surface. Place the pre-shaped rounds seam-side down on your work surface.
Resting the Dough: The Key to Relaxation
After pre-shaping, the dough needs to rest. This short rest period, usually 15 to 20 minutes, is crucial for allowing the gluten you just tightened during pre-shaping to relax. If you try to shape the baguettes immediately after pre-shaping, the dough will be tight and spring back, making it difficult to elongate without tearing. This rest period allows the dough to become pliable and easy to work with again.
Cover the dough rounds loosely with plastic wrap or a damp cloth to prevent them from drying out and forming a skin. During this rest, you'll notice the dough spreads out slightly, losing some of the tension you built. This is exactly what you want – it's a sign that the gluten has relaxed and is ready for the final shaping step.
The Final Shaping Technique: Creating the Baguette Form
This is where the "Mini baguette shaping tutorial" and standard baguette shaping converge – the technique is the same, just the final length differs. The goal is to create an elongated cylinder with even thickness and a taut surface.
Step 1: Flattening the Dough
Take one rested dough round (remembering the 15-20 minute rest). Place it seam-side up on a lightly floured surface. Using the pads of your fingers, gently flatten the dough into an oval or rectangle shape, roughly 6-8 inches long for a standard baguette or proportionally shorter for a mini baguette. Be careful not to degas the dough completely; you just want to create a flat surface to work with.
Step 2: Folding and Sealing the Dough
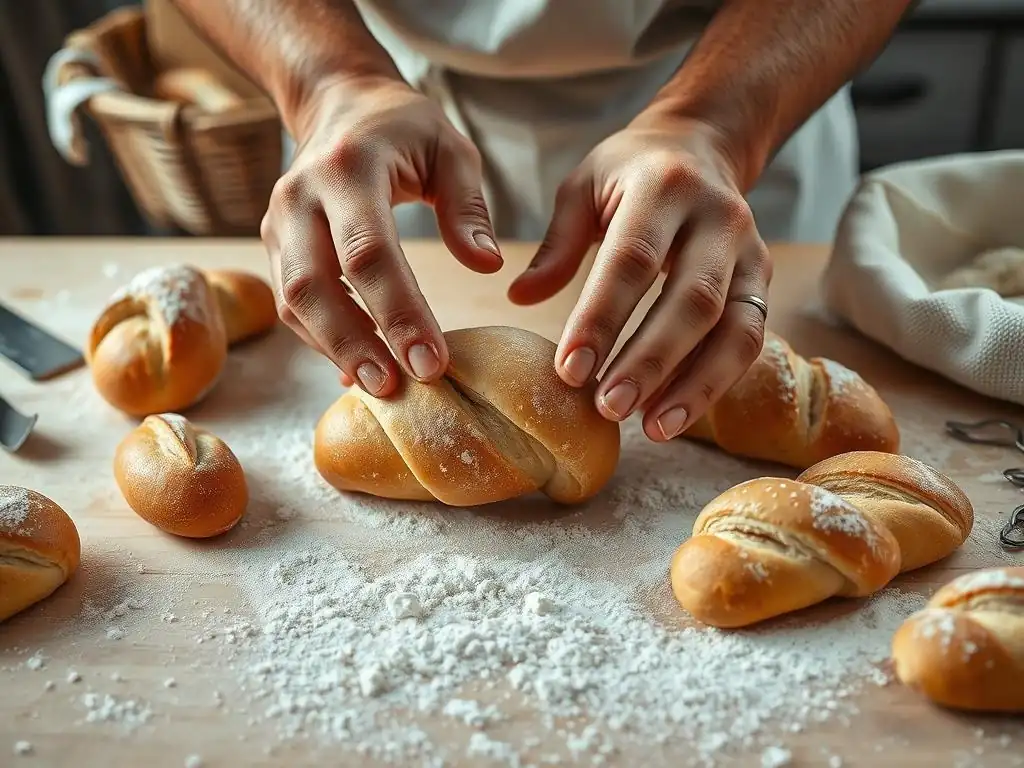
Imagine the oval is divided horizontally. Fold the top third of the oval down towards the center and gently press to seal the edge with your fingertips. Then, fold the bottom third up over the folded top section. Press firmly along the seam with the heel of your hand to create a strong seal. This initial double fold builds tension. Now, fold the dough in half lengthwise, bringing the top edge down to meet the bottom sealed edge.
Step 3: Elongating the Baguette
Once folded in half, seal the final seam firmly along the entire length using the heel of your hand. This seam will be the bottom of your baguette. Now, gently roll the dough back and forth with the palms of your hands, starting from the center and working outwards, to elongate it to the desired length. Apply even pressure to maintain a consistent thickness along the loaf. For a standard baguette, you might aim for 18-24 inches. For a mini baguette shaping tutorial, roll it to maybe 6-10 inches, depending on your preference.
Step 4: Tapering the Ends
As you roll and elongate, gently reduce the pressure towards the ends of the baguette to create a slight taper. This gives the classic pointed baguette shape. Ensure the seam remains on the bottom throughout the rolling process. You should feel tension building on the surface of the dough. If the dough resists stretching, let it rest for 5 minutes under cover and try again. Place the shaped baguette, seam-side down, onto your prepared proofing surface (like a floured couche).
Mastering Baguette Shaping: Tips and Tricks
Achieving Uniform Size and Shape
Consistency in shaping is key to baking multiple baguettes evenly. Start by accurately weighing each dough portion after dividing – aiming for variations of no more than 5-10 grams between loaves. During the final shaping, try to apply even pressure as you roll and elongate the dough. Practice helps immensely; the more you shape, the better feel you'll develop for how the dough responds. For instance, if you're shaping a batch of mini baguettes using this tutorial, weigh each portion to be consistently 120g and aim for a final length of 8 inches for each.
Using a ruler or measuring tape occasionally as you roll can help ensure you're hitting your target length and maintaining straightness. If one baguette is significantly shorter or thicker than others, it will bake differently. Paying attention to the tautness of the surface is also important; a consistently taut surface across all loaves helps predict even oven spring.
Preventing Tears and Imperfections
Tears and imperfections during shaping often result from a few common issues. One is insufficient resting time after pre-shaping; if the gluten hasn't relaxed, the dough will be tight and prone to tearing when stretched. Another is excessive flour on the work surface, which prevents the dough layers from sealing properly, leading to blowouts during baking. Use just enough flour to prevent sticking, or work on a clean, unfloured surface if the dough hydration allows.
Handling the dough too roughly can also degas it excessively or create weak spots. Be firm but gentle as you fold and seal. If the dough feels like it's tearing or resisting heavily during elongation, stop, cover it, and let it rest for another 5-10 minutes before trying again. This relaxation can make all the difference. A well-developed dough from proper bulk fermentation is naturally more resilient and less likely to tear during shaping.
Working with High-Hydration Dough
High-hydration doughs (those with 75% water or more relative to flour) are notoriously sticky but produce wonderfully open crumbs and crispy crusts. Shaping these can be challenging. Minimize the use of dry flour on your work surface; too much flour creates a pasty layer that prevents the dough from sealing properly. Instead, try working on a lightly wet surface or using wet hands and a wet bench scraper.
Focus on building tension with minimal handling. The folding and sealing technique described earlier is effective for high-hydration doughs as it relies on overlapping and sealing layers rather than extensive rolling. Use your bench scraper to help lift and fold the sticky dough. Don't be afraid if it's not perfectly smooth; a slightly rustic look is part of the charm. The key is to get the dough into a basic elongated form with some surface tension, trusting that the oven spring will do the rest.
Proofing Shaped Baguettes
Optimal Proofing Conditions for Baguettes
Proofing, the final rise after shaping, is where the baguettes increase in volume and develop flavor before baking. Optimal conditions are typically warm and humid. A temperature around 75-80°F (24-27°C) is ideal, allowing the yeast to be active but not overly so. Humidity is important to prevent the surface from drying out and forming a skin, which can inhibit oven spring and make scoring difficult.
Traditionally, baguettes are proofed on a baker's couche, a heavy linen cloth dusted generously with rice flour (which is less likely to be absorbed by the dough than wheat flour). The couche is pleated to support the shape of the baguettes and prevent them from spreading sideways or sticking together. If you don't have a couche, you can improvise using a well-floured tea towel or proof them in elongated baskets or forms designed for baguettes. Cover the proofing baguettes loosely with plastic wrap or another cloth to maintain humidity.
Avoiding Over-Proofing
Over-proofing is a common pitfall that can ruin your carefully shaped baguettes. An over-proofed baguette will look overly puffy and may even start to deflate slightly. The dough will feel very fragile and might collapse when you try to score it or transfer it to the oven. In the oven, it will have poor oven spring, resulting in a flat, dense loaf. Under-proofing, on the other hand, leads to dense loaves with explosive, uncontrolled oven spring and thick crusts.
The ideal proofing time depends heavily on the dough temperature, ambient temperature, and yeast activity, but it's often between 45 and 90 minutes at room temperature. A good test is the "poke test": gently press the dough with a floured finger. If the indentation springs back immediately, it needs more time. If it stays completely indented, it's likely over-proofed. If it slowly springs back halfway, it's ready. For smaller loaves from a mini baguette shaping tutorial, proofing time will likely be shorter, perhaps 30-60 minutes.
Scoring Baguettes for Perfect Oven Spring
The Importance of Scoring
Scoring, or slashing the surface of the dough just before baking, is not merely decorative; it's a critical step that controls how the baguette expands in the hot oven. As the dough heats up, the yeast undergoes a final burst of activity, and moisture turns to steam, causing the dough to expand rapidly (this is called oven spring). Without controlled cuts, the dough would burst haphazardly at the weakest points, resulting in an uneven shape and crust.
Scoring provides predetermined weak points where the dough can expand predictably. This directed expansion helps achieve a beautiful, elongated shape, promotes a more open crumb structure, and contributes to the development of a thin, crispy crust by allowing moisture to escape evenly. The angle and overlap of the scores are part of the art, influencing the final look and expansion.
Scoring Techniques for Baguettes
The classic scoring pattern for baguettes consists of several overlapping diagonal slashes running along the length of the loaf. These slashes are typically made at about a 30 to 45-degree angle relative to the surface of the dough. The cuts should be decisive and quick, about 1/2 inch deep. Each slash should overlap the previous one by about a third of its length. For a standard baguette, you might make 3 to 5 slashes.
For smaller loaves from a mini baguette shaping tutorial, you might only need 1 to 3 slashes. The key is to make clean cuts that allow the dough to open up cleanly. If the blade drags or tears the surface, it can hinder proper expansion. Practice on less important loaves first to get a feel for the depth and angle.
Choosing the Right Scoring Blade (Lame)
For the cleanest, most effective scores, a specialized tool called a lame (pronounced "lahm") is highly recommended. A lame is essentially a razor blade held in a handle. The sharpness of the razor blade allows you to make swift, clean cuts through the dough surface without dragging or compressing it. This is particularly important for high-hydration doughs which can be delicate.
While you can use a very sharp knife, a lame allows you to hold the blade at a very low angle to the dough surface, which is crucial for creating the "ear" – that lovely flap of crust that lifts up along the edge of a well-scored baguette. Lames come in various styles, some holding a straight blade, others curved. A curved blade can sometimes make it easier to achieve the overlapping curved slashes often seen on artisan baguettes.
Baking Baguettes to Golden Perfection
Oven Temperature and Baking Time
Baguettes require a hot oven to achieve maximum oven spring and a crispy crust. Preheat your oven, ideally with a baking stone or steel inside, to a high temperature, typically between 450°F and 475°F (230°C and 245°C). Allow the oven and stone to preheat for at least 30-60 minutes after reaching the set temperature to ensure the stone is fully heated through.
The baking time for standard baguettes is usually between 20 and 30 minutes. For smaller loaves from a mini baguette shaping tutorial, the baking time will be shorter, perhaps 15-20 minutes. The baguettes are done when they are deeply golden brown and sound hollow when tapped on the bottom. Baking at a high temperature initially helps set the crust quickly, locking in moisture and promoting a good rise.
Creating a Steamy Baking Environment
Steam is absolutely essential during the first 10-15 minutes of baking baguettes. The high heat causes the dough surface to set rapidly, but steam keeps the surface moist and pliable longer, allowing the dough to expand fully before the crust hardens. This results in better oven spring and a thinner, crispier crust. Without steam, the crust sets too quickly, restricting expansion and resulting in a denser loaf with a thicker, tougher crust.
There are several ways to create steam in a home oven. One common method is to place a heat-safe pan on the bottom rack while preheating and carefully pour about a cup of boiling water into it just as you load the baguettes. Another technique is to place ice cubes in the hot steam pan. Some bakers also mist the oven walls with water or use a Dutch oven or specialized cloche, which traps the dough's own steam. Be cautious when introducing steam to a hot oven.
Achieving a Crispy Crust and Open Crumb
The journey to a perfect crispy crust and open crumb involves successful execution of all previous steps: proper dough development, careful shaping, adequate proofing, precise scoring, and crucially, baking with high heat and sufficient steam. The high temperature creates the Maillard reaction and caramelization on the crust. The steam ensures the crust remains extensible during the initial oven spring, allowing the loaf to expand fully, which contributes to the open crumb.
After the initial steam period (often 10-15 minutes), you may want to vent the oven by opening the door briefly to release the steam, allowing the crust to dry out and crisp up further. Continue baking until the desired color is achieved. A well-baked baguette should have a crust that crackles when you press it and an interior crumb filled with irregular holes of various sizes.
Cooling and Storing Your Homemade Baguettes
Proper Cooling Techniques
Once the baguettes are baked to a beautiful golden brown, resist the urge to slice into them immediately. This is a crucial step for the interior texture and flavor development. Transfer the hot baguettes from the oven to a wire cooling rack. Cooling on a rack allows air to circulate around the entire loaf, preventing the bottom crust from becoming soggy due to trapped steam.
Allow the baguettes to cool completely, which can take at least an hour or more depending on their size (mini baguettes might cool faster, perhaps 30-45 minutes). During cooling, moisture from the interior migrates to the crust, and flavors continue to meld. Slicing too early will result in a gummy interior.
Best Practices for Storing Baguettes
Baguettes are best enjoyed fresh, ideally within a few hours of baking, when the crust is at its peak crispness. However, if you need to store them, the key is to protect the crust from becoming soft without making it stale. The worst place to store a baguette is in a plastic bag, which traps moisture and quickly turns the crust rubbery.
For storage at room temperature (up to 1-2 days), wrap the cooled baguette loosely in a paper bag or a clean linen or cotton cloth. This allows some airflow while offering protection. For longer storage, you can freeze cooled baguettes. Wrap them tightly in plastic wrap, then in foil or a freezer bag. To reheat, remove from the freezer, unwrap, and bake in a preheated oven (around 350°F / 175°C) for 10-15 minutes until the crust is crisp again.
Troubleshooting Common Baguette Shaping Issues
Dough Too Sticky
If your dough is excessively sticky and difficult to handle during shaping, it might be a sign of high hydration combined with insufficient gluten development or improper handling. Ensure you've performed enough stretch and folds during bulk fermentation to build strength. When shaping, try wetting your hands and bench scraper slightly instead of using dry flour, especially for very wet doughs. A small amount of rice flour on the work surface or couche is also helpful as it doesn't absorb into the dough as readily as wheat flour.
Alternatively, if you're consistently struggling with stickiness, you might consider slightly reducing the hydration in your recipe by 2-3% in the next batch until you become more comfortable working with wetter doughs. Remember, practice makes perfect, and handling sticky dough gets easier with experience.
Baguettes Losing Shape During Proofing
If your carefully shaped baguettes flatten out or spread excessively during proofing, several factors could be at play. The most common reasons are insufficient tension built during shaping, over-proofing, or a dough that is too weak (under-developed gluten). Ensure you are creating a taut surface and sealing the seam firmly during the final shaping steps. This tension is what helps the baguette hold its elongated form.
Using a properly floured couche with deep pleats provides essential support to the baguettes as they proof, preventing them from spreading sideways. Check your proofing time and temperature; over-proofed dough lacks the structural integrity to hold its shape. If the dough is consistently weak regardless of proofing, focus on improving gluten development during mixing and bulk fermentation through techniques like longer fermentation times or more stretch and folds.
Uneven Baking
Uneven baking, where parts of the baguette are darker or lighter than others, can be frustrating. This is often caused by hot spots in your oven. Most home ovens have areas that are hotter than others. To combat this, try rotating your baguettes halfway through the baking time. If you're baking multiple baguettes on a single stone or sheet, ensure there is adequate space between them for even heat circulation.
Using a baking stone or steel can also help distribute heat more evenly across the bottom crust and provide a consistent heat source. If one end is consistently darker, try placing the baguettes in the oven with the lighter ends facing the back. Monitoring your oven with an independent oven thermometer can also reveal if your oven's thermostat is inaccurate, helping you adjust the temperature accordingly.
Baguette Shaping Variations and Recipes
Poolish Baguettes
A poolish is a type of preferment (a portion of the dough mixed in advance and allowed to ferment) often used in baguette recipes. It's typically a wet mixture of equal parts flour and water by weight, with a small amount of yeast, left to ferment for several hours or overnight. Incorporating a poolish into your baguette dough adds significant flavor complexity and helps create a more open crumb structure.
When shaping poolish baguettes, the dough is often higher in hydration and can be a bit stickier than a straight dough. The same shaping techniques apply, but you might need to rely more on wet hands or a bench scraper and be extra gentle to preserve the airy structure created by the long fermentation of the poolish. The resulting baguettes have a more nuanced flavor profile and often an exceptionally crispy crust.
Sourdough Baguettes
For those who prefer the tang and unique characteristics of sourdough, baguettes can also be made using a sourdough starter (levain) as the sole leavening agent. Sourdough baguettes typically involve a longer fermentation process, both in bulk and proofing, compared to commercial yeast recipes. The shaping process for sourdough baguettes is identical to that for yeasted baguettes, including the steps outlined in this tutorial.
Working with sourdough dough can sometimes be slightly different depending on the hydration and the activity of your starter, but the principles of building tension and creating a uniform shape remain the same. Sourdough fermentation contributes a robust flavor and often results in a wonderfully irregular and open crumb structure. Mastering the basic shaping detailed here is the perfect foundation for tackling more complex variations like sourdough or poolish baguettes.
Conclusion: Mastering the Art of Baguette Shaping
The Joy of Baking Homemade Baguettes
There's a unique satisfaction that comes from pulling warm, golden-brown baguettes from your oven, especially when you've shaped them yourself. The process, from preparing the dough to the final shaping and baking, is a rewarding journey in artisan bread making. While it might seem intimidating at first, particularly mastering the shaping technique or tackling a mini baguette shaping tutorial, each loaf you bake builds your skills and understanding of the craft. The crackle of the crust and the aroma filling your kitchen are ample rewards for your efforts.
Sharing homemade baguettes with friends and family, perhaps served simply with butter or alongside a meal, is one of the great pleasures of baking. It connects you to centuries of baking tradition and provides a tangible result of your patience and practice.
Further Resources for Artisan Bread Baking
Mastering baguette shaping is a significant step in your artisan bread baking journey, but there's always more to explore. Understanding fermentation, working with different flours, experimenting with hydration levels, and trying various preferments like poolish or biga can further enhance your skills. Continue practicing the techniques covered in this guide, perhaps varying the size as shown in a mini baguette shaping tutorial, and observe how small changes impact your final loaf.
Explore other artisan bread recipes and techniques available on BakeWithEase.com to broaden your repertoire. From rustic loaves to enriched doughs, the world of bread baking is vast and full of delicious possibilities waiting for you to discover. Keep baking, keep learning, and most importantly, enjoy the process and the delicious results!
Frequently Asked Questions
How long should I proof my mini baguettes after shaping?
After shaping, proof your mini baguettes for approximately 30-45 minutes, or until they have almost doubled in size. This allows for the final rise before baking.
What is the best flour to use for mini baguettes?
For an authentic flavor and texture, use bread flour with a higher protein content. This helps develop gluten strength, resulting in a chewy crumb and crisp crust.
How do I get a good score on my mini baguettes?
Use a lame or very sharp knife to make a single, clean slash along the length of each baguette. This allows for oven spring and prevents cracking.
What oven temperature is ideal for baking mini baguettes?
Bake mini baguettes in a preheated oven at 450°F (232°C). This high temperature helps create a crisp crust and airy interior.
What if my dough is too sticky to shape?
If your dough is too sticky, gently dust your work surface and hands with extra flour. Avoid adding too much, as this can result in a dense baguette.
Final Reflection: The Art and Soul of the Mini Baguette
The perfect mini baguette, a testament to precision and patience, transcends mere baking; it's a symbol of dedication to craft. In a world increasingly dominated by convenience, the meticulous process of shaping these miniature loaves offers a powerful counterpoint – a reminder of the satisfaction found in mastering a skill and the beauty inherent in handcrafted goods. The techniques detailed in this tutorial, from the initial shaping to the crucial final proof, are not just steps in a recipe; they are the building blocks of a timeless tradition.
The influence of artisanal baking, and the mini baguette in particular, extends far beyond the kitchen. It speaks to a growing appreciation for quality ingredients, mindful preparation, and the simple pleasure of sharing something made with love. The act of shaping these little loaves, with its delicate balance of strength and gentleness, mirrors the care we should take in nurturing other aspects of our lives. The best things in life are simple, but not easy.
This quote perfectly encapsulates the journey of mastering mini baguette shaping – a seemingly simple task that demands dedication and practice.
Now, consider your own journey. Perhaps you've already felt the satisfaction of perfectly shaped mini baguettes, the crisp crust yielding to a soft, airy crumb. Or maybe you're just beginning your exploration of this craft.
Regardless, I invite you to embrace the process, to find joy in the details, and to appreciate the transformative power of mindful creation. Let the shaping of these miniature loaves be a metaphor for your own aspirations – a reminder that with patience, precision, and a touch of passion, even the smallest endeavors can yield extraordinary results. So, gather your ingredients, and let the baking begin.
Unleash Your Inner Boulanger: Bake Perfect Mini Baguettes!
Thanks for joining us on this mini baguette baking adventure! You've now got the knowledge to craft perfectly crisp, airy loaves. Ready to put your new skills to the test?
- Bake a batch today! Use the recipe and tips from the article to create your own delicious mini baguettes. Imagine the aroma filling your kitchen!
- Share your creations! Post a picture of your mini baguettes on social media using #BakeWithEaseMiniBaguettes and tag us – we'd love to see your baking success!
- Experiment with flavors! Try adding herbs, seeds, or different flours to your dough – the possibilities are endless!
So, what unique twist will you add to your next mini baguette masterpiece?