
How to Make Authentic Vegan Challah Bread

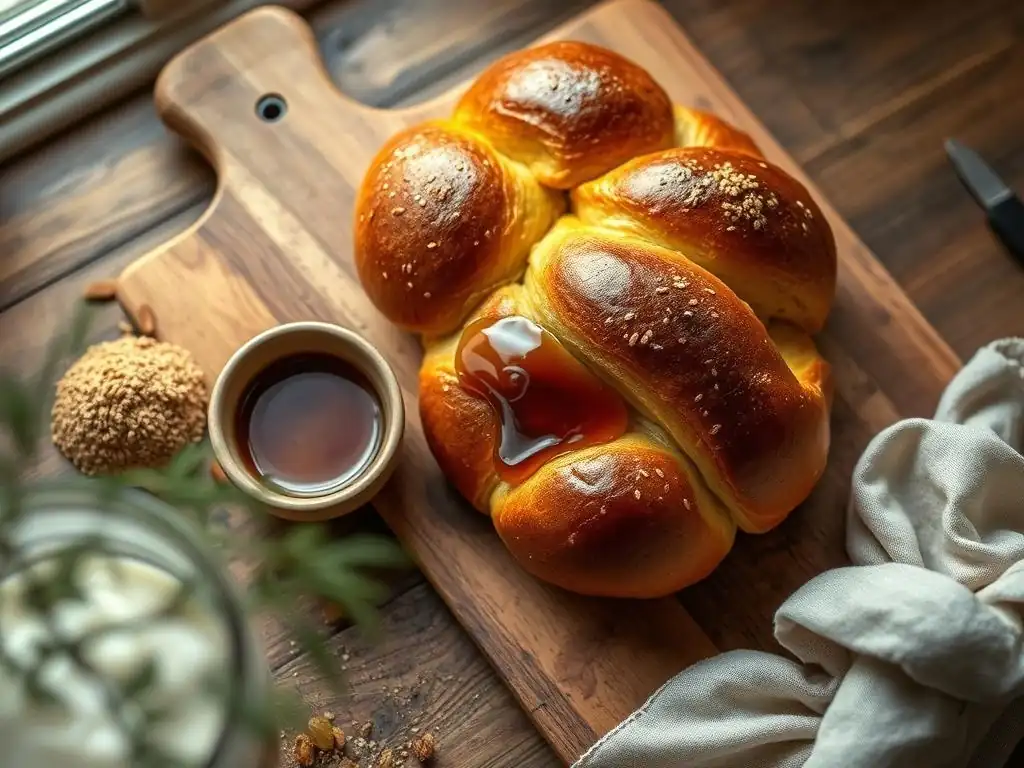
Welcome to BakeWithEase, your haven for unlocking baking brilliance! Ever dreamt of sinking your teeth into a warm, golden-brown challah, but thought vegan baking was too complicated? Prepare to be amazed! This week, we're diving deep into a surprisingly simple and incredibly delicious Vegan Challah Bread Recipe. Discover the secrets to achieving that authentic, braided beauty without any animal products – a truly transformative experience awaits! Curious to know how it's done? Let's get baking!
- How to Make Authentic Vegan Challah Bread: A Step-by-Step Guide
- Bake Delicious Vegan Challah at Home
- Understanding Vegan Challah Bread
- Vegan Challah Bread Recipe: Ingredients and Equipment
- Step-by-Step Guide to Baking Vegan Challah Bread
- Tips and Tricks for the Best Vegan Challah
- Serving and Enjoying Your Homemade Vegan Challah
- Perfecting Your Vegan Bread Baking Skills
- Frequently Asked Questions
- Final Reflection: The Humble Loaf, a Symbol of Connection
- Unleash Your Inner Baker: Craft the Perfect Vegan Challah!
How to Make Authentic Vegan Challah Bread: A Step-by-Step Guide
Bake Delicious Vegan Challah at Home
Embarking on the journey of baking bread at home is incredibly rewarding, and mastering a Vegan Challah Bread Recipe offers a unique satisfaction. Traditional challah, a beautiful braided bread, is often rich with eggs, making a vegan version a delightful challenge. But fear not! With the right approach and a few clever swaps, you can bake a soft, slightly sweet, and perfectly braided vegan challah that rivals its conventional counterpart.
This guide will walk you through every step, from understanding the essence of this special bread to troubleshooting common issues. Get ready to fill your kitchen with the comforting aroma of freshly baked vegan challah and impress yourself and your loved ones with your newfound vegan bread baking skills. Let's get started on crafting this wonderful loaf together!
Understanding Vegan Challah Bread
What is Challah Bread? A Traditional Jewish Bread
Challah is a distinctive braided bread that holds significant cultural and religious importance, particularly within Jewish traditions. It's often enjoyed on Shabbat (the Sabbath) and other holidays. Traditionally, challah dough is enriched with eggs and often sweetened with sugar or honey, giving it a rich flavor, a tender crumb, and a beautiful golden-brown crust. Its iconic braided shape can range from simple three-strand loaves to more intricate six-strand or even twelve-strand variations, each carrying its own symbolism.
Beyond its ritualistic use, challah is simply a delicious bread. Its slightly sweet profile and soft, airy texture make it perfect for slicing and serving alongside meals, or even for transforming into other dishes like French toast or bread pudding. The presence of eggs and often honey (which is not vegan) in traditional recipes means that creating an authentic-tasting vegan challah requires careful consideration of ingredient substitutions to achieve that signature richness and texture without animal products.
The Challenge of Veganizing Challah
The primary challenge in developing a reliable Vegan Challah Bread Recipe lies in replacing the functions of eggs. In traditional challah, eggs contribute significantly to the dough's structure, richness, and elasticity. They also provide color to both the interior crumb and, when used as a wash, the exterior crust. A typical challah recipe might call for 3 to 4 large eggs for a single loaf made with about 4 cups of flour. Simply omitting them would result in a drier, denser bread lacking the characteristic softness and golden hue.
Finding the right combination of vegan ingredients to replicate these effects is key. Vegan egg replacers must provide binding to hold the dough together, moisture and fat for tenderness, and some element that contributes to a desirable crust color. Achieving the balance without making the dough too heavy or the final bread too dense is the art of crafting a successful vegan challah.
Why This Vegan Challah Recipe Works
This Vegan Challah Bread Recipe addresses the challenges of veganization by employing a combination of strategic ingredient swaps designed to mimic the qualities of traditional challah. Instead of eggs, we rely on a blend of plant-based ingredients. Plant-based milk (like soy, almond, or oat milk) contributes moisture and a touch of richness, while melted vegan butter or oil adds necessary fat for tenderness.
Crucially, a binder like a flax egg or a commercial vegan egg replacer provides the structural integrity that eggs would typically offer. This combination ensures the dough is pliable enough for braiding and results in a soft, slightly chewy crumb after baking. The use of a vegan wash (often plant milk mixed with a little sweetener) before baking helps achieve that desirable golden-brown, slightly shiny crust, ensuring your homemade vegan challah looks as good as it tastes.
Vegan Challah Bread Recipe: Ingredients and Equipment
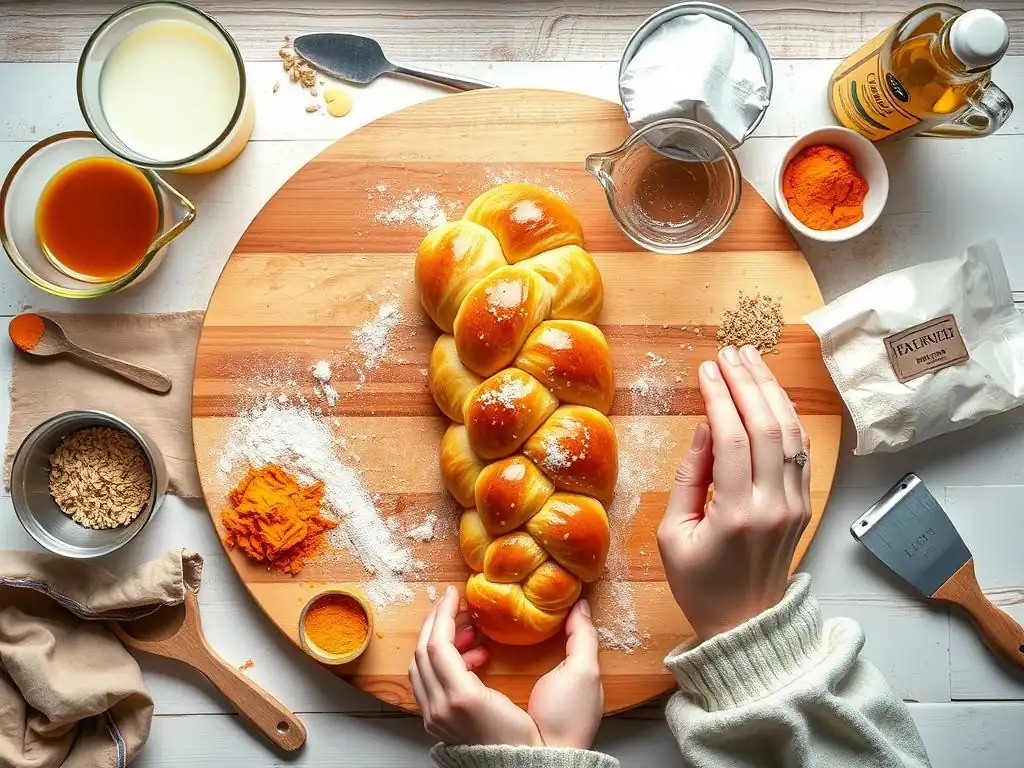
Essential Ingredients for Perfect Vegan Challah
Crafting a delicious vegan challah starts with selecting the right ingredients. Each component plays a vital role in achieving the desired texture, flavor, and appearance of this beautiful braided bread. Paying attention to the type and quality of your ingredients will make a noticeable difference in the final loaf.
Getting the measurements right is also critical in vegan bread baking. Using measuring cups and spoons accurately, or even better, weighing your ingredients, especially flour, helps ensure consistency and predictability in your results. For instance, 4 cups of all-purpose flour can weigh anywhere from 16 to 20 ounces depending on how it's measured, which significantly impacts the dough's hydration. Aiming for around 18-19 ounces (about 510-540 grams) for 4 cups is a good target when scooping and leveling.
Flour Selection for Vegan Challah
The type of flour you choose impacts the texture of your vegan challah. All-purpose flour is the most common choice and provides a soft, tender crumb suitable for this bread. Its protein content (typically 10-12%) develops enough gluten for structure without making the bread too dense.
For a chewier texture, you could use bread flour, which has a higher protein content (12-14%). Some bakers also like to incorporate a small percentage of whole wheat flour (say, replacing 1/4 to 1/2 cup of the all-purpose flour) for added flavor and fiber, though this will result in a slightly denser loaf. Ensure your flour is fresh for the best results.
Sweeteners for Vegan Challah's Signature Taste
Sweeteners are essential in a Vegan Challah Bread Recipe for both flavor and function. They contribute to the bread's characteristic slight sweetness and also help activate the yeast and promote browning of the crust during baking. Granulated sugar is standard and reliable.
You can also use liquid sweeteners like maple syrup or agave nectar, typically substituting them cup-for-cup with granulated sugar, though you might need to slightly reduce the total liquid in the recipe. A typical recipe using 4 cups of flour might call for anywhere from 1/4 cup to 1/3 cup of sugar, depending on how sweet you prefer your challah. This amount is usually sufficient to feed the yeast and provide a pleasant sweetness without being overly dessert-like.
Vegan Egg Replacers: Binding and Texture
This is where the vegan challah magic happens! To replace the binding and enriching properties of eggs, you'll need effective vegan alternatives. A flax egg is a popular and easy option: whisk together 1 tablespoon of ground flaxseed meal with 3 tablespoons of water and let it sit for 5-10 minutes until it forms a gel-like consistency. This mixture can replace one egg in a recipe. For a recipe needing 3-4 eggs, you'd use 3-4 flax eggs.
Commercial vegan egg replacers (like those from Ener-G or Bob's Red Mill) also work well, offering reliable binding. Some recipes might use a small amount of silken tofu or applesauce, but be cautious as these can sometimes make the bread heavier. The key is to use enough binder to provide structure without compromising the light, airy texture characteristic of challah.
Liquid Choices: Water vs. Plant-Based Milk
The liquid in your vegan challah dough provides hydration and helps activate the yeast. Warm water is a simple and effective choice. It lets the flavor of the flour and other ingredients shine through.
Using warm plant-based milk (such as soy milk, almond milk, or oat milk) instead of water adds a bit more richness and tenderness to the dough due to the fat and protein content in the milk. Whichever liquid you choose, ensure it's warmed to the correct temperature for yeast activation – ideally between 105°F and 115°F (40°C and 46°C). Temperatures above 120°F (49°C) can kill the yeast, while temperatures below 100°F (38°C) might not activate it effectively.
Equipment You'll Need
Having the right tools makes the process of baking vegan challah smoother and more enjoyable. You don't need fancy equipment, but a few essentials will be very helpful in creating your delicious loaf.
A reliable set of measuring cups and spoons is fundamental for accuracy, as discussed earlier. A kitchen scale is even better for precise ingredient weights. You'll also need large mixing bowls for preparing the dough and allowing it to rise.
Stand Mixer vs. Hand Kneading
Kneading is crucial for developing the gluten structure in your vegan challah dough, which gives the bread its texture. A stand mixer fitted with a dough hook is the most efficient way to do this, typically taking about 8-10 minutes of mixing on medium speed to achieve a smooth, elastic dough. This saves significant time and effort compared to hand kneading.
Hand kneading is also perfectly viable and a rewarding process in itself. It requires more time and physical effort, usually taking 10-15 minutes or even longer, depending on your technique and the dough's hydration. You'll know you've kneaded enough when the dough is smooth, elastic, and bounces back slowly when gently poked. It should also pass the windowpane test – you should be able to stretch a small piece thinly enough to see light through it without it tearing.
Baking Sheets and Parchment Paper
You will need at least one sturdy baking sheet to bake your braided vegan challah loaf. Standard half-sheet pans (approximately 18x13 inches) are ideal as they provide enough surface area for a large loaf or two smaller ones.
Lining your baking sheet with parchment paper is highly recommended. Parchment paper prevents the dough from sticking to the pan during baking, makes cleanup much easier, and helps the bottom crust brown evenly. While you can grease and flour the pan directly, parchment paper is the simplest way to ensure your beautiful loaf doesn't get stuck.
Measuring Tools for Accuracy
Precise measurement is a cornerstone of successful vegan bread baking. For liquids, use clear liquid measuring cups placed on a flat surface, reading at eye level. For dry ingredients like flour, sugar, and salt, use dry measuring cups. The standard method for flour is to lightly spoon it into the measuring cup until overflowing, then level off the excess with a straight edge (like the back of a knife). Avoid scooping directly from the bag, which can compact the flour and result in using too much.
As mentioned, a digital kitchen scale offers the highest level of accuracy, especially for flour. Using weights (grams or ounces) ensures that you use the exact amount specified in the Vegan Challah Bread Recipe, leading to more consistent results batch after batch. This is particularly helpful when troubleshooting if a recipe doesn't turn out as expected.
Step-by-Step Guide to Baking Vegan Challah Bread
Follow these steps carefully, and you'll be well on your way to baking a beautiful and delicious vegan challah loaf. Patience is key in bread baking, especially during the rising stages.
Remember to keep your workspace clean and have all your ingredients measured and ready before you begin. This mise en place approach helps ensure you don't miss a step or ingredient in your Vegan Challah Bread Recipe.
Step 1: Preparing the Vegan Challah Dough
The initial mixing and kneading are fundamental to developing the structure of your vegan challah. This is where the magic of gluten development begins, transforming simple ingredients into a cohesive, elastic dough ready for its first rise.
Pay close attention to the dough's texture during kneading. It should feel smooth, supple, and slightly tacky but not overly sticky. The dough should also be able to hold its shape roughly when you stop kneading.
Activating the Yeast for Vegan Challah
Yeast is the leavening agent that makes your vegan challah light and airy. If using active dry yeast, you'll need to activate it first. In a small bowl, combine the warm liquid (plant milk or water, 105°F-115°F / 40°C-46°C) with the yeast and a pinch of sugar. Stir gently and let stand for 5-10 minutes. The mixture should become foamy and bubbly, indicating the yeast is alive and active. If it doesn't foam, your liquid might have been too hot or cold, or the yeast might be expired; you'll need to start this step over with fresh yeast.
If using instant yeast, you can often mix it directly with the dry ingredients, though some bakers still prefer to activate it in warm liquid to be certain of its viability. A typical loaf using 4 cups of flour will require about 2 1/4 teaspoons (or one standard packet) of yeast. Ensure your liquid temperature is correct for optimal yeast activity.
Combining Dry Ingredients
In a large mixing bowl (or the bowl of your stand mixer), whisk together the measured flour, sugar, and salt. Whisking helps distribute the salt and sugar evenly throughout the flour and aerates it slightly. This step is simple but important for ensuring a consistent flavor and texture throughout your vegan challah.
Make sure your salt is evenly distributed, as direct contact with yeast in high concentrations can inhibit its activity. Using fine-grain salt like table salt or fine sea salt ensures it dissolves and disperses easily.
Adding Wet Ingredients and Mixing
Once your yeast is activated (if using active dry), or your instant yeast is mixed with the dry ingredients, it's time to combine everything. Add the warm liquid/yeast mixture, melted vegan butter or oil, and your chosen vegan egg replacer(s) to the bowl with the dry ingredients.
Mix with a wooden spoon, spatula, or the stand mixer on a low speed until a shaggy dough forms and most of the flour is incorporated. At this point, the mixture will look rough and uneven, and it might still have some dry patches. This is normal before kneading begins.
Kneading the Dough: Achieving the Right Texture
Now comes the crucial step of kneading. If using a stand mixer, switch to the dough hook and knead on medium speed for about 8-10 minutes. Scrape down the sides of the bowl as needed. If kneading by hand, turn the shaggy dough out onto a lightly floured surface and knead for 10-15 minutes, or until the dough is smooth, elastic, and no longer sticky. Use the heel of your hand to push the dough away from you, then fold it back towards you and rotate.
You'll know the dough is properly kneaded when it feels smooth and supple. It should spring back slowly when you gently poke it with a finger. The windowpane test is the ultimate indicator: pinch off a small piece of dough and gently stretch it outwards. If you can stretch it into a thin membrane that light can pass through without tearing, the gluten is well-developed. This strong gluten structure is vital for a well-risen and tender vegan challah.
Step 2: First Rise: Letting the Dough Develop
The first rise, or bulk fermentation, is essential for flavor development and for the yeast to begin its work, producing carbon dioxide gas that will make your vegan challah light. This stage typically takes the longest.
Patience during this rise is rewarded with a better-tasting bread. Don't rush it; let the yeast do its job in a comfortable environment.
Creating the Ideal Proofing Environment
After kneading, shape the dough into a ball and place it in a lightly oiled bowl. Turn the dough to coat it in oil, then cover the bowl tightly with plastic wrap or a damp kitchen towel. Place the bowl in a warm, draft-free place for the first rise. An ideal temperature is between 75°F and 80°F (24°C and 27°C).
Locations like a turned-off oven with the light on, a proofing drawer, or simply a warm spot on your kitchen counter away from drafts work well. The warmth encourages yeast activity, leading to a consistent and timely rise.
Monitoring the Dough's Rise
During the first rise, the dough should approximately double in size. The time this takes can vary significantly depending on the temperature of your proofing environment and the activity of your yeast. It could take anywhere from 1 hour in a very warm spot to 2 hours or even longer in a cooler kitchen.
To check if the dough is ready, gently poke it with two fingers. If the indentation remains and springs back very slowly, the dough has risen sufficiently. If it springs back quickly, it needs more time. If it collapses, it might be slightly over-proofed, but you can usually still proceed.
Step 3: Shaping the Vegan Challah Bread
Shaping the dough into its signature braided form is one of the most enjoyable parts of making vegan challah. It allows for creativity and gives the bread its distinctive look.
Ensure your workspace is clean and lightly floured before you begin shaping. This prevents the dough from sticking as you roll and braid the strands.
Dividing the Dough Evenly
Once the first rise is complete, gently punch down the dough to deflate it. Turn the dough out onto a lightly floured surface. For even braiding and baking, it's best to divide the dough into equal portions for the strands. Using a kitchen scale to weigh the portions is the most accurate method. For a standard loaf using about 4 cups of flour, dividing the dough into three equal portions of roughly 300-350 grams each works well for a simple three-strand braid.
If you plan a more complex braid (like a six-strand), divide the dough into the corresponding number of equal portions. Roll each portion into a smooth ball before proceeding to shape the strands.
Braiding Techniques for Vegan Challah
The braiding technique you choose will determine the appearance of your vegan challah. Rolling each portion of dough into a long, even strand is the first step for any braid. Aim for strands of uniform thickness along their length to ensure even baking.
Place the strands side-by-side and pinch them together firmly at one end. Then, you can begin braiding. Practice makes perfect with braiding, so don't worry if your first attempt isn't perfectly symmetrical.
Simple 3-Strand Braid
The three-strand braid is the most basic and a great place to start for your first vegan challah. Pinch the three strands together at the top. Take the right-most strand and cross it over the middle strand, so it becomes the new middle. Then, take the left-most strand and cross it over the new middle strand. Continue alternating sides, bringing the outer strand over the middle, working your way down the length of the loaf. Pinch the ends firmly together and tuck them under the loaf for a neat finish.
This technique is simple to learn and results in a classic challah shape. Ensure the strands are relatively uniform in thickness for an even bake.
More Complex 6-Strand Braid
A six-strand braid creates a wider, more intricate-looking vegan challah. Pinch the six strands together at the top. Lay them out side-by-side. A common method is the "under and over" technique: starting from the right, take the outer right strand and move it under two strands, then over one strand, laying it down as the new left-most strand. Repeat this process starting from the outer left strand: move it under two strands, then over one strand, laying it down as the new right-most strand. Continue alternating sides, working your way down the loaf.
This braid requires a bit more coordination but results in a stunning loaf. Ensure the strands are of equal length and thickness for the best result.
Round Challah for Special Occasions
Round challah, often braided in a spiral, is traditionally baked for Rosh Hashanah (the Jewish New Year), symbolizing continuity and the cyclical nature of the year. To make a round vegan challah, you can form a single very long strand (perhaps by combining multiple dough portions) and coil it into a spiral, tucking the end underneath.
Alternatively, you can braid three or four strands as usual, but then coil the entire braid into a round shape on the baking sheet, pinching the ends together to form a neat circle. This shape bakes slightly differently than a long loaf, sometimes requiring a few extra minutes to ensure the center is fully cooked.
Step 4: Second Rise: Enhancing the Flavor and Texture
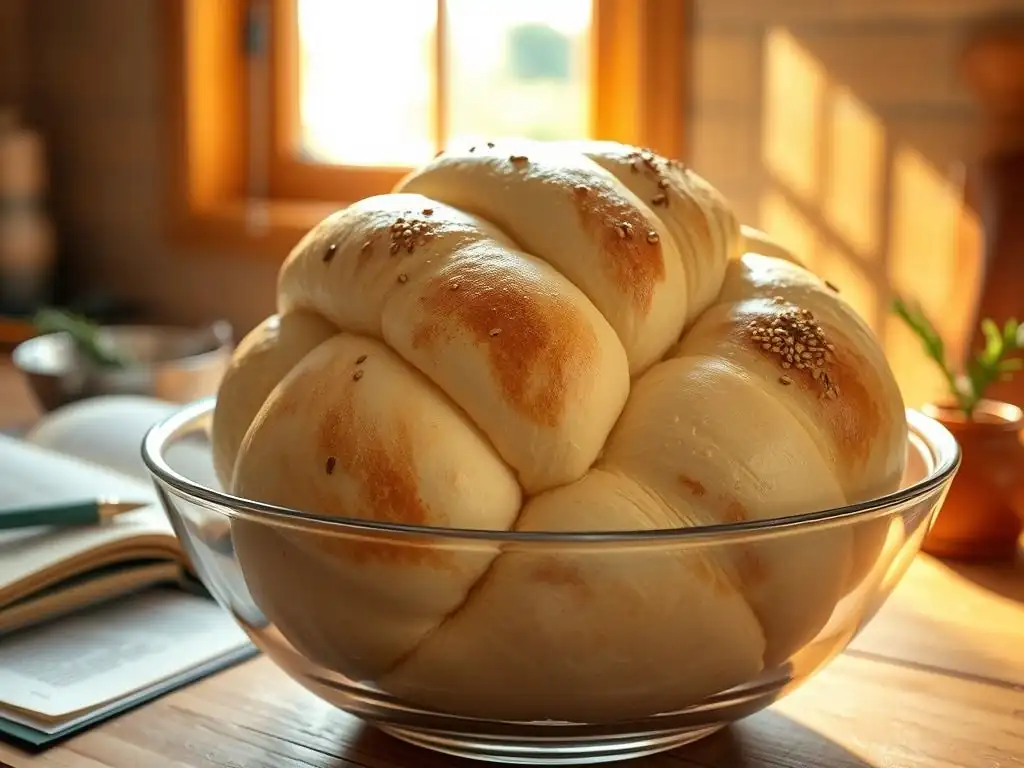
After shaping, your vegan challah needs a second rise, also known as the proofing stage. This rise is shorter than the first but just as important for achieving a light and airy texture.
This gentle puffing up helps the bread maintain its shape during baking and contributes to a softer crumb. Don't skip this step!
Gentle Proofing for a Light and Airy Challah
Carefully transfer your braided vegan challah loaf (or loaves) onto the parchment-lined baking sheet. Cover the loaf loosely with plastic wrap or a light kitchen towel to prevent a skin from forming. Place the baking sheet back in a warm, draft-free spot for the second rise.
This rise typically takes about 30-60 minutes. The dough should look noticeably puffier and slightly larger, but it probably won't double in size like the first rise. It should look soft and pillowy.
Step 5: Baking the Vegan Challah Bread
Baking is the final step where your beautiful braided dough transforms into a golden, fragrant loaf of vegan challah. Proper oven temperature and timing are key to achieving a perfect crust and a fully cooked interior.
Preheating your oven adequately is crucial for consistent baking results. Don't rush this step; give your oven time to reach and stabilize at the target temperature.
Preheating the Oven to the Perfect Temperature
About 20-30 minutes before you plan to bake, preheat your oven to 375°F (190°C). This gives the oven enough time to not only reach the set temperature but also for the heat to distribute evenly throughout the cavity. Baking bread in a properly preheated oven ensures a good oven spring (the final burst of rising in the oven) and contributes to a nicely browned crust.
Place your oven rack in the middle position for even heat distribution around the loaf. Avoid placing the bread too close to the top or bottom heating elements.
Baking Time and Temperature Guidelines
The baking time for vegan challah can vary depending on the size and thickness of your loaf and the accuracy of your oven. For a standard loaf made with about 4 cups of flour, baking typically takes between 25 and 40 minutes at 375°F (190°C). Smaller loaves or rolls will bake faster, while larger or thicker loaves will take longer.
You'll know the bread is done when the crust is a deep golden brown and the internal temperature reaches 190°F to 200°F (88°C to 93°C) when measured with an instant-read thermometer inserted into the center of the loaf (avoiding any add-ins like raisins). If the crust is browning too quickly before the inside is cooked, you can loosely tent the loaf with aluminum foil for the remaining baking time.
Achieving a Golden-Brown Crust
To achieve that characteristic shiny, golden-brown crust on your vegan challah, apply a wash just before placing it in the oven. A simple and effective vegan wash is plant-based milk (like soy or almond) mixed with a little agave nectar or maple syrup. Brush this mixture generously over the entire surface of the braided loaf.
Some bakers also like to apply a second wash partway through the baking process (e.g., after 15-20 minutes) for an even deeper color and shine. This vegan wash not only contributes to the color but also helps create a slightly crisp exterior while keeping the interior soft.
Step 6: Cooling and Storing Your Vegan Challah
After the excitement of baking, it's tempting to slice into your warm vegan challah immediately. However, allowing it to cool properly is a crucial step for the best texture and flavor.
Proper cooling allows the internal structure to set and moisture to redistribute evenly throughout the loaf. Cutting into hot bread can result in a gummy texture.
Cooling on a Wire Rack
Once your vegan challah is finished baking and has reached the correct internal temperature, carefully remove it from the oven. Immediately transfer the loaf from the hot baking sheet to a wire cooling rack.
Cooling on a wire rack allows air to circulate around all sides of the bread, preventing condensation from building up on the bottom crust and making it soggy. Let the loaf cool completely on the rack, which can take 1-2 hours depending on the size of the loaf.
Proper Storage to Maintain Freshness
Freshly baked vegan challah is best enjoyed on the day it's made. However, if you have leftovers, proper storage will help maintain its freshness and texture. Once completely cooled, store the loaf at room temperature in an airtight container, a bread bag, or wrapped tightly in plastic wrap.
Stored correctly, your vegan challah should stay fresh for 2-3 days. For longer storage, you can freeze the loaf. Wrap it tightly in plastic wrap, then place it in a freezer bag or wrap in aluminum foil. Frozen vegan challah can be kept for up to 3 months. Thaw at room temperature before slicing or reheating.
Tips and Tricks for the Best Vegan Challah
Even with a great Vegan Challah Bread Recipe, baking can sometimes present challenges. Knowing how to troubleshoot common issues and add personal touches can elevate your vegan bread baking game.
Don't be discouraged if your first loaf isn't perfect! Every baking experience teaches you something new about the process and your ingredients.
Troubleshooting Common Vegan Challah Baking Issues
Encountering problems during baking is normal, especially when trying a new vegan challah recipe. Here are some common issues and how to address them.
Understanding the potential causes helps you adjust your technique or ingredients for future baking sessions. Keep notes on what worked and what didn't!
Dough Not Rising
If your vegan challah dough isn't rising, the most likely culprit is inactive yeast. This can happen if the liquid used to activate it was too hot (killing the yeast) or too cold (not activating it). Ensure your liquid is between 105°F and 115°F (40°C-46°C). Old or expired yeast will also fail to activate; check the expiration date on your yeast packet or jar.
Another reason could be a proofing environment that is too cold or drafty. Yeast is most active in warm conditions (75°F-80°F / 24°C-27°C). Ensure your dough is in a warm, draft-free spot. Insufficient kneading can also hinder rising, as proper gluten development is needed to trap the gases produced by the yeast.
Dry or Crumbly Challah
A dry or crumbly vegan challah is often a sign of too much flour or not enough liquid in the dough. Flour measurements can be tricky, especially when using volume measurements (cups); weighing your flour provides more accuracy. If your dough felt stiff and dry during kneading, it likely needed a little more liquid.
Over-baking can also result in a dry loaf. Ensure you're baking for the correct amount of time and temperature, and use an instant-read thermometer to check for doneness (190-200°F internal temperature). Kneading too much can sometimes lead to a tougher, slightly drier crumb, but it's less common than issues with hydration or baking time.
Burnt Crust
If the crust of your vegan challah is burning before the inside is cooked, your oven might be running too hot, or the loaf might be positioned too high in the oven. Use an oven thermometer to verify your oven's actual temperature, as they can sometimes be inaccurate by 25°F or more.
Try baking on a lower rack position (e.g., the lower third instead of the middle). If the crust starts to darken significantly while the internal temperature is still below 180°F (82°C), loosely tent the loaf with aluminum foil for the remainder of the baking time. This protects the top crust from direct heat while allowing the interior to finish cooking.
Variations and Additions to Your Vegan Challah Recipe
Once you've mastered the basic Vegan Challah Bread Recipe, feel free to experiment with delicious variations and additions to customize your loaf.
These simple additions can transform the flavor profile of your challah, making it suitable for different occasions or preferences.
Sweet Variations: Raisins, Chocolate Chips
For a sweeter treat, you can add dried fruits like raisins or currants, or even vegan chocolate chips, to your vegan challah dough. A good starting point is about 1/2 cup of your chosen addition for a standard loaf. Incorporate them during the last minute or two of kneading, ensuring they are evenly distributed throughout the dough without overworking it.
Raisins are a classic challah addition, providing bursts of sweetness. Vegan chocolate chips melt slightly during baking, creating delightful pockets of chocolatey goodness.
Savory Variations: Herbs, Garlic
Vegan challah doesn't have to be sweet! You can easily turn it into a savory bread by reducing the sugar slightly (while keeping enough for yeast activation) and adding herbs or garlic. Mix about 1 tablespoon of dried herbs (like rosemary, thyme, or dill) or 1-2 cloves of finely minced garlic into the dry ingredients before adding the wet.
Savory challah is wonderful served alongside soups, stews, or savory main dishes. You could also add finely chopped caramelized onions or sun-dried tomatoes for extra flavor depth.
Seed Toppings: Poppy Seeds, Sesame Seeds
Adding seeds to the top of your vegan challah before baking provides a lovely texture and visual appeal, as well as extra flavor. After applying your vegan wash before the second rise or just before baking, generously sprinkle seeds over the top of the loaf.
Classic choices include poppy seeds or sesame seeds. You could also use everything bagel seasoning, nigella seeds, or a mix of different seeds like sunflower or pumpkin seeds. Use about 1-2 tablespoons of seeds for a single loaf, ensuring they stick well to the wash.
Serving and Enjoying Your Homemade Vegan Challah
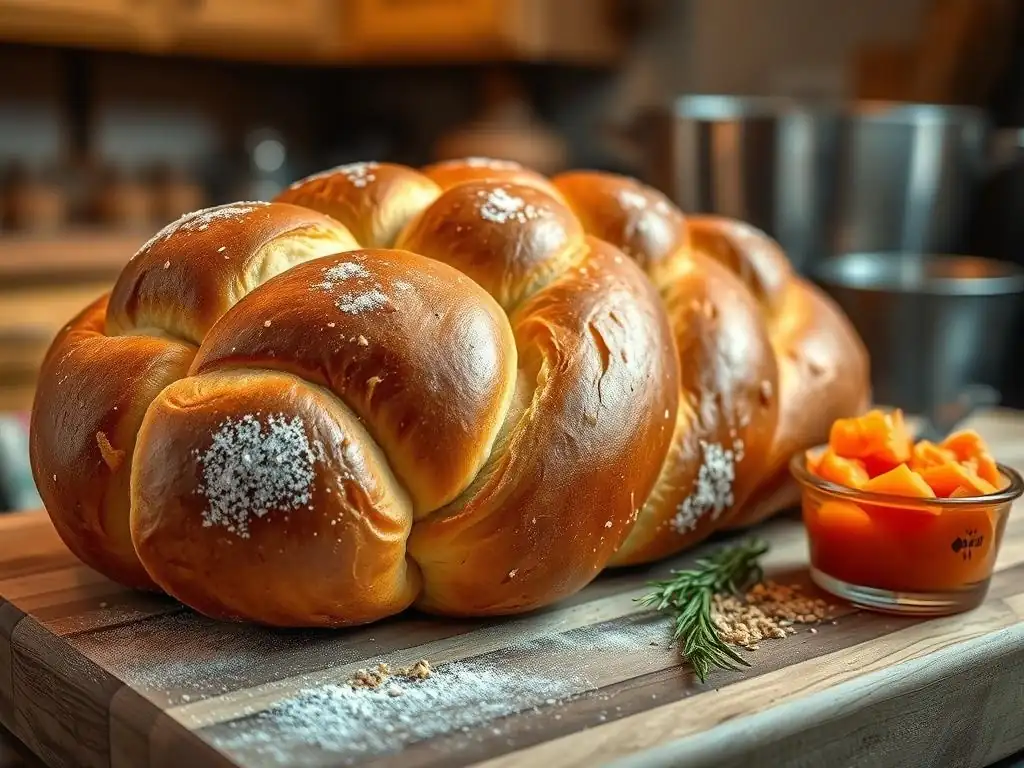
Congratulations! You've successfully baked a beautiful loaf of vegan challah. Now comes the best part: enjoying it!
There are countless ways to savor your homemade vegan challah, from simple slices to elaborate dishes.
Serving Suggestions for Vegan Challah
Your warm, fragrant vegan challah is versatile and can be enjoyed in many ways. Its soft, slightly sweet nature makes it a perfect accompaniment to various meals or a delightful base for other culinary creations.
Share your creation with friends and family – homemade bread is always a welcome treat!
Vegan Challah French Toast
Vegan challah makes absolutely incredible French toast. Its rich texture and slight sweetness hold up beautifully when soaked in a vegan custard mixture. Slice the cooled challah into thick slices (about 1 inch). Whisk together plant milk, a little sugar or maple syrup, vanilla extract, and a binder like cornstarch or ground flaxseed. Dip the challah slices into the mixture, letting them soak briefly, then cook on a hot, greased griddle or pan until golden brown and cooked through. Serve with fresh fruit, maple syrup, or vegan whipped cream.
This is a fantastic way to use up day-old challah, transforming it into a decadent breakfast or brunch.
Vegan Challah Bread Pudding
Another wonderful use for leftover vegan challah is bread pudding. The bread's structure absorbs the custard base beautifully, resulting in a rich, comforting dessert. Cube the challah and place it in a baking dish. Whisk together plant milk, sugar, vegan butter, vanilla, and a binder (like silken tofu or commercial vegan egg replacer). Pour the mixture over the bread cubes, ensuring they are fully saturated, and let it sit for 15-30 minutes to absorb.
Bake according to a vegan bread pudding recipe until set and golden brown. This is a perfect dessert for cooler weather or a cozy treat.
Enjoying it Fresh with Vegan Butter
Sometimes, the simplest way to enjoy your homemade vegan challah is the best. Slice a warm (but fully cooled!) piece and spread it generously with vegan butter. The combination of the soft, slightly sweet bread and the creamy, rich butter is pure bliss.
You can also enjoy it with jam, vegan cream cheese, or simply on its own, appreciating the texture and flavor you created through your vegan bread baking efforts.
Perfecting Your Vegan Bread Baking Skills
Baking vegan challah is a rewarding process that builds confidence in your vegan bread baking abilities. Each loaf you bake will teach you more about working with vegan doughs and understanding the nuances of yeast activity and proofing.
Don't hesitate to try this Vegan Challah Bread Recipe multiple times. Practice truly makes perfect in the world of bread baking.
Further Exploration in Vegan Bread Baking
Mastering this Vegan Challah Bread Recipe opens the door to exploring other exciting areas of vegan bread baking. You've learned key techniques like kneading, proofing, and shaping, which are fundamental to many other types of bread.
Consider experimenting with different flours, hydration levels, or longer fermentation times to develop more complex flavors in your future baking projects. The principles you've applied here are transferable to a wide range of vegan bread recipes.
Other Vegan Bread Recipes to Try
Having successfully baked vegan challah, you might be interested in trying other types of vegan bread recipes. Many classic bread types can be easily made vegan with simple substitutions.
Look for recipes for vegan focaccia (often naturally vegan or easily adapted), vegan sandwich bread, vegan dinner rolls, or even more complex loaves like vegan enriched doughs for cinnamon rolls or babka. Each new recipe offers a chance to refine your skills and expand your repertoire in vegan bread baking.
Frequently Asked Questions
What makes this challah bread recipe vegan?
This recipe substitutes traditional ingredients like eggs and honey with plant-based alternatives. We use ingredients like aquafaba and maple syrup to achieve a similar texture and sweetness.
What is aquafaba and why is it used in this vegan challah bread recipe?
Aquafaba is the liquid from canned chickpeas, used as an egg replacement. It provides binding and moisture essential for the bread's structure.
Can I use a different sweetener instead of maple syrup?
Yes, you can substitute maple syrup with other liquid sweeteners like agave nectar or brown rice syrup. Just ensure the consistency is similar to maintain the dough's hydration.
What are some tips for braiding the challah bread dough?
Divide the dough into equal strands (typically 3 or 6). Ensure they are evenly rolled and then carefully braid them together, pinching the ends to secure the shape.
How do I achieve a golden-brown crust on my vegan challah bread?
Brush the loaf with a plant-based milk (like almond or oat milk) before baking. You can also sprinkle with sesame or poppy seeds for added flavor and visual appeal.
Final Reflection: The Humble Loaf, a Symbol of Connection
The art of baking vegan challah isn't just about creating a delicious loaf; it's about forging a connection—with tradition, with community, and with ourselves. This recipe, designed to be accessible and authentic, aims to bridge the gap between traditional Jewish baking and the growing vegan movement, proving that deliciousness and ethical choices can coexist beautifully. The rising popularity of vegan baking demonstrates a growing awareness of our impact on the world, and this recipe offers a delicious way to participate in that positive change.
Creating this vegan challah recipe felt deeply personal. It was a journey of experimentation, adaptation, and ultimately, a celebration of the power of substitution and innovation within a cherished tradition. Food is symbolic of love when words are inadequate.
- Alan D. Wolfelt. This quote resonates deeply, as the act of sharing a loaf of challah, whether vegan or traditional, transcends mere sustenance; it becomes a gesture of warmth, connection, and shared experience, regardless of dietary restrictions. The process itself, from kneading the dough to the satisfying aroma of baking bread, fosters a sense of mindfulness and connection to the ingredients and the history behind the recipe.
Now, I invite you to try your hand at this recipe. Don't be intimidated by the process; embrace the journey. Let the kneading be a form of meditation, the rising a symbol of growth, and the sharing a testament to the power of food to bring people together.
More than just a recipe, this is an invitation to explore your creativity in the kitchen, to connect with your heritage (or discover a new one), and to share the joy of delicious, ethical baking with those you love. The humble loaf of challah, in its vegan form, holds a powerful message of inclusivity and delicious possibility.
Unleash Your Inner Baker: Craft the Perfect Vegan Challah!
Thanks for joining us on this delicious journey into the world of vegan challah! We hope you gained some valuable tips and tricks to create a truly unforgettable loaf. Now it's time to put your newfound skills to the test!
- Bake your own masterpiece! Use the recipe and techniques from this article to create your own stunning vegan challah. Don't be afraid to experiment with different flavors and additions.
- Share your creation! Post a picture of your delicious challah on social media and tag us – we'd love to see your baking success!
- Explore more vegan baking adventures by browsing our other amazing recipes on BakeWithEase.com (this is an example of an internal link; remove in final version per instruction)
What unique twist will you add to your next vegan challah? Let us know in the comments below!