
Avoid These Mistakes: Common Pitfalls When Starting Sourdough


Welcome to BakeWithEase, your trusted guide to baking bliss! Are you embarking on the tantalizing journey of sourdough baking? Many beginners face unexpected hurdles with their starter. This week, we're diving deep into sourdough starter troubleshooting for beginners, shining a light on common pitfalls and offering simple solutions. Ready to unlock the secrets to a vibrant and bubbly starter? Let's get baking!
- Sourdough Starter Success: Avoiding Common Pitfalls
- Troubleshooting Your Sourdough Starter for Beginners
- Mistake #1: Using Bleached Flour
- Mistake #2: Irregular Feeding Schedule
- Mistake #3: Fermenting at the Wrong Temperature
- Mistake #4: Baking with an Underdeveloped Starter
- Mistake #5: Contamination and Poor Hygiene
- Mistake #6: Using Chlorinated Tap Water
- Mistake #7: Discarding Too Much Starter
- Sourdough Starter Troubleshooting: Key Mistakes to Avoid
-
Frequently Asked Questions
- What is the most common reason a sourdough starter fails to activate, especially for beginners?
- How can I tell if my sourdough starter is actually dead and not just sluggish?
- What type of flour is best for initially creating a sourdough starter, keeping in mind I'm a beginner?
- What are the key signs that my sourdough starter is ready to bake with?
- What should I do if my sourdough starter develops a layer of liquid on top (hooch)?
- Final Reflection: The Joyful Journey of Sourdough, Despite the Pitfalls
- Unleash Your Inner Baker: Master Sourdough Today!
Sourdough Starter Success: Avoiding Common Pitfalls
Troubleshooting Your Sourdough Starter for Beginners
Why Avoiding Mistakes is Crucial for a Healthy Sourdough Starter
Starting your sourdough journey is an exciting step into the world of fermentation and natural leavening. However, many beginners encounter frustrating setbacks that can lead to inactive or unhealthy starters. Understanding and preventing common errors from the outset is paramount. A healthy, vibrant sourdough starter is the foundation for successful baking, yielding loaves with superior flavor, texture, and rise compared to those made with commercial yeast alone. Without a consistently active starter, your bread won't rise properly, and you'll miss out on the tangy depth that sourdough is known for.
Addressing potential issues proactively saves time, ingredients, and prevents the common frustration that leads many to abandon their sourdough efforts. For beginners tackling sourdough starter troubleshooting, recognizing the early signs of problems – like a lack of activity after feeding, the presence of strange odors, or visible signs of contamination – is much easier when you know what not to do from the start. This guide will walk you through the most frequent pitfalls and provide practical solutions to help you cultivate a thriving starter, making sourdough starter troubleshooting for beginners a less daunting task.
A Comprehensive Guide to Sourdough Starter Perfection
Cultivating a strong sourdough starter involves nurturing a delicate ecosystem of wild yeast and bacteria. This guide is designed to illuminate the path to a perfect starter by highlighting the most frequent missteps beginners make. We'll cover everything from the right ingredients to use, the importance of consistency, and understanding the signs your starter is giving you. Think of this as your essential manual for sourdough starter troubleshooting beginners, breaking down complex concepts into easy-to-understand steps.
By focusing on prevention and providing clear solutions, this guide aims to empower you to confidently build and maintain a robust starter. We'll delve into specific errors, such as using the wrong type of flour or inconsistent feeding schedules, and explain why these matter, often backed by approximate fermentation science principles. By the end, you'll have a solid understanding of how to avoid common issues and know exactly what steps to take if problems arise, ensuring your starter is ready to bake delicious bread.
Mistake #1: Using Bleached Flour
The Negative Impact of Bleached Flour on Starter Activity
Bleached flour, while common in many baking recipes, undergoes a chemical process that whitens it and can reduce its nutrient content. This bleaching process often involves agents like benzoyl peroxide or chlorine gas. These chemicals can interfere with the delicate balance of wild yeast and bacteria trying to establish themselves in your starter.
Wild yeast and beneficial bacteria thrive on the natural sugars and nutrients present in flour. When these are diminished or altered by bleaching agents, the microbial activity necessary for fermentation can be inhibited or significantly slowed down, making sourdough starter troubleshooting beginners who used this flour a frequent scenario.
Using bleached flour can result in a sluggish, weak, or even completely inactive starter. The yeast and bacteria struggle to multiply and produce the carbon dioxide needed for rise and the organic acids that give sourdough its characteristic flavor. Many beginners unknowingly use bleached all-purpose flour because it's readily available, only to wonder why their starter isn't bubbling or doubling. Avoiding this pitfall from day one is a simple yet critical step in ensuring a healthy and vigorous starter.
Best Flour Choices: Unbleached All-Purpose, Bread Flour, or Rye
For optimal sourdough starter health and activity, it is highly recommended to use unbleached flour. Unbleached all-purpose flour is a great starting point for many beginners. It retains more of the natural enzymes and nutrients that wild yeast and bacteria feed on. Bread flour, with its higher protein content (typically 12-14%), can also provide a robust food source, leading to a strong gluten network in the starter itself, which helps trap gases and shows activity clearly.
Rye flour is arguably one of the best flours for starting a starter, though some bakers switch to white flour later. Dark rye flour is particularly rich in nutrients and microbial life, often leading to a very active starter quickly, sometimes within just a few days.
A common approach for sourdough starter troubleshooting beginners is to switch to rye flour for a few feedings if their white flour starter is sluggish. Using a mix of unbleached white and whole grain flours (like rye or whole wheat) can also provide a broad spectrum of nutrients, encouraging a diverse and resilient microbial population.
Mistake #2: Irregular Feeding Schedule
Understanding Feeding Ratios: 1:1:1, 1:2:2, and 1:4:4
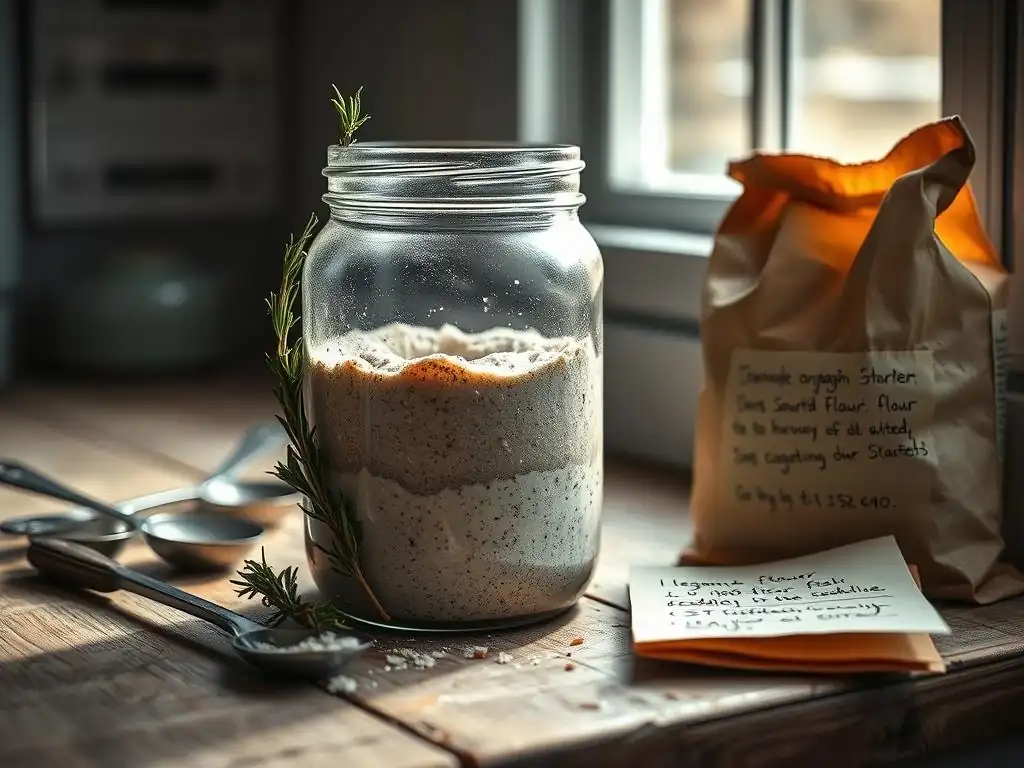
A feeding ratio refers to the proportion of starter to flour to water by weight. Common ratios include 1:1:1 (1 part starter, 1 part flour, 1 part water), 1:2:2, and 1:4:4. The ratio you use significantly impacts how quickly your starter consumes its food and reaches its peak activity. A 1:1:1 ratio provides a lot of 'seed' starter relative to new food, meaning it will peak faster, perhaps within 4-8 hours at room temperature. This is often used when trying to build up a starter quickly or preparing to bake.
Using a higher ratio, like 1:4:4 (1 part starter, 4 parts flour, 4 parts water), provides much more food relative to the starter mass. This slows down the fermentation process, allowing the starter to last longer between feedings, perhaps 12-24 hours or even longer if the temperature is cool. Understanding these ratios is key to maintaining a starter on a consistent schedule and is a core part of sourdough starter troubleshooting beginners often overlook when their starter seems unpredictable.
Establishing a Consistent 12- or 24-Hour Feeding Schedule
Consistency in feeding time is vital for a healthy starter. Most beginners maintain their starter at room temperature, requiring feeding typically every 12 or 24 hours, depending on the ambient temperature and feeding ratio used. Feeding around the same time each day helps establish a predictable cycle of activity. For example, if you feed at 8 AM daily using a 1:2:2 or 1:4:4 ratio, your starter will likely peak sometime in the late afternoon or evening and then begin to fall before its next feeding.
Establishing this routine allows you to observe its behavior – how quickly it rises, how much it rises, and when it starts to fall. This consistent observation is crucial for learning your starter's rhythm and identifying when something is off. An irregular schedule, feeding only when you remember, disrupts this cycle and can lead to an unhappy, less active starter that struggles to perform when you need it for baking.
Troubleshooting Irregular Feeding: Signs and Solutions
An irregularly fed starter often shows signs of distress. It might become very liquidy or develop a layer of dark hooch (a liquid byproduct of fermentation) on top, indicating it's hungry. It might also smell strongly of acetone or nail polish remover – another sign of hunger and stress. Lack of significant rise after feeding is also a common symptom. These are classic sourdough starter troubleshooting beginners' issues stemming from inconsistent care.
To fix this, simply commit to a regular feeding schedule. Discard most of the starter, leaving only a small amount (e.g., 10-20 grams), and feed it with fresh flour and water using your chosen ratio (1:1:1 or 1:2:2 are good for recovery). Feed it consistently at the same time each day. Within a few days of consistent care, you should see a significant improvement in activity and smell. Patience and regularity are your best tools here.
Mistake #3: Fermenting at the Wrong Temperature
The Ideal Temperature Range: 70-75°F (21-24°C)
Temperature plays a critical role in the activity of the wild yeast and bacteria in your sourdough starter. The optimal temperature range for vigorous and balanced fermentation is typically between 70°F and 75°F (21°C to 24°C). Within this range, both the yeast (responsible for rise) and the lactic acid bacteria (responsible for flavor) thrive and work synergistically. Temperatures significantly outside this range can favor one type of microorganism over the other or slow down activity considerably, leading to an unbalanced or sluggish starter.
Maintaining a consistent temperature within this range is often the missing piece for sourdough starter troubleshooting beginners who report slow or inconsistent results. A kitchen that fluctuates widely in temperature throughout the day or is too cold (below 70°F) will dramatically slow down fermentation, while a kitchen that is too warm (above 80°F) can make the starter peak too quickly and potentially develop off-flavors or undesirable bacteria/yeast strains.
How Temperature Affects Activity and Flavor
At lower temperatures, say 65°F (18°C), the yeast activity slows down considerably. While this can be useful for storing a starter in the refrigerator (where activity is greatly reduced at ~40°F/4°C), it's not ideal for developing a new starter or maintaining one at room temperature for regular baking. A cold starter will take much longer to rise after feeding, sometimes 12-24 hours or more, even with a generous feeding ratio. This slower fermentation can sometimes contribute to a more sour flavor profile as the bacteria continue to produce acid over a longer period.
Conversely, at warmer temperatures above 75°F (24°C), yeast activity accelerates rapidly. The starter might double in size within just a few hours. While this seems active, it can also lead to the starter peaking and falling quickly, potentially being hungry again sooner than expected. Very high temperatures (above 80°F/27°C) can stress the culture, potentially encouraging undesirable microbial growth or leading to a very sour, vinegary smell and taste if not fed frequently enough. Understanding this temperature sensitivity is key for effective sourdough starter troubleshooting beginners face.
Maintaining a Consistent Temperature for Reliable Results
Finding a consistent spot in your home within the 70-75°F range is crucial. Avoid windowsills that get direct sun or drafts, and steer clear of spots right next to a hot oven or stovetop. Ideas for maintaining temperature include:
- Keeping the starter in a turned-off oven with the light on (check the temperature inside first, as oven lights vary).
- Using a proofing box or a proofer setting on some ovens.
- Placing the starter in a microwave (door closed) – it acts as a small, insulated environment.
- Using a seedling mat or placing the jar in a container of warm water (change water as needed).
Monitoring the temperature near your starter with a simple thermometer can provide valuable insight. If your starter is consistently sluggish, even with proper feeding, temperature is one of the first variables to check when performing sourdough starter troubleshooting beginners' guides recommend.
Mistake #4: Baking with an Underdeveloped Starter
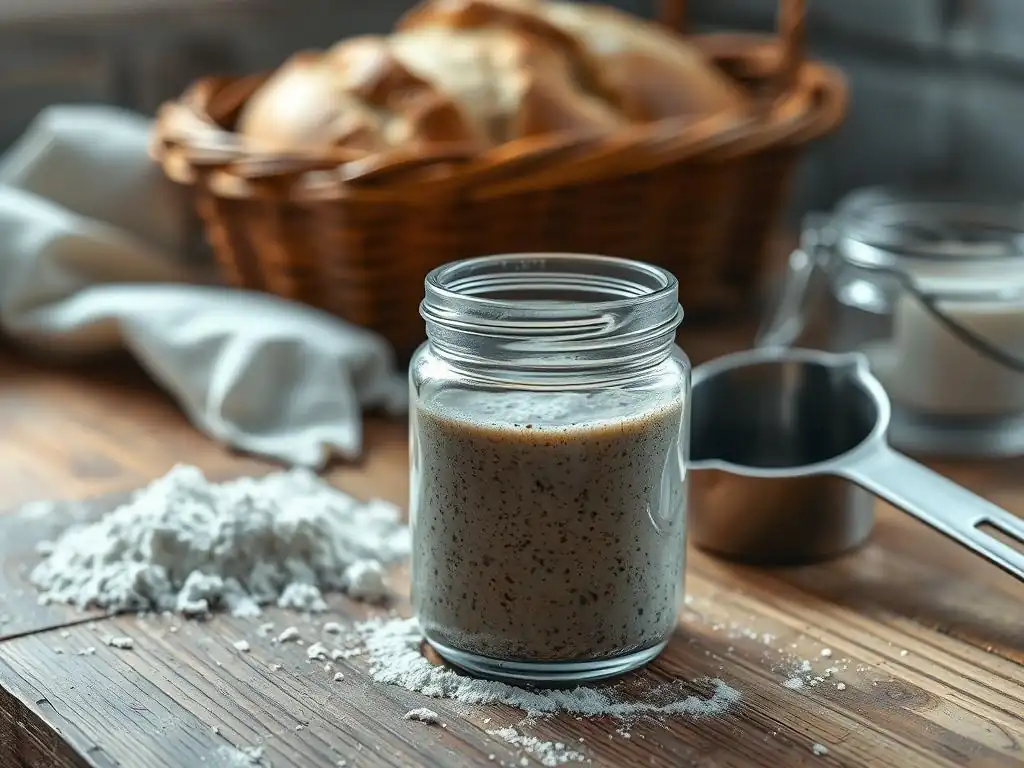
Recognizing a Mature Starter: Doubling in Size
One of the most common reasons for dense, flat sourdough loaves among beginners is using a starter that isn't mature or active enough. A truly ready-to-bake starter, kept at room temperature and fed regularly, should consistently double (or even triple) in size within 4 to 8 hours after being fed, especially when using a 1:1:1 or 1:2:2 feeding ratio at optimal temperatures (70-75°F). This vigorous rise indicates a healthy, active population of yeast producing ample carbon dioxide.
Observing this consistent doubling over several consecutive feeding cycles (at least 5-7 days, often longer, depending on initial conditions) is a primary indicator of maturity. A starter that only rises 25% or 50% after 8 hours is likely not strong enough to leaven a loaf of bread effectively. Patience is key; it typically takes at least 7-14 days, sometimes up to a month, for a new starter to become consistently strong enough for baking.
Understanding Rise and Fall Patterns
A mature starter follows a predictable pattern after feeding: it rises steadily, reaches a peak, and then begins to fall back down as the yeast consume most of the available sugars. The peak is the point of maximum leavening power. Ideally, you want to use your starter for baking when it is near its peak or just beginning to fall. This is when the yeast are most active.
Observing this full rise-and-fall cycle is essential. Mark the level of your starter in its jar immediately after feeding using a rubber band or marker. Watch how quickly and how high it rises, and note when it starts to recede. An underdeveloped starter may rise slowly and weakly, maybe only increasing by half, and then sit there without a clear fall. Recognizing this pattern is a crucial part of sourdough starter troubleshooting beginners need to master.
Testing Readiness: The Float Test
A traditional test for starter readiness, particularly for baking, is the float test. To perform this test, gently take a small spoonful of starter when you believe it is at or near its peak (after it has doubled or more). Carefully drop this spoonful into a glass of room-temperature water.
If the starter floats, it is generally considered ready to use. This indicates that it is full of trapped carbon dioxide bubbles, making it less dense than water. If it sinks, it suggests there aren't enough gas bubbles, and the starter isn't active enough to leaven bread effectively. While not foolproof, the float test is a simple, practical assessment that complements visual observation of the rise-and-fall pattern and aids in sourdough starter troubleshooting beginners' readiness questions.
Mistake #5: Contamination and Poor Hygiene
Maintaining a Clean Jar and Utensils
Sourdough starters are living cultures, and like any culture, they can be susceptible to contamination from undesirable molds or bacteria. Maintaining cleanliness is paramount. Always use clean jars and utensils when feeding your starter. Jars should be washed thoroughly with hot, soapy water and rinsed well to remove any soap residue, which can inhibit microbial growth. Some bakers even rinse with boiling water for extra precaution.
While you don't need a sterile laboratory environment, minimizing external bacteria and mold spores is important. Wipe down your workspace before feeding. Using dedicated utensils for your starter can also help prevent cross-contamination from other foods. Cleanliness is a simple yet effective strategy in preventing common sourdough starter troubleshooting beginners encounter related to unwanted growth.
Preventing Mold: Proper Ventilation and Observation
Mold requires moisture and still air to grow. While your starter needs to be covered to prevent drying out and keep pests out, it shouldn't be sealed airtight, especially in the initial stages or if your kitchen is humid. Using a loose-fitting lid, a piece of cloth secured with a rubber band, or the jar lid placed loosely on top allows for some airflow while still protecting the starter. This ventilation helps prevent a humid environment on the surface where mold spores might land and germinate.
Regular observation is your best defense against mold. Check your starter daily. Look for any fuzzy or colored spots (green, black, orange) on the surface or sides of the jar. Mold is generally visible and often appears as distinct patches. If you see mold, unfortunately, it's usually best to discard the entire starter and begin anew, as the mold spores can permeate the culture.
Identifying and Addressing Potential Issues: Kahm Yeast vs. Mold
Sometimes beginners confuse Kahm yeast with mold, leading to unnecessary discarding. Kahm yeast is a type of wild yeast that can form a white, powdery, or thin film on the surface of fermented foods, including sourdough starter. It often looks like a wrinkly skin or a white dust. Unlike mold, Kahm yeast is generally harmless, though it can impart an off-flavor. If you see Kahm yeast, you can usually scrape it off, discard it, and feed your starter as usual. Ensure your starter is healthy and active, as a vigorous starter is less likely to develop Kahm yeast.
Mold, on the other hand, typically appears as fuzzy, raised spots that can be various colors (most commonly green, black, or white fuzz). If you see anything that looks fuzzy or has distinct color patches, assume it is mold and discard the starter. Distinguishing between Kahm yeast and mold is a key skill in sourdough starter troubleshooting beginners should learn to avoid discarding a perfectly good starter unnecessarily.
Mistake #6: Using Chlorinated Tap Water

The Impact of Chlorine on Starter Activity
Tap water in many municipalities is treated with chlorine or chloramine to kill harmful bacteria and microorganisms, making it safe to drink. However, these same chemicals can inhibit or kill the beneficial wild yeast and bacteria that you are trying to cultivate in your sourdough starter. Using chlorinated tap water consistently can significantly slow down or prevent your starter from becoming active, leading to frustrating sourdough starter troubleshooting beginners' experiences.
While a small amount of chlorine might not completely kill a mature, robust starter, it can certainly hinder the development and activity of a new one. It's a simple variable to control and can make a big difference in the health and vigor of your culture.
Best Water Choices: Filtered or Bottled Water
The safest and most recommended water choices for feeding your sourdough starter are filtered water or bottled water. Filtered water, passed through a carbon filter (like those in pitcher filters or refrigerator dispensers), effectively removes chlorine. Bottled spring water or purified water is also typically free of chlorine.
Using filtered or bottled water ensures that you are providing a clean, chemical-free environment for your yeast and bacteria to thrive. This eliminates one potential inhibitor and helps ensure consistent results as you cultivate your starter.
Letting Tap Water Sit Out to Evaporate Chlorine
If you don't have access to filtered or bottled water, you can often make tap water suitable for your starter by letting it sit out. Chlorine is a gas and will evaporate from water when exposed to the air. Simply pour your tap water into a container (like a jug or bowl) and leave it uncovered for at least 24 hours. This allows most of the chlorine to dissipate into the atmosphere.
Note that this method is primarily effective for chlorine. Some water supplies use chloramine, which is a more stable compound and does not evaporate readily. If your water supply uses chloramine (check with your local water company), letting it sit out will not remove it effectively. In this case, filtered or bottled water is necessary. Letting water sit out is a useful technique for sourdough starter troubleshooting beginners can try if they suspect chlorine is an issue and don't have other water options.
Mistake #7: Discarding Too Much Starter
Understanding the Importance of Starter Mass
When you feed a sourdough starter, you are essentially providing a fresh supply of flour and water for a portion of the existing culture to consume and propagate within. If you don't discard any starter before feeding, you would need to add enormous amounts of flour and water to feed the entire mass adequately. This quickly becomes unsustainable and wasteful, resulting in gallons of starter. Discarding a portion of the starter before feeding allows you to maintain a manageable amount while still preserving a healthy, active culture to inoculate the new flour and water.
Maintaining a consistent, relatively small mass of starter (e.g., 50-100 grams) is standard practice. When you feed, say using a 1:2:2 ratio for a 50g starter, you'd add 100g flour and 100g water. This keeps the volume manageable and ensures the starter is fed efficiently, preventing it from becoming too dilute or too large to feed properly.
Best Practices for Discard Management
Best practice involves discarding a significant portion of your starter before each feeding, especially if you are maintaining it at room temperature with daily feedings. A common approach is to keep only a small amount, perhaps 10-30 grams, and feed that amount with fresh flour and water according to your chosen ratio (e.g., discard down to 20g, then feed 40g flour and 40g water for a 1:2:2 ratio). This minimizes waste while ensuring you have enough active starter to build upon.
While it might feel wasteful initially, remember that the 'discard' isn't necessarily waste if you use it. It's simply the portion of the starter you remove before feeding to keep the culture at a manageable size. Learning proper discard management is a key aspect of successful sourdough starter troubleshooting beginners need to understand.
Alternative Uses: Sourdough Discard Pancakes, Crackers, or Pizza Dough
The good news is that sourdough discard is a fantastic ingredient for many recipes that don't rely solely on the starter for leavening. Since the discard is essentially a mix of flour and water with some fermented culture, it adds a pleasant tang and depth of flavor to baked goods. Using discard in recipes is a great way to avoid waste and add a unique twist to everyday items.
Popular uses for sourdough discard include:
- Pancakes or Waffles: Discard adds a lovely tang.
- Crackers: A simple mix of discard, flour, oil, and seasonings bakes into crispy crackers.
- Pizza Dough: Discard can replace some of the flour and water in a regular pizza dough recipe, adding flavor.
- Biscuits or Scones: Incorporating discard can result in tender, flavorful results.
- Quick Breads or Muffins: Discard adds moisture and tang.
Keeping your discard in a separate jar in the refrigerator is a convenient way to store it until you have enough for a recipe. This not only solves the 'waste' problem but also turns a perceived byproduct into a valuable ingredient.
Sourdough Starter Troubleshooting: Key Mistakes to Avoid
Mastering sourdough starter troubleshooting for beginners comes down to understanding the fundamental needs of your culture: good food (unbleached flour), clean water (unchlorinated), consistent feeding, the right temperature, and proper hygiene. Avoiding the seven common pitfalls discussed – using bleached flour, irregular feeding, wrong temperature, baking with an immature starter, contamination, chlorinated water, and improper discard management – will dramatically increase your chances of success.
A healthy starter is resilient and forgiving, but getting it to that point requires attention to detail in the beginning. Don't be discouraged by early setbacks; sourdough starter troubleshooting beginners is a common part of the learning process. By being mindful of these potential issues, you're well on your way to cultivating a strong, reliable starter ready to produce delicious, naturally leavened bread.
Quick Checklist for Success
Here is a quick checklist to help beginners avoid common sourdough starter troubleshooting issues:
- [ ] Using Unbleached Flour (All-purpose, Bread, or Rye recommended)
- [ ] Using Unchlorinated Water (Filtered or Bottled)
- [ ] Maintaining a Consistent Feeding Schedule (e.g., every 24 hours)
- [ ] Feeding with an Appropriate Ratio (e.g., 1:1:1, 1:2:2, 1:4:4 by weight)
- [ ] Fermenting at the Correct Temperature (Ideally 70-75°F / 21-24°C)
- [ ] Maintaining Cleanliness (Clean jar and utensils)
- [ ] Discarding Most of the Starter Before Feeding
- [ ] Observing Starter Activity (Looking for doubling in size)
- [ ] Waiting for Maturity Before Baking (Typically 7-14+ days)
- [ ] Knowing How to Identify Kahm Yeast vs. Mold
Resources for Continued Learning
For beginners delving into sourdough starter troubleshooting and beyond, there are many resources available. Online communities and forums offer peer support and advice. Numerous reputable baking websites and blogs provide detailed guides and videos. Cookbooks dedicated to sourdough baking often contain comprehensive sections on starter care.
Remember that every starter is unique, influenced by its environment and the specific microbes present. Continue to observe your starter, learn its rhythm, and don't hesitate to consult reliable resources when questions arise. With patience and attention to these common pitfalls, you'll soon be confidently baking with your own thriving sourdough starter.
Frequently Asked Questions
What is the most common reason a sourdough starter fails to activate, especially for beginners?
The most common reason is incorrect feeding ratios or incorrect temperature. Starters need a consistent environment and proper food (flour and water) to thrive.
How can I tell if my sourdough starter is actually dead and not just sluggish?
A dead starter will exhibit no signs of activity like bubbling or rising, even after consistent feeding. It will also likely smell foul or moldy, indicating unwanted bacteria growth.
What type of flour is best for initially creating a sourdough starter, keeping in mind I'm a beginner?
Whole wheat or rye flour is often recommended for beginners because they contain more natural yeasts and nutrients, which help kickstart the fermentation process. These flours provide a stronger initial boost.
What are the key signs that my sourdough starter is ready to bake with?
A ready starter will double in size within a few hours of feeding and have a bubbly, slightly tangy aroma. This indicates peak activity and sufficient leavening power.
What should I do if my sourdough starter develops a layer of liquid on top (hooch)?
Hooch indicates the starter is hungry and needs feeding. Simply pour it off or stir it back in before feeding the starter with fresh flour and water to re-establish balance.
Final Reflection: The Joyful Journey of Sourdough, Despite the Pitfalls
Mastering sourdough isn't about avoiding every mistake; it's about embracing the learning process. The seemingly simple act of nurturing a sourdough starter and baking with it reveals a complex interplay of science and art, a journey fraught with potential pitfalls, but ultimately rewarding beyond measure. This article highlighted common beginner mistakes, from temperature fluctuations to inconsistent feeding, but the true takeaway transcends simple troubleshooting.
The enduring appeal of sourdough lies not just in the delicious, tangy bread it produces, but in the connection it fosters – a connection to tradition, to the natural world, and to the very act of creation. Bread is the staff of life,
they say, and in the case of sourdough, it's a staff crafted with patience, observation, and a willingness to learn from imperfections. My own journey with sourdough has been a testament to this; each failed loaf has taught me more than any successful one, shaping my understanding and deepening my appreciation for this ancient craft.
So, as you embark on (or continue) your own sourdough adventure, remember this: don't be discouraged by setbacks. Embrace the challenges, learn from your mistakes, and celebrate the small victories. Each bubbly rise, each perfectly formed loaf, is a testament to your dedication and perseverance. The journey itself, with all its imperfections, is what makes the final product so incredibly satisfying. Now, go forth and bake!
Unleash Your Inner Baker: Master Sourdough Today!
Thanks for taking the time to explore the wonderful world of sourdough baking! We hope you've gained valuable insights into avoiding those pesky pitfalls that can derail your sourdough journey. Now it's time to put your newfound knowledge into practice!
- Dive into your first sourdough starter: The most important step is to begin! Follow the detailed instructions in our Starter Guide (which you can find on the website) and experience the magic of creating your own live sourdough starter.
- Share your sourdough journey: Connect with our vibrant baking community on our forum and share your experiences, successes, and even those inevitable setbacks – learning together makes all the difference!
- Explore advanced sourdough techniques: Once your starter thrives, discover our extensive library of recipes and tutorials to elevate your sourdough skills. From crusty loaves to airy baguettes, the possibilities are endless!
Ready to transform from sourdough novice to confident baker? What’s your first step towards making that delicious, tangy loaf you've always dreamed of?