
Preferments Demystified: Poolish, Biga, and Sourdough for Flavor Depth

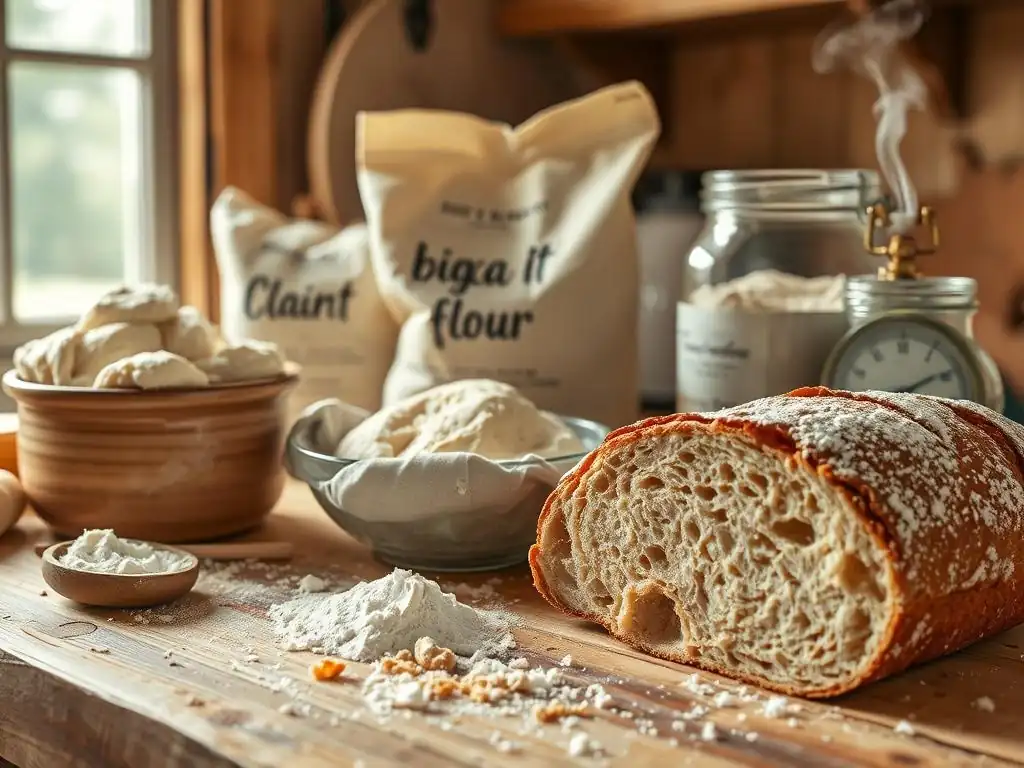
Welcome to BakeWithEase, your trusted guide to the delightful world of baking! Ever wondered what gives some breads that unforgettable depth of flavor? This week, we're diving into the magic of preferments, specifically poolish, biga, and, of course, the star of the show – understanding sourdough starter recipe basics. Discover how these simple techniques can elevate your bread baking from ordinary to extraordinary. Ready to unlock the secrets? Let's get started!
- Unlock Flavor: Exploring Poolish, Biga, and Sourdough in Bread Baking
- Understanding Preferments
- Types of Preferments
- Sourdough Starter: A Detailed Guide
- Comparing Preferments
- Preferments in Pizza Dough
- Troubleshooting
- Recipes
- Mastering Preferments
- Conclusion: Elevating Your Baking
-
Frequently Asked Questions
- What is a sourdough starter and why is it important in baking?
- How does a sourdough starter differ from a poolish or biga?
- What are the "sourdough starter recipe basics" I need to know before starting?
- How often should I feed my sourdough starter?
- What are some common problems encountered when making a sourdough starter and how can I fix them?
- Final Reflection: The Enduring Allure of the Sourdough Starter
- Unleash Your Inner Baker: Elevate Your Bread Baking!
Unlock Flavor: Exploring Poolish, Biga, and Sourdough in Bread Baking
Understanding Preferments
What are Preferments and Their Purpose?
Preferments, also known as pre-ferments or starters, are dough or batter mixtures that are prepared in advance and allowed to ferment for a period before being added to the final dough. They typically consist of flour, water, and a leavening agent (either commercial yeast or wild yeast from a sourdough starter).
The purpose is multifaceted: preferments kickstart the fermentation process, allowing complex flavors to develop and enzymes to break down starches and proteins, which contributes to a more digestible and flavorful finished product. Think of it as giving your dough a head start, building microbial activity and acidity before the main mix.
The development of preferments dates back centuries, long before commercial yeast was widely available. Bakers relied on these techniques to improve the quality of their bread, creating structure and depth of flavor that a simple direct mix couldn't achieve. By controlling the temperature and hydration of the preferment, bakers can influence the type of fermentation (lactic vs. acetic acid production, for instance) and the resulting flavor profile. This foundational step is key to understanding why certain breads, like a classic baguette or a tangy sourdough loaf, possess such distinctive characteristics.
Impact on Flavor, Texture, and Shelf Life
Using a preferment significantly enhances the flavor of baked goods. During the extended fermentation of the preferment, yeast and bacteria produce various organic acids, alcohols, and esters. These compounds contribute to the complex, nuanced taste and aroma that are often lacking in breads made with a direct yeast addition. For example, a well-developed sourdough starter can impart a delightful tanginess due to lactic and acetic acid production, while a poolish might contribute a subtle sweetness and nutty notes.
Beyond flavor, preferments dramatically improve the texture of bread. The enzymatic activity in the preferment helps strengthen the gluten network, leading to better dough structure, increased oven spring, and a more open crumb structure with larger, irregular holes. This is particularly noticeable in artisan-style loaves. Furthermore, the increased acidity from fermentation helps inhibit mold growth, extending the shelf life of the finished bread by several days compared to a non-prefermented loaf. A baguette made with a poolish, for instance, will likely stay fresh and palatable longer than one made without.
Types of Preferments
Poolish: The Simple Start
Poolish is a highly liquid preferment, typically made with equal parts flour and water by weight (100% hydration) and a very small amount of commercial yeast. Its simplicity makes it a popular choice for bakers looking to add flavor and structure without significant complexity. The high hydration encourages rapid yeast activity and enzyme action, leading to a relatively quick fermentation compared to stiffer preferments. It's known for contributing a light, airy texture and subtle, sweet, and slightly nutty flavors to the final bake.
Originating in Poland and popularized in France, poolish is frequently used in baguettes, ciabattas, and other European-style loaves. Its loose consistency makes it easy to mix into the final dough. A typical poolish might ferment for anywhere from 3 hours at warmer temperatures (around 25°C or 77°F) up to 12-18 hours at cooler room temperatures (around 20°C or 68°F), or even longer in the refrigerator, depending on the amount of yeast used and the desired level of maturity. A mature poolish will be bubbly, slightly domed, and smell pleasantly alcoholic and fruity.
Poolish Recipe: Hydration and Ingredients
A standard poolish uses a 1:1 ratio of flour to water by weight. For example, a recipe might call for 200g of flour and 200g of water. The amount of yeast is very small, often between 0.1% to 0.5% of the flour weight in the poolish, or even less for longer fermentation times. So, for 200g of flour, you might use just 0.2g to 1g of instant dry yeast. The type of flour can vary; all-purpose or bread flour is common, but using a portion of whole wheat or rye flour can add complexity.
### Basic Poolish Recipe

*   Flour: 200g (e.g., Bread Flour)
*   Water: 200g (Room temperature, around 20-25°C / 68-77°F)
*   Instant Dry Yeast: 0.2g - 1g (Amount depends on fermentation time and temperature)

**Instructions:**
1.  In a medium bowl, whisk together the water and yeast until the yeast is mostly dissolved.
2.  Add the flour and mix with a spoon or spatula until a smooth, lump-free batter forms. It will be quite wet.
3.  Cover the bowl tightly with plastic wrap to prevent a skin from forming.
4.  Let it ferment at room temperature or in a cooler place for the specified time until mature and bubbly.
Making Poolish: A Simple Guide
Creating a poolish is straightforward. You simply combine the specified amount of water with the yeast, ensuring the yeast is distributed. Then, add the flour and mix until you have a uniform, wet batter. The key is the consistency, which should be like a thick pancake batter. Avoid overmixing; just ensure all the flour is hydrated.
Once mixed, cover the container securely. This prevents the surface from drying out and forming a crust, which can hinder fermentation and make incorporating the poolish into the final dough difficult. Place the covered bowl in a location with a consistent temperature suitable for the desired fermentation time. Watch for signs of maturity: the poolish will expand, become very bubbly, and the surface may even start to collapse slightly in the center when it's fully ripe. This typically takes 8-12 hours at standard room temperature (around 21°C / 70°F) with a small amount of yeast.
Using Poolish in Bread
Incorporating poolish into your final bread dough is easy due to its liquid consistency. Simply add the ripe poolish to the mixing bowl along with the rest of the water called for in the recipe. Mix these together to disperse the poolish. Then, add the remaining flour, salt, and any other ingredients.
The amount of poolish used in a recipe is usually calculated as a percentage of the total flour in the final dough. Recipes commonly use anywhere from 20% to 50% of the total flour weight in the poolish. For instance, if your final dough uses 500g of flour total, and you're using a 30% poolish, the poolish would contain 150g of flour (and 150g of water, plus yeast).
This percentage significantly impacts the fermentation timeline and the final flavor profile. A higher percentage of poolish will result in a faster bulk fermentation and a more pronounced flavor contribution from the preferment.
Biga: The Italian Secret
Biga is a traditional Italian preferment known for its relatively low hydration compared to poolish, typically ranging from 40% to 60% water to flour by weight. This results in a much stiffer, firmer dough. The low hydration and often minimal yeast content lead to a slower, longer fermentation process. This slow fermentation primarily encourages lactic acid production, which contributes a different kind of tang and sweetness compared to the acetic acid often found in very wet or long-fermented preferments like some sourdoughs.
Biga is a staple in Italian bread making, used for loaves like ciabatta, focaccia, and panettone, as well as various pizza doughs. Its stiff consistency helps develop gluten strength during fermentation, contributing to excellent structure and volume in the final bread. A well-made biga has a sweet, slightly alcoholic aroma and a creamy white color. It should be active but not overly bubbly or collapsed when ready to use.
Biga Recipe: Achieving the Right Consistency
The key to a good biga is its stiff consistency. While hydration can range, 50-60% is quite common for a general-purpose biga. A recipe for 300g of flour might use 150-180g of water. The amount of yeast is again very small, similar to poolish, perhaps 0.1% to 0.5% of the flour weight in the biga, especially for a long, cool fermentation.
### Basic Biga Recipe

*   Flour: 300g (e.g., Italian '00' or Bread Flour)
*   Water: 150g - 180g (Cooler temperature, around 18-20°C / 64-68°F is good for longer ferments)
*   Instant Dry Yeast: 0.3g - 1.5g (Amount depends on fermentation time and temperature)

**Instructions:**
1.  In a bowl, combine the flour and yeast.
2.  Add the water gradually while mixing with your hands or a stand mixer on low speed.
3.  Mix until the ingredients are just combined and there are no dry flour pockets. The dough will be stiff and shaggy, not smooth. Avoid developing significant gluten at this stage.
4.  Transfer to a clean container, cover tightly with plastic wrap or a lid.
5.  Ferment according to the recipe's instructions (usually 12-18 hours at cool room temperature or longer in the fridge).
Biga Fermentation: Time and Temperature
Biga fermentation is typically longer than poolish fermentation due to its stiffness and lower yeast content. A common fermentation schedule is 12 to 18 hours at a relatively cool room temperature, around 18-22°C (64-72°F). At these temperatures, the yeast activity is slower, allowing more time for flavor development through enzymatic action and slower acid production.
For even longer fermentation, such as 24 to 48 hours, a biga can be fermented in the refrigerator (around 4-5°C / 39-41°F) with an even smaller amount of yeast. A mature biga will have increased in volume, smell sweet and slightly alcoholic, and its surface may show some small bubbles but won't be as actively bubbly as a poolish. It should still hold its shape relatively well. The extended fermentation time in the biga contributes significantly to the final flavor complexity and dough strength.
Incorporating Biga into Bread and Pizza Dough
Because biga is a stiff dough, incorporating it into the final mix requires a bit more effort than a liquid poolish. It's best added to the mixing bowl along with the rest of the water for the final dough. Break the biga into smaller pieces before adding it to help it disperse more easily. Start mixing on a low speed, allowing the biga pieces to hydrate and break down in the water before adding the remaining dry ingredients.
The percentage of biga in the total dough's flour can range from 20% to 100%. Using a higher percentage, like 50% or more, will significantly impact the dough's handling characteristics and the final product's flavor and texture, leading to a more open crumb and robust taste. Biga is particularly excellent for pizza dough, providing structure and a delightful chewiness, and is fundamental for achieving the classic texture of a Neapolitan-style pizza crust.
Sourdough Starter: The Wild Card
A sourdough starter is a living culture of wild yeast and lactic acid bacteria cultivated from flour and water. Unlike poolish or biga which use commercial yeast, sourdough relies entirely on the microorganisms naturally present in flour and the environment. This symbiotic relationship between yeast and bacteria creates a unique leavening agent and flavor profile that commercial yeast alone cannot replicate. The wild yeasts provide lift, while the bacteria produce organic acids (primarily lactic and acetic), giving sourdough its characteristic tangy flavor and contributing to its texture and keeping qualities.
Developing and maintaining a sourdough starter is a rewarding process that connects the baker directly to the fermentation process. It requires patience and consistent feeding to keep the microbial community healthy and active. Understanding the basics of a sourdough starter recipe and maintenance is crucial for anyone wanting to explore this traditional baking method. A healthy, active starter is the heart of all sourdough baking, whether you're making rustic loaves, pancakes, or even pizza dough.
Creating Your Own Sourdough Starter
Creating a sourdough starter involves simply mixing flour and water and allowing it to ferment spontaneously over several days. The process begins with a small amount of flour and water, left exposed to the air (loosely covered to prevent drying). Each day, you discard a portion of the mixture and "feed" the remainder with fresh flour and water. This regular feeding replenishes the food source for the microorganisms and encourages the desired yeast and bacterial cultures to flourish while discouraging undesirable ones.
Over time, typically 5-14 days, the mixture will become active, showing signs of fermentation like bubbles, increased volume, and a pleasant, slightly tangy aroma. The specific timeline can vary greatly depending on environmental temperature, the type of flour used, and even the microbial environment of your kitchen. Patience is key during this initial creation phase; consistency in feeding is more important than rapid growth. This foundational step is the very beginning of mastering sourdough starter recipe basics.
Maintaining a Healthy Sourdough Starter
Maintaining a healthy sourdough starter requires regular feeding with fresh flour and water. The frequency of feeding depends on how you store your starter. A starter kept at room temperature needs to be fed daily, or even twice daily in very warm conditions, to keep it active and prevent it from becoming overly acidic or developing off-flavors. A starter stored in the refrigerator, on the other hand, ferments much more slowly and only needs to be fed typically once a week.
When feeding, you discard a portion of the old starter before adding fresh flour and water. Common feeding ratios are 1:1:1 (1 part starter: 1 part flour: 1 part water by weight) or 1:2:2, or even 1:5:5 for longer intervals between feedings. The ratio of water to flour can also be adjusted (e.g., 100% hydration, 80% hydration) depending on preference and the desired consistency. Consistent feeding at appropriate intervals ensures the yeast and bacteria have enough food and maintains a balanced, vigorous culture ready for baking. This regular care is fundamental to sourdough starter recipe basics.
Sourdough Starter in Recipes
A mature, active sourdough starter can be used to leaven a wide variety of baked goods. It replaces commercial yeast entirely or is used in combination with it. Before using your starter in a recipe, it's best to feed it and wait until it is active and bubbly, typically 4-12 hours after feeding, depending on the feeding ratio and temperature. This is often referred to as using the starter at its "peak" activity.
To use it, you simply measure the required amount of active starter and incorporate it into your dough mix along with the other ingredients. The percentage of starter used in a recipe relative to the total flour weight can vary widely, from as low as 10% for a slow fermentation to 30% or more for a faster rise. Understanding sourdough starter recipe basics, including how to gauge its activity and incorporate it correctly, is essential for successful sourdough baking. The unique flavor and rise it provides are unparalleled.
Sourdough Starter: A Detailed Guide
Ingredients for Sourdough Starter
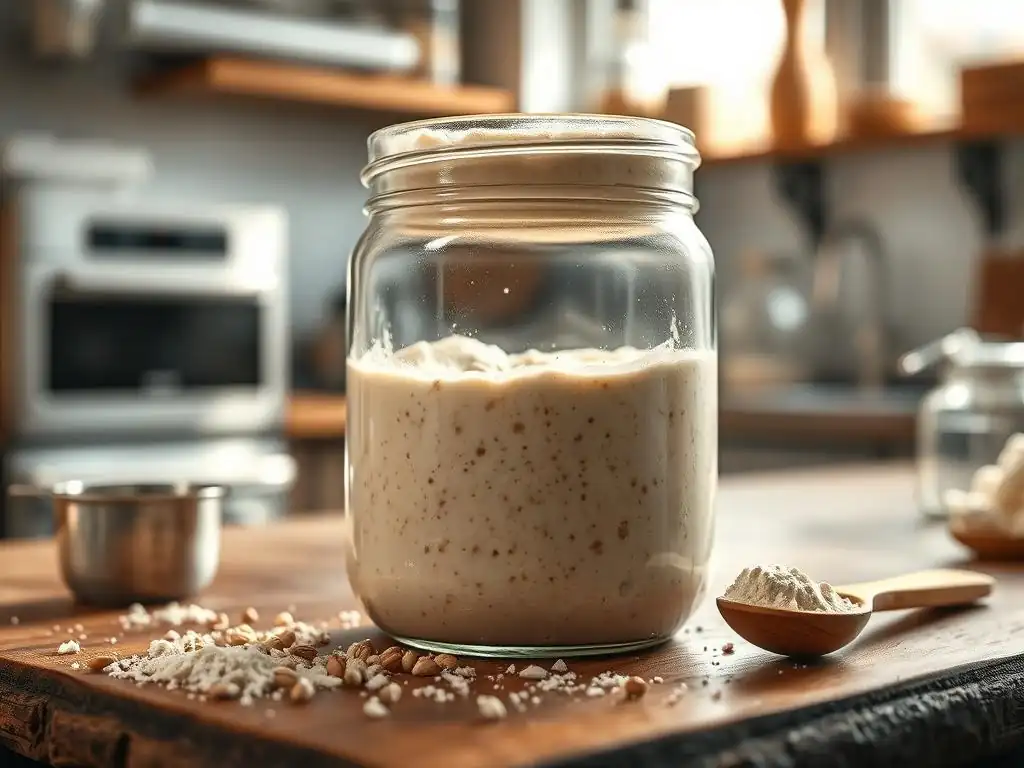
Creating a sourdough starter requires only two ingredients: flour and water. The type of flour can influence the starter's initial development and character. While all-purpose flour works perfectly well, using a portion of whole-grain flour, particularly rye or whole wheat, can help kickstart the process. Whole grains contain a higher concentration of wild yeasts and bacteria compared to refined flours. For instance, starting with a mix of 50% rye and 50% bread flour is a common and effective method.
The water used should be non-chlorinated, as chlorine can inhibit microbial activity. Tap water that has been left out for 24 hours or filtered water is ideal. The temperature of the water can also play a role; using lukewarm water (around 25-30°C / 77-86°F) can help encourage initial activity, especially in cooler environments. However, room temperature water is generally fine for ongoing maintenance. The ratio of flour to water is typically 1:1 by weight, resulting in a 100% hydration starter, which is a good starting point for beginners learning sourdough starter recipe basics.
Step-by-Step Guide to Creating a Starter
Creating your own sourdough starter is a process that unfolds over about one to two weeks. Patience is key!
[ ] Day 1: Mix 50g flour (e.g., 25g rye + 25g bread flour) with 50g non-chlorinated water in a jar or container. Mix until no dry flour remains. Cover loosely (e.g., with a lid placed on top or plastic wrap secured with a rubber band, poked with a few holes). Leave at room temperature (ideally 20-24°C / 68-75°F).
[ ] Day 2: Check for activity (small bubbles, subtle smell). Discard half of the starter (about 50g). Feed the remaining 50g with 50g fresh flour and 50g fresh water. Mix, cover loosely, and return to room temperature.
[ ] Day 3-7: Repeat the Day 2 process daily. You should start seeing more significant activity, like bubbles throughout the mixture and a noticeable rise and fall. The aroma will change from potentially unpleasant (like gym socks) to more yeasty, then eventually pleasantly tangy. Feed when the starter looks hungry (starts deflating).
[ ] Day 8-14: Your starter should now be reliably doubling or tripling in size within 6-12 hours after feeding. It should have a pleasant, tangy, slightly yeasty smell. At this point, it's considered active and ready for baking. Continue daily feedings at room temperature if you bake frequently, or transition to refrigerator storage with weekly feedings.
Following these steps consistently helps establish a robust microbial culture. Don't be discouraged by periods of inactivity or strange smells in the first week; this is normal as different microorganisms compete before the stable sourdough culture takes hold. Mastering these sourdough starter recipe basics is about consistency.
Feeding Your Starter: Ratios and Frequency
Feeding your sourdough starter involves discarding a portion and adding fresh flour and water. This provides new "food" for the yeast and bacteria and helps maintain a healthy balance. The most common feeding ratio is 1:1:1 by weight (starter: flour: water). For example, if you keep 50g of starter, you would feed it with 50g of flour and 50g of water. This ratio, especially when feeding daily at room temperature, typically leads to the starter peaking in activity within 6-12 hours, ready for baking.
Adjusting the ratio allows for flexibility. A 1:2:2 ratio (50g starter + 100g flour + 100g water) or even 1:5:5 provides more food, allowing the starter to go longer between feedings, useful if you can only feed every 12-24 hours at room temperature. For refrigerated storage, a 1:5:5 or similar ratio is common before putting it in the fridge, as it will ferment very slowly over the week. Understanding these ratios and frequency is a key part of sourdough starter recipe basics and managing your starter's activity level.
Identifying a Healthy Starter
A healthy sourdough starter is active, predictable, and has a pleasant aroma. Visual cues include significant bubbling throughout the mixture, not just on the surface, and a noticeable increase in volume after feeding – ideally doubling or tripling within a predictable timeframe (e.g., 4-8 hours after a 1:1:1 feed at room temperature). The texture should be light and airy, not dense or gummy.
The "float test" is a common way to check if your starter is ready for baking: drop a small spoonful into a glass of water; if it floats, it's typically active enough. However, this isn't foolproof. A more reliable indicator is observing its rise and fall after feeding; it should consistently rise to a peak and then slowly begin to deflate.
A healthy starter smells pleasantly tangy, slightly acidic, and yeasty, perhaps with notes of fruit or yogurt. Foul smells (like cheese, nail polish remover, or strong alcohol) can indicate that it needs more frequent feeding or a different feeding ratio. Mastering these sourdough starter recipe basics includes learning to read your starter's cues.
Comparing Preferments
Flavor Profiles: Poolish, Biga, Sourdough
Each preferment contributes a distinct flavor profile to bread. Poolish, being high hydration and often using commercial yeast, tends to produce breads with a relatively mild, slightly sweet, and nutty flavor. The fermentation is primarily alcoholic and lactic, but less intensely acidic than sourdough. It enhances the natural flavors of the flour without overpowering them.
Biga, with its lower hydration and slower fermentation, encourages more lactic acid production relative to acetic acid, resulting in a sweeter, more rounded, and less overtly tangy flavor than many sourdoughs. It adds complexity and depth without significant sourness. Sourdough, fermented by a diverse community of wild yeasts and bacteria, offers the most complex and variable flavor. The balance of lactic and acetic acids can range from mildly tangy to quite sour, depending on the starter's hydration, feeding routine, and fermentation temperature. It imparts a unique depth and characteristic "sour" note not found in commercially yeast-leavened breads.
Hydration Levels and Dough Handling
The hydration level is a defining characteristic of each preferment and significantly impacts the final dough's handling. Poolish is 100% hydration, making it very wet and easy to mix into the final dough, but it contributes a lot of liquid, requiring adjustments to the main dough's water content. Doughs made with poolish tend to be higher hydration overall, resulting in a more open and airy crumb.
Biga is stiffer, typically 40-60% hydration. This requires more effort to incorporate into the final dough but adds significant structure and gluten development from the start. Doughs made with biga are often easier to handle than high-hydration poolish doughs, lending themselves well to shaping.
Sourdough starters are commonly 100% hydration (like poolish) or sometimes lower (e.g., 60-80% hydration, called a "stiff" starter or "lievito madre"). A 100% hydration sourdough starter behaves similarly to poolish in terms of hydration contribution, while a stiff starter is more akin to a biga in terms of handling and the type of fermentation it encourages.
Fermentation Times: Planning Considerations
The fermentation time for preferments varies considerably, influencing baking schedules. Poolish is often fermented for 8-18 hours, making it suitable for an overnight rise at room temperature or a longer, cooler fermentation. This fits well into a schedule where you mix the poolish the evening before baking.
Biga typically requires a longer fermentation, often 12-24 hours at cool room temperature or up to 48 hours in the refrigerator, due to its stiffness and potentially lower yeast amount. This requires planning further in advance.
Sourdough fermentation depends heavily on the starter's activity and the desired outcome, but using a significant percentage of ripe sourdough starter (part of the sourdough starter recipe basics) often entails a bulk fermentation of 4-8 hours and a final proof of several hours or overnight in the fridge. Planning is essential for any preferment, ensuring it is ripe exactly when you need it for the final mix.
Preferments in Pizza Dough
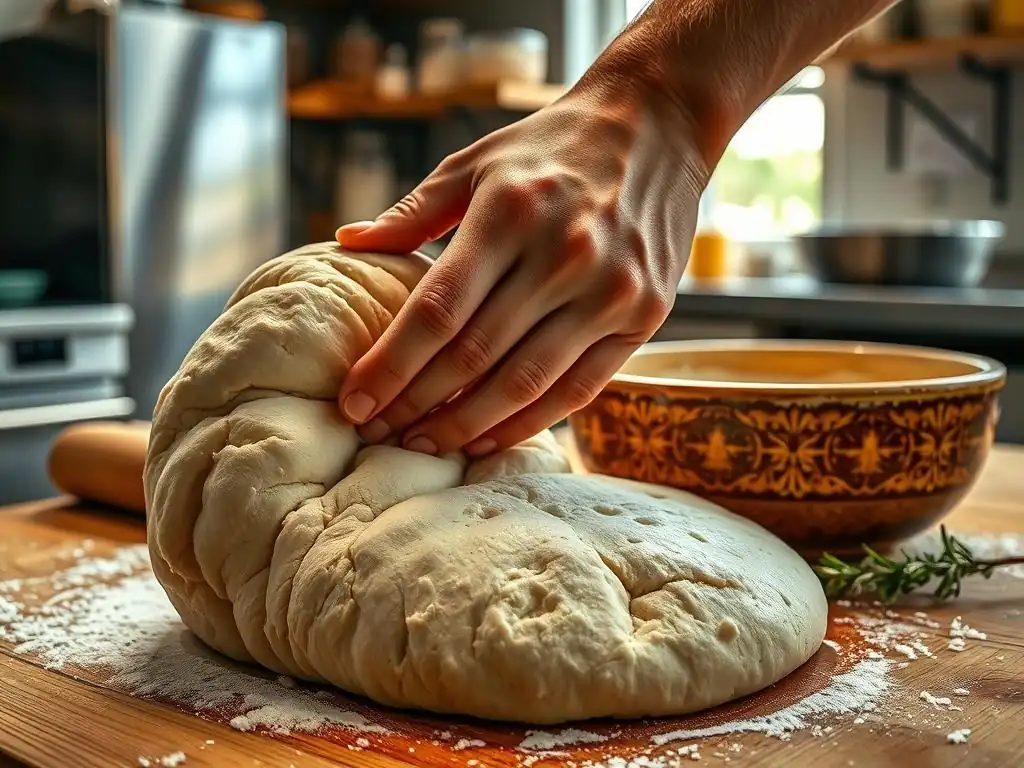
Preferments are a fantastic way to elevate homemade pizza dough, contributing flavor, texture, and improved crust development. Each type offers distinct advantages depending on the desired outcome for your pizza.
Poolish for Light Pizza Crust
Using a poolish in pizza dough results in a light, airy, and crispy crust. The high hydration of the poolish contributes to a more open crumb structure within the crust. A typical pizza dough recipe might use 20-30% of its total flour as a poolish, fermented overnight. This long, slow fermentation of the poolish builds flavor compounds that translate into a delicious, slightly sweet crust with subtle nutty notes.
When baked at high temperatures, common for pizza, the open structure created by the poolish allows for excellent oven spring and the development of characteristic large bubbles or "cornicione" on the edge of the crust. This technique is favored for achieving a lighter, more delicate crust texture that is less dense than a direct-dough pizza.
Biga for Flavorful Pizza Dough
Biga contributes structure, chewiness, and a deeper, more complex flavor to pizza dough. The lower hydration and longer, cooler fermentation of the biga encourage robust gluten development and the production of lactic acid, which adds a pleasant, rounded sweetness and tang without being overtly sour. Using 20-40% of the total flour in a biga is common for pizza.
Incorporating a ripe biga into pizza dough results in a dough that is often easier to handle and stretch than a high-hydration poolish dough. The finished crust has excellent structure, a satisfying chew, and a rich aroma. This technique is often used for Neapolitan-style pizza, where a balance of chewiness and airiness in the crust is highly prized. The biga provides the backbone for this texture.
Sourdough for Tangy Pizza
Using a sourdough starter in pizza dough imparts a unique tanginess and complex flavor profile that cannot be achieved with commercial yeast. It contributes to a chewy crust with varying degrees of sourness, depending on the starter's acidity and the fermentation time. For pizza, using a portion of active sourdough starter (part of mastering sourdough starter recipe basics) adds both leavening and flavor.
Sourdough pizza dough typically undergoes a longer fermentation, often involving an overnight cold proof in the refrigerator. This slow, cool fermentation further develops the sourdough's characteristic flavor and creates a crust that is both chewy and has a pleasant acidity that complements the pizza toppings. It's a favorite for those who enjoy the distinctive taste of sourdough bread in their pizza crust.
Troubleshooting
Even with careful planning, working with preferments can sometimes present challenges. Understanding common issues helps in adjusting your process.
Common Issues
One common issue is a preferment that doesn't become active. This can be due to inactive yeast (commercial yeast that is old or improperly stored, or a sourdough starter that isn't healthy), water that is too hot or chlorinated, or a room temperature that is too cold.
Ensuring your leavening agent is viable and your water and temperature are appropriate are key starting points. Another issue is a preferment that becomes too active and collapses before you're ready to use it; this often means it's over-fermented, usually due to too much yeast or too warm a temperature for the intended fermentation time.
Off-smells in a sourdough starter (like acetone or strong alcohol) or other preferments can indicate imbalance or over-fermentation. For sourdough, this often means it's hungry and needs more frequent feeding or a larger feeding ratio. For poolish or biga, it might mean too much yeast was used or it fermented too long. Adjusting temperature or yeast quantity for the next batch is necessary.
Adjusting for Environmental Factors
Environmental temperature significantly impacts fermentation speed. In a warm kitchen (above 24°C / 75°F), preferments will ferment much faster than in a cool kitchen (below 20°C / 68°F). You must adjust accordingly. If your kitchen is warm, use less yeast in your poolish or biga, or plan for a shorter fermentation time. Alternatively, you can use cooler water or ferment the preferment in a cooler spot, like a basement or a wine fridge.
In a cool kitchen, fermentation will be slower. You might need to use slightly more yeast, use warmer water when mixing, or find a warmer spot for fermentation (like inside a slightly warm oven that's turned off). For sourdough starter recipe basics, temperature control is paramount for consistent activity. Learning to read your preferment's activity based on your environment is crucial for success.
Over-Proofing and Under-Proofing
While these terms usually apply to the final dough, preferments can also be over- or under-fermented. An under-fermented preferment hasn't had enough time to develop flavor or microbial activity; it may not have expanded much and won't contribute optimally to the final dough's rise or flavor. Using it will result in a less flavorful bread with potentially poor texture.
An over-fermented preferment (ripe to the point of collapsing or smelling strongly acidic/alcoholic) has exhausted its food source. While it can sometimes still be used, it may impart overly strong or unpleasant flavors and have less leavening power. The key is to use the preferment when it is ripe and active but not yet collapsing. This requires timing and observation, checking the preferment's volume and aroma cues.
Recipes
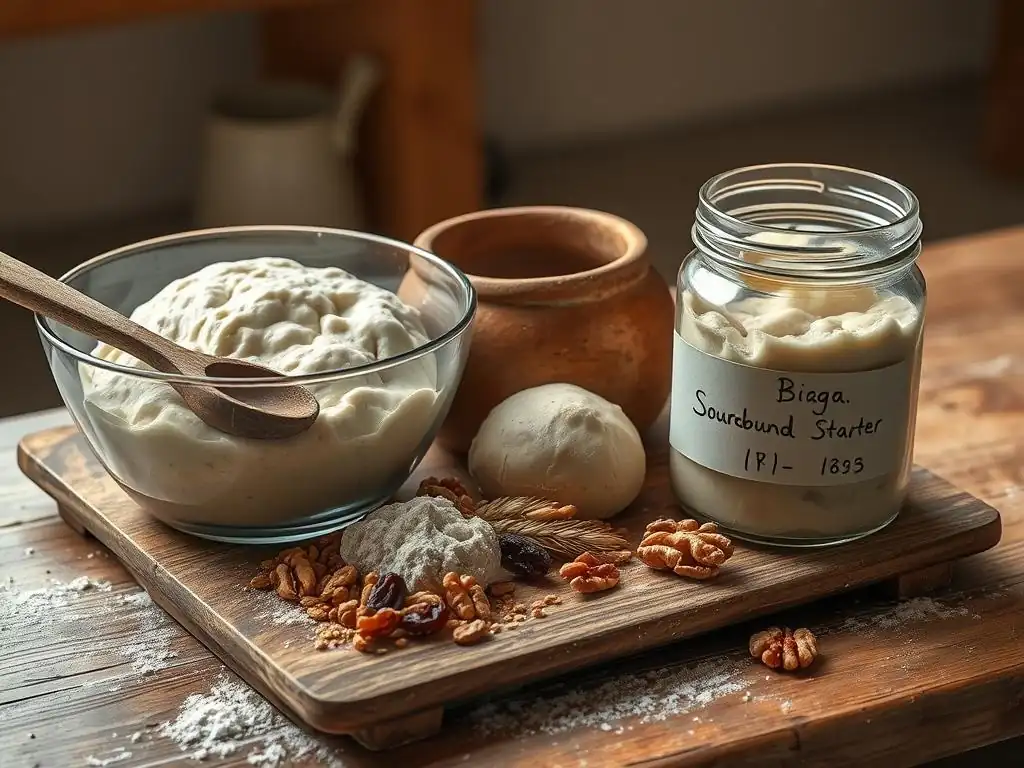
Here are some basic recipes incorporating preferments. Remember to adjust fermentation times based on your environment.
Classic Baguette with Poolish
This recipe uses a poolish for authentic flavor and texture.
### Poolish Baguette Recipe (Approximate)

**Poolish (Mix 12-18 hours before final dough):**
*   Bread Flour: 150g
*   Water (approx. 20°C / 68°F): 150g
*   Instant Dry Yeast: 0.2g

**Final Dough:**
*   All of the Poolish
*   Bread Flour: 350g
*   Water (approx. 25°C / 77°F): 180g - 200g (adjust based on flour absorption)
*   Fine Sea Salt: 10g
*   Instant Dry Yeast: 1g

**Instructions:**
1.  Mix Poolish ingredients until smooth. Cover and let ferment at cool room temperature until bubbly and slightly domed/starting to collapse.
2.  In a large bowl, combine the Poolish and water for the final dough. Mix to disperse the Poolish.
3.  Add the remaining flour, salt, and yeast. Mix until a shaggy dough forms.
4.  Knead by hand or mixer until the dough is smooth and elastic (approx. 8-10 mins in mixer).
5.  Bulk Fermentation: Place dough in a lightly oiled bowl, cover. Ferment for 1.5 - 2 hours at room temperature, with 2-3 stretch-and-folds during this time.
6.  Divide dough into 3-4 pieces (approx. 250-330g each). Gently pre-shape into rough logs. Rest 20 mins.
7.  Shape into baguettes. Place on a floured couche or parchment paper. Proof for 45-60 mins or until slightly increased in size and springy to the touch.
8.  Preheat oven with baking stone/steel to 250°C (480°F). Score baguettes.
9.  Bake with steam for 20-25 minutes, or until golden brown and crusty.
Neapolitan Pizza Dough with Biga
A biga provides structure and chew for a classic Neapolitan-style crust.
### Biga Pizza Dough Recipe (Approximate)

**Biga (Mix 18-24 hours before final dough):**
*   Italian '00' Flour: 200g
*   Water (approx. 18°C / 64°F): 110g (55% hydration)
*   Instant Dry Yeast: 0.1g

**Final Dough (Makes approx. 3 medium pizzas):**
*   All of the Biga
*   Italian '00' Flour: 300g
*   Water (approx. 20°C / 68°F): 180g - 200g (adjust based on flour)
*   Fine Sea Salt: 12g

**Instructions:**
1.  Mix Biga ingredients until just combined and shaggy. Cover and ferment at cool room temperature for 18-24 hours.
2.  In a mixer bowl, add the Biga and water for the final dough. Mix on low speed to break up the Biga.
3.  Add the remaining flour and salt. Mix on low speed, then increase to medium speed. Knead until dough is smooth and elastic (approx. 10-15 mins).
4.  Bulk Fermentation: Place dough in a lightly oiled container, cover. Ferment at room temperature for 2-3 hours.
5.  Divide dough into 3-4 balls (approx. 250-330g each). Shape into tight balls.
6.  Cold Proof: Place dough balls in individual containers or a proofing box. Refrigerate for 24-48 hours.
7.  Remove dough from fridge 1-2 hours before baking. Gently shape into pizza rounds.
8.  Top and bake at highest possible oven temperature (ideally 450-500°C / 850-930°F in a pizza oven, or 250-280°C / 480-530°F in a home oven with stone/steel).
Rustic Sourdough Loaf
This recipe utilizes an active sourdough starter for flavor and rise. Mastering sourdough starter recipe basics is essential here.
### Rustic Sourdough Loaf (Approximate)

**Ingredients:**
*   Active Sourdough Starter (100% hydration): 100g (fed 4-8 hours prior and active)
*   Bread Flour: 400g
*   Whole Wheat Flour: 100g
*   Water (approx. 28-30°C / 82-86°F): 350g (70% hydration relative to total flour)
*   Fine Sea Salt: 10g

**Instructions:**
1.  Autolyse: In a large bowl, mix the flours and water until just combined. Cover and let rest for 30-60 minutes.
2.  Mix: Add the active sourdough starter and salt to the autolysed dough. Mix by hand or mixer until incorporated and dough starts to develop strength (approx. 5-10 mins).
3.  Bulk Fermentation: Place dough in a clean container. Ferment at room temperature (approx. 24-26°C / 75-79°F) for 4-5 hours, performing 3-4 sets of stretch-and-folds every 30-45 minutes during the first 2 hours. Dough should increase in volume and become airy.
4.  Pre-shape: Gently turn dough onto a lightly floured surface. Gently shape into a round or rectangle. Rest for 20-30 minutes.
5.  Final Shape: Shape dough into a boule or batard. Place seam-side up in a floured banneton or proofing basket.
6.  Cold Proof: Cover banneton and refrigerate for 12-18 hours.
7.  Baking: Preheat oven with Dutch oven or baking stone to 250°C (480°F) for 1 hour.
8.  Turn dough onto parchment paper. Score the top. Carefully transfer to hot Dutch oven or baking stone. Bake covered (or with steam) for 20 minutes.
9.  Remove lid (or steam). Reduce oven temperature to 220°C (430°F). Bake for another 25-30 minutes, or until crust is deep golden brown and internal temperature is 96-99°C (205-210°F).
Mastering Preferments
Achieving consistent results with preferments involves understanding and controlling a few key variables.
Choosing the Right Flour
The type of flour used in both the preferment and the final dough matters. Different flours have varying protein content and absorption rates. Bread flour, with its higher protein (around 12-14%), is excellent for developing strong gluten networks, crucial for structure in preferments like biga and the final dough. All-purpose flour (around 10-12% protein) works well for poolish and less structured breads.
Using whole-grain flours, especially rye or whole wheat, in a sourdough starter (part of sourdough starter recipe basics) or a portion of a poolish or biga can significantly boost microbial activity and add complex flavors and nutrients. However, whole grains absorb more water and can speed up fermentation, requiring adjustments to hydration and timing. Experimenting with different flours will help you understand their impact.
Controlling Temperature
Temperature is perhaps the most critical factor in controlling fermentation. Yeast and bacteria activity are highly sensitive to temperature fluctuations. Warmer temperatures accelerate fermentation, while cooler temperatures slow it down. This principle is used strategically: cool fermentation (like refrigerating a biga or sourdough) develops more complex flavors over a longer period, while warmer fermentation provides faster leavening.
Monitoring your ambient kitchen temperature is essential. If it's warmer than average, you might need to reduce the amount of yeast, use cooler water, or shorten fermentation times. If it's cooler, you might need to do the opposite or find a warmer spot for your preferment. For sourdough starter recipe basics, maintaining a consistent temperature for feeding and fermentation leads to a more stable and predictable starter.
Experimenting with Hydration
Hydration levels in preferments (and the final dough) affect texture, flavor, and handling. Poolish (100% hydration) and liquid sourdough starters are easy to incorporate but result in wetter doughs that can be challenging to handle but yield open crumbs. Stiffer preferments like biga (40-60% hydration) or stiff sourdough starters (e.g., lievito madre, around 50-60% hydration) develop strength early and lead to doughs that are often easier to shape, providing chewiness and structure.
Adjusting the hydration of your final dough when using a preferment is crucial. Remember that the water in the preferment contributes to the total hydration of the final dough. Experimenting with different hydration levels in your preferments and final doughs will help you understand how they impact the final bread's texture and appearance.
Conclusion: Elevating Your Baking
Incorporating preferments like poolish, biga, and sourdough into your baking repertoire is a transformative step. These techniques, rooted in centuries of baking tradition, are not just about leavening; they are about building flavor, enhancing texture, and improving the keeping quality of your bread and pizza dough. While they add a layer of planning to your baking process, the results are undeniably rewarding.
Understanding the basics of each preferment – their hydration levels, fermentation characteristics, and flavor contributions – empowers you to choose the right one for the job, whether aiming for a light and crispy baguette, a chewy Neapolitan pizza crust, or a deeply flavorful rustic loaf using sourdough starter recipe basics. By mastering these foundational techniques, you unlock a new level of aroma, taste, and texture that will elevate your homemade baked goods from good to truly exceptional. Embrace the journey of fermentation and taste the difference preferments make!
Frequently Asked Questions
What is a sourdough starter and why is it important in baking?
A sourdough starter is a live culture of wild yeast and bacteria that ferments flour and water. It's crucial for sourdough baking because it provides unique flavor and texture absent in commercial yeast breads. It's also the foundation of sourdough bread's characteristic tang.
How does a sourdough starter differ from a poolish or biga?
While all three are preferments, a sourdough starter is maintained long-term and relies on wild yeast, unlike poolish or biga, which often use commercial yeast. Poolish and biga are also typically used within a day, while a sourdough starter requires regular feeding and maintenance. They also provide different flavor profiles in the final product.
What are the "sourdough starter recipe basics" I need to know before starting?
The basic recipe consists of equal parts flour and water, mixed and left to ferment. Regular feeding with fresh flour and water is essential to maintain its health and activity. Pay attention to temperature and consistency for optimal results.
How often should I feed my sourdough starter?
Feeding frequency depends on the starter's age and environment. A young starter may need daily feedings, while a mature starter can be fed less often, perhaps every few days when stored in the refrigerator. Observe your starter's activity and adjust accordingly.
What are some common problems encountered when making a sourdough starter and how can I fix them?
Common issues include lack of activity (fix by warming it up and feeding more frequently), mold growth (discard and start over, ensuring cleanliness), and too much acidity (increase feeding frequency). Ensure you are using unbleached flour and filtered water.
Final Reflection: The Enduring Allure of the Sourdough Starter
The pursuit of perfect sourdough bread is a journey, not a destination, and understanding the nuances of preferments like poolish, biga, and sourdough starters is key to unlocking its full potential. The seemingly simple act of baking bread becomes a profound exploration of fermentation, flavor, and the enduring connection between humans and their food. This journey, as detailed in this article, highlights the power of patience and precision in achieving truly exceptional results.
The impact of sourdough, and the knowledge surrounding its creation, extends far beyond the kitchen. It represents a return to traditional methods, a celebration of slow food, and a deeper understanding of the microbial world that shapes our culinary landscape. It's a testament to the power of simple ingredients transformed through time and care. Bread is the staff of life.
This simple statement holds a profound truth, especially when considering the depth of flavor and complexity achieved through the careful cultivation of a sourdough starter. The process itself becomes a meditative practice, a connection to a history of baking that spans centuries.
Now, consider your own kitchen. Imagine the possibilities: the satisfying tang of a perfectly risen loaf, the aroma filling your home, the pride in crafting something delicious and nourishing from scratch. This isn't just about baking bread; it's about embracing a process, understanding the science, and connecting with a tradition that has sustained humanity for millennia. Take the time to nurture your own starter, experiment with different preferments, and discover the unique flavors they bring to your baking. The journey of sourdough awaits.
Unleash Your Inner Baker: Elevate Your Bread Baking!
Thanks for taking the time to explore the fascinating world of preferments! You've now unlocked the secrets to adding incredible depth and complexity to your bread. Ready to put your new knowledge into practice?
- Bake a Poolish loaf today! This is your chance to experiment with this simple yet powerful preferment and taste the difference. Start small, and enjoy the journey!
- Share your baking experience! Let's connect! Tell us about your favorite preferment or post a picture of your creation on social media using #BakeWithEasePreferments.
- Explore our other resources: Delve deeper into the world of artisan bread baking with our collection of recipes and tutorials!
Ready to transform your baking from good to extraordinary? What preferment will you tackle next?