
Pumpernickel Perfection: Your Guide to Dark Rye Bread

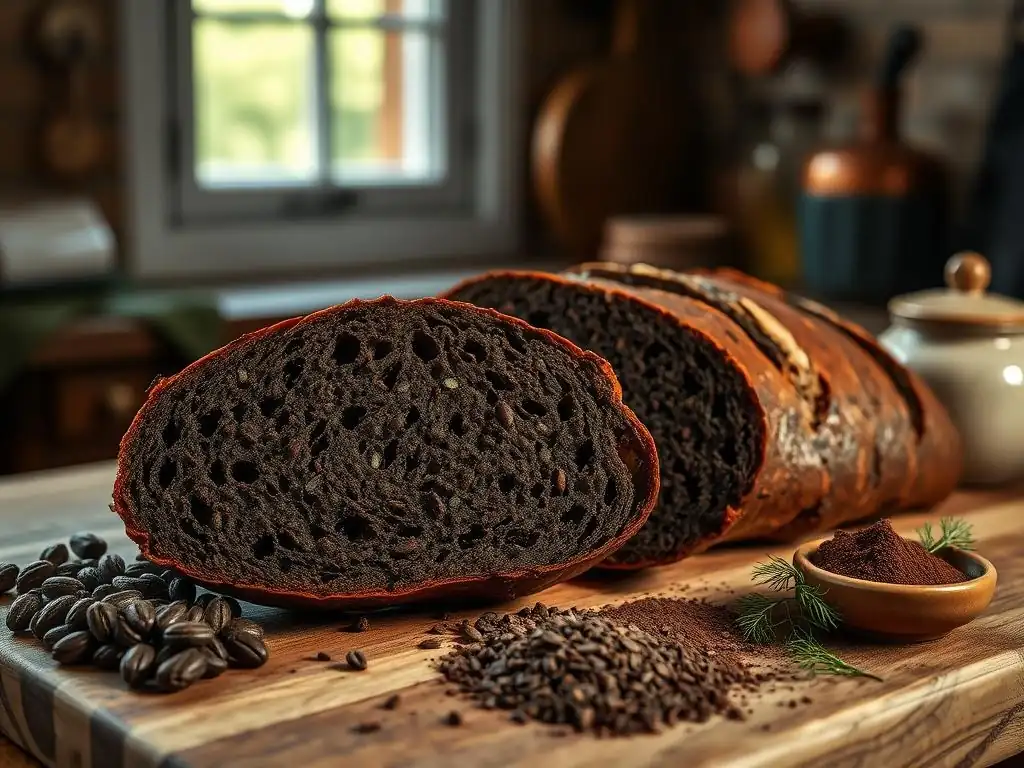
Welcome to BakeWithEase, where delicious baking is within everyone's reach! Ever wondered how to achieve that deeply flavorful, satisfying crust of authentic dark rye bread? Then you're in the right place. Dive into our article, Pumpernickel Perfection: Your Guide to Dark Rye Bread, and discover the secrets behind crafting the perfect dark rye bread recipe from scratch. We'll guide you through each step, ensuring your baking journey is both enjoyable and rewarding. Intrigued? Let's get started!
- German Black Bread: A Guide to Authentic Pumpernickel
- Understanding Pumpernickel: A Westphalian Staple
- Mastering the Pumpernickel Recipe: A Step-by-Step Guide
- The Pumpernickel Recipe: Detailed Instructions
- Troubleshooting Your Pumpernickel: Common Issues and Solutions
- Enhancing Your Pumpernickel: Flavor Variations and Serving Suggestions
- Storing Your Homemade Pumpernickel for Optimal Freshness
- Frequently Asked Questions
- Final Reflection: The Enduring Allure of Dark Rye
- Unlock the Secrets of Pumpernickel!
German Black Bread: A Guide to Authentic Pumpernickel
Understanding Pumpernickel: A Westphalian Staple
What is Pumpernickel? A Slow-Baked Rye Bread
Pumpernickel is a traditional German bread, specifically originating from the Westphalia region. It is renowned for its incredibly dark color, dense texture, and slightly sweet, earthy flavor. Unlike many modern breads that rely heavily on wheat flour and rapid yeast fermentation, authentic pumpernickel is made primarily from coarsely ground rye and utilizes a long, slow baking process at very low temperatures.
This unique method, often involving temperatures as low as 120-150°C (approximately 250-300°F), is more akin to steaming or "baking" in residual heat over many hours, sometimes 16 to 24 hours or even longer. This extended, low-temperature bake allows complex flavors to develop and the natural sugars in the rye to caramelize, contributing significantly to the bread's characteristic dark hue and rich taste.
The core of a true pumpernickel dark rye bread recipe lies in its simplicity and the quality of the ingredients and process. It traditionally contains only rye flour (often a mix of coarse meal and cracked rye berries), water, salt, and sometimes a natural sourdough starter. The long baking time breaks down starches into sugars, contributing to its natural sweetness without the need for added sugar in many traditional preparations.
This contrasts sharply with faster-baked breads, where higher temperatures and shorter times result in different textures and flavors. The density comes from the high proportion of rye, which has less gluten-forming protein than wheat, resulting in a tighter crumb structure.
Distinguishing Pumpernickel from Other Rye Breads: Coarseness and Baking Time
While many breads are labeled as "rye bread," pumpernickel stands apart primarily due to the coarseness of the rye used and its exceptionally long, low-temperature baking time. Many other rye breads, such as those found in Eastern Europe or North America, often incorporate a significant amount of wheat flour, use finer rye flour, and are baked at much higher temperatures (e.g., 200-220°C or 400-425°F) for shorter durations, typically 45-60 minutes.
This results in a lighter color, a less dense texture, and a less intense, complex flavor profile compared to pumpernickel. For instance, a classic Jewish deli rye might be made with a mix of white wheat flour and medium rye flour and baked relatively quickly, giving it a lighter crumb and tangier flavor from a sourdough or commercial yeast starter.
Authentic Westphalian pumpernickel, on the other hand, is typically made with 100% rye, using very coarse rye meal or even whole cracked rye berries. The defining characteristic is the bake: a traditional pumpernickel dark rye bread recipe calls for baking in a sealed container at temperatures around 120-150°C (250-300°F) for 16 to 24 hours, or sometimes even longer in professional ovens.
This process is almost a form of steaming, allowing the rye to soften and the flavors to deepen without forming a hard crust. The Maillard reaction and caramelization that occur over this extended period at low heat are crucial for developing the bread's signature dark color and sweet, malty notes, distinguishing it significantly from other, faster-baked rye varieties.
The Unique Flavor Profile of Pumpernickel: Sweet, Earthy, and Slightly Sour
The flavor of traditional pumpernickel is a complex symphony of sweet, earthy, and subtly sour notes, largely a result of its unique composition and baking process. The sweetness is not typically from added sugar but from the breakdown of starches into simpler sugars during the long, slow bake; this caramelization process is similar to how grains are malted, giving the bread a rich, almost molasses-like sweetness. This natural sweetness is balanced by the inherent earthiness of the rye grain itself, which provides a deep, robust base flavor.
Furthermore, authentic pumpernickel often incorporates a sourdough starter (Sauerteig), which contributes a mild tang or sourness. However, unlike some highly acidic sourdough wheat breads, the sourness in pumpernickel is usually background and serves to balance the sweetness and earthiness rather than dominate the profile. The very long fermentation and baking times allow these flavors to meld and intensify, creating a bread with remarkable depth and character. A well-made pumpernickel should have a moist crumb and a lingering, pleasant aftertaste, making it distinct from any other dark rye bread recipe.
Mastering the Pumpernickel Recipe: A Step-by-Step Guide
Gathering Your Ingredients for Authentic Pumpernickel
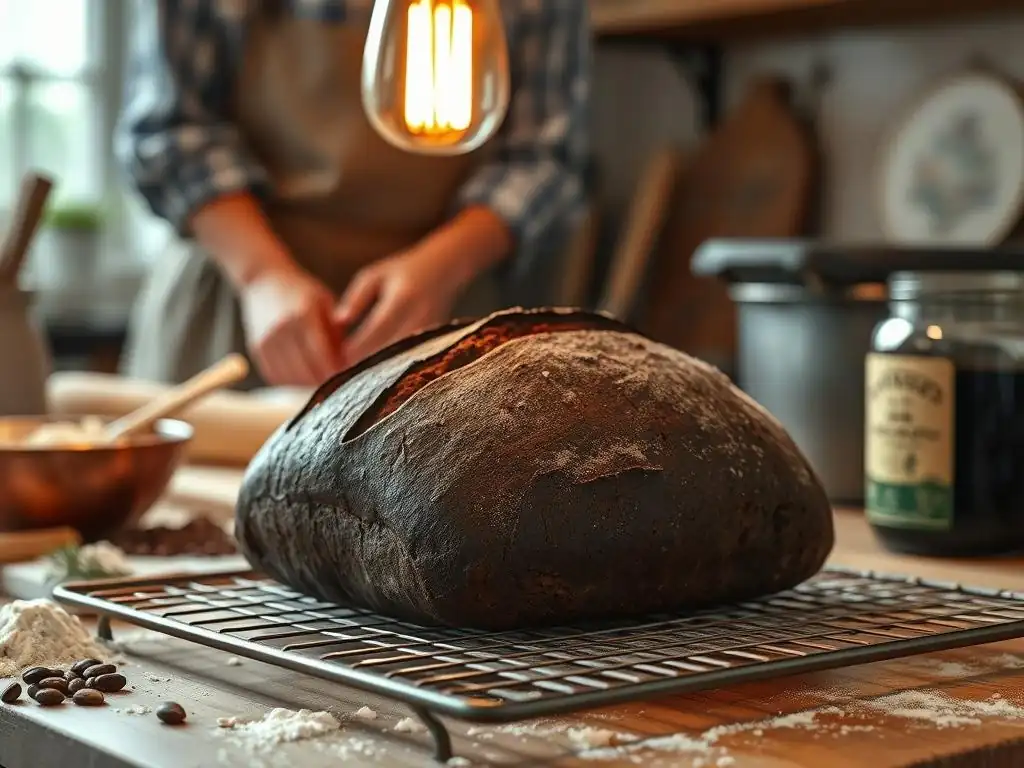
Creating authentic pumpernickel begins with selecting the right ingredients, prioritizing quality and type, especially when it comes to the rye. The foundation of a traditional dark rye bread recipe is, naturally, rye itself, but not just any rye flour will do. You'll typically need a combination of coarsely ground rye meal and potentially some whole or cracked rye berries.
While some recipes might use a small amount of finer rye flour, the characteristic texture comes from the larger particles. Water is essential, often used in a relatively high proportion compared to wheat breads to hydrate the dense rye. Salt is crucial for flavor and structure.
Beyond these basics, many traditional German pumpernickel recipes rely on a natural rye sourdough starter (Sauerteig) for leavening and flavor development, rather than commercial yeast. This starter is vital for achieving the characteristic tang and crumb structure. Some recipes also include treacle or molasses; while purists might omit it, a small amount can enhance the color and sweetness, complementing the flavors developed during the long bake. Sourcing high-quality, coarsely ground rye can sometimes be a challenge depending on your location, but it's a key factor in replicating the authentic texture.
Essential Ingredients: Coarsely Ground Rye, Rye Meal, and Treacle
The bedrock of a genuine pumpernickel dark rye bread recipe involves specific forms of rye. Coarsely ground rye, often labeled as "pumpernickel flour" or "whole rye chops," provides the defining texture. It consists of cracked or roughly ground rye kernels, much coarser than typical rye flour.
Rye meal, which is slightly finer than coarse ground rye but still coarser than medium or light rye flour, is also frequently used to provide structure. Together, these form the bulk of the dough. Water is added to hydrate the dense rye particles; the ratio can vary, but rye doughs are often stickier and less elastic than wheat doughs.
Salt is indispensable for enhancing flavor and controlling fermentation. While not strictly traditional in all Westphalian recipes, treacle (a type of molasses) or sugar beet syrup is often included in modern or regional variations to boost the dark color and deepen the sweet, caramelized notes. Using a natural rye sourdough starter is highly recommended for authentic flavor and leavening, providing the necessary acidity to balance the sweetness and help break down the rye starches during the long process.
Sourcing Coarsely Ground Rye: Finding the Right Texture
Finding the correct type of coarsely ground rye is perhaps one of the trickiest parts of making authentic pumpernickel, as it's not always readily available in standard supermarkets. Look for products labeled "pumpernickel flour," "whole rye chops," "cracked rye," or "rye grits." The texture should be noticeably coarser than regular rye flour, with distinct pieces of the rye kernel visible. Online specialty flour retailers are often a good source, as are health food stores or stores specializing in European imports.
If you have access to a mill or a high-capacity grain grinder, you could also purchase whole rye berries and crack or coarsely grind them yourself. The goal is a mixture of textures, from roughly cracked pieces to a somewhat finer meal, but distinctly not fine flour.
Using only fine rye flour will result in a denser, less textured bread that doesn't capture the true essence of pumpernickel. Don't be afraid to ask local bakeries that specialize in rye breads where they source their ingredients; they might be able to point you in the right direction or even sell you a small quantity.
Equipment You'll Need for Baking Pumpernickel
Baking authentic pumpernickel requires more than just an oven; specific equipment is necessary to facilitate the long, low-temperature bake and manage moisture. The most critical piece of equipment is a heavy, lidded baking vessel. This is essential for trapping steam and maintaining a consistent, moist environment around the loaf during its exceptionally long baking time. Without a lid, the bread would dry out and form a hard crust long before it's properly baked through.
Additionally, accurate oven temperature control is paramount. Since pumpernickel bakes at such low temperatures for so long (sometimes 16-24 hours or more), a reliable oven thermostat is crucial. An external oven thermometer is highly recommended to verify the internal oven temperature, as oven thermostats can sometimes be inaccurate at the lower end of the temperature spectrum. Patience is also a key "ingredient," as the long process demands a significant time commitment.
Heavy-Duty Dutch Oven or Loaf Pan with Lid
A heavy-duty vessel like a cast iron Dutch oven or a Pullman loaf pan with a tight-fitting lid is ideal for baking pumpernickel. These vessels are excellent at retaining and distributing heat evenly, which is important for the long, slow bake. More importantly, the lid traps the moisture released by the dough as it bakes, creating a steamy environment that prevents the crust from hardening prematurely. This steam is vital for allowing the rye to soften and the interior to develop properly over the many hours in the oven.
If you don't have a Dutch oven, a sturdy loaf pan with a lid specifically designed for bread baking will work. You can also improvise by using a standard loaf pan and covering it tightly with heavy-duty aluminum foil, ensuring a good seal to trap the steam. Some traditional methods even involve baking the bread in sealed stoneware crocks buried in embers, mimicking the slow, even heat distribution that a lidded vessel provides in a modern oven. The goal is to create a miniature, moist oven environment around the loaf.
Importance of a Long, Slow Baking Process
The defining characteristic of authentic pumpernickel, and what sets it apart from most other breads, is its exceptionally long and slow baking process. Unlike a typical loaf baked at 200-220°C (400-425°F) for under an hour, pumpernickel is baked at temperatures ranging from a mere 120°C to 150°C (approximately 250°F to 300°F) for durations stretching from 16 to 24 hours, and sometimes even longer. This low-temperature, extended bake is not just about cooking the bread; it's a transformative process.
During this prolonged period, complex chemical reactions occur within the dough. Starches are broken down into simpler sugars (dextrinization), which contributes to the bread's sweetness and dark color. The Maillard reaction, which creates browning and complex flavors in many cooked foods, also occurs, but slowly and gently at these low temperatures, developing deep, malty, and caramelized notes without burning.
The long bake also allows the dense rye to fully hydrate and soften, resulting in the moist, tender crumb characteristic of genuine pumpernickel. Attempting to bake pumpernickel faster or at higher temperatures will result in a dry, hard, and pale loaf that lacks the depth of flavor and texture of the real thing.
The Pumpernickel Recipe: Detailed Instructions
Step 1: Preparing the Dough for Pumpernickel
Preparing the dough for pumpernickel is a process that emphasizes time and proper hydration of the rye. Since rye flour has less gluten-forming protein than wheat, the dough will be less elastic and much stickier. The first crucial step in many traditional dark rye bread recipes is developing the sourdough starter, or Sauerteig, which provides both leavening and essential flavor. This starter, made from rye flour and water, needs time to become active and acidic, typically several days if starting from scratch, or several hours if refreshing an existing starter.
Once the starter is ready, the main dough is mixed. This usually involves combining the active rye sourdough starter with the coarsely ground rye meal, cracked rye berries, and water. The mixture will be very thick and paste-like. Unlike wheat doughs that require extensive kneading to develop gluten, rye doughs benefit from gentle mixing to combine ingredients. Over-mixing can actually harm the structure. Finally, salt is added for flavor, and if using, treacle or molasses is incorporated to enrich the color and sweetness.
Creating the Sauerteig: Initial Fermentation
The Sauerteig, or rye sourdough starter, is the heart of a traditional pumpernickel dark rye bread recipe. It's typically a mixture of rye flour and water that ferments over time, populated by wild yeasts and lactic acid bacteria. For pumpernickel, a mature and active rye starter is crucial, contributing not only leavening power but also the characteristic tangy notes that balance the bread's sweetness. If you don't have an established rye starter, you'll need to create one, which can take 5-7 days or longer, feeding it daily with rye flour and water until it becomes active and bubbly.
Once you have an active starter, preparing the Sauerteig for the pumpernickel involves taking a portion of your mature starter and feeding it with fresh rye flour and water. This refreshed starter is then left to ferment for a period, typically 8-12 hours at room temperature (around 20-24°C or 68-75°F), until it is bubbly, active, and has a pleasant, tangy aroma. This activated Sauerteig provides the necessary acidity to help break down the phytic acid in the rye, improving nutrient availability, and contributes significantly to the final flavor profile.
Combining Rye Meal, Rye Berries, and Water
The main dough for pumpernickel is built around its rye components and water. The specific ratio of rye meal to cracked rye berries can vary, but a typical recipe might use a higher proportion of coarse meal with a smaller percentage of whole or cracked berries for added texture. These are combined in a large mixing bowl.
Water is then added, often warm water (around 30-35°C or 85-95°F) to encourage the starter's activity and help hydrate the coarse rye particles. The amount of water is significant because rye absorbs more water than wheat, and the goal is a very wet, sticky dough or even a thick batter consistency.
The active Sauerteig is then added to the rye and water mixture. Everything is mixed thoroughly, usually with a sturdy spoon or dough hook, until all the dry ingredients are fully hydrated and evenly distributed. Unlike wheat dough, you won't develop a smooth, elastic structure. The mixture will remain coarse and dense. It's important to ensure there are no dry pockets of flour. This initial mixing step prepares the dough for the long bulk fermentation and subsequent baking.
Adding Treacle and Salt for Flavor and Preservation
After the rye, water, and sourdough starter are combined, the final essential ingredients are typically added: salt and treacle (if using). Salt is crucial in any bread recipe, enhancing the flavor of the rye and controlling the rate of fermentation. For pumpernickel, the salt content is usually around 1.5-2% of the total flour weight. It should be thoroughly mixed into the dough to ensure even distribution.
Treacle, or dark molasses, is often included in modern variations of this dark rye bread recipe, though it's not strictly traditional in all Westphalian versions. Its primary purpose is to deepen the dark color and add a layer of rich, slightly bitter sweetness that complements the earthy rye and tangy sourdough. Approximately 2-4% of the flour weight in treacle is a common addition. It also contributes to the bread's moisture and can help extend its shelf life. Both salt and treacle are mixed in during the final stages of dough preparation before the long fermentation begins.
Step 2: Fermenting and Shaping Your Pumpernickel Dough
Fermentation is a cornerstone of the pumpernickel-making process, allowing the sourdough starter to work and flavors to develop before the incredibly long bake. Unlike the relatively short proofing times for wheat breads, pumpernickel dough undergoes a substantial fermentation period. After the ingredients are mixed, the dough is typically covered and left to ferment at room temperature.
This bulk fermentation can last anywhere from 4 to 12 hours, depending on the activity of the starter and the ambient temperature. During this time, the sourdough starter produces carbon dioxide, causing a slight rise, and more importantly, develops complex acids that contribute to the bread's characteristic tangy flavor.
Following the bulk fermentation, the dough is shaped and placed into its baking vessel. Given the sticky, dense nature of rye dough, shaping is usually more about forming a rough log or round and transferring it carefully. The dough is then placed into the prepared lidded loaf pan or Dutch oven.
The vessel should ideally be greased and perhaps dusted with coarse rye meal or lined with parchment paper to prevent sticking after the very long bake. The dough typically fills the pan about two-thirds to three-quarters full, allowing a little room for expansion during the initial phase of baking.
The Importance of a Long Fermentation Period
A long fermentation period is absolutely critical in a traditional pumpernickel dark rye bread recipe, serving multiple vital functions beyond just leavening. Because rye contains enzymes that can degrade starch and protein more readily than wheat, particularly in the presence of moisture and heat, a sufficiently acidic environment is needed to deactivate these enzymes. The lactic acid produced by the sourdough starter during the long fermentation provides this acidity, preventing the bread from becoming gummy or sticky inside. A typical fermentation might last 6-10 hours at room temperature, allowing the starter to produce enough acid.
Furthermore, the extended fermentation allows for the development of complex flavors. Wild yeasts and bacteria in the sourdough starter break down sugars and proteins, creating a wider range of aromatic compounds than a quick yeast-based fermentation. This contributes to the depth and nuance of pumpernickel's taste profile. It also helps to pre-digest some of the difficult-to-break-down components in the rye, potentially making the bread easier to digest for some people. Rushing this step will result in a bread with suboptimal texture, flavor, and shelf life.
Shaping the Dough into a Log or Round
Shaping pumpernickel dough is different from shaping wheat dough due to its lack of gluten elasticity. The dough will be very sticky and dense. The goal is not to build tension like with a wheat loaf, but simply to form it into a manageable shape that fits neatly into your baking vessel. After the bulk fermentation, gently scrape the dough out onto a surface dusted with coarse rye meal or wet your hands to prevent sticking.
Form the dough into a log shape if using a loaf pan, or a round if using a Dutch oven. This is usually done by simply folding the edges underneath or patting it into the desired form. Avoid excessive handling. The shape doesn't need to be perfect, as the pan will provide the final structure during the long bake. The important part is to transfer the shaped dough carefully into the prepared pan, ensuring it sits relatively evenly to promote uniform baking.
Preparing the Baking Vessel
Properly preparing your baking vessel is essential to prevent the pumpernickel from sticking during its incredibly long bake and to ensure easy removal. A heavy-duty lidded vessel like a Dutch oven or a Pullman pan with a lid is standard. Start by lightly greasing the interior of the pan with butter, oil, or a non-stick spray. Some bakers then dust the greased surface with coarse rye meal or cracked rye berries, which adds a rustic texture to the crust (what little crust develops) and further helps prevent sticking.
Alternatively, and often more reliably for such a long bake, line the baking vessel with parchment paper. Cut the parchment paper to fit the pan, allowing some excess to hang over the sides, which can serve as handles for lifting the finished loaf out. This method virtually guarantees that the bread won't adhere to the pan, even after 20+ hours of baking. Once the vessel is prepared, the shaped dough is carefully placed inside, ready for the final steps before the long journey in the oven begins.
Step 3: Baking Your Pumpernickel to Perfection
Baking pumpernickel is where the magic truly happens, transforming the dense rye dough into the iconic dark loaf. The process is characterized by an exceptionally low oven temperature and an incredibly long baking time, unlike any standard bread. This is less about traditional baking and more about a slow, controlled cooking or steaming process within the sealed vessel.
The filled and lidded baking vessel is placed into a preheated oven set to a very low temperature, typically between 120°C and 150°C (250°F to 300°F). The exact temperature can vary slightly by recipe and oven, but it must remain consistently low. The bread then bakes for a duration of 16 to 24 hours.
Some traditional recipes even call for longer, up to 36 hours in residual heat after an initial period. This extended, low-temperature bake is what allows the deep flavors and dark color to develop through caramelization and dextrinization, and ensures the dense rye is cooked through without drying out.
Low Oven Temperature and Extended Baking Time (16-24 Hours)
The signature element of baking authentic pumpernickel is the combination of a low oven temperature and an extremely long baking duration. Set your oven to a temperature in the range of 120°C to 150°C (approximately 250°F to 300°F). This low heat prevents the rapid formation of a hard crust and allows the internal temperature of the bread to rise very slowly. The baking time is not measured in minutes, but in hours – typically between 16 and 24 hours for a standard loaf, though some recipes might go even longer.
This extended period at low heat allows for the complex transformation of the rye. The long exposure to gentle heat breaks down starches into sugars, resulting in the bread's natural sweetness and contributing significantly to its dark color through caramelization. It also ensures that the dense, high-rye dough is thoroughly cooked through to the center, preventing a gummy interior. Think of it less as baking and more as slow-cooking or steaming the bread. Patience is absolutely key; attempting to shorten the baking time or increase the temperature will not yield true pumpernickel.
Using Steam to Maintain Moisture
Maintaining a moist environment within the baking vessel is critical during the long pumpernickel bake. This is primarily achieved by using a lidded pot or pan. As the dough heats up, it releases moisture. The lid traps this steam inside the vessel, creating a humid microclimate around the loaf. This steamy environment is essential for preventing the outer layers of the bread from drying out and forming a hard, impenetrable crust before the interior is fully cooked.
The steam also helps to keep the rye particles soft and facilitates the enzymatic and chemical reactions that occur during the long bake. It allows the dense dough to cook evenly and develop its characteristic moist crumb. Without sufficient steam, the bread would become dry and hard long before the extensive baking time is complete, resulting in a poor texture and preventing the full flavor development. The sealed vessel effectively acts as a mini-steamer within the oven.
Cooling the Bread Properly: Allowing Flavors to Develop
Once the incredibly long baking time is complete, the process isn't quite over. Proper cooling is just as important for pumpernickel as the baking itself. After removing the lidded vessel from the oven, the bread should ideally be left in the covered vessel for a significant period, often several hours or even overnight, as it cools down slowly. This allows the internal heat to redistribute and the moisture to settle, ensuring the crumb remains moist.
After this initial cooling period in the pan, the loaf is carefully removed. Even then, the bread benefits greatly from resting for another 24 hours before slicing. Yes, that's right – after potentially 24 hours of baking and several hours of cooling in the pan, it's recommended to wait a full day before cutting into your pumpernickel.
This resting period allows the complex flavors that developed during the long bake to fully mature and the texture to stabilize. Slicing too early can result in a gummy texture and a less pronounced flavor profile. Patience is rewarded with a truly superior loaf.
Troubleshooting Your Pumpernickel: Common Issues and Solutions
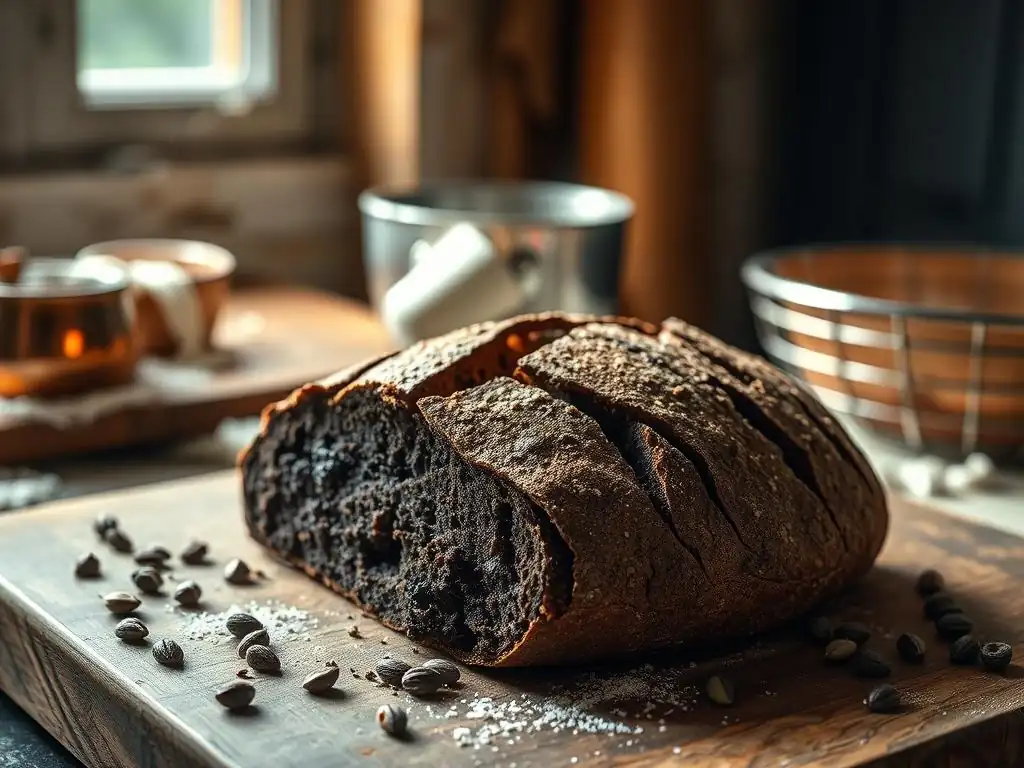
Making authentic pumpernickel can be a rewarding experience, but its unique process means encountering specific challenges is possible. Unlike baking a quick wheat loaf, the long fermentation and bake introduce variables that can affect the final outcome. Common issues include a dough that remains too dense, bread that turns out excessively sour, or uneven baking. Understanding the potential causes and solutions is key to mastering this dark rye bread recipe.
For instance, if your pumpernickel is too dense, it might indicate insufficient fermentation or an inactive starter. If the bread is overly sour, it could be a matter of balancing the sourdough starter's acidity, perhaps with a touch more sweetener. Uneven baking often points to issues with oven temperature consistency or the distribution of heat within the baking vessel. Identifying these problems early in your baking journey will help you refine your technique and consistently produce delicious pumpernickel.
Dough That Remains Dense: Ensuring Proper Fermentation
If your pumpernickel dough or final bread is excessively dense, beyond the expected compactness of rye, the most common culprit is insufficient fermentation. Rye dough relies heavily on the activity of the sourdough starter to develop structure and a slightly lighter texture than it would otherwise have. If the starter wasn't active enough, or if the bulk fermentation time was too short or the temperature too cool, the dough won't develop properly. A lack of sufficient acidity from the starter can also lead to a gummy texture, which appears as extreme density.
To address this, ensure your rye sourdough starter is vigorous and active before using it in the recipe. Feed it and wait until it is bubbly and shows signs of activity (like doubling in volume) before incorporating it into the main dough. Pay close attention to the bulk fermentation time and temperature; aim for the recommended duration (often 6-10 hours) at a comfortable room temperature (around 20-24°C or 68-75°F).
If your kitchen is cool, consider finding a warmer spot or using a proofing box. A properly fermented dough will show some signs of life and have a pleasant, tangy aroma, even if it doesn't rise dramatically like wheat dough.
Bread That is Too Sour: Balancing the Treacle
While a characteristic tang from the sourdough is desirable in pumpernickel, an excessively sour flavor can overpower the other subtle notes. This usually indicates that the lactic acid production in your sourdough starter was very high, or perhaps the fermentation period was too long for your specific starter's profile. The balance between sweetness (from caramelized sugars and potential treacle) and sourness (from the starter) is key to a harmonious pumpernickel flavor.
If your bread consistently turns out too sour when following a dark rye bread recipe, you can try a few adjustments. First, consider slightly reducing the bulk fermentation time. A shorter fermentation might result in less acid production.
Alternatively, you can adjust the feeding schedule or hydration of your starter to favor yeast activity (which produces CO2 and alcohol) over bacterial activity (which produces acids) in the days leading up to baking. A more direct approach is to slightly increase the amount of treacle or molasses in the recipe. The added sweetness can help to balance and mellow the perceived sourness, creating a more rounded flavor profile.
Uneven Baking: Maintaining Consistent Temperature
Uneven baking in pumpernickel can manifest as parts of the loaf being drier or lighter in color than others, or the center not being fully cooked. Given the extremely long baking time at low temperatures, maintaining a consistent oven temperature is crucial. Oven thermostats, especially in older ovens, can fluctuate significantly, particularly at lower settings. This can lead to hot or cool spots that affect how the bread bakes over 16-24 hours.
To combat uneven baking, first, invest in an accurate oven thermometer to verify the actual temperature inside your oven. Adjust your oven's setting based on what the thermometer reads, not just the dial. If your oven has known hot spots, rotating the baking vessel halfway through the incredibly long bake (perhaps after 8-12 hours) can help ensure more even heat exposure.
Ensure your lidded vessel is centered in the oven and not touching the walls. The heavy nature of a Dutch oven helps distribute heat, but external factors like drafts or inaccurate oven calibration can still cause issues. Using a well-sealed lid is also vital for maintaining a consistent environment around the loaf.
Enhancing Your Pumpernickel: Flavor Variations and Serving Suggestions
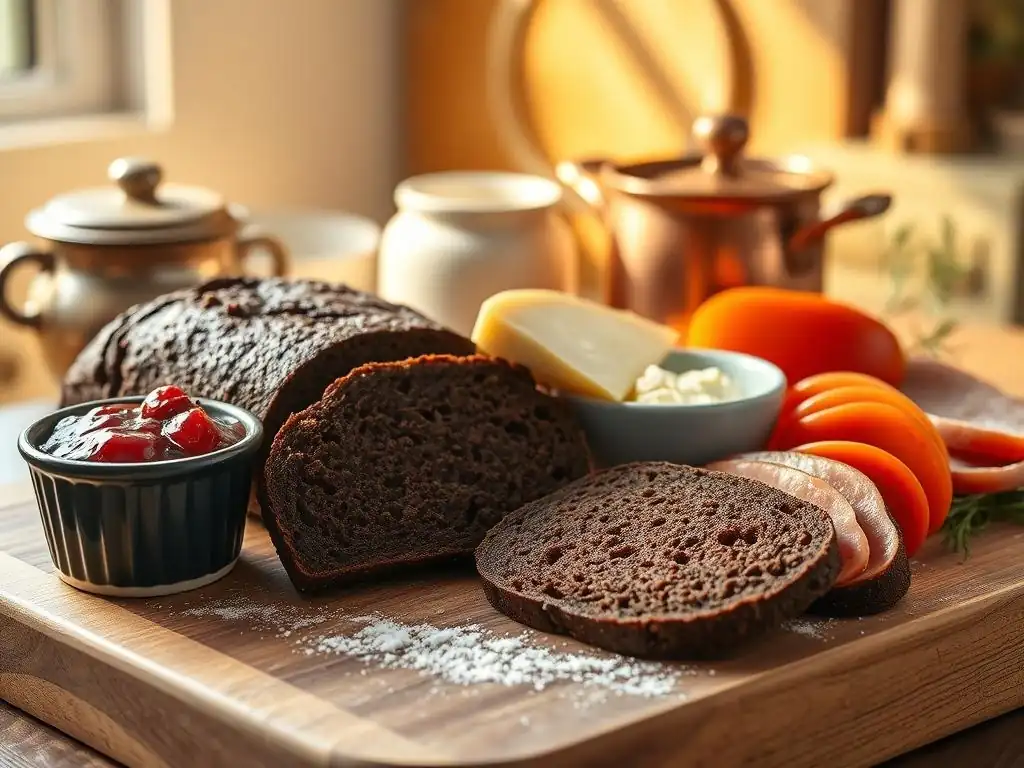
While traditional pumpernickel is wonderful in its pure form, there's room to experiment with flavor variations to add complexity and personalize your dark rye bread recipe. The earthy, slightly sweet base of pumpernickel pairs well with a variety of spices and additions that can complement or contrast with its core profile. Exploring these variations can lead to exciting new dimensions of this classic bread.
Beyond altering the recipe itself, the true joy of pumpernickel often lies in how it's served. Its dense texture and rich flavor make it an excellent foundation for a wide array of toppings and pairings, particularly those with strong, savory profiles. From classic German accompaniments to more modern uses, there are countless ways to enjoy your homemade pumpernickel.
Adding Spices and Other Flavorings
Adding spices and other flavorings is a fantastic way to put your own spin on a pumpernickel dark rye bread recipe. Whole or ground spices can be incorporated into the dough during the mixing stage. Common additions that complement rye include caraway seeds, which provide a slightly bitter, anise-like note often found in rye breads. Anise seeds themselves can also be used for a more pronounced licorice flavor. Coriander seeds, either whole or ground, add a citrusy, slightly sweet note that pairs beautifully with the depth of the rye.
Other interesting additions include fennel seeds, which offer a mild, sweet licorice taste, or even a pinch of ground cloves or allspice for warmth. For a hint of brightness, some bakers add grated orange zest, which provides a fragrant, slightly bitter counterpoint to the bread's richness. The amount of spice to add depends on personal preference, but starting with 1-2 teaspoons per standard loaf is a good guideline. These flavorings not only enhance the taste but also contribute to the bread's aroma, making your homemade pumpernickel even more inviting.
Anise, Coriander, and Orange Zest
Specific flavorings that work particularly well with the unique profile of pumpernickel include anise seeds, coriander seeds, and orange zest. Anise seeds (Pimpinella anisum) contribute a distinct, sweet, licorice-like flavor that is a classic pairing with rye. A small amount, perhaps 1 to 1.5 teaspoons of whole seeds per loaf, can add a warm, aromatic note without being overpowering. They can be lightly crushed before adding to release more flavor.
Coriander seeds (Coriandrum sativum) offer a bright, citrusy, and slightly sweet aroma that provides a lovely contrast to the deep, earthy tones of pumpernickel. Using about 1 to 2 teaspoons of lightly crushed seeds per loaf works well. The citrus notes from the coriander are further enhanced by the addition of fresh orange zest.
The zest from one medium orange, grated finely, adds a fragrant, slightly bitter lift that cuts through the richness of the bread. These additions are mixed into the dough along with the salt and treacle, ensuring they are evenly distributed throughout the loaf for a consistent flavor experience.
Serving Suggestions: Pairings and Recipes
Pumpernickel's dense texture and rich, slightly sweet flavor make it an exceptional base for a variety of toppings and pairings. It stands up well to strong flavors. A classic combination, particularly popular in Germany and Scandinavia, is thinly sliced pumpernickel served with smoked fish, such as smoked salmon or smoked trout. The richness of the fish is beautifully complemented by the bread's earthiness. Add a smear of cream cheese or a dollop of créme fraîche, some fresh dill or chives, and perhaps a squeeze of lemon for a simple yet elegant open-faced sandwich.
Another traditional pairing involves savory spreads and cured meats. Pumpernickel is excellent with liverwurst (Leberwurst) or other pâtés. A slice of pumpernickel topped with liverwurst and thinly sliced pickled onions or gherkins offers a delightful contrast of rich, savory, and tangy flavors. Consider also pairing it with strong cheeses, pickled herring, or even sweet toppings like butter and jam (though savory pairings are more common). Its robustness makes it a great alternative to crackers for serving dips or spreads.
Pumpernickel with Smoked Salmon and Cream Cheese
One of the most popular and delicious ways to enjoy pumpernickel is by creating simple, elegant open-faced sandwiches with smoked salmon and cream cheese. The dense, slightly sweet crumb of the pumpernickel provides a sturdy and flavorful foundation that contrasts wonderfully with the smooth, tangy cream cheese and the rich, salty smoked salmon.
To assemble, spread a generous layer of plain or herbed cream cheese onto a thin slice of pumpernickel. Top with folds of high-quality smoked salmon. Garnish with fresh dill sprigs, capers, or thinly sliced red onion for extra flavor and visual appeal. A squeeze of fresh lemon juice over the salmon just before serving can brighten all the flavors. This combination is perfect for brunch, appetizers, or a light lunch, showcasing how the unique characteristics of this dark rye bread recipe enhance classic pairings.
Pumpernickel with Liverwurst and Pickled Onions
A truly traditional German way to enjoy pumpernickel is pairing it with liverwurst and sharp pickled onions. Liverwurst, a type of sausage spread made from pork or veal liver, has a rich, savory, and often slightly earthy flavor that harmonizes exceptionally well with the depth of the pumpernickel. The bread's density prevents it from becoming soggy under the spread.
For this classic pairing, spread a thick layer of your favorite liverwurst onto a slice of pumpernickel. Top generously with thinly sliced pickled onions or small gherkins (cornichons). The acidity and crunch of the pickles cut through the richness of the liverwurst and the bread, creating a balanced and satisfying bite. This is a hearty and flavorful snack or light meal, typical of Westphalian cuisine, highlighting the bread's regional roots and its ability to complement robust, savory flavors.
Storing Your Homemade Pumpernickel for Optimal Freshness
Given the significant effort and time invested in baking authentic pumpernickel, proper storage is essential to maintain its quality and extend its shelf life. Unlike quick-baked breads that might stale rapidly, pumpernickel, with its high moisture content and dense crumb, actually improves in flavor over the first day or two after baking (hence the recommended resting period before slicing). However, once sliced, its exposed surfaces can begin to dry out.
The key to keeping pumpernickel fresh is protecting it from air and moisture loss. Stored correctly, a loaf of pumpernickel can last for quite a while at room temperature, and even longer in the refrigerator or freezer. Understanding the best techniques for wrapping and storing will ensure that each slice you enjoy is as moist and flavorful as possible.
Proper Storage Techniques: Wrapping Tightly
The best way to store homemade pumpernickel at room temperature is by wrapping it tightly to prevent it from drying out. After the initial cooling period (including the recommended 24-hour rest), wrap the whole loaf first in parchment paper, then tightly in plastic wrap, followed by a layer of aluminum foil or placing it in a sturdy, airtight bread bag or container. The multi-layer wrapping helps to create a barrier against air.
Stored this way at cool room temperature (ideally below 20°C or 68°F), a whole loaf of pumpernickel can remain fresh for up to a week, sometimes even longer depending on the humidity and temperature. Once you begin slicing the loaf, it's best to store the cut side down on a cutting board wrapped in plastic wrap, or transfer the remaining loaf to an airtight container or bag.
Slices can also be stacked with parchment paper in between and stored in a sealed container. If you live in a very warm or humid climate, or want to store it longer, refrigeration can extend its life for another week or two, though the texture might change slightly.
Freezing Pumpernickel for Later Enjoyment: Slicing Before Freezing
Pumpernickel freezes exceptionally well, making it a great candidate for baking a whole loaf and storing portions for future enjoyment. Freezing is ideal if you won't be able to consume the entire loaf within its fresh shelf life (about a week at room temperature). The most convenient method for freezing is to slice the entire loaf before wrapping and freezing. This allows you to thaw only the number of slices you need at a time, rather than having to thaw and refreeze the whole loaf.
Slice the cooled and rested pumpernickel into your desired thickness. Stack the slices with a small piece of parchment paper between each one to prevent them from sticking together when frozen. Then, wrap the stack tightly in plastic wrap, followed by a layer of aluminum foil, or place the stack in a freezer-safe bag or container, pressing out as much air as possible.
Label with the date. Frozen pumpernickel can maintain its quality for up to 3-4 months. To thaw, simply take out the desired number of slices and let them sit at room temperature for 15-30 minutes, or gently warm them in a toaster or oven.
Frequently Asked Questions
What makes BakeWithEase's dark rye bread recipe different?
Our Pumpernickel Perfection recipe focuses on easy-to-find ingredients and clear, step-by-step instructions, making it accessible to bakers of all skill levels. We also emphasize the importance of proper proofing for optimal flavor and texture.
I'm new to baking. Is this dark rye bread recipe too difficult?
No! While dark rye bread can seem intimidating, our recipe is designed with beginners in mind. We provide detailed explanations and troubleshooting tips to ensure success.
Can I substitute any ingredients in your dark rye bread recipe?
While we recommend following the recipe for the best results, you can experiment. However, be mindful that substituting key ingredients like rye flour may significantly alter the taste and texture of the bread.
How do I store my freshly baked dark rye bread?
To maintain freshness, store your dark rye bread in an airtight container at room temperature. It can also be frozen for longer storage; just ensure it's well-wrapped to prevent freezer burn.
What kind of flour is best for making dark rye bread?
The recipe calls for a combination of dark rye flour and bread flour. The dark rye flour gives the bread its characteristic flavor and color, while the bread flour provides structure and gluten development.
Final Reflection: The Enduring Allure of Dark Rye
The rich, complex flavor of dark rye bread transcends mere sustenance; it's a testament to the enduring power of tradition and the artistry of baking. From humble beginnings, this dense, deeply flavorful bread has woven its way into culinary traditions across the globe, and its popularity continues to grow as more people seek out authentic, handcrafted foods. The recipes and techniques explored in this guide represent more than just instructions; they are a gateway to understanding the history and craft behind this beloved loaf.
The journey through the world of dark rye bread has been a personal one, revealing the surprising depth and versatility of this often-underestimated staple. I've discovered the subtle nuances in flavor profiles, from the tangy sharpness of a well-fermented sourdough to the sweet notes of caraway seeds. More than just a recipe, it's a connection to generations of bakers who have perfected this craft. Bread is the staff of life,
they say, and in the case of dark rye, it's a staff imbued with history, tradition, and a profound satisfaction in the simple act of creation.
Now, I invite you to embark on your own pumpernickel perfection journey. Don't be afraid to experiment, to adjust the recipes to your own taste, and to share your creations with others. The true reward lies not just in the delicious loaf you produce, but in the process itself – the kneading, the rising, the baking – a mindful connection to the ingredients and the rich history behind this remarkable bread. Let the aroma of freshly baked dark rye fill your home, and savor the taste of tradition, one slice at a time.
Unlock the Secrets of Pumpernickel!
Thanks for joining us on this delicious journey into the world of pumpernickel! We hope you now feel confident in your ability to bake this complex and rewarding bread. Ready to take your baking skills to the next level?
- Bake your own pumpernickel loaf today! Use the recipe we've provided as a starting point, experimenting with different ingredients and techniques to find your perfect pumpernickel.
- Share your baking triumphs (and even your stumbles!) with us on social media using #BakeWithEasePumpernickel. Let's build a community of pumpernickel enthusiasts!
- Try a creative twist—incorporate your pumpernickel into a unique recipe, like a pumpernickel French toast or pumpernickel croutons for a salad.
What unique ingredient will you add to your next pumpernickel loaf to make it truly your own?