
Create Realistic Water Effects with Icing and Gel Colors

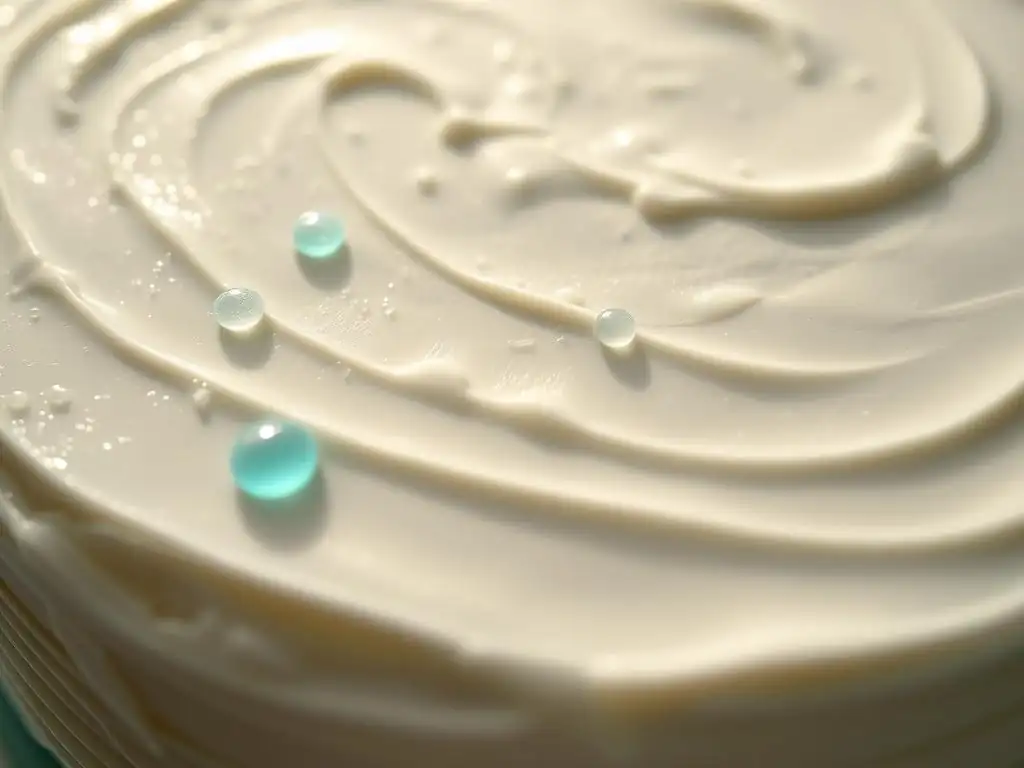
Welcome to BakeWithEase, your trusted guide to the delightful world of baking! Ever wondered how to achieve those mesmerizing, realistic icing water effects you see on stunning cakes and desserts? This article unveils the secrets, providing you with simple, step-by-step instructions and techniques to create breathtaking aquatic illusions. Dive in and discover how to elevate your pastry creations from ordinary to extraordinary!
- Creating Realistic Lake and Ocean Effects with Royal Icing and Gel Colors for Stunning Cookie Decorations
- Introduction to Realistic Royal Icing Water Effects on Cookies
- Achieving Realistic Water Effects: A Step-by-Step Guide
- Techniques for Creating Realistic Icing Water
- Mastering Gel Color Blending for Water Icing Effects
- Adding Final Touches for Enhanced Realism
- Troubleshooting Common Royal Icing Water Effect Problems
- Examples of Stunning Cookie Decorations with Realistic Water Effects
- Tips for Practicing and Perfecting Your Royal Icing Water Skills
- Conclusion: Elevate Your Cookie Decorating with Realistic Water Icing
-
Frequently Asked Questions
- How do I achieve a realistic water effect on my baked goods using icing?
- What type of icing is best for creating realistic water effects?
- Can I use liquid food coloring instead of gel food coloring?
- What are some tools I can use to create different water textures?
- How do I prevent the water effect from looking artificial or too uniform?
- Final Reflection: The Ebb and Flow of Icing Creativity
- Unleash Your Inner Cake Artist: Master Realistic Water Effects!
Creating stunning, edible art on cookies can be a deeply rewarding experience. While many decorating techniques exist, mastering realistic icing water effects opens up a world of possibilities, from serene lake scenes to dynamic ocean waves. These techniques, primarily utilizing royal icing and concentrated gel colors, allow bakers to add incredible depth, movement, and visual interest to their cookie canvases. Achieving realistic icing water effects isn't just about applying blue icing; it involves understanding consistency, color blending, and specific application methods to mimic nature's fluid beauty.
The goal is to make the icing look less like flat color and more like actual water, complete with variations in depth, ripples, or even crashing waves. This level of detail elevates a simple decorated cookie into a true work of art. Whether you're aiming for a calm pond reflecting a painted sky or a vibrant coral reef scene, developing skills in realistic icing water effects is a fantastic way to enhance your advanced cookie decorating repertoire.
Achieving Realistic Water Effects: A Step-by-Step Guide
Achieving truly realistic icing water effects involves careful planning and execution. It starts with having the right tools and ingredients, understanding the properties of royal icing, and mastering color application. Each step builds upon the last, leading to those captivating, lifelike results that make your cookies stand out. Following a structured approach ensures you tackle the challenges of consistency and color blending effectively.
This guide breaks down the process into manageable steps, from preparing your workspace and supplies to applying the finishing touches. By focusing on each stage, you can build confidence and skill, gradually improving your ability to create increasingly complex and realistic icing water effects on your cookies.
Before you begin creating realistic icing water effects, gather all necessary supplies. Having everything ready ensures a smooth and uninterrupted decorating process. This typically includes baked and cooled cookies, a batch of prepared royal icing, a selection of gel food colors (especially blues, greens, and whites), piping bags or bottles, various piping tips (optional, but helpful for details), scribes or toothpicks for manipulating icing, and potentially some edible glitter or sanding sugar for texture.
Having your supplies organized saves time and prevents frustration. For instance, ensuring you have multiple piping bags filled with different shades of blue or green allows for seamless transitions between colors when creating depth. A scribe tool is indispensable for blending wet-on-wet techniques and coaxing the icing into the desired shapes, essential for achieving those realistic icing water effects.
Preparing Your Royal Icing for Water Effects
The foundation of any royal icing decoration is the icing itself. For realistic icing water effects, proper preparation is crucial, focusing specifically on achieving the correct consistency and effectively tinting your icing with gel colors to capture varying depths and hues found in natural water.
Achieving the Right Royal Icing Consistency: Flood Consistency
For most realistic icing water effects, especially for large areas like lakes or oceans, you will need royal icing at a "flood" consistency. This consistency is thin enough to spread and self-level smoothly but thick enough to stay within piped outlines (if you choose to use them). A common way to test for flood consistency is the "10-15 second rule": drizzle a line of icing back into the bowl, and it should disappear back into the surface within 10 to 15 seconds.
If your icing is too thick (faster than 10 seconds), add water very gradually, a drop or two at a time, mixing thoroughly after each addition until the desired consistency is reached. If it's too thin (slower than 15 seconds, or runs off the spoon too quickly), add a small amount of thicker royal icing or powdered sugar (carefully, as this can introduce lumps) to thicken it. Getting this consistency right is paramount for a smooth, even base that looks like calm water or serves as the canvas for more complex realistic icing water effects.
Tinting Royal Icing with Gel Colors for Water Depths
Tinting your royal icing is where the magic of creating realistic icing water effects truly begins. Gel colors are preferred over liquid colors because they are highly concentrated and won't significantly alter the icing's consistency. To mimic water, you'll need various shades, from very light blues and greens for shallow areas or highlights to deeper, more intense shades for depth. Start with a base color (like light blue or teal) and then create variations by adding more color for darker shades or adding white icing to the base color for lighter shades.
Consider the specific water effect you want to achieve. A tropical lagoon might require vibrant turquoises and greens, while a deep ocean could use navy blues and deep teals. For realistic results, prepare at least 2-3 different shades of your chosen water color, ranging from light to dark. This allows you to layer or blend colors on the cookie to create the illusion of depth and variation, which is key to realistic icing water effects.
Techniques for Creating Realistic Icing Water
Several techniques can be employed to create realistic icing water effects, each offering a different look and feel. Combining these methods often yields the most dynamic and convincing results. Understanding when and how to use each technique is essential for mastering realistic icing water effects.
The Flood Fill Technique: Simulating Calm Water Surfaces
The basic flood fill technique is fundamental for creating smooth, flat areas of icing that can represent calm water or serve as the base for more complex water effects. After outlining the area you want to fill (optional, but helpful for beginners), pipe a generous amount of flood-consistency icing within the outline. Use a scribe tool or toothpick to gently guide the icing to the edges and pop any air bubbles.
Allowing this layer to dry completely creates a smooth, glossy surface that can look like still water. This technique is perfect for depicting lakes, ponds, or very calm ocean surfaces. Once dried, this base layer can then be built upon using other techniques to add ripples, reflections, or other realistic icing water effects.
The Wet-on-Wet Technique: Adding Subtle Movement and Depth
The wet-on-wet technique is excellent for adding subtle movement, swirls, and blending colors directly into the wet flood coat. While the base flood layer is still wet, pipe lines or dots of a different color (or a lighter/darker shade of the same color) onto the wet surface. Then, use a scribe tool to gently drag through the piped lines or dots, swirling or pulling the colors together.
This technique creates soft, blended effects perfect for representing gentle currents, ripples, or variations in water depth that aren't sharply defined. For example, piping darker blue lines onto a wet light blue flood coat and swirling them can create the look of deeper channels within shallower water. Mastering this technique adds a dynamic element crucial for realistic icing water effects.
The Layering Technique: Building Dimension and Wave Effects
The layering technique involves applying multiple layers of icing, often with different consistencies or colors, allowing each layer to partially or fully dry before adding the next. This method is particularly effective for creating dimension, such as building up the look of waves or splashing water. Start with a base flood layer and let it dry. Then, pipe thicker icing (perhaps a 20-second consistency) in wave shapes or lines on top.
For more dramatic waves, you might pipe lines of medium-consistency icing and use a brush or scribe to lift and shape the edges before they dry. Repeating this process with different shades and consistencies builds texture and depth, essential for realistic icing water effects like ocean waves crashing on a shore.
Marbling Technique: Creating Swirling Water Patterns
The marbling technique is another variation of wet-on-wet, specifically used to create swirling, marbled patterns reminiscent of turbulent water, eddies, or colorful reef areas. Flood your area with a base color. While it's still wet, add drops, lines, or swirls of several other colors. Then, use a scribe tool to swirl the colors together in a more random or deliberate pattern across the surface.
This technique works well for abstract water effects or depicting areas where different currents meet. For instance, using blues, greens, and whites marbled together can create a convincing turbulent sea surface. The key is to work quickly while the icing is still wet to allow the colors to blend smoothly, resulting in captivating realistic icing water effects.
Mastering Gel Color Blending for Water Icing Effects
Effective color blending is perhaps the most critical skill for achieving truly realistic icing water effects. Nature's water bodies are rarely a single, flat color; they feature subtle shifts in hue and intensity based on depth, light, and surrounding environment. Using gel colors strategically allows you to capture this complexity.
Selecting Gel Colors for Realistic Water: Blues, Greens, and Whites
A basic palette for realistic icing water effects should include various shades of blue, green, and white. Blues are fundamental, ranging from sky blue for shallow, bright water to navy or deep teal for oceanic depths. Greens are essential for depicting lakes, ponds, or coastal waters influenced by vegetation or algae; think emerald, teal, or even olive-green hints. White is crucial for highlights, foam, wave crests, and creating lighter shades of your base colors.
Beyond the basics, consider adding a touch of brown or black for muddy river water, or even purple or pink for sunset reflections on water. Having a range of these core colors allows you to mix custom shades tailored to the specific water scene you are creating, enhancing the realism of your realistic icing water effects.
Blending Gel Colors to Achieve Depth and Variation: Ombre Effects
Blending gel colors within your icing or directly on the cookie surface is key to creating depth and variation. One effective method is creating an ombre effect, transitioning from a darker shade to a lighter shade. This can be done by preparing several bags of icing, each a slightly different shade, and flooding the area by piping the darkest color at the bottom and progressively lighter colors towards the top, then gently blending the edges with a scribe tool while wet.
Alternatively, you can flood the entire area with a medium shade and then use the wet-on-wet technique to add lines or swirls of darker and lighter shades, blending them in. For instance, on a beach cookie, you might transition from deep blue in the "ocean" area to light turquoise or even white near the "shoreline" using carefully blended colors for realistic icing water effects.
Avoiding Common Mistakes When Using Gel Colors in Royal Icing: Over-Mixing
One common mistake when tinting royal icing with gel colors is over-mixing, especially after adding the color. While you need to mix thoroughly to distribute the color evenly, excessive mixing can incorporate too much air into the icing, leading to bubbles and potentially cratering when the icing dries. Add your gel color, mix gently but thoroughly with a spatula until the color is uniform, then cover the icing to prevent it from drying out.
Another mistake is adding too much color at once. Gel colors are concentrated, so start with a small amount (a tiny drop or the tip of a toothpick) and gradually add more until you achieve the desired shade. It's much easier to add more color than to lighten icing that is too dark, especially when trying to achieve subtle variations needed for realistic icing water effects.
Adding Final Touches for Enhanced Realism
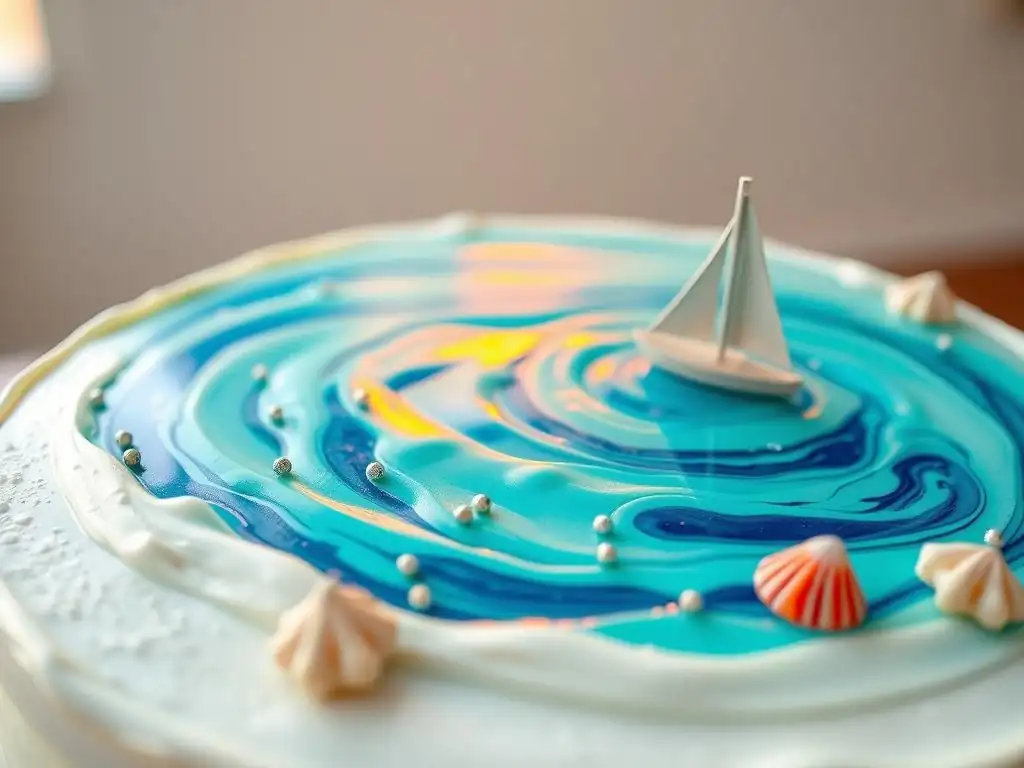
Once your base water layers are dry or partially dry, adding final touches can significantly enhance the realism of your realistic icing water effects. These details can add sparkle, texture, or even inhabitants to your watery scene.
Using Edible Glitter for Sparkling Water Effects
Edible glitter, particularly fine disco dust or superfine glitter in iridescent white, clear, or blue/green hues, can add a beautiful shimmer that mimics sunlight reflecting on water. Apply a thin layer of edible glue or clear piping gel to the dried icing surface where you want the sparkle, then gently brush or sprinkle the glitter over the adhesive. Tap off any excess.
Using glitter sparingly can create a subtle sparkle, while a denser application can give the appearance of shimmering light on the water's surface. This simple addition can dramatically elevate the visual appeal and realism of your realistic icing water effects.
Incorporating Sanding Sugar for Realistic Water Texture and Beach Effects
Sanding sugar, with its larger crystal size compared to standard granulated sugar, is excellent for adding texture. While not typically used directly on the water itself (unless representing turbulent, frothy areas), it's indispensable for creating adjacent realistic beach effects that complement your realistic icing water. Use tan or brown sanding sugar for sand. Apply edible glue or a thin layer of icing to the "beach" area next to your water, then sprinkle sanding sugar generously.
For areas where water meets sand, you can gently blend the blue icing edge into the sanding sugar before the icing dries completely, creating a soft transition. This contrast between the smooth water and the textured sand enhances the overall realistic icing water effects scene.
Adding Small Details: Royal Icing Fish and Edible Seaweed
To bring your realistic icing water effects to life, consider adding small details. Tiny royal icing transfers of fish, starfish, or turtles, made and dried separately, can be attached to the dried water surface with a dot of fresh royal icing. For seaweed or aquatic plants, you can pipe green icing using a small round or leaf tip, or even use edible paper cut into shapes.
These small elements add narrative and scale to your cookie decoration, making the realistic icing water effects part of a larger, more engaging scene. They provide focal points and enhance the feeling of looking into a real body of water.
Troubleshooting Common Royal Icing Water Effect Problems
Even experienced decorators encounter issues. Knowing how to troubleshoot common problems will save you frustration and help you achieve consistently good realistic icing water effects.
Icing Bleeding: Causes and Solutions
Color bleeding occurs when dark colors seep into lighter colors, ruining crisp lines and smooth transitions. This is often caused by excess moisture, whether from the icing being too wet, high humidity, or applying wet icing next to partially dried icing of a different color. To minimize bleeding, ensure your icing is the correct consistency, allow layers to dry sufficiently between applications, and avoid adding too much liquid color (use gels! ).
If working in high humidity, consider using a fan (not blowing directly on the cookies) to aid drying or using a recipe specifically formulated for humid conditions. Sometimes, certain color combinations are more prone to bleeding than others; testing colors on a scrap cookie beforehand can help identify potential issues before you work on your final piece, preserving your realistic icing water effects.
Icing Cratering: Prevention and Fixes
Cratering is when the surface of flooded icing sinks or collapses as it dries, leaving hollows. This is usually caused by trapped air bubbles or the icing being too thick for the flood consistency required. To prevent cratering, ensure your flood icing is thin enough (10-15 second rule) and spend time gently coaxing the icing with a scribe tool to eliminate as many air bubbles as possible immediately after flooding. Tapping the cookie gently on the counter can also help air bubbles rise.
If cratering occurs on a dried piece, you can sometimes carefully fill the crater with a small amount of fresh flood icing and let it dry again, though this may leave a visible patch. Prevention is the best approach for smooth, realistic icing water effects surfaces.
Achieving a Smooth, Glossy Finish
A smooth, glossy finish is desirable for realistic icing water effects, mimicking the reflective nature of water. The primary factor is using royal icing at the correct flood consistency and ensuring all air bubbles are removed. The smoother the wet surface, the smoother and glossier it will be when dry. Drying conditions also play a role; drying cookies in a low-humidity environment allows the icing to set correctly, resulting in a harder, glossier finish.
Some decorators also believe that certain royal icing recipes (e.g., those using meringue powder vs. egg whites) can yield different gloss levels. Experimenting with your recipe and drying environment will help you achieve the most appealing finish for your realistic icing water effects.
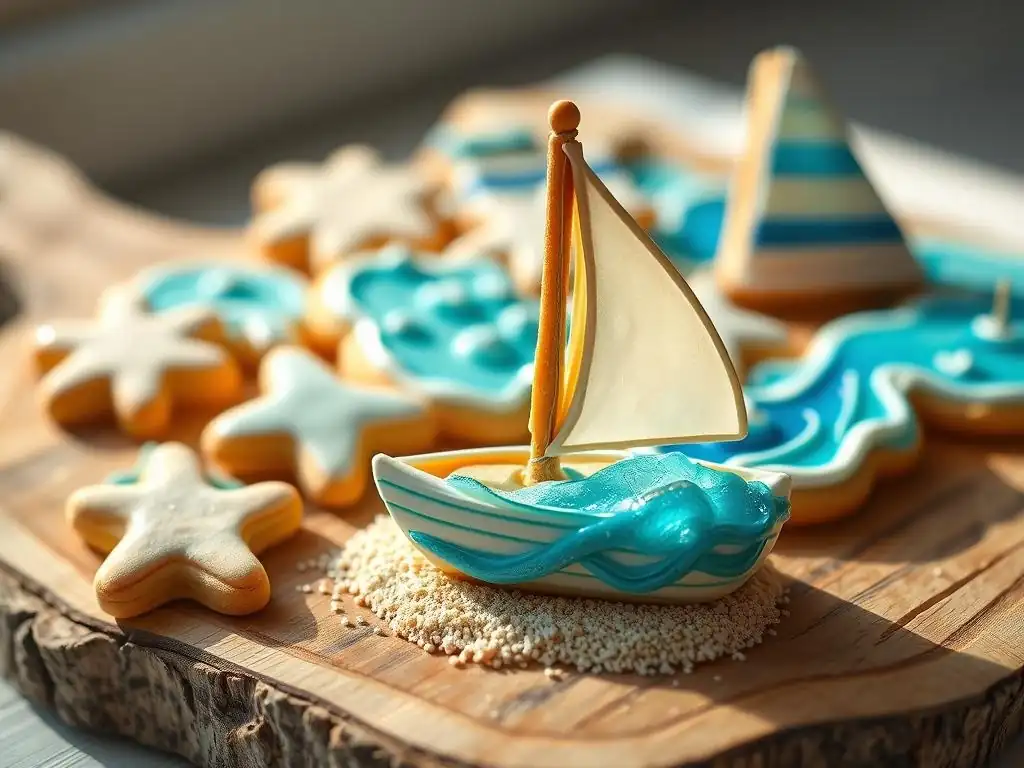
Realistic icing water effects can transform simple cookie shapes into captivating scenes. Here are a few examples of how these techniques can be applied to create stunning edible art.
Imagine a rectangular cookie divided diagonally. One half is covered with tan sanding sugar for a beach. The other half depicts the ocean using realistic icing water effects. A base layer of deep blue transitions to a lighter turquoise near the shore using the ombre blending technique. Wet-on-wet swirls of white and lighter blue add subtle wave movement. The sunset sky above could feature warm colors, reflecting slightly on the water's surface, enhancing the realistic icing water effects.
Small royal icing palm trees or seashells placed on the beach complete the scene. The contrast between the matte sand and the glossy, dynamic water creates a striking visual effect.
Picture a circular cookie with a small island shape in the center, perhaps covered in green icing and edible grass sprinkles. The surrounding area is a vibrant tropical sea created with realistic icing water effects. Use bright teal and emerald green flood icing, blended wet-on-wet with touches of white and deeper blue to suggest shallow areas near the island and deeper water beyond.
Tiny royal icing fish or coral pieces added to the water surface bring the underwater scene to life. The clear, colorful water effect makes the island pop and creates a delightful miniature world.
Consider a lighthouse-shaped cookie or a round cookie depicting a rocky coast with a lighthouse. The water surrounding the rocky base is where realistic icing water effects shine. Use layers of blue and grey icing to build up choppy waves crashing against the rocks. The layering technique with thicker icing is perfect here to give the waves dimension and texture.
White icing can be used for seafoam and wave crests, perhaps applied with a brush or palette knife technique for a frothy look. The dynamic, realistic icing water effects around the stoic lighthouse create a dramatic and visually compelling cookie.
Tips for Practicing and Perfecting Your Royal Icing Water Skills
Mastering realistic icing water effects takes practice. Don't be discouraged if your first attempts aren't perfect. Each cookie is an opportunity to learn and refine your techniques.
Start with Simple Designs
Begin with simple shapes and basic water effects, like a calm pond or a flat expanse of ocean using just the flood technique. Focus on achieving the correct icing consistency and smooth finish before attempting complex blending or layering.
- Practice flooding consistent, smooth surfaces.
- Experiment with basic color mixing to get different shades of blue/green.
- Try simple wet-on-wet swirls on practice cookies.
Practice Your Piping Techniques
Precise piping is essential for outlining (if used) and adding details like waves, ripples, or small elements. Practice piping straight lines, curves, and consistent pressure control on parchment paper before working on your cookies.
- Draw grids and lines to practice piping straight.
- Practice piping circles and curves for outlines.
- Work on consistent pressure for even icing flow.
Experiment with Different Gel Color Combinations
Don't be afraid to mix and match gel colors. Nature's water is incredibly varied. Try adding hints of unexpected colors like purple, grey, or even yellow to your blues and greens to create unique and realistic hues.
- Mix small batches of icing with different color ratios.
- Test color blends on a white plate or scrap paper.
- Observe real water photos for color inspiration.
Creating realistic icing water effects is a skill that will significantly enhance your cookie decorating abilities. By understanding royal icing consistency, mastering gel color blending, and practicing techniques like flooding, wet-on-wet, and layering, you can transform simple cookies into breathtaking edible scenes. The ability to depict realistic icing water adds depth, movement, and a touch of artistry that captivates anyone who sees your creations.
While it requires patience and practice, the results are incredibly rewarding. So, gather your supplies, mix your colors, and dive into the world of realistic icing water effects. Your cookies will thank you!
Frequently Asked Questions
How do I achieve a realistic water effect on my baked goods using icing?
The key is to use a combination of clear piping gel and gel food coloring. Layering the gel and applying it in waves or ripples creates depth and mimics the appearance of water.
What type of icing is best for creating realistic water effects?
Royal icing is ideal for the base, providing a smooth, level surface. Then, use clear piping gel, tinted with gel food coloring, to build the water effect on top.
Can I use liquid food coloring instead of gel food coloring?
No, liquid food coloring is not recommended. It can thin out the icing or piping gel, making it difficult to achieve the desired consistency and realistic water effect.
What are some tools I can use to create different water textures?
Use tools like offset spatulas, toothpicks, or even the back of a spoon to manipulate the piping gel and create ripples, waves, and other water-like textures. Experiment!
How do I prevent the water effect from looking artificial or too uniform?
Vary the shades of blue and green gel coloring used, and create imperfections. Real water isn't perfectly smooth; incorporate subtle variations in texture and color.
Final Reflection: The Ebb and Flow of Icing Creativity
The ability to create realistic water effects with icing is no longer a niche skill; it's a powerful tool for elevating cake design to a breathtaking new level. This technique, once confined to the most experienced bakers, is now accessible to anyone with a little patience and the right materials. The demand for visually stunning, hyper-realistic cakes continues to grow, and mastering this skill provides a significant competitive edge in the world of cake artistry.
The journey of learning to mimic the fluidity and translucency of water in icing has been a fascinating exploration of texture, color, and the subtle interplay of light and shadow. It's a testament to the power of simple ingredients to achieve extraordinary results. The details are not the details. They make the design.
This quote, often attributed to Charles Eames, perfectly encapsulates the importance of mastering realistic water effects – the seemingly small details are what transform a good cake into a masterpiece. The impact of this technique extends beyond the purely aesthetic; it allows bakers to tell stories, evoke emotions, and create truly immersive cake experiences.
Now, it's your turn. Don't just admire the shimmering waves and cascading waterfalls of expertly iced cakes; create your own. Experiment with different icing consistencies, color combinations, and application techniques. Embrace the challenge, celebrate the successes, and learn from the inevitable imperfections. The journey of mastering realistic water effects is as rewarding as the final, breathtaking result. Let your creativity flow, just like the water you're about to perfectly replicate in icing.
Unleash Your Inner Cake Artist: Master Realistic Water Effects!
Thanks for diving into the world of realistic water effects with icing and gel colors! We hope you now feel empowered to create stunningly lifelike aquatic scenes on your cakes. Ready to put your new skills to the test?
- Create your masterpiece! Try recreating one of the techniques from the article – or even better, design your own unique water feature!
- Share your creation! We’d love to see your breathtaking results – post a picture on social media and tag us!
- Explore further! Try experimenting with different gel colors and icing consistencies to discover new levels of realism.
What unique aquatic scene will you bring to life next?