
Painting with Gel Colors on Royal Icing: A Detailed Guide

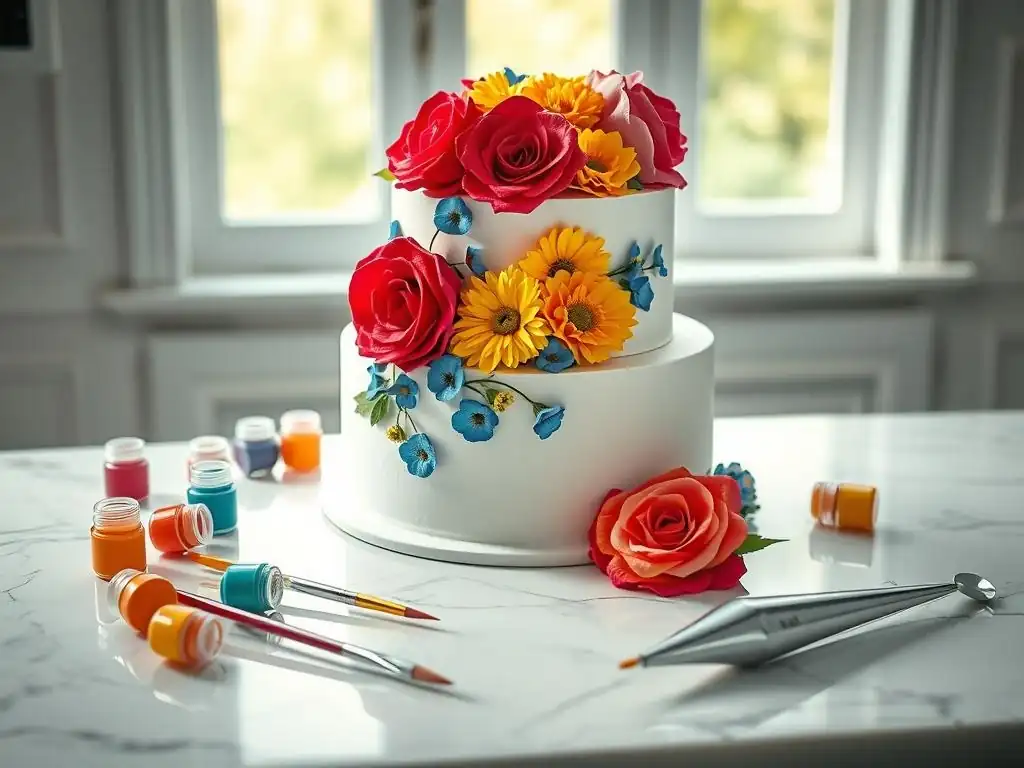
Welcome to BakeWithEase, your haven for all things baking! Ever wondered how to achieve those stunning, vividly colored designs on your pastries? This guide dives deep into the secrets of using gel colors royal icing to transform your creations into edible masterpieces. Prepare to unleash your inner artist as we unravel the techniques and tips that will leave you painting like a pro. Intrigued? Let's get started and discover the vibrant world of royal icing artistry!
- Introduction to Painting Royal Icing with Gel Food Coloring
- Essential Supplies for Gel Color Painting on Royal Icing
- Preparing Royal Icing for Gel Color Painting
- Mixing and Preparing Gel Colors for Royal Icing Painting
- Painting Techniques for Royal Icing with Gel Colors
- Common Mistakes and How to Avoid Them When Painting Royal Icing
- Drying and Storing Painted Royal Icing Cookies
- Advanced Techniques and Inspiration for Painting Royal Icing
- Troubleshooting Guide: Common Problems with Painting Royal Icing and Solutions
- Conclusion: Mastering the Art of Gel Color Painting on Royal Icing
-
Frequently Asked Questions
- How do I prepare royal icing for painting with gel colors?
- What type of gel colors are best for painting on royal icing?
- How do I prevent the gel color from bleeding on the royal icing?
- Can I mix gel colors to create custom shades for my royal icing decorations?
- How do I clean my brushes after painting with gel colors on royal icing?
- Final Reflection: The Enduring Allure of Vibrant Royal Icing
- Unleash Your Inner Icing Artist!
Introduction to Painting Royal Icing with Gel Food Coloring
Why Use Gel Colors for Royal Icing Painting?
Gel food colors are the preferred medium for painting on royal icing due to their highly concentrated pigment and minimal water content. Unlike traditional liquid food colorings, which can be thin and watery, gel colors offer intense vibrancy without adding excessive moisture to your icing canvas. This high concentration means you need only a tiny amount of color to achieve rich, deep hues, making them incredibly cost-effective for detailed work.
The thicker consistency, compared to liquids, also provides better control when mixing and applying, reducing the risk of oversaturation and bleeding on the delicate royal icing surface. Mastering the use of gel colors on royal icing unlocks a new level of artistic expression in cookie decorating.
Furthermore, the composition of gel colors allows for greater flexibility in technique. They can be diluted with a small amount of water or clear alcohol (like vodka or grain alcohol, which evaporates quickly) to create beautiful watercolor effects, or used more concentrated for bold lines and solid areas of color.
This versatility is essential for painters aiming for intricate designs and varied textures on their cookies. The stable nature of gel pigments also contributes to their popularity; they are less prone to fading over time compared to some liquid dyes, ensuring your stunning "Gel colors royal icing" creations maintain their visual appeal.
Painting with gel colors on royal icing allows decorators to achieve a level of detail and vibrancy that is difficult with other methods. The concentrated pigments produce brilliant, true-to-life colors that stand out beautifully against the white or lightly colored icing base. This intensity is crucial for creating eye-catching designs, from realistic floral arrangements to intricate portraits or complex patterns. The ability to mix and layer these colors allows for subtle shading, highlights, and gradients, adding depth and dimension to flat cookie surfaces.
The precision offered by using brushes with diluted or concentrated gel colors means you can execute extremely fine lines, delicate brushstrokes, and tiny details that elevate a simple cookie into a miniature work of art. Whether you're outlining intricate patterns, adding definition to painted elements, or creating fine calligraphy, "Gel colors royal icing" painting provides the control necessary for precision. This technique transforms cookies from baked goods into edible canvases, offering endless possibilities for personalization and artistic expression, making each piece unique.
Essential Supplies for Gel Color Painting on Royal Icing
The Right Royal Icing Consistency for Painting
For painting with gel colors, your royal icing base needs to be completely dry and firm. This typically requires flooding your cookies with a medium-consistency royal icing (often referred to as 10-15 second icing, meaning a line drawn on the surface disappears in 10-15 seconds) and allowing it to dry fully. The drying process can take anywhere from 8 to 24 hours, depending on humidity levels and icing thickness. A fully hardened surface is critical because it prevents the moisture from your gel colors from softening the icing base and causing indentations or bleeding.
Once the base is dry, the consistency of the royal icing used for painting itself is not applicable, as you will be painting on the dry icing base using diluted gel colors as your paint medium. The "right consistency" here refers solely to the base layer being hard and smooth enough to accept the paint without damage.
An improperly dried or too-soft base will absorb the liquid from the gel color mixture unevenly, leading to patchy results or, worse, dissolving the icing surface. Ensuring a perfectly set, hard royal icing foundation is the first step to successful "Gel colors royal icing" artwork.
Selecting High-Quality Gel Food Colors
The quality of your gel food colors significantly impacts the vibrancy and performance of your painting on royal icing. High-quality gel colors contain a higher concentration of pigment and less filler, resulting in more intense colors with smaller amounts of product. Brands known for their quality often produce colors that are less prone to separation and offer a smoother consistency when diluted for painting. Using superior gel colors means you can achieve rich hues without over-saturating your paint mixture with excess liquid, which is crucial for preventing bleeding on your royal icing canvas.
Investing in a basic set of primary colors (red, blue, yellow) plus black and white from a reputable brand allows you to mix a wide spectrum of custom shades. Look for colors specifically labeled as gel or paste food coloring. While liquid colors exist, they are generally too watery for detailed "Gel colors royal icing" painting. A good quality gel color will dissolve smoothly in your chosen diluent and maintain its intensity, providing reliable results for your artistic endeavors.
Must-Have Brushes for Painting Intricate Royal Icing Details
Selecting the appropriate brushes is fundamental for achieving detailed and controlled painting on royal icing. You'll need a variety of sizes and shapes, much like an artist painting on canvas. Essential brushes include small round brushes (sizes 0, 1, 2) for fine lines, outlines, and small details, as well as slightly larger round or flat brushes (sizes 3, 4, 6) for filling in areas or creating washes. Detail brushes with very fine tips (sizes 00, 000) are indispensable for tiny accents, dots, or intricate patterns.
Synthetic brushes are often preferred for food applications because they are non-porous, easy to clean, and maintain their shape well, especially when working with water-based mediums like diluted gel colors. Having a dedicated set of brushes solely for food use is vital for hygiene. Keep your brushes clean and in good condition; a frayed or damaged brush can ruin a delicate stroke and compromise the quality of your "Gel colors royal icing" artwork.
Other Necessary Tools: Palette, Water, and Paper Towels
Beyond gel colors and brushes, a few simple tools are essential for a smooth painting process. A palette is needed to mix and dilute your gel colors. A clean, non-porous surface like a ceramic tile, a plastic paint palette, or even a small plate works well. Using a palette allows you to control the amount of color and diluent you are working with and prevents you from contaminating your main color jars.
You will also need a small container of clean water (or clear alcohol) for diluting your gel colors and for cleaning your brushes. Keep the water clean by changing it frequently, especially when switching between colors. Finally, paper towels are indispensable for drying your brushes after rinsing and for controlling the amount of moisture on your brush tip before picking up paint. Dabbing your brush on a paper towel helps prevent excess liquid from transferring to your royal icing, a common cause of bleeding when painting "Gel colors royal icing".
Preparing Royal Icing for Gel Color Painting
Achieving the Perfect Canvas: Smooth and Dry Royal Icing
The foundation for beautiful gel color painting is a perfectly smooth and completely dry royal icing surface. After flooding your cookies, ensure they air dry in a low-humidity environment for an extended period, typically 12 to 24 hours, or even longer for very thick layers. The icing should be hard to the touch and show no tackiness. You can often tell it's fully dry when the shine has completely disappeared and the surface feels solid and resistant to light pressure.
A smooth surface is equally important. Achieve this by using the correct flooding consistency and gently tapping or vibrating the cookie after flooding to help the icing settle evenly and release any trapped air bubbles. Using a scribe tool or toothpick to guide the icing and pop bubbles also contributes to a flawless finish. Any bumps, dips, or imperfections on the dried surface will show through your painting, so taking the time to create a smooth, hard canvas is crucial for professional-looking "Gel colors royal icing" results.
Preventing Color Bleeding on Royal Icing
Color bleeding is a common frustration when painting on royal icing, but it is largely preventable. The primary cause of bleeding is excess moisture interacting with the dried icing. Ensuring your royal icing base is completely dry before you begin painting is the most critical step. Even slight tackiness can cause the color to spread uncontrollably.
When mixing your gel colors, use the minimal amount of diluent necessary to achieve your desired consistency. If using water, use it sparingly. Clear alcohol like vodka evaporates faster than water, making it a safer choice for dilution as it introduces less long-term moisture. Test your diluted colors on a hidden spot or a practice cookie before applying them to your main design. Applying paint in thin layers and allowing them to dry slightly between coats also helps prevent moisture buildup and ensures clean, crisp lines when working with "Gel colors royal icing".
Tips for a Flawless Royal Icing Base
Creating a flawless royal icing base starts with having the right consistency for flooding. A consistency that is too thick won't spread smoothly, leaving peaks or uneven surfaces. A consistency that is too thin might overflow the edges or dry with depressions. Aim for that sweet spot, often described as 10-15 second icing, which flows easily but holds its shape enough to stay within your outline.
After flooding, gently vibrate or tap the cookie against your work surface to help the icing settle and remove air bubbles. A scribe tool is invaluable for coaxing the icing into corners and popping stubborn bubbles near the surface. Work in a clean, dust-free environment to prevent particles from landing on the wet icing. Finally, patience is key during the drying phase; resist the urge to paint until the base is rock hard, which can take a full 24 hours, ensuring your "Gel colors royal icing" has the best possible canvas.
Mixing and Preparing Gel Colors for Royal Icing Painting
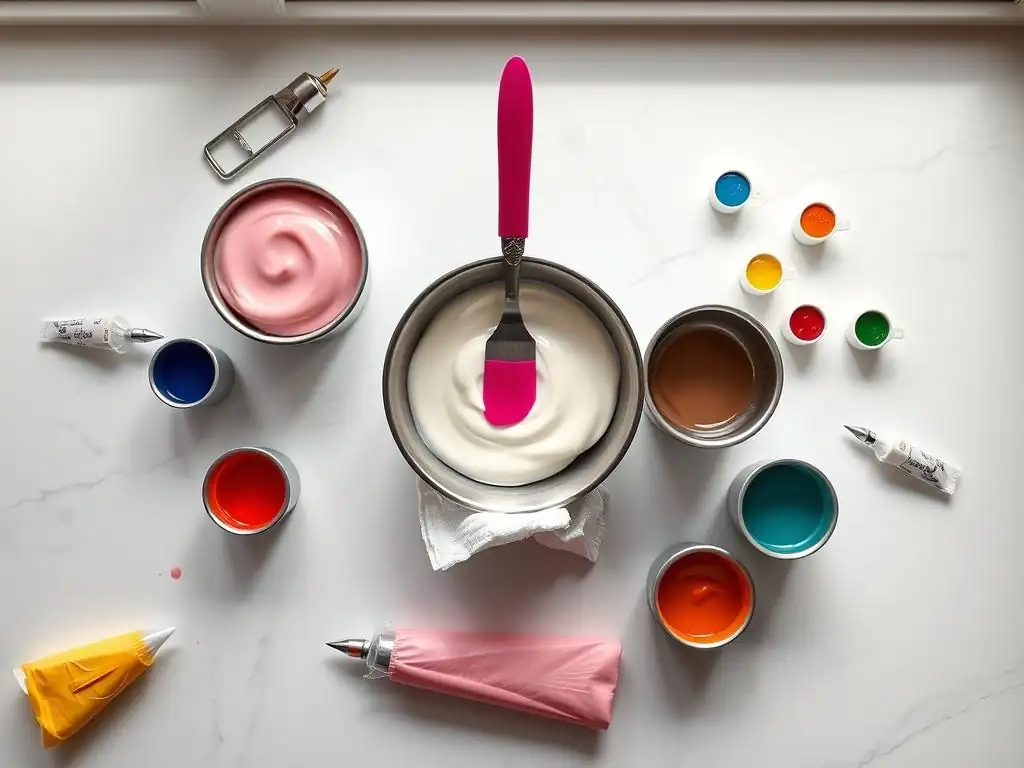
Diluting Gel Colors for Watercolor Effects
Achieving beautiful watercolor effects with gel colors requires careful dilution. Start with a tiny dab of gel color on your palette. Using a clean brush, pick up a very small amount of water or clear alcohol and mix it into the color. Begin with just a drop or two of liquid and gradually add more until you reach the desired transparency. For a light wash, you'll need more diluent; for a more saturated watercolor effect, use less.
Test your diluted color on a paper towel or a practice piece of dried royal icing to see how it looks and behaves. Remember, it's easier to add more diluent than to remove it if you've added too much. Using alcohol like vodka is beneficial because it evaporates quickly, minimizing the moisture introduced to the royal icing surface, which helps prevent bleeding and speeds up the drying time of your painted layers when working with "Gel colors royal icing" in a watercolor style.
Creating Custom Color Palettes with Gel Colors
One of the joys of painting with gel colors is the ability to mix custom shades. Start with a basic set of primary colors (red, yellow, blue) and experiment with mixing them on your palette to create secondary and tertiary colors. For example, mixing yellow and blue creates green, while adding a touch of red to blue can create purple. Adding white gel color will lighten shades, creating pastels, while a tiny amount of black or brown can deepen or mute a color.
Keep track of your successful color mixes by noting approximate ratios if you need to recreate them later. Mixing on a palette allows you to see the true color before applying it to your cookie. Create small wells of frequently used mixes for a particular project. This practice not only saves time but also ensures color consistency throughout your set of cookies when working with "Gel colors royal icing" and aiming for a specific palette.
Avoiding Common Mistakes When Mixing Gel Colors
Several common mistakes can hinder your success when mixing gel colors for royal icing painting. The most frequent error is adding too much diluent (water or alcohol) at once, resulting in a watery paint that lacks pigment and is prone to bleeding. Always add your diluent drop by drop. Another mistake is contaminating your main gel color jars by dipping a used brush directly into them; always scoop a small amount onto your palette first.
Failing to mix colors thoroughly can lead to streaks or uneven color application. Ensure your color and diluent are fully combined on the palette. Lastly, don't mix too large a batch of custom color unless you plan to use it all immediately, as diluted colors can dry out on the palette or separate over time. By taking care during the mixing process, you set yourself up for a smoother and more successful "Gel colors royal icing" painting experience.
Painting Techniques for Royal Icing with Gel Colors
Basic Brush Strokes for Beginners
Starting with basic brush strokes is key to building confidence in painting on royal icing. Practice simple lines, varying the pressure to see how it affects line thickness. Try straight lines, curved lines, and wavy lines. Practice creating dots of different sizes by gently touching the brush tip to the surface. Experiment with washes by applying a thin, diluted layer of color over an area.
Another fundamental technique is blocking in color, where you fill a defined area with paint using smooth, even strokes. Focus on controlling the amount of paint on your brush and maintaining a consistent stroke direction for a smooth finish. Practicing these basic strokes on a piece of parchment paper or a practice cookie will significantly improve your control and precision when you move on to more complex "Gel colors royal icing" designs.
Layering Gel Colors for Depth and Dimension
Layering colors is a powerful technique to add depth and dimension to your painted royal icing designs. Start with a base layer, which is often a lighter shade or a wash. Allow this layer to dry partially or completely, depending on the effect you want. Then, apply subsequent layers of darker shades or more concentrated colors to add shadows, details, or build up intensity.
Applying thin, translucent layers allows the colors beneath to show through, creating rich, complex hues. This is particularly effective for painting realistic elements like flower petals or fabric folds. Ensure each layer isn't too wet to avoid reactivating the layer beneath and causing bleeding. Building up color gradually through layering adds richness and realism to your "Gel colors royal icing" artwork.
Watercolor Painting Techniques on Royal Icing
Watercolor effects on royal icing are achieved by using highly diluted gel colors. The wet-on-dry technique involves applying diluted color to a completely dry royal icing surface. This allows for controlled washes and crisp edges. You can blend colors by applying them side-by-side while they are still wet on the surface, allowing them to softly merge.
For a wet-on-wet effect, you would apply a small amount of clean diluent (water or alcohol) to the dry icing surface first, then drop diluted color into the wet area. The color will spread and blend organically within the wet patch, creating soft, diffused edges. This technique is great for backgrounds, soft gradients, or abstract effects. Mastering these "Gel colors royal icing" watercolor methods adds a delicate, artistic touch to your cookies.
Dry brushing is a technique used to create texture and distressed effects on your painted royal icing. Load your brush with a small amount of paint, then wipe most of it off on a paper towel until the brush is nearly dry. The brush bristles should be separated and hold very little moisture or paint.
Then, lightly drag or flick the brush across the dry royal icing surface. The sparse paint will catch on the subtle texture of the icing, creating broken lines and a textured appearance. This technique is excellent for mimicking textures like wood grain, stone, fabric, or even fur. It adds a tactile visual element to your "Gel colors royal icing" designs, providing a contrast to smooth areas.
Shading and Highlighting with Gel Colors
Shading and highlighting are essential techniques for adding realism and dimension to your painted elements. Shading involves using darker tones of a color to create shadows and indicate areas where light doesn't directly hit. This adds depth and makes objects appear more three-dimensional. Apply darker shades in layers, building up the intensity gradually.
Highlighting involves using lighter tones, often white or a very pale version of the base color, to represent areas where light is hitting. This brings elements forward and adds a sense of volume. Apply highlights sparingly to the highest points or edges of your painted objects. Effective shading and highlighting using "Gel colors royal icing" can transform flat shapes into realistic forms.
Adding Fine Details with a Fine-Tip Brush
Once the main colors and shading are applied, a fine-tip brush is crucial for adding the final intricate details that bring your painting to life. Use a size 0, 00, or even 000 brush for these tasks. These brushes allow for extremely thin lines, tiny dots, small patterns, and delicate accents.
Use a slightly more concentrated gel color mixture for these details, but ensure it still flows smoothly from the brush. Examples include adding veins to leaves, pupils to eyes, intricate patterns on clothing, or fine outlines to sharpen edges. Patience and a steady hand are key for this step, as these fine details significantly enhance the overall quality and realism of your "Gel colors royal icing" artwork.
Common Mistakes and How to Avoid Them When Painting Royal Icing
Preventing Air Bubbles in Royal Icing
Air bubbles in your royal icing base can create frustrating craters or bumps on your smooth canvas, ruining the surface before you even start painting. These bubbles are often introduced during the mixing process, especially if the icing is beaten at high speed. To minimize bubbles, mix your royal icing at a low speed using a paddle attachment rather than a whisk.
After mixing, gently scrape down the sides of the bowl to incorporate any unincorporated sugar or meringue powder without whipping in more air. Cover your royal icing tightly with plastic wrap pressed directly onto the surface to prevent crusting. When flooding cookies, gently tap the cookie against your work surface or use a scribe tool to bring any remaining bubbles to the surface so they can be popped before the icing sets. A smooth, bubble-free base is essential for successful "Gel colors royal icing" painting.
Fixing Mistakes: Correcting Imperfections in Your Gel Color Painting
Mistakes happen, but sometimes they can be fixed on royal icing. If you make a small error while the paint is still wet, you can often gently lift the color using a clean brush that has been dipped in your diluent (water or alcohol) and then blotted almost dry on a paper towel. Use a light dabbing or lifting motion rather than scrubbing, which can damage the icing surface.
For mistakes that have dried, correction is much more difficult. You might be able to carefully scrape off a small, raised detail with a sharp, clean craft knife (used only for food), but this risks damaging the underlying icing. Sometimes, the best approach for a dried mistake is to incorporate it into the design or, if it's significant, start over on a new cookie. Practice minimizes mistakes, but knowing how to handle wet errors can save a cookie when working with "Gel colors royal icing".
Avoiding Over-Saturation of Gel Colors
Over-saturation occurs when you apply too much concentrated color or too much liquid to an area of your royal icing, leading to bleeding, a sticky surface, or even dissolving the icing. Gel colors are highly pigmented, so a little goes a long way. When mixing, always start with a tiny amount of color and add more as needed to reach your desired intensity.
Similarly, use your diluent (water or alcohol) sparingly, especially water. It's better to apply multiple thin layers of diluted color, allowing each to dry slightly, than one thick, wet layer. If you notice the icing surface looking overly wet or feeling tacky after applying color, you've likely used too much liquid. Controlling the amount of paint and diluent on your brush before it touches the cookie is key to preventing over-saturation in "Gel colors royal icing" artwork.
Maintaining the Right Consistency of Gel Colors
As you paint, the diluted gel colors on your palette can evaporate, especially if using alcohol as a diluent. This causes the paint to thicken over time, affecting its flow and application. To maintain the right consistency, keep your palette covered when not actively painting, if possible, or work in smaller batches.
If your paint thickens, add a tiny drop more of your diluent and mix it thoroughly. Test the consistency on your paper towel before returning to your cookie. If you're using a custom mix, you might need to remix a small amount if the original batch dries out completely. Consistently maintaining the desired paint consistency ensures smooth brushstrokes and even color application throughout your "Gel colors royal icing" project.
Ensuring Proper Drying Time for Gel Colored Royal Icing
After painting with gel colors on royal icing, it's crucial to allow the painted areas to dry completely before handling or storing the cookies. The drying time for the paint depends on the thickness of the application, the amount of diluent used, and the humidity of the environment. Thin washes diluted with alcohol will dry relatively quickly, perhaps within an hour or two. Thicker applications or those using water may take several hours.
To speed up drying and ensure the paint is fully set, you can place the cookies in front of a fan on a low setting or in a dehydrator set to a very low temperature (around 90-100°F or 32-38°C). Avoid high heat, which can melt the icing or cause colors to fade. Proper drying prevents smudging and ensures the durability of your "Gel colors royal icing" designs.
Once your painted royal icing cookies are completely dry (both the base icing and the painted layers), proper storage is essential to preserve their appearance and freshness. Store the cookies in an airtight container at room temperature, away from direct sunlight or heat, which can cause colors to fade or bleed over time.
If stacking cookies, separate layers with parchment or wax paper to prevent the painted surfaces from sticking together or scratching. Avoid storing decorated cookies in the refrigerator, as condensation can form and potentially damage the royal icing and paint. Properly stored "Gel colors royal icing" cookies can maintain their visual quality and taste for one to two weeks.
Advanced Techniques and Inspiration for Painting Royal Icing
Creating Realistic Effects with Gel Colors
Achieving realism in "Gel colors royal icing" painting involves combining several techniques. Layering thin washes of color allows you to build up complex tones and textures, much like traditional painting. Shading and highlighting are critical for giving painted objects volume and form; carefully observe how light falls on real-world objects to guide your application of shadows and highlights.
Techniques like dry brushing can add texture to mimic surfaces like wood, stone, or fabric. Using a fine brush for intricate details, such as fine hairs, veins in leaves, or subtle patterns, further enhances realism. Studying real objects and practicing observational painting will significantly improve your ability to create realistic effects on your edible canvas using gel colors.
Inspired Designs and Ideas for Gel Color Royal Icing Art
Inspiration for "Gel colors royal icing" art can come from countless sources. Look to fine art paintings for composition and color palette ideas. Nature offers endless subjects, from detailed botanical illustrations of flowers and leaves to landscapes and animal portraits. Fabric patterns, tile designs, and architectural details can provide inspiration for intricate geometric or decorative cookies.
Consider themes like vintage illustrations, storybook characters, or even abstract art. Browsing online galleries of paintings, illustrations, or even photography can spark ideas for your next cookie project. Don't be afraid to experiment and adapt different artistic styles to the medium of gel colors on royal icing.
Painting Realistic Flowers on Royal Icing
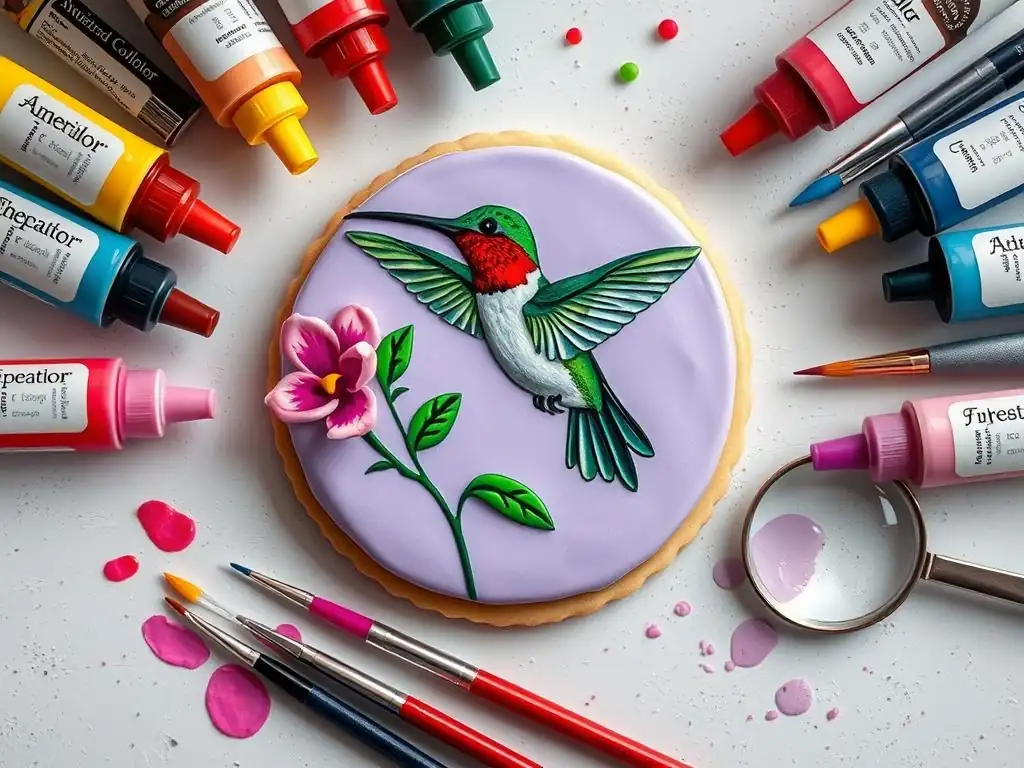
Painting realistic flowers on royal icing is a popular application for gel colors. This technique often involves starting with a base wash for the general shape and color of the petal or leaf. Then, use layering to build up the color intensity and add subtle variations in hue.
Use a fine brush and slightly darker shades to paint delicate veins on leaves or add shadows at the base of petals. Highlights with a lighter color or white can be used to indicate where light catches the edges of petals, adding dimension. Observing real flowers or detailed botanical illustrations helps in accurately capturing the form and subtle color transitions when painting flowers with "Gel colors royal icing".
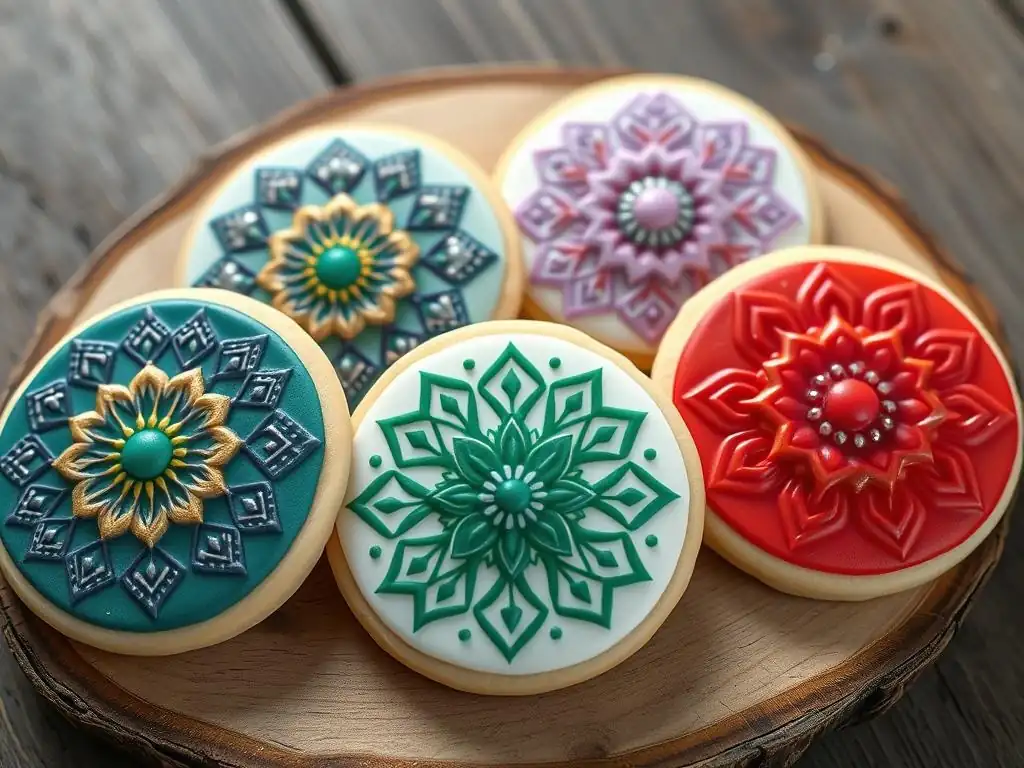
Creating intricate mandala designs on cookies with gel colors requires precision and patience. Start by lightly sketching or tracing your design onto the dry royal icing using a food-safe pencil or by projecting an image. Then, use a fine-tip brush (sizes 0 or 00) and a slightly diluted gel color to carefully paint along the lines.
Work from the center outwards or in sections, allowing areas to dry slightly before adding adjacent elements to prevent colors from blending unintentionally. The repetitive patterns of mandalas lend themselves well to building up detail layer by layer. Consistent paint consistency and a steady hand are key to achieving clean, crisp lines in these complex "Gel colors royal icing" patterns.
Adding hand-painted lettering or calligraphy to royal icing cookies using gel colors can personalize and elevate your designs. Use a fine-tip brush and a smooth-flowing, slightly diluted gel color. Practice your chosen script or font on paper first to get a feel for the strokes.
For calligraphy, vary the pressure on your brush to create thick and thin lines characteristic of the style. For standard lettering, aim for consistent line weight and spacing. Lightly sketching the text onto the cookie first can help with placement and sizing. Patience and practice are essential for achieving elegant and legible hand-painted lettering with "Gel colors royal icing".
Troubleshooting Guide: Common Problems with Painting Royal Icing and Solutions
Color Bleeding Issues and Fixes
Bleeding colors are a common issue when painting on royal icing, primarily caused by excess moisture or an inadequately dried icing base.
- Cause: Royal icing base not fully dry.
- Solution: Ensure your base layer dries for a minimum of 12-24 hours, or until completely hard and non-tacky, preferably in a low-humidity environment or with the aid of a fan/dehydrator.
- Cause: Too much diluent (water) in your gel color mixture.
- Solution: Use clear alcohol (like vodka) instead of water, as it evaporates faster. Use the minimal amount of diluent necessary to achieve the desired paint consistency. Test on a practice surface first.
- Cause: Applying too much paint or too wet a layer at once.
- Solution: Apply paint in thin layers, allowing each layer to dry slightly before adding the next. Control the amount of paint on your brush by dabbing it on a paper towel before applying to the cookie.
If bleeding occurs while painting, sometimes you can gently wick away the excess moisture with the corner of a clean paper towel before it spreads too far. For dried bleeding, it's often difficult to fix without damaging the cookie. Prevention is the best strategy for avoiding bleeding in "Gel colors royal icing".
Uneven Color Distribution Solutions
Uneven color distribution can result in patchy or streaky painted areas on your royal icing.
- Cause: Gel color not fully mixed with diluent on the palette.
- Solution: Spend time thoroughly mixing your gel color and diluent until the color is uniform throughout the mixture on your palette.
- Cause: Applying paint too thickly or unevenly.
- Solution: Use thin, consistent layers of paint. For washes, apply paint with smooth, overlapping strokes, ensuring even coverage. It's better to apply two thin, even coats than one thick, uneven one.
- Cause: Inconsistent paint consistency during painting.
- Solution: Regularly check the consistency of your paint on the palette and add a tiny amount of diluent if it has started to thicken due to evaporation. Maintain the same consistency throughout the application process for uniform "Gel colors royal icing" coverage.
Practicing your brush strokes and paint application on a practice surface can help you develop a feel for applying paint evenly.
Sticky or Tacky Royal Icing After Painting: Causes and Solutions
Sometimes, after painting, the royal icing surface can feel sticky or tacky, even after the paint appears dry.
- Cause: Too much liquid (diluent or high moisture in gel color) was applied to the surface.
- Solution: Ensure your royal icing base was completely dry before painting. Use minimal diluent when mixing colors, preferring alcohol over water if possible. Apply thin layers of paint rather than thick, wet ones.
- Cause: High humidity in the drying environment.
- Solution: After painting, allow the cookies to dry in a low-humidity environment. Using a fan or a dehydrator set to a low temperature (like 90-100°F or 32-38°C) can help evaporate the moisture more quickly and prevent tackiness.
- Cause: Certain gel colors or brands may contain additives that affect drying.
- Solution: If a specific color consistently causes tackiness, try using a different brand for that color or a different shade.
Patience during the drying phase is key. Allow painted "Gel colors royal icing" cookies ample time to fully set before stacking or packaging.
Conclusion: Mastering the Art of Gel Color Painting on Royal Icing
Painting with gel colors on royal icing is a rewarding technique that allows you to transform simple cookies into stunning edible works of art. By understanding the properties of gel colors, preparing your royal icing canvas correctly, and practicing various painting techniques, you can achieve incredible detail, vibrant colors, and artistic effects that are sure to impress. While it requires patience and practice, the ability to essentially paint on cookies opens up a vast world of creative possibilities, from intricate floral designs to realistic portraits and complex patterns.
Embracing "Gel colors royal icing" painting elevates your cookie decorating beyond simple flooding and piping. It allows for a level of artistic expression comparable to traditional painting, offering you the opportunity to create truly unique and personalized cookies for any occasion. Don't be discouraged by initial challenges; each cookie you paint is a step towards mastering this beautiful craft.
Continuing to learn and practice is key to mastering advanced cookie decorating techniques like painting with gel colors. While this guide provides a detailed foundation for working with "Gel colors royal icing", exploring different styles and complex designs will further hone your skills.
Experiment with different brush types, explore advanced color mixing theories, and practice combining painting with other decorating methods like piping or stenciling for multi-dimensional effects. Consistent practice and a willingness to experiment with new ideas are the best ways to continue growing as a cookie artist.
Frequently Asked Questions
How do I prepare royal icing for painting with gel colors?
Royal icing needs to be smooth and completely dry before painting. Allow it to set for at least several hours or overnight to achieve a firm surface.
What type of gel colors are best for painting on royal icing?
Use high-quality gel food colors specifically designed for baking. Avoid liquid food coloring as it can thin the icing and create a messy result.
How do I prevent the gel color from bleeding on the royal icing?
Use a small amount of gel color and gently apply it with a fine-tipped brush. Avoid over-saturating the icing with color to prevent bleeding.
Can I mix gel colors to create custom shades for my royal icing decorations?
Yes, you can mix gel colors to achieve the exact shade you desire. Remember to mix small amounts at a time and test the color on a piece of paper towel before applying it to the icing.
How do I clean my brushes after painting with gel colors on royal icing?
Clean your brushes immediately after use with warm, soapy water. Ensure all traces of gel color are removed to prevent color contamination in future projects.
Final Reflection: The Enduring Allure of Vibrant Royal Icing
The art of decorating with royal icing, enhanced by the vibrant hues of gel colors, continues to captivate bakers and cake artists worldwide. This detailed guide has explored the nuances of achieving perfectly colored royal icing, from choosing the right gel colors to mastering consistent application techniques. The enduring popularity of this craft speaks to its timeless appeal and the sheer joy of creating edible masterpieces.
The journey of mastering gel colors in royal icing is a testament to patience, precision, and the transformative power of color. It's a process that demands attention to detail, yet the rewards are immeasurable – the vibrant smiles of those who receive your creations, the satisfaction of witnessing your skills blossom, and the sheer artistry that unfolds with each carefully applied stroke. The details are not the details. They make the design.
– Charles Eames. This quote perfectly encapsulates the importance of precise color mixing and application in achieving truly stunning results.
Now, it's your turn. Pick up your piping bag, select your favorite gel colors, and let your creativity flow. Don't be afraid to experiment, to push boundaries, and to discover your unique style. The world of royal icing awaits, a canvas of endless possibilities just waiting for your personal touch. Embrace the challenge, celebrate the process, and most importantly, enjoy the journey of creating beautiful, vibrant, and unforgettable treats.
Unleash Your Inner Icing Artist!
Thanks for taking the time to explore the world of gel color painting on royal icing with us! We hope you've discovered new techniques and inspiration to elevate your baking creations. Now it's time to put your newfound knowledge into practice!
- Dive into your next project: Grab your supplies and try a simple design from the article, or challenge yourself with a more complex pattern. Remember, practice makes perfect!
- Share your masterpiece: Post a picture of your beautiful, hand-painted cookies on social media and tag us! We'd love to see your creations.
- Explore new color combinations: Experiment with different gel color blends to discover your unique icing palette. What unexpected colors will you create?
Ready to transform your baking from good to gorgeous?