
Advanced Strategies to Prevent Craters in Flooded Cookies


Welcome to BakeWithEase, your haven for baking brilliance! Ever wondered why your beautifully flooded cookies sometimes end up with unsightly craters? Dive into our latest article where we unveil advanced strategies for preventing cratered flooded cookies, transforming your creations from frustrating to flawless. Discover the secrets that professional bakers use and elevate your cookie decorating game today!
- BakeWithEase: Advanced Strategies for Preventing Cratered Flooded Cookies
- Understanding Why Cookie Cratering Occurs
- Advanced Techniques to Prevent Cratered Flooded Cookies
- Refined Cookie Dough Recipes for Crater-Free Results
- Troubleshooting Common Cratering Issues
- Expert Tips for Consistently Perfect Flooded Cookies
- Conclusion: Achieving Crater-Free Flooded Cookies with Precision
-
Frequently Asked Questions
- What causes craters to form in flooded cookies?
- How can I prevent air bubbles from forming in my royal icing?
- What consistency of royal icing is best for preventing craters?
- Should I do anything to my cookies before flooding them to prevent craters?
- What can I do if I still get craters in my flooded cookies despite my best efforts?
- Final Reflection: The Enduring Quest for the Perfect Flooded Cookie
- Unlock Perfectly Smooth Cookies: Conquer Cratered Edges!
Achieving a perfectly smooth, glassy surface on flooded royal icing cookies is the hallmark of a skilled decorator. However, many bakers encounter the frustrating issue of craters – small or large depressions that mar the otherwise flawless surface. Preventing cratered flooded cookies is crucial for professional-looking results, whether you're selling your baked goods or simply aiming for perfection in your hobby. These unsightly voids can ruin intricate designs and detract significantly from the overall appearance of your beautiful creations.
Understanding the science behind cookie cratering is the first step towards mastering the art of smooth flooding. Craters are primarily caused by trapped air bubbles that expand and contract during the drying process, or by inconsistencies in the cookie structure or icing itself. While basic flooding techniques are essential, advanced strategies are often needed to consistently achieve that coveted smooth finish, especially when working with large flood areas or in challenging environmental conditions.

Air bubbles are perhaps the most common culprit behind craters in flooded cookies. Air can get trapped in various stages: during the mixing of the cookie dough, especially if overmixed or creamed too vigorously; and, more significantly, during the preparation and coloring of royal icing. Whipping the icing at too high a speed or for too long incorporates excessive air. Even gentle stirring can introduce small bubbles.
During the drying process, as the water evaporates from the royal icing, these trapped air bubbles can expand or shift. If a bubble is close to the surface and bursts prematurely, it might leave a small depression. If it remains trapped deeper within the icing, the drying process around it can cause the surrounding icing to sink slightly, forming a crater. The expansion and contraction are subtle but powerful enough to disrupt the delicate surface tension of the drying icing.
The baking temperature of your cookies plays a more significant role in preventing cratered flooded cookies than many realize. Baking cookies at the optimal temperature ensures they bake evenly and hold their shape without excessive spreading or puffing. For most sugar cookies, a temperature range of 325°F to 350°F (160°C to 175°C) is often recommended. Baking too hot can cause the edges to set too quickly while the center remains soft, potentially leading to structural weaknesses that manifest as subtle dips after cooling.
Conversely, underbaking leaves the cookie structure weak and prone to collapsing slightly as it cools, creating an uneven surface for flooding. Overbaking, while resulting in a firm cookie, can sometimes lead to a dry, brittle texture that might develop micro-fractures, also providing opportunities for icing to sink or crater. Ensuring consistent, even baking is foundational; a uniform cookie base is less likely to contribute to crater formation in the icing layer. Aim for cookies that are fully baked through but not excessively browned around the edges.
Royal Icing Consistency and Its Influence on Cratering
Achieving the perfect royal icing consistency is paramount for successful flooding and a major factor in preventing cratered flooded cookies. Icing that is too thick will trap air bubbles more readily, making them difficult to release. It also won more slowly, increasing the chance of uneven drying. Icing that is too thin, while flowing easily, may separate or dry with a dull finish and can still crater if underlying issues like trapped air or an uneven cookie surface are present.
The ideal consistency for flooding is often described as "10-15 second icing." This means that when you drizzle a line of icing back into the bowl, it takes approximately 10 to 15 seconds for the line to disappear back into the surface. This consistency allows the icing to flow smoothly and settle flat while being thick enough to hold its shape and prevent excessive spreading. Properly thinned icing allows trapped air bubbles to rise more easily to the surface, where they can be popped before the icing sets.
Mastering the "Tap and Shake" Method for Air Bubble Removal
The "tap and shake" method is a fundamental yet powerful technique for preventing cratered flooded cookies caused by trapped air. After flooding a section of your cookie with royal icing, gently tap the cookie on your work surface a few times. Follow this with a gentle side-to-side shaking motion. This encourages air bubbles to rise to the surface.
To enhance this technique, use a firm, flat surface. A sturdy baking sheet or a thick cutting board works well. You can tap directly on the counter or place a towel underneath for slight cushioning if you're concerned about breakage, although a direct tap is often more effective. As bubbles surface, use a scribe tool or toothpick to gently pop them before the icing begins to crust over, typically within the first minute or two after flooding. This simple yet crucial step dramatically reduces the likelihood of craters forming.
Employing a Dehydrator for Uniform Drying and Cracking Prevention
Using a dehydrator is an advanced technique that can significantly improve the drying process and aid in preventing cratered flooded cookies. A dehydrator provides a controlled environment with low heat and consistent airflow, which promotes even drying from the surface down. This uniform drying reduces the chances of the top layer crusting over too quickly while the interior remains wet, a scenario that can lead to sinking and cratering as the underlying layers dry and contract.
Optimal dehydrator settings for flooded cookies typically involve a low temperature, around 95°F to 105°F (35°C to 40°C), and drying for several hours, potentially 4 to 8 hours depending on the icing thickness and humidity. This slow, steady drying process not only helps prevent craters but also enhances the shine of the royal icing and reduces the risk of breakage or cracking in the dried icing layer. It's a game-changer for achieving reliably smooth results, especially in humid climates.
Using a Scribe Tool for Targeted Air Bubble Release
A scribe tool is an indispensable instrument in advanced cookie decorating for preventing cratered flooded cookies. This tool, essentially a fine-tipped needle or pick, allows for precise manipulation of the wet royal icing. After flooding, use the scribe tool to gently guide the icing to the edges and into corners, ensuring even coverage. More importantly, it is used to locate and pop any visible air bubbles that rise to the surface after tapping and shaking.
To use a scribe tool effectively, hold it at a low angle to the cookie surface. Gently touch the tip to the center of any visible air bubble. The surface tension will usually cause the bubble to pop immediately. Avoid dragging the tool through the icing unnecessarily, as this can create lines or disturb the smooth surface. A quick, precise touch is all that's needed. Using the scribe tool in conjunction with tapping and shaking provides a powerful defense against air-bubble-induced craters.
Implementing a Two-Stage Flooding Technique
For large cookies or designs with expansive flood areas, implementing a two-stage flooding technique can be highly effective in preventing cratered flooded cookies. This method involves first outlining the cookie with a slightly thicker consistency of royal icing (often called "piping" or "outline" consistency) and allowing that border to crust over for 15-30 minutes.
Once the outline is partially set, the interior is flooded with the thinner "flood" consistency icing. In the two-stage method, you can further refine this by flooding the area in two thinner layers rather than one thick one. Apply the first thin layer, gently tap and shake, pop bubbles, and allow it to dry partially (perhaps 30-60 minutes) until a skin forms.
Then, apply a second thin layer over the first. This layered approach provides structural support and allows air to escape more readily between layers, reducing the risk of sinking and cratering compared to a single, deep flood layer.
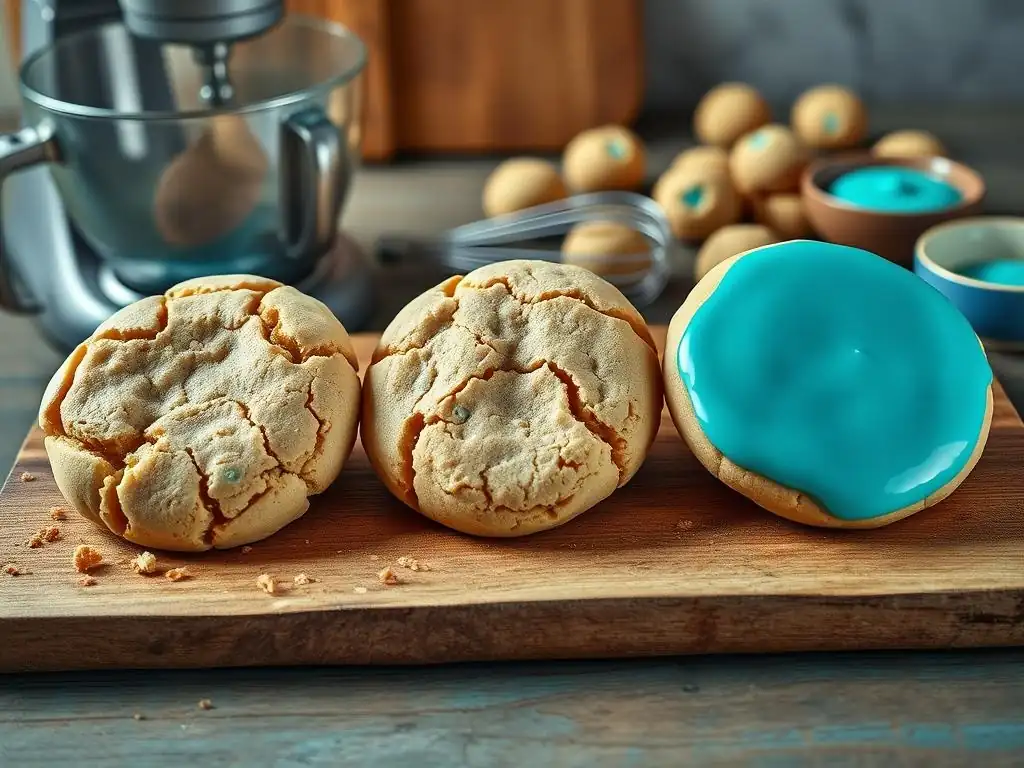
Preventing cratered flooded cookies starts even before the icing is mixed, by considering your cookie dough. Some dough recipes, particularly those that rely heavily on creaming butter and sugar, can incorporate a significant amount of air. While aeration is desirable for some baked goods, excessive air in a roll-out cookie destined for flooding can lead to a slightly uneven surface after baking. Adjusting wet to dry ingredient ratios can also play a role; dough that is too wet might spread excessively or bake unevenly.
To minimize air incorporation, consider recipes that use methods like reverse creaming (adding dry ingredients to butter before wet) or simply mixing wet and dry ingredients until just combined, avoiding prolonged beating after flour is added. Ensure your butter is at the correct temperature (softened, not melted) for your chosen method. Techniques for minimizing air during dough mixing include using a stand mixer on a lower speed setting or mixing by hand once the flour is incorporated. The goal is a cohesive dough without excessive trapped air pockets.
Resting your cookie dough in the refrigerator is a critical step that contributes to preventing cratered flooded cookies. After mixing, wrap the dough tightly and chill it for at least 1-2 hours, or preferably longer, such as overnight (8-12 hours). This resting period allows the gluten to relax, which results in less shrinkage during baking and helps the cookies maintain their shape.
More importantly, chilling the dough allows the fats to firm up and gives any trapped air bubbles time to stabilize or dissipate slightly. When the dough is rolled out cold and baked, it holds its structure better, leading to a flatter, more stable surface for decorating. Cookies baked from well-rested, chilled dough are less likely to have subtle dips or unevenness that can later translate into craters in the royal icing.
Troubleshooting Common Cratering Issues
When craters appear despite your best efforts, troubleshooting is key to preventing cratered flooded cookies in the future. Start by analyzing the type and location of the craters. Are they small and numerous, suggesting trapped air bubbles in the icing? Are they larger, perhaps in the center of the cookie, which might indicate an issue with the cookie's structure or baking? Assess your baking conditions: Was the oven temperature accurate and consistent? Were the cookies baked thoroughly?
Next, evaluate your icing consistency. Was it too thick or too thin? Did you properly mix it to minimize air? Consider the drying environment: Was it humid? Was there insufficient airflow? Review your process: Did you tap and shake adequately? Did you pop visible bubbles? By systematically reviewing each step from dough preparation to icing application and drying, you can often pinpoint the most likely cause of the cratering issue you are experiencing.
Corrective Actions for Different Types of Cratering
Corrective actions for preventing cratered flooded cookies depend on the identified cause. If small, numerous craters are present, focus on improving your icing preparation (mixing at lower speeds, allowing icing to rest) and execution (thorough tapping, shaking, and using a scribe tool). Ensure your icing consistency is truly 10-15 seconds. If craters are larger and seem related to the cookie structure, adjust your baking temperature and time, ensuring cookies are fully baked on a flat surface. Rest your dough longer.
If the environment seems to be the issue, especially humidity, consider using a fan (aimed away from the cookies to avoid disturbing the surface) or, ideally, a dehydrator to control the drying process. If you suspect a combination of issues, implement multiple corrective actions simultaneously – refine icing consistency and improve tapping technique and use a dehydrator. Consistent practice and careful observation of the results will help you fine-tune your process for reliably smooth cookies.

The Importance of Precise Measurements and Ingredients
Precision in baking is always important, but it's absolutely critical for consistently preventing cratered flooded cookies. Royal icing is particularly sensitive to ingredient ratios. Using a kitchen scale to measure both wet and dry ingredients, especially powdered sugar and liquid (water, milk, lemon juice), ensures your icing consistency is repeatable every time. Even small variations in the amount of liquid can drastically change how the icing flows and dries.
Selecting high-quality ingredients also makes a difference. Fresh, finely sifted powdered sugar prevents lumps. Using a reliable meringue powder or egg white powder is essential for the structure and stability of the icing, which directly impacts its ability to dry smoothly without collapsing. Stale or poor-quality ingredients can lead to unpredictable results and make preventing craters much more challenging.
Maintaining a Clean and Organized Baking Environment
A clean and organized baking environment contributes significantly to consistent results when preventing cratered flooded cookies. Dust, crumbs, or grease on your cookies or workspace can interfere with the smooth application and drying of the royal icing. Ensure your cookies are completely cool and free of any debris before flooding.
Optimizing your workspace for efficient cookie decorating means having all your tools ready – icing bags filled and secured, scribe tool handy, a flat surface for tapping, and your drying area prepared (whether air drying racks or a dehydrator). Working efficiently minimizes the time the icing is exposed before it can begin to set, reducing the chance of environmental factors interfering and helping you focus on precise application and bubble removal techniques.
Advanced Royal Icing Techniques for a Smooth Finish
Beyond basic flooding, several advanced royal icing techniques can contribute to preventing cratered flooded cookies and achieving a superior finish. Adding a tiny amount of glycerin (e.g., 1/4 teaspoon per cup of icing) can improve the flexibility of the dried icing, making it slightly less brittle and potentially reducing the risk of fine cracks or surface imperfections that could resemble or lead to craters.
Using high-quality meringue powder is key, as its stabilizers help the icing form a strong, smooth structure as it dries. Some decorators also advocate for sifting powdered sugar multiple times or even using a food processor briefly with the powdered sugar to ensure it's extra fine and lump-free before mixing the icing. Mastering the pressure applied when piping the outline and filling in the flood area with even pressure also helps in creating a level surface from the start.
Preventing cratered flooded cookies is a skill that combines careful preparation, precise techniques, and attention to detail. We've explored several advanced strategies, including understanding the crucial role of air bubbles, optimizing baking temperature, and mastering royal icing consistency. Key techniques like the "tap and shake" method, using a dehydrator for controlled drying, and employing a scribe tool are indispensable. Refining your cookie dough preparation and understanding how to troubleshoot common issues further equip you for success.
Achieving consistently crater-free flooded cookies is a rewarding milestone in your baking journey. It requires practice and patience, but by implementing these advanced strategies, you significantly increase your chances of success. Each perfectly smooth cookie is a testament to your growing skill and dedication. Embrace the process, learn from any imperfections, and enjoy the beautiful results of your efforts in preventing cratered flooded cookies and mastering the art of perfect cookie decorating.
Frequently Asked Questions
Craters in flooded cookies are primarily caused by air bubbles escaping from the royal icing before it sets. This can also be exacerbated by uneven cookie surfaces or icing that is too thin.
How can I prevent air bubbles from forming in my royal icing?
To minimize air bubbles, mix your royal icing on a low speed and avoid overmixing. After mixing, allow the icing to rest for a few minutes, then gently stir it to release trapped air before flooding.
What consistency of royal icing is best for preventing craters?
The ideal consistency for flooding is often described as "15-second icing," meaning a line drawn through the icing will disappear in approximately 15 seconds. Icing that is too thin is more prone to cratering.
Yes, ensure your cookies have a smooth and level surface before flooding. Use a rolling pin to achieve even thickness and consider lightly sanding any imperfections with a microplane or knife after baking.
Use a toothpick or scribe tool to gently pop any air bubbles as they appear while the icing is still wet. You can also use a dehydrator on low setting to help the icing set quickly and reduce cratering.
The seemingly simple act of baking a flooded cookie hides a universe of potential pitfalls, and mastering the art of preventing craters remains a crucial challenge for bakers of all levels. A perfectly smooth, glossy surface is not just aesthetically pleasing; it represents a deep understanding of batter consistency, baking temperatures, and the delicate dance between moisture and heat. This understanding, once achieved, unlocks a world of creative possibilities in cookie design.
The pursuit of the perfect flooded cookie transcends mere culinary skill; it reflects a broader human desire for precision and control. It's a microcosm of our attempts to navigate complex processes and achieve desired outcomes, whether in baking, engineering, or even life itself. Perfection is not attainable, but if we chase perfection we can catch excellence.
– Vince Lombardi. This quote speaks to the inherent challenge and ultimate reward of striving for flawlessness in any endeavor, even the seemingly trivial one of baking cookies. The journey itself, filled with experimentation and learning from mistakes, is as valuable as the final product.
Consider the lessons learned within these pages. Reflect on the subtle nuances of ingredient ratios, the importance of proper chilling, and the impact of oven temperature fluctuations. You now possess the knowledge to conquer the cratered cookie, but more importantly, you hold the key to unlocking your own baking potential. Embrace the challenge, experiment fearlessly, and let the pursuit of the perfect flooded cookie inspire you to strive for excellence in all your endeavors. The journey is just as rewarding as the destination.
Thanks for taking the time to explore advanced techniques for preventing those pesky craters in your flooded cookies! We hope you gained valuable insights and are ready to bake some flawless treats. Now, let's put that knowledge into action:
- Master the Perfect Flood: Practice your flooding technique with a batch of cookies, focusing on consistent, even spreading to avoid pooling and subsequent craters. This is the key to success!
- Share Your Cookie Creations: Show off your perfectly smooth cookies on social media using #BakeWithEaseCraterFree for a chance to be featured!
- Experiment with Different Icings: Try various consistencies and types of icing to see how they affect your cookie's surface. What unexpected discoveries will you make?
Ready to bake a batch of crater-free cookies that'll impress everyone? What unique ingredient or technique will you try next to elevate your flooding game?