
Unlock the Magic of Spun Sugar Garlands and Cages

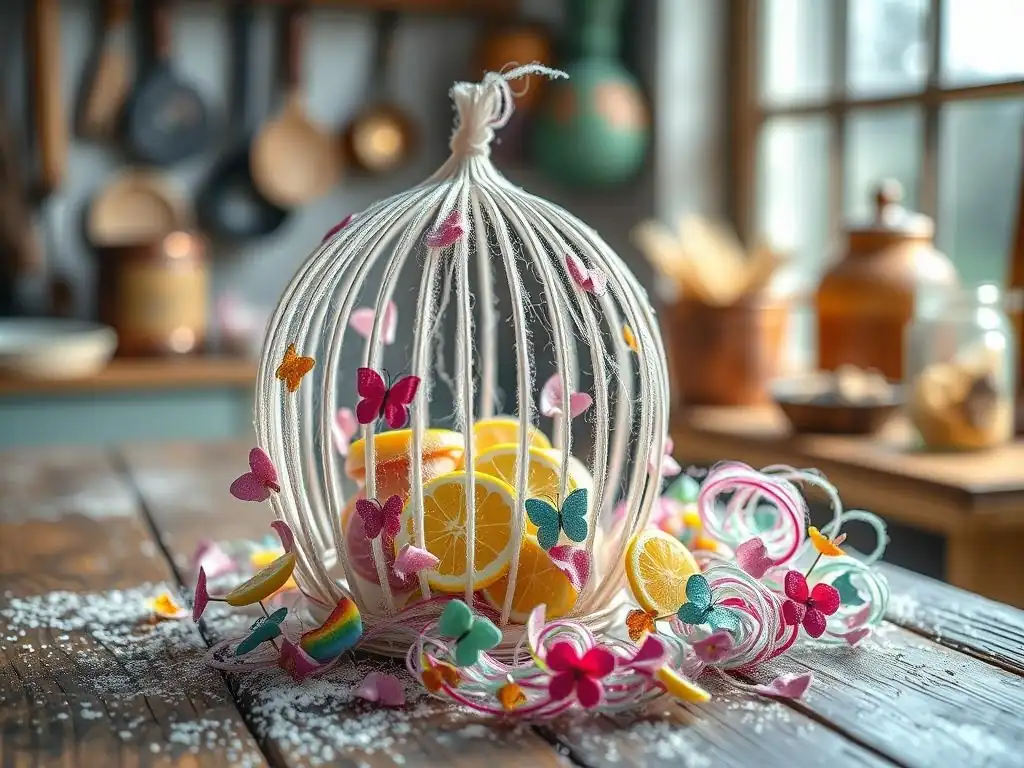
Welcome to BakeWithEase, your portal to the sweeter side of life! Ever dreamt of adorning your cakes with ethereal, glistening strands? Our Spun Sugar Garland Tutorial unveils the secrets to crafting these delicate masterpieces, transforming your desserts into edible works of art. Prepare to be amazed – and hungry – as we guide you through this advanced baking technique, turning simple sugar into breathtaking creations. Ready to sprinkle a little magic on your next bake? Let's begin!
- Unlock the Magic of Spun Sugar Garlands and Cages: A BakeWithEase.com Tutorial
- Introduction to Spun Sugar Artistry
- Essential Tools and Ingredients for Spun Sugar Success
- Mastering the Spun Sugar Garland Technique: A Step-by-Step Guide
- Crafting Exquisite Spun Sugar Cages: A Detailed Tutorial
- Troubleshooting Common Spun Sugar Problems
- Spun Sugar Garland and Cage Ideas & Inspiration
- Storing and Preserving Your Spun Sugar Creations
- Conclusion: Elevate Your Baking with Spun Sugar Art
-
Frequently Asked Questions
- What exactly is spun sugar, and what makes it unique?
- Is making spun sugar garlands and cages difficult for a beginner baker?
- What are the essential tools and ingredients needed for this spun sugar garland tutorial?
- How long will spun sugar garlands and cages last once they are made?
- Can I use different types of sugar to create spun sugar garlands?
- Final Reflection: The Enduring Allure of Spun Sugar Art
- Unleash Your Inner Sugar Artist: Craft Stunning Garlands & Cages!
Unlock the Magic of Spun Sugar Garlands and Cages: A BakeWithEase.com Tutorial
Introduction to Spun Sugar Artistry
What is Spun Sugar and Why Use It?
Spun sugar, also known as filetina, is a delicate confectionery art form created by pulling or spinning threads of cooked sugar syrup into fine, hair-like strands. This technique transforms simple sugar into an ethereal, visually stunning decoration. Beyond its aesthetic appeal, spun sugar offers a unique texture – a crisp, melt-in-your-mouth quality that provides a delightful contrast to softer components in a dessert, like a creamy mousse or a smooth ganache. Mastering this technique, as you will in this spun sugar garland tutorial, opens up a world of creative possibilities for elevating your baked goods.
The primary ingredients are minimal – sugar, water, and sometimes a touch of acid like lemon juice or cream of tartar – but the magic lies in precise temperature control and technique. By heating the sugar mixture to the hard crack stage, typically between 300°F and 310°F (149°C to 154°C), the water evaporates, leaving behind molten sugar that quickly hardens upon cooling. This brief window of workability is what allows the sugar to be stretched and spun into incredibly fine threads before it sets.
The Allure of Spun Sugar Garlands and Cages in Baking
Spun sugar garlands and cages are particularly captivating forms of sugar work, adding drama and elegance to any dessert. A spun sugar garland tutorial focuses on creating flowing, interconnected threads that can be draped over cakes, wrapped around dessert plates, or formed into intricate nests. These delicate structures catch the light beautifully and add an instant touch of sophistication. Imagine a simple chocolate cake transformed by a cascade of golden spun sugar threads!
Cages, on the other hand, are more architectural, providing a stunning edible dome or structure around a dessert. Crafted by spinning sugar around a mold, they create a fragile, often hollow form that encases or tops a creation.
A perfect example is a raspberry tart crowned with a delicate spun sugar cage, offering a visual surprise and a delightful textural element when broken into. Both garlands and cages demonstrate a high level of skill and artistry, making them popular choices for special occasion cakes and plated desserts in professional settings, and impressive projects for the home baker looking to explore advanced techniques.
Essential Tools and Ingredients for Spun Sugar Success
Must-Have Equipment for Creating Spun Sugar
Working with hot sugar requires specific tools for safety and precision. A heavy-bottomed saucepan is essential as it distributes heat evenly, preventing the sugar from burning in spots. A reliable candy thermometer is non-negotiable; achieving the exact hard crack stage temperature (300-310°F or 149-154°C) is critical for successful spinning. Even a few degrees off can result in sugar that's too soft to spin or too brittle to work with.
You'll also need a heatproof surface or baking sheet lined with parchment paper or a silicone mat to catch the spun sugar threads. For spinning, pastry chefs often use a fork, whisk, or a specialized sugar spinning tool. Protection is paramount: heat-resistant gloves are highly recommended to prevent severe burns from the extremely hot sugar. Having everything prepped and within easy reach before you start cooking the sugar will make the process smoother and safer.
Key Ingredients for Perfect Spun Sugar
The foundation of spun sugar is granulated sugar and water. A common ratio is 2 parts sugar to 1 part water, for example, 400 grams of sugar to 200 ml of water. This proportion provides enough liquid to dissolve the sugar before heating, minimizing the risk of crystallization.
Adding an acid, such as a small amount of lemon juice (about 1-2 teaspoons per batch) or cream of tartar, is highly recommended. The acid acts as an invert sugar, breaking down sucrose into glucose and fructose. This process helps prevent the sugar from crystallizing as it cooks and cools, resulting in a smoother, more pliable syrup that is easier to spin into fine threads. Using high-quality ingredients ensures a clear, golden spun sugar that looks and tastes beautiful.
Safety Precautions When Working with Hot Sugar
Working with sugar heated to over 300°F (150°C) is inherently dangerous, as spills can cause severe burns. Always wear long sleeves and closed-toe shoes to protect your skin. Keep pets and children out of the kitchen while you are working with hot sugar.
As mentioned, heat-resistant gloves are crucial when handling the hot syrup or spun threads. Have a bowl of ice water nearby – not to put your hands in if you get burned (that can worsen the burn), but as a reminder of the danger and to potentially cool down tools quickly if needed away from your skin. Never leave the melting sugar unattended, as it can go from perfectly cooked to burnt very quickly.
If you do spill hot sugar on yourself, immediately run the affected area under cool water for at least 15-20 minutes and seek medical attention if necessary. Your safety is the most important ingredient in this spun sugar garland tutorial.
Mastering the Spun Sugar Garland Technique: A Step-by-Step Guide

Step 1: Preparing the Sugar Syrup for Spinning
Begin by combining your granulated sugar and water in your heavy-bottomed saucepan. Add the acid, like lemon juice or cream of tartar, at this stage. Stir gently over low heat only until the sugar is completely dissolved. It's important not to stir once the mixture starts boiling, as this can encourage crystallization.
Once the sugar is dissolved, increase the heat to medium-high and insert your candy thermometer. Allow the syrup to boil without stirring. You'll see the syrup clear up as it cooks. Continue to heat the syrup until it reaches the hard crack stage, between 300°F and 310°F (149°C to 154°C). The color will transition from clear to a pale golden amber. Remove the pan immediately from the heat once the target temperature is reached.
Step 2: Achieving the Perfect Sugar Consistency
After removing the sugar from the heat, you need to let it cool slightly to the ideal spinning consistency. This usually takes just a minute or two. The sugar will be thick but still fluid enough to drip in fine streams. If it cools too much, it will become too hard to spin effectively. If it's too hot, the threads will be too fine and break easily.
You can test the consistency by carefully dipping a fork into the sugar and lifting it. The sugar should form fine, thin threads that solidify quickly. If it drips in thick blobs, it's still too hot. If it hardens instantly and breaks before you can even lift it, it's too cool – you can gently rewarm it over very low heat for just a few seconds, being careful not to burn it. This brief cooling period is vital for creating the long, delicate strands needed for a successful spun sugar garland tutorial.
Step 3: Setting Up Your Spun Sugar Spinning Station
Preparation is key to managing the fast-paced process of spinning sugar. Clear a large workspace. Lay down parchment paper or a silicone mat on a clean, flat surface or baking sheet. Some bakers prefer to spin sugar between the backs of two chairs placed apart, allowing the threads to fall in the air before collecting them. Others spin over a dowel rod suspended between two supports.
Have your spinning tool (fork, whisk, or specialized tool) ready. Ensure you are wearing your heat-resistant gloves. The idea is to create a controlled environment where you can easily collect the fine sugar threads as they are spun. Having everything ready before you start spinning ensures you can work efficiently during the brief window when the sugar is at the perfect temperature.
Step 4: The Art of Spinning Sugar Strands
Once the sugar is at the correct temperature and consistency, dip your spinning tool into the syrup, allowing excess to drip back into the pan. Then, quickly move the tool back and forth over your prepared surface or between your chairs/dowel rod. The sugar will stretch into fine threads as you move the tool.
Work quickly and fluidly. You can vary the speed and distance of your movements to create different thicknesses and lengths of threads. As the sugar in the pan cools and becomes harder to spin, you may need to gently warm it again over very low heat for just a moment. Collect the spun threads carefully as they solidify. They are incredibly fragile! This step is the heart of the spun sugar garland tutorial, requiring practice to get just right.
Step 5: Assembling Your Spun Sugar Garland
As you collect the spun sugar threads, they will likely form loose clumps or nests. To assemble a garland, gently gather these clumps together. You can twist, shape, or layer the threads to create the desired form. For a flowing garland, you might gently pull and arrange the threads into a long, delicate chain.
Work with a light touch; spun sugar is extremely brittle. You can use the heat from your hands (even through gloves) slightly to help shape the threads, but be careful not to melt them. Once assembled, the garland can be carefully transferred to your dessert. For a cake, you might drape it over the sides or across the top. For a plated dessert, it can be coiled or arranged artfully on the plate just before serving.
Tips for Avoiding Common Spun Sugar Garland Mistakes
Several pitfalls can derail your spun sugar efforts. Crystallization is a common issue, often caused by stirring the syrup while it's boiling or by having sugar crystals on the sides of the pan. Wiping down the sides of the pan with a wet pastry brush before boiling can help. Burning the sugar results in a dark, bitter product that is unusable; always use a thermometer and remove from heat promptly.
Working with sugar that is too hot or too cool will make spinning difficult – practice identifying the correct consistency in Step 2. Finally, humidity is the enemy of spun sugar. Avoid making it on rainy or humid days if possible, as it will quickly absorb moisture and become sticky or collapse. Following each step precisely in this spun sugar garland tutorial minimizes these risks.
Crafting Exquisite Spun Sugar Cages: A Detailed Tutorial
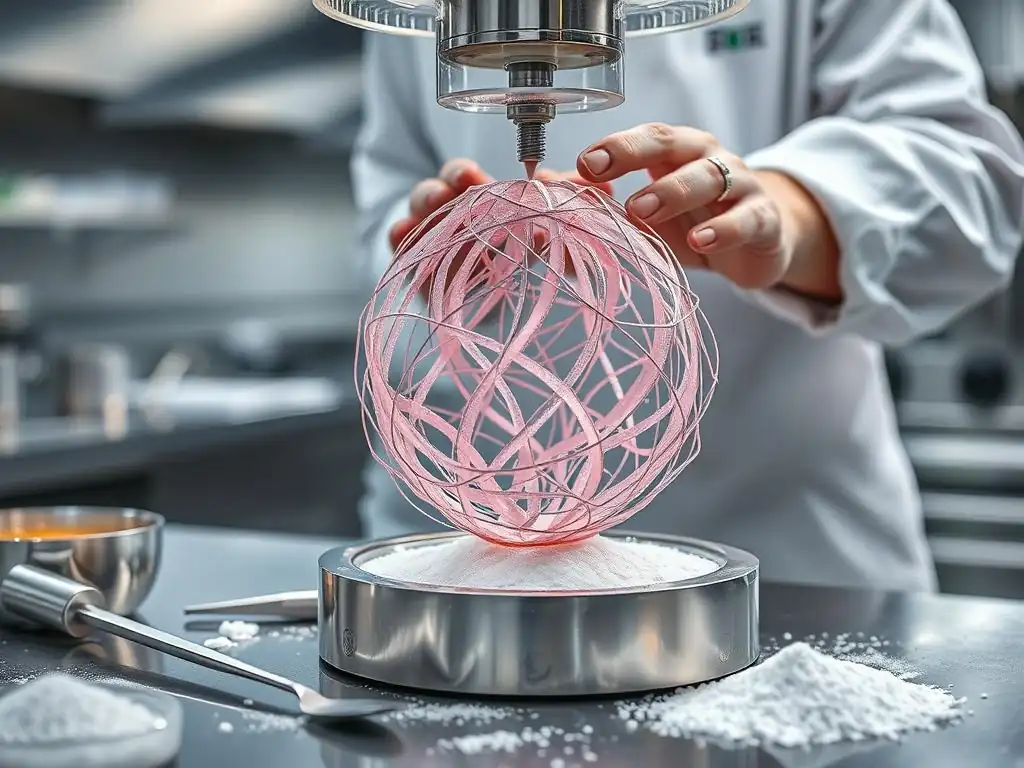
Preparing the Cage Form: Using a Stainless Steel Bowl
To create a spun sugar cage, you need a form to spin the sugar around. A clean, smooth stainless steel bowl is a popular and effective choice. Invert the bowl onto a surface covered with parchment paper or a silicone mat. Ensure the outside of the bowl is perfectly clean and dry.
Some bakers lightly oil the outside of the bowl with a neutral vegetable oil or non-stick spray, then wipe off almost all of it with a paper towel, leaving just a微 lượng (trace amount). This helps the sugar cage release cleanly once it hardens. The size and shape of the bowl will determine the final dimensions and curvature of your spun sugar cage. A standard mixing bowl might yield a cage suitable for covering a small tart or individual dessert portion.
Spinning Sugar Around the Form
Once your bowl is prepared and inverted, and your sugar syrup has reached the hard crack stage (300-310°F / 149-154°C) and cooled slightly to spinning consistency, you can begin. Dip your spinning tool (fork, whisk, etc.) into the syrup.
Hold the tool a few inches away from the inverted bowl and move it rapidly back and forth, allowing the fine sugar threads to wrap around the curved surface of the bowl. Work methodically, covering the entire surface of the bowl with layers of spun sugar threads. You can create a dense cage by spinning many layers or a more open, airy cage with fewer passes. Rotate the bowl as needed to ensure even coverage.
Solidifying and Removing the Spun Sugar Cage
As you spin the sugar around the bowl, the threads will cool and harden almost instantly upon contact with the cooler surface. Continue spinning until you have achieved the desired thickness and structure for your cage.
Once finished, allow the spun sugar cage to sit on the bowl for a few minutes to harden completely. This is a critical step in this spun sugar garland tutorial variant. To remove the cage, gently lift the bowl. The spun sugar structure should have solidified into a rigid cage form. Carefully slide or lift the cage off the bowl. If you lightly oiled the bowl, it should release relatively easily. If it's sticking, a very gentle twist of the bowl might help, but be extremely careful not to break the delicate structure.
Creative Cage Designs and Embellishments
The basic spun sugar cage can be customized in many ways. You can spin different thicknesses of threads to create varied textures. Try adding a second color by making a separate small batch of tinted sugar syrup (using gel food coloring added before cooking) and spinning it in layers with the clear sugar.
Embellishments can be added after the cage is formed. Small sugar flowers or edible glitter can be attached using a tiny drop of warm, clear sugar syrup as glue. You can also create a base for the cage by spinning a denser disc of sugar on parchment paper, then attaching the cage to it with a little warm sugar. The possibilities for using this spun sugar garland tutorial technique for cages are vast, limited only by your imagination.
Troubleshooting Common Spun Sugar Problems
Dealing with Crystallization
Crystallization is a frequent frustration when making spun sugar. It occurs when dissolved sugar begins to revert to its solid, crystalline state, often resulting in a grainy texture or a solid block of sugar instead of a smooth syrup. The primary culprits are undissolved sugar crystals left on the sides of the pan or accidentally introducing foreign particles (like dust or undissolved sugar) into the boiling syrup through stirring.
To combat this, ensure all sugar is dissolved before the syrup boils. Wipe down the sides of the pan with a wet pastry brush during the initial heating phase to wash down any clinging sugar crystals. Avoid stirring the syrup once it begins to boil. If crystallization does occur, sometimes adding a little more water and reheating can dissolve the crystals, but often it's best to start over for the finest results required for a delicate spun sugar garland tutorial.
Preventing Sugar from Sticking
Spun sugar is delicate and prone to sticking to surfaces it shouldn't. When spinning, ensure your collection surface (parchment paper, silicone mat) is clean and dry. If spinning over a dowel or chair backs, ensure they are also clean.
For spun sugar cages, preparing the form (like the stainless steel bowl) is key. A very light coating of oil, wiped almost completely off, creates a barrier that aids in releasing the hardened sugar cage. Ensure the bowl is cool before spinning. If the sugar sticks stubbornly, sometimes chilling the form slightly can help the sugar contract and release, but be cautious as extreme temperature changes can also cause breakage.
Fixing Broken or Misshapen Spun Sugar
Given its fragile nature, breakage is almost inevitable when working with spun sugar. Small breaks in a garland can sometimes be "glued" back together using a tiny amount of warm, clear sugar syrup applied with a toothpick. For cages, larger breaks are more difficult to mend seamlessly.
Often, it's easier to incorporate broken pieces into other designs or use them as garnish rather than attempting a perfect repair. If a spun sugar garland or cage is significantly misshapen during spinning, you can sometimes gently reshape it while it's still slightly warm and pliable, but once it hardens completely, reshaping is very difficult without causing breakage. Practice is key to minimizing these issues; the more you follow this spun sugar garland tutorial, the better you'll become at handling the delicate threads.
Spun Sugar Garland and Cage Ideas & Inspiration

Spun Sugar Cake Decorations
Spun sugar is a spectacular way to decorate cakes, especially for weddings, anniversaries, or significant birthdays. A classic use involves creating a large, airy nest of spun sugar to top a cake, perhaps encircling fresh berries or a sugar flower. Another dramatic application is draping a delicate spun sugar garland around the tiers of a multi-tiered cake, creating a waterfall effect of shimmering threads.
Cages can also be used on cakes, often placed on top of a smaller cake tier or as a feature on a single-layer cake, encasing a decorative element within. Imagine a deep red velvet cake topped with a shimmering golden spun sugar cage! The lightness of the spun sugar provides a beautiful contrast to the density of the cake.
Spun Sugar Garnishes for Desserts
Beyond cakes, spun sugar makes an exquisite garnish for individual desserts. A small spun sugar nest can cradle a scoop of sorbet or ice cream on a plate. A delicate spun sugar garland can be draped artfully over a panna cotta or crème brûlée just before serving, adding height and visual interest.
Consider topping a chocolate lava cake with a small spun sugar cage filled with fresh raspberries. The possibilities are endless for adding a touch of gourmet flair to simpler desserts. Spun sugar elevates the perceived value and artistry of even a humble treat, making it feel special and luxurious.
Incorporating Spun Sugar into Plated Desserts
In professional kitchens, spun sugar is a staple for adding flair to plated desserts. Chefs use spun sugar garlands to create flowing lines across the plate, leading the eye to the main components. A spun sugar cage can be placed over a small dome of mousse or a fruit compote, requiring the diner to break through the delicate shell to access the treat inside, adding an interactive element.
Sometimes, spun sugar is formed into specific shapes, like bows or abstract sculptures, to complement the theme of the dessert. A common technique is to spin sugar threads around a cylindrical object to create a sugar "tube" that can be used vertically on the plate. Incorporating spun sugar transforms a dessert from just a dish into an edible work of art, demonstrating skill learned from mastering techniques like this spun sugar garland tutorial.
Storing and Preserving Your Spun Sugar Creations
Best Practices for Keeping Spun Sugar Fresh
Spun sugar's worst enemy is moisture. It is hygroscopic, meaning it readily absorbs water from the air, causing it to become sticky, lose its structure, and eventually dissolve. Therefore, the best way to store spun sugar creations is in a cool, dry environment.
An airtight container is essential to protect spun sugar from humidity. Place the spun sugar garland or cage gently inside the container, ideally with minimal stacking to prevent breakage. You can separate layers with parchment paper if necessary, but be careful not to crush the delicate threads.
Preventing Moisture Damage to Spun Sugar
To further protect spun sugar from moisture, consider adding desiccants to the storage container. Food-grade silica gel packets (often found in packaging for dried goods) can absorb excess moisture within the container, helping to keep the air dry and preserve the crispness of the sugar.
Avoid storing spun sugar in the refrigerator or freezer, as temperature fluctuations and condensation upon removal will quickly lead to moisture absorption and degradation. Ideally, spun sugar should be made as close to the time of serving as possible, especially in humid climates. If you must store it, a cool, air-conditioned room in an airtight container with a desiccant is your best bet for maintaining its delicate structure.
Conclusion: Elevate Your Baking with Spun Sugar Art
The Enduring Appeal of Spun Sugar Decorations
Spun sugar, whether in the form of a delicate spun sugar garland or an intricate spun sugar cage, possesses a timeless appeal in the world of patisserie. Its ability to transform simple sugar into shimmering, airy sculptures adds a touch of magic and sophistication to any dessert. The technique, while requiring precision and practice, is accessible to dedicated home bakers willing to master the fundamentals outlined in this spun sugar garland tutorial.
Creating spun sugar is not just about decoration; it's about adding texture, visual drama, and an element of surprise to your culinary creations. The contrast between the crisp, ephemeral sugar and the rich, soft dessert underneath is a sensory delight. Embracing spun sugar artistry allows you to push the boundaries of your baking skills and create truly memorable desserts that impress and enchant.
Further Resources for Advanced Sugar Work Techniques on BakeWithEase.com
Mastering spun sugar is a fantastic step into the world of advanced sugar work, but there's so much more to explore! BakeWithEase.com offers a wealth of resources for those looking to deepen their skills.
Explore our tutorials on pulled sugar for creating glossy ribbons and bows, blown sugar for crafting delicate sugar spheres and fruits, and poured sugar for making isomalt decorations and sugar glass. Each technique offers unique possibilities for dessert decoration. Continue your sugar work journey with us and discover how these advanced methods can transform your baking into edible art.
Frequently Asked Questions
What exactly is spun sugar, and what makes it unique?
Spun sugar is a delicate confectionery made by pulling cooked sugar into thin, hair-like strands. Its unique texture and airy appearance make it ideal for artistic dessert decorations. It adds a touch of elegance to any creation.
Is making spun sugar garlands and cages difficult for a beginner baker?
While it requires some practice, the BakeWithEase tutorial breaks it down into easy-to-follow steps. With patience and the right tools, even beginners can create beautiful spun sugar decorations. Don't be afraid to experiment!
What are the essential tools and ingredients needed for this spun sugar garland tutorial?
You'll primarily need sugar, water, corn syrup (to prevent crystallization), and food coloring (optional). Essential tools include a candy thermometer, a saucepan, and a mold or frame for shaping the spun sugar.
How long will spun sugar garlands and cages last once they are made?
Spun sugar is highly susceptible to moisture. To ensure longevity, store your creations in an airtight container with desiccant packets. They typically last for a few days in a dry, cool environment.
Can I use different types of sugar to create spun sugar garlands?
While granulated sugar is the most common and recommended, you can experiment with other types. However, be aware that using different sugars may affect the texture and color of the final product. Granulated sugar gives the best, most reliable results.
Final Reflection: The Enduring Allure of Spun Sugar Art
The delicate art of spun sugar, once a confectionery marvel confined to high-end pastry shops, is experiencing a vibrant resurgence. Its intricate beauty, now easily accessible through online tutorials and shared techniques, is transforming celebrations and adding a touch of whimsical elegance to events worldwide. This isn't just a fleeting trend; it's a testament to the enduring power of handcrafted beauty and the joy found in mastering a challenging skill.
The journey from simple sugar syrup to breathtaking spun sugar structures has been a deeply rewarding one for me, and I hope it has been for you too. The process itself is meditative, requiring patience, precision, and a healthy dose of creativity. It's a reminder that even the most seemingly fragile creations can possess immense strength and beauty. The best things in life are not things.
– Unknown. This quote resonates deeply with the ephemeral nature of spun sugar, highlighting the value of the experience and the artistry involved, rather than just the final product.
Now, I invite you to take this inspiration and create your own magic. Don't be afraid to experiment with colors, shapes, and designs. Let the spun sugar become a canvas for your imagination, a testament to your dedication, and a source of joy for yourself and those you share your creations with. The possibilities are as limitless as your creativity – so go forth and spin your own story!
Unleash Your Inner Sugar Artist: Craft Stunning Garlands & Cages!
Thanks for exploring the delightful world of spun sugar with us! You've now unlocked the secrets to creating breathtakingly beautiful and intricate sugar art. Ready to put your new skills to the test?
- Master the art of spun sugar: Practice your technique with the step-by-step guide you just read, focusing on perfecting your sugar pulls. This will be the foundation for all your future creations.
- Share your sugary masterpieces: Post pictures of your spun sugar creations on social media using #BakeWithEaseSpunSugar – let's inspire each other!
- Experiment with different flavors and colors: Try adding extracts or natural food coloring to your spun sugar – the possibilities are endless!
What incredible spun sugar design will you create next?