
Crafting Glossy Chocolate Shells for Bonbons and Desserts.

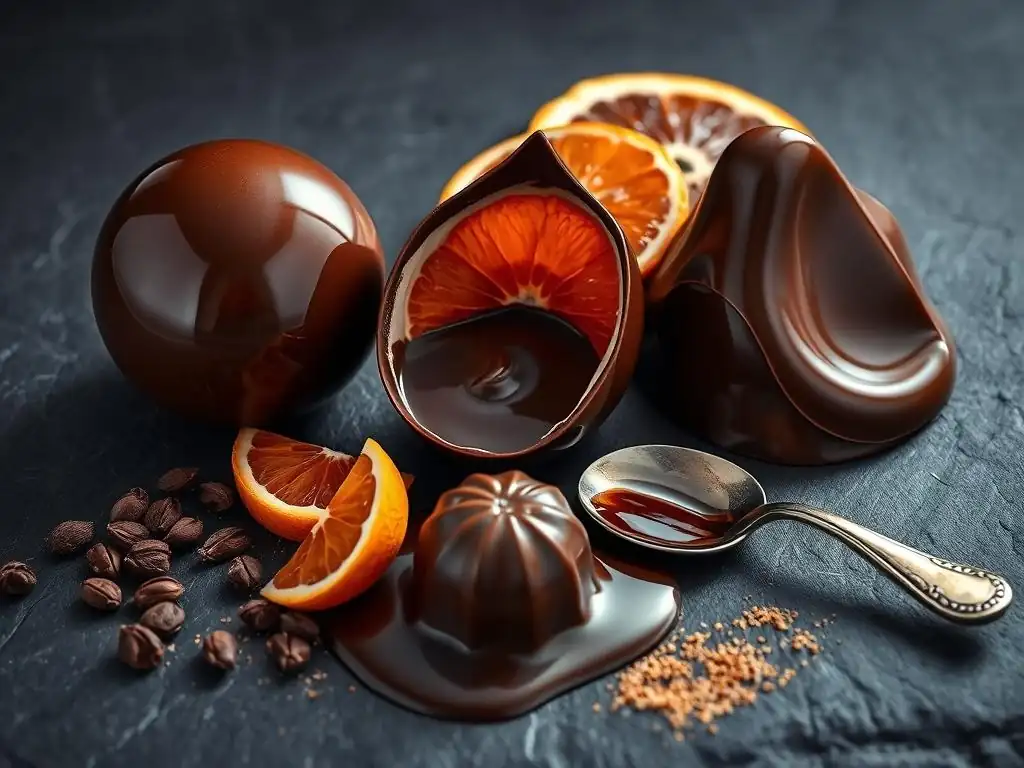
Welcome to BakeWithEase, your passport to a world of baking possibilities! Are you ready to elevate your desserts with a touch of professional elegance? Delve into our guide on crafting a glossy chocolate shell ganache recipe – a technique that transforms ordinary treats into extraordinary masterpieces. Discover the secrets behind achieving that perfect shine and satisfying snap, and unlock a world of creative confectionery. Intrigued? Let's begin!
- Introduction to Glossy Chocolate Shells
- Understanding Chocolate Tempering for Shells
- Glossy Chocolate Shell Ganache Recipe: Ingredients & Equipment
- Step-by-Step Guide: Crafting Your Glossy Chocolate Shell
- Troubleshooting Common Issues with Chocolate Shells
- Flavor Variations and Creative Ideas for Chocolate Shells
- Storing and Handling Your Finished Chocolate Shells
- Advanced Techniques: Beyond the Basic Chocolate Shell
- Conclusion: Mastering the Art of the Glossy Chocolate Shell
-
Frequently Asked Questions
- How do I achieve a perfectly glossy finish on my chocolate shell ganache?
- What type of chocolate is best for a glossy chocolate shell ganache?
- Can I use different types of fat in my glossy chocolate shell ganache besides heavy cream?
- What can I do if my chocolate shell ganache is too thick or too thin?
- How long does it take for a glossy chocolate shell ganache to set properly?
- Final Reflection: The Enduring Allure of a Perfect Glossy Chocolate Shell
- Unleash Your Inner Chocolatier: Craft Exquisite Chocolate Shells!
Introduction to Glossy Chocolate Shells
Creating stunning bonbons and desserts often hinges on one key element: the chocolate shell. A truly exceptional shell isn't just about enclosing a delicious filling; it's about achieving that flawless, mirror-like sheen that captivates the eye before the first bite. This glossy finish is the hallmark of professional-quality confectionery and elevates simple ingredients into edible works of art. Mastering the technique behind these shells unlocks a new level of sophistication in your baking repertoire, perfect for homemade gifts or impressing guests.
The journey to a perfect glossy chocolate shell involves understanding chocolate's unique properties, especially its crystalline structure. When chocolate is melted and cooled incorrectly, it can result in dull, streaky, or brittle shells. The desired gloss comes from aligning the fat crystals within the chocolate in a stable, uniform structure through a process known as tempering. This article, your BakeWithEase guide, will walk you through the essential steps, from choosing ingredients for your glossy chocolate shell ganache recipe to troubleshooting common issues, ensuring your shells are consistently beautiful and professional.
Why Master the Glossy Chocolate Shell Technique?
Mastering the glossy chocolate shell technique is crucial for anyone serious about creating high-quality bonbons, chocolate bars, or decorative elements for cakes and pastries. A properly tempered, glossy shell provides several key benefits beyond just aesthetics. Firstly, it gives the chocolate a satisfying snap when bitten into, a texture highly valued in fine confectionery. This crispness contrasts beautifully with soft fillings like ganache or caramel.
Secondly, a well-executed glossy shell is more stable at room temperature and less prone to melting quickly in your hands. This is due to the stable crystalline structure achieved through tempering. It also helps prevent "bloom," those unsightly gray streaks or patches that can appear on untempered chocolate over time, preserving the visual appeal and perceived freshness of your creations. For anyone aiming for professional results at home, understanding how to achieve this perfect finish is non-negotiable.
What Makes a Chocolate Shell "Glossy"?
The gloss on a chocolate shell is a direct result of successful chocolate tempering. Chocolate contains cocoa butter, a fat that can crystallize in several different forms, each with a different melting point and structure. Untempered chocolate contains a mix of unstable crystal forms, resulting in a dull, soft, and often streaky appearance.
Tempering is the process of heating and cooling chocolate precisely to encourage the formation of only the most stable crystal form, known as Beta (Type V) crystals. These crystals align tightly together, creating a smooth, hard surface that reflects light evenly, producing that coveted glossy finish. Think of it like polishing a surface – the smoother and more uniform the surface, the better it reflects light. Achieving this specific crystalline structure is the secret behind every beautiful, glossy chocolate shell you see in high-end patisseries.
BakeWithEase's Guide to Perfect Chocolate Shells
Welcome to the BakeWithEase comprehensive guide designed to demystify the process of creating perfect glossy chocolate shells. We understand that working with chocolate can sometimes feel intimidating, especially when aiming for that professional sheen. Our goal is to break down the steps, provide clear instructions, and share practical tips to help you succeed, whether you're a beginner or looking to refine your technique.
This guide will cover everything from understanding the science of tempering to selecting the best ingredients for your glossy chocolate shell ganache recipe. We'll walk you through different tempering methods, explain the essential equipment needed, provide a detailed step-by-step process for crafting your shells, and offer solutions to common problems. By the end of this guide, you'll have the knowledge and confidence to consistently produce beautiful, glossy chocolate shells for all your bonbon and dessert projects.
Understanding Chocolate Tempering for Shells
Tempering is arguably the most critical step in creating a glossy chocolate shell. It's the controlled process of melting chocolate, cooling it down to a specific temperature, and then gently reheating it slightly. This temperature manipulation ensures that the cocoa butter crystals within the chocolate form a stable structure, which is essential for achieving a shiny appearance, a firm texture with a good snap, and preventing fat bloom. Without proper tempering, your chocolate shells will be dull, soft, and prone to melting easily.
The success of tempering hinges on hitting specific temperature ranges for different types of chocolate (dark, milk, white) and maintaining those temperatures throughout the process. For instance, dark chocolate typically needs to be heated to around 115°F (46°C), cooled to about 82°F (28°C), and then brought back up to a working temperature of 88-90°F (31-32°C). Milk and white chocolate have slightly lower temperature ranges. These precise temperatures activate and stabilize the desired cocoa butter crystals, setting the stage for a perfect glossy chocolate shell.
The Importance of Tempering for a Glossy Finish
As discussed earlier, tempering is the cornerstone of a glossy finish on your chocolate shells. It's not just about making the chocolate look good; it's about creating a stable molecular structure that reflects light uniformly. When chocolate is simply melted and allowed to cool randomly, the cocoa butter crystals form haphazardly, resulting in a dull, matte surface. This is because the unstable crystal forms scatter light rather than reflecting it directly.
Proper tempering encourages the formation of stable Beta V crystals. These crystals are small, tightly packed, and uniformly distributed throughout the chocolate. When the chocolate sets, this ordered structure creates a smooth surface at a microscopic level. This smooth surface acts like a mirror, reflecting incident light directly back, which is what we perceive as gloss or shine. Furthermore, the stable structure ensures the chocolate contracts slightly as it cools, making it easier to release from molds and contributing to that desirable "snap."
Different Tempering Methods for Chocolate Shells
There are several reliable methods for tempering chocolate, each with its pros and cons. The best method for you might depend on the amount of chocolate you're working with, the equipment you have available, and your comfort level. Regardless of the method chosen, the goal is always to melt the chocolate completely, introduce stable Beta V crystals (either by adding tempered chocolate or cooling to the seeding temperature), and then raise it back to the correct working temperature while maintaining the stable crystals.
Understanding these methods is key to successfully executing any glossy chocolate shell ganache recipe that requires tempered chocolate. While the seed method is often recommended for beginners due to its simplicity, the tablier method offers more control for larger quantities. The microwave method provides convenience for smaller batches but requires careful attention to avoid burning. Each method, when performed correctly, can yield beautifully tempered chocolate ready to become a perfect glossy shell.
Seed Tempering for Chocolate Shells
The seed tempering method is perhaps the most popular and easiest method for home bakers. It involves melting about two-thirds of your chocolate completely, then adding the remaining one-third of finely chopped, untempered chocolate (the "seed") to the melted chocolate. The finely chopped chocolate contains stable Beta V crystals. As the melted chocolate cools, these stable crystals melt slowly and act as a template, encouraging the liquid chocolate to crystallize into the desired Beta V form.
For instance, if tempering 300g of dark chocolate, you would melt 200g to around 115°F (46°C). Then, you'd gradually stir in the remaining 100g of finely chopped chocolate. Stir continuously until all the chopped chocolate has melted and the temperature drops to the working temperature (88-90°F or 31-32°C for dark chocolate). This method is effective because the added seed chocolate provides the necessary stable crystals without requiring precise cooling on a surface like the tablier method.
Tablier Tempering for Chocolate Shells
The tablier method, also known as the marble or table method, is a classic technique often used by professional chocolatiers, particularly for larger quantities. It involves melting all of the chocolate to its initial melting temperature (e.g., 115°F/46°C for dark). Then, about two-thirds of the melted chocolate is poured onto a clean, cool surface, typically marble or granite.
Using a spatula and scraper, the chocolate is worked back and forth across the surface, spreading and gathering it, until it cools and starts to thicken slightly, reaching the seeding temperature (around 82°F/28°C for dark chocolate). This cooling and movement encourage crystal formation. Once it reaches the correct temperature and texture, the cooled chocolate is scraped back into the bowl with the remaining one-third of warm melted chocolate.
This mixes the stable crystals formed on the cool surface throughout the batch, bringing the overall temperature up to the working temperature (88-90°F/31-32°C for dark). This method requires practice but offers excellent control over the cooling process.
Microwave Tempering for Chocolate Shells
The microwave tempering method is convenient for small quantities of chocolate, making it suitable for testing a glossy chocolate shell ganache recipe or making a small batch of shells. It's a type of seed tempering done directly in the microwave. You start by placing finely chopped chocolate in a microwave-safe bowl. Heat the chocolate in short bursts (e.g., 20-30 seconds), stirring thoroughly after each burst.
Continue heating and stirring until the chocolate is mostly melted, with just a few small pieces remaining. The goal is to melt the chocolate using the residual heat from the already melted chocolate and the bowl itself. Remove the bowl from the microwave and stir continuously until all the remaining pieces melt and the chocolate reaches the correct working temperature (88-90°F/31-32°C for dark, 86-88°F/30-31°C for milk, 84-86°F/29-30°C for white). This method relies on careful monitoring and stirring to avoid overheating, which would destroy the tempered state.
Glossy Chocolate Shell Ganache Recipe: Ingredients & Equipment
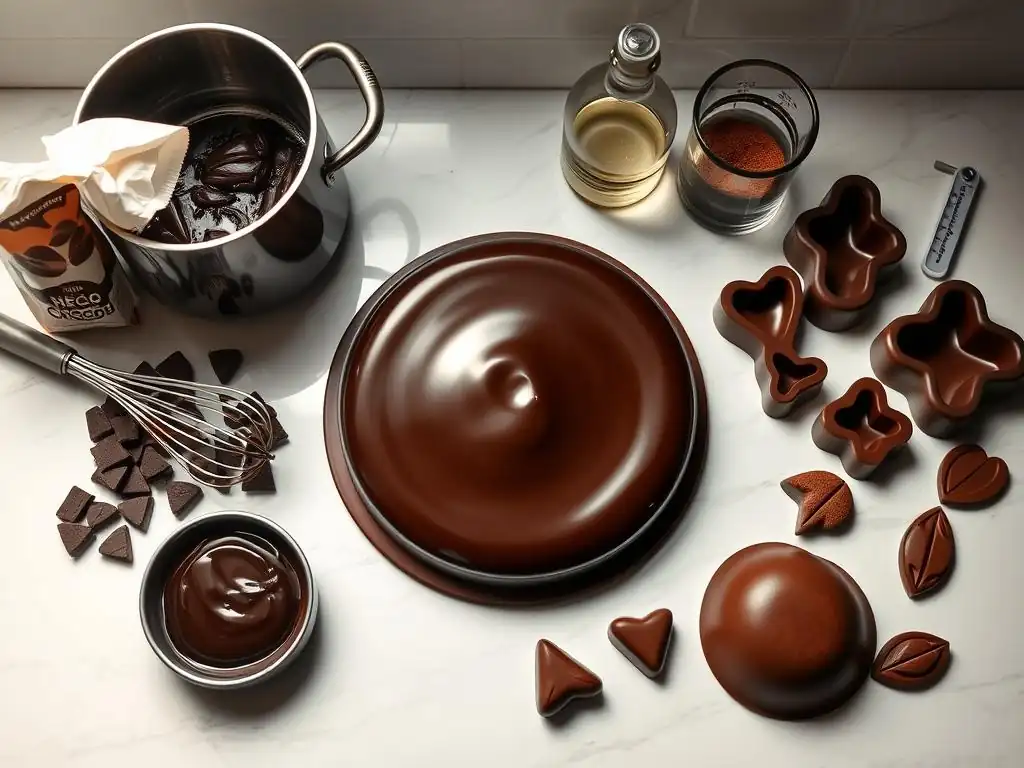
Creating a perfect glossy chocolate shell for your bonbons or desserts starts with selecting the right ingredients and having the necessary tools at hand. While the term "ganache" usually refers to a chocolate and cream mixture used as a filling, the principles of using high-quality chocolate and potentially adding ingredients for texture and stability are relevant when considering the chocolate itself for the shell, or if you're making a unique shell that incorporates other elements for flavor and gloss.
For a standard glossy chocolate shell, the primary ingredient is high-quality chocolate, tempered correctly. However, some recipes might incorporate small amounts of other fats or syrups to enhance gloss or workability, particularly in compound coatings, but for true chocolate shells, it's about the chocolate and its tempering.
Let's focus on the core components and potential additions that contribute to a flawless finish. The quality of your chocolate is paramount, as it dictates the behavior of the cocoa butter during tempering. Beyond the chocolate, other ingredients sometimes mentioned in shell recipes or related ganache fillings can play a role in texture and shine, though they aren't strictly part of the shell itself in the traditional sense. Understanding the role of each potential ingredient ensures you select the best components for your glossy chocolate shell ganache recipe or the chocolate tempering process itself.
Essential Ingredients for the Perfect Chocolate Shell Ganache
For a classic, pure chocolate shell, the only essential ingredient is high-quality chocolate suitable for tempering (couverture chocolate is best). However, if your "glossy chocolate shell ganache recipe" implies a shell made from a ganache-like mixture that sets firmly, or if you are using a technique where additions enhance shine, the following ingredients are relevant. It's important to clarify that a true, temperable chocolate shell is primarily just tempered chocolate. The term "ganache recipe" might be used loosely here to encompass a technique or mixture that results in a shell-like structure.
Assuming we are focused on the chocolate part of the shell, or a shell-like coating that isn't pure tempered chocolate, the quality of the chocolate is still critical. For recipes where a ganache-like mixture is used for the shell (less common for bonbons, more for specific dessert coatings), ingredients like cream, glucose, and butter might be included. Let's detail the role of these if they were part of a shell recipe, keeping in mind a classic bonbon shell is just tempered chocolate.
High-Quality Chocolate: Choosing the Right Type
The foundation of any great chocolate shell is the chocolate itself. For tempering and achieving a brilliant gloss, you need to use couverture chocolate. Couverture chocolate is professional-grade chocolate that contains a higher percentage of cocoa butter (typically 30-39%) compared to standard baking or eating chocolate. This higher cocoa butter content is essential because it provides the necessary fat structure for successful tempering and a superior glossy finish.
Avoid using chocolate chips or standard baking bars unless they explicitly state they are couverture or suitable for tempering. These often contain stabilizers or lower cocoa butter content that prevents proper tempering and results in a dull finish. Choose a reputable brand like Callebaut, Valrhona, or Guittard for consistent, high-quality results. The type (dark, milk, or white) depends on your preference and the recipe, but the principle of using couverture remains constant for a glossy chocolate shell.
Heavy Cream: Achieving the Ideal Consistency
While not used in a traditional tempered chocolate shell (which is just chocolate), heavy cream is a key component in ganache fillings and could potentially be used in a non-tempered coating or a shell made from a ganache that sets firm. In a ganache, hot heavy cream is poured over chopped chocolate. The heat from the cream melts the chocolate, and the mixture is then emulsified into a smooth, rich filling.
The ratio of chocolate to cream dictates the consistency of the ganache – more chocolate results in a firmer ganache, while more cream makes it softer. If a recipe were to use a ganache-like mixture for a shell, the cream would contribute to the texture and richness, but it would also prevent the mixture from achieving the true snap and temper of pure chocolate. For a glossy chocolate shell ganache filling, the cream provides the smooth, melt-in-your-mouth texture.
Glucose Syrup: Adding Shine and Stability
Glucose syrup (or corn syrup) is sometimes added to ganache fillings, and occasionally in trace amounts to chocolate coatings (though rarely in pure tempered shells). In ganache, glucose syrup helps to prevent sugar crystallization, resulting in a smoother, more stable texture. It also adds a subtle sheen to the ganache itself.
If included in a shell-like coating that isn't pure tempered chocolate, glucose could contribute to gloss and flexibility. However, for a classic, hard, glossy chocolate shell made from tempered chocolate, glucose is not typically used in the shell material itself. Its primary role in confectionery related to shells is usually within the ganache filling or other internal components, helping to create a smooth, glossy interior that complements the outer shell.
Butter: Enhancing Flavor and Texture
Butter is another ingredient commonly found in ganache recipes, but not in a pure tempered chocolate shell. Adding a small amount of softened butter to a finished ganache and whisking it in can significantly enhance its richness, smoothness, and gloss. The fat from the butter contributes to a luxurious mouthfeel.
In the context of a glossy chocolate shell ganache recipe for a filling, butter is often whisked in at the end to add extra shine and a silky texture. For the shell itself, adding butter to tempered chocolate would alter its composition, potentially interfering with the tempering process and the desired snap. Therefore, for a classic glossy chocolate shell, rely on the quality of the chocolate and proper tempering, not added butter.
Necessary Equipment for Making Chocolate Shells
Having the right tools makes the process of creating glossy chocolate shells much easier and more precise. While you don't need a professional chocolate lab, some basic equipment is highly recommended, especially when it comes to accurately monitoring temperatures, which is crucial for successful tempering. Investing in these few items will significantly improve your results and consistency when working with chocolate.
From melting the chocolate gently to ensuring its temperature is within the precise tempering range, each piece of equipment plays a vital role. Don's skimp on the tools that provide accuracy, particularly the thermometer. Using guesswork for temperature during tempering is a common pitfall that leads to dull, untempered chocolate.
Double Boiler or Heat-Safe Bowl and Saucepan
A double boiler or a makeshift version using a heat-safe bowl set over a saucepan of simmering water is the preferred method for melting chocolate for tempering. This gentle, indirect heat prevents the chocolate from overheating or scorching, which can ruin its temperability and flavor. Ensure the bottom of the bowl does not touch the water.
The steam from the simmering water provides consistent, gentle heat to melt the chocolate evenly. Stir the chocolate frequently as it melts to ensure uniform heating. Using direct heat from a stovetop or microwave without careful control can easily burn the chocolate or take it out of temper.
Digital Thermometer: Precision is Key
A reliable digital thermometer is absolutely essential for successful chocolate tempering and creating a glossy chocolate shell. Tempering relies on hitting specific temperature points precisely. A thermometer that can accurately measure temperatures within a degree or two is invaluable.
An instant-read digital thermometer is ideal, allowing you to quickly check the temperature of your chocolate as it heats and cools. Avoid old-fashioned candy thermometers that might not be accurate enough for the narrow temperature ranges required for tempering. Precision in temperature monitoring is the single most important factor after chocolate quality for achieving that perfect glossy finish.
Spatulas and Scrapers: Ensuring Smoothness
You will need flexible spatulas and scrapers for working with chocolate. Silicone spatulas are excellent for stirring chocolate as it melts and for scraping down the sides of the bowl, ensuring all the chocolate is evenly heated or cooled.
If using the tablier tempering method, a sturdy metal scraper is necessary for working the chocolate on the cool surface. Having clean, dry spatulas dedicated to chocolate work helps prevent contamination from water or other ingredients, which can cause the chocolate to seize.
Bonbon Molds or Parchment Paper
To form your chocolate shells, you will need either polycarbonate bonbon molds or parchment paper. Polycarbonate molds are highly recommended for creating uniform, professional-looking glossy chocolate shells. Their smooth surface contributes to the shine, and the rigid material makes it easy to fill and unmold.
If you don't have molds, you can create free-form shells or discs on parchment paper, although they won't have the same uniform shape or potentially the same level of gloss as those from a polished mold. Ensure your molds are perfectly clean and dry, as any moisture or residue will prevent the chocolate from setting properly and releasing cleanly.
Step-by-Step Guide: Crafting Your Glossy Chocolate Shell
Crafting a perfect glossy chocolate shell involves careful execution of each step, from preparing your chocolate to setting the final shell. This detailed guide will walk you through the process, assuming you have your high-quality chocolate and necessary equipment ready. Following these steps precisely, especially the temperature guidelines, is crucial for achieving that desired professional shine and snap.
Remember that practice makes perfect. Your first attempt might not be flawless, but understanding each stage will help you identify where things went wrong and improve on subsequent tries. This step-by-step approach is designed to make the glossy chocolate shell ganache recipe technique accessible and achievable for home bakers.
Preparing the Chocolate Shell Ganache
While a true chocolate shell for bonbons is made solely from tempered chocolate, let's consider the process if your "glossy chocolate shell ganache recipe" implies a mixture or if you are making a ganache filling that needs to be prepared before filling shells. If you are simply tempering chocolate for shells, skip the cream, glucose, and butter steps below. However, if you're working on a recipe that incorporates these into a shell-like coating, follow these instructions.
Assuming we are preparing a ganache filling for glossy chocolate shells, or a coating that uses ganache principles: The process involves melting chocolate, heating cream, combining them, and potentially adding other ingredients. The key is to create a smooth, emulsified mixture ready to be piped into your shells once they are set.
Melting the Chocolate Properly
Begin by finely chopping your high-quality couverture chocolate. The finer the chop, the faster and more evenly it will melt. Place the chopped chocolate in your heat-safe bowl or the top of your double boiler. Heat the water in the saucepan below to a gentle simmer – do not let it boil vigorously, as steam can introduce moisture into the chocolate.
Place the bowl of chocolate over the simmering water, ensuring the bottom doesn't touch the water. Stir the chocolate gently and continuously with a clean, dry spatula. Melt the chocolate until it is completely smooth and reaches the initial melting temperature (e.g., 115°F/46°C for dark chocolate). Remove the bowl from the heat as soon as it's fully melted. Avoid the temptation to rush this step by turning up the heat too high.
Incorporating the Cream and Glucose Syrup
(Note: This step is for preparing a ganache filling or a ganache-based coating, not a pure tempered chocolate shell).
If making a ganache filling for your glossy chocolate shells, heat the heavy cream in a separate saucepan until it just comes to a simmer. You can also gently warm glucose syrup with the cream if your recipe calls for it. Once the cream is hot, pour it over the finely chopped or already melted chocolate.
Let the mixture stand for a minute or two to allow the heat from the cream to melt the chocolate further. Then, starting in the center of the bowl, gently whisk or stir the mixture with a spatula or whisk in small circles. Gradually expand your circles to incorporate all the chocolate and cream until a smooth, emulsified ganache forms. Avoid whisking vigorously, as this can incorporate air bubbles.
Adding Butter for Extra Gloss and Flavor
(Note: This step is for preparing a ganache filling, not a pure tempered chocolate shell).
If your glossy chocolate shell ganache filling recipe includes butter, add softened, room-temperature butter to the warm ganache after it has emulsified. Cut the butter into small pieces before adding.
Whisk or stir the butter into the ganache until it is completely melted and incorporated. This will give the ganache a richer flavor and a silkier, more glossy texture. Ensure the ganache is still warm enough to melt the butter easily but not so hot that the butter separates.
Now comes the crucial step for the glossy finish: tempering the chocolate. As previously explained, this process aligns the cocoa butter crystals. Whether you used the seed, tablier, or microwave method, the principle is the same: cool the chocolate to the seeding temperature, then gently reheat to the working temperature while maintaining the stable crystals. This step is essential for any glossy chocolate shell ganache recipe aiming for a professional result.
Let's assume you are tempering pure chocolate for the shell using one of the methods described earlier. Accurate temperature control during this stage is paramount. A few degrees too high or too low can mean the difference between a perfectly glossy shell and a dull, bloomed one.
Monitoring the Temperature Closely
Use your digital thermometer to constantly monitor the temperature of your chocolate as you temper it. If using the seed method, stir the melted chocolate with the seed chocolate until it cools to the target seeding temperature (e.g., 82°F/28°C for dark). Then, gently reheat it, often over the warm water bath (removed from heat), stirring until it reaches the working temperature (88-90°F/31-32°C for dark).
If using the tablier method, monitor the temperature as you work the chocolate on the surface until it reaches the seeding temperature, then mix it back with the reserved chocolate and check the final working temperature. For the microwave method, check the temperature after each short heating burst and continuous stirring until it reaches the working temperature. Always stir the chocolate well before taking a temperature reading to ensure accuracy.
Maintaining the Temper During the Shelling Process
Once your chocolate is tempered and at the correct working temperature, it's crucial to maintain that temperature range while you are working with it. If the chocolate cools too much, it will become too thick to work with and may start to set incorrectly. If it gets too hot, the stable crystals will melt, and you'll lose the temper.
Keep the bowl of tempered chocolate over a very gently warm water bath (with the heat off) or use a warming pad designed for chocolate to keep it within its working temperature range. Stir the chocolate frequently. If it starts to cool and thicken, gently warm it a degree or two while stirring constantly, ensuring it doesn't go above the maximum working temperature. This keeps the chocolate fluid and tempered, ready for molding or coating.
Molding or Creating the Chocolate Shells
With your chocolate perfectly tempered and at the correct working temperature, you are ready to form your glossy chocolate shells. The method will depend on whether you are using bonbon molds or creating free-form shapes. Both require working quickly and efficiently while the chocolate remains tempered.
Using polycarbonate molds is the standard for achieving consistent, professional-looking shells. They help create that smooth, reflective surface necessary for a high-gloss finish. Working with molds also allows for uniform thickness, which contributes to the desirable snap.
Using Bonbon Molds for Uniform Shells
Ensure your polycarbonate molds are spotlessly clean and completely dry before you begin. Any residue or moisture will prevent the chocolate from releasing cleanly and can ruin the glossy finish. Pour or ladle the tempered chocolate into the mold cavities, filling them completely. Tap the mold firmly on your work surface several times to remove any air bubbles trapped against the mold's surface.
Quickly invert the mold over your bowl of tempered chocolate, allowing the excess chocolate to drain out. Tap the mold again to help gravity pull out as much chocolate as possible, leaving a thin, even layer coating the inside of the cavities. Use a clean scraper or spatula to scrape the excess chocolate from the top surface of the mold, ensuring clean edges. This creates the shell structure.
Free-Form Shells on Parchment Paper
If you are not using molds, you can create free-form glossy chocolate shells or shapes on parchment paper. For simple discs or abstract shapes, you can pour or spread tempered chocolate onto parchment paper. Use an offset spatula to spread it to your desired thickness.
For creating hollow spheres or other shapes without molds, you might use techniques involving balloons (ensure they are food-safe and clean) dipped in tempered chocolate or by piping shapes onto parchment paper and allowing them to set. While these methods can produce interesting shapes, achieving a consistently smooth, glossy finish might be more challenging than with polished polycarbonate molds.
Thinning the Ganache for a Delicate Shell
(Note: This applies if you are using a ganache-like mixture for a shell-like coating, not a pure tempered chocolate shell).
If your "glossy chocolate shell ganache recipe" involves a ganache mixture intended to be used as a coating or a softer shell (less common for bonbons), you might need to adjust its consistency. If the ganache is too thick, it will result in a heavy, overly thick coating.
To thin a ganache slightly, you can gently warm it and stir in a tiny amount of additional warm cream or a neutral oil like grapeseed oil, a teaspoon at a time, until it reaches the desired pouring or coating consistency. Be careful not to add too much liquid or fat, as this can cause the ganache to break or become greasy. This technique is more relevant for glazes or softer coatings than the hard shells needed for bonbons.
Setting the Chocolate Shells
Once your chocolate shells are formed, they need to set properly to achieve their final hard texture and brilliant gloss. The setting process involves the chocolate cooling and the stable Beta V crystals solidifying. Proper cooling conditions are essential to maintain the temper and prevent issues like bloom.
Rushing the setting process or exposing the shells to incorrect temperatures or humidity can compromise the glossy finish and the shell's structural integrity. Patience at this stage is key to ensuring all your hard work tempering pays off with perfect results.
Optimal Cooling Conditions for a Glossy Finish
For best results, allow your chocolate shells to set in a cool, dry place with a consistent temperature, ideally between 60°F and 68°F (15°C and 20°C). Avoid placing them in the refrigerator if possible, as the high humidity and low temperature can cause condensation to form on the surface as they warm up, leading to sugar bloom (white, dusty spots) and a loss of gloss.
If you must use the refrigerator due to a warm environment, place the molds or parchment paper in an airtight container first to protect them from moisture. Let them set for at least 20-30 minutes, or until the chocolate has fully contracted and appears opaque. Properly tempered chocolate will contract as it sets, making it easy to release from molds.
Avoiding Bloom and Imperfections
Bloom is the enemy of a glossy chocolate shell. Fat bloom appears as gray streaks or patches and is caused by incorrectly tempered chocolate or storing chocolate at inconsistent temperatures, which causes the unstable fat crystals to rise to the surface. Sugar bloom appears as a white, dusty layer and is caused by moisture coming into contact with the chocolate's surface, dissolving sugar, which then recrystallizes on the surface as the moisture evaporates.
To avoid bloom, ensure your chocolate is perfectly tempered before molding. Cool and store your finished shells in a cool, dry place with stable temperatures. Avoid drastic temperature changes. Also, ensure your molds and tools are completely dry, as even a tiny drop of water can cause sugar bloom.
Troubleshooting Common Issues with Chocolate Shells
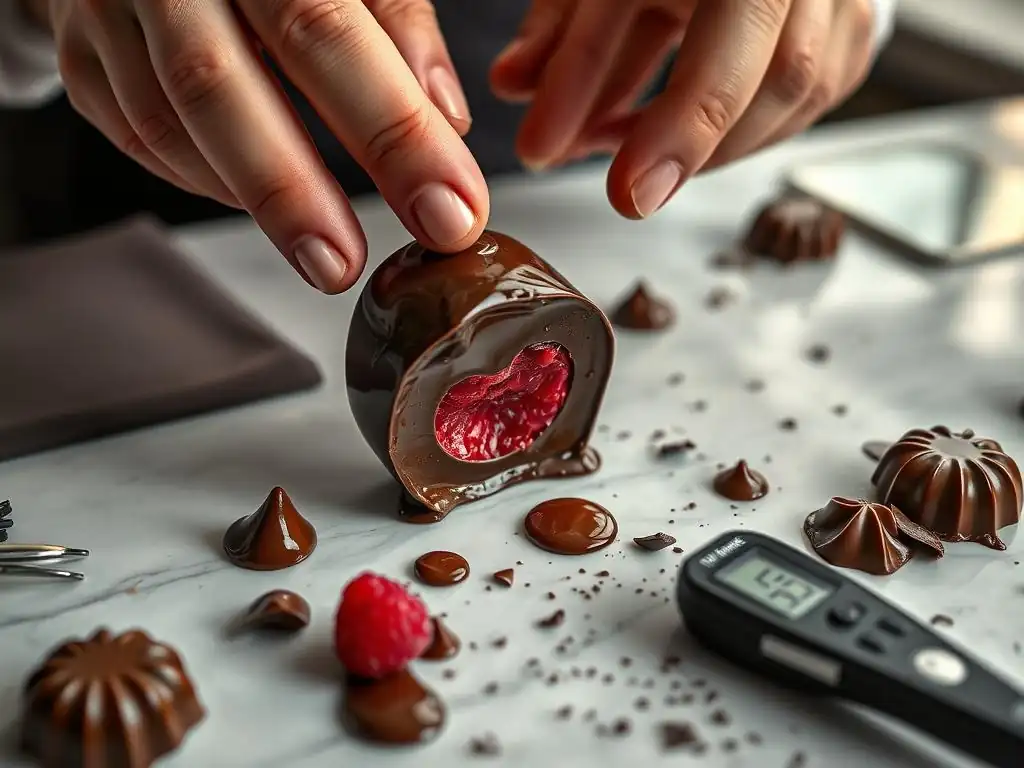
Even with careful attention to detail, you might encounter issues when crafting glossy chocolate shells. Understanding the common problems and their causes is the first step to fixing them and improving your technique. Don't be discouraged if your first batch isn't perfect; troubleshooting is part of the learning process.
This section addresses some of the most frequent challenges faced when making chocolate shells, from a lack of gloss to cracking and bloom. Identifying the root cause of the problem, often related to tempering or cooling, will help you adjust your approach for better results next time you attempt your glossy chocolate shell ganache recipe.
Chocolate Shell Not Glossy Enough
If your chocolate shells are dull or matte instead of brilliantly glossy, the most likely culprit is improper tempering. The chocolate either wasn't tempered at all, or the tempering process wasn't successful in creating enough stable Beta V crystals. This could be due to not reaching the correct temperatures during melting, cooling, and reheating, or losing the temper by overheating the chocolate while working with it.
Another potential reason is using chocolate that is not couverture quality with sufficient cocoa butter content for tempering. Ensure you are using chocolate specifically designed for tempering. Also, check that your molds were clean and polished; residue or scratches on the mold surface can transfer to the chocolate, affecting the gloss. Re-tempering the chocolate and trying again is often the solution.
Chocolate Shell Cracking or Breaking
Chocolate shells that crack or break easily can be caused by several factors. One common reason is the shell being too thin. If you didn't leave enough chocolate in the mold cavities when draining the excess, the resulting shell might be too delicate to handle or unmold without breaking. Aim for a shell thickness of around 1-2 millimeters.
Another cause can be cooling the shells too quickly or at too low a temperature, especially in a refrigerator. While tempered chocolate contracts as it cools, rapid cooling can cause uneven contraction and stress, leading to cracks. Ensure your cooling environment is within the recommended temperature range (60-68°F or 15-20°C). Finally, rough handling during unmolding can also cause breakage; tempered chocolate is firm but brittle.
Chocolate Shell Bloom: Causes and Prevention
Chocolate bloom, either fat or sugar bloom, is a visual defect that ruins the appearance of a glossy chocolate shell. Fat bloom, the gray streaking, is almost always due to improper tempering or storing chocolate at fluctuating temperatures. The unstable fat crystals melt and recrystallize on the surface. Sugar bloom, the white, dusty surface, is caused by moisture.
To prevent bloom, ensure your chocolate is perfectly tempered before use. Store finished shells in a cool, dry place with stable temperatures. Avoid refrigeration unless absolutely necessary, and if you must refrigerate, use an airtight container to protect from moisture. Ensure your molds and workspace are completely dry. If bloom occurs, the chocolate can often be re-melted and re-tempered, although the bloom itself cannot be removed from the surface without melting.
Shell Ganache Too Thick or Too Thin
(Note: This applies if you are using a ganache-like mixture for a shell-like coating, not a pure tempered chocolate shell).
If you are working with a ganache-based coating for your shells and find it's the wrong consistency, adjustments can be made. If the ganache is too thick to coat evenly, gently warm it slightly over a water bath while stirring. You can also whisk in a very small amount of additional warm cream or neutral oil (teaspoon by teaspoon) until the desired consistency is reached. Be cautious, as adding too much liquid can break the emulsion.
If the ganache is too thin and runs off the shells, it needs to thicken. This is best achieved by letting it cool down. Place the bowl in a cooler spot and stir occasionally until it thickens to a coatable consistency. Avoid putting it in the refrigerator unless absolutely necessary, as rapid cooling can make it seize or set unevenly. If it's still too thin after cooling, you may need to make a small batch of thicker ganache (with a higher chocolate-to-cream ratio) and whisk it in.
Flavor Variations and Creative Ideas for Chocolate Shells
Once you've mastered the technique of crafting a perfect glossy chocolate shell, you can begin to experiment with flavors and decorations to make your bonbons and desserts truly unique. While the classic chocolate shell is delicious on its own, infusing flavors into the shell itself or adding decorative elements can add an exciting dimension to your confectionery creations.
These variations can transform a simple glossy chocolate shell ganache recipe into something truly special. Experimenting with different flavorings and decorative techniques allows you to tailor your creations for specific occasions, seasons, or personal preferences, showcasing your creativity and skill as a baker.
Infusing Flavors into Your Chocolate Shell Ganache
Infusing flavors directly into the chocolate used for the shell (or a ganache coating) can add a subtle or pronounced note that complements the filling. This is typically done by adding flavorings to the chocolate while it's melted or, if making a ganache coating, infusing the cream before adding it to the chocolate.
When adding flavorings, ensure they are oil-based or specifically designed for chocolate, as water-based extracts can cause the chocolate to seize. Start with a small amount, as flavors can be quite potent in chocolate.
Citrus Zest
Adding finely grated citrus zest (orange, lemon, or lime) to melted chocolate before tempering can impart a bright, aromatic flavor. Ensure you only use the colored part of the peel, avoiding the bitter white pith.
Stir the zest into the melted chocolate and let it steep for about 10-15 minutes before tempering. Strain out the zest particles if you want a smooth shell, or leave them in for visual interest and a stronger flavor burst. This works wonderfully with dark or milk chocolate shells intended to hold fruit-based or complementary fillings.
Coffee
Coffee is a classic pairing with chocolate. You can infuse a coffee flavor into your chocolate shell by adding finely ground espresso powder or coffee extract to the melted chocolate.
If using espresso powder, whisk it into the melted chocolate until fully dissolved. If using coffee extract, ensure it's an oil-based extract suitable for chocolate. This adds a sophisticated depth of flavor, perfect for shells that will be filled with caramel, hazelnut, or more coffee ganache.
Spices
Warm spices like cinnamon, cardamom, chili powder, or ginger can add an intriguing complexity to chocolate shells. These can be added as fine powders or by infusing the melted chocolate with whole spices before tempering.
For powders, whisk a small amount into the melted chocolate. For infusion, add whole spices (like cinnamon sticks or cardamom pods) to the melted chocolate, let steep, then strain out before tempering. A pinch of cayenne pepper, for example, can add a subtle heat that pairs beautifully with dark chocolate.
Decorating Your Glossy Chocolate Shells
Beyond the inherent beauty of the glossy finish, you can add further visual appeal to your chocolate shells using various decorative techniques. These methods can be applied before the chocolate sets or after the shells have fully hardened, adding color, texture, or patterns.
From simple edible glitter to complex cocoa butter transfers, these techniques allow you to customize the appearance of your bonbons and desserts, making them even more enticing. Practice these methods on tempered chocolate spread thinly on parchment paper before applying them to your molds or shells.
Adding Edible Glitter
Edible glitter or dust is a simple way to add sparkle to your glossy chocolate shells. Before pouring the tempered chocolate into polycarbonate molds, you can lightly brush or dust the inside of the cavities with edible glitter or colored edible dust.
When the chocolate sets against the mold, the glitter will adhere to the surface of the shell, creating a shimmering effect. Ensure the glitter/dust is specifically labeled as "edible." This technique adds a festive touch, great for special occasions.
Using Cocoa Butter Transfers
Cocoa butter transfer sheets are a popular method for applying intricate patterns or colors to chocolate shells. These are plastic sheets printed with designs using colored cocoa butter. To use them, cut the transfer sheet to size and place it printed-side up into the bottom of your polycarbonate mold cavities before adding the tempered chocolate.
When the tempered chocolate is poured into the mold and sets against the transfer sheet, the cocoa butter design melts slightly and adheres to the chocolate surface. Once the chocolate is fully set and the mold is inverted, the plastic sheet peels away, leaving the design transferred onto the glossy chocolate shell.
Creating Marbled Effects
Creating marbled effects adds a sophisticated, artistic look to your chocolate shells. This can be done by using two different colors of tempered chocolate or by swirling tempered colored cocoa butter into the mold before adding the main chocolate color.
For a simple marble effect, swirl a small amount of a second tempered chocolate color (or colored tempered cocoa butter) into the mold cavity before pouring the main chocolate color. Gently swirl with a toothpick or small brush. Alternatively, you can lightly drizzle the second color over the main chocolate after pouring it into the mold and swirl gently before draining the excess.
Storing and Handling Your Finished Chocolate Shells
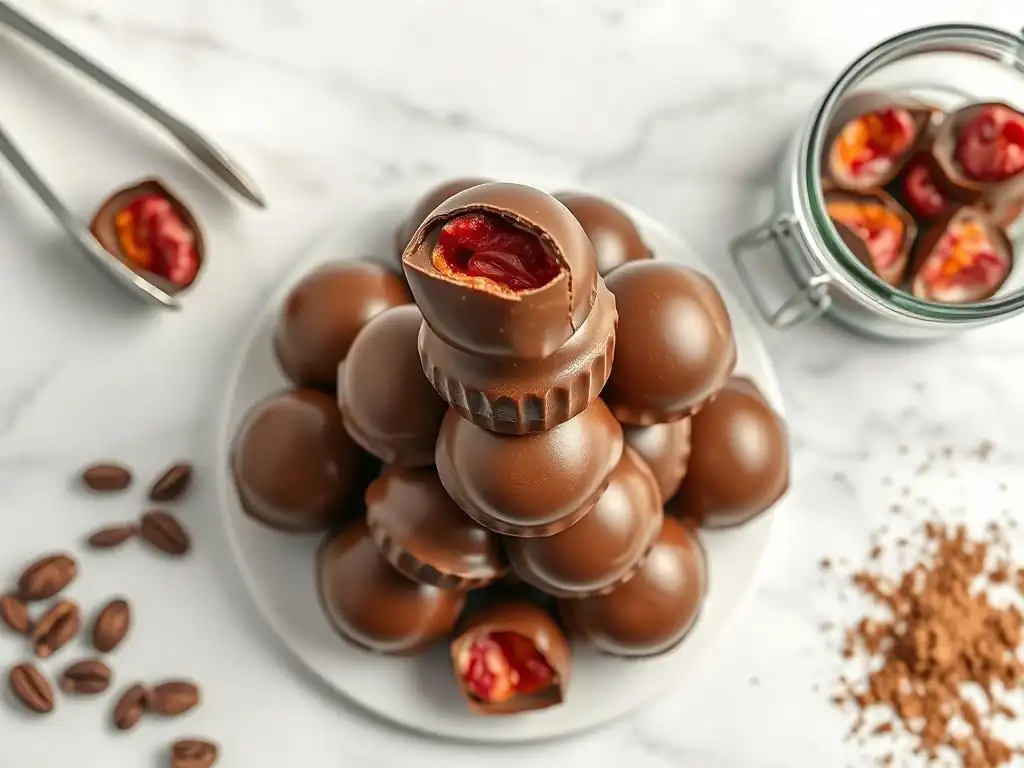
Proper storage and handling are crucial for maintaining the beautiful glossy finish and structural integrity of your finished chocolate shells. Once tempered chocolate has set correctly, it is relatively stable, but it is still susceptible to damage from heat, humidity, and physical mishandling.
Following best practices for storing and handling will ensure your glossy chocolate shells remain pristine until you are ready to fill, decorate, or serve them. This is especially important if you are making shells in advance.
Proper Storage Techniques to Maintain Gloss
Store your finished glossy chocolate shells in a cool, dry place with a stable temperature, ideally between 60°F and 68°F (15°C and 20°C). The humidity level should be low, ideally below 50%. A pantry or a cool cellar is often suitable.
Store the shells in an airtight container to protect them from moisture, odors, and temperature fluctuations. Layer them gently between sheets of parchment paper to prevent them from sticking together or scratching the glossy surface. Avoid storing chocolate near strong-smelling foods, as it can absorb odors. Properly stored, tempered chocolate shells can last for several weeks.
Best Practices for Handling and Serving
Tempered chocolate shells are firm but brittle, so handle them with care to avoid breakage. When unmolding from polycarbonate molds, gently flex the mold to release the shells; they should pop out easily if properly tempered and set. Avoid touching the glossy surface with your bare hands as much as possible, as fingerprints can dull the shine. Consider wearing food-safe gloves when handling large batches.
When serving bonbons or desserts with chocolate shells, keep them at room temperature for a short period before serving to allow the flavors of the filling to meld and the chocolate to soften slightly for the best eating experience. Avoid exposing them to direct sunlight or warm environments for extended periods.
Advanced Techniques: Beyond the Basic Chocolate Shell
Once you've mastered the fundamentals of creating a single, perfect glossy chocolate shell, you can explore more advanced techniques to elevate your confectionery art. These methods allow for greater complexity in texture, flavor, and visual design, pushing the boundaries of what you can create with chocolate.
These advanced techniques build upon the basic principles of tempering and molding but introduce additional steps or materials for more elaborate results. They are perfect for experienced bakers looking to challenge themselves and create truly show-stopping chocolate pieces.
Layered Chocolate Shells
Creating layered chocolate shells involves using different types or colors of tempered chocolate within the same mold cavity. This technique allows for interesting visual effects and flavor combinations within the shell itself, such as a dark chocolate layer followed by a white chocolate layer.
To create layered shells, first add a thin layer of one tempered chocolate color to the mold and let it set partially (just until it's no longer liquid but not fully hardened). Then, add the second layer of a different tempered chocolate color and proceed with the standard shelling process (draining excess, scraping). This requires careful timing to ensure the layers bond properly without fully hardening between applications.
Combining Different Types of Chocolate in Shells
Beyond just layering, you can create shells using a blend of different tempered chocolates for unique flavors and colors. For example, mixing tempered dark and milk chocolate can create a custom 'dark milk' chocolate with its own unique tempering curve and flavor profile.
This requires careful attention to the tempering temperatures, as the blend will have characteristics somewhere between the two types of chocolate used. Experimenting with ratios allows you to fine-tune the flavor and color of your glossy chocolate shell to perfectly match your filling.
Creating Geode Chocolate Shells
Geode chocolate shells are a stunning visual technique that mimics the appearance of natural crystal formations inside a rock. This involves painting layers of colored cocoa butter and edible crystals into the mold before adding the tempered chocolate shell.
The process typically starts with brushing abstract shapes of colored tempered cocoa butter into the mold. Once set, edible rock candy or sugar crystals are pressed into the cocoa butter. Then, another layer of colored cocoa butter might be added around the crystals. Finally, the tempered chocolate shell is formed over these layers. When the bonbon is cut open, the inside of the shell reveals the glittering geode effect.
Conclusion: Mastering the Art of the Glossy Chocolate Shell
Mastering the art of crafting glossy chocolate shells is a rewarding skill that significantly enhances the quality and presentation of your bonbons and chocolate desserts. It's a technique that requires patience, precision, and a good understanding of chocolate's unique properties, particularly the science of tempering. While it may seem daunting at first, by following the steps outlined in this BakeWithEase guide – from choosing the right ingredients for your glossy chocolate shell ganache recipe to troubleshooting common issues – you can achieve consistently beautiful, professional results.
A perfect glossy shell offers more than just visual appeal; it provides that essential snap, contributes to the overall texture, and protects the delicate filling within. Whether you're creating classic bonbons, decorative elements, or exploring advanced techniques like layered or geode shells, the foundation remains the same: starting with high-quality chocolate and executing the tempering process flawlessly.
Elevate Your Baking with Perfect Chocolate Shells
Incorporating perfect glossy chocolate shells into your baking repertoire will undoubtedly elevate your creations. Imagine presenting homemade bonbons with a mirror-like finish, or adding stunning tempered chocolate decorations to your cakes and pastries. This skill sets your work apart, demonstrating a level of care and expertise that your friends and family will appreciate.
By practicing the techniques discussed – from precise temperature control during tempering to proper cooling and handling – you'll gain confidence and consistency. Don't be afraid to experiment with different types of chocolate, explore flavor infusions, and play with decorative methods. Each attempt is a learning opportunity that brings you closer to perfection.
BakeWithEase: Your Partner in Baking Success
At BakeWithEase, we are passionate about helping you master baking techniques and achieve professional-quality results in your home kitchen. This guide to crafting glossy chocolate shells is just one example of our commitment to providing clear, detailed instructions and practical tips for bakers of all levels. We believe that with the right knowledge and guidance, anyone can create stunning and delicious treats.
Whether you're perfecting your glossy chocolate shell ganache recipe, trying a new tempering method, or troubleshooting a tricky batch, BakeWithEase is here to support your baking journey. Keep exploring, keep practicing, and enjoy the sweet rewards of your efforts!
Frequently Asked Questions
How do I achieve a perfectly glossy finish on my chocolate shell ganache?
Achieving a glossy finish relies on proper tempering of the chocolate and using high-quality ingredients. Avoid overheating the chocolate during melting, and ensure your ganache is smooth and emulsified.
What type of chocolate is best for a glossy chocolate shell ganache?
Using high-quality couverture chocolate with a good cocoa butter content is crucial. Look for chocolates labeled for their fluidity, as this will help with a thin, even coating.
Can I use different types of fat in my glossy chocolate shell ganache besides heavy cream?
While heavy cream is traditional, you can experiment with other fats like coconut cream (for a vegan option) or butter for a richer flavor. Adjust the ratios to maintain the desired consistency and gloss.
What can I do if my chocolate shell ganache is too thick or too thin?
If too thick, add a small amount of warmed cream or butter to thin it. If too thin, carefully melt and add a bit more finely chopped chocolate to thicken it. Small adjustments are key.
How long does it take for a glossy chocolate shell ganache to set properly?
Setting time depends on the temperature and humidity. Generally, allow at least 30 minutes in a cool (not cold) environment or 15 minutes in the refrigerator. Ensure the ganache is fully set before handling.
Final Reflection: The Enduring Allure of a Perfect Glossy Chocolate Shell
The pursuit of the perfect glossy chocolate shell is more than just a culinary quest; it's a testament to the enduring power of visual appeal and the artistry of confectionery. A flawlessly smooth, intensely shiny chocolate shell elevates any dessert from simple to spectacular, transforming a humble truffle into a luxurious indulgence. This article has explored various techniques and recipes to achieve this coveted finish, techniques that remain as relevant today as they were decades ago.
The impact of a visually stunning dessert, particularly one featuring a glossy chocolate shell, should not be underestimated. It's a sensory experience that begins before the first bite, a promise of the rich flavors and textures to come. As the great French chef Fernand Point once said, Cooking is at its best a creative art, and the chef is an artist.
The creation of a glossy chocolate shell is a perfect example of this artistry, a demonstration of skill and precision that transforms simple ingredients into something truly special. The pursuit of this perfect gloss reflects a deeper human desire for beauty and perfection, a desire that transcends mere culinary skill.
Consider the techniques and recipes outlined in this article. Experiment with different tempering methods, explore variations in ganache ratios, and don't be afraid to let your creativity guide you. You, too, can master the art of the glossy chocolate shell. The journey to creating that perfect, mirror-like finish is a rewarding one, filled with learning, experimentation, and ultimately, the immense satisfaction of crafting a truly beautiful and delicious dessert. Embrace the challenge, and let the glossy sheen of your creations reflect your own unique artistry.
Unleash Your Inner Chocolatier: Craft Exquisite Chocolate Shells!
Thanks for joining us on this chocolate-making adventure! We hope you've learned valuable techniques to create stunning, glossy chocolate shells for your next confectionery masterpiece. Ready to put your new skills to the test?
- Master the art of tempering: Practice your newfound tempering skills and create a batch of perfect chocolate shells – you'll be amazed by the results!
- Share your creations: Show off your beautifully crafted chocolate shells on social media using #BakeWithEaseChocolate. Let's inspire each other!
- Experiment with flavors: Try adding different extracts or spices to your chocolate to create unique and delicious flavor combinations. What will your next culinary adventure be?
What unexpected flavor combination will you try in your next batch of chocolate shells? Let us know in the comments below!