
The Science of Meringue: Understanding Why It Works for Better Results

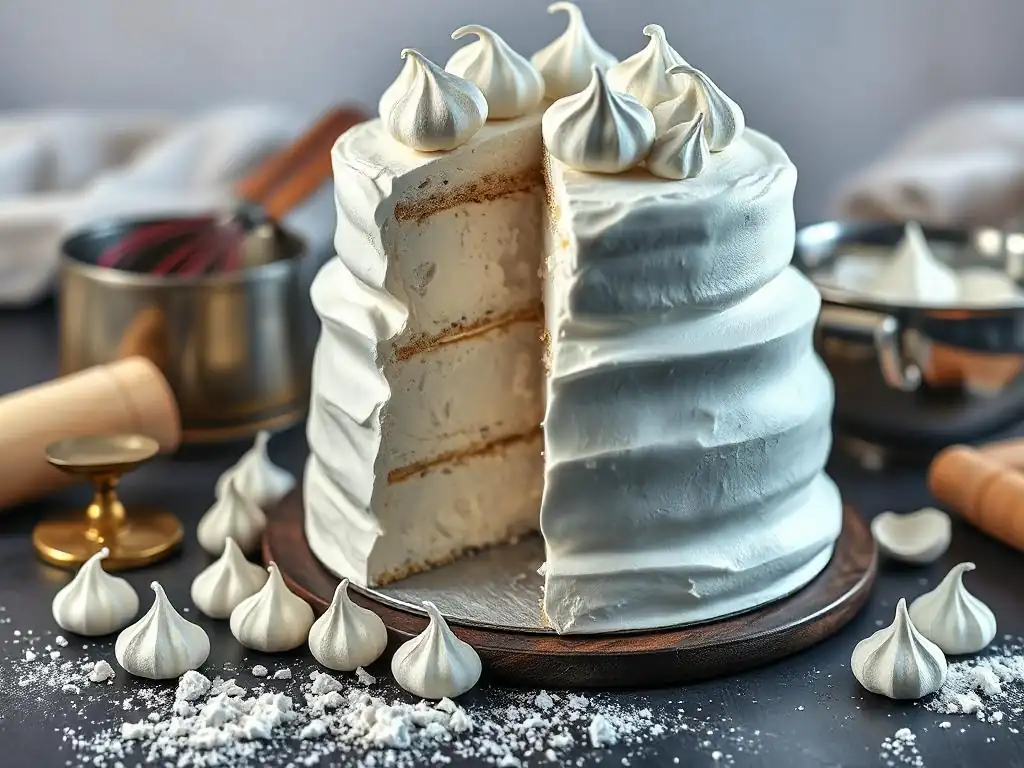
Welcome to BakeWithEase, your trusted guide to conquering the world of baking! Ever wondered why your meringue deflates faster than a soufflé in a blizzard? Unravel the mysteries behind achieving perfect, stable meringue with our in-depth exploration of the science behind it. Discover crucial meringue stability tips, and unlock the secrets to baking airy, delectable masterpieces that will impress every time. Ready to transform your meringue game? Let's dive in!
- Introduction to Meringue: BakeWithEase's Guide to Meringue Mastery
- The Key Ingredients for Meringue: A Scientific Breakdown
- The Meringue Making Process: A Step-by-Step Scientific Explanation
- Meringue Stability Tips Baking: Troubleshooting and Solutions
- Types of Meringue: Italian, Swiss, and French – A Comparison
- Meringue Recipes for BakeWithEase: Putting the Science to Practice
- Conclusion: Mastering Meringue Through Scientific Understanding
-
Frequently Asked Questions
- What are the key factors that contribute to meringue stability?
- Why is it important to avoid any trace of yolk when making meringue?
- What role does sugar play in stabilizing meringue?
- What temperature is best for baking meringues, and why?
- How can I prevent my meringue from weeping or shrinking after baking?
- Final Reflection: The Delicate Dance of Air and Sugar
- Unlock Your Meringue Mastery: Bake Perfection Today!
Introduction to Meringue: BakeWithEase's Guide to Meringue Mastery
Meringue, that ethereal cloud of whipped egg whites and sugar, is a cornerstone of many beloved desserts, from delicate cookies and tarts to impressive pie toppings and cake decorations. While seemingly simple, mastering meringue requires understanding a bit of science behind its transformation from liquid egg white to a stable, airy foam. At BakeWithEase, we believe that knowing the 'why' behind the 'how' is key to consistent baking success, especially with something as finicky as meringue.
This guide delves into the fascinating world of meringue science, breaking down the roles of its essential ingredients and the processes involved in whipping and baking. By understanding the chemical and physical changes occurring at each step, you'll be better equipped to troubleshoot common issues, achieve reliable results, and confidently apply various meringue stability tips baking techniques. Let's unlock the secrets to perfect meringue together!
What is Meringue? A Baker's Essential Guide
At its core, meringue is a foam created by vigorously whisking egg whites, causing them to trap air bubbles. Sugar is then incorporated, which helps to stabilize this delicate structure and adds sweetness. The process transforms liquid egg whites into a voluminous, opaque, and surprisingly sturdy substance that can be piped, shaped, and baked or gently cooked.
There are three primary types of meringue – French, Swiss, and Italian – each distinguished by the method of incorporating sugar and whether heat is applied during the whipping process. French meringue is the simplest, made by whisking raw egg whites and gradually adding sugar. Swiss meringue involves heating the egg whites and sugar over a water bath while whisking. Italian meringue, the most stable, is made by pouring hot sugar syrup into already whipped egg whites. Understanding these types is crucial for choosing the right meringue for your specific baking needs and applying effective meringue stability tips baking.
Why Understanding Meringue Science Matters for Baking Success
Baking, at its heart, is applied chemistry and physics. Nowhere is this more evident than in the creation of meringue. The proteins in egg whites, the crystalline structure of sugar, and the effects of heat and acid all play vital roles in determining whether your meringue will be light and airy or flat and weeping. Without understanding these interactions, troubleshooting common meringue problems becomes a frustrating guessing game.
Knowing the science allows you to predict how changes in ingredients, technique, or environment (like humidity) will affect the outcome. For instance, understanding how sugar stabilizes the protein network explains why adding it too quickly can deflate your foam. Likewise, knowing how acid helps proteins unfold illuminates why a pinch of cream of tartar can boost volume. This scientific foundation empowers you to move beyond just following recipes and truly master meringue, applying effective meringue stability tips baking to achieve perfect results every time.
The Key Ingredients for Meringue: A Scientific Breakdown
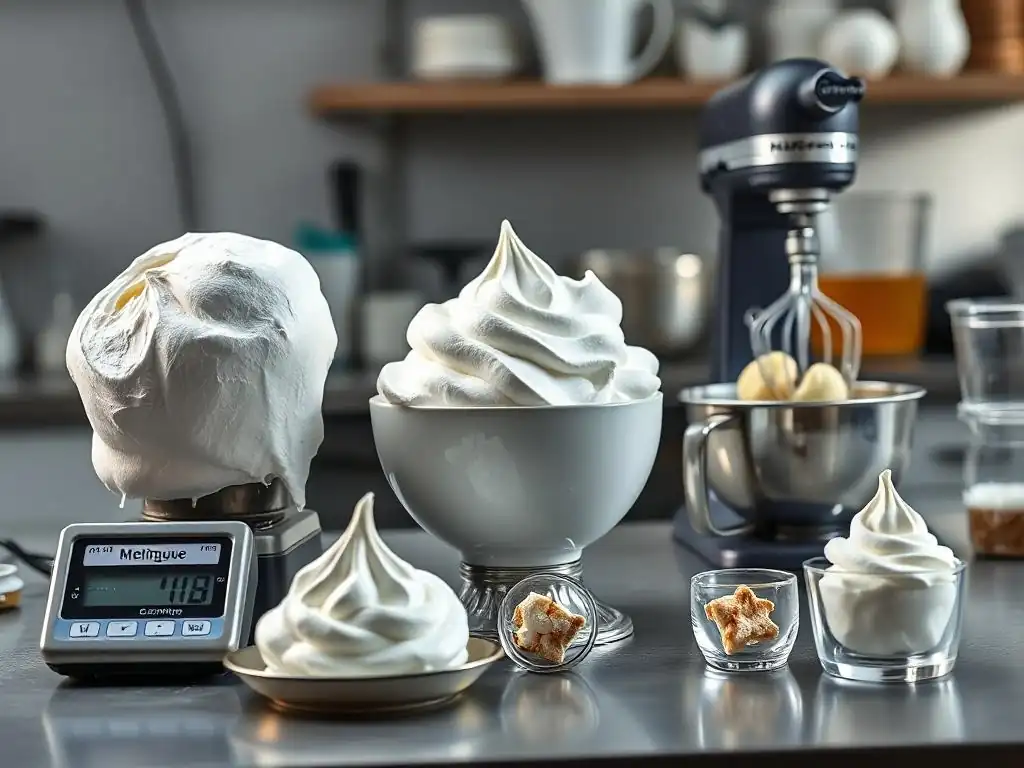
Meringue requires surprisingly few ingredients, typically just egg whites and sugar. However, optional additions like acid or flavorings can significantly impact the final result. Each ingredient plays a specific scientific role in building and stabilizing the delicate foam structure. Let's look closer at these components.
Understanding the function of each ingredient is paramount when seeking meringue stability tips baking. The quality and handling of your egg whites, the type and amount of sugar used, and the strategic addition of acid all contribute to the final texture, volume, and longevity of your meringue creation.
Egg Whites: The Foundation of Meringue Structure
Egg whites, also known as albumen, are the primary building blocks of meringue. They are composed of about 90% water and 10-11% protein, with trace amounts of carbohydrates and minerals. When egg whites are whisked, the mechanical action denatures (unfolds) these proteins, primarily ovalbumin and ovotransferrin. As the proteins unfold, they rearrange themselves around the incoming air bubbles, creating a flexible network that traps the air.
This protein network is what gives meringue its structure and volume. The denaturation process exposes hydrophobic (water-repelling) parts of the protein molecules, which cling to the air bubbles, and hydrophilic (water-attracting) parts, which remain in the water phase. This arrangement forms a film around each air bubble, preventing them from collapsing and allowing the foam to grow in volume – often increasing up to eight times its original volume!
The Role of Protein in Egg White Foam
The proteins in egg whites are like tiny, folded chains. When you whisk them, the mechanical force disrupts the bonds holding these chains together, causing them to unfold. Once unfolded, they are free to interact with the air being incorporated. Specific proteins like ovalbumin are particularly good at forming stable films around air bubbles.
As whisking continues, these denatured proteins bond with each other, forming a complex, interconnected network. This network rigidifies the foam, allowing it to hold its shape and creating the structure necessary for meringue. The strength and flexibility of this protein network are critical for achieving good meringue stability tips baking outcomes.
Separating Eggs Perfectly: Avoiding Yolk Contamination
Even a tiny amount of egg yolk can spell disaster for meringue. Egg yolks contain fats and lipoproteins. Fat molecules are attracted to the hydrophobic parts of the egg white proteins that are trying to bond with each other to form the foam structure. When fat is present, it interferes with the protein-protein interactions, preventing the formation of a strong, stable network.
Think of it like trying to build a fragile structure with sticky glue – if you introduce oil, the glue won't stick properly. Just a drop of yolk can significantly reduce the volume and stability of your meringue, making it difficult to whip to stiff peaks and prone to weeping or collapsing later. Always separate eggs carefully, ideally one at a time into a separate bowl before adding to your main mixing bowl, to avoid ruining the entire batch.
Sugar: Stabilizing and Sweetening Your Meringue
Sugar plays a dual role in meringue: it provides sweetness and, crucially, it stabilizes the protein foam. As sugar dissolves in the water phase of the egg whites, it interacts with the protein network. Sugar molecules attract and bind to water, reducing the amount of free water available. This helps to prevent the protein network from drying out and becoming brittle, which can lead to the foam collapsing.
Furthermore, dissolved sugar increases the viscosity of the liquid phase surrounding the air bubbles. This thicker liquid makes the bubble walls more resistant to breaking and helps to hold the trapped air in place. The sugar essentially acts like a glue, reinforcing the fragile protein structure and contributing significantly to meringue stability tips baking.
Granulated vs. Caster Sugar: Impact on Meringue Texture
While any sugar can technically be used, the particle size affects how quickly it dissolves and, consequently, the final texture of the meringue. Granulated sugar has larger crystals and dissolves more slowly. If not fully dissolved during whipping, it can leave a slightly gritty texture in the finished meringue.
Caster sugar (also known as superfine sugar) has much smaller crystals. This allows it to dissolve quickly and evenly into the egg whites as you whip. Using caster sugar generally results in a smoother, more uniform meringue texture. For the best meringue stability tips baking results, especially when whipping raw egg whites (French meringue), caster sugar is often preferred because it integrates seamlessly without overworking the foam.
The Sugar-to-Egg White Ratio for Optimal Meringue Stability
The ratio of sugar to egg white is critical for achieving the desired texture and stability. A typical range for French meringue is about 1:2 egg white to sugar by weight, but ratios can go up to 1:4 or even higher for drier, crispier meringues. Too little sugar will result in a less stable foam that is prone to weeping and collapse because the protein network isn't sufficiently reinforced.
Too much sugar, especially if added too quickly or if it doesn't dissolve properly, can weigh down the foam or prevent the proteins from fully denaturing and bonding. For a stable, glossy meringue that holds its shape well, a ratio around 1:2 or 1:2.5 is a good starting point. Experimentation within this range, considering the specific type of meringue and its intended use, is part of mastering meringue stability tips baking.
Acid (Cream of Tartar/Lemon Juice): Enhancing Meringue Volume and Whiteness
Acids, such as cream of tartar (potassium bitartrate) or a few drops of lemon juice or white vinegar, are often added to egg whites before or during the initial stages of whipping. A common recommendation is about 1/8 teaspoon of cream of tartar per large egg white. Acid doesn't directly create the foam, but it significantly helps the egg white proteins unfold more easily and prevents them from bonding too tightly too quickly.
This slower, more controlled bonding allows the proteins to spread out more effectively around the air bubbles, resulting in a more flexible and voluminous foam. Acid also helps to keep the whipped egg whites bright white by preventing a reaction called the Maillard reaction (browning) during whipping, which can slightly yellow the foam.
The Science Behind Acid's Effect on Egg White Proteins
Egg white proteins are complex molecules that contain both positively and negatively charged regions. In their natural state, these proteins are folded and can interact with each other in ways that prevent optimal foam formation. Acid introduces positively charged hydrogen ions (H+) into the mixture.
These hydrogen ions interact with the negatively charged parts of the egg white proteins, neutralizing some of the charges. This neutralization reduces the repulsion between protein molecules and helps them unfold more readily when whipped. Once unfolded, the proteins can then form stronger, more flexible bonds with each other around the air bubbles. This leads to a more stable foam that is less likely to collapse prematurely, offering valuable meringue stability tips baking.
The Meringue Making Process: A Step-by-Step Scientific Explanation
Creating meringue is a process of physical and chemical transformation driven by mechanical action and, sometimes, heat. Each step, from the initial whipping to the final baking, involves specific scientific principles that determine the structure, texture, and stability of the finished product. Let's break down the journey from liquid egg white to airy cloud.
Understanding the why behind each step in the process is crucial for implementing effective meringue stability tips baking. Knowing what's happening at a molecular level helps you anticipate potential problems and adjust your technique accordingly.
Whipping Egg Whites: Aeration and Protein Denaturation
The first critical step is whipping the egg whites. This mechanical action serves two main purposes: aeration and protein denaturation. As the whisk or beater moves through the liquid egg white, it incorporates air, creating tiny bubbles. Simultaneously, the force of the whisk denatures the proteins, causing them to unfold from their compact structures.
These unfolded proteins then migrate to the interface between the air bubbles and the liquid. They arrange themselves with their hydrophobic parts facing the air and hydrophilic parts facing the water, forming a protective film around each bubble. As whipping continues, more air is incorporated, more proteins unfold, and the protein films around the bubbles link together, building the foam structure. The speed and duration of whipping directly impact the volume and initial stability of the meringue.
Achieving Stiff Peaks: The Importance of Proper Whipping Technique
As you continue to whip, the foam progresses through different stages, commonly described as soft, medium, and stiff peaks. Soft peaks are characterized by a foam that collapses back on itself when the whisk is lifted. Medium peaks hold their shape but curl over at the tip. Stiff peaks stand straight up when the whisk is lifted, indicating a strong, well-developed protein network capable of supporting its own weight.
Achieving stiff peaks means you've incorporated a significant amount of air and the protein network is sufficiently strong to hold the shape. This stage is typically the target for many meringue recipes, especially those involving baking. Whipping at a medium-high speed generally allows for optimal air incorporation and protein development without overworking the foam too quickly. Proper technique here is a fundamental meringue stability tips baking practice.
Over-Whisking Egg Whites: Recognizing and Avoiding Instability
While reaching stiff peaks is the goal, over-whisking can actually decrease stability. If you whip for too long past the stiff peak stage, the protein network can become too tight and brittle. The protein films around the air bubbles become stretched thin and eventually start to break.
Signs of over-whisked egg whites include a lumpy, granular texture and a watery liquid separating at the bottom of the bowl. This separation is called syneresis. Over-whipped meringue is more prone to collapsing, weeping, and shrinking when baked. It's better to stop whipping just as stiff peaks are achieved – the meringue should look glossy and smooth, not dull or curdled. Recognizing this point is a key meringue stability tips baking skill.
Adding Sugar Gradually: Promoting Meringue Stability and Preventing Collapse
Once the egg whites have reached the desired peak stage (typically soft or medium peaks for French meringue, or after heating for Swiss/Italian), sugar is added. The way sugar is added is crucial. Adding all the sugar at once will likely cause the foam to collapse because the weight of the sugar disrupts the fragile protein network before it can dissolve and integrate properly.
The correct method is to add the sugar gradually, usually one or two tablespoons at a time, while continuing to whisk. This allows each addition of sugar sufficient time to dissolve into the liquid phase and interact with the protein network, reinforcing it rather than overwhelming it. Continue whisking until all the sugar is dissolved and the meringue is glossy and smooth.
The Correct Way to Incorporate Sugar into Whipped Egg Whites
For French meringue, start adding sugar slowly once the egg whites reach soft or medium peaks. Using caster sugar helps it dissolve more quickly. Add a tablespoon or two, whisk for 30-60 seconds to allow it to dissolve, then add the next batch. Repeat until all sugar is incorporated. Test for dissolved sugar by rubbing a small amount of meringue between your fingers; it should feel smooth, not gritty.
For Swiss and Italian meringues, the sugar is either heated with the egg whites (Swiss) or dissolved into a hot syrup (Italian). In these methods, the heat assists in dissolving the sugar completely before or during incorporation into the foam, making these meringues inherently more stable and less prone to grittiness or weeping. This controlled sugar incorporation is a major factor in meringue stability tips baking for these types.
Baking Meringue: Understanding Heat and Moisture
Baking meringue, particularly French meringue cookies or shells, is less about cooking and more about drying. Meringues are typically baked at very low temperatures (often between 200°F and 250°F, or 90°C and 120°C) for extended periods. This gentle heat evaporates the water trapped within the protein/sugar matrix, causing the structure to solidify and become crisp.
As the water evaporates, the sugar concentration increases, forming a solid, glassy structure that further stabilizes the dried foam. The low temperature is essential to prevent the meringue from browning too quickly on the outside before the inside has a chance to dry out. Proper baking is a fundamental aspect of achieving long-term meringue stability tips baking.
The Maillard Reaction in Meringue: Achieving Desired Color and Texture
While low baking temperatures are used to primarily dry the meringue, some degree of the Maillard reaction can occur, especially at the surface. The Maillard reaction is a complex chemical process between amino acids (from the egg white proteins) and reducing sugars (like glucose, present in small amounts in egg whites, and fructose, if using inverted sugar or corn syrup in Italian meringue).
This reaction is responsible for the browning and development of complex flavors in many baked goods. In meringue, it contributes to the light golden color and slightly caramelized flavor on the exterior, while the interior remains white and porous. Controlled, minimal browning indicates successful drying without scorching.
Temperature Control: Preventing Cracking and Shrinking
Precise temperature control is paramount when baking meringues. Too high a temperature will cause the outside to set and brown too quickly, trapping moisture inside. As the interior tries to expand or dry later, it can cause the outer crust to crack. Rapid temperature changes, like opening the oven door frequently or removing the meringues from the oven too soon, can also lead to shrinking or cracking as the internal structure cools and contracts before it's fully dry.
For best results and optimal meringue stability tips baking during baking, use an oven thermometer to verify your oven's temperature is accurate. Bake at the recommended low temperature until the meringues are crisp and dry throughout. Often, the oven is turned off after baking, and the meringues are left inside to cool completely, allowing for gradual drying and preventing sudden temperature shock.
Meringue Stability Tips Baking: Troubleshooting and Solutions
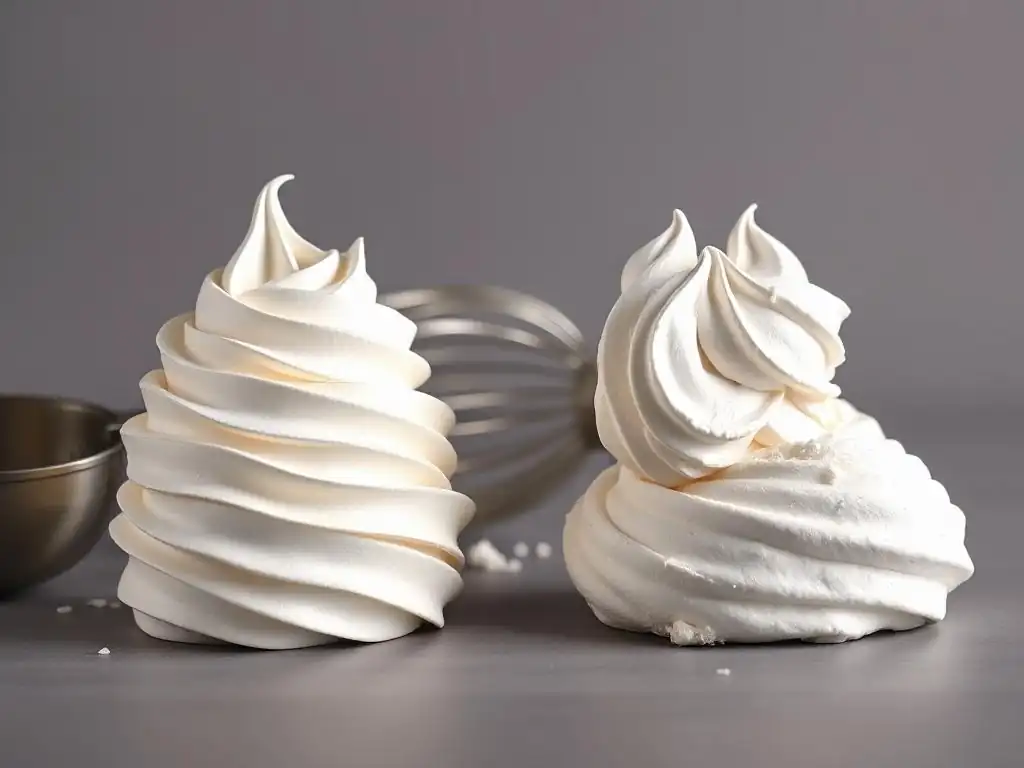
Even with the best intentions and freshest ingredients, meringue can sometimes be challenging. Common problems like weeping, collapsing, or remaining soft can frustrate any baker. Fortunately, understanding the science behind these issues provides clear paths to troubleshooting and improving your meringue stability tips baking outcomes.
Addressing these problems requires identifying the root cause, which is often related to ingredient ratios, whipping technique, or baking conditions. By applying specific adjustments based on scientific principles, you can significantly improve the reliability and quality of your meringues.
Common Meringue Problems and Their Scientific Explanations
Let's look at some frequent issues encountered when making meringue and why they happen from a scientific perspective. Knowing the why makes the how to fix it much clearer and reinforces effective meringue stability tips baking.
Weeping Meringue: Causes and Prevention Strategies
Weeping, where liquid beads or pools at the base of the meringue, is a common issue, especially with pie toppings. It's essentially syneresis – the separation of water from the protein/sugar matrix. This happens when the protein network isn't sufficiently stabilized or if moisture is drawn out of the meringue.
Common causes include:
- Undissolved sugar: Sugar crystals attract water, drawing it out of the meringue structure. Ensure all sugar is dissolved before baking.
- Under-baking: The meringue hasn't dried out sufficiently, leaving excess moisture trapped within. Bake until completely dry inside.
- High humidity: Humid air contains more moisture, which can be absorbed by the hygroscopic sugar in the meringue, causing it to become sticky and weep.
- Applying hot meringue to a cold filling: The temperature difference can cause condensation and structural breakdown. Apply meringue to warm fillings, or use a more stable meringue type like Italian.
- Fat contamination: Even tiny amounts of fat disrupt the protein network, making it weak and prone to releasing water.
To prevent weeping, ensure sugar is fully dissolved, bake thoroughly at a low temperature, consider using a more stable meringue type (Swiss or Italian), apply meringue to warm surfaces, and always work with impeccably clean equipment free of any grease. These are fundamental meringue stability tips baking practices.
Collapsed Meringue: Understanding the Reasons and How to Fix It
A collapsed meringue loses its volume and becomes flat or sunken. This indicates that the protein network wasn't strong enough to support the structure, or it was compromised during or after the process.
Reasons for collapse include:
- Under-whipping: Not reaching stiff peaks means the protein network isn't fully developed.
- Over-whipping: A brittle protein network is prone to breaking.
- Adding sugar too quickly: Disrupts the foam structure.
- Fat contamination: Prevents proper protein bonding.
- Under-baking: The structure hasn't solidified through drying.
- Rapid temperature changes: Removing from the oven too soon or into a cold, humid environment.
To prevent collapse, ensure proper whipping technique, add sugar gradually, avoid fat contamination, and bake the meringue until completely dry, allowing it to cool gradually in the oven. Following these meringue stability tips baking steps is crucial.
Soft Meringue: Techniques for Strengthening the Structure
If your meringue remains soft and marshmallow-like when you intended a crisp texture, it's usually due to insufficient drying during the baking process. The protein/sugar matrix hasn't solidified adequately.
Techniques for strengthening the structure:
- Bake longer: Extend the baking time at a low temperature.
- Lower temperature, longer time: Sometimes baking at an even lower temperature (e.g., 180°F or 80°C) for a very long time (several hours) ensures complete drying without browning.
- Cool in the oven: Leaving the meringues in the turned-off oven as it cools helps them dry out gradually and completely.
- Consider meringue type: French meringue is the most delicate and prone to softness if not dried properly. Swiss and Italian meringues are inherently more stable due to the heat treatment and higher sugar ratios, often resulting in a firmer set.
Implementing these meringue stability tips baking will help achieve the desired crisp texture.
Achieving Long-Lasting Meringue Stability: Advanced Techniques
Beyond the basics, there are additional techniques and ingredients that can further enhance the stability and shelf life of your meringue, particularly in challenging environments or for specific applications like decorative piping.
These advanced meringue stability tips baking often involve incorporating ingredients that reinforce the protein-sugar structure or manage moisture more effectively.
Using Stabilizers: Cream of Tartar, Cornstarch, and Gelatin
While acid (like cream of tartar) is a common addition to aid initial foam formation and volume, other stabilizers can be used to improve long-term stability.
- Cream of Tartar: As discussed, helps proteins unfold and bond properly, leading to a more flexible and less brittle foam. Use about 1/8 teaspoon per large egg white.
- Cornstarch: A small amount (e.g., 1 teaspoon per cup of egg whites) can be sifted with the sugar and added gradually. Cornstarch absorbs moisture, which helps prevent weeping, especially in baked meringues like pie topping. It also adds a slight chewiness to the texture.
- Gelatin: Dissolved gelatin can be incorporated into meringue (often Italian or Swiss) to create a very stable foam that holds its shape exceptionally well, even at room temperature. This is particularly useful for decorative work or parfaits. Gelatin works by forming a gel network that reinforces the protein structure.
Using these stabilizers strategically can significantly boost meringue stability tips baking success, especially in humid conditions.
Baking Meringue in Different Environments: Humidity Considerations
Humidity is the nemesis of crisp meringue. Sugar is hygroscopic, meaning it readily absorbs moisture from the air. In a humid environment, the sugar in the meringue will start to pull in water, causing the meringue to become soft, sticky, and eventually weep or collapse.
- Baking on a dry day: Whenever possible, choose a low-humidity day for making and baking meringues.
- Storing properly: Once baked and cooled, store meringues immediately in an airtight container at room temperature. Refrigeration can cause them to soften due to condensation.
- Using a desiccant: Some bakers place a small sachet of food-grade silica gel or even a piece of paper towel in the storage container to absorb excess moisture.
- Increased baking/drying time: In humid conditions, you may need to bake (dry) meringues for a longer time at a very low temperature to ensure they are completely moisture-free.
- Consider meringue type: Italian meringue is generally the most resistant to humidity due to the high sugar concentration and heat treatment, offering better meringue stability tips baking in challenging climates.
Types of Meringue: Italian, Swiss, and French – A Comparison
While all meringues are based on whipped egg whites and sugar, the method of combining these ingredients results in distinct types with varying textures, uses, and, importantly, stability. Understanding these differences is key to selecting the right meringue for your dessert and applying the most relevant meringue stability tips baking.
Each type has its strengths and weaknesses, making them suitable for different applications, from delicate cookies to stable cake frostings.
French Meringue: The Simplest but Most Unstable
French meringue, also known as common meringue, is the simplest to make. It involves whisking raw egg whites until foamy, then gradually adding granulated or caster sugar while continuing to whisk until stiff peaks form. This method relies solely on mechanical action to create the foam.
- Characteristics: Light, airy, slightly grainy texture (if sugar isn't fully dissolved), least stable of the three types.
- Uses: Often baked into crisp cookies, meringue shells, or used as a topping for pies that are then briefly baked (like Lemon Meringue Pie) to cook the surface.
- Stability: Most prone to weeping, collapsing, and softening in humidity because the egg whites are not cooked, and the sugar is simply dissolved, not heated into a syrup. Achieving meringue stability tips baking for French meringue heavily relies on proper whipping, slow sugar addition, and thorough low-temperature baking/drying.
Swiss Meringue: A Heat-Treated Meringue for Enhanced Stability
Swiss meringue involves gently heating egg whites and sugar together over a double boiler (or bain-marie) while whisking until the sugar dissolves and the mixture reaches a temperature of about 130-140°F (55-60°C). The mixture is then removed from the heat and whipped vigorously until cool, glossy, and stiff peaks form.
- Characteristics: Smoother, denser, and more stable than French meringue. The heat partially cooks the egg whites, providing more structure.
- Uses: Excellent for soft-set meringue toppings, buttercream frostings (Swiss Meringue Buttercream), and bases for mousses or parfaits. It can also be piped and briefly torched or baked at a low temperature.
- Stability: More stable than French meringue, less prone to weeping and collapse due to the heat treatment and fully dissolved sugar. This method offers inherent meringue stability tips baking compared to the raw French method.
Italian Meringue: The Most Stable Meringue, Perfect for Decoration
Italian meringue is considered the most stable meringue type. It is made by whipping raw egg whites to soft peaks and then slowly pouring a stream of hot sugar syrup (heated to the soft-ball stage, 238-245°F or 114-118°C) into the whipping egg whites while continuing to whisk. The hot syrup cooks the egg whites as it's incorporated.
- Characteristics: Very smooth, glossy, dense, and exceptionally stable. Holds piped shapes beautifully. Since the egg whites are cooked by the hot syrup, it is safe to consume without further baking.
- Uses: Ideal for frosting cakes (Italian Meringue Buttercream), topping tarts and pies that will be torched (not baked), making macarons, nougat, and as a base for soufflés or mousses where stability is key.
- Stability: The most stable meringue due to the high sugar concentration (often higher ratio than French or Swiss) and the cooking of the egg whites by the hot syrup. It is highly resistant to weeping and humidity, making it the go-to choice when meringue stability tips baking is paramount for decorative or structural purposes.
Comparing Stability, Texture, and Uses of Different Meringue Types
| Meringue Type | Stability Rank (1=Least, 3=Most) | Typical Sugar Ratio (Egg White:Sugar by weight) | Texture | Common Uses | Key Meringue Stability Tips Baking Factor |
|---|---|---|---|---|---|
| French | 1 | 1:2 to 1:4+ | Light, airy, sometimes slightly gritty | Baked cookies, pie toppings (requires baking) | Proper whipping, slow sugar addition, thorough low-temp drying/baking. |
| Swiss | 2 | 1:1.5 to 1:2.5 | Smooth, dense, glossy | Buttercream, soft toppings, bases for mousses | Heat treatment of egg whites, fully dissolved sugar. |
| Italian | 3 | 1:2.5 to 1:3+ | Very smooth, dense, very glossy | Buttercream, stable toppings (torched), macarons, decorative piping | Hot sugar syrup cooks egg whites, high sugar concentration, fully dissolved. |
Choosing the right meringue type based on its inherent characteristics is the first step in applying effective meringue stability tips baking for your specific recipe.
Meringue Recipes for BakeWithEase: Putting the Science to Practice
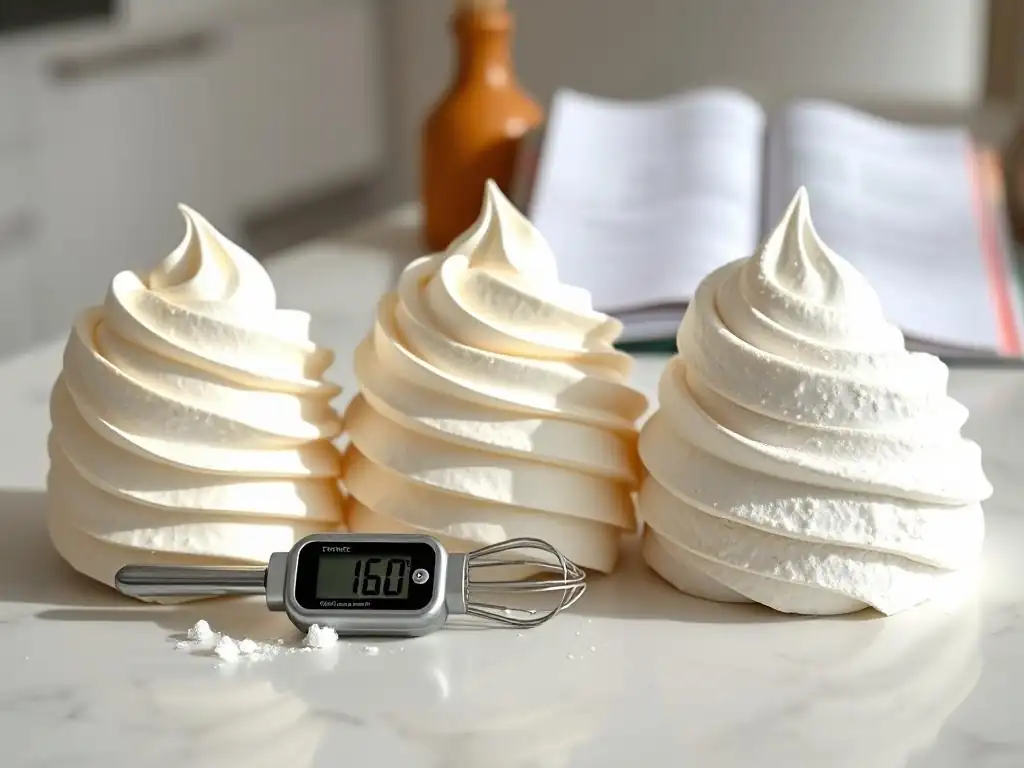
Now that we've explored the science behind meringue, let's put that knowledge to work with some practical recipes from BakeWithEase. These recipes demonstrate how understanding the principles of egg white proteins, sugar stabilization, and temperature control translates into successful meringue creations. By applying the meringue stability tips baking we've discussed, you can achieve consistent, delicious results.
These recipes are designed to guide you through the process, highlighting the key moments where scientific principles are at play. Pay attention to the details, and you'll see the science come alive in your kitchen.
Classic meringue cookies are a perfect example of French meringue, relying on thorough drying in a low oven for their crisp texture.
- Ingredients:
- 2 large egg whites, room temperature
- 1/8 teaspoon cream of tartar (optional, but recommended for stability)
- 1/2 cup (100g) caster sugar
- 1/2 teaspoon vanilla extract (optional)
- Instructions:
- Preheat oven to 200°F (90°C). Line baking sheets with parchment paper. This low temperature is key for drying, not cooking.
- Ensure your mixing bowl and whisk are spotlessly clean and dry. Any trace of fat will prevent the egg whites from whipping.
- Add egg whites to the bowl. Whip on medium speed until foamy. Add cream of tartar (if using) and continue whipping until soft peaks form. This is where the proteins begin to denature and trap air.
- Gradually add the caster sugar, 1-2 tablespoons at a time, whipping well after each addition until it is fully dissolved before adding the next. This slow addition prevents the foam from collapsing and allows sugar to stabilize the structure.
- Increase speed to medium-high and whip until stiff, glossy peaks form and all sugar is dissolved. Test by rubbing a tiny bit between your fingers – it should be smooth. The gloss indicates dissolved sugar reinforcing the protein network. Add vanilla if using and whip briefly to combine.
- Spoon or pipe meringue onto the prepared baking sheets.
- Bake for 1.5 to 2.5 hours, or until the meringues are crisp and easily lift off the parchment paper. They should be dry throughout. The long, low bake evaporates the water, solidifying the sugar/protein matrix.
- Turn off the oven and leave the meringues inside with the door slightly ajar until completely cool (at least 1-2 hours, or overnight). This gradual cooling prevents cracking and ensures complete drying, applying meringue stability tips baking for crispness.
- Store immediately in an airtight container at room temperature.
Lemon Meringue Pie Recipe: Applying Stability Tips for a Perfect Pie
Lemon meringue pie topping is typically a French meringue baked briefly on top of a hot filling. Applying meringue stability tips baking here is crucial to prevent weeping.
- Key Meringue Stability Tips Baking for Lemon Meringue Pie:
- Use a stable ratio: A slightly higher sugar ratio (e.g., 1:2.5 or 1:3 egg white to sugar) can help.
- Ensure sugar is fully dissolved: This is paramount to prevent weeping. Caster sugar is recommended.
- Add a stabilizer: Incorporating a teaspoon of cornstarch sifted with the sugar can absorb excess moisture and improve stability.
- Apply meringue to a hot filling: Spread the meringue over the lemon filling as soon as it's off the heat. The residual heat helps set the bottom of the meringue immediately, reducing the chance of weeping where it meets the filling.
- Bake briefly at a high temperature: Unlike dry meringue cookies, pie topping is baked just long enough to set the protein network and lightly brown the peaks (e.g., 375°F or 190°C for 10-15 minutes, or until golden). This rapid heat sets the outside before the inside has a chance to weep excessively.
- Cool gradually: Avoid placing the hot pie directly into a cold refrigerator. Let it cool at room temperature for a while before chilling.
By following these specific meringue stability tips baking for pie topping, you can significantly reduce the likelihood of that disappointing liquid layer forming.
Meringue Kisses Recipe: Mastering the Art of Delicate Meringues
Meringue kisses are simply smaller versions of baked meringue cookies, often flavored and colored. Mastering them involves precise piping and patient drying.
- Ingredients: Same as Classic Meringue Cookies, with optional food coloring and flavor extracts.
- Process:
- Prepare French meringue mixture as described in the Classic Meringue Cookies recipe, ensuring stiff, glossy peaks and fully dissolved sugar. This provides the necessary structure for piping.
- Tint with gel food coloring (liquid can add too much moisture) and fold gently if desired. Add flavor extract (like peppermint or almond) at the end of whipping.
- Transfer meringue to a piping bag fitted with your desired tip.
- Pipe small "kisses" onto the parchment-lined baking sheets. The stiffness of the meringue will determine how well the shapes hold.
- Bake at a very low temperature (200-225°F or 90-105°C) for 1 to 1.5 hours, depending on size, or until they are completely dry and crisp throughout. Smaller meringues require less drying time.
- Turn off the oven and let them cool inside completely.
- Store immediately in an airtight container.
Achieving perfectly shaped, crisp meringue kisses relies heavily on starting with a stable, well-whipped French meringue and ensuring complete drying in the oven – core meringue stability tips baking principles.
Conclusion: Mastering Meringue Through Scientific Understanding
Meringue, while seemingly simple, is a fascinating study in the science of food. By understanding the roles of egg white proteins, sugar, and heat, and the delicate balance between them, you gain the power to control the outcome of your meringue creations. From preventing weeping and collapse to achieving the perfect crispness or smooth stability, applying these scientific principles provides the most effective meringue stability tips baking.
Baking is an art, but it's an art informed by science. Embrace the 'why,' and your 'how' will become infinitely more successful and rewarding. Don't be afraid to experiment and observe the effects of small changes in your process.
The Importance of Experimentation and Practice in Meringue Baking
While science provides the roadmap, practice builds mastery. The nuances of your specific ingredients, oven, and even the day's humidity can all subtly influence your meringue. Don't be discouraged by initial failures; view them as learning opportunities.
Try adjusting whipping times, sugar ratios within recommended ranges, or baking temperatures slightly. Keep notes on what works and what doesn't. Each batch, successful or not, teaches you more about handling this delicate foam. Continuous practice, guided by your understanding of meringue stability tips baking science, will refine your technique and lead to consistent success.
Further Resources for Meringue Mastery on BakeWithEase.com
Dive deeper into the world of meringue and explore more recipes and techniques on BakeWithEase.com. We offer detailed guides, video tutorials (where applicable, though not linked here), and a community of bakers sharing their experiences.
Explore our sections on Advanced Baking Techniques, Meringue Mastery, and our extensive recipe library to continue your journey. Understanding the science is the foundation, and BakeWithEase is here to help you build upon it to become a confident and successful meringue maker.
Frequently Asked Questions
What are the key factors that contribute to meringue stability?
The key factors include the quality of the egg whites, proper sugar incorporation, and the right baking temperature. These elements work together to create a strong and lasting meringue structure.
Why is it important to avoid any trace of yolk when making meringue?
Even a tiny amount of yolk can prevent the egg whites from whipping properly, as the fats in the yolk interfere with protein coagulation. This significantly reduces meringue volume and stability.
What role does sugar play in stabilizing meringue?
Sugar helps to stabilize the egg white foam by absorbing excess moisture and preventing over-coagulation of the proteins. It also adds structure and sweetness to the finished meringue.
What temperature is best for baking meringues, and why?
A low baking temperature, typically around 200-250°F (95-120°C), allows the meringue to dry out slowly without browning too quickly. This ensures a crisp exterior and a stable interior.
How can I prevent my meringue from weeping or shrinking after baking?
Ensure the meringue is completely cooled before storing, and bake in a low-humidity environment. A small amount of cream of tartar can also help to stabilize the egg whites and prevent weeping.
Final Reflection: The Delicate Dance of Air and Sugar
The science behind meringue isn't just about achieving stiff peaks; it's about understanding the fundamental principles of food chemistry and applying them to create culinary magic. A perfectly stable meringue, a testament to the precise interplay of protein denaturation and sugar crystallization, is a delicious reward for understanding these principles. This knowledge empowers bakers to troubleshoot issues and consistently achieve stunning results, transforming a seemingly simple dessert into a masterpiece.
The journey of understanding meringue stability has been a fascinating exploration of the hidden world within our kitchens. It's a reminder that even the most delicate creations are governed by scientific laws, and that mastering these laws unlocks a world of culinary possibilities. The best things in life are simple, but not easy.
This quote perfectly encapsulates the challenge and reward of perfecting meringue. The simplicity of the ingredients belies the complex processes at play, demanding precision and patience, but ultimately rewarding the baker with a light and airy delight.
Now, consider your own baking journey. What seemingly simple recipes have hidden depths? I encourage you to approach your next baking project with a newfound curiosity, exploring the science behind the process. Don't be afraid to experiment, to adjust techniques based on your understanding of the underlying principles. By embracing the science of baking, you'll not only improve your meringue-making skills but also enhance your overall culinary confidence and creativity. The next time you whip up a meringue, remember the delicate dance of air and sugar, and the power of understanding that dance.
Unlock Your Meringue Mastery: Bake Perfection Today!
Thanks for taking the time to explore the science behind perfect meringues! You've now got the knowledge to elevate your baking game. Ready to put your newfound expertise to the test?
- Whip up your dream meringue: Try the recipe mentioned in the article – and pay close attention to the temperature and mixing techniques. This will make all the difference!
- Share your meringue success: Post a picture of your creation on social media using #BakeWithEaseMeringue and tag us! We'd love to see your baking brilliance.
- Experiment with flavors: Try adding a dash of vanilla, lemon zest, or even cocoa powder to create your own unique meringue masterpiece.
What exciting flavor combinations will you create with your newfound meringue expertise?