
Your First Time Tempering Chocolate? Start Here with Ease.

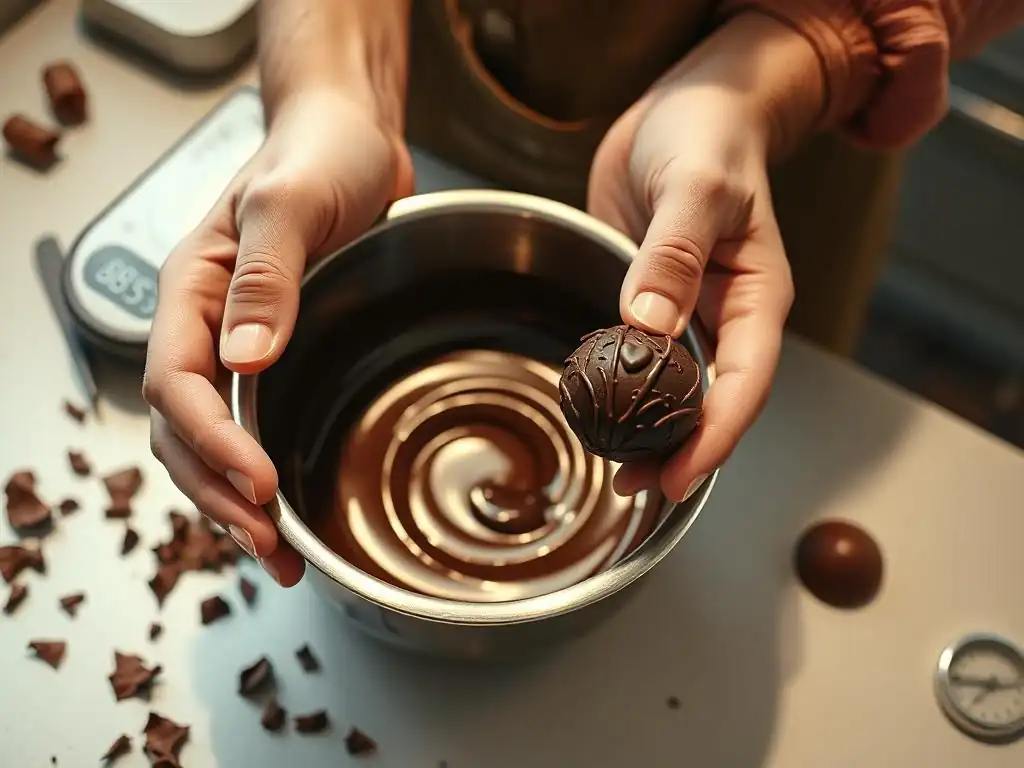
Welcome to BakeWithEase, where the joy of baking meets achievable expertise! Ever wondered how professional chocolatiers achieve that perfect shine and snap? This week, we're diving deep into an essential technique that unlocks a world of decadent possibilities. Are you ready to conquer your fear and master tempering chocolate for beginners? Discover the secrets that elevate your creations from amateur to exquisite. Let's get started!
- Tempering Chocolate: A Comprehensive Guide
- Understanding Chocolate Tempering
- Essential Equipment
- Tempering Process: Seed Method
- Tempering Methods
- Troubleshooting
- Applications of Tempered Chocolate
- Storage and Re-Tempering
- Tips for Success
- Mastering Different Chocolate Types
- Conclusion: Enjoy Your Tempered Chocolate!
-
Frequently Asked Questions
- What exactly is tempering chocolate, and why is it important?
- What are the most common mistakes beginners make when tempering chocolate?
- What equipment do I really need to temper chocolate at home?
- Can I temper chocolate in the microwave, and is it easier than using a double boiler?
- What type of chocolate is best for tempering, and what should I avoid?
- Final Reflection: The Sweet Science of Tempering, Unlocked
- Unlock Your Inner Chocolatier: Master Tempering Today!
Tempering Chocolate: A Comprehensive Guide
Tempering chocolate can seem intimidating at first, but it's a fundamental skill that unlocks a world of possibilities in baking and confectionery. For anyone looking to master the art of working with chocolate, understanding how to temper it properly is key. This guide aims to make tempering chocolate for beginners an accessible and rewarding process, helping you achieve those professional-looking results right in your own kitchen. We'll walk through the 'why' and 'how', focusing on simple techniques and providing practical tips to ensure your first time tempering chocolate is a success.
Understanding Chocolate Tempering
Tempering is a process of carefully melting and cooling chocolate to specific temperatures to stabilize the cocoa butter crystals. This controlled temperature curve ensures that the cocoa butter solidifies into the most stable crystalline form, known as Beta V crystals. When chocolate is properly tempered, it hardens with a beautiful sheen, snaps cleanly when broken, and doesn't melt immediately in your hand. This stability is crucial for making candies, dipping fruits, or creating decorative elements that hold their shape and appearance.
Achieving Snap, Shine, and Stability
The primary goals of tempering chocolate are to achieve three desirable characteristics: a firm snap, a glossy shine, and structural stability. Untempered chocolate, or chocolate that has bloomed, lacks these qualities. It tends to be dull, soft, crumbly, and melts very easily, which is undesirable for most applications beyond simply melting it into a batter or ganache. A good snap indicates the proper formation of stable cocoa butter crystals, providing that satisfying break when you bite into a piece of chocolate.
A brilliant shine is another hallmark of well-tempered chocolate. This glossy surface is a direct result of the uniform alignment of the Beta V crystals during solidification. Compare a poorly melted chocolate bar (often dull and streaky) to a commercially produced one (bright and shiny), and you'll see the visual difference tempering makes. Achieving this aesthetic appeal is just as important as the structural benefits, especially when presenting finished chocolate work.
The Science Behind Tempering
At its core, tempering chocolate is about controlling the crystallization of cocoa butter, the fat component in chocolate. Cocoa butter can crystallize in several different forms, each with a different melting point and structure. These forms are often labeled from Alpha (Form I) to Beta (Form VI).
Forms I through IV are unstable and melt at lower temperatures, resulting in soft, dull, and bloomed chocolate. Form V, the Beta V crystal, is the target – it's stable, melts around 31-34°C (depending on the chocolate type), and gives chocolate its desired snap, shine, and smooth texture. Form VI can develop over time but is very hard and brittle.
The tempering process involves heating the chocolate high enough to melt all existing crystal forms (usually above 45°C for dark chocolate), then cooling it down to a specific temperature range while stirring constantly. This cooling period, often called "working temperature," encourages the formation of the desired Beta V crystals while discouraging unstable ones. Finally, the chocolate is gently reheated slightly to melt any remaining unstable crystals, leaving behind predominantly stable Beta V seeds ready to guide the crystallization process as the chocolate cools and solidifies.
Essential Equipment
Having the right tools makes tempering chocolate for beginners much easier and significantly increases your chances of success. Precision is key, especially when dealing with temperature. Don't worry, you likely have many of these items already in your kitchen!
Digital Thermometer: Accuracy is Key
A reliable digital thermometer is perhaps the single most important tool when tempering chocolate. Cocoa butter crystals form and melt within very narrow temperature ranges, often varying by just a degree or two. An accurate thermometer allows you to hit the precise melting, cooling, and working temperatures required for successful tempering, ensuring you are guiding the cocoa butter to form the correct stable crystals.
While candy thermometers can work, a digital instant-read thermometer is typically more responsive and accurate, giving you real-time temperature updates as you work. This precision is vital, as overheating or undercooling by even a few degrees can lead to an unsuccessful temper. Think of it as your GPS for navigating the delicate temperature landscape of chocolate.
Double Boiler (or Heat-Safe Bowl and Saucepan)
Melting chocolate directly over high heat is a recipe for disaster; it burns easily. A double boiler provides gentle, indirect heat, preventing scorching. You don't need a fancy piece of equipment; a simple setup of a heat-safe bowl (glass or stainless steel) placed snugly over a saucepan containing a few inches of simmering water works perfectly. Ensure the bottom of the bowl does not touch the water, as direct contact can lead to overheating and potentially introduce steam, which is detrimental to chocolate.
This method allows for controlled, gradual melting, ensuring you reach the initial melting temperature without burning the delicate cocoa solids. It's also useful for maintaining the working temperature later in the tempering process, providing a gentle heat source to keep the tempered chocolate fluid.
Spatula or Scraper
You'll need something to stir the chocolate constantly during the cooling and working stages. A rubber or silicone spatula is ideal as it scrapes the sides and bottom of the bowl effectively, ensuring even cooling and crystal distribution. For the tabliering method (working on a marble slab), a metal scraper or bench knife is essential for spreading and gathering the chocolate.
Constant stirring is crucial during cooling because it helps dissipate heat evenly and encourages the formation of those desirable Beta V crystals throughout the entire batch of chocolate. Without adequate stirring, crystals might form unevenly, leading to a spotty or incomplete temper.
Tempering Process: Seed Method
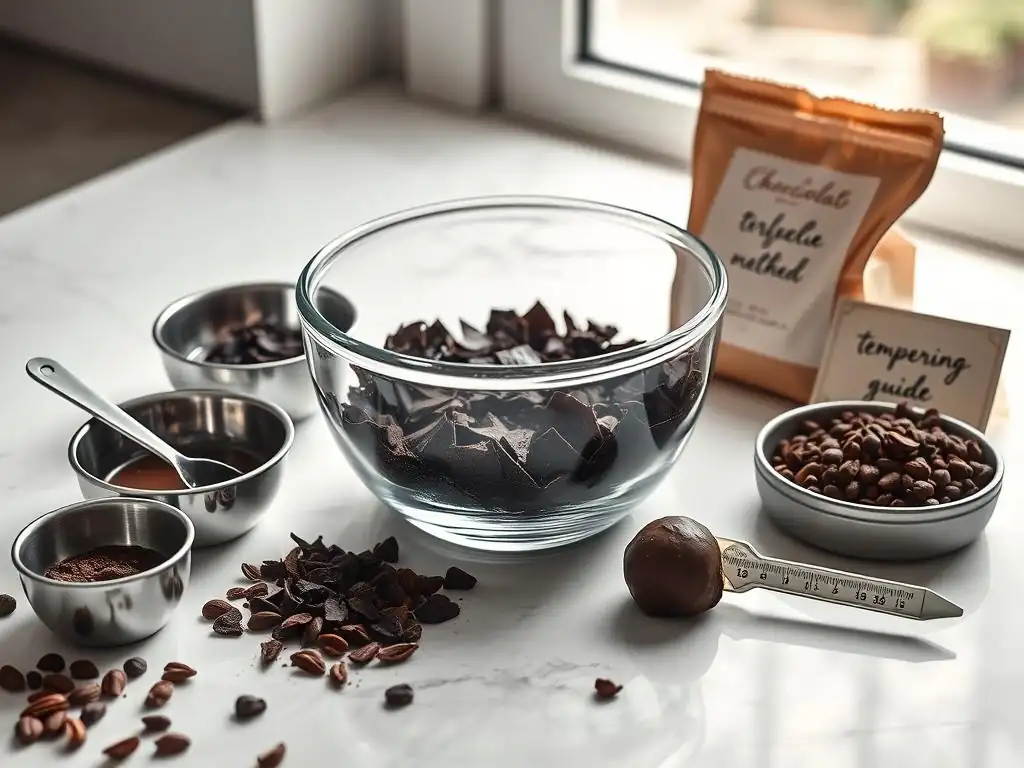
The seed method is widely considered the most accessible way for tempering chocolate for beginners. It's reliable, requires minimal special equipment beyond a thermometer, and provides good control over the process. Here's a step-by-step breakdown focusing on dark chocolate, which is often the easiest to start with due to its higher working temperature range.
Step 1: Melting Chocolate (45-50°C for Dark)
Begin by finely chopping your high-quality chocolate. Smaller pieces melt more evenly and quickly. Place about 75% of your chopped chocolate in your heat-safe bowl set over a double boiler with gently simmering water. Stir the chocolate constantly with your spatula as it melts. The goal here is to melt all the cocoa butter crystals, including the unstable ones. For dark chocolate, this means heating it to a temperature between 45°C and 50°C (113-122°F). Use your digital thermometer to monitor the temperature closely.
Once the chocolate reaches this temperature and is completely smooth with no lumps, remove the bowl from the heat. Carefully wipe any condensation from the bottom of the bowl to prevent water from getting into the chocolate, which can cause it to seize (become a thick, unworkable mass). This initial melting step ensures a blank slate, free from any undesirable crystal structures.
Step 2: Adding Seed Chocolate (25% by Weight)
Now, take the remaining 25% of your finely chopped, untempered chocolate (the "seed" chocolate) and add it to the melted chocolate. This seed chocolate contains stable Beta V crystals, which will act as templates to encourage the formation of more stable crystals as the chocolate cools. The amount of seed chocolate can vary slightly, but 20-30% by weight is a common range. Using very finely chopped or even grated chocolate for seeding helps it melt quickly and evenly into the warm chocolate.
This step is critical. The seed chocolate introduces the desired crystal structure into the melted batch. Think of it like adding a starter culture when making yogurt or sourdough – you're introducing the 'good' elements to guide the process. The amount of seed is important; too little might not effectively seed the batch, while too much could cool the chocolate too quickly.
Step 3: Stirring and Cooling (31-32°C for Dark)
Stir the mixture continuously and vigorously. The heat from the melted chocolate will begin to melt the seed chocolate, and the constant stirring helps distribute the heat evenly and encourages the formation of Beta V crystals as the temperature drops. Your goal is to cool the dark chocolate down to its working temperature range, which is typically 31°C to 32°C (88-90°F). Keep stirring until the chocolate is smooth, and all the seed pieces have melted (or nearly melted – a few tiny unmelted bits are okay).
This cooling phase, combined with stirring, is where the magic of tempering happens. As the chocolate cools through a specific temperature window (around 27-31°C for dark), the Beta V crystals from the seed chocolate multiply. Stirring ensures these crystals are evenly distributed and prevents the formation of unstable crystals, which tend to form if the chocolate cools undisturbed. The final working temperature (31-32°C for dark) is just above the melting point of the desirable Beta V crystals, keeping the chocolate fluid enough to work with while maintaining the temper.
Step 4: Testing the Temper (Dip Test)
Once your dark chocolate reaches the working temperature of 31-32°C and is smooth, it's time to test if it's properly tempered. The simplest method for tempering chocolate for beginners is the "dip test." Dip the tip of a knife, spoon, or a small piece of parchment paper into the chocolate. Scrape off any excess so you have a thin layer. Set it aside at room temperature (ideally around 20-22°C or 68-72°F).
Within 3-5 minutes, the chocolate on the knife or paper should set firmly and appear glossy. If it sets quickly with a shine and a snap, your chocolate is tempered and ready to use! If it remains soft, streaky, or dull after 5-10 minutes, it is not properly tempered, and you'll need to repeat the process (start from Step 1). This test is a quick and effective way to verify the temper before committing your entire batch to your project.
Step 5: Maintaining Temperature (Gentle Heat)
After achieving temper, you need to maintain the chocolate within its working temperature range (31-32°C for dark chocolate) while you use it. If it cools down too much, it will start to solidify, becoming too thick to work with. If it gets too hot, you'll melt the stable Beta V crystals, losing the temper. The best way to maintain the temperature is to place the bowl back over the warm (but not simmering or boiling) water of your double boiler, off the heat. The residual heat from the water will keep the chocolate fluid.
Stir occasionally to ensure even temperature distribution. If the chocolate starts to thicken, place it briefly back over the very gentle heat of the double boiler, stirring until it reaches the correct working temperature again. Avoid letting the temperature exceed 32°C for dark chocolate. This careful temperature management during use is essential for achieving a consistent, glossy finish on all your tempered chocolate creations.
Tempering Methods
While the seed method is excellent for tempering chocolate for beginners, there are other techniques used by chocolatiers. Understanding them provides context for why the seed method is so popular for home bakers.
Seed Method: Simplicity and Control
As detailed above, the seed method is ideal for tempering chocolate for beginners because it's relatively straightforward and requires minimal specialized tools. By introducing stable Beta V crystals via the "seed" chocolate, you effectively inoculate the melted chocolate, guiding the crystallization process in a controlled manner during cooling. This method is forgiving compared to others and works well for smaller batches, making it perfect for home use.
The control comes from being able to adjust the amount of seed chocolate and the rate of cooling through stirring. You can easily monitor the temperature and observe the texture change as you stir, giving you direct feedback on the tempering process. It's a reliable technique that consistently produces good results when temperatures are carefully followed.
Tabliering: The Traditional Marble Slab
The tabliering method, also known as the marble slab method, is a classic technique used by professional chocolatiers. It involves pouring two-thirds of the melted chocolate onto a cool, smooth surface like a marble slab (or granite or stainless steel). The chocolate is then spread and worked back and forth with a metal scraper or bench knife, cooling it rapidly while encouraging crystal formation through movement.
Once it thickens slightly and reaches the correct temperature (around 27-28°C for dark), it's scraped back into the bowl with the remaining one-third of warm, melted chocolate. The mixture is stirred until it reaches the final working temperature (31-32°C for dark).
This method requires practice and skill to master the speed and temperature control on the slab. It's very effective for cooling large quantities of chocolate quickly but can be messy and less practical for small home batches compared to tempering chocolate for beginners using the seed method.
Sous Vide: Precise Temperature Control
The sous vide method uses a temperature-controlled water bath to melt and temper chocolate with exceptional precision. Chopped chocolate is placed in a sealed bag (like a vacuum seal or zip-top bag with air removed) and submerged in a water bath set to the desired melting temperature (e.g., 45°C for dark). Once melted, the water bath temperature is lowered to the working temperature (31-32°C for dark) and the bag is left in the bath. The chocolate is then ready to use directly from the bag, or transferred to a bowl.
This method offers unparalleled temperature accuracy and consistency, minimizing the risk of overheating or losing the temper while working. It's a less hands-on approach during the cooling phase compared to stirring but requires a sous vide immersion circulator. It's a fantastic method for tempering chocolate for beginners who own the equipment, as it takes much of the temperature guesswork out of the equation.
Troubleshooting
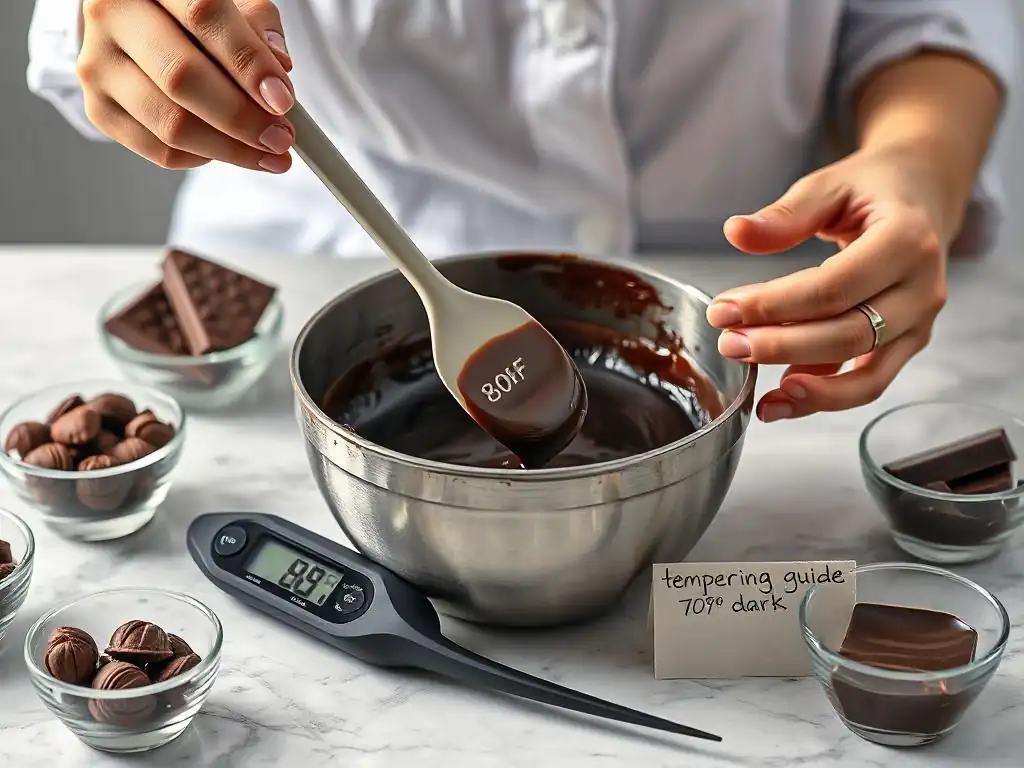
Even when following the steps for tempering chocolate for beginners carefully, sometimes things don't go as planned. Understanding common issues and how to address them is part of the learning process.
Seizing: Prevention with No Water
Seizing is one of the most heartbreaking problems when working with chocolate. It happens when even a tiny amount of water or steam comes into contact with melted chocolate. The chocolate instantly transforms from a smooth, fluid state into a thick, grainy, unworkable paste. This is because sugar, a component of chocolate, dissolves in water and causes the cocoa solids to clump together. An approximate ratio for seizing can be as little as 1 gram of water per 100 grams of chocolate.
Prevention is key: ensure all your equipment (bowls, spatulas) is completely dry before starting. Be careful when using a double boiler that no steam or water splashes into the bowl. If seizing occurs, you might be able to salvage it by stirring in a tablespoon or two of hot vegetable oil or melted cocoa butter per cup of seized chocolate, turning it into a ganache-like consistency suitable for fillings or sauces, but it won't be usable for dipping or molding.
Bloom: Temperature Fluctuations
Chocolate bloom is a common issue that appears as a grayish or white film or streaks on the surface of chocolate. There are two types: sugar bloom and fat bloom. Sugar bloom occurs when moisture condenses on the surface (e.g., moving cold chocolate into a warm, humid room), dissolving the sugar, which then recrystallizes on the surface as white spots when the moisture evaporates. Fat bloom, the more common type related to tempering, happens when chocolate isn't properly tempered or is stored at fluctuating temperatures. Unstable cocoa butter crystals melt and recrystallize on the surface as a grayish film.
While bloomed chocolate is perfectly safe to eat, it affects texture and appearance. To prevent fat bloom, ensure your chocolate is properly tempered and stored at a consistent, cool temperature (ideally 16-18°C or 60-64°F). If chocolate has bloomed, you can often re-melt and re-temper it to restore its shine and snap, assuming it hasn't seized from moisture exposure.
Grainy Texture: Improper Cooling
A grainy or sandy texture in tempered chocolate often indicates that the chocolate cooled too slowly without sufficient stirring, or that it wasn't heated high enough initially to melt all the unstable crystals. When chocolate cools slowly and undisturbed, it can form larger, less desirable crystal structures (like Form IV or VI) that give it a gritty mouthfeel instead of the smooth melt of properly tempered chocolate.
To avoid a grainy texture, ensure you are stirring the chocolate consistently and vigorously during the cooling phase of tempering. This helps to evenly distribute the Beta V crystals and prevents the formation of larger, unstable crystal aggregates. If your chocolate turns out grainy, the solution is to re-melt it fully (back to 45-50°C for dark) and repeat the tempering process, paying close attention to the cooling and stirring steps.
Applications of Tempered Chocolate
Once you've mastered tempering chocolate for beginners, a world of confectionery possibilities opens up! Tempered chocolate is essential for any application where you need the chocolate to set firm, glossy, and stable at room temperature.
Making Chocolate Truffles
Tempered chocolate is perfect for creating crisp, thin shells for molded truffles or for dipping ganache centers. A tempered chocolate shell provides a satisfying snap when bitten into and protects the soft ganache filling inside. For example, using 200 grams of tempered dark chocolate, you could mold approximately 20-25 standard-sized truffle shells, each requiring just a few grams of tempered chocolate to form the outer layer. The temper prevents the shell from melting too quickly in your fingers and gives the truffle a professional finish.
Dipping ganache centers in tempered chocolate also ensures a beautiful, glossy coating that hardens quickly and evenly. This allows for easy handling and packaging of the finished truffles, preventing them from sticking together or losing their shape.
Creating Chocolate Bark with Nuts and Dried Fruit
Chocolate bark is one of the easiest and most rewarding ways to use tempered chocolate. Simply spread a layer of tempered chocolate thinly onto parchment paper or a silicone mat, sprinkle generously with your favorite toppings (chopped nuts like almonds or pistachios, dried fruits like cranberries or apricots, sea salt, spices), and let it set. Because the chocolate is tempered, it will harden quickly at room temperature, forming a stable sheet that can be easily broken into pieces.
An example: using 300 grams of tempered milk chocolate, you could create a sheet of bark roughly 10x15 inches, easily incorporating 50-100 grams of mixed nuts and dried fruit. The tempered chocolate ensures the bark has a good snap and doesn't become soft or sticky, even at room temperature, making it perfect for gifting or snacking.
Enrobing Candies and Fruits
Dipping various items like caramels, nougat, cookies, or fresh fruits (like strawberries or orange slices) in tempered chocolate gives them a hard, shiny coating. The thin layer of tempered chocolate sets quickly, sealing in the moisture of the filling or fruit and providing a delightful textural contrast. Dipped items look significantly more professional and are more stable for storage and transport when coated in tempered chocolate.
Imagine dipping 500 grams of fresh strawberries. Using approximately 200-300 grams of tempered white chocolate, you could coat a substantial portion of them. The tempered chocolate adheres smoothly, sets fast, and gives the berries a beautiful, snap-able shell that doesn't melt as you hold them, unlike untempered chocolate which would leave a messy coating.
Storage and Re-Tempering
Properly stored, tempered chocolate maintains its temper for extended periods. However, even tempered chocolate needs care.
Cool, Dry Place (16-18°C)
The ideal storage temperature for chocolate is between 16°C and 18°C (60-64°F), in a cool, dry place away from direct sunlight and strong odors. Fluctuating temperatures, especially warming up and then cooling down, are the main enemy of tempered chocolate, as they can cause fat bloom even in properly tempered chocolate. Avoid storing chocolate in the refrigerator if possible, as the humidity can cause sugar bloom, and the low temperature can make it brittle and dull. An airtight container can help protect it from moisture and odors.
Storing tempered chocolate correctly ensures that the stable Beta V crystals remain intact, preserving the snap, shine, and texture you worked hard to achieve. A consistent environment is key to longevity.
Re-Tempering: Melting and Repeating the Process
If your tempered chocolate cools and hardens before you've used it all, or if it loses its temper during use (e.g., by getting too hot or cooling too much), you can re-temper it. Simply chop the hardened chocolate back into small pieces. Then, repeat the entire tempering process from the beginning: melt it to the initial melting temperature (45-50°C for dark), cool it down to the working temperature (31-32°C for dark) using the seed method, and test the temper.
Chocolate can be re-tempered multiple times as long as it hasn't been burned or contaminated with water or other ingredients that would prevent proper crystallization. This makes tempering chocolate for beginners less wasteful, as you can always try again if your first attempt or subsequent handling isn't perfect.
Tips for Success
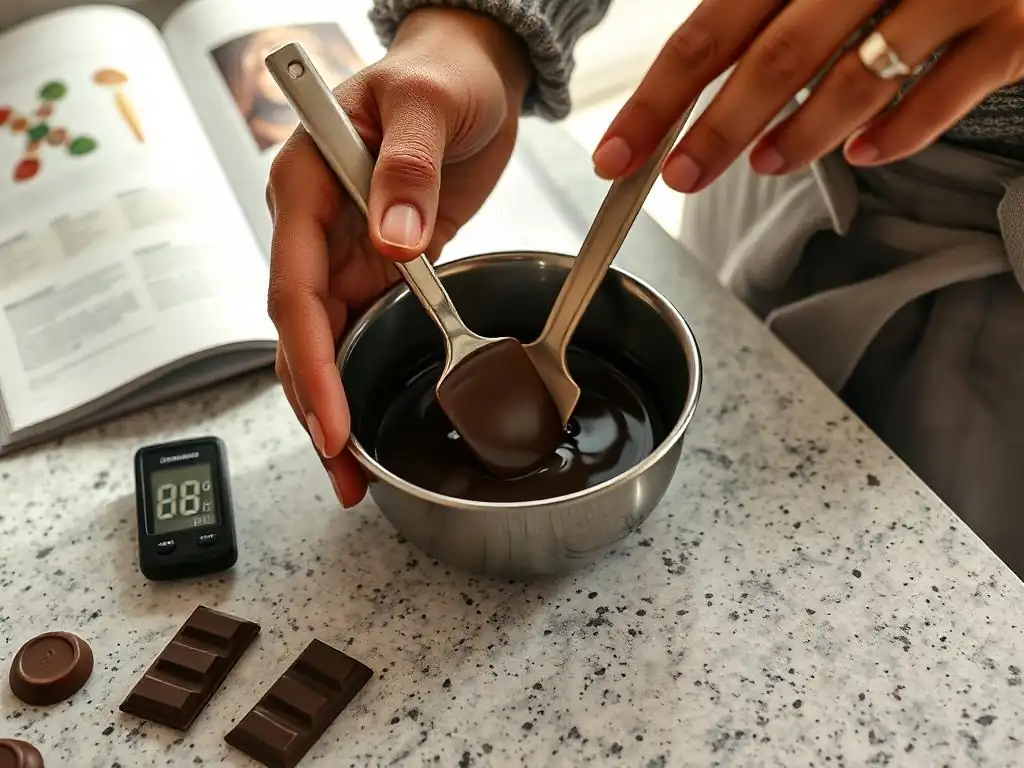
Making tempering chocolate for beginners a successful endeavor comes down to a few key principles. Keep these in mind as you practice.
Use High-Quality Chocolate
The quality of your starting chocolate significantly impacts your tempering success. High-quality chocolate contains a higher percentage of cocoa butter and fewer additives compared to compound chocolates or lower-quality bars. Cocoa butter is essential for the tempering process, as it's the fat that crystallizes. Chocolate labeled as "couverture" is specifically formulated for melting and tempering, having a higher cocoa butter content (typically 32-39%). Using good quality chocolate makes tempering easier and yields superior results in terms of snap, shine, and flavor.
Avoid using chocolate chips directly from the bag for tempering, as they often contain stabilizers that hinder proper melting and crystallization. Opt for solid bars or wafers of good quality chocolate designed for melting.
Control Temperature Precisely
We've mentioned it multiple times, but it bears repeating: temperature control is paramount when tempering chocolate. Using an accurate thermometer and sticking to the recommended temperature ranges for melting, cooling, and working is non-negotiable for successful tempering. Even a few degrees off can mean the difference between perfectly tempered chocolate and a dull, soft mess.
Be patient and monitor the temperature constantly, especially during the cooling phase. Don't rush the process. If the chocolate cools too quickly, it might not form enough stable crystals; if it cools too slowly without sufficient stirring, it might form the wrong kind of crystals.
Be Patient and Practice
Tempering chocolate for beginners is a skill that improves with practice. Your first attempt might not be perfect, and that's okay! Don't get discouraged. Take notes on what you did, the temperatures you hit, and the result. Chocolate can be re-tempered, so you can always try again.
Patience is also key during the process itself. Allow the chocolate to melt and cool according to the temperatures. Don't try to speed things up by using high heat or putting the chocolate in the refrigerator to cool faster during tempering (only use the fridge briefly for the dip test). With each attempt, you'll become more familiar with the texture changes and temperature cues, making the process feel more intuitive.
Mastering Different Chocolate Types
While the principles of tempering remain the same across different types of chocolate, the specific temperature ranges vary due to differences in composition (cocoa solids, sugar, milk solids).
Dark Chocolate Tempering (31-32°C)
Dark chocolate, with its higher percentage of cocoa solids and cocoa butter, is often considered the easiest chocolate to temper for beginners. Its working temperature range is typically 31°C to 32°C (88-90°F). The initial melting temperature is usually between 45°C and 50°C (113-122°F). The cooling phase involves bringing it down to the working temperature, often after adding seed chocolate.
Because dark chocolate has less sugar and no milk solids compared to milk or white chocolate, its tempering curve is less sensitive to slight temperature variations, offering a bit more leeway for those new to the process.
Milk Chocolate Tempering (29-30°C)
Milk chocolate contains milk solids and more sugar than dark chocolate, which affects its melting and working temperatures. The initial melting temperature for milk chocolate is typically around 42°C to 45°C (108-113°F). Its working temperature range is slightly lower than dark chocolate, usually between 29°C and 30°C (84-86°F).
Tempering milk chocolate requires a bit more precision in temperature control due to the presence of milk solids and sugar. Overheating can easily scorch the milk solids, and the lower working temperature means it can solidify more quickly if not kept warm enough.
White Chocolate Tempering (28-29°C)
White chocolate contains no cocoa solids, only cocoa butter, sugar, and milk solids. This composition gives it the lowest melting and working temperatures of the three types. The initial melting temperature for white chocolate is often between 40°C and 42°C (104-108°F). The working temperature range is the lowest, typically 28°C to 29°C (82-84°F).
Tempering white chocolate is often considered the most challenging due to its low working temperature range and sensitivity to heat. It's very easy to overheat white chocolate, and its lower cocoa butter content (compared to dark couverture) can sometimes make it trickier to achieve a perfect temper. However, with careful temperature monitoring and practice, it's certainly achievable for anyone learning tempering chocolate for beginners.
Conclusion: Enjoy Your Tempered Chocolate!
Learning to temper chocolate for beginners is a rewarding step in expanding your baking skills. While it involves precise temperature control and a bit of practice, the results are well worth the effort. Achieving that beautiful snap, brilliant shine, and stable structure elevates your homemade treats to a professional level. The seed method is a fantastic starting point, offering a reliable and accessible way to guide cocoa butter crystallization.
Remember to use quality chocolate, keep a close eye on temperatures with a reliable thermometer, and be patient with the process. With practice, tempering chocolate will become a familiar and enjoyable technique. Now that you have the knowledge, gather your tools, choose your chocolate, and start creating stunning confections with your perfectly tempered chocolate! Enjoy the sweet rewards of your new skill.
Frequently Asked Questions
What exactly is tempering chocolate, and why is it important?
Tempering is a process of heating and cooling chocolate to stabilize the cocoa butter crystals. This results in chocolate that is shiny, snaps crisply, and doesn't bloom.
What are the most common mistakes beginners make when tempering chocolate?
Common mistakes include overheating the chocolate, not properly seeding it with tempered chocolate, or failing to maintain the correct temperature range.
What equipment do I really need to temper chocolate at home?
While fancy equipment helps, you really only need a double boiler (or a heat-safe bowl and saucepan), a thermometer (preferably digital), and a spatula. A reliable chocolate melting pot can also be incredibly helpful.
Can I temper chocolate in the microwave, and is it easier than using a double boiler?
Yes, you can temper chocolate in the microwave, but it requires very careful monitoring and short bursts of heating. It's often considered more challenging for beginners due to the risk of overheating.
What type of chocolate is best for tempering, and what should I avoid?
Use high-quality chocolate with a high cocoa butter content for best results. Avoid chocolate chips as they often contain stabilizers that hinder proper tempering.
Final Reflection: The Sweet Science of Tempering, Unlocked
Mastering the art of tempering chocolate is more than just a culinary skill; it's the key to unlocking a world of incredibly smooth, shiny, and satisfying chocolate creations. This journey into the seemingly complex world of chocolate tempering has shown us that with the right knowledge and a little patience, even beginners can achieve professional-looking results. The techniques outlined, from seeding to using a thermometer, are designed to demystify the process and empower you to confidently tackle your next chocolate project.
The impact of perfectly tempered chocolate extends far beyond the simple act of eating it. It's a testament to precision and attention to detail, reflecting a dedication to quality that resonates with consumers. The difference between good chocolate and great chocolate is often the tempering.
This simple statement highlights the profound impact of this seemingly small detail on the overall experience. From the satisfying snap of a perfectly tempered truffle to the elegant sheen of a hand-dipped bonbon, the visual and textural appeal elevates the entire culinary experience. It's a skill that allows us to connect with the artistry and craftsmanship behind our favorite treats.
Now, it's your turn. Don't be intimidated by the initial steps; embrace the process, experiment with different techniques, and most importantly, enjoy the journey! The satisfaction of creating beautiful, flawlessly tempered chocolate is a reward in itself. So, gather your ingredients, follow the steps outlined, and prepare to be amazed by the transformative power of a little chocolate science. The world of chocolate awaits – go forth and conquer!
Unlock Your Inner Chocolatier: Master Tempering Today!
Thanks for taking the time to explore the art of chocolate tempering with us! We hope you now feel confident in tackling this seemingly daunting technique. Ready to put your newfound knowledge into practice?
- Temper a small batch of your favorite chocolate: Start small to build confidence and refine your technique. Don't be afraid to experiment!
- Share your tempered chocolate creations with us on social media! Use #BakeWithEaseTempering to inspire others.
- Explore different types of chocolate and experiment with tempering various recipes — the possibilities are endless!
What delicious treat will you create with your perfectly tempered chocolate?