
Simple Stencils for Incredible Cake Designs: Beyond Basic Borders

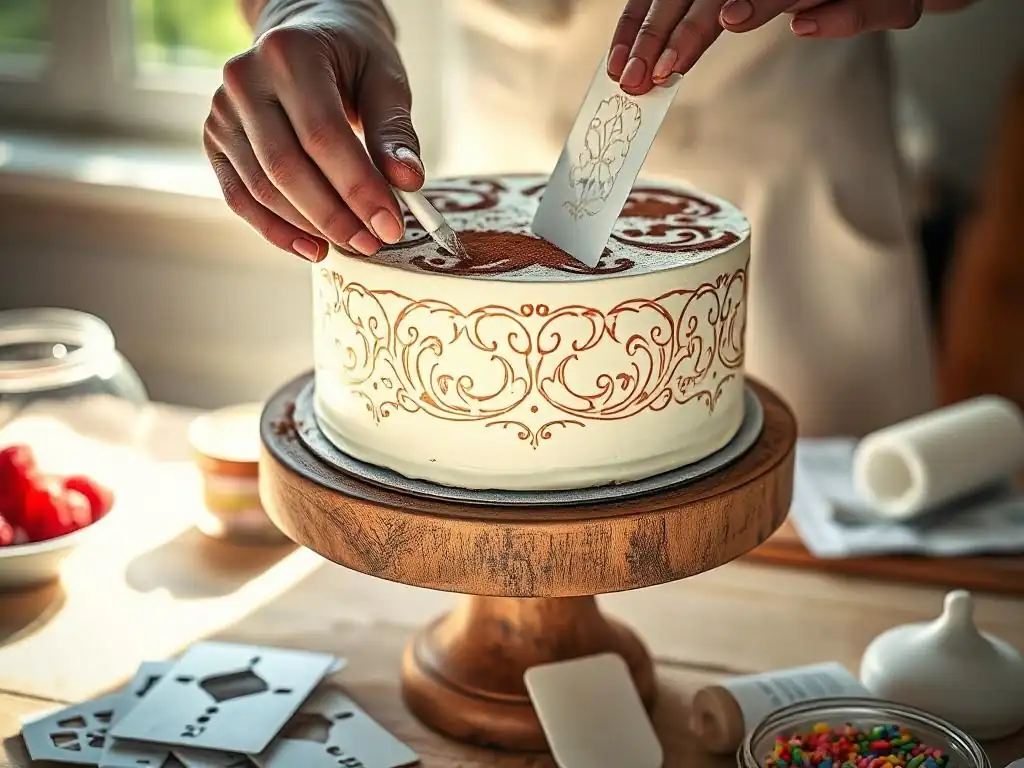
Welcome to BakeWithEase, your partner in creating delectable delights! Ever wondered how to achieve professional-looking cake designs without the fuss? This week, we dive into the world of easy cake stencil designs, unveiling secrets that go far beyond simple borders. Prepare to transform your cakes into edible masterpieces with techniques even beginner bakers can master. Intrigued? Let's get stenciling!
Stencils are a fantastic tool in the world of cake decorating, transforming a plain surface into a canvas of intricate patterns with surprising ease. Whether you're a beginner looking to add a touch of flair or an experienced baker wanting to achieve complex designs quickly, exploring easy cake stencil designs opens up a world of creative possibilities. Forget the hours spent piping delicate details by hand; stencils offer a shortcut to professional-looking results, making stunning cake decorations accessible to everyone.
Moving beyond simple piped borders, stencils allow for full coverage patterns, detailed motifs, and elegant textures that can elevate any cake, from a simple birthday treat to a multi-tiered wedding masterpiece. The versatility of easy cake stencil designs means you can work with various mediums like royal icing, buttercream, edible dusts, or airbrush colors, adapting the technique to suit your recipe and desired finish. Embracing this technique is a game-changer for efficiency and design impact.
Importance of Simple Stencils in Advanced Cake Decorating
While often perceived as a beginner's tool, simple stencils play a crucial role even in advanced cake decorating. They provide a foundation for complex designs, allowing decorators to apply consistent, intricate patterns rapidly across large surfaces, which would be incredibly time-consuming or even impossible with freehand techniques. For instance, achieving a perfectly uniform damask pattern or a delicate lace effect on an entire tier of a cake is significantly streamlined using easy cake stencil designs.
Furthermore, stencils ensure precision and repeatability, essential for professional-level work, especially on multi-tiered cakes or when creating multiple cakes with the same design. Imagine needing to replicate a detailed floral pattern on twenty individual cupcakes for an event; using a stencil makes this task efficient and guarantees uniformity across all pieces. This frees up time for other advanced techniques like sugar flowers, sculpted elements, or complex airbrushing, making simple stencils an indispensable part of an advanced decorator's toolkit.
How Easy Cake Stencil Designs Elevate Your Baking Creations
Incorporating easy cake stencil designs into your baking process instantly elevates the perceived skill and artistry of your creations. A simple cake covered in a beautiful, repeating stencil pattern looks far more sophisticated than a plain iced cake, even if the stenciling process itself was quite straightforward. This technique allows home bakers to achieve results that mimic professional patisseries without requiring years of practice in detailed piping or freehand painting.
The impact is not just visual; it's also about expanding your creative repertoire. With a collection of easy cake stencil designs, you can easily adapt a single cake recipe for various occasions by simply changing the stencil pattern. A vanilla cake can become a festive Christmas cake with snowflake stencils, or an elegant anniversary cake with a classic trellis pattern. This versatility encourages experimentation and helps you develop a signature style, proving that "easy" doesn't mean "basic" when it comes to stunning cake decoration.
- Importance of Simple Stencils in Advanced Cake Decorating
- How Easy Cake Stencil Designs Elevate Your Baking Creations
Understanding Cake Stencils: Tools and Materials for Beginners and Experts
Before diving into the application, understanding the different types of cake stencils and the materials you'll use with them is crucial for success. Stencils themselves vary widely in material, size, and design complexity, catering to different needs and skill levels. Knowing what tools are available helps you choose the right ones for your desired easy cake stencil designs.
The materials you use to apply the design through the stencil are just as important as the stencil itself. From thick icings that create raised patterns to fine powders that add subtle color and shimmer, each medium offers unique possibilities. Selecting the appropriate stencil and pairing it with the correct application material is the first step towards creating beautiful and effective easy cake stencil designs.
Types of Cake Stencils Suitable for Easy and Intricate Designs
Cake stencils are typically made from food-safe plastic or acrylic. Plastic stencils are often thinner and more flexible, making them good for wrapping around curved surfaces like the sides of a round cake. Acrylic stencils, usually 1/16 to 1/8 inch thick, are more rigid, which is excellent for flat surfaces or creating raised designs with thicker mediums like royal icing.
Designs range from simple geometric shapes and polka dots to intricate lace, florals, or even custom patterns. For easy cake stencil designs, look for patterns with slightly thicker lines and fewer tiny, delicate details, as these are less prone to smudging. However, even complex-looking stencil patterns can be surprisingly easy to apply once you master the basic technique. Stencils come in various sizes, from small motifs for cupcakes to large wraps designed for cake tiers up to 12 inches or more in diameter.
Essential Materials for Using Stencils: Icing, Sprays, and Powders
Several mediums can be used with easy cake stencil designs, each offering a different effect:
- Royal Icing: Ideal for creating raised, textured patterns. It's applied with an offset spatula. Approximately 1/4 cup of medium-consistency royal icing can cover a 6-inch cake side with a stencil pattern.
- Buttercream: A softer option for textured patterns. Use a firm buttercream (like crusting buttercream) and chill the cake before stenciling.
- Airbrush Colors: Liquid food colors applied with an airbrush for smooth, flat, detailed patterns. A few drops can cover a significant area.
- Edible Dusts/Powders: Applied with a dry brush or sponge for subtle coloring, shading, or shimmer effects. A gram or two of dust can go a long way.
- Edible Sprays: Canned color sprays or edible glitter sprays for quick, even coverage through the stencil.
Choosing the right material depends on the desired look and the type of cake finish you are stenciling onto. For instance, royal icing works best on a firm, smooth surface like fondant or chilled ganache, while airbrushing can work on various smooth finishes.
Choosing the Right Stencil for Your Cake Design Style
When selecting a stencil, consider the overall style of your cake and the occasion. For elegant, classic designs, look for lace, damask, or floral easy cake stencil designs. If you're aiming for a modern look, geometric patterns, abstract shapes, or bold lines work well. The size of the stencil pattern should also be proportionate to the size of your cake tier. A large, bold pattern might overwhelm a small 4-inch cake, while a tiny, intricate pattern might get lost on a large 12-inch tier.
Think about the medium you plan to use. If you want thick, raised royal icing designs, a slightly thicker acrylic stencil might be easier to work with. If you plan to airbrush fine details, a thinner plastic stencil might allow for sharper lines. Don't be afraid to start with a few simple, versatile easy cake stencil designs, such as a basic brick pattern or a simple vine, to practice the technique before investing in more complex ones.
Step-by-Step Guide to Using Easy Cake Stencil Designs on Cakes
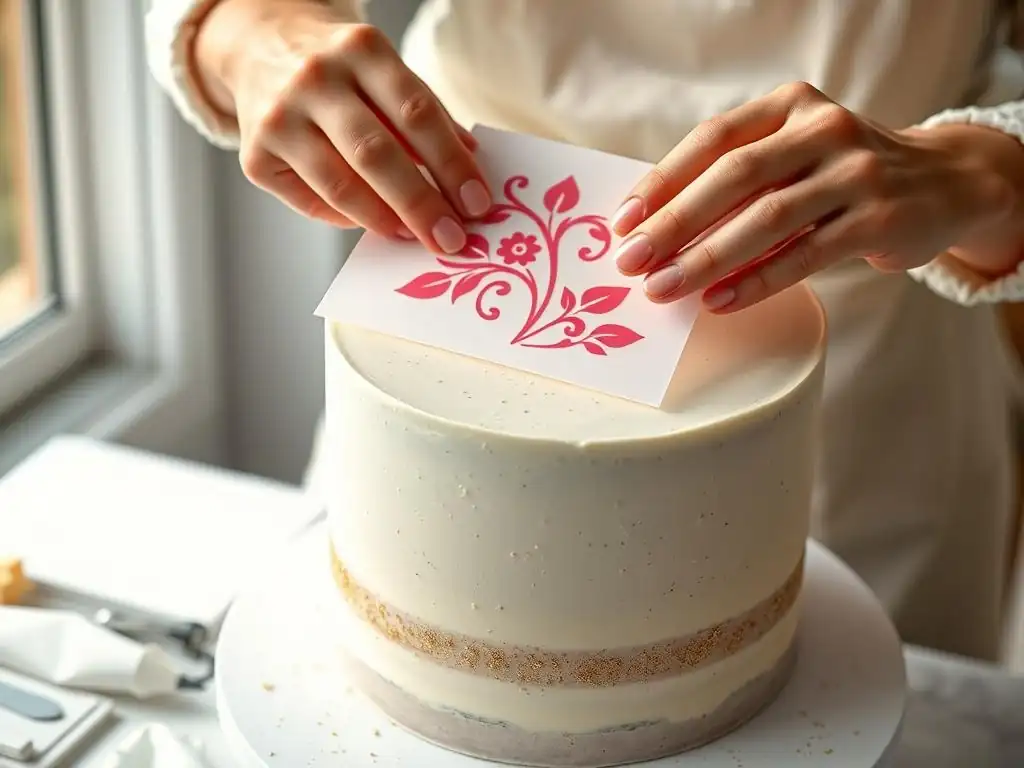
Applying cake stencils requires a bit of practice, but the basic steps are straightforward. This guide focuses on applying a pattern to the side of a cake, a common use for easy cake stencil designs. The key is preparation and careful application to prevent smudges and ensure clean lines.
Working methodically through each step helps ensure a successful outcome. Remember that the cake surface needs to be properly prepared, and the stencil must be held securely in place. Patience and a steady hand are your best friends when working with these versatile tools.
Preparing the Cake Surface for Perfect Stenciling Results
The surface of your cake is paramount for successful stenciling. It needs to be smooth, firm, and preferably chilled. Fondant-covered cakes are ideal as they provide a perfectly smooth, non-porous surface. Chill the fondant-covered cake in the refrigerator for at least 20-30 minutes, or until the surface feels firm and dry to the touch.
If stenciling onto buttercream, use a crusting buttercream recipe that forms a slight crust when exposed to air. Ensure the buttercream is perfectly smooth before chilling the cake thoroughly until the buttercream is very firm, typically 30-60 minutes depending on size. A firm surface prevents the stencil from sinking into the frosting and helps create a clean edge when the stencil is removed. A crumb coat and final smooth layer are essential for a good base.
Techniques for Applying Stencils: From Basic Borders to Complex Patterns
Here's a general technique for applying medium-consistency royal icing with an easy cake stencil design:
- Ensure the cake is chilled and firm.
- Position the stencil against the cake surface. For sides, align the bottom edge of the stencil with the bottom edge of the cake or desired line.
- Hold the stencil firmly against the cake. You can use pins (for fondant) or a helper to keep it steady. For a full side wrap, you'll need to wrap the stencil carefully around the cake.
- Apply a small amount of royal icing (about 1/4 cup for a 6-inch side) to the top edge of the stencil design.
- Using an offset spatula held at a 45-degree angle, gently spread the icing downwards across the stencil pattern, ensuring all openings are filled.
- Scrape off excess icing using the spatula held at a steeper angle (around 80-90 degrees), leaving just enough to fill the stencil openings.
- Carefully and steadily peel the stencil away from the cake, pulling it straight back rather than lifting upwards.
- Allow the stenciled design to crust or dry before potentially applying adjacent sections or adding further decoration.
Applying other mediums like airbrush color involves similar steps but uses different application tools (airbrush gun) and scraping isn't required.
Tips for Avoiding Common Mistakes in Cake Stenciling
Several common issues can arise when using easy cake stencil designs, but they are often easily preventable:
- Bleeding/Smudging: This usually happens if the cake surface isn't firm enough, the stencil isn't held securely, or too much medium is applied. Ensure your cake is well-chilled and firm. Use just enough icing or color to fill the stencil openings. Hold the stencil taut and flat against the surface.
- Uneven Pattern: This can occur if the stencil isn't held flush against the cake or if the medium isn't spread evenly. Practice applying consistent pressure across the stencil.
- Sticking: If the stencil sticks to the cake or the design pulls away when removing the stencil, the cake surface might be too wet or sticky, or the medium is too wet. Ensure surfaces are firm and dry.
- Pro Tip: Keep a damp cloth handy to wipe your spatula clean between passes when working with icing. Also, have a dry cloth or paper towel to dab any moisture from your hands or tools.
Creative Easy Cake Stencil Designs Beyond Basic Borders
While basic borders are a great starting point, the true magic of easy cake stencil designs lies in their ability to create intricate, all-over patterns and detailed motifs. Moving beyond simple stripes or dots opens up a vast world of decorative possibilities that can make your cakes truly stand out.
Exploring different themes and styles with stencils allows you to match your cake decoration to any occasion, from elegant weddings to fun children's parties. The variety of available easy cake stencil designs means there's a pattern for every creative vision you might have.
Floral and Nature-Inspired Stencil Patterns for Elegant Cakes
Floral and nature-inspired easy cake stencil designs bring a touch of elegance and organic beauty to cakes. Patterns featuring roses, vines, leaves, or abstract botanical elements are perfect for wedding cakes, anniversaries, or sophisticated celebrations. You can use these stencils to create a delicate lace-like effect around the sides of a tier or apply individual floral motifs as accents.
For example, a stencil of a single large rose bloom can be repeated around the cake, airbrushed in soft pinks and greens. Or, a continuous vine pattern can be applied with white royal icing onto a contrasting colored fondant for a classic look. These designs often look intricate but are surprisingly easy to apply, providing maximum visual impact with minimal effort compared to piping each detail individually.
Geometric and Abstract Stencils to Modernize Cake Decoration
Geometric and abstract easy cake stencil designs are excellent for creating modern, clean, and striking cake decorations. Patterns like chevrons, hexagons, stripes, or abstract splatters can give a cake a contemporary feel. These designs work particularly well with sharp-edged cakes and minimalist aesthetics.
Consider a cake covered in a hexagon stencil pattern, airbrushed in metallic gold over a dark navy fondant – a simple technique yielding a sophisticated, modern look. Or, a stencil with bold abstract lines applied with thick white buttercream onto a vibrant cake color can create a dynamic, artistic effect. These patterns are often forgiving, making them ideal easy cake stencil designs for those new to the technique.
Seasonal and Themed Cake Stencil Ideas for Special Occasions
Stencils are perfect for quickly adapting a cake for specific holidays or themes. There are countless easy cake stencil designs available for every season and occasion imaginable.
- Christmas: Snowflakes, holly leaves, reindeers.
- Halloween: Spiders, bats, pumpkins.
- Valentine's Day: Hearts, cupid arrows.
- Birthdays: Stars, balloons, confetti.
- Baby Showers: Footprints, rattles, simple animal outlines.
Using a seasonal stencil allows you to quickly transform a basic cake. For instance, applying snowflake stencils with white edible dust onto a blue cake creates an instant winter wonderland theme. A simple star stencil applied with yellow airbrush color onto a brightly colored cake is perfect for a child's birthday. These themed easy cake stencil designs make decorating for parties quick and fun.
Enhancing Cake Designs with Layered and Multicolor Stenciling Techniques
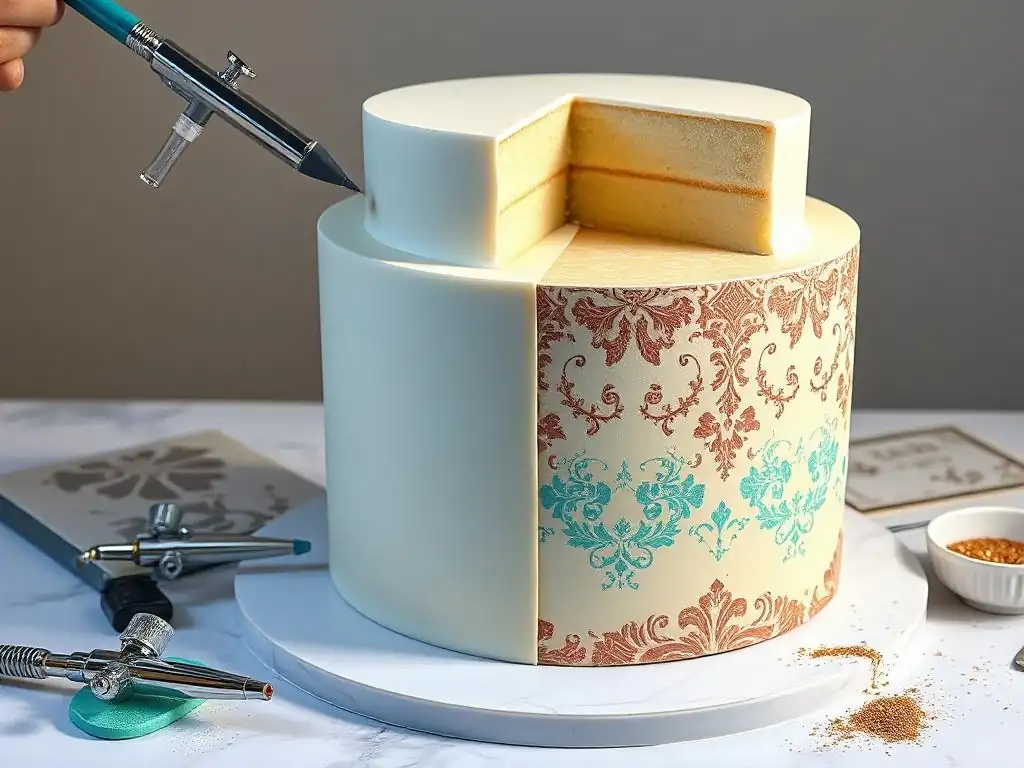
Once you're comfortable with basic single-layer stenciling, you can explore more advanced techniques like layering stencils or using multiple colors. These methods add depth, texture, and vibrancy to your easy cake stencil designs, taking them to the next level.
Layering involves using more than one stencil or applying the same stencil multiple times with different mediums or colors. Multicolor techniques involve using different colors within a single stencil application or across multiple layers. These methods require a bit more precision and drying time but yield stunning results.
How to Create Depth and Texture Using Multiple Stencils
Layering stencils can create complex patterns with depth. You might start with a background stencil pattern applied in a subtle color or texture (like edible dust), allow it to dry, and then apply a different, perhaps bolder, stencil pattern on top using a contrasting color or medium (like royal icing).
For example, apply a fine dot pattern using white edible dust over a colored fondant. Once set, place a floral stencil over the top and apply royal icing. When the stencil is removed, you'll have raised floral designs sitting on a subtly textured background. Another technique is to use the same stencil twice, slightly offsetting the second application in a different color to create a shadow effect, adding dimension to your easy cake stencil designs.
Combining Colors and Edible Sprays for Vibrant Cake Designs
Using multiple colors within a single stencil application is easiest with airbrushing or edible sprays. With careful masking (using paper or plastic to cover areas you don't want colored), you can spray different colors through different parts of the same stencil design before removing it.
Alternatively, you can use different colored royal icings or buttercreams within the same stencil, carefully applying each color to its designated area with a small spatula or piping bag tip before scraping off the excess. For vibrant effects, consider using bright edible spray colors through a stencil onto a white or light-colored cake surface. Approximate coverage for a standard edible color spray might be enough for 2-3 full sides of an 8-inch cake.
Using Edible Glitter and Metallics with Cake Stencils
Edible glitter and metallic dusts or sprays are fantastic for adding shimmer and luxury to easy cake stencil designs. Metallic dusts (like gold, silver, or bronze) can be applied dry with a brush through a stencil for a subtle sheen, or mixed with a clear alcohol-based extract (like lemon extract) to create a paint that can be applied through the stencil for a more opaque metallic finish.
Edible glitter sprays provide a quick way to add sparkle. Simply hold the stencil against the cake and spray a light, even layer of glitter spray over the openings. This works beautifully over dried royal icing stencils or directly onto fondant. A small pot of edible gold dust (perhaps 2-3 grams) can provide enough material to stencil several cake tiers, adding significant sparkle for a relatively low cost.
Maintenance and Care for Reusable Cake Stencils
Cake stencils are reusable tools, and with proper care, they can last for many projects, making them a cost-effective way to enhance your cake decorating. Cleaning and storing them correctly is essential to maintain their condition and ensure they are ready for your next application of easy cake stencil designs.
Neglecting stencil care can lead to damage, such as bending, tearing, or residue buildup, which can affect the quality of future stenciled patterns. A little attention after each use goes a long way in preserving these valuable tools.
Cleaning Techniques to Prolong Stencil Life
Clean your stencils immediately after use, especially if using mediums like royal icing or buttercream, which can harden and become difficult to remove.
- Rinse the stencil under warm running water to remove as much residue as possible.
- For stubborn bits, gently scrub the stencil with a soft brush (like a clean toothbrush designated for cake tools) and mild dish soap.
- Be careful not to bend or crease the plastic/acrylic while cleaning, especially with intricate designs.
- Rinse thoroughly to remove all soap residue.
- Dry the stencil completely before storing. You can lay it flat on a clean towel or paper towel, or hang it if it has a hole for doing so. Ensure all crevices are dry to prevent water spots or mildew.
Avoid using abrasive cleaners or harsh scrubbing pads, as these can scratch or damage the stencil surface.
Storage Tips to Keep Stencils in Perfect Condition
Proper storage prevents stencils from getting bent, torn, or warped.
- Store stencils flat. This is the best way to prevent bending. You can store them in a shallow drawer, a binder with plastic sleeves, or a dedicated stencil storage box.
- If stencils came with a protective backing, keep it and store the stencil with the backing attached.
- Avoid placing heavy objects on top of stored stencils.
- Keep stencils away from direct heat or sunlight, which can cause some plastics to warp or become brittle over time.
- Organize your stencils by size or theme so you can easily find the easy cake stencil designs you need for your next project.
A simple system, like using binder clips to group similar stencils together before storing them flat, can help keep your collection tidy and protected.
Troubleshooting Common Issues in Easy Cake Stencil Designs
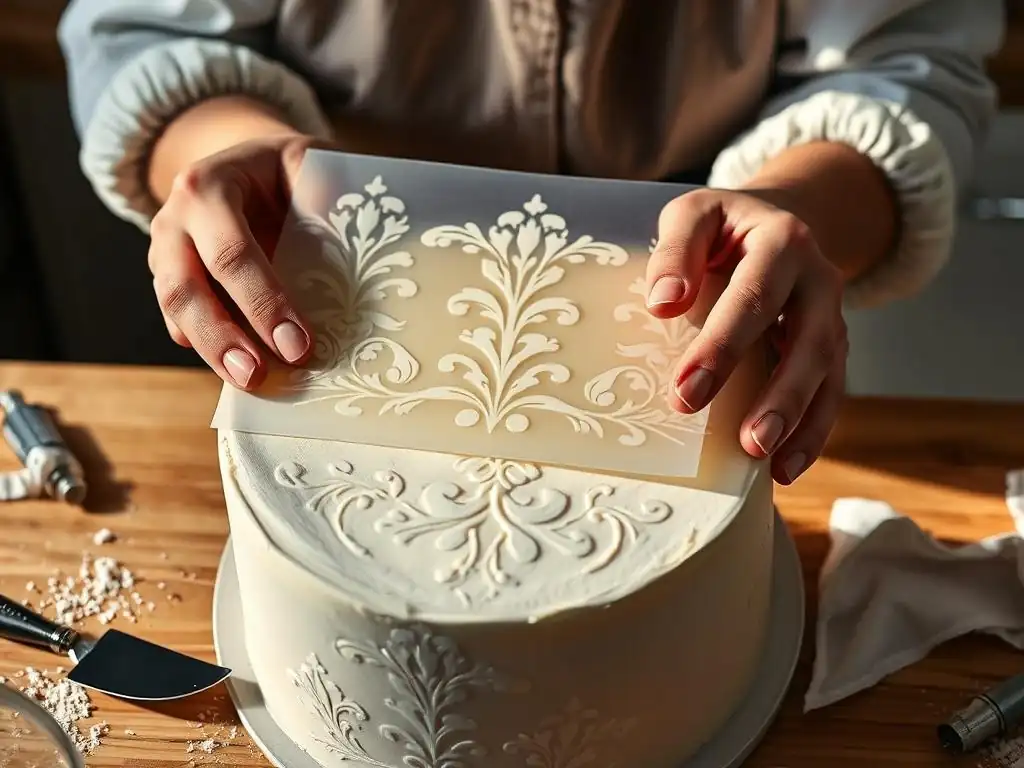
Even with careful preparation, you might encounter small issues when using easy cake stencil designs. Knowing how to troubleshoot common problems like smudges or misalignment can save your cake and help you learn from the experience.
Most problems stem from the surface, the medium consistency, or the stencil handling. Identifying the cause is the first step to fixing the issue or preventing it from happening on your next cake. Don't be discouraged by minor imperfections; they happen to everyone!
Fixing Smudges and Uneven Patterns on Cakes
Smudges usually occur when the stencil moves during application or removal, or if the medium is too wet.
- On Fondant/Ganache: If the smudge is minor and the medium (like royal icing or airbrush color) hasn't fully dried, you might be able to gently scrape it off with a sharp, clean craft knife or scalpel blade held flat against the surface. For dried royal icing, you might need to carefully chip it away. If the smudge is large, you might need to cover that area with another decoration, like a piped detail or a sugar flower.
- On Buttercream: Smudges on buttercream are harder to fix cleanly. If the buttercream is firm enough, you might be able to gently smooth the area with a warm spatula. Often, it's better to try and cover the smudge with sprinkles, edible pearls, or a small piped design.
Uneven patterns often result from inconsistent pressure or uneven scraping of the medium. Practice applying even pressure across the stencil and scraping consistently. If you have thin spots in a royal icing design, you might be able to carefully pipe a little extra icing into the gap once the stencil is removed, but this can be tricky to make seamless.
Solutions for Stencil Slippage and Misalignment
Stencil slippage is a common frustration. It usually happens because the stencil isn't held firmly enough or the cake surface isn't ideal.
- For Round Cakes: When stenciling the sides, ensure the stencil is wrapped snugly and held taut. Pins can be used on fondant-covered cakes to secure the stencil (inserting them just outside the area being stenciled). For buttercream, a helper is invaluable to hold the stencil steady.
- For Flat Surfaces: Ensure the surface is level and the stencil is lying perfectly flat against it.
- Alignment for Repeating Patterns: Many stencils have registration marks (small lines or dots) to help you align the stencil correctly when moving it to apply the next section of a repeating pattern. Pay close attention to these marks. If you slightly misalign, sometimes a small gap or overlap can be disguised with edible glitter or a fine brushstroke of color.
If a section is significantly misaligned or smudged beyond repair, consider covering that section of the cake with a larger decoration or design element. Sometimes, incorporating "mistakes" into a new design can lead to unexpectedly creative results!
Inspiring Examples of Easy Cake Stencil Designs for Home Bakers
Seeing how others have used easy cake stencil designs can be incredibly inspiring. These examples demonstrate that you don't need years of professional training to create cakes that look like edible works of art. Simple stencils put impressive decoration within reach of any home baker.
These illustrations showcase the versatility and impact that can be achieved with relatively little effort compared to traditional hand-piping techniques. They highlight how easy cake stencil designs can truly transform a basic cake into a showstopper.
Showcasing Simple Yet Incredible Cake Decorations Using Stencils
Imagine a plain white fondant cake tier adorned with a single, elegant lace pattern applied around the base using white royal icing. This classic look, achieved with an easy cake stencil design, is timeless and beautiful, perfect for weddings or anniversaries.
Another example could be a vibrant birthday cake covered in a repeating confetti dot pattern airbrushed in multiple bright colors. This playful, modern design is quick to execute with a stencil and airbrush, creating a festive look instantly. Or consider a chocolate cake with a simple, bold chevron pattern applied with contrasting white buttercream – a graphic and stylish design that's surprisingly easy to achieve. These examples underscore how simple stencil patterns, applied well, can yield truly incredible results.
How Easy Cake Stencil Designs Can Boost Your Baking Creativity
Easy cake stencil designs remove the barrier of needing advanced freehand skills to create detailed patterns, freeing you up to focus on other aspects of cake creation like flavor combinations, sculpting, or sugar flowers. This allows your creativity to flourish in new ways.
Instead of spending hours piping a lace pattern, you can stencil it in minutes and then spend that saved time crafting delicate gum paste flowers or experimenting with new cake flavors. Stencils also encourage experimentation with color and texture, as you can easily try different mediums and color palettes with the same stencil pattern. They make ambitious design ideas feel achievable, boosting confidence and encouraging you to try more complex overall cake concepts, knowing you have a reliable tool for intricate surface decoration.
Conclusion: Mastering Easy Cake Stencil Designs to Transform Your Cake Decorating Skills.
Mastering the use of easy cake stencil designs is a pivotal step in enhancing your cake decorating skills. These simple tools offer a pathway to creating intricate, professional-looking patterns and textures without the need for extensive freehand practice. From classic lace and floral motifs to modern geometric shapes and fun seasonal themes, stencils provide endless creative possibilities.
By understanding the different types of stencils and mediums, preparing your cake surface correctly, and practicing basic application techniques, you can confidently use stencils to elevate any cake. Troubleshooting common issues and properly caring for your stencils ensures they remain valuable assets in your baking toolkit for years to come. Embrace the power of easy cake stencil designs and watch as your cakes transform from simple bakes into stunning edible masterpieces, impressing everyone with your newfound decorating prowess.
Frequently Asked Questions
How can stencils help me create professional-looking cakes?
Stencils allow even novice bakers to achieve intricate designs with ease. They provide a guide for applying frosting, cocoa powder, or other decorations, resulting in a consistent and polished finish.
Where can I find easy cake stencil designs for beginners?
BakeWithEase.com offers a variety of free and beginner-friendly stencil templates. You can also find stencils online or at craft stores, looking for designs with clear, simple patterns.
What kind of materials can I use with cake stencils?
You can use a range of materials, including royal icing, buttercream, cocoa powder, edible glitter, and airbrush colors. The best choice depends on the desired effect and the cake's frosting.
How do I prevent my stencil from smudging when applying the design?
Secure the stencil tightly against the cake using pins or stencil holders. Use a gentle, even pressure when applying your chosen material, and carefully lift the stencil straight up to avoid smudging.
Can I reuse cake stencils, and how should I clean them?
Yes, most cake stencils are reusable. Clean them immediately after use with warm, soapy water. Ensure they are completely dry before storing to prevent damage or warping.
Final Reflection: Unlocking Cake Decorating Creativity Through Simple Stencils
The accessibility of cake decorating, once a perceived barrier for many home bakers, is now within reach thanks to the power of simple stencils. This isn't just about pretty borders anymore; it's about unlocking a world of creative expression, empowering anyone to transform a simple cake into a stunning masterpiece.
The impact of easily accessible design techniques like stenciling is profound. It's democratizing the art of cake decorating, allowing individuals to express their creativity and share their passion with others, regardless of prior experience. The best things in life are simple,
and this rings true for cake decorating. A few well-placed stencils can elevate a cake from ordinary to extraordinary, fostering a sense of pride and accomplishment in the baker.
Now, it's your turn. Consider the simple yet powerful designs showcased in this article. Don't be afraid to experiment, to try new combinations, and to let your creativity flow. Pick up a stencil, grab some edible paint, and transform your next cake into a testament to your own unique artistic vision. The possibilities are as limitless as your imagination.
Unleash Your Inner Cake Artist: Stunning Stencils Await!
Thanks for joining us on this journey into the world of cake decorating! We hope you've discovered the amazing possibilities that simple stencils can unlock. Ready to transform your baking game?
- Master a new stencil technique: Try out the "reverse stencil" method we discussed – you'll be amazed at the unique results! This is your chance to create truly breathtaking cakes.
- Share your creations: We'd love to see your stencil masterpieces! Tag us on social media with #BakeWithEaseStencils to inspire others.
- Explore our other tutorials: Dive deeper into cake decorating with our extensive library of free guides on frosting, filling, and more. You might discover your next favorite technique!
So, what stunning cake design will you create with stencils today?