
Decorating with Royal Icing: From Flooding to Fine Line Details


Welcome to BakeWithEase, your haven for all things baking! Ever wondered how to achieve those impossibly delicate and intricate designs with royal icing? This week, we're diving deep into the world of decorating with Royal Icing: From Flooding to Fine Line Details. Discover the secrets to creating stunning, professional-looking decorations that will elevate your baking to a whole new level. Are you ready to unlock the magic of fine line details and transform your cookies and cakes into edible masterpieces? Let's get baking!
- Mastering Royal Icing for Cake and Cookie Decoration
- Royal Icing: A Baker's Guide to Achieving Perfect Consistency
- Flooding with Royal Icing: Achieving a Smooth, Even Base
- Piping Intricate Designs: Mastering Royal Icing Fine Line Details
- Advanced Royal Icing Techniques: Creating Complex Designs
- Troubleshooting Royal Icing Fine Line Details: Common Issues and Solutions
- Royal Icing Recipes: BakeWithEase's Tried and Tested Formulas
- Beyond the Basics: Expanding Your Royal Icing Skills
- Troubleshooting Royal Icing Fine Line Details: Common Issues and Solutions
- Royal Icing Recipes: BakeWithEase's Tried and Tested Formulas
- Beyond the Basics: Expanding Your Royal Icing Skills
- Perfecting Your Royal Icing Fine Line Details: A Summary for BakeWithEase Bakers
-
Frequently Asked Questions
- How do I achieve a very fine line with royal icing for detailed decorations?
- What's the best consistency of royal icing for creating fine line details?
- What kind of piping tip is recommended for fine line royal icing work?
- How can I prevent my royal icing from clogging when piping fine lines?
- What are some common mistakes to avoid when working with royal icing for fine details?
- Final Reflection: Mastering the Art of Royal Icing Fine Lines
- Unleash Your Creativity with Royal Icing!
Royal icing is a classic decorator's medium, known for its smooth finish and ability to dry hard, creating durable and intricate designs on cakes, cookies, and gingerbread houses. Its versatility allows for a range of techniques, from simple flooding to complex piping and delicate royal icing fine line details. Understanding how to work with royal icing is a fundamental skill for any baker looking to elevate their decorative skills.
Achieving mastery with royal icing involves not just following a recipe, but also understanding its behavior. Humidity, temperature, and even the age of your meringue powder or egg whites can impact the final result. A batch that seems perfect one day might be too stiff or too thin the next, requiring slight adjustments. This sensitivity is part of the craft, encouraging bakers to develop a keen eye for consistency and flow.
Understanding Royal Icing Consistency for Different Techniques
The consistency of royal icing is perhaps the single most important factor determining the success of your decorating efforts. Different projects and techniques demand specific consistencies, ranging from very thick to quite thin. Using the wrong consistency can lead to frustrating issues like bleeding colors, cracking surfaces, or inability to hold shape.
Generally, royal icing consistency is described by how quickly a ribbon of icing dropped back into the bowl disappears. A very stiff consistency might take 30 seconds or more to blend back in and is used for piping flowers or creating structural elements. A medium consistency, taking around 10-15 seconds, is ideal for outlining and piping borders.
A flood consistency, which blends in within 5-10 seconds, is perfect for filling areas smoothly. Finally, a thin consistency, disappearing in under 5 seconds, can be used for watercolor effects or dipping. For intricate royal icing fine line details, a medium or medium-stiff consistency is typically required, allowing for precise control without breaking.
Royal Icing: A Baker's Guide to Achieving Perfect Consistency
Achieving the perfect royal icing consistency is more art than science initially, but with practice, it becomes intuitive. It involves starting with a base recipe and then gradually adding small amounts of liquid (usually water or lemon juice) or powdered sugar to adjust the thickness. This process requires patience and frequent testing.
The environment plays a significant role. On a humid day, your icing might become thinner than expected, requiring more powdered sugar. Conversely, in a dry climate, it might thicken up quickly, needing more liquid. Keeping your workspace clean and covered when not in use is crucial to prevent the icing from drying out prematurely.
The Importance of Royal Icing Consistency in Cake Decorating
In cake decorating, royal icing consistency is paramount for both structural integrity and aesthetic appeal. A stiff consistency is essential for piping elaborate borders, latticework, or dimensional flowers that need to hold their shape vertically. If the icing is too soft, these elements will slump and lose their definition.
Conversely, when using royal icing for pressure piping or creating delicate brush embroidery effects on a cake, a slightly softer, medium consistency is often preferred. This allows the icing to flow smoothly from the piping tip without requiring excessive force, which can lead to shaky lines or uneven application. The desired final look dictates the starting point for your consistency adjustment.
How to Adjust Royal Icing Consistency for Flooding and Piping
Adjusting royal icing consistency is a step-by-step process. Start with your base recipe, which is usually a medium or stiff consistency. To thin it for flooding, add liquid (water, milk, or lemon juice) one drop or a quarter teaspoon at a time. Mix thoroughly after each addition and test the consistency. The "ribbon test" is reliable: lift a spoon of icing and let it drizzle back into the bowl. For flood consistency, the ribbon should sink back and become smooth within 5-10 seconds.
To thicken icing for piping or borders, add more sifted powdered sugar one tablespoon at a time. Mix well until fully incorporated and test. For piping detailed work or borders, you want a consistency that holds a defined shape when piped but is still smooth enough to flow without breaking. A good test is to pipe a line; it should hold its shape without spreading but also not break or appear grainy. For intricate royal icing fine line details, a consistency that holds a sharp point when lifted is often ideal.
Flooding with Royal Icing: Achieving a Smooth, Even Base
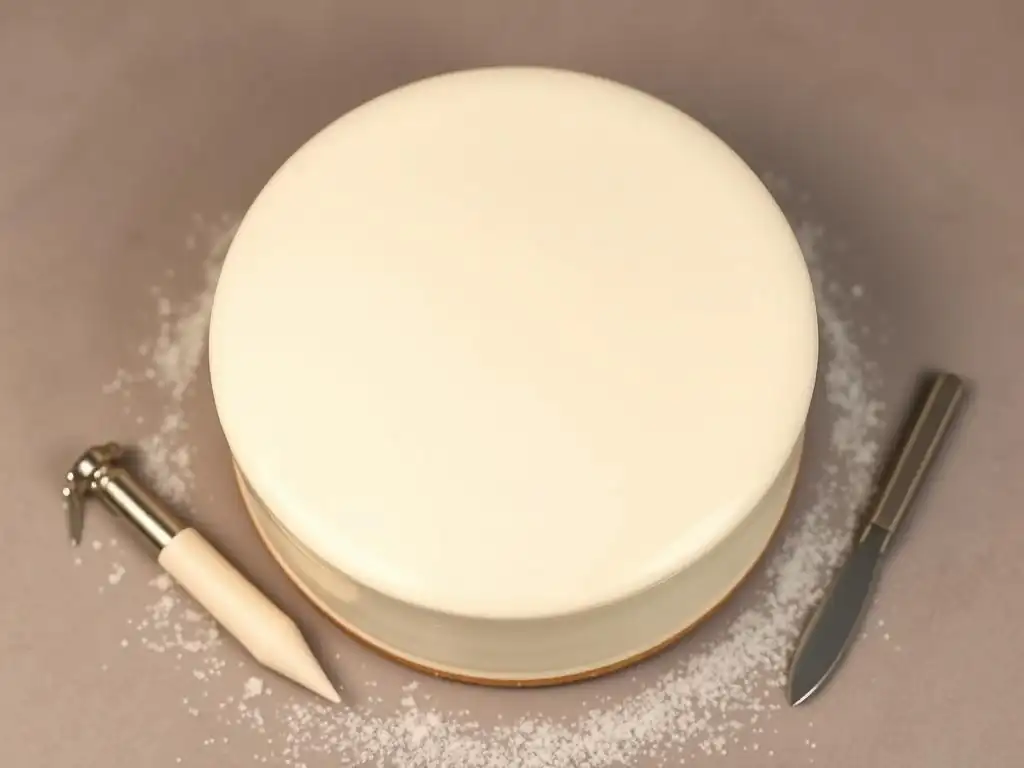
Flooding is the technique used to create a smooth, solid layer of royal icing, typically on cookies or sections of a cake. It involves outlining the area with a slightly thicker icing (medium consistency) and then filling the interior with a thinner, flood consistency icing. The goal is a perfectly smooth, uniform surface once dried.
This technique provides the ideal canvas for adding subsequent layers of decoration, including piping, wet-on-wet designs, or intricate royal icing fine line details once the base layer is completely dry. Proper flooding prevents craters and ensures a clean look.
Before you even mix your icing, ensure your cookies or cakes are fully cooled and completely free of grease. Even a tiny amount of grease can destabilize royal icing, preventing it from setting properly. Cookies should be baked flat and level for the best results.
Wipe the surface of your cooled baked goods gently with a dry paper towel to remove any residual crumbs or grease. For cakes, ensure your base layer (like buttercream or ganache) is firm and chilled if applying royal icing directly, though flooding is most commonly used on cookies or firm sugarpaste/fondant surfaces.
Step-by-Step Guide to Royal Icing Flooding Techniques
- Outline: Using a piping bag fitted with a small round tip (like a PME 1.5 or Wilton 2) and medium-consistency icing, pipe a border around the area you want to flood. Ensure the outline is continuous with no gaps.
- Prepare Flood Icing: Have your flood-consistency icing ready in a piping bag or squeeze bottle.
- Fill: Start filling the outlined area, working from the edges inwards. Don't overfill.
- Spread/Smooth: Use a scribe tool, toothpick, or small offset spatula to gently spread the flood icing to the edges and pop any air bubbles. Jiggle the cookie or cake gently to help the icing settle smoothly. Aim for an even layer.
- Dry: Allow the flooded area to dry completely before adding any further decorations, especially if you plan on adding royal icing fine line details. This can take 6-8 hours or even longer depending on humidity. Using a fan can speed up the drying process and help prevent craters.
Troubleshooting Common Royal Icing Flooding Problems
One common issue is craters, sunken areas in the flooded surface. This is often caused by air bubbles that weren't popped or by the icing being too thin. Ensure you tap and jiggle the cookie/cake and use a scribe tool to eliminate bubbles. If the icing is too thin, thicken it slightly.
Another problem is bleeding colors, where darker colors bleed into lighter ones. This usually happens if the base layer isn't fully dry before applying wet details or if the icing consistency is too thin. Ensure each layer is dry. Using gel food colors sparingly and avoiding liquid colors helps. Pinholes are tiny holes in the surface, often caused by trapped air. Use a scribe tool vigorously to pop bubbles immediately after flooding. If the outline breaks during flooding, stop, let it set briefly, and patch the break before continuing.
Piping Intricate Designs: Mastering Royal Icing Fine Line Details
Once your flooded base layer is bone dry (ideally 24 hours), you can begin adding intricate designs. This is where the magic of piping comes in, allowing you to create delicate patterns, script writing, or detailed images. Mastering royal icing fine line details requires practice, patience, and the right tools.
The key to beautiful royal icing fine line details is consistent pressure on the piping bag and a steady hand. Whether you're piping filigree, dots, or tiny flowers, the ability to control the flow of icing is paramount. Working slowly and deliberately is more important than speed.
Essential Tools for Royal Icing Fine Line Work
To achieve sharp, crisp royal icing fine line details, specific tools are indispensable.
- Piping Bags: Small disposable piping bags are convenient. You can use couplers or just snip the end.
- Piping Tips: Very small round tips are crucial. Sizes like PME 00, 0, 1, or Wilton 1, 2 are standard for fine work. Metal tips generally provide sharper lines than plastic ones.
- Couplers: Allow you to change tips easily without changing bags, useful if you need to switch between slightly different line thicknesses.
- Scribe Tool/Toothpicks: Essential for correcting mistakes, guiding lines, and popping tiny air bubbles in the piped lines.
- Food Clips/Rubber Bands: To secure the end of the piping bag and prevent icing from squeezing out the top.
Preparing Your Piping Bag for Fine Detail Royal Icing
Properly filling and preparing your piping bag is crucial for smooth piping and achieving excellent royal icing fine line details. Start by inserting your small round tip into the bag (with or without a coupler). Push the tip down firmly.
Fold the top edges of the bag down to create a cuff. This prevents icing from getting on the outside of the bag. Fill the bag about half to two-thirds full with your medium-stiff royal icing. Do not overfill, as it makes the bag hard to handle and control pressure. Unfold the cuff and twist the top of the bag tightly. This creates pressure behind the icing. Practice squeezing gently to ensure the icing flows smoothly and evenly from the tip.
Practicing Basic Fine Line Piping Techniques
Like any skill, mastering royal icing fine line details requires practice. Don't expect perfection on your first try! Practice on parchment paper or wax paper first.
Start with basic exercises:
- Straight Lines: Try piping lines of varying lengths, aiming for consistent thickness and straightness. Practice stopping and starting cleanly.
- Dots: Practice piping dots of different sizes by applying pressure, letting the icing mound slightly, and then pulling straight up.
- Curves and Swirls: Move on to piping smooth curves, S-shapes, and simple swirls.
- Zigzags and Shells: Practice classic border techniques that build hand strength and control.
Focus on maintaining even pressure throughout the line or shape. Hold the bag loosely in your hand, using your dominant hand to apply pressure and your non-dominant hand to guide the bag. Keep the tip slightly elevated above the surface you are piping on – this is called "piping in the air" and helps create smooth, flowing lines.
Advanced Royal Icing Techniques: Creating Complex Designs
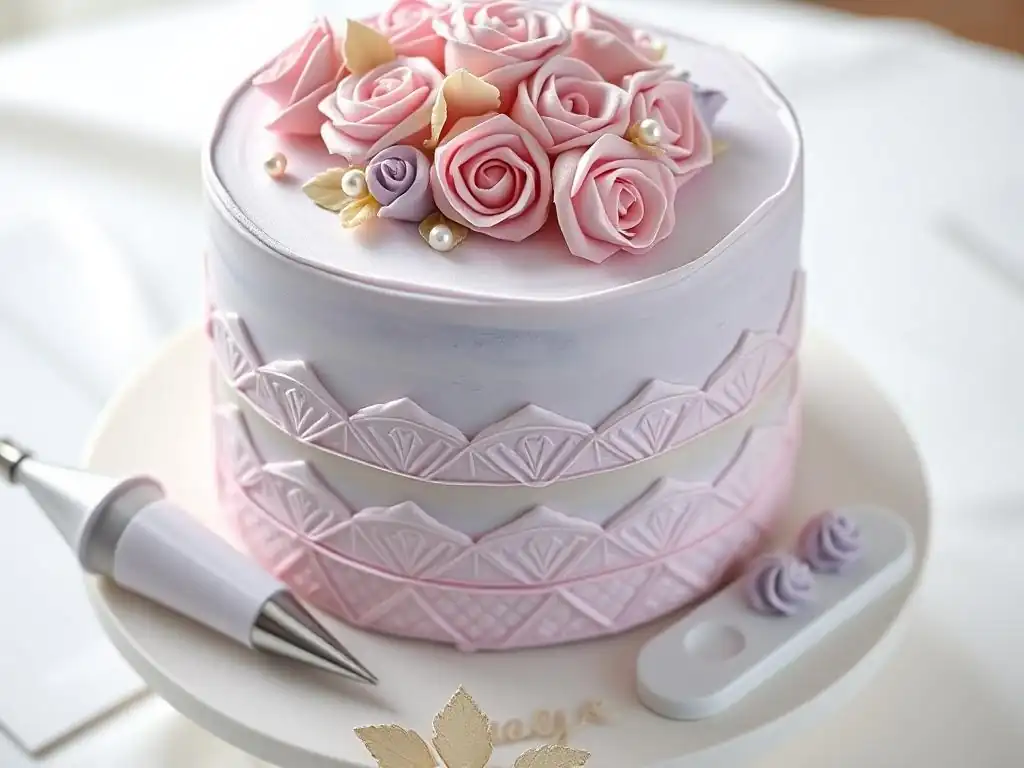
Once you're comfortable with basic flooding and piping, you can explore more advanced royal icing techniques to create stunning, multi-dimensional decorations. These methods often involve combining different consistencies and building up layers.
Advanced techniques allow for greater realism and artistic expression. Whether it's creating delicate lace, realistic flowers, or intricate scenes, royal icing offers immense possibilities for those willing to experiment.
Layering Royal Icing for Dimension and Texture
Layering is a fundamental technique for adding dimension to royal icing designs. After your first layer of flooded icing is completely dry, you can pipe or flood additional elements on top. For instance, you might flood a cookie with white icing, let it dry, then flood a smaller area with a different color, let it dry, and finally add piped details like royal icing fine line details or dots on top of those layers.
Each layer must be fully dry before applying the next to prevent colors from bleeding and to ensure the design stands out crisply. This can mean waiting several hours, or even overnight, between steps. Building layers allows you to create depth and visual interest, making your decorations pop.
Using Royal Icing Transfers for Intricate Patterns
Royal icing transfers are an excellent way to create intricate or repetitive designs, especially delicate royal icing fine line details, that might be difficult to pipe directly onto a vertical cake surface or a small cookie. You pipe the design onto parchment paper or a special transfer sheet, allow it to dry completely, and then carefully peel it off and attach it to your cake or cookie using a tiny dab of fresh royal icing.
This technique is perfect for creating consistent elements like small flowers, logos, letters, or complex lace patterns. You can make many transfers ahead of time, saving valuable decorating time, especially for large projects or multiple items. Ensure the transfers are completely dry and hardened (often 24 hours or more) before attempting to peel them off to prevent breakage.
Adding Color and Shine to Royal Icing Decorations
Color is added to royal icing using gel food coloring, which is highly concentrated and won't significantly alter the consistency like liquid colors. Add coloring sparingly with a toothpick and mix thoroughly to achieve the desired shade. Remember colors often deepen slightly as the icing dries.
For shine and sparkle, edible luster dusts and glitters can be applied. Luster dust can be brushed onto dry royal icing using a soft brush for a shimmery effect. It can also be mixed with a clear extract (like vodka or lemon extract, which evaporates quickly) to create an edible paint for adding metallic accents or washes of color. Edible glitter can be sprinkled onto wet or slightly wet icing, or attached to dry icing with a little edible glue or a dab of fresh icing.
Troubleshooting Royal Icing Fine Line Details: Common Issues and Solutions
Even experienced bakers encounter issues with royal icing. Knowing how to troubleshoot common problems can save your project and reduce frustration, especially when working on delicate royal icing fine line details.
Identifying the cause of a problem is the first step to fixing it. Is the icing too thick? Too thin? Is it drying too fast? Is there moisture involved? Patience and a willingness to adjust are key.
Preventing Royal Icing from Cracking or Breaking
Cracking in royal icing can occur during drying or after the decoration is complete. This is often due to the icing being too stiff, drying too quickly, or being applied too thickly over a soft base (like buttercream).
To prevent cracking, ensure your icing consistency is appropriate – not too thick for the application. Avoid drying the icing in direct sunlight or in a very hot oven with just the light on, as this can cause the surface to dry faster than the interior, leading to cracks. If decorating a cake, ensure the base layer is stable. Adding a tiny amount of corn syrup or glycerine (just a drop or two per cup of icing) can also improve elasticity and help prevent cracking, especially for delicate royal icing fine line details.
Fixing Royal Icing Bleeding and Color Migration
Color bleeding is a common and frustrating issue, especially when using dark colors next to light ones. It happens when colors migrate into each other while the icing is still wet or if the base layer wasn't fully dry before applying a new color on top.
Ensure each layer of icing is completely dry before adding adjacent or overlapping colors. This is crucial. Use high-quality gel food colors sparingly. Avoid adding too much color, as this increases the risk of bleeding. Sometimes, painting details onto a fully dried white base with edible paints (luster dust mixed with extract) is safer than piping colored icing directly.
Storing and Preserving Royal Icing Decorated Treats
Royal icing dries hard and is quite stable, making decorated treats excellent candidates for storage. Once the royal icing is completely dry (allow at least 24 hours, preferably 48 for very humid conditions), store cookies or cakes in an airtight container at room temperature.
Layer cookies carefully between sheets of parchment or wax paper to prevent them from sticking together or damaging the intricate royal icing fine line details. Avoid refrigerating or freezing royal icing decorated items if possible, as condensation upon thawing can cause the icing to soften, bleed, or become sticky. Properly stored, royal icing decorated cookies can last for several weeks.
Royal Icing Recipes: BakeWithEase's Tried and Tested Formulas

Having a reliable royal icing recipe is the foundation of successful decorating. At BakeWithEase, we've tested numerous formulas to find ones that are stable, easy to work with, and produce beautiful results, whether you're flooding large areas or creating delicate royal icing fine line details.
These recipes use common ingredients and techniques, suitable for bakers of all levels. Remember that the consistency will need to be adjusted based on your specific project and environmental conditions.
Basic Royal Icing Recipe for Beginners
This recipe is simple and forgiving, a great starting point.
- 2 lbs (approx. 8 cups) powdered sugar, sifted
- 1/2 cup meringue powder
- 1 cup warm water
- 1/2 tsp vanilla extract (optional)
- 1/4 tsp cream of tartar (optional, helps with stability)
In a large bowl, whisk together the sifted powdered sugar and meringue powder. In a separate bowl, whisk the warm water with the vanilla and cream of tartar (if using). Pour the liquid mixture into the dry ingredients. Using a stand mixer with the whisk attachment (or a hand mixer), beat on low speed until just combined.
Increase speed to medium-high and beat for 5-7 minutes until the icing is stiff and glossy. This will be a stiff consistency. Add water very slowly, a teaspoon at a time, beating until the desired consistency is reached for outlining, flooding, or piping basic shapes. Keep covered with a damp cloth or plastic wrap touching the surface when not in use.
Advanced Royal Icing Recipe for Fine Line Work
This recipe produces a slightly more elastic icing, preferred by some for intricate piping like royal icing fine line details and latticework.
- 1 lb (approx. 4 cups) powdered sugar, sifted
- 3 tbsp meringue powder
- 6-8 tbsp warm water (adjust as needed)
- 1 tsp light corn syrup (optional, for elasticity)
Combine sifted powdered sugar and meringue powder in a bowl. In a separate bowl, whisk warm water and corn syrup (if using). Add liquid to dry ingredients. Mix on low speed until combined. Increase speed to medium-high and beat for 5-7 minutes until icing forms stiff, glossy peaks. Adjust consistency for royal icing fine line details by adding water drop by drop until it flows smoothly from a small tip without breaking, holding a sharp point when pressure is released. This is usually a medium-stiff consistency. Store as directed above.
Vegan Royal Icing Recipe
Achieving a true royal icing consistency without egg products can be tricky, but this recipe using aquafaba (the liquid from canned chickpeas) is a popular alternative.
- 1/2 cup aquafaba (liquid from one can of chickpeas, unsalted preferred)
- 1 tsp lemon juice or white vinegar
- 1/2 tsp vanilla extract (optional)
- 3-4 cups powdered sugar, sifted (adjust as needed)
In a clean, grease-free bowl, beat the aquafaba with an electric mixer (whisk attachment) on high speed for 5-10 minutes until it forms stiff, glossy peaks, similar to meringue. Add the lemon juice and vanilla (if using) and beat for another minute. Gradually add the sifted powdered sugar, one cup at a time, beating on low speed until fully incorporated.
Increase speed to medium-high and beat for 2-3 minutes until the icing is stiff and holds its shape. Adjust consistency with tiny amounts of water or more powdered sugar for flooding or achieving vegan royal icing fine line details. Note that aquafaba icing may take longer to dry than traditional royal icing.
Beyond the Basics: Expanding Your Royal Icing Skills
Once you've mastered flooding and basic piping, a world of advanced royal icing techniques opens up. Experimenting with different tools and mediums can take your decorations to the next level, allowing you to create truly unique pieces.
Pushing the boundaries of royal icing involves creativity and a willingness to try new things. From experimenting with tip shapes to incorporating edible glitters, each new technique adds another tool to your decorating arsenal.
Exploring Different Piping Tips and Their Uses
Beyond the small round tips used for royal icing fine line details and outlining, there are dozens of other piping tips that create various effects. Star tips create ruffled borders or rosettes. Petal tips form flower petals. Leaf tips create realistic leaves. Basketweave tips produce woven patterns.
Experimenting with different tips on parchment paper is a great way to learn their capabilities. A single batch of medium-consistency royal icing can be divided and used with several different tips to practice various border styles or floral elements.
Incorporating Edible Luster Dust and Glitter into Royal Icing
Adding sparkle and shimmer can dramatically enhance royal icing decorations. Edible luster dust, available in various metallic and pearl colors, can be brushed onto dry icing for a subtle sheen or mixed with clear extract to paint solid metallic areas or delicate accents over royal icing fine line details.
Edible glitters come in different shapes and sizes. Fine glitters can be sprinkled onto wet icing or attached with edible glue to dry surfaces. Larger glitters or sprinkles can be pressed gently into wet icing. Always ensure the products are labeled "edible" to be food-safe.
Creating 3D Royal Icing Decorations
Royal icing can be used to create freestanding 3D decorations. This involves piping elements (like flower petals, leaves, or even structural pieces) onto a curved form (like a flower nail, dowel, or shaped mold) or flat onto parchment paper, allowing them to dry completely, and then assembling them using more royal icing as glue.
This technique requires stiff royal icing and significant drying time, sometimes several days for larger pieces. Examples include delicate royal icing flowers, standing figures, or intricate cages built from piped lines. It's a challenging but rewarding technique that allows for truly sculptural cake and cookie decorations.
Troubleshooting Royal Icing Fine Line Details: Common Issues and Solutions
Even with practice, problems can arise when working with delicate royal icing fine line details. Lines might break, colors might smudge, or the icing might not flow correctly.
Being able to identify the cause quickly is key to correcting the issue without ruining your hard work. Often, the solution lies in adjusting the icing consistency or refining your piping technique.
Preventing Royal Icing from Cracking or Breaking
When piping fine lines, cracking or breaking can occur if the icing is too stiff or you're applying inconsistent pressure. Ensure your medium-stiff icing flows smoothly from the tip. If lines are breaking as you pipe, add a tiny drop of water and mix thoroughly.
Also, avoid stretching the icing too thinly as you pipe. Maintain consistent, gentle pressure and keep the tip slightly above the surface ("piping in the air") to allow the line to fall naturally onto the surface. If piping over a curve, ensure the icing isn't under too much tension as it dries.
Fixing Royal Icing Bleeding and Color Migration
Bleeding colors are particularly noticeable in fine detail work. If a color is bleeding, it's usually because the underlying layer wasn't fully dry, or the icing consistency is too thin, allowing the colors to spread.
If you notice bleeding, stop immediately. If possible, gently blot the wet area with a paper towel. Let the piece dry completely. Sometimes, you can carefully scrape off the offending detail once dry and re-pipe it. The best fix is prevention: ensure base layers are bone dry and use proper consistency and minimal coloring.
Storing and Preserving Royal Icing Decorated Treats
Proper storage ensures your beautiful royal icing fine line details remain intact. Once fully dry, store items in a single layer in an airtight container if possible. If stacking is necessary, use parchment or wax paper between layers to protect the delicate piping.
Keep containers away from direct sunlight and fluctuating temperatures. Humidity is the enemy of dry royal icing, potentially causing it to soften or become sticky. Storing in a cool, dry place is ideal for preserving the crispness and detail of your royal icing work.
Royal Icing Recipes: BakeWithEase's Tried and Tested Formulas
Having a solid royal icing recipe is the first step to creating stunning decorations. These BakeWithEase recipes have been refined to provide a stable and workable icing base for all your decorating needs, from simple outlines to complex royal icing fine line details.
Remember that environmental factors can influence the final consistency, so always be prepared to make minor adjustments to achieve the perfect flow for your project.
Basic Royal Icing Recipe for Beginners
This easy recipe is perfect for those starting out. It yields a good volume and is versatile enough for outlining, flooding, and basic piping.
- 900g (approx. 8 cups) Icing Sugar, sifted
- 120g (approx. 1 cup) Meringue Powder
- 240ml (approx. 1 cup) Warm Water
- Optional: few drops clear extract (vanilla, almond), 1/4 tsp cream of tartar
In a large bowl, whisk together the sifted icing sugar and meringue powder. Gradually add the warm water while mixing on low speed with a stand mixer (whisk attachment) or hand mixer. Once combined, scrape down the bowl.
Increase speed to medium-high and beat for 7-10 minutes until the icing is thick, glossy, and holds stiff peaks. This is a stiff consistency, great for flowers or structural piping. To adjust for other techniques, add water or lemon juice a teaspoon at a time, mixing until the desired consistency is reached (e.g., 10-15 second ribbon for outlining, 5-10 second ribbon for flooding).
Advanced Royal Icing Recipe for Fine Line Work
This recipe is often preferred for its slightly smoother texture and elasticity, which helps prevent breakage when piping delicate elements and royal icing fine line details.
- 450g (approx. 4 cups) Icing Sugar, sifted
- 45g (approx. 3 tbsp) Meringue Powder
- 90-120ml (approx. 6-8 tbsp) Warm Water (start with less, add more)
- 1 tsp Light Corn Syrup
Combine sifted icing sugar and meringue powder in a bowl. In a separate bowl, whisk warm water and corn syrup. Add the liquid mixture to the dry ingredients. Mix on low speed until combined. Increase speed to medium-high and beat for 5-8 minutes until the icing is thick, glossy, and holds stiff peaks. For royal icing fine line details, this stiff consistency will need to be thinned slightly. Add water drop by drop, beating after each addition, until the icing flows smoothly from a small piping tip without breaking, usually a medium-stiff consistency.
Vegan Royal Icing Recipe
For those avoiding egg products, this recipe uses aquafaba as a meringue substitute. Drying times may vary.
- 120ml (approx. 1/2 cup) Aquafaba (liquid from 1 standard can of unsalted chickpeas)
- 1 tsp Lemon Juice or White Vinegar
- A pinch of Cream of Tartar (optional, helps stabilize)
- 450-600g (approx. 4-5 cups) Icing Sugar, sifted (adjust as needed)
- 1/2 tsp Vanilla Extract (optional)
In a very clean, grease-free bowl, whip the aquafaba with an electric mixer on high speed for 8-12 minutes until stiff, fluffy peaks form. Add the lemon juice, cream of tartar (if using), and vanilla (if using) and whisk for another minute. Gradually add the sifted icing sugar, one cup at a time, beating on low speed until fully incorporated.
Once all sugar is added, increase speed to medium-high and beat for 2-3 minutes until the icing is thick and glossy. Adjust consistency for flooding or vegan royal icing fine line details by adding tiny amounts of water or more powdered sugar as needed. Note that this icing may take 24-48 hours or longer to dry completely depending on humidity.
Beyond the Basics: Expanding Your Royal Icing Skills
Moving past fundamental techniques allows you to create truly intricate and impressive royal icing work. These skills build upon your understanding of consistency and piping control, enabling more complex designs.
Exploring these advanced areas pushes your creativity and technical ability, leading to stunning sugar art.
Exploring Different Piping Tips and Their Uses
A vast array of piping tips can transform your royal icing decorations. Beyond the small round tips for royal icing fine line details, consider:
- Open Star Tips (e.g., Wilton 1M): Create swirls, rosettes, and star borders.
- Closed Star Tips (e.g., Wilton 2D): Produce deeper ridges for shells and flowers.
- Petal Tips (e.g., Wilton 104): Used for piping realistic flower petals like roses or carnations.
- Leaf Tips (e.g., Wilton 352): Pipe quick, realistic leaves with a simple squeeze and pull motion.
Practicing with different tips on parchment paper will show you the unique textures and shapes each creates. A medium-stiff royal icing is typically versatile enough for many of these tips.
Incorporating Edible Luster Dust and Glitter into Royal Icing
Adding sparkle can make decorations more festive and elegant. Edible luster dust can be applied dry with a brush to highlight textures or royal icing fine line details, or mixed with a clear liquid (like vodka or lemon extract) to paint solid metallic areas.
For example, after piping a delicate lace pattern (royal icing fine line details) on a cookie, you could brush it with pearl luster dust for a subtle shimmer, or paint sections with gold luster dust mixed with extract for a metallic filigree effect. Edible glitter can be sprinkled onto still-wet flood icing for a sparkly base or adhered to dry icing using a tiny amount of edible glue.
Creating 3D Royal Icing Decorations
Creating standing or dimensional royal icing pieces requires patience and proper drying time. This technique is often used for delicate flowers, characters, or structural elements like cages or frames.
You pipe the design onto a non-stick surface (like parchment paper or a silicone mat) or over a form (like a flower nail for petals). For intricate pieces or royal icing fine line details that need to hold a specific shape, you might pipe them onto a curved surface like the outside of a glass or bottle, letting them dry in that shape.
Once completely dry and hardened (this can take 24-72 hours depending on size and humidity), the pieces are carefully peeled off and assembled using fresh royal icing as glue. This allows for complex structures that would be impossible to pipe directly.
Perfecting Your Royal Icing Fine Line Details: A Summary for BakeWithEase Bakers
Mastering royal icing fine line details is a rewarding skill that opens up endless possibilities for decorating cakes and cookies. It requires understanding consistency, using the right tools, and consistent practice.
From the smooth canvas of a flooded cookie to the delicate strokes of filigree, royal icing allows for precision and artistry. Remember to start with a reliable recipe, pay close attention to consistency, and don't be afraid to practice your piping techniques.
Here's a quick checklist for perfecting your royal icing fine line details:
- [ ] Use a medium-stiff royal icing consistency that flows smoothly but holds a sharp point.
- [ ] Choose very small round piping tips (PME 00, 0, 1 or Wilton 1, 2).
- [ ] Ensure your base layer of icing is completely dry before adding fine details.
- [ ] Practice on parchment paper to build muscle memory and control.
- [ ] Maintain consistent, gentle pressure on the piping bag.
- [ ] Keep the tip slightly above the surface ("piping in the air") for smooth lines.
- [ ] Have a scribe tool or toothpick handy for corrections and popping bubbles.
- [ ] Work in a cool, dry environment if possible.
- [ ] Allow sufficient drying time for your finished details.
- [ ] Store decorated items properly once fully dry.
With dedication and practice, you'll be creating stunning royal icing fine line details that impress everyone! Happy decorating from BakeWithEase!
Frequently Asked Questions
How do I achieve a very fine line with royal icing for detailed decorations?
To achieve fine lines, use a very stiff royal icing consistency and a fine-tipped piping bag or nozzle. Practice applying consistent pressure for even lines.
What's the best consistency of royal icing for creating fine line details?
The best consistency is often called "piping consistency." It should be stiff enough to hold its shape without spreading, but thin enough to flow smoothly through a fine tip.
What kind of piping tip is recommended for fine line royal icing work?
Use a very small round piping tip, such as a #0, #1, or #1. These tips are specifically designed for creating intricate details and fine lines.
How can I prevent my royal icing from clogging when piping fine lines?
Strain your royal icing thoroughly to remove any undissolved sugar granules. Also, keep the tip clean and unclogged by using a needle or toothpick.
What are some common mistakes to avoid when working with royal icing for fine details?
Avoid using icing that is too thin, as it will spread. Don't apply too much pressure, which can result in uneven lines. Also, ensure your icing is free from air bubbles.
Final Reflection: Mastering the Art of Royal Icing Fine Lines
The intricate beauty of royal icing fine lines isn't just a fleeting trend; it's a testament to the enduring power of handcrafted detail in a mass-produced world. These delicate strokes, painstakingly applied, transform ordinary baked goods into edible works of art, captivating the eye and delighting the palate. The techniques explored in this article—from achieving the perfect consistency to mastering pressure control—are more than just steps in a process; they are keys to unlocking a level of creativity that transcends the simple act of decorating.
The journey of learning royal icing fine lines is a deeply personal one. It's a process of patience, precision, and a willingness to embrace imperfection. Each tiny flaw, each slightly wobbly line, becomes a lesson learned, a step closer to mastery. The difference between ordinary and extraordinary is that little extra.
This quote perfectly encapsulates the dedication required to achieve truly stunning results with royal icing. The impact of this skill extends beyond the individual; it fosters community, inspiring bakers to share their creations and techniques, building a vibrant network of artistic expression.
Now, it's your turn. Don't be intimidated by the seemingly intricate nature of royal icing fine lines. Pick up your piping bag, experiment with different nozzles, and embrace the challenge. Let the process of creation be as rewarding as the final product. Remember the techniques discussed, practice regularly, and watch as your skills evolve, transforming your baked goods from delicious to breathtaking. The world awaits your unique artistic contribution—dare to create something truly extraordinary.
Unleash Your Creativity with Royal Icing!
Thank you for diving into the delicious world of royal icing with us! We hope you’ve gathered valuable insights that will enhance your decorating skills and inspire your next baking masterpiece. Now, it's time to take action and let your creativity flow!
Here are some steps to elevate your royal icing game:
- Start your next project today! Gather your tools and try your hand at flooding or adding fine line details to a simple cookie design.
- Share your creations with fellow bakers in your community or online—your work can inspire others!
- Experiment with unexpected techniques, like mixing colors or adding edible glitter, to make your designs truly unique.
What unique design will you create first with your newfound royal icing skills? We can't wait to hear about your masterpiece!