
Advanced Chocolate Tempering Techniques to Elevate Your Skills.

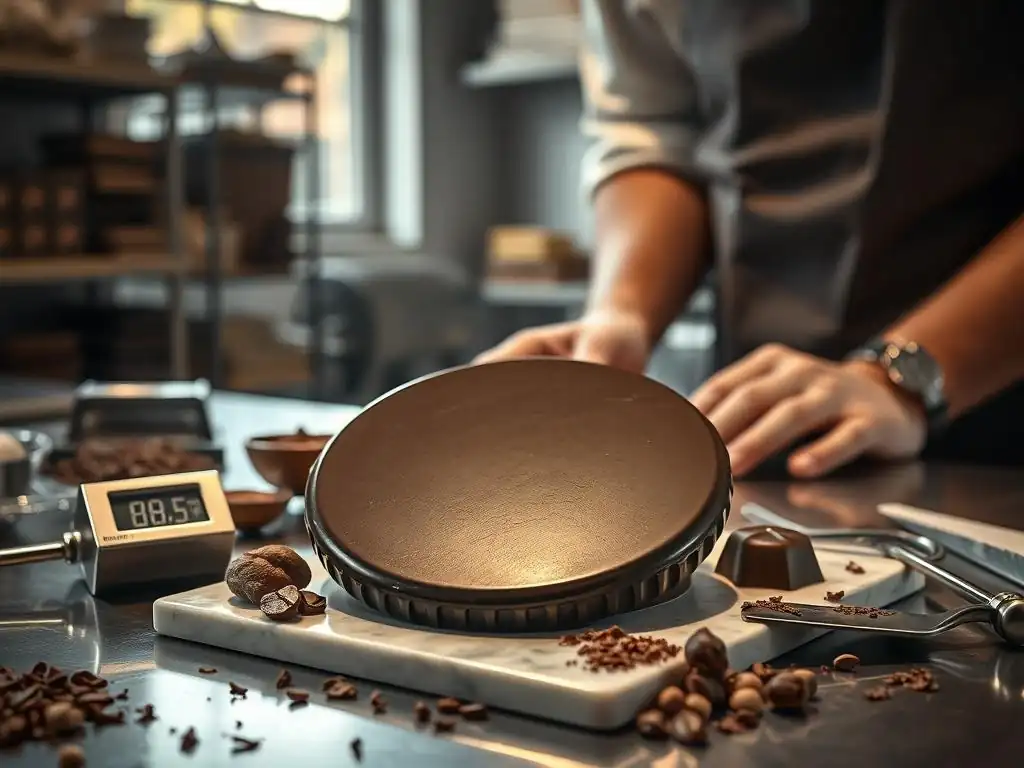
Welcome to BakeWithEase, your haven for baking mastery! Ever wondered how to achieve that perfect, glossy shine on your homemade chocolates? This isn't just about melting chocolate; it's about unlocking the secrets of chocolate tempering techniques for beginners, and even pushing beyond! Discover how mastering this fundamental skill can elevate your desserts from simple treats to professional-level creations. Intrigued? Let's dive in and transform your baking game!
- Advanced Chocolate Tempering Techniques to Elevate Your Skills | BakeWithEase
- Understanding the Science of Chocolate Tempering
- Advanced Chocolate Tempering Techniques
- Troubleshooting Common Chocolate Tempering Problems
- Elevating Your Skills: Applications of Perfectly Tempered Chocolate
- Beyond the Basics: Exploring Different Chocolate Varieties for Tempering
- Conclusion: Unleash Your Chocolate Tempering Potential | BakeWithEase
-
Frequently Asked Questions
- What is chocolate tempering and why is it important?
- What are the different chocolate tempering techniques discussed?
- Is chocolate tempering necessary for all chocolate recipes?
- What are some common mistakes beginners make when tempering chocolate?
- What equipment is recommended for successful chocolate tempering?
- Final Reflection: The Enduring Allure of Perfectly Tempered Chocolate
- Unleash Your Inner Chocolatier: Master the Art of Tempering!
Advanced Chocolate Tempering Techniques to Elevate Your Skills | BakeWithEase
Introduction: Mastering Chocolate Tempering for Professional Results
Welcome to the next level of chocolate mastery! While understanding basic chocolate tempering techniques for beginners is a fantastic starting point, truly elevating your confectionery skills requires delving into more precise and reliable methods. Tempering chocolate isn't just a fancy step; it's the key to achieving that desirable glossy finish, satisfying snap when broken, and preventing unsightly bloom. It transforms melted chocolate from a dull, soft substance into a professional-grade medium ready for molding, dipping, and decorating.
This guide will take you beyond the simple double boiler method, exploring advanced techniques used by chocolatiers worldwide. We'll uncover the science behind why tempering works, detail methods like seeding, tabliering, and sous vide, and provide practical tips for troubleshooting common issues. Whether you're aiming to create stunning chocolate decorations or perfectly enrobed truffles, mastering these techniques is essential for unlocking your full chocolate potential and achieving consistent, beautiful results every time.
Understanding the Science of Chocolate Tempering
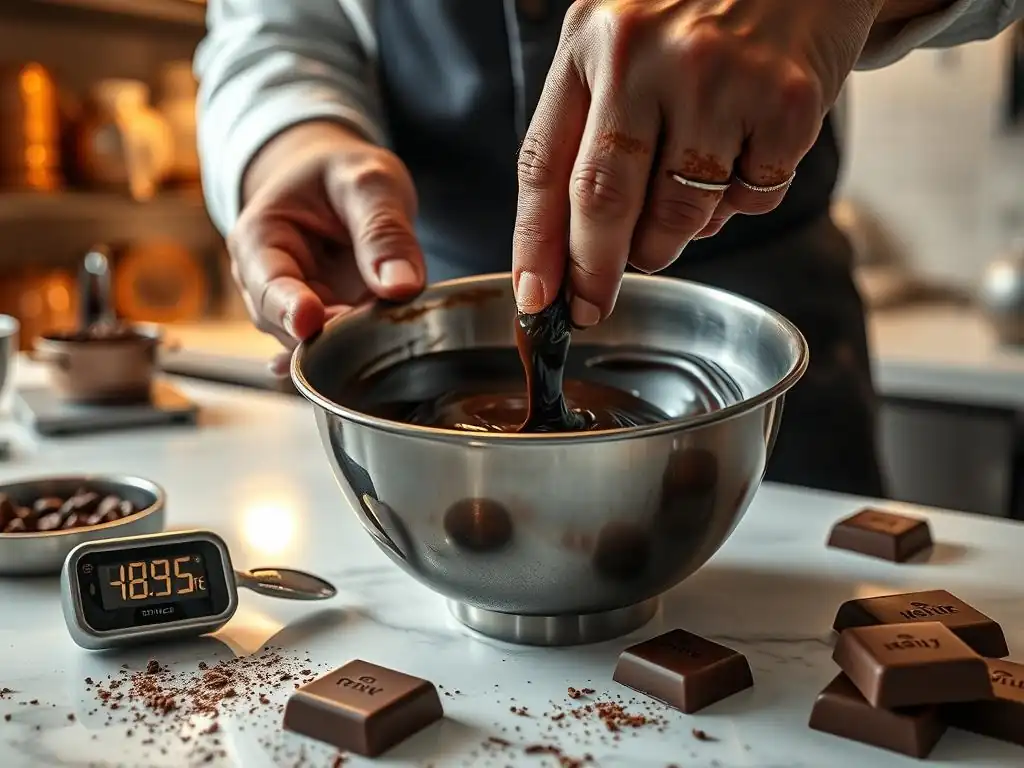
Why Temper Chocolate? Achieving the Perfect Snap and Shine
Tempering chocolate is the process of heating and cooling chocolate to specific temperatures to align the cocoa butter crystals within its structure. When chocolate is simply melted, the cocoa butter crystals are in a chaotic, unstable state. As it cools, these unstable crystals form, resulting in a chocolate that is dull, soft, prone to melting easily, and often develops a grayish-white film known as bloom. Think of untempered chocolate like poorly set concrete – it lacks strength and a smooth finish.
Proper tempering ensures that the cocoa butter molecules solidify into the most stable crystalline form, known as Beta (β) crystals. These β crystals are responsible for the desirable characteristics of high-quality chocolate: a firm structure that provides a clean snap when broken, a beautiful, glossy surface sheen, resistance to melting at room temperature (around 20-22°C or 68-72°F), and a smoother mouthfeel. Without tempering, even the finest couverture chocolate won't perform as expected in applications requiring a solid, stable finish.
The Role of Cocoa Butter Crystals in Chocolate Tempering
Cocoa butter is a complex fat composed of various fatty acids that can crystallize into different forms, or polymorphs, each stable at a different temperature range. There are six known forms, labeled I through VI. When chocolate is melted above approximately 45-50°C (113-122°F), all these crystal forms are destroyed, and the cocoa butter is completely liquid. The goal of tempering is to encourage the formation of only the stable Type V (Beta) crystals during the cooling and solidification process, while avoiding the less stable forms.
The tempering process involves carefully cooling the melted chocolate to a specific temperature range where Type V crystals can form, often through agitation or seeding with already-tempered chocolate. Once sufficient Type V crystals have formed, the chocolate is gently reheated slightly to melt any unstable crystal types that might have also formed. This leaves a suspension primarily of stable Type V crystals throughout the liquid chocolate, which then act as templates, guiding the rest of the cocoa butter to solidify into this desired structure as the chocolate cools and sets.
Different Types of Cocoa Butter Polymorphs and Their Impact
Cocoa butter can crystallize into at least six different forms, each with distinct melting points and structures. Type I and II crystals are very unstable, melting below 20°C (68°F), and result in soft, crumbly chocolate. Type III and IV crystals are slightly more stable, melting around 25-27°C (77-81°F), but still lead to a dull finish and poor snap. These are the forms that tend to develop when chocolate cools without proper tempering.
The highly sought-after Type V (Beta) crystals melt around 32-34°C (90-93°F), which is why tempered chocolate holds its shape well at room temperature and melts cleanly just below body temperature. These are the crystals responsible for gloss, snap, and resistance to bloom. Type VI crystals are the most stable form, melting around 36°C (97°F), but they form very slowly over time, often weeks or months, and are associated with fat bloom in aged chocolate. The art of tempering is to rapidly guide the cocoa butter into the Type V structure, bypassing the formation of the less desirable, unstable forms.
Advanced Chocolate Tempering Techniques
Seed Tempering: A Precise Approach to Chocolate Tempering
Seed tempering is one of the most accessible yet reliable methods for achieving perfectly tempered chocolate, making it an excellent step up from basic methods for beginners. It relies on the principle of introducing stable Type V crystals into melted chocolate to act as seeds, encouraging the rest of the cocoa butter to crystallize correctly as it cools. This method offers good control and is suitable for various batch sizes, from a small bowl to a larger quantity in a bain-marie.
The process involves melting the bulk of your chocolate completely, then gradually adding finely chopped pieces of already tempered chocolate (the "seed"). As the melted chocolate cools, the stable crystals in the seed chocolate promote the formation of more stable crystals throughout the mixture. This method is often preferred for its relative simplicity and effectiveness, provided you use good quality seed chocolate and monitor temperatures carefully. It's a technique that provides a solid foundation for mastering chocolate tempering techniques for beginners looking to advance.
Choosing the Right Seed Chocolate
Selecting the correct seed chocolate is crucial for the success of this tempering method. The seed chocolate must be in temper itself – meaning it already contains stable Type V cocoa butter crystals. Using untempered chocolate or chocolate that has bloomed will not work, as it won't provide the necessary crystalline structure to guide the tempering process. High-quality couverture chocolate, which is specifically formulated with a higher percentage of cocoa butter for easier tempering, is an ideal choice for seeding.
The seed chocolate should also be of the same type (dark, milk, or white) and preferably the same brand and origin as the chocolate you are tempering, as different chocolates can have slightly different tempering curves. It's best to use finely chopped chocolate or callets (small drops) for seeding, as smaller pieces melt more quickly and evenly, facilitating faster cooling and integration of the seed crystals. Aim to use approximately 10-20% of the total weight of the chocolate you are tempering as seed chocolate, adjusting based on the chocolate type and ambient temperature.
Step-by-Step Guide to Seed Tempering Chocolate
Here is a typical process for seed tempering:
- Melt the majority of your chocolate: Gently heat about 80-90% of your chocolate in a bowl over a double boiler or in a microwave on low power, stirring frequently, until it reaches its initial melting temperature. For dark chocolate, this is typically 45-50°C (113-122°F); for milk or white chocolate, it's slightly lower, around 40-45°C (104-113°F). Ensure the chocolate is completely melted and smooth, with no lumps.
- Remove from heat and add seed chocolate: Take the melted chocolate off the heat source. Immediately begin adding the finely chopped seed chocolate (the remaining 10-20%) to the bowl.
- Stir and cool: Stir the mixture constantly and vigorously with a spatula or whisk. The seed chocolate will begin to melt as it cools the bulk chocolate down. Continue stirring until all the seed chocolate has melted and the temperature of the mixture drops to the working temperature. This temperature varies by chocolate type: dark chocolate typically 31-32°C (88-90°F), milk chocolate 30-31°C (86-88°F), and white chocolate 28-30°C (82-86°F).
- Check for temper: Once the target temperature is reached and all seed is melted, lift the spatula or dip a piece of parchment paper or the tip of a knife into the chocolate. If it sets within 3-5 minutes at room temperature (around 20-22°C / 68-72°F) with a glossy finish and firm texture, your chocolate is in temper.
- Maintain working temperature: If the chocolate is in temper, you can now use it. Keep it at its working temperature using gentle heat (e.g., over very warm, but not hot, water or on a warming pad) if needed, stirring occasionally. If it cools too much and thickens, you may need to gently rewarm it slightly within the working temperature range.
Troubleshooting Common Seed Tempering Issues
Seed tempering is generally reliable, but problems can arise. One common issue is the chocolate not reaching the correct working temperature or setting properly. If the chocolate is too warm after adding the seed, it means you haven't added enough seed or stirred long enough for it to cool down sufficiently and incorporate enough stable crystals. Adding a bit more finely chopped seed chocolate and stirring vigorously can help bring the temperature down and introduce more seed crystals.
Conversely, if the chocolate cools down too much and becomes too thick or seizes during the process, it might indicate you added too much seed chocolate relative to the volume of melted chocolate, or the seed chocolate wasn't finely chopped enough to melt smoothly while cooling. In this case, you may need to gently rewarm the chocolate slightly to bring it back into the working temperature range, stirring constantly.
If it still doesn't temper after adjusting, you might need to start over by fully melting the chocolate again and repeating the process with more careful temperature monitoring and seed addition.
Tabliering: The Classic Marble Slab Tempering Method
Tabliering, also known as table tempering or marble slab tempering, is a classic method favored by professional chocolatiers for its direct control and visual feedback. It involves pouring melted chocolate onto a cool, clean marble or granite surface and working it with spatulas or scrapers to cool it down rapidly while agitating it. This vigorous movement and cooling on the stone encourage the formation of stable Type V crystals.
This technique requires a bit of practice to master the coordination of spreading and gathering the chocolate, but it offers excellent control over the cooling process. It's particularly effective for larger batches where rapid, even cooling is desired. While it might seem intimidating at first for beginners exploring advanced chocolate tempering techniques, understanding the principles of cooling and agitation on a cold surface is key to many tempering methods.
Preparing Your Marble Slab
A clean, cool marble or granite slab is essential for tabliering. The stone's density allows it to retain a consistent, cool temperature, which efficiently draws heat out of the melted chocolate. Ensure the slab is perfectly clean and dry before you begin; even a drop of water can cause chocolate to seize.
The ideal slab temperature is typically around 18-20°C (64-68°F). If your kitchen is warm, you might need to cool the slab slightly, perhaps by placing it near an open window in cool weather or briefly placing it in a very cool room (avoid refrigeration as condensation is a risk).
Have your tools ready: a sturdy metal scraper or bench knife and a flexible spatula. These tools are used to spread, gather, and manipulate the chocolate on the cold surface. Ensure your working environment is cool and dry, ideally around 20°C (68°F) with low humidity, as high temperatures and moisture can interfere with the tempering process and the setting of the chocolate.
The Tabliering Process: Spreading and Cooling
Begin by melting your chocolate completely to its initial melting temperature (45-50°C for dark, 40-45°C for milk/white), ensuring all crystals are melted. Pour about two-thirds of the melted chocolate onto the prepared marble slab. Keep the remaining one-third warm in the bowl over the double boiler (with the heat off) or under a heat lamp; this portion will be used later to raise the temperature back to the working range.
Using your scraper and spatula, immediately begin spreading the chocolate into a thin layer across the slab. Then, scrape it back into a pile. Repeat this spreading and gathering action continuously. The goal is to keep the chocolate moving over the cool surface to cool it down rapidly and evenly, while the agitation promotes stable crystal formation. Continue working the chocolate until it thickens slightly and reaches a lower temperature – typically around 27-28°C (81-82°F) for dark chocolate, 26-27°C (79-81°F) for milk, and 25-26°C (77-79°F) for white chocolate. It should be visibly thicker but still workable.
Achieving the Correct Consistency
Once the chocolate on the slab has cooled and thickened to the target temperature range and consistency, scrape it back into the bowl with the reserved, warmer chocolate. Stir the mixture gently but thoroughly. The warmer chocolate in the bowl will raise the temperature of the cooled chocolate from the slab back up to the correct working temperature (31-32°C for dark, 30-31°C for milk, 28-30°C for white). Stir until the mixture is smooth and homogenous.
At this point, the chocolate should be in temper. Perform a test by dipping a piece of parchment paper or a knife tip into the chocolate. It should set quickly (within 3-5 minutes) with a smooth, glossy finish.
If it sets too quickly and is brittle, it might be slightly over-tempered; if it doesn't set or remains dull, it's under-tempered. If it's too thick, you might need to gently warm the bowl slightly to reach the correct working viscosity. If it's too thin but won't set, you might need to repeat the tabliering process with a smaller portion of the chocolate to add more seed crystals.
Sous Vide Chocolate Tempering: Precise Temperature Control
Sous vide, a method known for its precise temperature control, has found its place in the chocolatier's toolkit as a highly reliable way to temper chocolate. This technique involves using a temperature-controlled water bath to maintain chocolate at the exact temperatures required for melting, cooling, and holding the working temperature. It eliminates guesswork and provides consistent results, making it particularly appealing for those who value accuracy and repeatability in their chocolate tempering techniques for beginners and beyond.
The primary advantage of sous vide tempering is the stability of the water bath temperature. Unlike direct heat or even a traditional double boiler, a sous vide immersion circulator keeps the water within a fraction of a degree of the target temperature. This gentle, consistent heat distribution minimizes the risk of burning the chocolate or accidentally exceeding the critical temperature ranges necessary for proper tempering.
Understanding Sous Vide Equipment
To temper chocolate using the sous vide method, you will need a few key pieces of equipment. The most important is a sous vide immersion circulator, which heats and circulates water in a container to a precise temperature. You will also need a container large enough to hold the water and the chocolate. This could be a large pot, a food-grade plastic container, or a dedicated sous vide bath.
The chocolate itself should be placed in a sealed bag or container that is suitable for immersion in the water bath. Food-grade vacuum seal bags, Ziploc bags (ensure they are sealed tightly with air removed using the water displacement method), or glass jars with tight-fitting lids are commonly used. The key is to prevent any water from coming into contact with the chocolate, as even a small amount of moisture can cause it to seize.
The Sous Vide Tempering Process
The sous vide tempering process typically follows these steps:
- Melt: Place your chocolate (callets or finely chopped) into a sealed bag or jar. Set the sous vide bath to the initial melting temperature for your chocolate type (e.g., 45-46°C / 113-115°F for dark, 40-41°C / 104-106°F for milk/white). Immerse the bag/jar, ensuring it's fully submerged. Allow the chocolate to melt completely, which may take 30-60 minutes depending on the quantity.
- Cool and Seed: Once melted, lower the water bath temperature to the crystallization temperature range. This is where Type V crystals form: approximately 31-32°C (88-90°F) for dark, 29-30°C (84-86°F) for milk, and 28-29°C (82-84°F) for white. Add a small amount (around 5-10%) of finely chopped, tempered seed chocolate to the bag (if not already added in step 1). Leave the chocolate in the bath at this temperature for 15-30 minutes, gently massaging the bag occasionally to distribute the seed crystals and encourage crystallization.
- Raise to Working Temperature: Increase the water bath temperature slightly to the final working temperature: 31-32°C (88-90°F) for dark, 30-31°C (86-88°F) for milk, and 28-30°C (82-86°F) for white. Hold the chocolate at this temperature. It should now be in temper and ready to use.
Benefits of Sous Vide Tempering
The sous vide method offers several significant benefits, particularly for achieving consistent results. The precise temperature control of the water bath means you are less likely to overheat or undercool the chocolate, reducing the risk of tempering failure. Once the chocolate reaches the working temperature, the sous vide bath can hold it there for extended periods without the risk of it falling out of temper, as long as the temperature is maintained correctly.
This stability makes it ideal for projects that require prolonged working times, such as dipping a large quantity of items or creating intricate molded pieces. It also simplifies the process by removing the need for constant monitoring and manual temperature adjustments required by other methods like tabliering or even traditional seeding over a bain-marie. For those looking for a hands-off, highly reliable method for chocolate tempering techniques for beginners advancing their skills, sous vide is an excellent option.
Using a Chocolate Tempering Machine: Automation for Efficiency
For serious home bakers or small-scale professionals who frequently work with chocolate, investing in a chocolate tempering machine can be a game-changer. These machines automate the heating, cooling, and holding phases of the tempering process, providing consistent results with minimal manual effort. They are designed to precisely control temperature and often include mechanisms for agitation, ensuring the chocolate remains in temper and at the correct viscosity for dipping or molding.
While an investment, a tempering machine significantly increases efficiency and reliability, especially when dealing with larger quantities of chocolate. It moves chocolate tempering techniques for beginners who are scaling up their production from manual methods to a more automated and less labor-intensive process, freeing up time for other tasks like filling or decorating.
Types of Chocolate Tempering Machines
Chocolate tempering machines come in various sizes and types, catering to different needs. Small, tabletop machines are suitable for home use or small batch production, typically holding anywhere from 1 to 5 kilograms (2-11 lbs) of chocolate. These often use a heating element and a cooling fan or refrigerated plate, combined with an auger or rotating bowl to stir the chocolate.
Larger, professional-grade machines can temper dozens or even hundreds of kilograms of chocolate at once. These often employ more sophisticated cooling systems and continuous tempering processes where melted chocolate is pumped through temperature-controlled zones. For most advanced home bakers, a smaller tabletop unit offering precise temperature control and continuous agitation is the most practical option. Look for features like digital temperature displays, adjustable thermostats, and removable bowls for easy cleaning.
Operating and Maintaining a Tempering Machine
Operating a chocolate tempering machine is relatively straightforward, as the machine handles the complex temperature cycles. You typically add solid chocolate (callets or chopped) to the machine's bowl, select the type of chocolate (dark, milk, white), and the machine melts it to the initial temperature, then cools it down to the crystallization temperature while agitating, and finally raises it to the working temperature. Some machines require you to add seed chocolate manually at the cooling phase, while others use a continuous flow system that incorporates seeding automatically.
Maintenance is crucial for ensuring the machine functions correctly and lasts a long time. Always clean the machine thoroughly after each use, following the manufacturer's instructions. Chocolate should never be allowed to harden inside the machine's working parts. Use warm, not hot, water and avoid soap unless specifically recommended, as residue can affect future batches of chocolate. Ensure all parts are completely dry before the next use, as moisture is detrimental to chocolate.
When to Consider Investing in a Tempering Machine
Deciding when to invest in a chocolate tempering machine depends largely on your volume of work and your need for consistency and efficiency. If you find yourself tempering chocolate frequently, perhaps weekly or even daily, or if you are producing chocolates for sale, a machine can quickly pay for itself in terms of saved time, reduced waste from failed tempering attempts, and improved product quality.
For beginners who are still exploring chocolate tempering techniques, starting with manual methods like seeding or tabliering is valuable for understanding the process. However, once you are comfortable with the principles and are consistently working with chocolate for larger projects, a machine provides a level of automation and reliability that manual methods cannot match, allowing you to scale up your production and achieve professional results more easily.
Troubleshooting Common Chocolate Tempering Problems
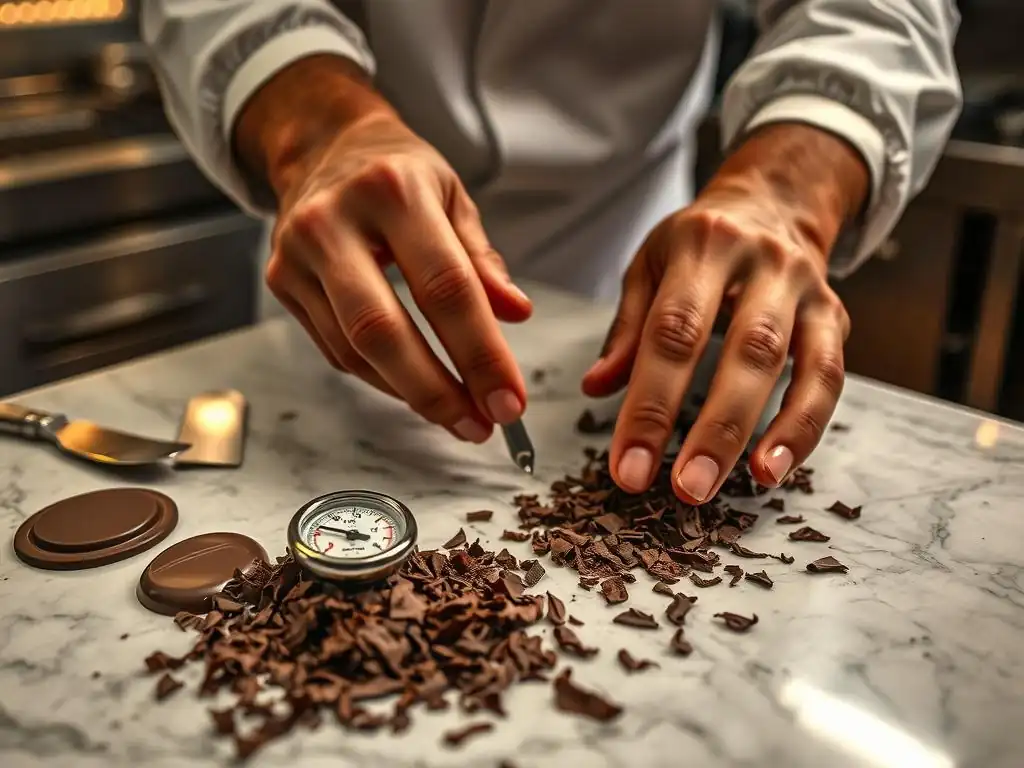
Even with advanced techniques, tempering can sometimes go wrong. Understanding common problems and their causes is essential for quickly identifying issues and knowing how to fix them. Patience and accurate temperature monitoring are your best friends when troubleshooting.
Seizing Chocolate: Causes and Solutions
Seizing is perhaps the most frustrating problem in chocolate work. It occurs when chocolate suddenly turns from a smooth, liquid state into a thick, grainy, unworkable paste. The most common cause is the introduction of even a tiny amount of water or steam. Chocolate contains sugar and cocoa solids, which are hydrophilic (water-attracting). When water is added, these particles clump together, causing the chocolate to seize. Overheating chocolate can also cause it to seize or become grainy by burning the sugar or protein solids.
If your chocolate seizes due to water, it's very difficult to recover it for tempering. You might be able to salvage it for use in baked goods (like brownies or cakes) by stirring in a tablespoon or two of vegetable oil or melted cocoa butter per cup of seized chocolate to create a paste, but it will not be suitable for molding or coating that requires temper.
To avoid seizing, always use dry equipment, ensure your double boiler water doesn't touch the bottom of the chocolate bowl, and be careful of steam. If seizing is due to slight overheating, sometimes stirring vigorously off the heat can help, but often the damage is done.
Bloom: Preventing Fat and Sugar Bloom
Bloom appears as a grayish or whitish film on the surface of chocolate and is a sign that the cocoa butter crystals are not in the stable Type V form or that sugar has migrated to the surface. Fat bloom, the more common type, occurs when unstable cocoa butter crystals melt and recrystallize on the surface, often due to improper tempering or storage at fluctuating or warm temperatures. Sugar bloom, which feels gritty, happens when moisture condenses on the chocolate surface, dissolves sugar, and the sugar recrystallizes as the water evaporates.
Preventing bloom relies heavily on proper tempering and storage. Ensuring your chocolate is perfectly tempered using reliable chocolate tempering techniques for beginners advancing their skills is the first defense against fat bloom. Store tempered chocolate in a cool, dry place with minimal temperature fluctuations, ideally between 18-20°C (64-68°F) and low humidity (below 50%).
Avoid refrigerating chocolate unless it's wrapped extremely well and brought to room temperature very slowly, as refrigeration often leads to condensation and sugar bloom. While bloomed chocolate is safe to eat, it lacks the desired texture and appearance. You can often re-melt and re-temper bloomed chocolate to restore its properties.
Over-Tempering: Recognizing and Correcting the Issue
Over-tempering occurs when the chocolate cools too much during the seeding or tabliering process, resulting in too many stable crystals forming, or the overall temperature drops below the working range for too long. The chocolate will become excessively thick, pasty, or even start to set prematurely while you are trying to work with it. This makes it difficult to pour, dip, or spread smoothly, resulting in uneven coatings or incomplete molds.
If your chocolate becomes too thick due to over-tempering, you need to gently raise its temperature back into the correct working range. Do this by placing the bowl back over a very gentle heat source (like a warm, but not hot, water bath or a warming pad) and stirring continuously.
Be careful not to exceed the maximum working temperature for your type of chocolate (e.g., 32°C for dark) as this can melt the desired Type V crystals and you'll need to start the tempering process over. Warm it just enough to regain a fluid, workable consistency while staying within the correct temperature window.
Elevating Your Skills: Applications of Perfectly Tempered Chocolate
Mastering advanced chocolate tempering techniques for beginners opens up a world of possibilities in confectionery. Perfectly tempered chocolate is not just aesthetically pleasing; its stable structure is essential for creating professional-quality molded chocolates, decorations, and enrobed items that hold their shape, snap cleanly, and resist melting at room temperature.
Creating Chocolate Decorations
Tempered chocolate is the medium of choice for creating intricate and stable chocolate decorations. Its ability to set firmly with a glossy finish allows for crafting elements like chocolate curls, fans, shards, geometric shapes, and delicate piped designs. You can spread tempered chocolate thinly onto acetate sheets, parchment paper, or textured mats to create various patterns and forms once set.
For piping decorations, tempered chocolate holds its shape beautifully when squeezed through a pastry bag with a fine tip. You can pipe intricate lace patterns, swirls, or lettering directly onto parchment paper. Once the chocolate sets, these decorations can be carefully peeled off and used to adorn cakes, pastries, or plated desserts. The clean snap of tempered chocolate also makes it easy to break larger pieces into elegant shards or geometric elements for modern presentations.
Enrobing Techniques
Enrobing, or coating items like truffles, caramels, or nuts in a layer of chocolate, requires perfectly tempered chocolate for a smooth, even, and glossy finish. Untempered chocolate would result in a dull, thick, and potentially bloomed coating that lacks appeal and stability. The ideal working temperature and viscosity achieved through proper tempering allow the excess chocolate to drip off cleanly, leaving a thin, crisp shell.
There are various enrobing methods, from simple hand-dipping using a tempering fork to using specialized enrobing machines for high volume. Regardless of the method, keeping the tempered chocolate at the correct working temperature is critical. If it's too cool, the coating will be too thick; if it's too warm, it might not set properly or could melt the core item. Mastering the flow and consistency of tempered chocolate is key to achieving a professional, seamless enrobed product.
Molding Chocolates
Creating solid chocolate bars, bonbons with fillings, or novelty shapes relies heavily on tempered chocolate. The glossy finish and shrinkage properties of properly tempered chocolate allow it to contract slightly as it cools, releasing easily from molds with a pristine surface. Untempered chocolate would stick to the mold, lack shine, and likely develop bloom.
To mold chocolates, fill clean, dry polycarbonate or silicone molds with tempered chocolate. Tap the molds gently to remove air bubbles, ensuring the chocolate fills all cavities and corners. If making filled chocolates, pour out the excess chocolate to create a shell, scrape the top clean, allow the shell to set slightly, then pipe in your filling. Cap the filling with more tempered chocolate, scrape smooth, and allow to set completely before demolding. The precise temperature control afforded by advanced chocolate tempering techniques for beginners ensures the chocolate sets correctly and releases flawlessly from the mold.
Beyond the Basics: Exploring Different Chocolate Varieties for Tempering
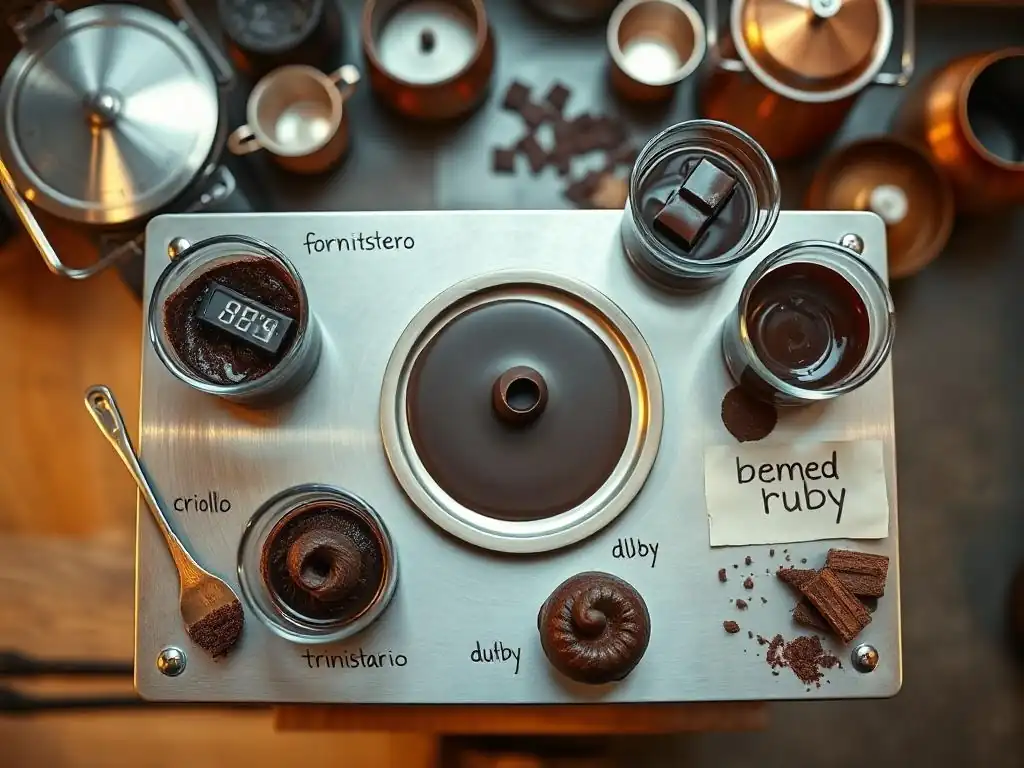
While the general principles of tempering apply to all real chocolate (chocolate containing cocoa butter), the specific temperatures and nuances vary depending on the type of chocolate due to differences in cocoa butter, sugar, and milk solid content. Understanding these variations is crucial for success when tempering dark, milk, or white chocolate.
Tempering Dark Chocolate
Dark chocolate typically has the highest percentage of cocoa solids and cocoa butter among the main chocolate types, and the lowest sugar content. This higher cocoa butter content means it has a slightly higher initial melting point and working temperature compared to milk or white chocolate. A typical temperature curve for dark chocolate is: melt to 45-50°C (113-122°F), cool to 27-29°C (81-84°F) to crystallize, and reheat to a working temperature of 31-32°C (88-90°F).
Due to its composition, dark chocolate is often considered the easiest type to temper, making it a good starting point for beginners practicing chocolate tempering techniques. It is less sensitive to overheating than milk or white chocolate. However, the cooling and working temperatures are more critical; dropping too low can cause it to thicken rapidly. Ensure you monitor temperatures accurately with a reliable thermometer.
Tempering Milk Chocolate
Milk chocolate contains milk solids and typically more sugar than dark chocolate, which affects its tempering properties. The presence of milk fat from the milk solids slightly alters the crystallization behavior of the cocoa butter. Milk chocolate has a lower initial melting point and working temperature than dark chocolate. A common temperature curve is: melt to 40-45°C (104-113°F), cool to 26-27°C (79-81°F), and reheat to a working temperature of 30-31°C (86-88°F).
Milk chocolate is slightly more sensitive to heat than dark chocolate due to the milk solids and sugar, so care must be taken not to overheat it during the initial melting phase. Its lower working temperature also means it will start to set faster than dark chocolate, requiring you to work more quickly or maintain the temperature carefully.
Tempering White Chocolate
White chocolate contains no cocoa solids, only cocoa butter, sugar, milk solids, and vanilla. Its composition makes it the most delicate type of chocolate to temper. It has the lowest melting point and working temperature. A typical curve is: melt to 40-45°C (104-113°F), cool to 25-26°C (77-79°F), and reheat to a working temperature of 28-30°C (82-86°F).
White chocolate is very susceptible to scorching and seizing due to its high sugar and milk solid content. It requires extremely gentle heat during melting. Its low working temperature means it sets quickly, and overheating it during the reheat phase is easy and will ruin the temper. Precise temperature control is paramount when tempering white chocolate, making it perhaps the most challenging type for beginners mastering chocolate tempering techniques.
Conclusion: Unleash Your Chocolate Tempering Potential | BakeWithEase
Mastering advanced chocolate tempering techniques moves you from simply melting chocolate to truly controlling its structure and properties. Whether you opt for the reliable seed method, the classic tabliering on marble, the precise sous vide approach, or the efficient automation of a tempering machine, each technique offers a path to achieving that coveted snap, shine, and stable finish.
By understanding the science of cocoa butter crystallization and practicing these methods, you gain the confidence to tackle more complex chocolate projects, from intricate decorations to flawless molded and enrobed creations. Don't be discouraged by initial challenges; tempering takes practice. With accurate temperature monitoring, quality chocolate, and a bit of patience, you'll soon be creating confectionery masterpieces that look as incredible as they taste. Keep practicing these chocolate tempering techniques for beginners and beyond, and unlock your full potential in the art of chocolate.
Frequently Asked Questions
What is chocolate tempering and why is it important?
Chocolate tempering is the process of stabilizing the cocoa butter crystals in chocolate. It's crucial for achieving a smooth, glossy finish and a satisfying snap.
What are the different chocolate tempering techniques discussed?
The article likely covers various methods like seeding, tabling, and using a water bath, each with its own approach to controlling the chocolate's temperature.
Is chocolate tempering necessary for all chocolate recipes?
No, tempering is primarily needed for chocolate coatings, candies, and decorations where appearance and texture are critical. It's less important for recipes where chocolate is melted and mixed into other ingredients.
What are some common mistakes beginners make when tempering chocolate?
Common errors include overheating the chocolate, not stirring properly, and allowing water to come into contact with the melted chocolate, ruining the temper.
What equipment is recommended for successful chocolate tempering?
A reliable thermometer is essential, along with a heat-resistant bowl, a double boiler or microwave, and tools for spreading and handling the tempered chocolate.
Final Reflection: The Enduring Allure of Perfectly Tempered Chocolate
The art of chocolate tempering, once a closely guarded secret of master chocolatiers, is now accessible to anyone with a passion for creating exquisite confections. The techniques detailed in this article, while advanced, build upon fundamental principles, empowering even beginners to achieve professional-quality results. This accessibility democratizes the creation of beautiful, flawlessly-textured chocolate, opening up a world of creative possibilities for home bakers and aspiring chocolatiers alike.
The impact of mastering chocolate tempering extends far beyond the simple act of melting and cooling chocolate. It's about understanding the science behind the process, appreciating the delicate balance of temperature and crystallization, and ultimately, experiencing the profound satisfaction of creating something truly beautiful. The best things in life are simple, but not easy.
This quote perfectly encapsulates the journey of learning advanced chocolate tempering techniques; the result is simple – perfectly tempered chocolate – but the mastery requires dedication and practice.
Now, it's your turn. Don't be intimidated by the seemingly complex nature of advanced tempering. Take the knowledge you've gained here, experiment with the techniques, and embrace the learning process. Each perfectly tempered piece of chocolate you create will be a testament to your dedication and a delicious reward for your efforts. The journey of mastering chocolate tempering is a continuous one, filled with experimentation, discovery, and the undeniable joy of creating something truly special. So, grab your chocolate, and let the tempering begin!
Unleash Your Inner Chocolatier: Master the Art of Tempering!
Thanks for taking the time to explore the world of advanced chocolate tempering! You've now gained the knowledge to create flawlessly smooth and shiny chocolates. Ready to put your new skills to the test?
- Craft your masterpiece: Use your newfound tempering expertise to create your dream chocolate treats – bonbons, truffles, or even a show-stopping chocolate cake! This is your chance to shine!
- Share your chocolate journey: Show off your beautifully tempered creations on social media and inspire others! Use #BakeWithEase to connect with our community.
- Experiment with flavors: Try tempering with different types of chocolate and incorporating unique flavor profiles – the possibilities are endless!
What exciting chocolate creation will you tackle first? Let us know in the comments below!