
Baking Ciabatta with Steam: The Secret to a Great Crust

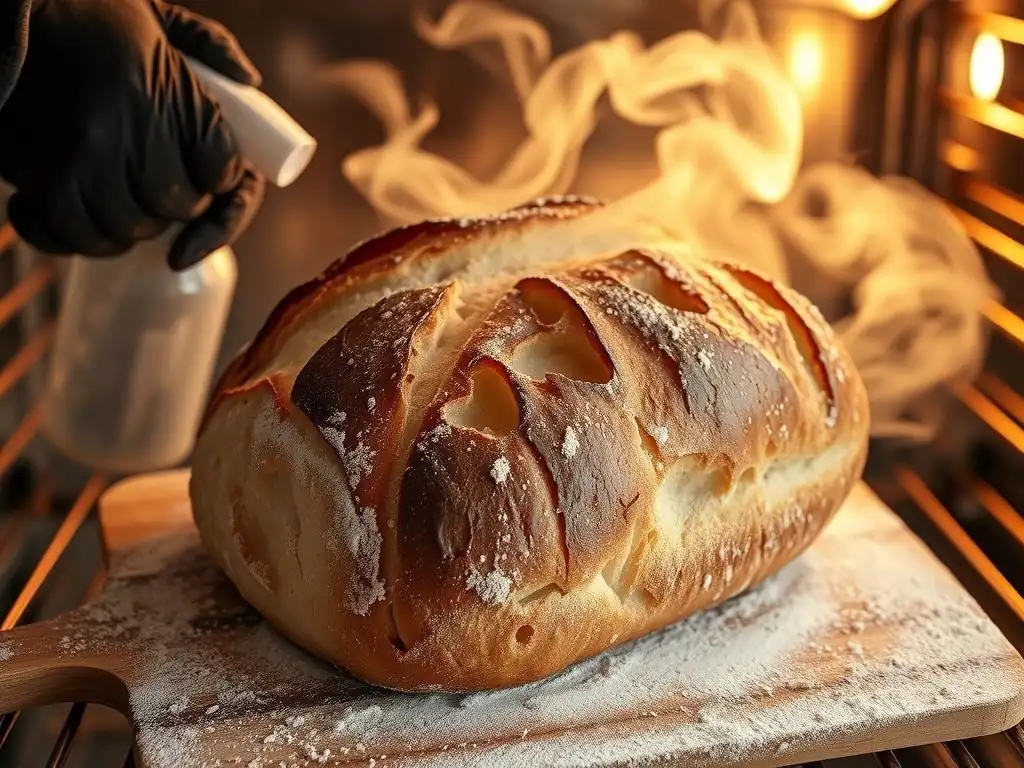
Welcome to BakeWithEase, your guide to baking bliss! Ever wondered how to achieve that perfectly crisp, airy crust on your Ciabatta bread? This article dives into the crucial Ciabatta bread steaming technique, revealing the secrets to transforming your homemade bread into a bakery-worthy masterpiece. Ready to unlock the key to incredible crust? Let's get baking!
- Baking Sourdough with Steam: Achieving Artisan Crust
- Introduction to Steaming Sourdough Bread
- The Science of Steam in Sourdough Baking
- Steaming Sourdough at Home: Practical Methods
- Optimizing Your Sourdough Dough for Steaming
- Troubleshooting Common Sourdough Steaming Issues
- Sourdough Steaming Variations and Experimentation
- Tips for Consistently Perfect Sourdough Crust
- Advanced Sourdough Steaming Techniques
- Conclusion: Mastering Sourdough with Steam
-
Frequently Asked Questions
- What is the most important reason for using a steaming technique when baking Ciabatta bread?
- At what point during the baking process should I introduce steam into my oven for Ciabatta bread?
- What are some common methods for creating steam in a home oven when baking Ciabatta?
- Is the steaming technique necessary for all types of bread, or is it particularly important for Ciabatta?
- Can too much steam be detrimental to the final result of my Ciabatta bread?
- Final Reflection: The Transformative Power of Steam in Ciabatta Baking
- Unlock Your Ciabatta Crust: Bake Like a Pro!
Baking Sourdough with Steam: Achieving Artisan Crust
Introduction to Steaming Sourdough Bread
Baking sourdough bread at home is a rewarding journey, culminating in that perfect loaf with a crackling crust and airy interior. While the starter, flour, and fermentation play crucial roles, one often overlooked element is the use of steam during baking. This simple technique is the secret weapon many artisan bakers employ to achieve that coveted crust and incredible oven spring. Understanding how and why to use steam can transform your homemade sourdough from good to truly exceptional.
This article will guide you through the essential role of steam in baking sourdough, delve into the science behind its effects, explore practical methods for creating a steamy environment in your home oven, and offer tips for troubleshooting common issues. Mastering the sourdough steaming technique is key to consistently baking beautiful, professional-quality loaves right in your own kitchen.
Why Steam is Essential for Sourdough Crust
Steam is absolutely critical during the initial phase of baking sourdough. When a cold dough hits the hot oven, the surface immediately begins to dry and set. Without sufficient moisture in the air, this setting happens too quickly, forming a hard crust before the loaf has had a chance to expand fully. This prematurely set crust restricts the dough's ability to achieve maximum oven spring, resulting in a denser loaf.
Introducing steam creates a humid environment around the dough. This moisture keeps the surface of the loaf pliable for a longer period, delaying the formation of the crust. This delay allows the dough to continue expanding under the intense heat, driven by the production of gases within the loaf. The result is significantly better oven spring, leading to a taller, more open crumb structure. Furthermore, the presence of steam promotes the gelatinization of starches on the surface, which contributes to a thin, crisp, and beautiful crust.
Desired Crust Characteristics in Sourdough
The ideal sourdough crust is a thing of beauty and texture. It should be relatively thin, incredibly crisp, and shatter slightly when you slice into it. A well-steamed crust often exhibits a rich, golden-brown color, sometimes with darker blistered spots, particularly on high-hydration doughs. The surface should feel firm but not overly hard or tough.
Beyond aesthetics, the crust plays a vital role in the overall eating experience. Its crispness provides a delightful contrast to the soft, airy interior crumb. The development of the crust also contributes to the complex flavors of the sourdough, as sugars caramelize on the surface during the later stages of baking after the steam is removed. Achieving these desired characteristics hinges significantly on implementing an effective sourdough steaming technique.
The Science of Steam in Sourdough Baking
Understanding the scientific principles behind why steam works is fascinating and helps bakers troubleshoot and refine their process. The oven's dry heat is necessary for the final crust browning and development, but that initial burst of moisture is transformative for the raw dough. It's a delicate balance between moisture and dry heat that defines the perfect artisan loaf.
The chemical and physical reactions that occur on the dough's surface in the presence of steam are complex but result in tangible improvements. From influencing the dough's expansion to setting the stage for perfect browning, steam is a powerful tool in the baker's arsenal.
Steam's Influence on Sourdough's Gluten Structure
When sourdough enters a hot oven, the heat causes rapid expansion of gases produced during fermentation. This expansion is what we call oven spring. The gluten network within the dough, developed through mixing and folding, needs to be flexible enough to accommodate this expansion. Steam plays a crucial role here by keeping the surface of the dough moist and cooler for a few critical minutes.
This moist environment prevents the outer layer of gluten from drying out and setting too quickly. A pliable outer layer allows the internal pressure from the expanding gases to stretch the gluten network more effectively. Think of it like blowing up a balloon – if the rubber is dry and brittle, it will crack quickly. If it's moist and flexible, it can expand much further. This extended pliability facilitated by the sourdough steaming technique enables maximum volume increase before the crust eventually sets.
Crust Development and Color Enhancement with Steam
After the initial steaming period (typically the first 15-25 minutes of baking), the steam is removed or dissipates. At this point, the temperature on the surface of the loaf rises rapidly. This shift is essential for crust development and color. The moisture that was present on the surface, which kept it pliable, now evaporates.
The gelatinized starches on the surface, a result of the steam, form a thin, slightly sticky layer. As the temperature increases, the Maillard reaction and caramelization occur. The Maillard reaction is a complex chemical process between amino acids and reducing sugars that creates hundreds of flavor compounds and the desirable brown color.
Caramelization is the browning of sugars. Both reactions are accelerated by the hot, dry heat after the steam is gone, leading to that deep, rich brown crust and the characteristic complex flavors of well-baked sourdough. The sourdough steaming technique, by delaying this setting, ensures these reactions happen on a fully expanded loaf.
Steaming Sourdough at Home: Practical Methods
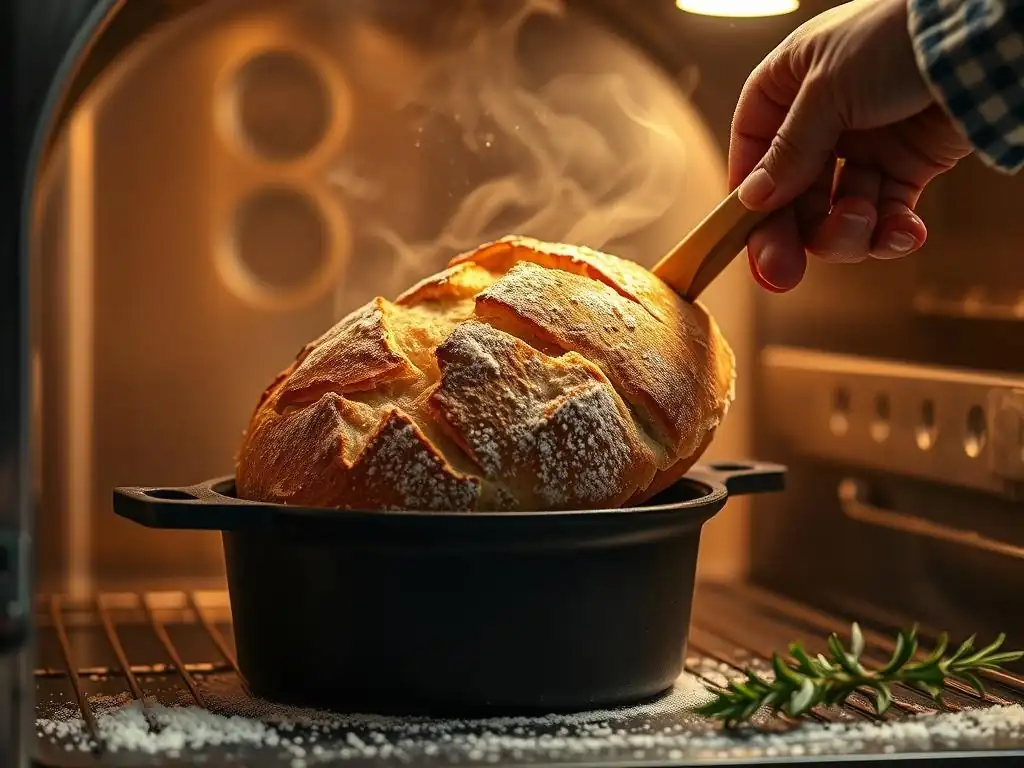
Achieving a steamy environment in a home oven can seem challenging, as home ovens are designed to circulate dry heat. However, there are several effective methods you can employ, ranging from using specialized equipment like Dutch ovens to simple techniques involving water and hot towels. The key is to create a burst of steam during the initial high-temperature phase of baking.
Choosing the right sourdough steaming technique often depends on the equipment you have available and the shape of the loaf you are baking. While some methods are more effective than others, even simple techniques can make a significant difference compared to baking in a dry oven.
Essential Equipment for Sourdough Steaming
To successfully implement a sourdough steaming technique at home, certain pieces of equipment are highly recommended. While not all are strictly mandatory for every method, they greatly improve results and consistency.
Here's a list of common and useful items:
- Dutch Oven: A heavy, lidded pot (cast iron is popular) that traps steam released by the dough itself.
- Baking Stone or Steel: Provides radiant heat from below, aiding oven spring and crust development.
- Oven-Safe Pan or Tray: Used to hold water for steam generation.
- Lava Rocks or Metal Chains: Placed in the water pan to increase the surface area for water to evaporate from, generating more steam.
- Spray Bottle: For directly misting the oven walls or the dough (use caution).
- Heat-Resistant Gloves: Essential for handling hot equipment like Dutch ovens or steam pans.
- Old Towels: Can be soaked and placed in the oven for steam, though this method requires careful handling and isn't always recommended due to potential oven damage or fire risk if not done correctly.
Having a combination of these tools allows for flexibility in your sourdough steaming technique.
Method 1: Dutch Oven Baking for Sourdough
Baking sourdough in a Dutch oven is one of the most popular and effective methods for home bakers. The lidded pot acts like a miniature oven within your oven, trapping the moisture released by the dough as it bakes. This creates a perfectly steamy environment around the loaf for the crucial initial phase.
This method is particularly effective because it requires no external steam generation – the dough provides its own moisture. It's also relatively safe and easy to manage compared to pouring water onto hot pans in the oven. The heavy cast iron also retains and radiates heat exceptionally well, contributing to excellent oven spring and a deeply colored crust.
Dutch Oven Preparation for Steaming
Proper preparation is key when using a Dutch oven for your sourdough steaming technique. The most common approach is to preheat the Dutch oven along with your oven to a high temperature, typically between 450°F (230°C) and 500°F (260°C). This usually takes at least 30-60 minutes, depending on your oven and the Dutch oven's mass. A very hot vessel is crucial for transferring immediate heat to the dough, promoting rapid oven spring.
Once the oven and Dutch oven are fully preheated, carefully remove the hot lid using heat-resistant gloves. Gently transfer your proofed sourdough loaf into the hot Dutch oven. This can be done by carefully lowering it in using parchment paper as a sling, or by quickly flipping the dough from a banneton into the pot. Score the loaf quickly if you haven't already, replace the lid, and immediately place it back in the hot oven. The trapped heat and the dough's moisture will begin creating steam instantly.
Sourdough Baking in a Dutch Oven: Temperature and Duration
The baking process in a Dutch oven typically involves two stages with different temperatures and lid positions. For the initial, steam-generating phase, bake the loaf covered at a high temperature, such as 475°F (245°C), for approximately 20-25 minutes. This allows the steam to work its magic, keeping the crust pliable and maximizing oven spring.
After this initial period, carefully remove the lid. Reduce the oven temperature slightly, often to around 450°F (230°C), and continue baking uncovered for another 20-25 minutes, or until the crust is a deep golden brown and the internal temperature of the loaf reaches 205-210°F (96-99°C). This second phase allows the crust to dry out, crisp up, and develop its final color and flavor. The exact timing may vary based on your oven and loaf size.
Method 2: Generating Steam in a Conventional Oven
If you don't have a Dutch oven, or you're baking multiple loaves simultaneously, you can still achieve excellent results by generating steam directly in your conventional oven. This sourdough steaming technique involves introducing water into the hot oven to create a humid environment. While it requires a bit more effort and caution than using a Dutch oven, it is a highly effective method used by many bakers.
The goal is to create a significant amount of steam right as the bread goes into the oven and maintain it for the first 15-20 minutes of baking. This requires preheating the oven to a high temperature and having your steam setup ready to go simultaneously with loading the bread.
Using a Baking Stone and Water Reservoir
A common and effective method for creating steam in a conventional oven is to use a baking stone or steel combined with a water reservoir. Preheat your oven with the baking stone/steel on a rack and an oven-safe pan (like a cast iron skillet or metal tray) on a rack below it. Preheat to a high temperature, typically 475-500°F (245-260°C).
Once the oven is fully preheated and you're ready to bake, carefully slide your proofed sourdough loaf onto the hot baking stone/steel. Immediately and very carefully pour about 1 cup of hot water (boiling water works best for instant steam) into the preheated pan on the lower rack. Close the oven door quickly to trap the steam. The water hitting the hot pan will instantly turn to steam, surrounding the loaf. Bake at this high temperature for 15-20 minutes with the steam, then carefully remove the water pan (caution: it will still be very hot) and continue baking at a slightly lower temperature ( 450°F / 230°C) until the crust is golden brown.
The Hot Towel Method for Consistent Steam
Another technique for conventional oven steaming involves using hot, wet towels. This method aims to provide a more sustained release of steam. You'll need an oven-safe tray or pan, preferably metal. Preheat your oven to your desired high baking temperature (e.g., 475°F / 245°C).
While the oven preheats, soak one or two clean, old towels in hot water. Wring them out so they are wet but not dripping excessively. Just before loading your bread, place the wet towels carefully into the hot oven-safe pan on the lower rack. Load your bread onto a preheated baking stone or steel on an upper rack, and quickly close the oven door.
The heat will cause the water in the towels to evaporate, creating steam. This method can be effective but carries a slight risk of fire if the towels are too dry or touch heating elements. Ensure towels are thoroughly wet and placed safely within the pan.
Injecting Steam with a Spray Bottle: A Targeted Approach
Using a spray bottle is a simpler, though often less effective, method for generating steam compared to pans of water or Dutch ovens. It provides a quick burst of steam but doesn't sustain it as well. This technique involves preheating your oven with a baking stone or steel.
Once the oven and stone are hot and you've loaded your bread, quickly and carefully open the oven door and mist the walls of the oven with water using a clean spray bottle. Be careful not to spray the heating element directly, as this can damage it. Close the door immediately to trap the steam.
You can repeat this process once or twice more during the first 5-10 minutes of baking, but avoid opening the oven too frequently as this lets heat escape. This method is often used in conjunction with other techniques or for smaller loaves where less steam is needed.
Optimizing Your Sourdough Dough for Steaming
While the sourdough steaming technique is vital for crust development, the dough itself must be properly prepared to fully benefit from the steamy environment. The dough's hydration, structure development through folding, and proofing stage all significantly impact how well it will perform and expand in the oven under steam. A dough that is too stiff, lacks structure, or is improperly proofed won't achieve optimal oven spring or crust quality, regardless of how much steam you use.
Focusing on the fundamentals of sourdough dough preparation ensures that when you apply steam, you get the best possible results. It's about giving your dough the best chance to succeed before it even hits the heat.
Hydration Levels and Their Impact on Crust
Hydration, which refers to the ratio of water to flour in your dough, plays a significant role in how your sourdough responds to steam and the resulting crust. Higher hydration doughs (e.g., 75-85% hydration) are typically stickier and more challenging to handle, but they contain more internal moisture. When these doughs are baked in a steamy environment, that internal moisture readily turns to steam, contributing to better oven spring and a thinner, more delicate crust. The high water content on the surface also interacts more effectively with the external steam.
Lower hydration doughs (e.g., 60-70% hydration) are easier to work with but have less internal moisture. While they still benefit from external steam, the effect on oven spring and crust texture might be less dramatic compared to higher hydration loaves. The crust on lower hydration loaves baked with steam tends to be slightly thicker but still crisp. Understanding your dough's hydration helps you anticipate its behavior and adjust your sourdough steaming technique accordingly.
Folding Techniques for Strength and Structure
Proper dough structure, developed through techniques like stretching and folding or coil folding, is essential for a successful sourdough loaf. This structure builds the gluten network, which acts like the scaffolding that holds the gases produced during fermentation and allows the dough to expand during oven spring. A dough with good structure will hold its shape better and rise more predictably under steam.
If a dough lacks sufficient structure, it may spread out rather than spring upwards when placed in the hot oven, even with plenty of steam. The steam keeps the surface pliable, but if the internal network can't support the expansion, the loaf will be flat. Aim for a dough that feels strong, elastic, and can hold tension after its bulk fermentation and shaping. This robust structure, combined with the flexibility provided by the sourdough steaming technique, is the recipe for impressive oven spring.
Proofing for Optimal Oven Spring in Sourdough
The proofing stage, the final rise before baking, is another critical factor influencing oven spring and how well your dough utilizes steam. An underproofed dough still has a lot of rising potential left, which can sometimes lead to explosive, but potentially uncontrolled, oven spring and tearing. An overproofed dough, on the other hand, has exhausted most of its rising power; the gluten structure may have begun to collapse, and it won't have much energy left to expand in the oven, even with perfect steam.
The ideal proofing stage for baking with steam is when the dough is just perfectly proofed or slightly underproofed. This ensures there is still significant gas production and structural integrity remaining to drive expansion during the first 20 minutes in the hot, steamy oven. Learning to read your dough – assessing its jiggle, feel, and how it springs back when gently poked – is crucial for timing your bake and maximizing the benefits of your sourdough steaming technique.
Troubleshooting Common Sourdough Steaming Issues
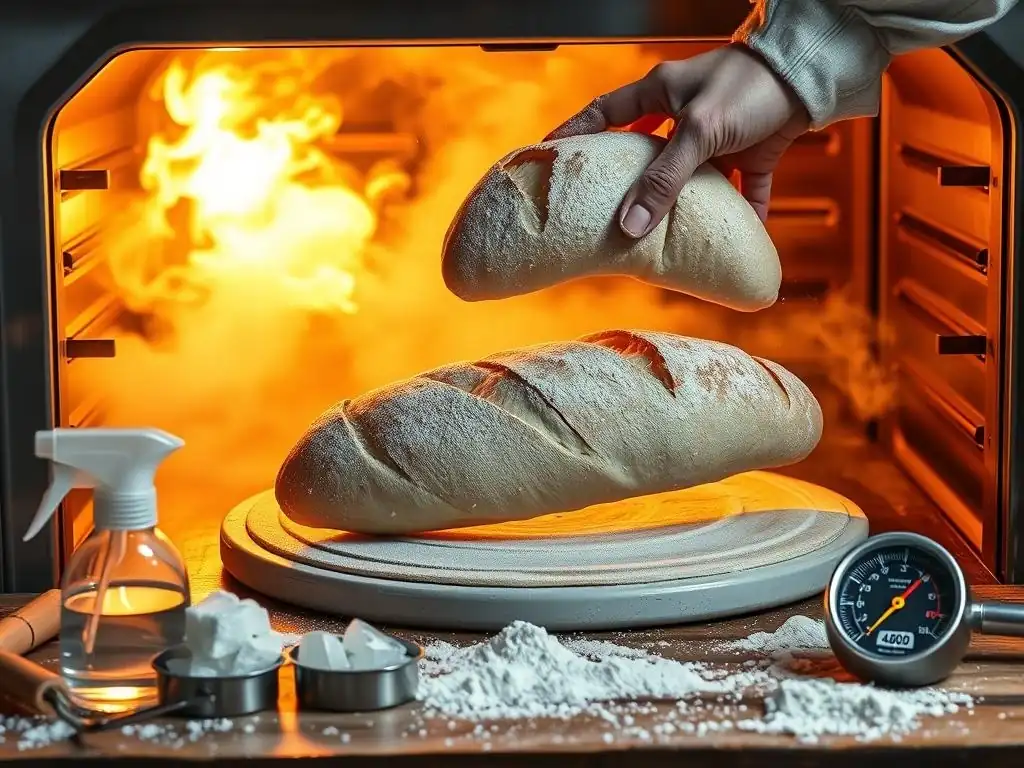
Even with the best intentions and techniques, you might encounter issues when steaming sourdough. Problems like overly thick crusts, crusts that aren't crisp enough, or disappointing oven spring are common frustrations for home bakers. Identifying the potential causes of these issues is the first step to fixing them and refining your sourdough steaming technique.
Many problems relate back to either insufficient or excessive steam, or issues with the dough itself that steam alone cannot fix. Let's explore some common pitfalls and how to address them.
Overly Thick or Hard Crust
An overly thick or excessively hard crust is a common sign that your sourdough steaming technique wasn't as effective as it could have been. This often happens when the dough's surface dries out and sets too quickly in the oven. The primary cause is usually insufficient steam during the initial baking phase.
Possible culprits include:
- Not enough water used to generate steam.
- Oven door not closed quickly enough, allowing steam to escape.
- Steam dissipating too rapidly (e.g., using a shallow water pan or towels that dry out too fast).
- Not preheating equipment (like a Dutch oven or steam pan) sufficiently.
- Baking at too high a temperature without adequate steam.
To fix this, ensure you are generating a significant amount of steam for the first 15-25 minutes of baking. If using a water pan, make sure it's large enough and the water is hot. If using a Dutch oven, ensure the lid is sealed properly. Consider increasing the amount of water or using lava rocks to boost steam production.
Insufficiently Crisp Crust
Conversely, if your sourdough crust is not crisp and crackly, but rather soft or leathery, it usually points to too much moisture after the initial steaming period, or not enough time baking uncovered. The crust needs a phase of hot, dry heat to fully crisp up and brown.
Potential reasons for a soft crust include:
- Removing the steam source too late in the bake.
- Not removing the steam source at all (e.g., keeping a Dutch oven lid on for the entire bake).
- Not baking the loaf long enough after the steam is removed.
- Oven temperature being too low during the dry baking phase.
- Not allowing the loaf to cool properly.
To achieve a crisp crust, ensure you remove the steam source (lid off Dutch oven, remove water pan) after the initial 15-25 minutes. Increase the baking time after removing steam if necessary, ensuring the crust reaches a deep golden-brown color. Verify your oven temperature is accurate during the second half of the bake. Finally, always cool your loaf on a wire rack, allowing air to circulate around the crust, preventing moisture from condensing and making it soft.
Poor Oven Spring in Steamed Sourdough
Disappointing oven spring, resulting in a flatter, denser loaf, can be caused by several factors, even when using a good sourdough steaming technique. While steam helps the crust remain pliable for expansion, it cannot force a dough to rise if it doesn't have the potential or structure to do so.
Common causes for poor oven spring despite steaming include:
- Under-developed gluten: The dough wasn't mixed or folded enough to build a strong structure.
- Over-proofed dough: The dough has exhausted its rising power before entering the oven.
- Under-proofed dough: While sometimes showing vigorous initial spring, it can be uneven or cause tears if severely underproofed.
- Insufficient final shaping tension: The loaf didn't have enough surface tension to hold its shape and direct expansion upwards.
- Not enough heat: The oven or baking surface (stone/steel/Dutch oven) wasn't sufficiently preheated, leading to slow initial expansion.
To improve oven spring, focus on your dough handling before it goes into the oven. Ensure adequate mixing/folding, proper bulk fermentation, skilled shaping to create tension, and accurate final proofing time based on dough temperature and room temperature. Combine these solid dough fundamentals with your refined sourdough steaming technique for the best possible rise.
Sourdough Steaming Variations and Experimentation
Once you've mastered the basic sourdough steaming technique, you can begin to experiment with variations to influence the final outcome of your loaf. Small adjustments to ingredients, scoring, and timing can lead to interesting changes in crust texture, appearance, and even subtle flavor nuances.
Experimentation is part of the joy of baking. Don't be afraid to try new things, but make small, controlled changes so you can understand the impact of each variable. Keep notes on your process and results to help you replicate successes and learn from outcomes you didn't expect.
Incorporating Seeds and Grains for Texture
Adding seeds (like sesame, poppy, or sunflower) or cooked grains (like oats or cracked wheat) to your sourdough dough can significantly impact the crust, especially when using steam. Seeds added to the exterior before baking, often adhered with a little water, benefit greatly from the steamy environment. The steam helps them stay moist longer, preventing them from burning too quickly and allowing them to toast nicely as the crust finishes baking.
When incorporating seeds or grains into the dough, the added material can sometimes slightly affect the dough's hydration and structure. However, the presence of these additions can also create interesting textures within the crust itself, adding little pockets or crunchy bits. The sourdough steaming technique ensures the base crust develops properly, providing a solid foundation for these textural variations.
Exploring Different Scoring Patterns for Crust Expansion
Scoring, the cuts made on the surface of the loaf just before baking, is both functional and artistic. Functionally, scoring provides weak points that allow the dough to expand in a controlled manner during oven spring. Without scoring, the crust would simply tear randomly. The pattern of your score directly influences the shape of the final loaf and how the crust opens up under the influence of steam.
Complex scoring patterns, like intricate leaves or geometric shapes, require a crust that remains pliable for a significant time to allow the cuts to open fully and create those dramatic "ears" or blisters. A good sourdough steaming technique is essential for achieving this. Experiment with different depths and angles of cuts. A simple deep slash down the middle encourages a large ear, while multiple shallow cuts can create a mosaic effect as they open.
Adapting Steaming Time Based on Loaf Size
The ideal duration for the steaming phase can vary depending on the size and shape of your sourdough loaf. Larger loaves have a greater thermal mass and take longer for the heat to penetrate to the core. They also contain more internal moisture, which contributes to steam within a Dutch oven.
For a standard 1kg (approx. 2.2 lb) loaf, 20-25 minutes of steaming is typical. For smaller loaves (e.g., 500g), you might reduce the steaming time slightly to 15-20 minutes, as they heat through faster. Very large bâtards or boules might benefit from the full 25 minutes to ensure the crust remains pliable long enough for maximum expansion. Pay attention to how your specific loaves behave and adjust your sourdough steaming technique based on your observations.
Tips for Consistently Perfect Sourdough Crust
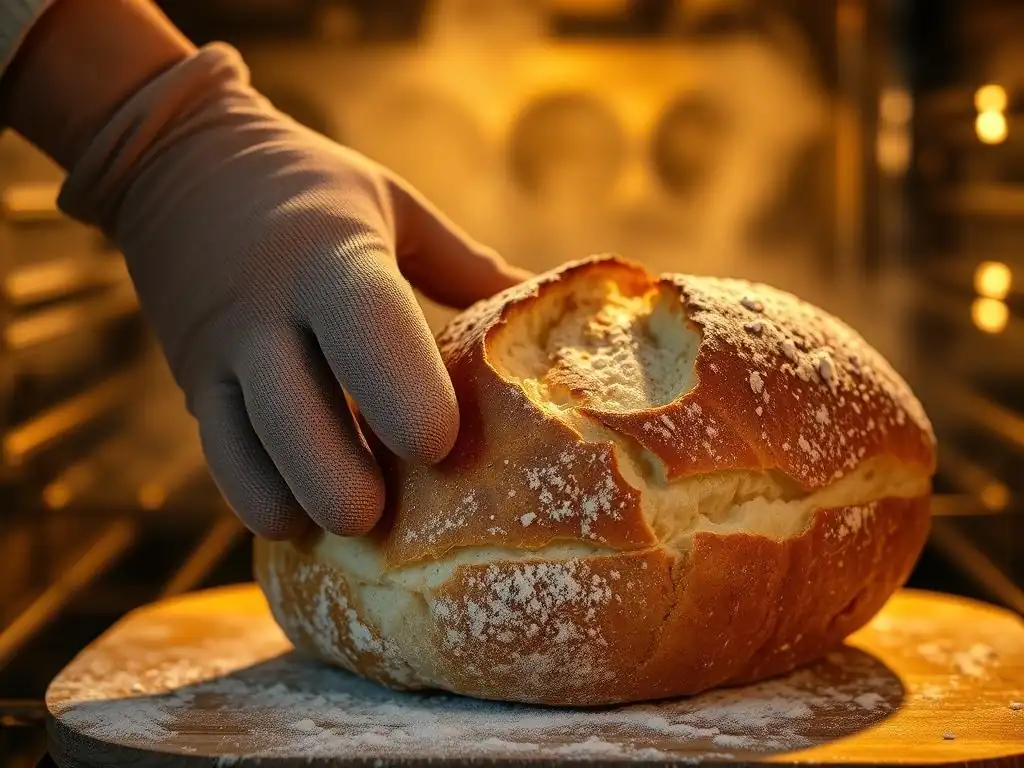
Achieving a consistently perfect sourdough crust involves more than just the steaming technique; it requires attention to detail throughout the entire baking process. From accurate temperature control to proper cooling, every step plays a role in the final texture and appearance of your crust.
Developing reliable habits in the kitchen will lead to more predictable and satisfying baking results. Focus on these key areas to elevate your sourdough crust game.
Maintaining Accurate Oven Temperature
Oven temperature accuracy is paramount for successful sourdough baking and effective steaming. If your oven runs cool, your baking stone or Dutch oven may not be hot enough to provide the necessary initial heat burst for oven spring, and the overall baking time will be off. If it runs too hot, the crust might set too quickly even with steam, or burn during the uncovered phase.
Using an inexpensive oven thermometer is highly recommended to verify that your oven reaches and maintains the set temperature. Preheat your oven with your baking vessel/stone for at least 45-60 minutes to ensure everything is thoroughly heated. Consistent, high heat is essential for maximizing the benefits of your sourdough steaming technique.
Monitoring Internal Dough Temperature
While crust appearance tells you a lot, monitoring the internal temperature of your loaf is the most reliable way to know when it is fully baked. A fully baked sourdough loaf should reach an internal temperature of 205-210°F (96-99°C). Baking to this temperature ensures the crumb is set and the loaf is cooked through, which also impacts crust development.
If you remove the loaf too early, the crumb might be gummy, and the crust, even if it looks brown, might soften significantly upon cooling due to residual moisture migrating outwards. Use an instant-read thermometer inserted into the center of the loaf from the bottom or side. This simple step, combined with a good sourdough steaming technique and visual cues, guarantees a perfectly baked loaf with a great crust and crumb.
Cooling Procedures for Ideal Crust Texture
The cooling process is just as important as the baking process for achieving that signature crisp sourdough crust. As the loaf cools, moisture from the interior crumb migrates towards the cooler exterior crust. If the loaf cools on a solid surface, this moisture gets trapped, softening the bottom crust.
Always cool your sourdough loaf on a wire rack, elevated from the counter. This allows air to circulate freely around the entire loaf, allowing moisture to escape and preventing the crust from becoming soggy. Resist the urge to slice into your loaf immediately after baking. While challenging, letting it cool for at least 1-2 hours (or longer for very large loaves) allows the internal structure to set and the crust to crisp up properly. Patience during cooling is a final, critical step in perfecting your sourdough steaming technique and overall bake.
Advanced Sourdough Steaming Techniques
For those looking to push the boundaries and achieve truly exceptional results, there are a few advanced considerations regarding steam and its interaction with the dough. These techniques often build upon the fundamentals and require a deeper understanding of dough behavior and oven dynamics.
Exploring these advanced concepts can help you refine your sourdough steaming technique further and unlock new levels of crust quality and flavor complexity in your homemade bread.
Achieving a Blistered Crust in Sourdough
A beautifully blistered crust, characterized by tiny bubbles on the surface, is highly prized in artisan sourdough. These blisters are formed when small pockets of gas or moisture just beneath the dough's surface expand rapidly in the oven. A key factor in achieving blistering is a very hot baking surface and a sufficiently steamy environment that keeps the immediate surface pliable long enough for these small bubbles to form and set.
High hydration doughs tend to blister more readily than lower hydration ones due to their higher moisture content. Using a very hot baking steel (which transfers heat faster than a stone) or a very well-preheated Dutch oven can encourage blistering. Ensuring robust steam for the first 15-20 minutes is crucial, as it prevents the outer skin from setting prematurely, allowing the blisters to develop before the crust hardens.
The Role of Steam in Sourdough's Flavor Development
While the Maillard reaction and caramelization during the dry baking phase are primarily responsible for the deep, complex flavors in the crust, the initial steaming phase also plays a subtle role. By allowing the loaf to expand fully, steam contributes to a more open crumb structure. This open structure, in turn, impacts the flavor of the crumb itself by influencing fermentation and the distribution of acids and alcohols produced by the sourdough starter.
Furthermore, by delaying the setting of the crust, steam allows more time for enzymatic activity within the dough before the heat becomes too intense. While subtle, these enzymatic processes can contribute to the breakdown of starches into sugars, potentially influencing the precursors available for the later browning reactions and contributing to overall flavor complexity. The sourdough steaming technique isn't just about texture and appearance; it's an integral part of the overall flavor development process.
Conclusion: Mastering Sourdough with Steam
Baking artisan-quality sourdough bread at home is a journey of learning and refinement. While many elements contribute to a successful loaf, mastering the sourdough steaming technique is arguably one of the most impactful steps you can take to improve your results, particularly when it comes to achieving that perfect crust.
From understanding the science of how steam keeps the crust pliable for maximum oven spring to implementing practical methods using Dutch ovens or conventional ovens, you now have the knowledge to significantly enhance your baking. Remember to pay attention to your dough's hydration, structure, and proofing, as these work in concert with steam. Troubleshooting common issues and experimenting with variations will further hone your skills.
Summary of the Sourdough Steaming Process
The sourdough steaming technique involves creating a moist environment around your loaf during the initial phase of baking (typically the first 15-25 minutes at high temperature). This keeps the dough's surface pliable, allowing for maximum expansion (oven spring). After this period, the steam is removed, and the loaf continues to bake in hot, dry heat, allowing the crust to brown, crisp up, and develop flavor through the Maillard reaction and caramelization.
Key methods include:
- Using a lidded Dutch oven (traps dough's own steam).
- Generating external steam in a conventional oven using a water pan with hot water or lava rocks, or carefully using wet towels.
- Baking at high temperatures (e.g.,
450-500°F / 230-260°C) during the steamed phase. - Reducing temperature slightly and removing steam for the second, dry phase.
Enjoying Your Artisan Sourdough Bread
With a solid sourdough steaming technique in your repertoire, you are well on your way to consistently baking beautiful loaves with impressive oven spring and that signature crisp, flavorful crust. There's immense satisfaction in pulling a perfectly baked loaf from your oven, hearing the crackle of the crust, and slicing into a well-developed crumb.
Whether you enjoy it simply with butter, as the base for a delicious sandwich, or alongside a meal, the result of your efforts, aided by the magic of steam, is a testament to the rewarding craft of baking. So go forth, practice your sourdough steaming technique, and enjoy the delicious fruits of your labor!
Frequently Asked Questions
What is the most important reason for using a steaming technique when baking Ciabatta bread?
The steaming technique is crucial for achieving a crispy crust and a light, airy interior in Ciabatta. The steam prevents the crust from setting too quickly, allowing the bread to fully expand.
At what point during the baking process should I introduce steam into my oven for Ciabatta bread?
Steam should be introduced at the beginning of the bake. This helps create a humid environment that encourages optimal crust formation and bread expansion.
What are some common methods for creating steam in a home oven when baking Ciabatta?
Popular methods include using a preheated cast iron skillet with water or ice cubes, or spraying the oven walls with water after placing the dough inside.
Is the steaming technique necessary for all types of bread, or is it particularly important for Ciabatta?
While steaming can benefit many types of bread, it's especially beneficial for Ciabatta due to the desired characteristics of a crisp crust and open crumb.
Can too much steam be detrimental to the final result of my Ciabatta bread?
Yes, too much steam can prevent proper crust formation, leading to a soft, pale crust instead of the desired crispy texture. Careful control is key.
Final Reflection: The Transformative Power of Steam in Ciabatta Baking
The perfect ciabatta crust, with its signature airy interior and crackling exterior, isn't just about the recipe; it's about mastering the art of steam. This seemingly simple element is the key to unlocking the full potential of this iconic Italian bread, transforming a good loaf into a truly exceptional one. The impact of controlled humidity during baking is profound, affecting not only the crust's texture but also the overall crumb structure and flavor development.
My journey into understanding the nuances of ciabatta steaming has been a fascinating exploration of both science and artistry. It's a testament to the power of seemingly small details to dramatically alter the final product. The subtle shifts in temperature and humidity within the oven create a dynamic environment that shapes the bread's evolution. This process, while precise, also allows for creativity and experimentation. As the renowned baker, Chad Robertson, once said, Baking is a conversation between you and the dough.
This conversation is profoundly enriched by understanding the role of steam.
Now, I invite you to take this knowledge and apply it to your own baking endeavors. Don't be afraid to experiment with different steaming techniques, to adjust the amount of steam, and to observe the results. Each loaf you bake will be a step further on your journey to mastering this beautiful craft. The satisfaction of biting into a perfectly crisp, airy ciabatta, born from your own hands and informed by the power of steam, is a reward unlike any other. Embrace the challenge, and discover the transformative power of steam for yourself.
Unlock Your Ciabatta Crust: Bake Like a Pro!
Thanks for taking the time to explore the world of steam-baked ciabatta with us! We hope you've gained valuable insights into achieving that perfect, crispy crust. Now it's time to put your newfound knowledge to the test.
- Bake your own masterpiece: Try out the ciabatta recipe from the article today! Remember the importance of that steam for an exceptional result.
- Share your success: Post a picture of your ciabatta creation on social media and tag us – we'd love to see it!
- Explore our other bread recipes: Ready to tackle another baking challenge? Discover more delicious recipes on our website for even more baking adventures.
Ready to experience the satisfaction of a perfectly crusty, airy ciabatta? What's your favorite bread baking tip to share?