
Autolyse with Preferments: Combining Techniques for Ultimate Dough Strength

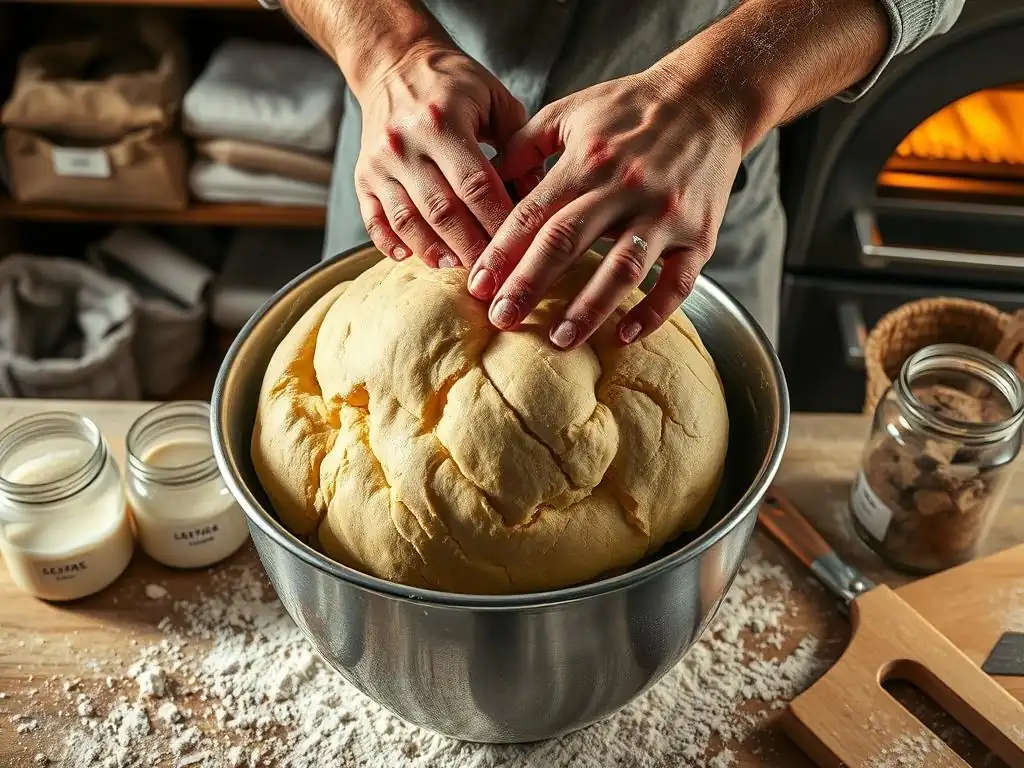
Welcome to BakeWithEase, your haven for all things baking! Ever wondered how to unlock unparalleled dough strength and achieve that perfect crumb in your bread? Dive in as we explore the fascinating synergy of autolyse with preferments, a game-changing technique that will elevate your bread baking from simple to spectacular. Discover how combining these methods can revolutionize your dough, creating loaves with improved texture, flavor, and rise. Are you ready to unlock the secrets?
- Autolyse with Preferments: Combining Techniques for Enhanced Pizza Dough
- Introduction to Autolyse and Preferments in Dough Making
- The Science Behind Combining Autolyse and Preferments
-
Step-by-Step Guide: Autolyse with Preferments for Pizza Dough
- Step 1: Preparing Your Preferment (Sourdough Starter/Biga/Poolish)
- Step 2: Calculating the Autolyse Hydration Level
- Step 3: Mixing the Flour and Water for Autolyse
- Step 4: Incorporating the Preferment into the Autolysed Dough
- Step 5: Bulk Fermentation and Folding Techniques for Dough Strength
- Step 6: Shaping and Proofing the Pizza Dough
- Troubleshooting Common Issues When Using Autolyse and Preferments
- Recipe: Pizza Dough with Autolyse and Preferment (Biga)
- Achieving Enhanced Dough: Tips and Best Practices
- Exploring Different Types of Preferments for Pizza Dough
- Advanced Techniques: Variations and Experimentation
- Conclusion: Improving Your Pizza Dough with Autolyse and Preferments
- Frequently Asked Questions
- Final Reflection: Unlocking Dough's Potential Through Autolyse and Preferments
- Unleash Your Inner Baker: Master Autolyse & Preferments!
Autolyse with Preferments: Combining Techniques for Enhanced Pizza Dough
Introduction to Autolyse and Preferments in Dough Making
Baking truly exceptional pizza dough involves understanding and manipulating the fundamental components: flour, water, yeast (or starter), and salt. While a basic mix can yield decent results, bakers seeking superior texture, flavor, and handling often turn to more advanced techniques. Two powerful methods, autolyse and incorporating preferments, stand out for their ability to significantly improve dough quality. When combined, they offer a synergistic approach that can elevate your pizza crust from good to truly outstanding, focusing on building robust dough strength and complex flavor.
This article delves into the world of autolyse and preferments, explaining what they are individually and how their combined application creates a unique advantage for pizza dough. We'll explore the science behind these techniques, provide a step-by-step guide for implementation, troubleshoot common issues, and even share a sample recipe. Mastering autolyse with preferments will empower you to create pizza dough with unparalleled elasticity, extensibility, and a beautiful, open crumb structure.
Understanding the Autolyse Technique: Hydration for Dough Development
The autolyse technique involves mixing only the flour and water in a recipe and letting them rest for a period before adding the other ingredients like salt and yeast. This simple step allows the flour to fully hydrate and activates enzymes, specifically protease and amylase, naturally present in the flour. Protease helps break down some of the tougher protein bonds, making the dough more extensible, while amylase converts starches into sugars, which later feed the yeast during fermentation.
A typical autolyse rest period can range from 20 minutes up to several hours, depending on the type of flour and desired outcome. For a high-protein bread flour often used in pizza dough, a 30-60 minute autolyse at room temperature (around 70-75°F or 21-24°C) is common. This initial hydration and enzyme activity begin the gluten development process without the interference of salt (which can tighten gluten) or yeast (which starts fermentation prematurely). This leads to dough that is easier to handle, less sticky, and requires less kneading to achieve optimal dough strength.
Exploring Preferments: Sourdough Starter, Biga, and Poolish for Enhanced Flavor
Preferments are portions of dough or batter mixed in advance and allowed to ferment for a significant period before being added to the final dough. They serve multiple crucial purposes: enhancing flavor through the production of organic acids and other aromatic compounds, improving dough structure and extensibility, and often providing leavening power. The three most common types are sourdough starter, biga, and poolish, each offering distinct characteristics.
A sourdough starter is a living culture of wild yeast and bacteria, typically maintained at 100% hydration (equal parts flour and water by weight). It imparts a characteristic tangy flavor and contributes significant dough strength and rise. Biga is a stiff preferment, usually made with a low hydration level (50-60% water to flour), fermented for 12-18 hours, often refrigerated.
It contributes chewiness and structure. Poolish is a wet preferment, typically 100% hydration, fermented similarly to a biga, and yields a more open crumb and lighter texture. Incorporating preferments fundamentally changes the fermentation profile and contributes greatly to the final dough strength and taste of the pizza.
Why Combine Autolyse and Preferments? Benefits for Pizza Dough
Combining autolyse and preferments leverages the unique advantages of each technique, resulting in pizza dough with superior qualities. Autolyse initiates hydration and enzyme action, making the dough more extensible and easier to work with from the start, while preferments introduce complex flavors developed over a longer fermentation period and contribute significant leavening power and inherent dough strength.
The synergy occurs because the autolyse prepares the flour for optimal gluten development and water absorption, making it more receptive to the preferment. The preferment, already active and structured, integrates smoothly into the autolysed flour and water mix.
This combined approach allows for less vigorous kneading to achieve excellent dough strength, promotes a more open and airy crumb structure, and develops a richer, more nuanced flavor profile typical of artisan pizzas. For example, using a 100% hydration poolish in an autolysed dough at 65% overall hydration can result in a dough that handles beautifully and bakes up with a crispy crust and tender interior.
The Science Behind Combining Autolyse and Preferments
Understanding the scientific principles at play helps explain why combining these techniques is so effective for boosting dough strength and overall quality. It's a dance between enzymes, gluten development, and microbial activity.
Autolyse: How Water Absorption Affects Gluten Development
During autolyse, the initial mixing of flour and water allows for complete hydration of the flour particles. This hydration is critical because gluten, the protein network responsible for dough structure and elasticity, only forms when the two primary proteins in flour, gliadin and glutenin, absorb water and bond together. Without sufficient water, these proteins remain dormant.
The resting period after mixing allows the water time to penetrate every flour particle fully. This process is passive but highly effective. Simultaneously, the activated protease enzymes begin to gently break down some of the more rigid protein chains. This controlled breakdown doesn't weaken the dough; rather, it makes the gluten network more extensible and less resistant to stretching later on. Think of it like loosening tight knots before trying to weave a strong fabric. This initial phase significantly contributes to the potential for developing high dough strength with minimal mechanical effort.
Preferments: The Role of Fermentation in Strengthening Dough
Preferments contribute to dough strength primarily through the process of fermentation. As yeast and bacteria consume sugars in the preferment, they produce carbon dioxide gas and organic acids (like lactic and acetic acid in sourdough). The gas helps the dough rise, creating an open structure, while the acids play a vital role in strengthening the gluten network.
The acidic environment created by fermentation helps tighten and organize the gluten proteins. It also makes the dough more resilient and less prone to collapsing. Furthermore, the long fermentation time in a preferment (often 8-18 hours) allows for a more mature and stable gluten structure to develop within the preferment itself. When this mature preferment is added to the final dough, it acts as a building block, contributing its pre-developed strength and structure to the overall mass, significantly enhancing the final dough strength and handling characteristics.
Synergy Between Autolyse and Preferments: Improved Dough Structure
The true magic of combining autolyse and preferments lies in their synergistic effect on dough structure. Autolyse prepares the flour by ensuring maximum hydration and initiating enzymatic activity that promotes extensibility. This makes the dough supple and ready to accept the addition of other ingredients.
When the active, structured preferment is then incorporated into the autolysed dough, the pre-formed gluten network from the preferment integrates with the nascent gluten development facilitated by the autolyse. The acids from the preferment further condition and strengthen the developing gluten in the main dough batch. This combination leads to dough that is not only strong and elastic but also highly extensible – capable of being stretched thinly without tearing, which is ideal for pizza. The result is dough with exceptional dough strength, capable of supporting a light, open crumb structure and a crispy exterior crust after baking.
Step-by-Step Guide: Autolyse with Preferments for Pizza Dough
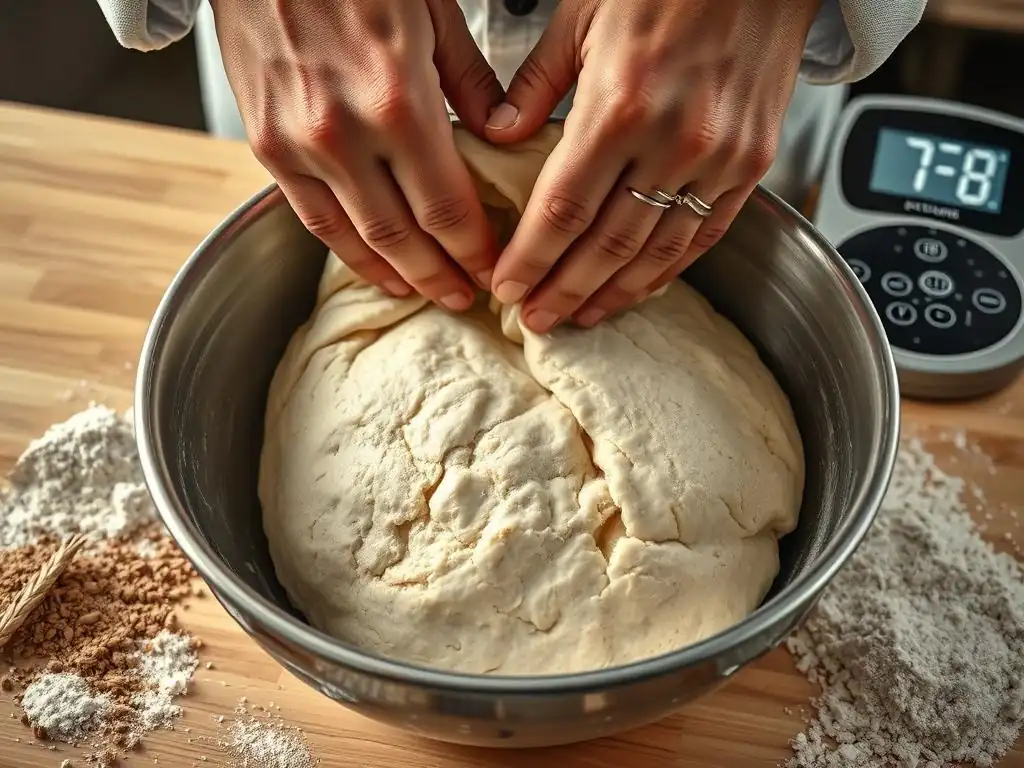
Implementing autolyse with a preferment adds a few steps to your baking process, but the payoff in terms of dough quality is immense. This guide outlines the general procedure, assuming you've already prepared your chosen preferment.
Step 1: Preparing Your Preferment (Sourdough Starter/Biga/Poolish)
The first crucial step, performed well in advance, is preparing your preferment. This could be activating your sourdough starter, mixing a biga, or making a poolish. The type of preferment you choose will influence the flavor and texture of your final pizza dough.
- Sourdough Starter: Ensure your starter is active and bubbly. Feed it 4-12 hours before you plan to mix the final dough, depending on its usual fermentation time. A common ratio is 1:2:2 (starter:water:flour).
- Biga: Mix your flour, water (typically 50-60% hydration), and a tiny pinch of instant yeast (if not using sourdough). Knead it into a stiff ball. Ferment at room temperature for 12-18 hours, or refrigerate for 24-48 hours for a slower, more acidic fermentation.
- Poolish: Mix equal parts flour and water (100% hydration) with a small amount of yeast (around 0.1-0.5% of the flour weight). It will be a wet, batter-like consistency. Ferment at room temperature for 8-12 hours, or until bubbly and slightly collapsed in the center.
Regardless of the type, the preferment should be mature and active when you're ready to mix the final dough to ensure it contributes effectively to leavening and dough strength.
Step 2: Calculating the Autolyse Hydration Level
Determining the right hydration for the autolyse step is key. You don't use all the water from your recipe at this stage. Typically, you'll use enough water to hydrate the main batch of flour, reserving some water to mix in later with the preferment, salt, and yeast (if using commercial yeast).
The calculation involves using the total flour and total water needed for the final dough, then accounting for the flour and water already present in the preferment. For instance, if your final recipe calls for 500g flour and 350g water (70% hydration), and you are using 100g of a 100% hydration poolish (50g flour + 50g water), your main dough flour is 500g - 50g = 450g. The water for the autolyse might be around 80-90% of the remaining water, say 350g - 50g = 300g total remaining water.
You might use 270g (90% of 300g) for the autolyse, reserving 30g to dissolve salt and yeast. This calculation ensures the flour in the autolyse gets adequate initial hydration, setting the stage for optimal dough strength development.
Step 3: Mixing the Flour and Water for Autolyse
In a large mixing bowl, combine the main portion of flour (total flour minus flour in preferment) with the calculated amount of water for the autolyse. Mix them together just until no dry flour remains. The mixture will look shaggy and possibly a bit lumpy – this is perfectly normal.
Do not knead the dough at this stage. The goal is simply hydration. Cover the bowl with plastic wrap or a damp towel to prevent the surface from drying out. Let the mixture rest for the predetermined autolyse time, typically 30-60 minutes at room temperature for pizza dough. During this rest, the magic of hydration and enzymatic activity begins, preparing the dough for the next steps and contributing to the eventual dough strength.
Step 4: Incorporating the Preferment into the Autolysed Dough
Once the autolyse period is complete, the dough will appear smoother and more cohesive. Now it's time to add the remaining ingredients: your preferment, salt, and yeast (if using commercial yeast in addition to or instead of a starter).
Spread the preferment over the surface of the autolysed dough. If you reserved some water, dissolve the salt and yeast in this water and pour it over the dough as well. Begin mixing the ingredients together.
This can be done by hand, folding the dough over itself repeatedly, or using a stand mixer on a low speed. Continue mixing until all the new ingredients are fully incorporated and the dough starts to come together into a more uniform mass. It might feel a bit messy at first, but as you mix, the dough will become smoother, building upon the initial work done during the autolyse phase to enhance dough strength.
Step 5: Bulk Fermentation and Folding Techniques for Dough Strength
After all ingredients are incorporated, the dough enters the bulk fermentation phase. This is where the primary rise occurs, and continued gluten development is encouraged through periodic folding. Place the dough in a lightly oiled container, cover it, and let it rest in a warm place (around 75-80°F or 24-27°C is ideal for faster pizza dough).
Perform a series of stretch and folds every 30-60 minutes for the first 2-3 hours of bulk fermentation. To fold, wet your hands, gently lift one side of the dough, stretch it upwards, and fold it over the center. Rotate the bowl and repeat this process 3-4 times. These folds help align the gluten strands, redistribute yeast and food sources, and build significant dough strength. The duration of bulk fermentation will vary depending on the temperature and the activity of your preferment, but it typically lasts 3-5 hours for a same-day pizza dough or much longer if cold fermenting.
Step 6: Shaping and Proofing the Pizza Dough
Once the bulk fermentation is complete and the dough has significantly increased in volume (usually doubled or more), it's time to divide and shape it into individual pizza balls. Gently turn the dough out onto a lightly floured surface. Be careful not to degas it too much.
Using a bench scraper, divide the dough into portions (e.g., 250-300g for a medium pizza). Shape each portion into a tight ball by gently tucking the edges underneath. Place the shaped dough balls seam-side down in individual containers or on a tray, ensuring they have room to expand.
Cover them and allow them to proof. Proofing can be done at room temperature for 1-2 hours for a faster bake, or preferably, cold proofed in the refrigerator for 24-72 hours. Cold proofing further develops flavor and makes the dough easier to handle and stretch, resulting in excellent dough strength for thin crusts.
Troubleshooting Common Issues When Using Autolyse and Preferments
While combining autolyse and preferments offers great rewards, it can sometimes present challenges. Knowing how to identify and fix common issues will help you achieve consistent results and build excellent dough strength every time.
Sticky Dough: Adjusting Hydration and Flour Type
A common issue is dough that feels excessively sticky and difficult to handle, even after mixing and some folding. This is often a sign of high hydration relative to the flour's absorption capacity. Different flours absorb water differently; for example, a high-protein bread flour can typically handle higher hydration (70-80%) than an all-purpose flour (60-65%).
If your dough is too sticky, first consider the type of flour you used. If it's lower protein, you may need to reduce the overall hydration in future batches. For the current batch, you can try adding a small amount of flour (a tablespoon at a time) during the initial stages of mixing or folding until the dough becomes more manageable. Ensure you are weighing your ingredients accurately, as even small variations can impact dough consistency. Proper dough strength helps manage stickiness by creating a more structured network.
Over-Fermentation: Monitoring Dough Development
Over-fermented dough, sometimes called "blown out," is typically very soft, often sticky, lacks structure, and may smell strongly alcoholic or acidic. This happens when the yeast and bacteria have consumed most of the available sugars and the gluten structure begins to degrade.
Monitoring your dough's development is key to preventing over-fermentation. Pay attention to visual cues: the dough should double or slightly more in volume during bulk fermentation, but not triple. Use the "poke test": gently press a floured finger into the dough; if the indentation springs back very slowly or not at all, it might be over-proofed.
Learn to recognize the feel of properly fermented dough – it should be alive and airy but still have tension. Adjust fermentation time based on ambient temperature; warmer temperatures require shorter times. Proper dough strength helps the dough hold its structure longer during fermentation.
Weak Dough: Enhancing Gluten Development
Weak dough lacks elasticity and extensibility; it tears easily when stretched and doesn't hold its shape well. This can result from insufficient kneading or folding, low protein flour, improper hydration, or under-fermentation.
To enhance dough strength, ensure you are performing adequate stretch and folds during bulk fermentation. These mechanical actions help align and strengthen the gluten network. Consider using a higher protein bread flour specifically designed for yeast baking, as it has a greater capacity for gluten development. Ensure your hydration level is appropriate for the flour type – too little water can also hinder gluten formation. Finally, make sure your preferment is active and that the dough has fermented for an adequate time, as fermentation itself contributes significantly to dough strength.
Understanding Dough Elasticity and Extensibility
Elasticity refers to the dough's ability to spring back after being stretched, while extensibility is its ability to stretch without tearing. Both are crucial for pizza dough – you need extensibility to stretch it thin for the base, and elasticity provides the tension needed for structure and a good crust.
Autolyse primarily enhances extensibility by relaxing the gluten. Preferments, particularly those with longer fermentation times and higher acidity, tend to increase elasticity and overall dough strength. Achieving the right balance is key. If your dough is too elastic (snaps back excessively when stretched), a slightly longer autolyse or a short rest period (5-10 minutes) after initial shaping can help. If it's too extensible (tears easily), it likely needs more gluten development through additional folds or longer fermentation, or perhaps a flour with higher protein content is needed to build more inherent dough strength.
Recipe: Pizza Dough with Autolyse and Preferment (Biga)
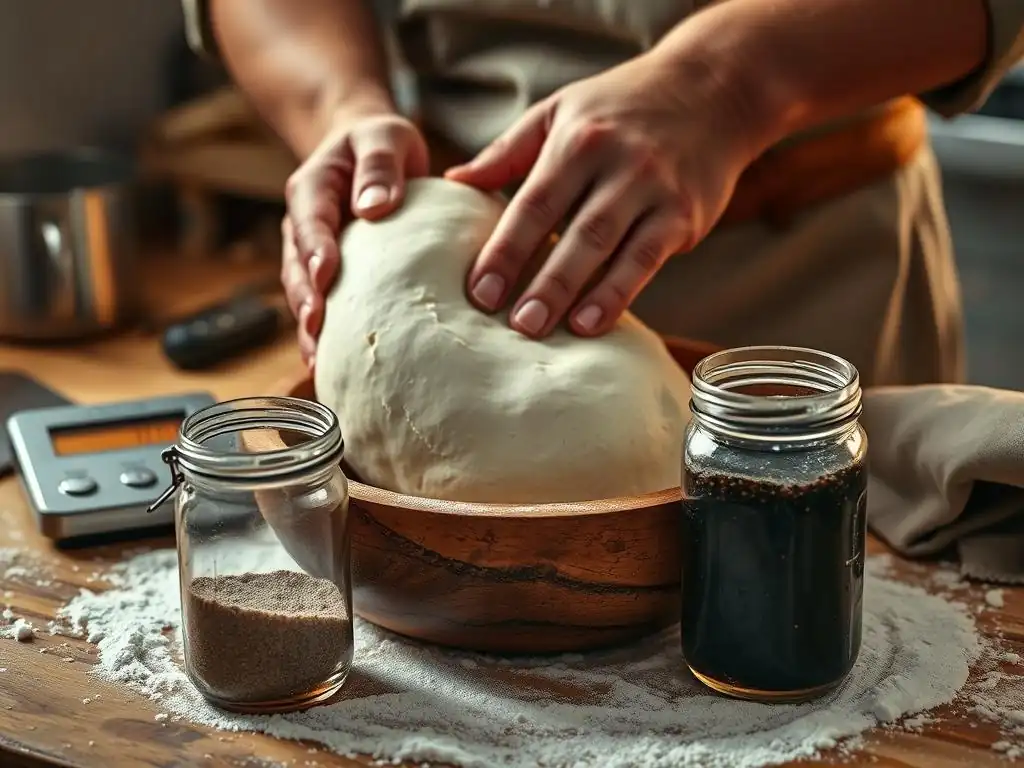
This recipe incorporates a biga preferment and the autolyse technique to produce a chewy, flavorful pizza crust with excellent dough strength. This recipe yields two medium (approx. 12-14 inch) pizzas.
Ingredients for the Pizza Dough
For the Biga (Prepare 12-18 hours in advance):
100gBread Flour55gWater (around 55% hydration)0.5gInstant Dry Yeast (a tiny pinch)
For the Final Dough:
400gBread Flour (total flour is 100g in biga + 400g = 500g)295gWater (total water is 55g in biga + 295g = 350g, resulting in 70% total hydration)10gFine Sea Salt- All of the prepared Biga
Instructions for Making the Pizza Dough
Here is a step-by-step process combining autolyse and biga for your pizza dough:
- [ ] Step 1: Mix the Biga: In a small bowl, combine the biga ingredients. Mix until a stiff dough forms. Knead briefly until smooth. Place in a covered container and let ferment at room temperature (around 70-75°F / 21-24°C) for 12-18 hours, or refrigerate for 24-48 hours. It should be roughly doubled and smell slightly yeasty/acidic.
- [ ] Step 2: Autolyse: In a large bowl, combine the 400g of bread flour and 295g of water for the final dough. Mix just until no dry flour remains. Cover the bowl and let rest for 30-60 minutes.
- [ ] Step 3: Incorporate Ingredients: Add the salt and the prepared biga (break it into smaller pieces) to the autolysed dough.
- [ ] Step 4: Mix and Knead: Mix by hand or with a stand mixer on low speed until all ingredients are fully incorporated. Then, knead the dough for 5-8 minutes until it becomes smoother and begins to develop dough strength. It doesn't need to be perfectly smooth yet.
- [ ] Step 5: Bulk Fermentation & Folding: Transfer the dough to a lightly oiled container. Cover. Perform 3-4 sets of stretch and folds at 45-minute intervals over the next 2-3 hours. The dough should become significantly smoother and more elastic, demonstrating increased dough strength.
- [ ] Step 6: Divide & Shape: Once bulk fermentation is complete (dough has increased significantly, feels airy), gently turn it out onto a lightly floured surface. Divide into two equal portions (approx. 475g each). Gently pre-shape each portion into a ball. Let rest for 10-15 minutes.
- [ ] Step 7: Final Shaping & Proofing: Tightly shape each portion into a round ball, tucking the edges underneath. Place in individual proofing containers or on a tray. Cover. Proof at room temperature for 1-2 hours, or refrigerate for cold proofing (24-72 hours) for best results. The dough balls should look puffy and relaxed.
- [ ] Step 8: Bake: When ready to bake, gently stretch the dough balls into pizza rounds. Top as desired and bake in a preheated oven (ideally 500°F / 260°C or higher) on a pizza stone or steel until the crust is golden brown and the cheese is melted and bubbly.
Baking Your Pizza: Tips for a Crispy Crust
Achieving a crispy pizza crust with dough prepared using autolyse and preferments requires high heat and proper technique during baking.
- High Temperature: A hot oven is crucial. Preheat your oven to the highest setting it allows (typically 500-550°F or 260-290°C) for at least 30-60 minutes with your pizza stone or steel inside. This ensures the stone/steel is screaming hot, providing the necessary thermal shock to the dough.
- Pizza Stone or Steel: Baking directly on a preheated pizza stone or steel transfers heat rapidly to the base of the pizza, resulting in a crispier bottom crust and better oven spring. A pizza steel typically conducts heat more efficiently than a stone.
- Launch Quickly: Once topped, transfer the pizza to the hot stone/steel quickly using a pizza peel dusted with semolina flour or cornmeal. This prevents sticking and ensures minimal heat loss.
- Monitor Baking: Bake for 8-15 minutes, depending on your oven and desired crispness. Watch the crust edge – it should be puffed and golden brown. The base should also be firm and crispy. The enhanced dough strength from autolyse and preferments helps the crust hold its structure beautifully during this high-heat bake.
Achieving Enhanced Dough: Tips and Best Practices
Beyond the basic steps, several factors can further optimize your results when using autolyse with preferments to build exceptional dough strength. Paying attention to details makes a significant difference.
Choosing the Right Flour for Autolyse and Preferments
The type of flour you use is paramount when aiming for optimal dough strength and texture. For pizza dough, a high-protein bread flour (typically 12-14% protein content) is often recommended. These flours contain more gluten-forming proteins (gliadin and glutenin), which are essential for developing a strong, elastic network.
Using a strong bread flour in both your preferment and your main autolyse batch will give you the best foundation for building robust dough strength. While all-purpose flour can be used, it will yield a less chewy and potentially weaker dough due to its lower protein content (around 10-11.5%). Some bakers experiment with a small percentage of finely ground durum wheat flour (like semola rimacinata) in the main dough or preferment for added flavor and structure, but the bulk should be a good quality bread flour for maximum dough strength potential.
Understanding Water Temperature and its Impact
Water temperature is a critical, often overlooked, variable in baking, especially when working with live cultures like preferments. It directly influences the rate of fermentation. Warmer water accelerates yeast activity, while colder water slows it down.
When incorporating your preferment and other ingredients into the autolysed dough, adjust the water temperature based on your desired fermentation speed and ambient temperature. For a faster bulk fermentation at room temperature, use lukewarm water (75-80°F / 24-27°C). If your kitchen is warm or you plan a longer fermentation, cooler water (60-65°F / 15-18°C) is advisable.
For cold proofing in the refrigerator, initial water temperature is less critical as the cold will significantly slow fermentation, but starting with cooler water can provide a buffer. Consistent water temperature management helps control the fermentation process, ensuring optimal dough strength develops over the intended time.
Mastering the Art of Dough Handling
Gentle yet firm handling is key to developing and preserving the delicate gluten structure built through autolyse and fermentation with preferments. Overworking the dough, especially after bulk fermentation, can damage the gluten network, leading to a dense or tough crust instead of the desired open crumb and crispy texture.
During mixing, ensure ingredients are fully incorporated without excessive kneading. During bulk fermentation, perform stretch and folds with wet hands to prevent sticking and avoid tearing the dough. When dividing and shaping, be gentle, using minimal flour on your work surface. The goal is to create tension on the dough surface without degassing it too much. Properly handled dough, benefiting from the inherent dough strength built by autolyse and preferments, will feel alive, elastic, and extensible, ready to be stretched thinly for baking.
The Importance of Proper Fermentation Time
Fermentation time is perhaps the single most influential factor in developing both flavor and dough strength. Both the long fermentation of the preferment and the bulk fermentation of the final dough are essential. Cutting fermentation time short results in underdeveloped flavor and a weak gluten structure. Over-fermentation leads to dough collapse and poor oven spring.
The ideal fermentation time depends heavily on temperature, the amount of preferment used, and the yeast activity. Pay attention to your dough's volume increase and feel rather than strictly adhering to times in a recipe. During bulk fermentation, the dough should roughly double. Cold proofing extends the fermentation time significantly (24-72 hours or even longer in the refrigerator), allowing for maximum flavor development and improved dough strength and handling. Learn to "read" your dough – its appearance, feel, and smell are the best indicators of proper fermentation.
Exploring Different Types of Preferments for Pizza Dough
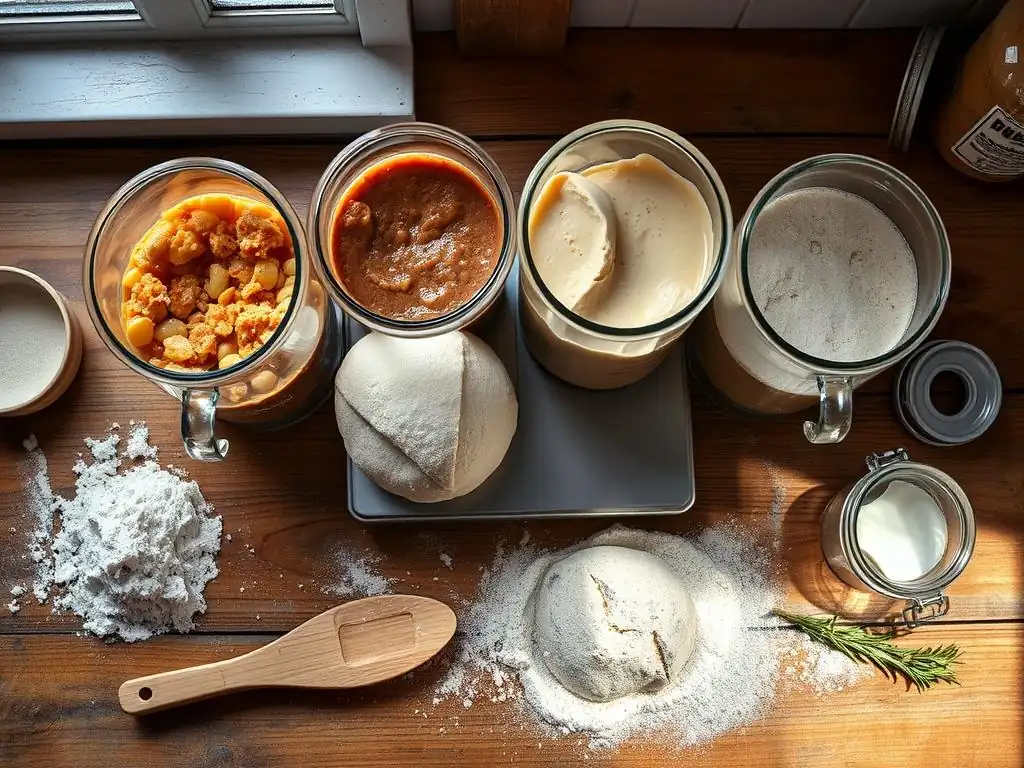
While the recipe example used a biga, you can achieve fantastic results with pizza dough by using other types of preferments. Each brings its own unique characteristics to the final product, influencing both flavor and dough strength.
Sourdough Starter: Adding Tang and Complexity
Using an active sourdough starter as your preferment introduces a delightful tang and complexity to your pizza dough that commercial yeast alone cannot replicate. The combination of wild yeasts and lactic acid bacteria in the starter produces a range of organic acids and aromatic compounds during its long fermentation.
Incorporating sourdough starter into an autolysed dough results in a crust with a more nuanced flavor profile and a slightly chewy texture. The acidity from the starter also helps strengthen the gluten network, contributing significantly to overall dough strength. When using sourdough, the fermentation times are often longer than with commercial yeast preferments, allowing for deeper flavor development. A typical sourdough pizza dough might involve a 12-18 hour cold proof after a few hours of bulk fermentation.
Biga: A Stiff Preferment for Chewier Crusts
As highlighted in the recipe example, biga is a stiff preferment (low hydration, typically 50-60%) that is fermented for a relatively long period. Because of its lower water content, yeast activity is slower, leading to a more controlled and extended fermentation.
Using a biga in combination with autolyse yields pizza dough that is particularly well-suited for creating a chewy crust with a satisfying bite. The stiff structure of the biga contributes significant dough strength to the final mix, making it easier to handle and stretch thinly. The flavor developed in a biga is typically less tangy than sourdough but adds a pleasant depth and aroma. Fermenting the biga at room temperature for 12-18 hours or refrigerating it for 24-48 hours allows for optimal flavor and structure development before it's incorporated into the autolysed main dough.
Poolish: A Wet Preferment for Open Crumb Structure
Poolish is a liquid or wet preferment (typically 100% hydration) that ferments quite actively due to the high water content. It's typically mixed with equal parts flour and water by weight, plus a small amount of yeast.
Combining a poolish with autolyse is an excellent approach if you're aiming for a very light, airy, and open crumb structure in your pizza crust. The high hydration of the poolish contributes to overall dough extensibility, while its active fermentation provides significant leavening power.
The flavor profile is generally milder and less acidic than sourdough or a long-fermented biga, offering a clean, slightly sweet taste. A poolish is usually fermented at room temperature for 8-12 hours until it is bubbly and has started to recede slightly in the center, indicating peak activity before being added to the autolysed dough to enhance its dough strength and structure.
Advanced Techniques: Variations and Experimentation
Once you're comfortable with the basic principles of combining autolyse and preferments, you can begin to experiment with variations to fine-tune your pizza dough and explore different outcomes in terms of flavor, texture, and dough strength.
Cold Autolyse: Slowing Down Gluten Development
Traditional autolyse is done at room temperature, but performing a "cold autolyse" by mixing flour and water and refrigerating the mixture for several hours (4-12 hours) or even overnight offers interesting possibilities.
The cold temperature significantly slows down enzymatic activity compared to room temperature autolyse. While hydration still occurs, the breakdown of proteins by protease is much less pronounced. This results in dough that might feel slightly less extensible initially but can contribute to a stronger, more elastic dough later on, particularly when combined with the strengthening effects of a preferment. Cold autolyse can be a good strategy if you need to delay your dough making process or want to experiment with different dough strength characteristics.
Using Different Types of Flour
Experimenting with different flours or blends can dramatically impact your final pizza dough. While high-protein bread flour is standard for dough strength, incorporating other flours can add complexity.
Consider substituting a small percentage (5-15%) of the main flour with whole wheat flour for nutty flavor and increased water absorption (you might need slightly more water overall). Alternatively, try a small amount of rye flour in your preferment (especially a sourdough starter) for a more pronounced tang. Using finely milled durum wheat (semola rimacinata) in the main dough can add a unique texture and golden hue. Each flour type interacts differently during autolyse and with fermentation, affecting dough strength and handling.
Adjusting Preferment Ratios for Desired Flavor and Texture
The amount of preferment used relative to the total flour weight in the final dough significantly influences the outcome. Most recipes use a preferment that accounts for 15-30% of the total flour.
Using a higher percentage of preferment (e.g., 30% of total flour) will result in faster fermentation of the final dough, a more pronounced flavor from the preferment, and can contribute greater initial dough strength. Using a lower percentage (e.g., 15%) will slow down fermentation, allow for a longer bulk or cold proof, and result in a milder flavor. Experimenting with these ratios allows you to control the pace of your bake and the intensity of the preferment's contribution to flavor and dough strength.
Conclusion: Improving Your Pizza Dough with Autolyse and Preferments
Mastering the art of pizza making often involves exploring techniques that go beyond basic mixing. Combining autolyse and preferments is a powerful approach that significantly enhances dough strength, improves handling, and develops complex flavors, resulting in a truly exceptional pizza crust. Autolyse prepares the flour for optimal hydration and gluten development, while preferments contribute flavor, leavening, and a head start on building structure.
By understanding the science behind these techniques, following a careful step-by-step process, and being mindful of factors like flour type, hydration, and fermentation time, you can consistently produce pizza dough with superior elasticity, extensibility, and an ideal balance of chewiness and crispness. Don't be afraid to troubleshoot common issues and experiment with variations like cold autolyse or different preferment ratios to find what works best for you and your desired pizza style.
The Future of Dough Making: Embracing Advanced Techniques
As bakers continue to seek ways to improve their craft, techniques like combining autolyse and preferments are becoming more mainstream. These methods, once primarily the domain of professional or highly dedicated amateur bakers, are now accessible to anyone willing to invest a little extra time and attention.
Embracing these advanced techniques is not just about following a recipe; it's about understanding the ingredients and processes at a deeper level. By focusing on building robust dough strength from the very beginning through autolyse and leveraging the power of long fermentation through preferments, you unlock the full potential of your flour. The result is not just better pizza, but a greater appreciation for the nuanced interactions that transform simple ingredients into something truly delicious. Continued learning and experimentation with techniques like autolyse and preferments will undoubtedly lead to even more exciting possibilities in the world of dough making.
Frequently Asked Questions
What is an autolyse, and how does it relate to preferments?
An autolyse is a resting period where flour and water are mixed before other ingredients are added. Using it with preferments enhances dough strength and improves flavor.
How does using a preferment impact the autolyse process?
A preferment, like a sourdough starter or poolish, introduces fermentation during the autolyse, adding complexity. This can increase extensibility and improve the final product's texture.
What are the benefits of combining autolyse and preferments for dough strength?
Combining the techniques creates a stronger gluten network resulting in improved dough handling and a better rise. It also contributes to a more complex flavor profile.
Can I use any type of preferment with an autolyse?
Yes, various preferments like sourdough starters, poolish, or biga can be used. The hydration level and fermentation time of the preferment will affect the autolyse.
How long should I autolyse when using a preferment?
The autolyse duration varies but generally ranges from 30 minutes to 1 hour. Monitor the dough's development for optimal gluten development and extensibility.
Final Reflection: Unlocking Dough's Potential Through Autolyse and Preferments
The synergy between autolyse and preferments represents a paradigm shift in bread baking, offering bakers of all levels a pathway to achieving unparalleled dough strength and flavor. This isn't just about technical mastery; it's about unlocking the inherent potential within the flour itself, transforming ordinary ingredients into extraordinary loaves. The techniques discussed here aren't merely recipes, but tools for understanding the fundamental processes at play in dough development.
The impact of these techniques extends beyond the kitchen, reflecting a broader cultural appreciation for artisanal food production and the pursuit of excellence. We've moved beyond simply following instructions; we're now actively engaged in a dialogue with our ingredients, understanding their nuances and responding to their needs. This mindful approach resonates with a growing movement towards sustainability and conscious consumption. The best bread is made with love and patience,
a baker once told me, and this sentiment perfectly encapsulates the spirit of autolyse and preferment techniques. The time invested yields not just stronger dough, but a deeper connection to the craft itself.
Consider the possibilities: Imagine the texture, the aroma, the sheer satisfaction of crafting a loaf of bread with the strength and character you've painstakingly cultivated. You now possess the knowledge to elevate your baking to new heights. Experiment with different flours, preferments, and autolyse times. Don't be afraid to fail; each attempt is a step closer to mastering this art. Embrace the journey, and discover the transformative power of autolyse and preferments in your own baking endeavors.
Unleash Your Inner Baker: Master Autolyse & Preferments!
Thanks for diving deep into the world of autolyse and preferments! You've now got the knowledge to create incredibly strong and flavorful doughs. Ready to put your new skills to the test?
- Bake your best loaf yet: Try the recipes we outlined, experimenting with different flour types and hydration levels. Notice the difference!
- Share your baking journey: Post a picture of your magnificent creation on social media and tag #BakeWithEase – we'd love to see your results!
- Join our baking community: Head over to our forum (link would go here) and share your tips, tricks, and questions with fellow bread enthusiasts.
So, what incredible bread masterpiece will you create with your newfound knowledge of autolyse and preferments?