
Sourdough Rye: A Comprehensive StepbyStep Guide

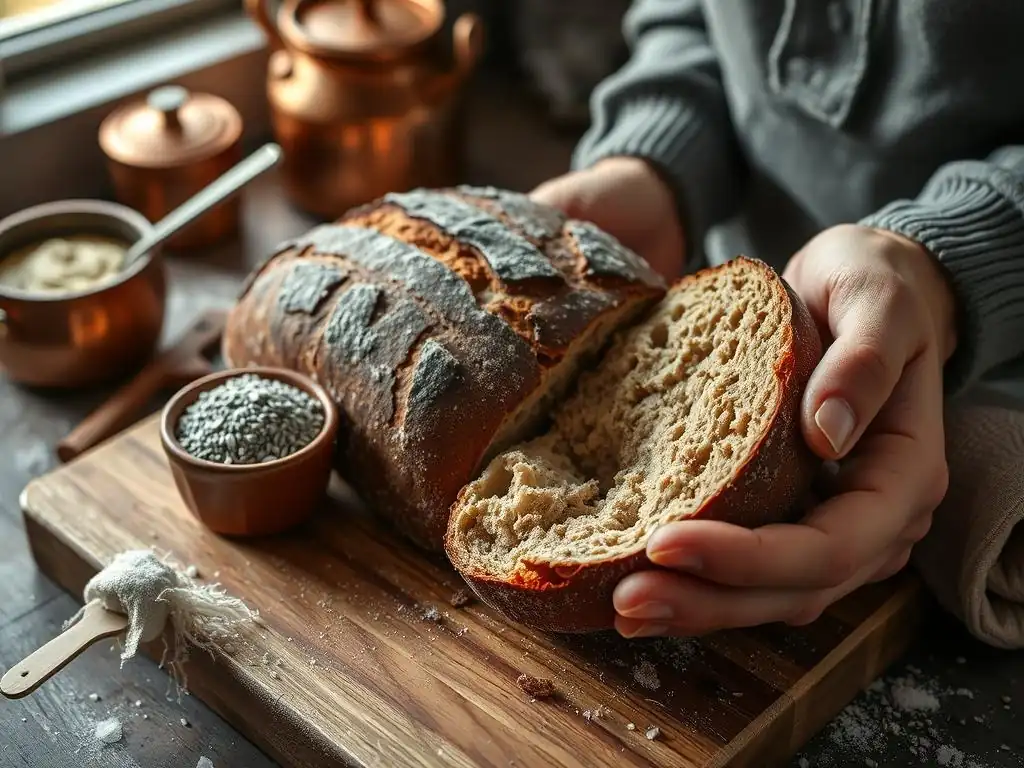
Welcome to BakeWithEase, your partner in baking brilliance! Ever dreamt of crafting a perfectly tangy and flavorful sourdough rye? Then you're in the right place. We'll demystify the process with our comprehensive guide, walking you through each step to create a sourdough rye bread recipe that's sure to impress. Intrigued? Let's get started and unlock the secrets to baking this classic bread!
- Sourdough Rye: A Comprehensive Step-by-Step Guide for BakeWithEase
- Introduction to Baking Sourdough Rye Bread at Home
- Understanding the Key Ingredients for a Perfect Sourdough Rye Loaf
- Step-by-Step: The Sourdough Rye Bread Recipe
- Troubleshooting Common Sourdough Rye Baking Problems
- Tips and Tricks for Perfecting Your Sourdough Rye Recipe
- Storing Your Sourdough Rye Bread
- Conclusion: Mastering the Art of Sourdough Rye Baking
-
Frequently Asked Questions
- What makes a sourdough rye bread different from regular sourdough bread?
- What is the ideal hydration level for a sourdough rye bread recipe?
- What are some common problems bakers encounter when making sourdough rye bread?
- Can I substitute different types of rye flour in the Sourdough Rye bread recipe?
- How long should I proof my sourdough rye bread before baking?
- Final Reflection: The Enduring Allure of Sourdough Rye
- Unleash Your Inner Baker: Craft the Perfect Rye
Sourdough Rye: A Comprehensive Step-by-Step Guide for BakeWithEase
Introduction to Baking Sourdough Rye Bread at Home
Embarking on the journey of baking sourdough rye bread at home is a rewarding experience. This guide is designed to walk you through each essential step, demystifying the process and helping you create delicious, hearty loaves right in your own kitchen. Unlike standard yeasted breads, sourdough rye relies on a natural leavening agent – your active sourdough starter – which contributes to its unique texture, flavor complexity, and keeping qualities. Mastering a sourdough rye bread recipe opens up a world of possibilities for home bakers.
Baking sourdough rye can seem intimidating at first glance, especially if you're new to working with high percentages of rye flour or maintaining a sourdough culture. However, with patience and attention to detail, anyone can achieve fantastic results. This guide breaks down the process into manageable phases, from understanding the ingredients to troubleshooting common issues, ensuring you feel confident and capable throughout your baking adventure. Get ready to discover the joy of pulling a warm, fragrant loaf of homemade sourdough rye from your oven.
Why Bake Your Own Sourdough Rye? The Benefits
Baking your own sourdough rye offers numerous advantages beyond just the delicious taste. One major benefit is the control you have over the ingredients. You can select high-quality flours, ensure no unwanted additives are used, and tailor the recipe to your dietary needs or preferences, such as adjusting salt levels or adding specific seeds. This level of customization is simply not possible with commercially produced bread. Furthermore, the sense of accomplishment derived from creating something so fundamental and nourishing from scratch is incredibly satisfying.
Beyond ingredient control, sourdough fermentation itself brings potential health benefits. The long fermentation process can help break down complex carbohydrates and phytic acid, potentially making the nutrients in the grain more bioavailable and the bread easier to digest for some people compared to quick-rise yeasted breads. Baking sourdough rye also fills your home with an incredible aroma, creating a warm and inviting atmosphere. It's a culinary skill that connects you to age-old traditions and provides a deeply fulfilling creative outlet.
Dive into the Flavor: Exploring the Unique Taste of Sourdough Rye
The flavor profile of sourdough rye is distinct and complex, setting it apart from wheat-based sourdoughs. Rye flour inherently brings earthy, slightly sweet, and sometimes tangy notes to the bread. When combined with the lactic and acetic acids produced by the sourdough starter during fermentation, these flavors intensify, resulting in a bread that can range from mildly tangy and aromatic to deeply sour and robust, depending on the rye percentage and fermentation process. The characteristic tang is a hallmark of a good sourdough rye bread recipe.
The sourness in sourdough rye comes from the metabolic activity of the diverse microbial community in the starter. Lactic acid bacteria produce lactic acid, which contributes a mellow, yogurt-like tang, while wild yeasts and other bacteria can produce acetic acid, which has a sharper, vinegar-like bite. The balance between these acids is influenced by factors like fermentation temperature and time.
High hydration and longer fermentation times often favor lactic acid, while cooler temperatures can sometimes promote acetic acid. Optional additions like caraway seeds further enhance the complexity, adding a warm, slightly peppery aroma that is classic in many rye bread traditions.
Understanding the Key Ingredients for a Perfect Sourdough Rye Loaf
Creating a truly exceptional sourdough rye loaf starts with understanding the role of each ingredient. Unlike simple wheat loaves, rye requires a slightly different approach due to its unique gluten structure and water absorption properties. The quality and type of each component significantly impact the final texture, flavor, and rise of your bread. Paying attention to these details is crucial for success with any sourdough rye bread recipe.
The core ingredients for a basic sourdough rye are typically rye flour, water, salt, and, most importantly, an active rye or mixed-flour sourdough starter. Optional additions like caraway seeds, molasses, or even a touch of vital wheat gluten (especially when using 100% rye) can further refine the loaf. Each ingredient plays a vital role in the complex biochemical processes that transform simple components into a delicious loaf of bread.
Rye Flour: Choosing the Right Type for Your Sourdough
Rye flour is the defining ingredient in sourdough rye bread. It differs significantly from wheat flour because its gluten-forming proteins (gliadins and glutenins) behave differently, resulting in a less elastic and more crumbly dough. Instead, the structure in rye bread is largely built by pentosans, complex carbohydrates that absorb large amounts of water and form a gel-like matrix. This is why rye doughs are often stickier and denser than wheat doughs.
There are several types of rye flour available, each impacting the final loaf differently. Light rye flour (also called white rye) contains only the endosperm and produces a milder flavor and lighter crumb. Medium rye contains some of the bran and germ, offering more flavor and color.
Dark rye flour (or pumpernickel) includes most of the bran and germ, resulting in a deeply flavored, dense, and dark loaf. Whole rye flour is the entire grain and is the most common type used in many traditional sourdough rye bread recipes, providing maximum flavor and nutritional benefits. Your choice of rye flour will significantly influence the characteristics of your finished bread.
Sourdough Starter: The Heart of Your Rye Bread Recipe
An active, vigorous sourdough starter is absolutely essential for baking sourdough rye. This living culture of wild yeasts and lactic acid bacteria is responsible for leavening the bread and developing its characteristic sour flavor. A starter fed regularly and kept healthy will provide the necessary lift and acidity required for a good rye loaf, which doesn't rely on gluten development in the same way wheat bread does.
For sourdough rye, you can use a starter fed with exclusively rye flour, or one fed with a mix of rye and wheat flour. A rye-only starter tends to be very active and promotes a more pronounced rye flavor. Regardless of the flour composition, your starter should be bubbly, have a pleasant tangy aroma, and ideally double in size within 4-8 hours after feeding, depending on the feeding ratio and temperature. Using a starter that is at its peak activity, usually a few hours after feeding, ensures optimal leavening for your sourdough rye bread recipe.
Water: The Importance of Hydration in Sourdough Rye Dough
Water is a critical component in any bread dough, but it plays a particularly interesting role in sourdough rye. Due to the high pentosan content in rye flour, it absorbs significantly more water than wheat flour. This means sourdough rye doughs often have much higher hydration levels than typical wheat sourdoughs, sometimes ranging from 75% to over 100% hydration relative to the flour weight.
The high hydration is necessary to allow the pentosans to swell and form the gel-like structure that gives rye bread its characteristic dense, moist crumb. Using too little water will result in a dry, dense, and potentially crumbly loaf. However, too much water can make the dough incredibly difficult to handle.
The ideal hydration level for your sourdough rye bread recipe will depend on the type of rye flour used (darker flours absorb more water) and personal preference for crumb texture. Using non-chlorinated water is generally recommended, as chlorine can potentially inhibit the activity of the wild yeasts and bacteria in your starter.
Salt: Enhancing Flavor and Controlling Fermentation in Rye Bread
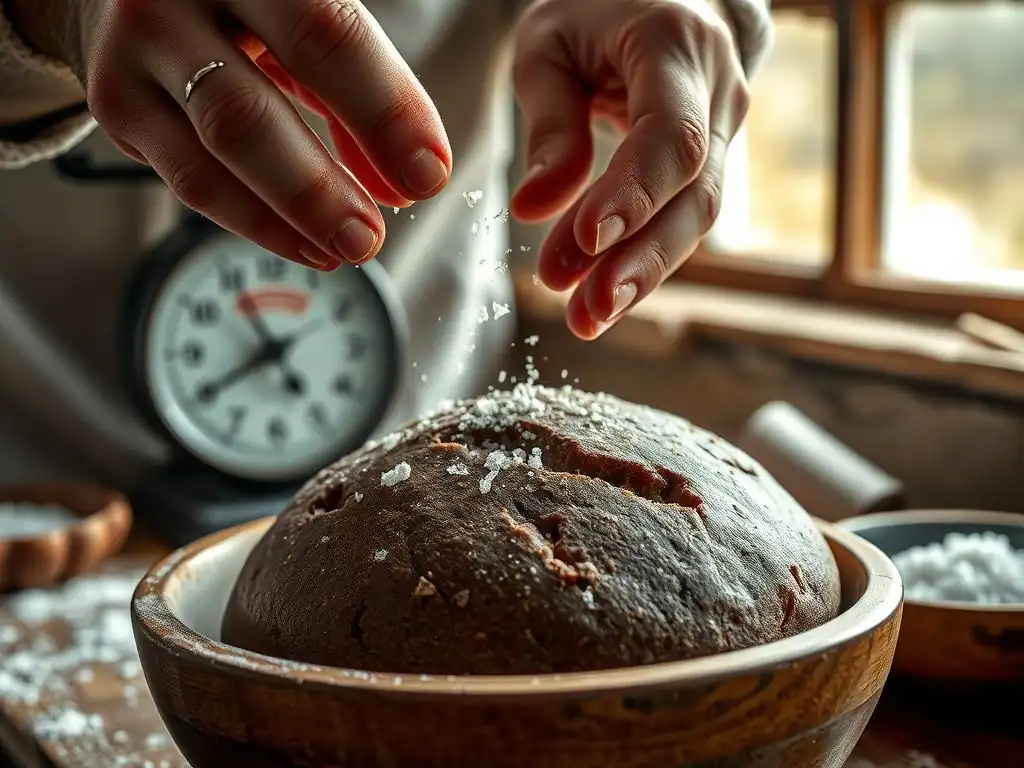
Salt is a fundamental ingredient in virtually all bread recipes, and sourdough rye is no exception. Its primary functions are to enhance the flavor of the bread, bringing out the nuances of the rye and the tang of the sourdough. Without salt, bread can taste bland and flat.
Beyond flavor, salt plays a crucial role in controlling the fermentation rate. It slows down the activity of both the wild yeasts and the lactic acid bacteria. This controlled fermentation allows for better flavor development over a longer period and prevents the dough from over-proofing too quickly. Typically, salt is added at a concentration of 1.8% to 2.2% of the total flour weight in a sourdough rye bread recipe. Adding the salt after the initial mixing or autolyse phase is common, allowing the flour to hydrate fully before the salt begins to influence the dough structure and microbial activity.
Optional Ingredients: Caraway Seeds, Molasses, and More
While a basic sourdough rye bread recipe requires only flour, water, salt, and starter, optional ingredients can significantly enhance flavor and texture. Caraway seeds are perhaps the most classic addition, providing a warm, slightly anise-like aroma and flavor that pairs beautifully with the tang of rye. They can be added whole or lightly crushed.
Molasses is another common addition, particularly in darker rye breads. It contributes color, a subtle sweetness, and helps keep the crumb moist. A small amount, perhaps 1-2% of the flour weight, can make a noticeable difference. Other potential additions include fennel seeds, coriander seeds, toasted nuts, or dried fruits like raisins. These ingredients not only add flavor but can also contribute to the texture and character of your homemade sourdough rye loaf. Experimenting with these optional elements allows you to personalize your sourdough rye bread recipe.
Step-by-Step: The Sourdough Rye Bread Recipe
Let's dive into the practical steps of baking your sourdough rye bread. This comprehensive guide breaks down the process into distinct phases, making it easier to follow and understand. Remember that baking sourdough is also about intuition and observation, so pay attention to how your dough looks and feels at each stage.
Successfully executing a sourdough rye bread recipe involves careful timing and handling, as rye doughs behave differently than wheat doughs. We'll cover everything from preparing your starter to the final cooling phase. Follow these steps diligently, and you'll be well on your way to baking a perfect loaf of sourdough rye.
Phase 1: Preparing Your Rye Sourdough Starter
The success of your sourdough rye bread recipe hinges on the health and activity of your sourdough starter. It needs to be fed and active before you begin mixing your dough.
Feeding Your Starter for Optimal Activity
To prepare your starter for baking, you'll need to feed it with fresh flour and water. The typical feeding ratio is 1:1:1 by weight (starter:flour:water), though ratios like 1:2:2 or even 1:5:5 can be used to build a larger quantity or extend the peak activity window. For a sourdough rye loaf, feeding with rye flour or a mix that includes rye is ideal, perhaps using 20g of starter, 40g of rye flour, and 40g of water if you need 100g of active starter for your recipe.
Feed your starter 4-12 hours before you plan to mix your dough, depending on the temperature of your kitchen. In warmer conditions (around 75-80°F or 24-27°C), it will become active more quickly, possibly peaking in 4-6 hours. In cooler conditions (around 70°F or 21°C), it might take 8-12 hours to reach peak activity. You want to use the starter when it has roughly doubled in size and is full of bubbles.
Testing Your Starter's Readiness
A reliable way to test if your starter is ready to bake with is the float test. Gently take a small spoonful of your peak-activity starter and drop it into a glass of water.
- If the starter floats, it indicates that it has enough trapped gas from fermentation to leaven your bread effectively. It's ready to use in your sourdough rye bread recipe.
- If the starter sinks, it might not be active enough yet, or it might have already passed its peak. Give it more time to ferment, or consider feeding it again if it has collapsed.
Using a starter at its peak ensures maximum lift and fermentation power for your dough.
Phase 2: Mixing the Sourdough Rye Dough
Mixing sourdough rye dough requires a slightly different approach than wheat dough due to the limited gluten development. The goal is to hydrate the flour thoroughly and distribute the starter and salt evenly.
Autolyse: Hydrating the Rye Flour
An autolyse (mixing flour and water only and letting it rest) is beneficial for rye dough, though for different reasons than wheat. For rye, the autolyse primarily allows the pentosans to hydrate fully and begin forming their gel structure. Mix the rye flour and water together until no dry bits remain. The mixture will be quite sticky and shaggy.
Cover the bowl and let it rest for 20 to 60 minutes. This resting period allows the water to penetrate the flour particles completely, making the dough easier to work with in the subsequent steps. This initial hydration step is key to achieving a good texture in your sourdough rye bread recipe.
Incorporating the Sourdough Starter
After the autolyse, it's time to add your active sourdough starter to the dough. Add the measured amount of starter to the hydrated flour and water mixture.
Mix the starter into the dough using your hands, a dough whisk, or a stand mixer on a low speed. The dough will be sticky. Work the starter in until it is fully incorporated and evenly distributed throughout the dough. This might take a few minutes of gentle mixing or kneading. Ensure there are no pockets of unincorporated starter.
Adding Salt and Other Ingredients
Once the starter is mixed in, add the salt. If you are including optional ingredients like caraway seeds or molasses, add them at this stage as well.
Mix the salt and any optional ingredients into the dough. Continue mixing gently until everything is evenly distributed. Avoid over-mixing, as aggressive kneading isn't necessary or beneficial for rye dough's structure. The dough will remain sticky and somewhat dense. Cover the bowl again after mixing is complete.
Phase 3: Bulk Fermentation (First Rise)
Bulk fermentation is the period where the dough rises as a single mass, developing flavor and structure. This phase is crucial for any sourdough rye bread recipe.
The Importance of Temperature Control
Temperature significantly impacts the rate of bulk fermentation. An ideal temperature range for bulk fermentation of sourdough rye is typically between 75°F and 80°F (24°C to 27°C). Warmer temperatures speed up fermentation, while cooler temperatures slow it down.
If your kitchen is cool, find a warmer spot or use a proofer box, a warm oven with the light on, or a fermentation mat. If your kitchen is very warm, you might need to shorten the bulk fermentation time or use cooler water during mixing. Consistent temperature helps ensure predictable fermentation and optimal flavor development.
Performing Stretch and Folds
While rye dough doesn't develop gluten like wheat dough, performing a few sets of stretch and folds can still help build some structure and evenly distribute the temperature and yeast activity throughout the dough.
Perform 2-3 sets of stretch and folds during the first 1-2 hours of bulk fermentation. With wet hands, gently stretch a portion of the dough up and fold it over onto itself. Rotate the bowl and repeat with the other sides. The dough will likely be very sticky, so wet hands are essential. Rye dough won't become smooth and elastic like wheat dough, but you should notice it gain a little tension.
Determining When Bulk Fermentation is Complete
Determining the end of bulk fermentation for sourdough rye can be tricky, as it doesn't always show the dramatic volume increase of wheat dough. Look for signs like:
- A noticeable increase in volume, perhaps 30-50%.
- Bubbles visible on the surface and sides of the dough.
- The dough appearing lighter and more airy.
- A pleasant, tangy aroma developing.
Bulk fermentation for sourdough rye typically takes 3 to 6 hours at room temperature (around 75°F/24°C), but this time is highly variable based on starter strength, temperature, and hydration. An experienced baker learns to judge readiness by feel and appearance.
Phase 4: Shaping the Sourdough Rye Loaf
Shaping rye dough is different from shaping wheat dough because it lacks strong gluten structure. The goal is to create a relatively tight surface tension without tearing the delicate dough.
Gently Shaping the Dough
Turn the dough out onto a lightly floured or wet surface. Because rye dough is sticky, using minimal flour or wetting your hands and surface can be helpful. Gently pat the dough into a rough shape (e.g., a rectangle or circle).
Shape the dough into your desired form (a boule or batard) using gentle folds to create tension on the surface. Avoid aggressive handling or excessive stretching, which can damage the structure. The dough will be less amenable to tight shaping than wheat dough. Aim for a cohesive mass that will hold its shape during proofing.
Preparing Your Banneton Basket
A banneton basket (proofing basket) is highly recommended for proofing sourdough rye, as it helps the sticky dough maintain its shape. Generously flour the banneton with rice flour (which is less likely to stick than wheat flour) or a mix of rice and rye flour. Ensure the flour gets into all the crevices.
Carefully place the shaped dough into the floured banneton, seam-side up if you plan to bake it seam-side down, or seam-side down if you plan to invert it before baking. The banneton provides support during the final rise and imparts a nice pattern on the crust.
Phase 5: Proofing (Second Rise)
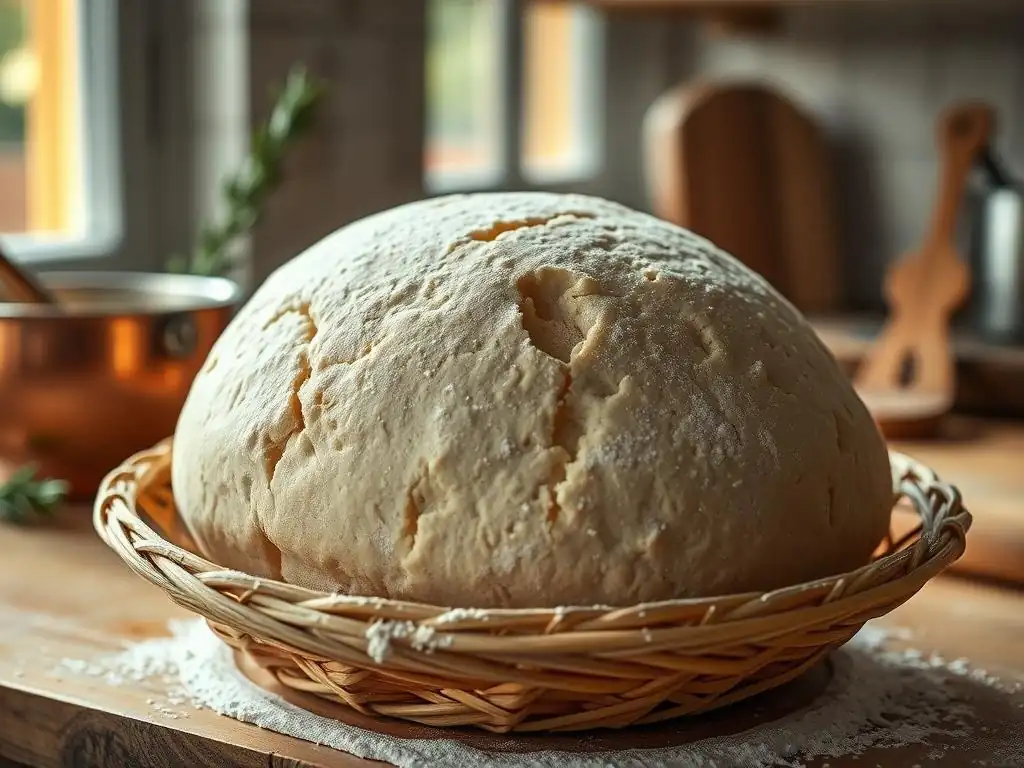
Proofing is the final rise before baking, allowing the dough to lighten further and develop more flavor. Sourdough rye can be proofed at room temperature or in the refrigerator.
Cold Proofing in the Refrigerator
Cold proofing involves placing the shaped dough in the banneton into the refrigerator (typically 38-40°F or 3-4°C) for an extended period, often 12 to 24 hours. This slow, cold fermentation significantly enhances the flavor development, resulting in a more complex and tangier sourdough rye bread recipe.
Cold proofing also makes the sticky rye dough much easier to handle and score before baking. The cold slows down the yeast activity but allows the bacterial activity (which produces the sourness) to continue.
Room Temperature Proofing
Alternatively, you can proof the dough at room temperature. This is a much shorter process, typically 1 to 3 hours, depending on the ambient temperature and dough activity.
To determine when room temperature proofing is complete, use the poke test. Gently press your finger into the side of the dough. If the indentation springs back slowly and partially, the dough is likely ready. If it springs back immediately, it needs more time. If the indentation remains completely, it might be over-proofed. Room temperature proofing results in a less sour loaf compared to cold proofing.
Phase 6: Baking Your Sourdough Rye Bread
Baking is the final, exciting step where your dough transforms into a beautiful loaf of sourdough rye. High heat and steam are key for a good crust and rise.
Preheating Your Oven and Dutch Oven (Optional)
For best results with a sourdough rye bread recipe, preheat your oven thoroughly to a high temperature, typically between 450°F and 500°F (230°C to 260°C). If using a Dutch oven or lidded baking vessel, place it in the oven while it preheats for at least 30-60 minutes to ensure it's scorching hot. This creates a steamy environment for the initial part of the bake.
A hot baking surface, whether a baking stone, steel, or the base of a Dutch oven, provides a strong thermal shock to the dough, encouraging a good oven spring (the final burst of rising in the oven).
Scoring the Dough
Just before baking, the dough needs to be scored. Scoring involves making cuts on the surface of the dough with a sharp blade (like a razor blade or lame). This allows the dough to expand in a controlled manner during baking, preventing blowouts and creating an attractive crust pattern.
For rye dough, which doesn't expand as dramatically as wheat, simple, shallow scores are often sufficient. A single slash down the center or a few parallel cuts work well. Score the dough quickly and confidently right before placing it in the oven. If cold proofing, the cold dough is much easier to score cleanly.
Baking with Steam
Baking with steam is crucial for developing a thin, crispy crust and maximizing oven spring during the first part of the bake. If using a Dutch oven, carefully transfer the scored dough from the banneton into the hot Dutch oven, place the lid on, and put it in the oven. The trapped moisture from the dough will create steam.
If not using a Dutch oven, you can create steam by placing a tray of hot water or ice cubes on the bottom rack of your oven as you load the bread. Bake with steam (lid on or steam method applied) for the first 15-20 minutes.
Baking without Steam
After the initial steam period, remove the lid from the Dutch oven (or remove the steam tray from the oven). Reduce the oven temperature slightly, perhaps to 425-450°F (220-230°C), and continue baking the loaf for another 20-30 minutes, or until the crust is a deep golden brown and the internal temperature reaches around 200-210°F (93-99°C). Baking without steam allows the crust to fully color and crisp up.
The total baking time for a standard-sized sourdough rye loaf (e.g., 800-1000g) is typically 40-50 minutes.
Phase 7: Cooling and Slicing
Patience is key after baking! Properly cooling your sourdough rye bread is just as important as the baking itself.
Allowing the Bread to Cool Completely
Once baked, immediately transfer the loaf to a wire rack to cool. It is absolutely crucial to let sourdough rye bread cool completely before slicing.
Rye bread, especially those with a high percentage of rye, continues to cook internally and its structure stabilizes as it cools. Slicing too early will result in a gummy, dense texture, often referred to as the "gummy bears" effect. For a standard loaf, this might mean cooling for 2-4 hours, or even longer for very dense loaves.
Slicing and Enjoying Your Homemade Sourdough Rye
Once the loaf is completely cool to the touch and the internal temperature has dropped significantly, it's ready to slice. Use a sharp serrated knife for clean cuts.
Slice your homemade sourdough rye to your desired thickness and enjoy! It pairs wonderfully with butter, cheese, smoked fish, or used for open-faced sandwiches. Celebrate your success in baking this classic sourdough rye bread recipe.
Troubleshooting Common Sourdough Rye Baking Problems
Even experienced bakers encounter issues. Understanding common problems and their potential causes can help you diagnose and fix them in your sourdough rye baking journey.
Dense or Gummy Sourdough Rye Bread
A common issue with sourdough rye, particularly high-percentage rye loaves, is a dense or gummy crumb. This is often due to insufficient fermentation, inadequate hydration, or slicing the bread before it has fully cooled.
- Insufficient Fermentation: If your starter wasn't active enough, or bulk fermentation/proofing times were too short or temperatures too low, the dough won't develop enough gas to create an open structure. Ensure your starter is peak activity and allow adequate fermentation time based on temperature.
- Inadequate Hydration: Rye flour needs a lot of water. If your hydration percentage is too low for the type of rye flour used, the pentosans won't hydrate sufficiently to form the necessary gel structure, leading to a dense loaf. Try increasing the water slightly in your sourdough rye bread recipe.
- Slicing Too Early: As mentioned, slicing warm rye bread is a primary cause of gumminess. Always let the loaf cool completely on a wire rack for at least 2-4 hours.
Flat or Under-Proofed Sourdough Rye
A loaf that spreads out rather than rising upwards during baking, or has a tight, dense crumb (though different from gummy), is often under-proofed. This means the dough did not ferment long enough to develop sufficient gas and structure before baking.
Signs of under-proofing include a loaf that feels heavy for its size, doesn't increase much in volume during bulk fermentation or proofing, and might have large, irregular holes mixed with very dense areas inside. The oven spring might be minimal or non-existent. Ensure your starter is vigorous and allow sufficient time for bulk fermentation and proofing, paying attention to the dough's feel and appearance rather than just the clock. Temperature plays a significant role here; colder dough ferments much slower.
Over-Proofed Sourdough Rye
Conversely, if your dough over-proofs, it can also result in a poor rise and potentially a collapsed loaf. Over-proofing occurs when the dough ferments for too long, exhausting the available sugars and weakening the dough structure.
Signs of over-proofing include dough that looks very bubbly and potentially starts to deflate or spread significantly before baking. During the poke test, the indentation might remain completely. An over-proofed loaf will have very little to no oven spring. The crumb might be dense but also have a uniform, small-holed structure. To prevent over-proofing, especially at warmer temperatures, monitor the dough closely and consider reducing proofing time or using a colder proofing method.
Sourdough Rye Bread with a Sour Taste (Too Sour or Not Sour Enough)
The desired level of sourness in a sourdough rye bread recipe is subjective. If your bread is too sour or not sour enough, it's related to the fermentation process, specifically the balance of lactic and acetic acids.
- Too Sour: High levels of acetic acid contribute a sharp, vinegary tang. This is often favored by cooler fermentation temperatures (below 70°F or 21°C) and longer proofing times, particularly cold proofing. If you want less sourness, try fermenting at slightly warmer temperatures (75-80°F or 24-27°C) and shortening the cold proof or using a shorter room temperature proof. Using a younger starter (closer to peak but not having started to collapse) can also result in less sourness.
- Not Sour Enough: If your bread lacks the characteristic tang, it might be due to short fermentation times, high fermentation temperatures (which favor milder lactic acid), or using a very young starter. To increase sourness, try a longer bulk fermentation, a longer cold proof in the refrigerator (18-24 hours), or using a starter that has just passed its peak (though be careful it's not too weak to leaven).
Tips and Tricks for Perfecting Your Sourdough Rye Recipe
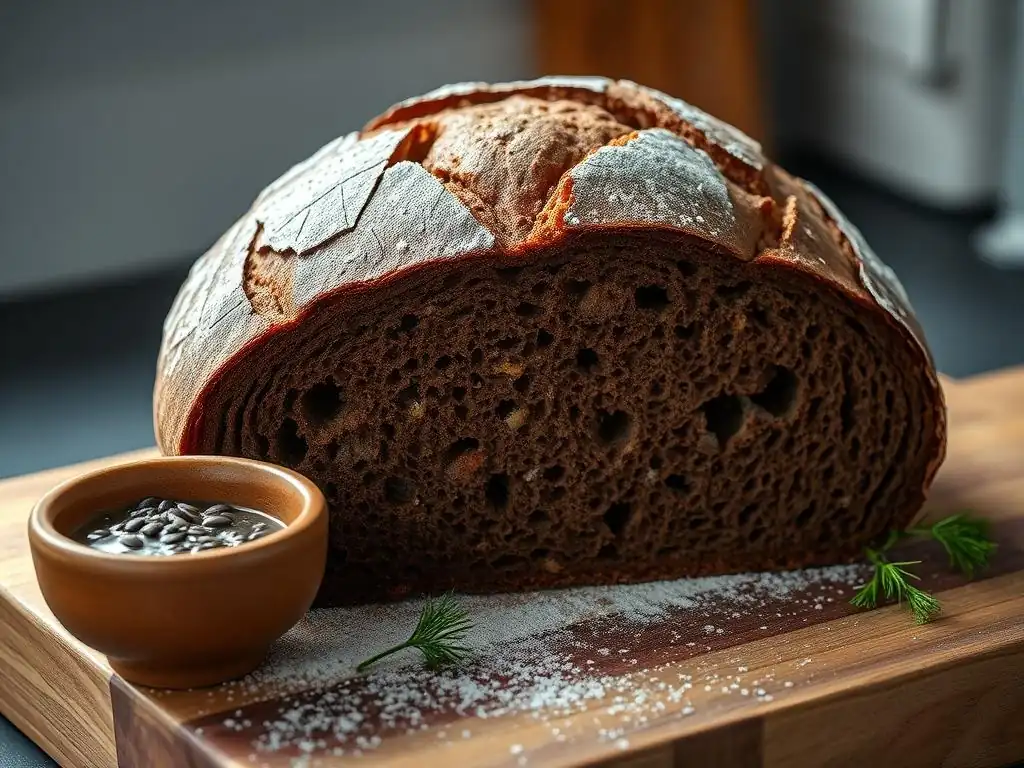
Elevate your sourdough rye baking with these helpful tips and techniques. Small adjustments can make a big difference in the final outcome of your loaf.
Adjusting Hydration Levels
Because rye flour's water absorption varies depending on the type (whole vs. light) and even the specific brand or batch, you may need to adjust the hydration in your sourdough rye bread recipe. Start with a recommended hydration (e.g., 80% for whole rye) and observe the dough.
If the dough feels too stiff and is difficult to mix and handle, you might need slightly more water in future bakes. If it's excessively wet, soupy, and impossible to shape even with wet hands, you might need to reduce the water slightly. Make small adjustments (e.g., 2-3% of the flour weight) in subsequent batches until you find the hydration level that works best with your flour and desired crumb texture. Remember, rye dough will always be stickier than wheat dough.
Experimenting with Different Rye Flours
The type of rye flour used dramatically changes the character of the bread. Don't hesitate to experiment with different percentages of light, medium, or dark rye flour, or even blends of rye and wheat (e.g., 80% rye, 20% strong bread flour).
Using a higher percentage of dark or whole rye flour will result in a denser, darker, and more intensely flavored loaf. Using a higher percentage of light rye or adding some wheat flour will result in a lighter crumb and a milder flavor. Each variation of a sourdough rye bread recipe offers a unique experience. Keep notes on your experiments to find your favorite combinations.
Adding Flavor Variations: Herbs, Spices, and More
Beyond the classic caraway seeds, many other ingredients can enhance your sourdough rye. Consider adding toasted fennel seeds, ground coriander, or a mix of "bread spices" common in European rye traditions.
Other additions could include chopped walnuts, pecans, or dried fruits like cranberries or raisins. For a savory twist, try incorporating dried herbs like dill or chives, or even roasted onions. Add these ingredients during the final mixing phase after the salt has been incorporated. Typically, additions are 5-15% of the total flour weight, depending on the ingredient and desired intensity. These variations allow you to truly make your sourdough rye bread recipe your own.
Scoring Techniques for Beautiful Bread
While rye dough doesn't bloom like wheat, thoughtful scoring can still improve the loaf's appearance and help control the rise. Use a very sharp blade and make decisive cuts.
For a simple, classic look, a single deep slash down the center works well. For a round loaf (boule), you could make a simple cross or a few parallel lines. For a longer loaf (batard), one or two parallel slashes or an angled pattern are common. Since rye crusts can be quite tough, a good score helps the loaf expand evenly. Practice makes perfect, and a well-scored loaf is a point of pride for any baker.
Storing Your Sourdough Rye Bread
Proper storage is essential to keep your homemade sourdough rye fresh and delicious for as long as possible.
Keeping Your Bread Fresh
Once completely cool, store your sourdough rye bread at room temperature. A linen bread bag, a paper bag, or a clean tea towel works well. These allow the crust to breathe slightly, preventing it from becoming soggy, while still protecting the crumb from drying out too quickly.
Avoid storing sourdough rye in plastic bags or airtight containers at room temperature for extended periods (more than a day or two), as this traps moisture and can lead to a gummy crust and potentially mold growth, especially in humid conditions. Sourdough rye, due to its acidity and dense crumb, generally stays fresh longer than wheat bread, often remaining good for 3-5 days when stored properly.
Freezing Sourdough Rye for Later
Sourdough rye freezes exceptionally well. To freeze, ensure the loaf is completely cooled. You can freeze it whole, as half loaves, or sliced.
Wrap the bread tightly in plastic wrap, ensuring no surface is exposed to prevent freezer burn. Then, wrap it again in aluminum foil or place it in a freezer-safe bag. Frozen sourdough rye can last for several months (typically up to 3-4 months) without significant loss of quality. To thaw, unwrap the bread and let it come to room temperature on a wire rack. For a crisper crust, you can reheat a thawed loaf or slices in a warm oven (350°F/175°C) for a few minutes.
Conclusion: Mastering the Art of Sourdough Rye Baking
Baking sourdough rye bread is a journey that rewards patience, practice, and a willingness to learn. From understanding the unique properties of rye flour to nurturing your starter and mastering fermentation, each step contributes to the creation of a truly special loaf. This comprehensive sourdough rye bread recipe guide provides the foundation you need to bake with confidence.
Enjoy the Journey of Baking Sourdough Rye at Home
Embrace the process, from the sticky feel of the dough to the incredible aroma filling your kitchen as it bakes. Don't be discouraged by early attempts that aren't perfect; every loaf is a learning experience. The more you bake sourdough rye, the more intuitive the process will become, and the better your results will be. The satisfaction of sharing a slice of your homemade sourdough rye makes every effort worthwhile.
We love seeing what our community is baking! Once you've successfully baked your sourdough rye using this guide, consider sharing your photos and experiences. Your successes and challenges can inspire and help other bakers on their own journey with this wonderful sourdough rye bread recipe. Happy Baking!
Frequently Asked Questions
What makes a sourdough rye bread different from regular sourdough bread?
Sourdough rye bread uses rye flour in addition to, or in place of, wheat flour. This gives it a distinct flavor and a denser texture compared to regular sourdough.
What is the ideal hydration level for a sourdough rye bread recipe?
Rye flour absorbs more water than wheat flour, so sourdough rye breads often have higher hydration levels, typically around 75-85%. This helps achieve a moist crumb despite the rye flour's properties.
What are some common problems bakers encounter when making sourdough rye bread?
Common issues include a sticky dough, a dense and gummy crumb, and a lack of rise. These can often be addressed by adjusting the hydration and fermentation times.
Can I substitute different types of rye flour in the Sourdough Rye bread recipe?
Yes, but the results might vary. Light rye flour will produce a milder flavor, while dark rye flour will result in a more intense, robust flavor. Adjust hydration as needed.
How long should I proof my sourdough rye bread before baking?
Proofing time depends on room temperature and the activity of your starter. Look for a noticeable increase in volume and a slightly jiggly texture. Over-proofing can lead to a flat bread.
Final Reflection: The Enduring Allure of Sourdough Rye
The journey of crafting sourdough rye bread, as detailed in this guide, is more than just a recipe; it's a testament to the enduring power of patience and precision in the culinary arts. The seemingly simple act of combining flour, water, and time yields a loaf of unparalleled depth and complexity, a reward that resonates far beyond the simple satisfaction of a warm, crusty loaf. This process, accessible to all, connects us to a rich history of baking traditions while offering a tangible link to the natural world.
The influence of sourdough, and rye bread specifically, on our cultural landscape is profound. It represents a counterpoint to the fast-paced, mass-produced food system, a symbol of mindful consumption and a return to traditional techniques. The act of nurturing a starter, a living organism, fosters a connection to the process that is both meditative and deeply rewarding. Bread is the staff of life,
they say, and in the case of sourdough rye, this statement takes on a whole new meaning, encompassing not just sustenance, but also a sense of accomplishment and connection to something larger than ourselves.
Now, consider your own kitchen. Imagine the aroma of freshly baked sourdough rye filling your home, the satisfying crunch of the crust, the complex flavors unfolding with each bite. This isn't just a recipe; it's an invitation. I encourage you to embark on this journey, to embrace the challenge, and to experience the profound satisfaction of creating something truly special with your own two hands. The rewards – both culinary and personal – are well worth the effort. Let the journey begin!
Unleash Your Inner Baker: Craft the Perfect Rye
Thanks for taking the time to explore the world of sourdough rye with us! We hope you now feel empowered to tackle this rewarding baking challenge. Ready to put your new skills to the test?
- Bake your own sourdough rye loaf: Use the step-by-step guide as your blueprint and proudly present your creation. It's more achievable than you think!
- Share your baking journey: Post a picture of your loaf on social media and tag #BakeWithEaseRye – let’s inspire each other!
- Experiment with different flours and additions: What unique twist will you add to your next sourdough rye?
What unique ingredient will you incorporate into your next sourdough rye adventure? Let's hear your ideas in the comments below!