
Unlock the Secrets to Ciabatta's Signature Open Crumb

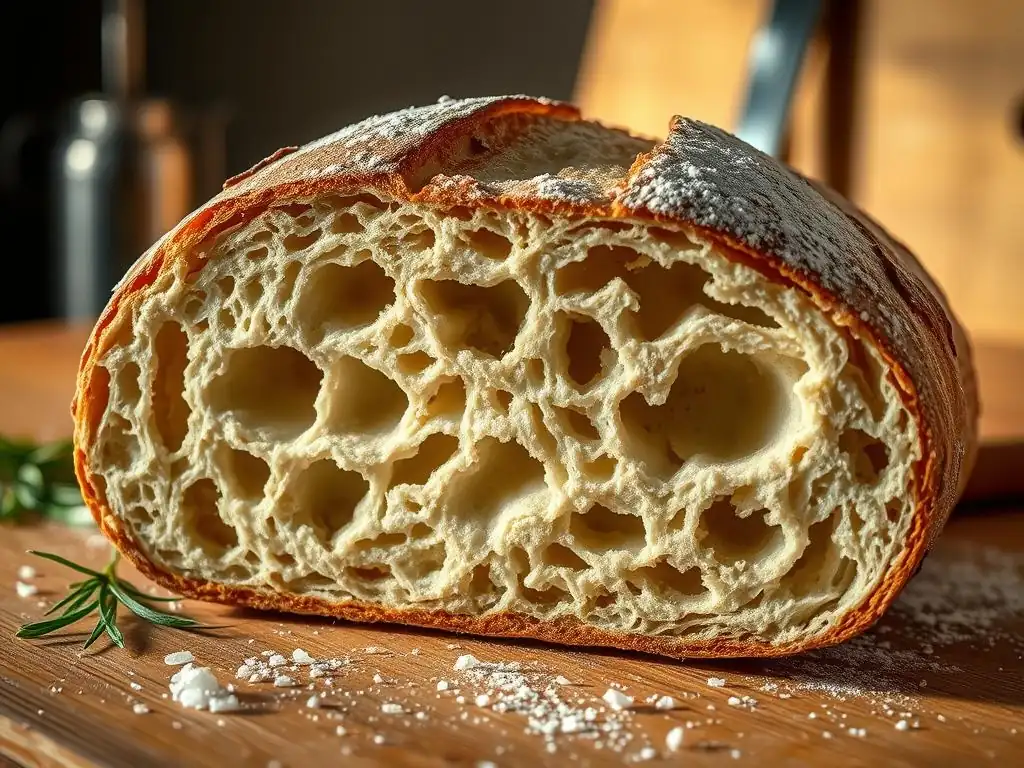
Welcome to BakeWithEase, your kitchen companion for baking brilliance! Ever dreamt of achieving that perfect, airy interior in your Ciabatta bread? We're about to unlock the secrets to creating the signature open crumb that defines this Italian classic. Get ready to transform your baking and discover techniques that will leave you craving more. Curious to know the crucial steps? Let's dive in!
- Achieving Open Crumb in Ciabatta Bread
- Introduction: The Allure of Open Crumb Ciabatta
- Understanding Open Crumb in Ciabatta
- Essential Ingredients for Open Crumb Ciabatta
- The Crucial Role of Hydration
- Fermentation Techniques for Open Crumb
- Shaping for Open Crumb
- Baking for Optimal Crumb Structure
- Troubleshooting Crumb Issues
- Advanced Techniques
- Open Crumb Ciabatta Recipe: A Step-by-Step Guide
- Conclusion: Enjoying Your Homemade Open Crumb Ciabatta
-
Frequently Asked Questions
- What is the key to achieving an open crumb in Ciabatta bread?
- Why is my Ciabatta bread dense instead of having an open crumb?
- What type of flour is best for achieving an open crumb in Ciabatta?
- How does the hydration level affect the crumb structure of Ciabatta?
- What are some common mistakes that prevent an open crumb in Ciabatta?
- Final Reflection: The Enduring Allure of Ciabatta's Open Crumb
- Unleash Your Inner Ciabatta Master!
Achieving Open Crumb in Ciabatta Bread
Introduction: The Allure of Open Crumb Ciabatta
There's something undeniably satisfying about a slice of Ciabatta bread with that characteristic airy, open crumb. It's the sign of a well-made loaf, perfect for soaking up olive oil, crafting a hearty sandwich, or simply enjoying its unique texture. While a tight crumb might be desired in other breads, the beauty of Ciabatta lies in those irregular, large holes – the signature Ciabatta bread open crumb. Mastering this aspect can feel like unlocking a baking superpower.
Achieving this coveted open crumb isn't just about luck; it's a result of understanding and controlling several key factors in the baking process. From the initial mixing to the final bake, each step plays a vital role in developing the structure that allows those large air pockets to form and hold their shape. We'll delve into the science and techniques behind creating that perfect Ciabatta bread open crumb, guiding you through the essential elements needed for success.
Understanding Open Crumb in Ciabatta
Defining Open Crumb and its Significance in Ciabatta
Open crumb in bread refers to the internal structure characterized by irregular, large air pockets or alveoli, separated by thin walls of baked dough. In Ciabatta, this open structure is not merely a visual trait but is fundamental to its identity and function. It contributes to the bread's light texture, its chewiness, and its ability to absorb liquids like olive oil or sandwich fillings without becoming soggy. Without a good Ciabatta bread open crumb, the bread loses its essential character.
The significance of this open structure goes beyond texture; it's also linked to flavor development. The extended fermentation times often used to achieve open crumb contribute complex flavors to the dough. Furthermore, the thin cell walls created during proper gluten development and gentle handling allow for a unique mouthfeel that is distinctly Ciabatta. A dense or tight crumb in Ciabatta indicates that something went wrong during fermentation, hydration, or handling, resulting in a less desirable loaf.
Factors Affecting Ciabatta Crumb Structure
Several critical factors influence the final crumb structure of Ciabatta. The most significant include dough hydration, gluten development, fermentation time and temperature, and gentle handling during shaping. High hydration is crucial because the excess water allows the gluten network to stretch more easily, creating larger bubbles. Without sufficient hydration, around 75-85% or even higher relative to flour weight, achieving large, open cells is very difficult.
Proper gluten development provides the elastic network needed to trap the gases produced during fermentation. This is achieved through mixing, stretching, and folding techniques. Fermentation is where the magic happens: yeast produces carbon dioxide gas, which inflates the dough. The duration and temperature of fermentation impact both gas production and the development of dough strength. Finally, how the dough is handled before baking is paramount; degassing the dough by rough handling will collapse the very structure needed for an open crumb.
Essential Ingredients for Open Crumb Ciabatta
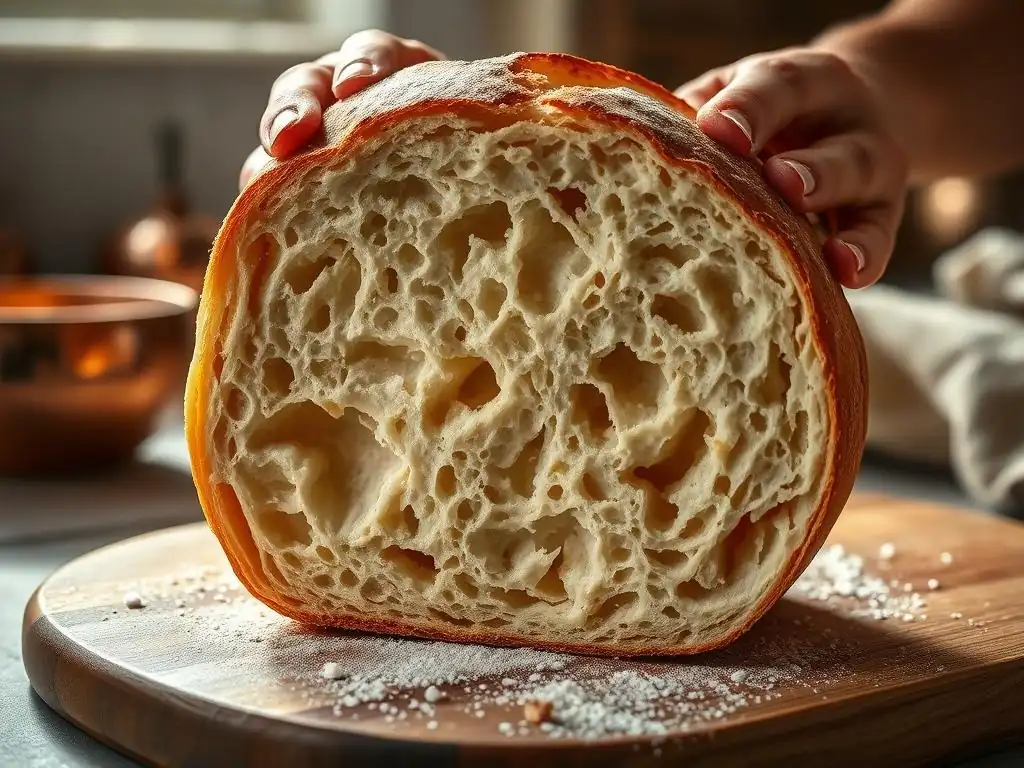
High-Protein Flour: Key to Strong Gluten Development
The type of flour used is fundamental to achieving a good Ciabatta bread open crumb. High-protein flour, typically bread flour with a protein content of 12-14%, is essential. The higher protein content means more gluten-forming proteins (glutenin and gliadin) are available. When hydrated and worked, these proteins form a strong, elastic network capable of trapping the large volumes of gas needed to create those signature open cells.
Using all-purpose flour (around 10-11% protein) might result in a weaker gluten structure that can't support the high hydration and the weight of the large air pockets. This can lead to a denser crumb or collapsed loaves. While some recipes incorporate a small amount of lower-protein flour for specific textures, the bulk should be high-protein bread flour to ensure the necessary dough strength for a beautiful Ciabatta bread open crumb.
Yeast: Choosing Between Commercial and Wild Yeast
Yeast is the engine that drives fermentation, producing the gas that creates the crumb structure. Commercial yeast, specifically active dry yeast or instant dry yeast, provides reliable and predictable leavening. Instant yeast can often be mixed directly with the dry ingredients, while active dry yeast usually requires proofing in warm water first (around 105-115°F or 40-46°C). Using the correct amount, typically between 0.5% and 2% of the flour weight depending on fermentation time and temperature, is key to controlled gas production.
Alternatively, wild yeast sourdough starter can be used. A well-maintained sourdough starter adds complexity of flavor and can produce a wonderfully open crumb, although the fermentation process is slower and more variable than with commercial yeast. The acidity from the sourdough can also help strengthen the gluten network. Whether using commercial or wild yeast, ensuring the yeast is active and healthy is crucial for adequate leavening and achieving that desired Ciabatta bread open crumb.
Water: Hydration and its Impact on Dough Consistency
Water is more than just a liquid; it's an active ingredient in bread making, particularly for Ciabatta bread open crumb. It hydrates the flour, allowing gluten proteins to form a network, and it dissolves the yeast and sugar, making them available for fermentation. Ciabatta dough is known for its high hydration levels, often ranging from 75% up to 90% or even higher relative to the flour weight. This high water content is critical for the development of large air pockets.
The high level of water makes the dough very wet and sticky, which can be challenging to work with. However, this fluidity allows the gluten network to expand more freely than in a drier dough, facilitating the formation of large, irregular bubbles during fermentation and baking. Managing this sticky consistency through proper mixing and gentle handling is a key skill in mastering Ciabatta and achieving its characteristic Ciabatta bread open crumb.
The Crucial Role of Hydration
Optimal Hydration Levels for Ciabatta Dough
Achieving the optimal hydration level is perhaps the single most important factor for developing a Ciabatta bread open crumb. While specific percentages can vary based on flour type and desired texture, a hydration level of at least 75% is generally considered the minimum for what would be recognized as traditional Ciabatta. Many recipes push hydration to 80%, 85%, or even 90% to encourage larger, more irregular holes. For example, using 500g of flour would require 375g to 450g or more of water.
The higher the hydration, the more challenging the dough is to handle, but the greater the potential for a very open crumb. This is because the abundance of water allows the gluten strands to separate and stretch further, creating more space for gas bubbles to expand. Experimenting within the 75-90% range based on your comfort level and the absorption rate of your specific flour is recommended to find your ideal hydration for a remarkable Ciabatta bread open crumb.
Techniques for Managing Sticky, High-Hydration Dough
Working with high-hydration Ciabatta dough can feel like wrestling a very wet cloud. It's sticky, slack, and doesn't behave like typical bread dough. The key is to minimize adding extra flour, which would lower the hydration and compromise the open crumb. Instead, rely on techniques like wet hands or a dough scraper to handle the dough. Using a small amount of water on your hands or scraper prevents the dough from sticking excessively.
During mixing, techniques like the "Ruba e Strappa" (stretch and tear) method or using a stand mixer with a dough hook on medium speed for an extended period (e.g., 10-15 minutes) can help develop gluten without excessive handling. For subsequent folds during bulk fermentation, working the dough directly in its container or on a lightly wet surface rather than a floured one is effective. Embracing the stickiness rather than fighting it is crucial for preserving the hydration needed for a great Ciabatta bread open crumb.
Gluten Development in Highly Hydrated Dough
Despite the high water content making the dough slack, gluten development is still essential for providing the structure needed to trap gas and form the Ciabatta bread open crumb. The abundance of water actually facilitates gluten development initially by allowing the proteins to hydrate fully. However, the slackness means the dough needs mechanical action to align these proteins into a strong network.
This is achieved through initial mixing and subsequent "stretch and fold" cycles during the bulk fermentation. A typical regimen might involve 3-5 sets of stretch and folds performed at intervals (e.g., every 30-45 minutes) during the first 2-3 hours of bulk fermentation. These gentle manipulations build strength and tension in the dough without degassing it significantly, creating the framework for those desirable large holes in your Ciabatta bread open crumb.
Fermentation Techniques for Open Crumb
Bulk Fermentation: Time, Temperature, and Flavor Development
Bulk fermentation, the first rise after mixing, is a critical phase for developing both flavor and the structure for an open crumb. This stage allows yeast to produce gas and enzymes to break down starches and proteins, contributing to the dough's extensibility and flavor complexity. For Ciabatta, bulk fermentation is often long and slow, typically lasting 3 to 6 hours at room temperature (around 70-75°F or 21-24°C), sometimes even longer or with a period in the refrigerator for enhanced flavor.
During this time, the dough should roughly double or triple in volume, becoming airy and showing visible bubbles, especially on the surface. Regular stretch and folds during the initial part of bulk fermentation are crucial for building strength. The duration depends heavily on the ambient temperature and the amount of yeast used; a cooler temperature or less yeast requires more time. Proper bulk fermentation is non-negotiable for achieving a light and airy Ciabatta bread open crumb.
Proofing: Achieving the Ideal Dough Rise
Proofing, or the final rise before baking, is the stage where the shaped dough pieces increase in volume and become ready for the oven. For Ciabatta, which is typically baked as freeform loaves or rolls, proofing is often done on a well-floured surface or using couche cloth to support their shape. The goal is to allow the dough to rise sufficiently without overproofing, which can lead to collapse in the oven.
Proofing time is usually shorter than bulk fermentation, typically 1-2 hours at room temperature. The dough should appear well-risen, puffy, and light. A good test is the poke test: gently poke the dough; if the indentation springs back slowly but not completely, it's likely ready. Overproofing can lead to a dense crumb or a lack of oven spring, while underproofing results in a tight crumb. Careful attention during this stage is vital for a successful Ciabatta bread open crumb.
Temperature's Influence on Fermentation Rate
Temperature is a major driver of yeast activity and thus fermentation rate. Yeast is most active in warm environments, typically between 75-85°F (24-29°C). However, warmer temperatures accelerate fermentation, which can be useful but may sacrifice some flavor complexity that develops during slower, cooler fermentation. For optimal flavor and structure development in Ciabatta, a moderate room temperature (70-75°F or 21-24°C) is often preferred for bulk fermentation.
Cooler temperatures, such as fermenting in a refrigerator (around 40°F or 4°C) for 12-24 hours, significantly slow down yeast activity but allow enzymes more time to break down starches, resulting in a sweeter, more complex flavor profile and often contributing to a more robust gluten structure capable of supporting a larger Ciabatta bread open crumb. Understanding how temperature affects fermentation allows bakers to control the process and tailor it to their desired outcome.
Shaping for Open Crumb
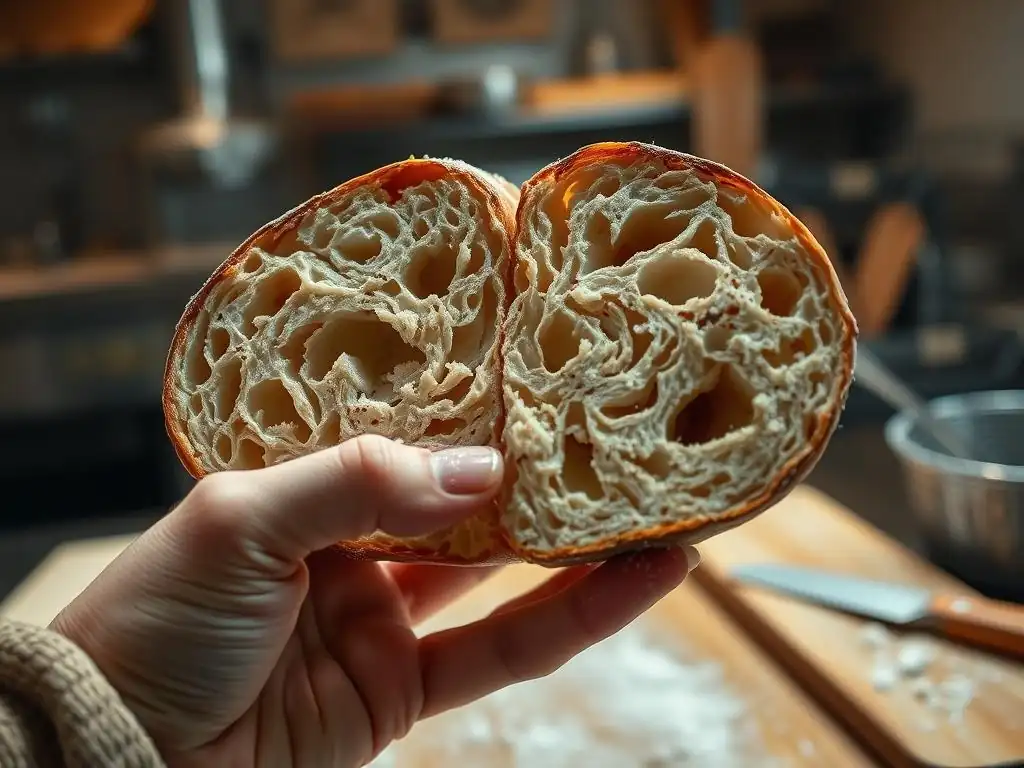
Gentle Handling to Preserve Gas
Once bulk fermentation is complete, the dough is filled with the gases produced by the yeast, which are essential for the Ciabatta bread open crumb. The process of shaping must be done with extreme gentleness to avoid degassing the dough. Unlike shaping a boule or baguette where you might create significant surface tension, Ciabatta shaping is more about dividing the dough and coaxing it into a rough loaf shape with minimal manipulation.
Think of it as handling a delicate balloon. Punching down or roughly kneading the dough at this stage will expel the trapped carbon dioxide, resulting in a dense crumb. Instead, use a bench scraper to divide the dough and handle each piece lightly, using flour on your hands and the work surface only as absolutely necessary to prevent sticking, without working it into the dough.
Minimizing Degassing During the Shaping Process
Minimizing degassing is the primary goal during Ciabatta shaping. The large bubbles that formed during bulk fermentation are the foundation of the open crumb. Any action that compresses or stretches the dough aggressively will pop these bubbles. Techniques like simply cutting the dough into rectangles and gently stretching them slightly are preferred over traditional kneading or folding methods that involve significant manipulation.
Some bakers avoid shaping altogether, simply pouring the fermented dough onto a floured surface and cutting it into portions before transferring to a proofing surface. If any folding is done, it is usually a very loose letter fold or a simple stretch from underneath to create a little tension, performed with a light touch. Protecting those precious gas bubbles is paramount to achieving a beautiful Ciabatta bread open crumb.
Shaping Techniques: Stretching and Folding
While minimizing degassing is key, some very gentle shaping is usually necessary to give the Ciabatta loaves a manageable form. A common technique after dividing the dough is a simple stretch and fold. On a well-floured surface, gently stretch each piece of dough into a rough rectangle. Then, perform a letter fold: fold one-third of the dough over the middle, and then fold the opposite third over that.
This simple fold helps to build a tiny bit of structure and tension without collapsing the airy interior. The seam is then usually placed down onto a floured couche or baking surface for proofing. The amount of stretching and folding is minimal compared to other bread types, focusing on preserving the internal structure rather than creating significant external tension. This gentle approach is fundamental to preserving the potential for a great Ciabatta bread open crumb.
Baking for Optimal Crumb Structure
Oven Temperature and Initial Oven Spring
Baking at a high temperature is crucial for achieving excellent oven spring and setting the open crumb structure. Ciabatta is typically baked in a very hot oven, often preheated to 450-500°F (230-260°C). The initial burst of heat causes rapid expansion of the gases trapped within the dough (oven spring) before the crust hardens. This rapid expansion helps to enlarge the existing air pockets and create new ones, contributing significantly to the Ciabatta bread open crumb.
Placing the dough into a preheated oven quickly is important to capitalize on this initial heat. Using a preheated baking stone or steel can also provide a strong burst of heat from below, further enhancing oven spring. After the initial rapid expansion (usually the first 10-15 minutes), the oven temperature is often slightly reduced (e.g., to 400-425°F or 200-220°C) to ensure the interior bakes through without burning the crust.
Steam's Role in Crust Formation and Crumb Expansion
Steam in the oven during the initial phase of baking is vital for achieving both a thin, crisp crust and maximizing the Ciabatta bread open crumb. Steam keeps the surface of the dough moist and elastic for longer, preventing a crust from forming too early. This allows the dough to expand fully during oven spring without being restricted by a hardened exterior.
Methods for creating steam include placing a pan of hot water on the bottom rack of the oven when preheating, using lava rocks or a cast iron pan with water added just before loading the bread, or using a Dutch oven or cloche. The steam is typically maintained for the first 10-15 minutes of baking. Without adequate steam, the crust sets too quickly, inhibiting oven spring and resulting in a denser crumb and a thicker, tougher crust.
Cooling: Allowing the Crumb to Stabilize
Once baked, it's tempting to slice into a warm loaf of Ciabatta immediately, but allowing it to cool properly is essential for the crumb structure to stabilize. The internal temperature of the bread continues to equalize, and moisture redistributes within the loaf as it cools. Slicing too early can result in a gummy texture, even if the crumb structure itself is open.
Ciabatta should be cooled on a wire rack to allow air circulation around the entire loaf, preventing the bottom crust from becoming soggy. A typical cooling time is at least 1-2 hours for a standard-sized loaf. This waiting period allows the starches to set and the moisture to settle, ensuring that the beautiful Ciabatta bread open crumb has the proper texture and is not gummy. Patience at this final step is rewarded with the best possible result.
Troubleshooting Crumb Issues
Addressing Dense Crumb: Identifying and Correcting Problems
A dense crumb in Ciabatta is a common issue and usually points to problems with hydration, gluten development, or fermentation/handling. If your Ciabatta consistently comes out dense, first check your hydration percentage – is it truly high enough (75%+)? Ensure you are using high-protein bread flour. Review your mixing process; is the gluten sufficiently developed through mixing and stretch and folds? The dough should show some elasticity and strength.
Next, evaluate your fermentation. Was the bulk fermentation long enough? Did the dough significantly increase in volume and show signs of activity (bubbles)? Was the final proofing adequate, or did you underproof? Crucially, consider your handling during shaping and transfer to the oven. Were you gentle enough, or did you accidentally deflate the dough? Identifying which of these stages fell short is key to correcting the issue and achieving that desirable Ciabatta bread open crumb.
Achieving Uniform Crumb Structure
While Ciabatta is known for its irregular open crumb, sometimes the crumb can be patchy, with large holes in some areas and very dense spots in others. This often indicates uneven gluten development or inconsistent handling. Ensure your initial mixing fully incorporates all the flour and water and that your stretch and folds are performed evenly on all sides of the dough during bulk fermentation.
Patchy crumb can also result from inconsistent temperature during fermentation or proofing. Ensure the dough is kept at a relatively stable temperature throughout these stages. Finally, be mindful during shaping; uneven stretching or folding can create areas of compressed dough next to areas with large bubbles. Aim for consistent, gentle handling across the entire piece of dough to promote a more uniformly irregular Ciabatta bread open crumb.
Preventing a Gummy Crumb
A gummy crumb, where the interior feels wet and sticky even after cooling, can be frustrating. This is often caused by slicing the bread before it has fully cooled, as mentioned earlier. The internal structure is still setting, and steam is still escaping. Patience is key here; always allow Ciabatta to cool completely on a wire rack for at least an hour, preferably two, before slicing.
Other potential causes of gumminess include underbaking – ensure the internal temperature reaches around 205-210°F (96-99°C) for a fully baked loaf. Also, extremely high hydration levels combined with insufficient gluten development or underbaking can contribute to gumminess. Ensure your gluten is well-developed to support the water, and always check for doneness. Proper cooling is your best defense against a gummy, rather than perfectly textured, Ciabatta bread open crumb.
Advanced Techniques
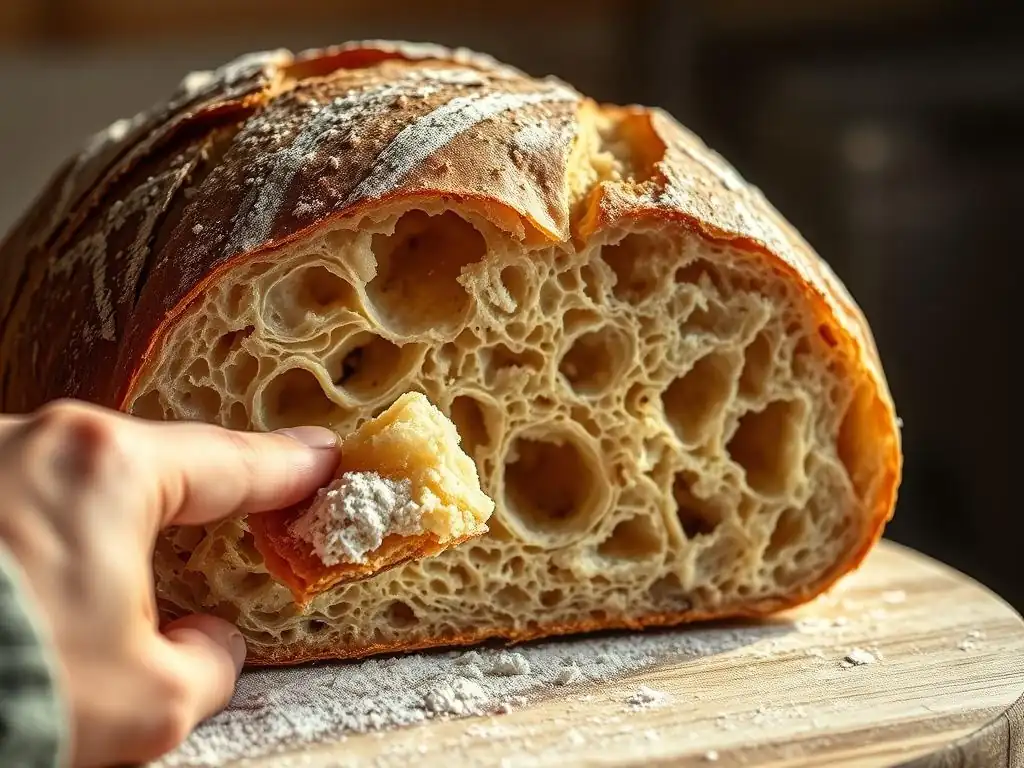
Using a Poolish or Biga for Enhanced Flavor
Incorporating a preferment like a poolish or biga is a common advanced technique in Ciabatta making that significantly enhances flavor and can also contribute to a better Ciabatta bread open crumb. A poolish is a wet starter (equal parts flour and water by weight, plus a tiny amount of yeast) typically fermented for 12-16 hours at room temperature or longer in the refrigerator. It adds tang and complexity.
A biga is a stiffer preferment (lower hydration, around 50-60% water to flour) also fermented for a similar duration. The biga contributes strength and structure to the final dough. Using a preferment means a portion of the flour ferments for an extended period, developing more complex flavors and organic acids that strengthen the gluten network. This added strength can help support the open structure during the long fermentation and high-hydration environment needed for a superior Ciabatta bread open crumb.
Incorporating Whole Wheat or Rye Flour
While traditional Ciabatta is made with white bread flour, incorporating small percentages of whole wheat or rye flour can add nutritional value, flavor, and subtle changes to the crumb. However, these flours absorb water differently and contain bran and germ that can interfere with gluten development. Using them requires careful consideration, usually limiting them to 10-20% of the total flour weight in a Ciabatta recipe.
Whole wheat flour, even in small amounts (e.g., 5-10%), can add a nuttiness and slightly denser texture, potentially impacting the openness if used excessively. Rye flour (even just 5%) adds a distinct flavor but contains pentosans which are highly water-absorbent and can make the dough sticky and inhibit gluten formation. When using these flours, you might need to slightly increase hydration or adjust fermentation times. Experimenting with small percentages can add depth to your Ciabatta bread open crumb creations while retaining the characteristic structure.
Autolyse: Improving Dough Hydration
Autolyse is a simple yet effective technique that can improve dough hydration and gluten development with minimal effort. It involves mixing only the flour and water from the recipe and letting the mixture rest for 20-60 minutes before adding the salt and yeast (and preferment, if using). During this rest period, the flour fully hydrates, and enzymatic activity begins to break down proteins, making the dough more extensible.
This initial hydration phase allows the gluten network to start forming without the interference of salt or yeast, which can tighten the dough. After the autolyse period, the salt and yeast are added, and mixing continues. The dough is often easier to mix and requires less kneading to reach the desired level of gluten development. Implementing an autolyse can lead to a more extensible dough that is better prepared to develop a large, open Ciabatta bread open crumb.
Open Crumb Ciabatta Recipe: A Step-by-Step Guide
Ingredient Ratios and Precise Measurements
Achieving a great Ciabatta bread open crumb starts with precise measurements and appropriate ratios. This recipe uses a high hydration of 80% and incorporates a preferment (biga) for enhanced flavor and structure.
- Biga:
- 100g High-Protein Bread Flour (approx. 13% protein)
- 50g Water (approx. 50°F / 10°C)
- 0.5g Instant Dry Yeast
- Final Dough:
- 400g High-Protein Bread Flour
- 350g Water (approx. 75-80°F / 24-27°C)
- 10g Fine Sea Salt
- 3g Instant Dry Yeast
- All of the Biga
Note: This yields dough for about two medium Ciabatta loaves.
Detailed Instructions for Mixing, Fermenting, Shaping, and Baking
- Make the Biga: The night before baking (12-18 hours prior), combine biga ingredients in a small bowl. Mix until just combined – it will be stiff and shaggy. Cover and let ferment at cool room temperature (65-70°F / 18-21°C) or in the refrigerator.
- Mix the Final Dough: In a large mixing bowl, combine the water for the final dough and the biga (break it into pieces). Add the 400g flour, salt, and yeast. Mix with a spoon or in a stand mixer on low speed until no dry flour remains. The dough will be very wet and shaggy.
- Autolyse (Optional but Recommended): Cover the bowl and let rest for 30 minutes.
- Develop Gluten: If mixing by hand, perform stretch and folds in the bowl for 5-10 minutes until the dough shows some initial strength. If using a stand mixer, mix on medium speed for 8-12 minutes until the dough pulls away from the sides of the bowl and passes the windowpane test (stretch a small piece thinly without tearing).
- Bulk Fermentation: Transfer the dough to a lightly oiled clear container. Perform stretch and folds every 45 minutes for the first 2.5-3 hours. Gently stretch a side of the dough up and fold it over the center, rotating the container a quarter turn after each fold, doing all four sides. Repeat 3-4 times over the bulk fermentation. The total bulk fermentation time will be 3-5 hours at room temperature (72-75°F / 22-24°C), or until the dough has roughly doubled in volume and is very bubbly.
- Divide and Rest: Gently scrape the dough onto a generously floured surface. Using a bench scraper, divide the dough into two equal pieces. Try to handle the dough as little as possible to preserve the gas. Let the pieces rest for 20 minutes.
- Shape: Gently stretch each dough piece into a rough rectangle (approx. 8x12 inches). You can perform a gentle letter fold if desired, or simply leave them as is. Place the shaped loaves seam-side down onto a well-floured couche or parchment paper, ensuring separation between them.
- Proofing: Cover the loaves loosely with plastic wrap or a light towel. Let proof for 60-90 minutes at room temperature, or until puffy and showing good volume increase.
- Preheat Oven: Preheat your oven to 475°F (245°C) with a baking stone or steel inside for at least 45-60 minutes. Place a steam pan on the bottom rack during the last 30 minutes of preheating.
- Bake: Carefully transfer the proofed loaves to the hot baking stone/steel. Pour about 1 cup of hot water into the steam pan (use caution!). Immediately close the oven door. Bake for 15 minutes with steam.
- Finish Baking: Remove the steam pan. Reduce oven temperature to 425°F (220°C). Continue baking for another 15-20 minutes, or until the crust is golden brown and the internal temperature reaches 205-210°F (96-99°C).
- Cool: Transfer the baked loaves to a wire rack and cool completely for at least 1-2 hours before slicing.
Tips for Achieving Consistent Results
Consistency in baking comes from controlling variables. To consistently achieve that beautiful Ciabatta bread open crumb:
- Use a digital scale for precise ingredient measurements, especially for flour and water.
- Monitor your dough temperature throughout fermentation if possible; a difference of a few degrees can significantly alter fermentation time.
- Learn to read your dough – look for signs of proper gluten development (smoothness, elasticity) and fermentation (volume increase, bubbles).
- Practice gentle handling during shaping; it's the hardest part for many beginners.
- Ensure your oven is fully preheated and you generate adequate steam at the start of the bake.
- Always cool the bread completely before slicing to prevent a gummy texture.
Conclusion: Enjoying Your Homemade Open Crumb Ciabatta
Mastering the Ciabatta bread open crumb is a rewarding endeavor that elevates your baking skills. It requires attention to detail, patience during fermentation, and a gentle touch. By focusing on high hydration, proper gluten development, controlled fermentation, gentle shaping, and a hot, steamy bake, you can consistently achieve those beautiful, airy holes that define great Ciabatta.
The journey to the perfect Ciabatta bread open crumb is one of learning and practice. Don't be discouraged by initial results; every loaf teaches you something new about dough behavior. The effort is well worth it when you slice into a loaf boasting that signature open structure, ready to be enjoyed in countless ways. Happy baking, and may your Ciabatta always be airy and delicious!
Frequently Asked Questions
What is the key to achieving an open crumb in Ciabatta bread?
The key lies in high hydration of the dough, allowing for larger air pockets to form during fermentation. Proper gluten development and gentle handling are also crucial.
Why is my Ciabatta bread dense instead of having an open crumb?
Dense Ciabatta often results from over-kneading the dough, which creates too much gluten development. It could also be due to under-proofing or using too little water.
What type of flour is best for achieving an open crumb in Ciabatta?
Using a strong bread flour with a high protein content is recommended. This helps develop the necessary gluten structure to support the large air pockets in the crumb.
How does the hydration level affect the crumb structure of Ciabatta?
A high hydration dough (around 75-85%) is essential. This creates a slack dough that allows for large bubbles to form during fermentation, resulting in an open crumb.
What are some common mistakes that prevent an open crumb in Ciabatta?
Common mistakes include over-kneading, insufficient fermentation, not using enough water, and incorrect baking temperature. Avoiding these will improve your crumb structure.
Final Reflection: The Enduring Allure of Ciabatta's Open Crumb
The pursuit of the perfect ciabatta crumb is more than just a baking challenge; it's a testament to the enduring power of artisanal breadmaking. This seemingly simple loaf, with its characteristic airy interior and rustic exterior, represents a deep connection to tradition, a celebration of simple ingredients, and a constant striving for perfection. The techniques explored in this article – from hydration levels to fermentation times – are not merely recipes, but pathways to understanding the fundamental principles of bread science.
The journey to mastering ciabatta's open crumb is a deeply rewarding one, mirroring the slow, deliberate process of the bread itself. It's a journey of experimentation, patience, and a profound appreciation for the transformative power of yeast and flour. The subtle nuances in texture and flavor, the satisfying crackle of the crust, and the airy lightness of the crumb are all testaments to the dedication involved. As the renowned baker, Chad Robertson, once said, Bread baking is a journey of discovery, a constant learning process.
This perfectly encapsulates the spirit of ciabatta baking and the ongoing quest for that perfect open crumb.
Now, it's your turn. Don't be intimidated by the seemingly complex process. Embrace the challenge, experiment with the techniques outlined, and discover the joy of creating your own perfect ciabatta loaf. The reward – that magnificent open crumb, the aroma filling your kitchen, and the satisfaction of creating something beautiful and delicious from simple ingredients – is well worth the effort. So, gather your ingredients, preheat your oven, and embark on your own ciabatta adventure. The secrets to that signature open crumb await you.
Unleash Your Inner Ciabatta Master!
Thanks for taking the time to delve into the world of ciabatta baking! We hope you’ve gained valuable insights into achieving that perfect open crumb. Now, it's time to put your new knowledge into action.
- Bake your own ciabatta masterpiece today! Use the techniques you've learned to create your first (or next!) loaf. Remember those crucial steps—autolyse, stretch and folds—and watch the magic happen.
- Share your ciabatta journey! Post a picture of your creation on social media and tag us—we'd love to see your results.
- Explore our other bread recipes! Discover new techniques and flavors to expand your baking horizons.
Ready to transform your baking game? What unique ingredient will you try in your next ciabatta attempt?