
Easy NoKnead Ciabatta Recipe for Busy Bakers

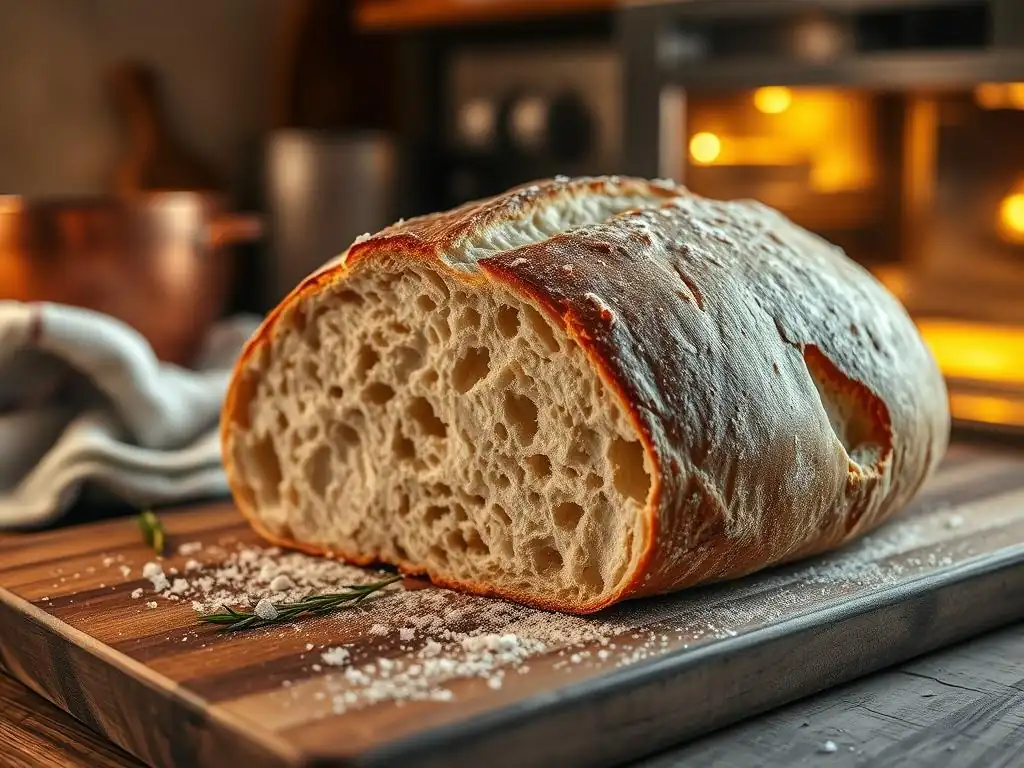
Welcome to BakeWithEase, your shortcut to baking brilliance! Ever dreamed of effortlessly crafting artisanal bread? Well, prepare to have your baking world transformed. Dive into our easy no-knead ciabatta recipe and discover how to create bakery-worthy loaves with minimal effort. Curious how simple ingredients and a little patience can unlock the secrets to light, airy, and perfectly crusty ciabatta? Let's get baking!
- Easy No-Knead Ciabatta Recipe for Busy Bakers | BakeWithEase
- Introduction to Effortless Ciabatta Baking: The No-Knead Method
- Mastering the No-Knead Ciabatta Dough: Ingredients & Equipment
- Step-by-Step Guide: Crafting Your No-Knead Ciabatta
- Tips & Tricks for Perfect No-Knead Ciabatta Every Time
- Serving & Storing Your Homemade Ciabatta Bread
- Conclusion: Enjoying the Ease of No-Knead Ciabatta Baking
- Frequently Asked Questions
- Final Reflection: The Humble Loaf, the Busy Baker, and the Joy of Simple Bread
- Unleash Your Inner Baker: Craft Your Perfect Ciabatta!
Easy No-Knead Ciabatta Recipe for Busy Bakers | BakeWithEase
Introduction to Effortless Ciabatta Baking: The No-Knead Method
Why Choose a No-Knead Ciabatta Recipe?
Busy schedules often leave little time for the traditional, labor-intensive kneading required for classic ciabatta bread. This is where a no-knead ciabatta recipe becomes a game-changer. The primary advantage lies in its minimal hands-on time. Instead of spending 20-30 minutes developing gluten through vigorous kneading, you simply mix the ingredients together and let time do the work. This passive gluten development results in a dough that's incredibly wet and sticky, which is precisely what contributes to ciabatta's signature open, airy crumb and delightfully chewy texture. It's a perfect solution for fitting authentic, rustic bread baking into a packed week.
Furthermore, embracing a no knead ciabatta recipe significantly reduces the barrier to entry for novice bakers. Traditional kneading can be intimidating and requires learning specific techniques to achieve the desired dough structure. With the no-knead method, the process is far more forgiving. The long fermentation period, often 12-18 hours, allows complex flavors to develop naturally, creating a bread that tastes like it came from an artisan bakery with a fraction of the effort. This simplicity makes baking delicious ciabatta accessible to anyone, regardless of their prior baking experience, truly embodying the "BakeWithEase" philosophy.
BakeWithEase Presents: Simple Ciabatta for the Modern Baker
At BakeWithEase, we understand the desire for delicious, homemade bread without the fuss. That's why we're thrilled to share this simple no knead ciabatta recipe, specifically designed for the busy modern baker. Our approach strips away the complexity often associated with artisan breads, focusing on straightforward steps and minimal intervention. The result is a loaf with that iconic bubbly interior and crisp crust that's perfect for sandwiches, dipping in olive oil, or serving alongside your favorite meal. It's about achieving professional-quality results right in your home kitchen.
This particular no knead ciabatta recipe leverages the power of time and hydration to create a dough that essentially kneads itself. By using a high ratio of water to flour and allowing a long, slow fermentation, the gluten strands naturally align and strengthen over many hours. This method not only simplifies the process but also often yields a more flavorful bread due to the extended yeast activity.
We'll guide you through each stage, from the initial mix to the final bake, ensuring that even if this is your first attempt at ciabatta, you'll achieve a successful and satisfying loaf. Get ready to discover the joy of baking incredible bread with incredible ease.
Mastering the No-Knead Ciabatta Dough: Ingredients & Equipment
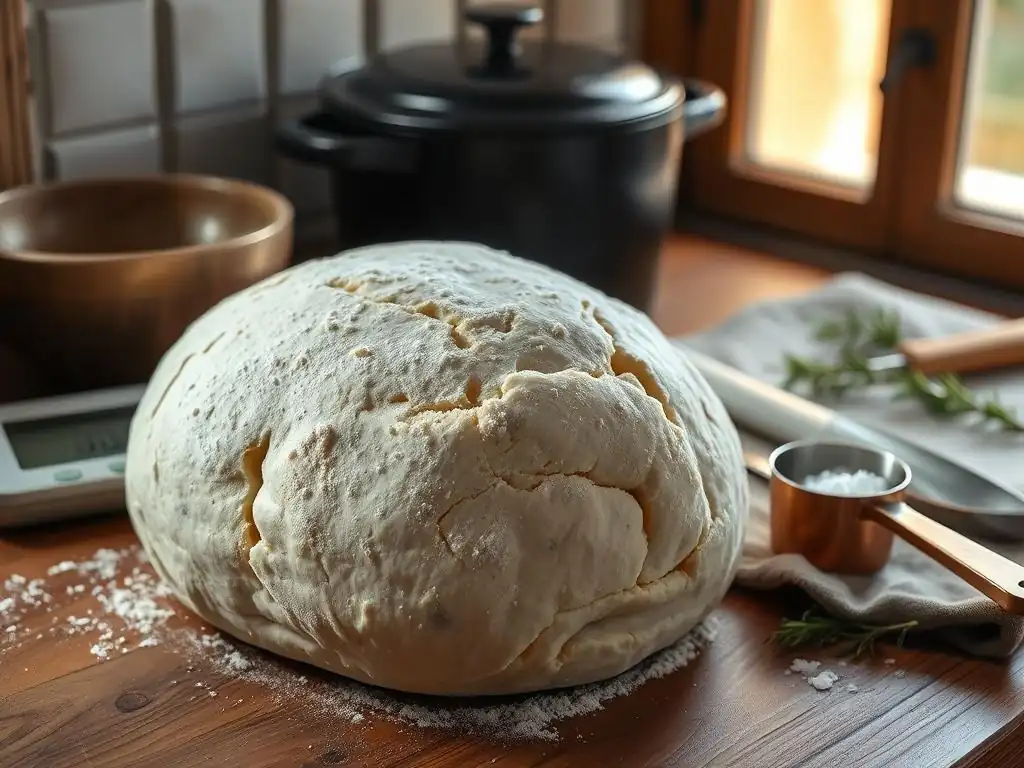
Essential Ingredients for Authentic No-Knead Ciabatta
Creating authentic ciabatta with a no knead ciabatta recipe relies on just a few fundamental ingredients, but their quality and proper handling are paramount. The base consists of flour, water, yeast, and salt. While seemingly simple, the interaction of these components during the long fermentation is what builds the unique structure and flavor of this rustic bread. Using the right type of flour and ensuring correct water temperature for yeast activation are critical first steps that lay the foundation for a successful bake.
The beauty of a simple no knead ciabatta recipe is that it doesn't require a long list of specialized items. However, paying attention to the details of these core ingredients makes a significant difference. For instance, the type of yeast used (instant or active dry) will slightly alter the mixing process, and the quality of your salt affects the overall taste and dough development. Understanding the role each plays ensures you get the best possible outcome from your minimal effort.
High-Protein Flour: The Key to Ciabatta's Open Crumb
High-protein flour, typically bread flour, is essential for achieving ciabatta's characteristic open and airy crumb structure. Bread flour generally contains between 12% and 14% protein, significantly higher than all-purpose flour which is usually around 10-11%. This higher protein content means more gluten can develop when the flour is hydrated. In a no knead ciabatta recipe, where mechanical kneading is absent, this inherent potential for gluten development is crucial. The long fermentation time allows the gluten network to build naturally, trapping the gases produced by the yeast and creating those desirable large holes.
Using a strong bread flour provides the necessary structure to support the high hydration level typical of ciabatta dough, which can be as high as 80-90% hydration (meaning 80-90 grams of water per 100 grams of flour). Without sufficient protein, the dough would be too weak to hold its shape and trap gas effectively, resulting in a dense loaf. While some recipes might suggest a blend, prioritizing a good quality bread flour is the most reliable way to ensure your no knead ciabatta develops that signature light texture and robust structure.
Water Temperature: Crucial for Yeast Activation
The temperature of the water used in your no knead ciabatta recipe is critical for properly activating the yeast and initiating fermentation. For active dry yeast, warm water is needed, typically between 105°F and 115°F (40°C to 46°C). This temperature range is warm enough to wake up the yeast cells and get them actively working, but not so hot that it kills them. Using water that's too cool might result in sluggish or inactive yeast, leading to a dough that doesn't rise properly, while water that's too hot can instantly kill the yeast, rendering your dough lifeless.
If you are using instant yeast, the water temperature is less critical. Instant yeast can often be mixed directly with the dry ingredients and cold or lukewarm water. However, using lukewarm water, perhaps around 80-90°F (27-32°C), can still help kickstart the process slightly faster in a no knead ciabatta recipe, especially if your kitchen is cool. Always check the instructions on your yeast packet, but generally, erring on the side of lukewarm rather than hot is safer for ensuring vibrant yeast activity and a successful rise.
Salt: Enhancing Flavor and Gluten Development
Salt plays a dual, indispensable role in a no knead ciabatta recipe: it significantly enhances the flavor of the bread and it helps control yeast activity while strengthening the gluten network. From a flavor perspective, salt is not just about making the bread taste "salty"; it brightens and rounds out the complex flavors produced during the long fermentation. Without salt, bread can taste bland and flat, lacking depth. The typical ratio of salt in bread dough is around 1.8% to 2% of the flour weight, providing the optimal balance.
Beyond flavor, salt is crucial for dough structure. It tightens the gluten network, making the dough stronger and more elastic. This strengthening effect helps the dough hold its shape and trap the carbon dioxide gas produced by the yeast, contributing to a better rise and a more open crumb. Salt also slows down yeast fermentation, preventing the dough from rising too quickly and allowing for a longer, more controlled fermentation period. This slow rise is vital for developing the nuanced flavors characteristic of artisan breads like ciabatta baked using a no knead method.
Must-Have Equipment for Your Ciabatta Baking Adventure
While a no knead ciabatta recipe minimizes the physical labor, having a few key pieces of equipment will make the process much smoother and contribute to a better final product. You don't need a stand mixer or fancy proofing baskets for this method, but certain tools are incredibly helpful for managing the very wet, sticky dough that is characteristic of ciabatta. Investing in these items will simplify handling and shaping, ensuring you can work with the dough effectively without it sticking everywhere.
The right equipment not only makes the process easier but also helps achieve the desired characteristics of ciabatta bread, such as the airy interior and crisp crust. Tools that facilitate gentle handling of the dough and provide the right baking environment are particularly valuable. You'll find that with these simple additions to your kitchen arsenal, tackling a no knead ciabatta recipe becomes a much more enjoyable and less messy experience, leading to consistently better results with your homemade bread.
Dough Scraper: Your Best Friend for Handling Sticky Dough
A dough scraper, also known as a bench scraper, is arguably the most valuable tool when working with the high-hydration dough of a no knead ciabatta recipe. This dough is intentionally very wet – often feeling more like a thick batter than traditional bread dough – which makes it extremely sticky and difficult to handle with just your hands.
A sturdy metal or plastic dough scraper allows you to easily portion the dough, lift it from your work surface, and maneuver it without it clinging uncontrollably to everything. It provides a clean edge to work with, essential for shaping and transferring the delicate dough.
Using a dough scraper minimizes the need to add excessive flour to your work surface or your hands, which can dry out the dough and negatively impact the final texture of your ciabatta. It allows you to maintain that desirable wetness while still controlling the dough's movement. Whether you're scraping the dough out of the mixing bowl, dividing it into loaves, or gently folding it during the shaping process, the dough scraper is indispensable for keeping the mess to a minimum and handling the dough delicately, preserving the airy structure developed during fermentation in your no knead ciabatta recipe.
Dutch Oven or Baking Stone: Achieving Oven Spring
To achieve the impressive oven spring and crispy crust characteristic of authentic ciabatta, baking in a preheated Dutch oven or on a baking stone with steam is highly recommended for your no knead ciabatta recipe. A preheated Dutch oven creates a contained, steamy environment around the dough during the initial phase of baking. This steam keeps the surface of the dough moist, allowing it to expand fully before the crust sets.
This rapid expansion is known as oven spring and is crucial for developing the open crumb structure. After about 20-30 minutes, the lid is removed, allowing the bread to brown and crisp up.
Alternatively, baking on a preheated baking stone or steel with added steam provides a similar effect. The hot surface provides a strong initial heat source, promoting good oven spring from the bottom, while adding steam to the oven (e.g., by placing a pan of hot water on a lower rack) keeps the crust pliable initially.
Both methods simulate the professional ovens used in bakeries, providing the necessary high heat and steam environment to transform the wet, floppy dough from your no knead ciabatta recipe into a beautifully risen, crusty loaf. While not strictly required, these tools significantly elevate the quality of your finished bread.
Step-by-Step Guide: Crafting Your No-Knead Ciabatta
Step 1: Mixing the Simple No-Knead Ciabatta Dough
The first step in this easy no knead ciabatta recipe is remarkably simple: mixing the ingredients. Unlike traditional methods that require intense kneading to develop gluten, the no-knead approach relies on time and hydration. You'll combine all the dry ingredients (flour, salt, yeast) in a large bowl, then add the water. There's no need for a mixer or any strenuous effort at this stage. A wooden spoon or spatula is usually sufficient to bring everything together.
The goal is simply to hydrate the flour completely and ensure there are no dry pockets remaining. The mixture will look shaggy and incredibly wet and sticky – this is exactly what you want. Don't be tempted to add more flour! Once combined, cover the bowl loosely with plastic wrap or a damp towel and let the magic of fermentation begin. This initial mix takes just a few minutes, making this no knead ciabatta recipe perfect for fitting into a busy schedule.
Combining Flour, Water, Yeast, and Salt
Start by measuring your flour, salt, and yeast accurately. For a typical batch using this no knead ciabatta recipe, you might use around 400-500 grams of high-protein bread flour, about 8-10 grams of salt (roughly 2% of the flour weight), and a small amount of yeast, perhaps 0.5 to 1 gram of instant yeast for a long, slow fermentation. Whisk the dry ingredients together in a large bowl. Using a large bowl is important because the dough will expand significantly during the long rise.
Next, add the measured water. The hydration level for ciabatta is high, often 80% or more of the flour weight. So, for 500 grams of flour, you might use 400-450 grams (milliliters) of water. Pour the water into the bowl with the dry ingredients. Using a spoon or spatula, mix until all the flour is hydrated and there are no dry spots. The mixture will be very loose and sticky. This combining step is quick, taking maybe 2-3 minutes total, setting you up for the long fermentation phase of your no knead ciabatta recipe.
Achieving the Right Dough Consistency
The correct dough consistency for a no knead ciabatta recipe is crucial and is characterized by its extreme wetness and stickiness. After mixing the flour, water, yeast, and salt, the dough should resemble a very thick batter or a sticky, shaggy mass that is difficult to handle with your hands. It will not form a cohesive ball like traditional bread dough. If you lift some with a spoon, it should stretch and eventually break, leaving sticky residue in the bowl. This high hydration is key to developing the large, open crumb structure that defines ciabatta.
Do not worry if the dough seems too wet; this is intentional. Adding more flour at this stage to make it easier to handle will result in a denser loaf without the characteristic open crumb. Trust the process: the long fermentation will develop the gluten network needed to give this wet dough structure. The consistency should be significantly stickier than typical sandwich bread dough, perhaps similar to a very loose sourdough starter. This wetness is a hallmark of a successful no knead ciabatta recipe.
Step 2: The Bulk Fermentation: Time is Your Ally
Bulk fermentation is where the magic truly happens in a no knead ciabatta recipe. After mixing, the dough is left undisturbed for a long period, typically at room temperature. This extended rest allows the yeast to slowly produce carbon dioxide gas, causing the dough to rise, while enzymes in the flour and the action of the yeast break down starches and proteins. This process is crucial for developing both the complex flavors and the gluten structure necessary for ciabatta's airy texture.
The duration of the bulk fermentation can vary depending on the amount of yeast used and the ambient temperature, but it often spans 12 to 18 hours. During this time, the dough will significantly increase in volume, potentially doubling or even tripling in size. You'll also notice bubbles forming on the surface and throughout the dough. This long, slow rise is the cornerstone of the no-knead method, transforming simple ingredients into flavorful dough with minimal effort on your part for this no knead ciabatta recipe.
First Rise: Developing Flavor and Structure
The first rise, or bulk fermentation, is the most critical phase for developing both the flavor and the initial structure of your no knead ciabatta dough. As the yeast consumes sugars in the flour, it produces carbon dioxide gas, which causes the dough to expand, and alcohol and organic acids, which contribute to the bread's complex taste profile. A long, slow fermentation at room temperature, perhaps around 70-75°F (21-24°C), allows these flavors to deepen and become more nuanced over many hours. A cooler room temperature might require a longer fermentation time, potentially up to 24 hours.
Simultaneously, during this extended rest, the gluten proteins in the high-protein flour absorb water and begin to link together, forming a network. While you aren't actively kneading, the simple passage of time, combined with the dough's high hydration, allows this network to develop passively. This slow, natural gluten development is surprisingly effective and results in a dough strong enough to support the large bubbles that characterize ciabatta's open crumb, all thanks to the patience required by this no knead ciabatta recipe.
Folding the Dough: Building Strength Without Kneading
While the no-knead method avoids traditional kneading, incorporating a few gentle folds during the bulk fermentation can significantly help build dough strength and structure. After the first few hours of the rise (say, after 2-4 hours), you can perform a set of folds. Wet your hands or use a wet dough scraper to handle the sticky dough. Gently lift one side of the dough from the bowl, stretch it up, and fold it over the center. Rotate the bowl a quarter turn and repeat this process 3-4 times, effectively folding the dough onto itself from all sides.
These folds redistribute the yeast and nutrients, even out the dough's temperature, and, most importantly, help align and strengthen the developing gluten network without degasing the dough too much. Depending on the length of your bulk fermentation, you might perform 1-2 sets of these folds within the first 4-8 hours of the rise. This simple technique, used sparingly in a no knead ciabatta recipe, contributes to better dough handling later on and helps ensure a more consistent, open crumb structure in the final loaf.
Step 3: Shaping the Ciabatta: Gentle Hands Required
Shaping ciabatta dough from a no knead ciabatta recipe requires a gentle touch due to its high hydration and delicate, gas-filled structure. The goal is to handle the dough as little as possible to preserve the bubbles that developed during the long fermentation. Aggressive handling will degas the dough, resulting in a dense loaf instead of the desired open crumb. The process typically involves turning the dough out onto a well-floured surface, gently dividing it, and then carefully shaping it into the characteristic elongated ciabatta loaf shape.
Working with a well-floured surface and using a dough scraper are essential for managing the sticky dough during shaping. You'll want to resist the urge to knead or press the air out. Instead, think of gently coaxing the dough into shape. This stage might feel a little awkward initially because the dough is so loose, but practicing the gentle techniques outlined in this no knead ciabatta recipe will lead to success in creating beautiful, airy loaves.
Dividing the Dough into Ciabatta Loaves
Once the bulk fermentation is complete (after 12-18 hours, when the dough has significantly increased in volume and is bubbly), it's time to divide the dough. First, generously flour your work surface – don't be shy, as this dough is very sticky. Gently scrape the dough out of the bowl onto the floured surface using a dough scraper, trying not to deflate it. The dough will spread out into a rough rectangle or blob.
Using your dough scraper, gently divide the large dough mass into the desired number of loaves. Depending on the size you want, you might divide a batch made with 500g of flour into 2 large loaves or 3-4 smaller ones. Cut straight down through the dough without sawing. Once divided, use the scraper to carefully lift each portion and move it slightly apart. The goal is to handle the dough minimally and preserve the trapped gases, a key principle when working with a no knead ciabatta recipe.
Shaping Techniques for Classic Ciabatta
After dividing, the shaping process for a no knead ciabatta recipe is more about creating tension and structure than traditional molding. Take one portion of dough. It will be a floppy rectangle or square. Gently stretch it slightly into an elongated shape. Then, fold the dough in thirds like a letter: fold one side over the middle, then the other side over that. This creates layers and builds a little tension.
Next, gently lift the dough using your scraper and hands and transfer it seam-side down onto a piece of parchment paper generously dusted with flour or cornmeal (semolina flour also works well). The parchment paper makes transferring the proofed dough to the hot oven much easier. Repeat the folding and transferring process for the remaining dough portions. The shaped loaves will still look relatively flat and rustic; they will gain height and structure during the final proof and baking. This gentle handling is vital to maintain the open crumb of your no knead ciabatta recipe.
Step 4: The Second Proof: Preparing for Baking
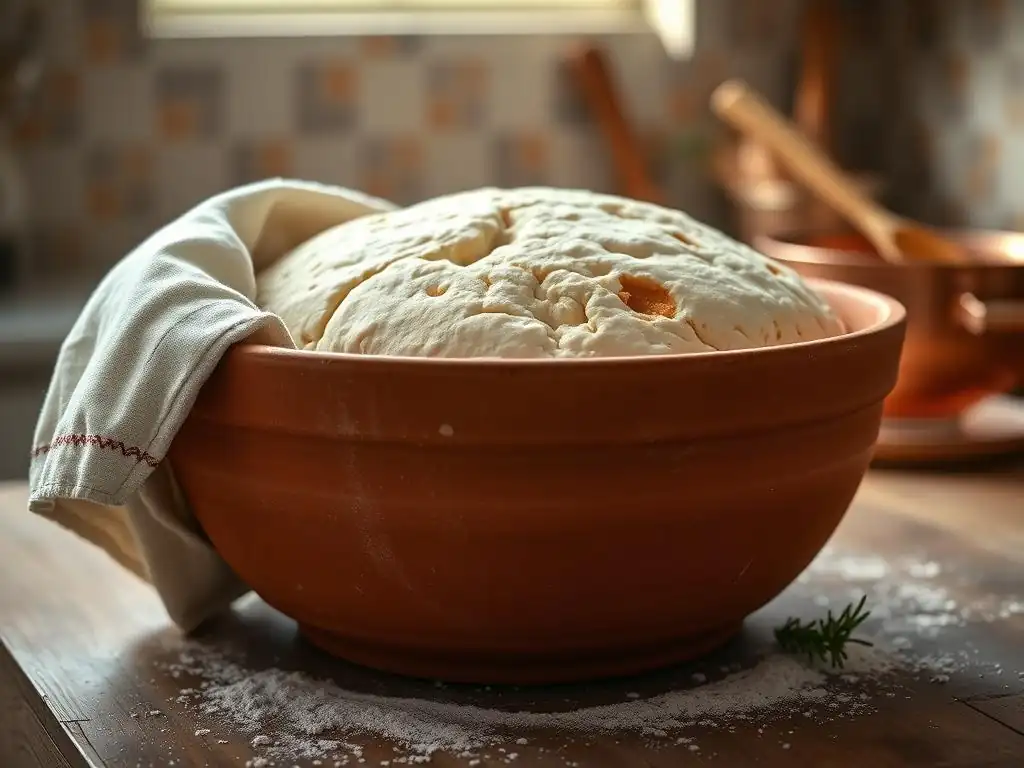
After shaping, the ciabatta loaves need a short second proof before baking. This allows the dough to relax slightly after handling and regain some of the gas lost during shaping, ensuring a good rise in the oven. The second proof is much shorter than the bulk fermentation, typically lasting only 30 to 60 minutes, depending on the room temperature. You'll know the dough is ready when it looks slightly puffed up but hasn't fully doubled in size; it should still feel light and airy.
During this proofing time, it's important to keep the dough covered to prevent a skin from forming on the surface, which would inhibit oven spring. Placing the dough on parchment paper is particularly helpful at this stage, as it allows you to transfer the delicate, proofed loaves directly into a hot oven or Dutch oven without disturbing them. This ease of handling is another benefit designed into a simple no knead ciabatta recipe.
Proofing on Parchment Paper
Proofing your shaped ciabatta loaves on parchment paper is a simple yet effective technique that greatly simplifies the transfer of the delicate dough into a hot oven. After shaping, gently place each loaf onto its own piece of parchment paper. You can arrange these on a baking sheet or directly on your counter if space allows. Dust the parchment paper generously with flour, cornmeal, or semolina flour before placing the dough to prevent sticking.
Once the loaves are on the parchment, cover them loosely with plastic wrap, a light kitchen towel, or even invert a large bowl or container over them. This covering prevents the surface from drying out during the 30-60 minute second proof. When it's time to bake, you can simply lift the parchment paper with the proofed loaf and carefully transfer it to your preheated baking vessel (Dutch oven, baking stone, etc.). This method minimizes handling of the fragile, proofed dough, helping to ensure maximum oven spring for your no knead ciabatta recipe.
Step 5: Baking Your No-Knead Ciabatta to Perfection
Baking is the final, exciting step in bringing your no knead ciabatta recipe to life. The key to achieving that signature crispy crust and airy interior is baking at a high temperature with the presence of steam during the initial phase. This high heat provides the necessary energy for rapid oven spring, while the steam keeps the crust pliable, allowing the dough to expand fully before setting into a firm shell.
Whether you're using a Dutch oven or a baking stone with added steam, preheating your oven and baking vessel to a high temperature, typically between 450°F and 500°F (230°C to 260°C), is crucial. This ensures that when the dough hits the hot surface, it gets an immediate burst of heat, maximizing its rise and contributing to the open crumb structure that makes this no knead ciabatta recipe so satisfying.
Baking with a Dutch Oven or Baking Stone
For baking with a Dutch oven, preheat the oven with the empty Dutch oven inside at 450-500°F (230-260°C) for at least 30-45 minutes. Carefully lift the proofed ciabatta loaf on its parchment paper and gently lower it into the hot Dutch oven. Place the lid on the Dutch oven and return it to the oven. Bake covered for 20-30 minutes. The lid traps the steam released by the dough, creating the perfect environment for oven spring.
If using a baking stone, preheat the oven with the stone inside at the same high temperature, and place a metal pan on a lower rack. Just before baking, carefully slide the proofed ciabatta loaves (still on their parchment) onto the hot stone. Immediately pour about a cup of hot water into the empty pan on the lower rack (be cautious of the steam!) and quickly close the oven door. This generates steam. Bake with steam for 20-30 minutes, depending on your no knead ciabatta recipe's specifics.
Achieving a Golden-Brown Crust
After the initial steam-assisted baking phase (20-30 minutes covered in a Dutch oven or with added steam on a stone), it's time to remove the lid (if using a Dutch oven) or the steam pan (if using a stone) and continue baking. Reduce the oven temperature slightly if necessary, perhaps to 425-450°F (220-230°C). This allows the surface of the bread to dry out and crisp up, developing that beautiful golden-brown color and chewy crust that is a hallmark of authentic ciabatta.
Continue baking for another 15-25 minutes, or until the crust is deeply colored and the internal temperature of the loaf reaches approximately 200-210°F (93-99°C) when measured with an instant-read thermometer. Don't be afraid of a dark crust; it contributes significantly to the flavor and texture. Once baked, carefully remove the ciabatta from the oven and transfer it to a wire rack to cool completely. Cooling is essential for the internal structure to set properly, ensuring the perfect crumb developed by your no knead ciabatta recipe.
Tips & Tricks for Perfect No-Knead Ciabatta Every Time
Achieving consistently great results with a no knead ciabatta recipe can involve a little fine-tuning, as factors like ambient temperature and humidity can influence the dough. Understanding how to adapt your process and troubleshoot common issues will help you bake perfect ciabatta loaves reliably. These tips are designed to empower you to adjust your method and ingredients based on your specific kitchen environment and desired outcomes.
Furthermore, once you've mastered the basic no knead ciabatta recipe, you can begin experimenting with variations to add new dimensions of flavor and texture. Simple additions or substitutions can transform your basic ciabatta into something unique and exciting. Don't be afraid to play around and make the recipe your own!
Optimizing Your Ciabatta Recipe for Different Climates
Climate can significantly impact baking, especially when working with high-hydration doughs like those in a no knead ciabatta recipe. In humid environments, the flour will absorb more moisture from the air, meaning you might need slightly less water than the recipe specifies.
Conversely, in dry climates, the flour and dough can dry out faster, so you might need a touch more water to achieve the correct very wet consistency and might need to be extra diligent about covering the dough during proofing. Pay attention to how the dough feels during the initial mix – it should be very slack and sticky, almost like a thick batter.
Temperature is another key factor. Warmer temperatures will speed up fermentation, potentially reducing the required bulk fermentation time (e.g., down to 10-12 hours if it's quite warm, say above 80°F or 27°C). Cooler temperatures will slow it down, potentially requiring a longer rise (up to 20-24 hours in a cool kitchen, say below 65°F or 18°C). Observe the dough's activity and volume increase rather than sticking strictly to time guides. Adjusting based on these observations is key to mastering your no knead ciabatta recipe in any climate.
Troubleshooting Common Ciabatta Baking Problems
Even with a simple no knead ciabatta recipe, you might encounter occasional issues. Understanding the potential causes and solutions can save you frustration and lead to better results. Two common problems are dough that seems too wet to handle (even for ciabatta!) or dough that doesn't rise sufficiently during the long fermentation. These issues often relate back to ingredient measurements, temperatures, or yeast viability.
Don't get discouraged if your first attempt isn't perfect. Baking is a skill that improves with practice. By learning how to identify and correct these common problems, you'll become more confident in your ability to work with high-hydration doughs and successfully execute this no knead ciabatta recipe, achieving the airy texture and delicious flavor you're aiming for.
Dough Too Wet?
If your dough feels excessively wet, even for a no knead ciabatta recipe (it should be very sticky, but not like liquid), it's likely due to slightly inaccurate water measurement or variations in flour absorption. Different brands and types of flour can absorb varying amounts of water. While you shouldn't drastically change the hydration mid-fermentation, you can try handling it on a more generously floured surface during shaping and using your dough scraper extensively to manage it.
For future batches, consider slightly reducing the water quantity by 10-20 grams (ml) and seeing if that yields a consistency that is still very wet and sticky but slightly more manageable for you. Alternatively, try a different brand of high-protein bread flour, as some may absorb moisture differently. Remember, the dough is supposed to be challenging to handle with bare hands, so embrace the stickiness and rely on your tools!
Dough Not Rising?
If your no knead ciabatta dough isn't rising as expected during the long bulk fermentation, the most common culprits are inactive yeast or incorrect water temperature during mixing. First, check the expiration date on your yeast packet; old yeast may be dead. If you're using active dry yeast, ensure the water was in the correct 105-115°F (40-46°C) range for activation; water that's too hot will kill it. You can test your yeast by dissolving it in warm water with a pinch of sugar – if it doesn't get foamy within 5-10 minutes, it's likely inactive.
Another factor is room temperature. If your kitchen is very cool (below 65°F or 18°C), fermentation will be significantly slower. Try placing the dough in a warmer spot, like inside a microwave or oven (turned off but maybe with the light on), or near a warm appliance. Giving it more time is often the solution in cooler conditions. If the dough still shows no activity after many hours in a warm spot, your yeast was likely inactive, and you may need to start over with fresh yeast.
Enhancing the Flavor of Your No-Knead Ciabatta
While a basic no knead ciabatta recipe yields delicious results, you can easily elevate the flavor profile with simple additions. These enhancements can turn a great loaf into an extraordinary one, catering to your personal preferences or complementing the meal you plan to serve it with. The porous structure of ciabatta is particularly well-suited for incorporating various ingredients that distribute throughout the crumb.
Experimenting with different additions is a fun way to customize your baking and explore new taste combinations. Whether you prefer savory notes from herbs and spices or a nuttier flavor from alternative flours, these simple modifications can add exciting dimensions to your homemade ciabatta, making your no knead ciabatta recipe a versatile base for creativity.
Adding Herbs and Spices
Incorporating fresh or dried herbs and spices is a fantastic way to add aromatic flavor to your no knead ciabatta. Popular choices include chopped fresh rosemary, thyme, or oregano, which pair wonderfully with olive oil. You can stir these directly into the dough during the initial mixing stage. For a garlic-infused loaf, consider adding a teaspoon or two of garlic powder, or even roasted garlic cloves mashed into a paste.
Olives, sun-dried tomatoes, or even chopped roasted red peppers can also be added during the mix. For a 500g flour recipe, start with about 50-100 grams of additions to ensure they are distributed but don't overwhelm the dough structure. Simply stir them in gently after the main ingredients are combined. These additions bake beautifully into the airy crumb, making your no knead ciabatta recipe even more flavorful and interesting.
Experimenting with Different Flours
While high-protein bread flour is key for the structure of a no knead ciabatta recipe, you can experiment with substituting a small percentage of it with other flours to add flavor and depth. Replacing 10-15% of the bread flour with whole wheat flour will add a nuttier taste and slightly denser texture. Similarly, substituting a small amount (say, 5-10%) with rye flour can introduce subtle tanginess.
Using a touch of durum flour or semolina flour (fine grind) can also add a lovely golden hue and slightly different texture. When experimenting, start with small substitutions (e.g., 50 grams of a different flour for every 450 grams of bread flour) to see how it affects the dough's hydration and the final loaf's texture and flavor. These small changes can significantly enhance the complexity of your no knead ciabatta recipe.
Serving & Storing Your Homemade Ciabatta Bread
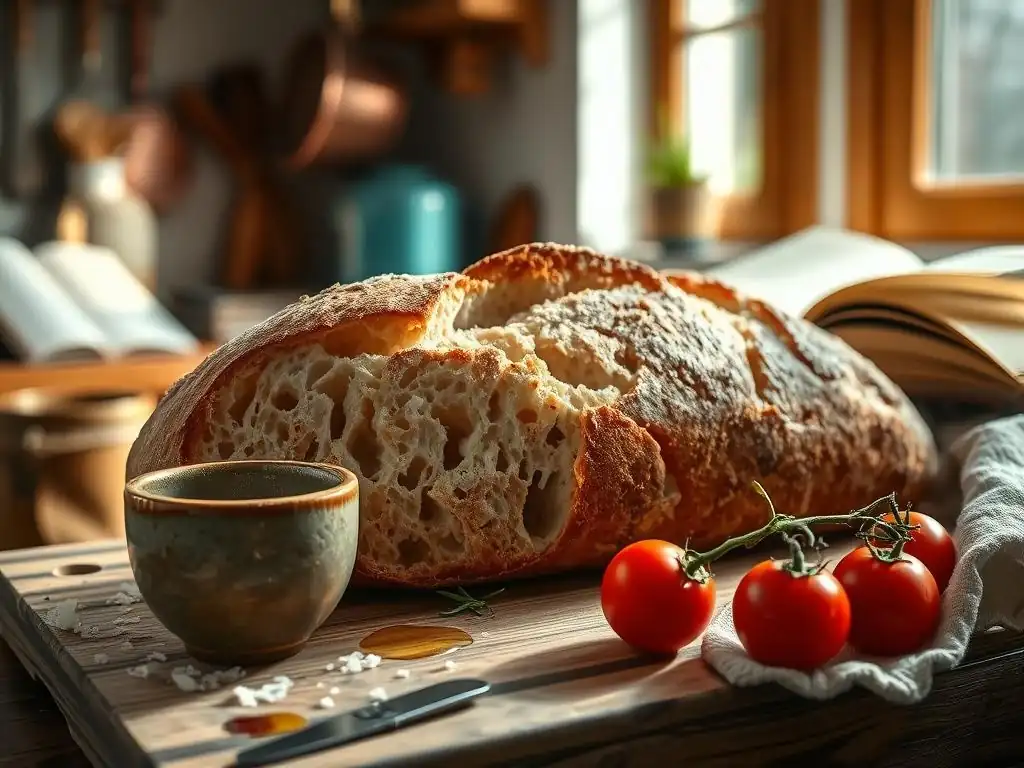
Once your beautiful no knead ciabatta loaves emerge from the oven, the aroma is likely irresistible. While it's tempting to tear into them immediately, allowing them to cool completely on a wire rack is crucial. This cooling period allows the internal structure to set and the moisture to redistribute, resulting in the best possible texture and flavor. Cutting into hot bread can lead to a gummy interior.
Properly serving and storing your homemade ciabatta ensures you enjoy its wonderful texture and taste for as long as possible. Ciabatta is incredibly versatile and pairs well with a wide range of dishes. Knowing how to store it correctly will help maintain its signature crispy crust and chewy interior, allowing you to savor the fruits of your no knead ciabatta recipe for days.
Delicious Ways to Enjoy Your Freshly Baked Ciabatta
Freshly baked ciabatta from your no knead ciabatta recipe is a culinary delight on its own. Slice it thickly and serve it with a good quality extra virgin olive oil for dipping, perhaps sprinkled with a little balsamic vinegar or red pepper flakes. Its open crumb is perfect for soaking up liquids. It also makes outstanding sandwiches; the sturdy crust and soft interior hold fillings beautifully, from simple ham and cheese to more elaborate Italian-style fillings.
Beyond dipping and sandwiches, ciabatta is the ideal base for bruschetta. Toast slices until golden, then top with chopped tomatoes, garlic, basil, and a drizzle of olive oil. You can also use it for panzanella (Italian bread salad) or as a side to soups and stews. Its rustic charm and satisfying texture make it a perfect companion for countless meals, showcasing the simple elegance achieved by your no knead ciabatta recipe.
Proper Storage Techniques for Maintaining Freshness
Ciabatta is best enjoyed the day it's baked, but you can certainly store it to maintain its quality for a couple of days. The key is to preserve the crust while preventing the interior from drying out too quickly. Avoid storing ciabatta in airtight plastic bags at room temperature, as this traps moisture and will soften the crust, making it rubbery. Instead, store cooled ciabatta in a paper bag or wrapped in a clean linen or cotton towel at room temperature. This allows the crust to breathe while protecting the interior somewhat.
For longer storage, ciabatta freezes exceptionally well. Once completely cooled, wrap the loaf tightly in plastic wrap, then in aluminum foil or place it in a freezer-safe bag. Frozen ciabatta can last for several months. To reheat, remove from the freezer, unwrap, and bake in a preheated oven at around 350-375°F (175-190°C) for 10-15 minutes, or until warmed through and the crust is crisp again. This method helps revive the texture of your no knead ciabatta recipe.
Conclusion: Enjoying the Ease of No-Knead Ciabatta Baking
Mastering a no knead ciabatta recipe opens up a world of possibilities for homemade bread, proving that you don't need hours of kneading or specialized equipment to create truly exceptional loaves. This method, which relies on time rather than muscle, is perfectly suited for busy individuals who crave the satisfaction of baking their own bread but lack the time for traditional techniques. The result is a rustic, flavorful ciabatta with that coveted open crumb, achievable with minimal effort.
Embracing the simplicity of this no knead ciabatta recipe means you can regularly enjoy warm, crusty bread straight from your oven. It demystifies the art of baking high-hydration doughs and shows that patience and a few basic tools are often more important than complex techniques. We hope this guide inspires you to try this easy method and discover the pure joy of baking and sharing delicious ciabatta with friends and family.
Elevate Your Bread Baking Skills with BakeWithEase
At BakeWithEase, our mission is to make the art of baking accessible and enjoyable for everyone, regardless of skill level. This easy no knead ciabatta recipe is a prime example of how simple techniques can yield impressive results. By following our detailed guides and tips, you can build confidence in working with different doughs and expand your baking repertoire. We provide the knowledge and encouragement you need to tackle recipes you might have previously thought were too challenging.
From understanding ingredient functions to troubleshooting common issues, BakeWithEase is your partner in the kitchen. We break down complex processes into manageable steps, empowering you to bake with confidence and creativity. Successfully baking this no knead ciabatta recipe is a significant step for any home baker, demonstrating that artisan-quality bread is well within reach with the right approach and guidance.
Embrace the Simplicity of This No-Knead Ciabatta Recipe
This no knead ciabatta recipe is a testament to the beauty of simplicity in baking. By minimizing hands-on time and maximizing the power of natural fermentation, it delivers authentic results without the traditional labor. It's an ideal recipe for beginners looking to venture into rustic breads or for experienced bakers seeking a reliable, low-effort method for their favorite Italian loaf. The satisfaction of pulling a warm, crusty ciabatta from your oven after following these simple steps is immense.
We encourage you to give this no knead ciabatta recipe a try. Experience the ease of the mixing process, marvel at the dough's transformation during the long rise, and savor the incredible flavor and texture of the finished bread. It's a recipe that proves that sometimes, the best things come from letting time and nature do the work, allowing you to enjoy delicious, homemade ciabatta with truly effortless ease.
Frequently Asked Questions
What makes this ciabatta recipe "no knead"?
This recipe eliminates the traditional kneading process. Instead, a high hydration dough is mixed and left to ferment for an extended period, developing gluten naturally without any manual kneading.
How long does the dough need to proof for this no knead ciabatta?
The dough needs to proof for a significant period, typically 12-18 hours at room temperature. This long fermentation is crucial for developing the characteristic flavor and open crumb structure.
What kind of flour is best for this no knead ciabatta recipe?
We recommend using bread flour for this recipe. Bread flour has a higher protein content than all-purpose flour, which is essential for developing the strong gluten structure needed for ciabatta.
Can I add any flavorings to this no knead ciabatta dough?
Yes, you can definitely add flavorings! Consider adding herbs like rosemary or thyme, or even some sun-dried tomatoes or olives for a savory twist.
What's the best way to get a crispy crust on my no knead ciabatta?
Baking the ciabatta on a preheated baking stone or steel is key. Also, creating steam in the oven, either with a water bath or ice cubes, helps to achieve that perfect crispy crust.
Final Reflection: The Humble Loaf, the Busy Baker, and the Joy of Simple Bread
The ease of making delicious, artisanal bread shouldn't be a luxury reserved for professional bakers. This no-knead ciabatta recipe proves that even the busiest among us can enjoy the satisfaction of crafting a truly exceptional loaf from just a few simple ingredients and minimal effort. The surprisingly simple process belies the incredible results, offering a delicious reward that far outweighs the minimal time investment.
The enduring appeal of homemade bread transcends mere sustenance; it's a connection to tradition, a celebration of simple pleasures, and a testament to the transformative power of mindful cooking. Bread is the staff of life,
a proverb often repeated, speaks to its fundamental importance, but it also hints at something more profound: the comfort and nourishment it provides, both physically and emotionally. This recipe, in its simplicity, allows us to reconnect with that fundamental human experience, even amidst our busy schedules.
Now, I invite you to roll up your sleeves, gather your ingredients, and experience the magic for yourself. Don't be intimidated by the seemingly complex texture of ciabatta; this recipe demystifies the process, making it accessible to everyone. The next time you crave the comforting aroma and satisfying chew of freshly baked bread, remember this recipe and the joy it can bring. Embrace the simplicity, savor the process, and share the delicious results with those you love. You might just surprise yourself with how easy—and rewarding—it is.
Unleash Your Inner Baker: Craft Your Perfect Ciabatta!
Thanks for taking the time to explore this easy ciabatta recipe! We hope you've gained the confidence to tackle this delicious bread, even with a busy schedule. Now it's time to get baking!
- Bake your own ciabatta: Grab those ingredients and give this recipe a try. You'll be amazed at how simple it is to create artisan-quality bread from scratch. Don't forget to share your baking journey on social media!
- Experiment with flavors: Once you've mastered the basic recipe, try adding herbs, olives, or sun-dried tomatoes for a unique twist! This is your chance to get creative.
- Share your success (or questions!): Let us know how your ciabatta turned out in the comments below! We’d love to hear about your baking experience and answer any questions you may have.
Ready to experience the joy of homemade ciabatta? What unique flavor combination will you try first?