
Elevate Your Desserts: The Power of Perfectly Tempered Chocolate.

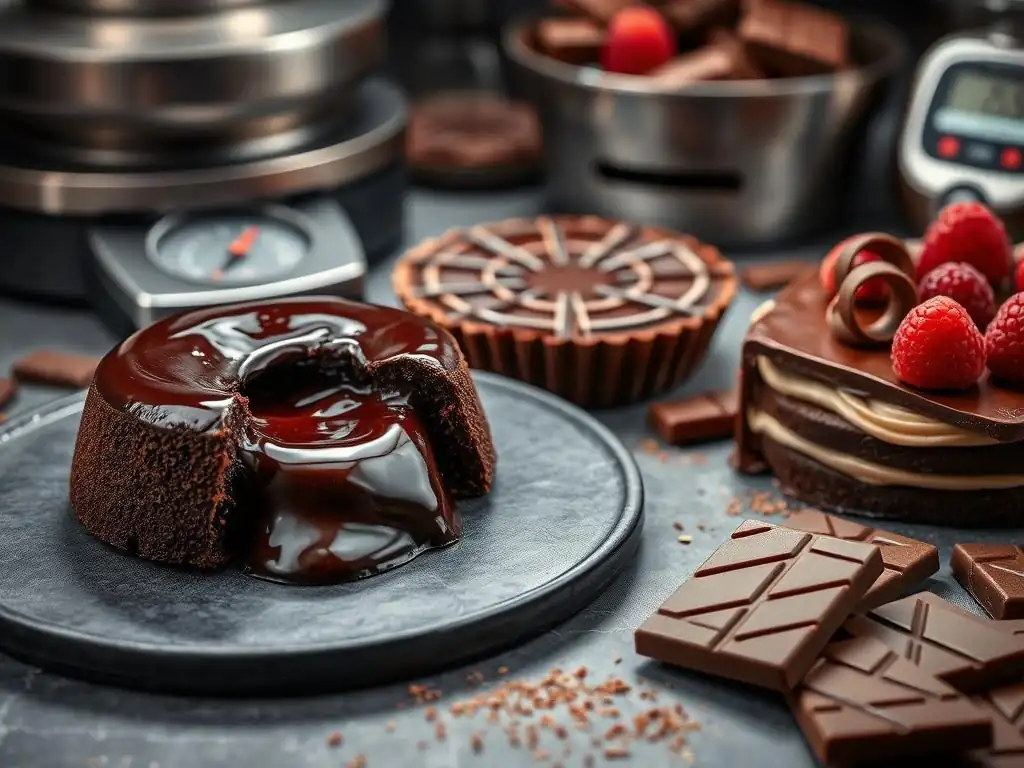
Welcome to BakeWithEase, your passport to baking brilliance! Ever wondered how to achieve that professional sheen and satisfying snap in your chocolate creations? This week, we're unlocking the secrets to crafting perfectly tempered chocolate desserts. Discover the transformative power of tempered chocolate, and prepare to elevate your baking game to a whole new level. Intrigued? Let's get started!
- Why Perfectly Tempered Chocolate is Essential for Exquisite Desserts
- Mastering the Art of Chocolate Tempering: A Step-by-Step Guide for Home Bakers
- Troubleshooting Common Chocolate Tempering Problems
-
Perfectly Tempered Chocolate Dessert Recipes to Showcase Your Skills
- Classic Chocolate Truffles Recipe: A Simple Starting Point
- Decadent Chocolate Bark Recipe: Customizable and Impressive
- Elegant Chocolate-Covered Strawberries Recipe: Perfect for Special Occasions
- Rich Chocolate Lava Cakes with Raspberry Coulis: Showcasing the Versatility of Tempered Chocolate
- Glossy Chocolate Ganache Tart with Sea Salt: Elevating a Classic with Perfect Temper
- Tips for Working with Tempered Chocolate
- Beyond the Basics: Exploring Advanced Chocolate Techniques
- Achieving Chocolate Perfection: Your Journey to Exquisite Desserts
-
Frequently Asked Questions
- How important is tempering chocolate for desserts?
- What are the key signs of perfectly tempered chocolate?
- What's the biggest mistake people make when tempering chocolate at home?
- Can I temper chocolate without special equipment like a marble slab?
- What types of desserts benefit most from using tempered chocolate?
- Final Reflection: The Enduring Allure of Perfectly Tempered Chocolate
- Unlock Your Chocolate Masterpiece: Next Steps to Decadence
Why Perfectly Tempered Chocolate is Essential for Exquisite Desserts
The Science Behind Chocolate Tempering: Understanding Crystal Formation
Chocolate is more than just melted cocoa solids and sugar; its structure is defined by the cocoa butter it contains. Cocoa butter can crystallize in six different forms, known as polymorphs, each with a unique melting point and structure. Untempered chocolate contains a mix of these unstable crystal forms (Types I-IV), leading to a dull appearance and crumbly texture as it cools. The goal of tempering is to encourage the formation of stable, desirable Type V crystals, which melt precisely at body temperature, giving chocolate that smooth, melt-in-your-mouth feel.
Achieving the correct balance of these Type V crystals is crucial. This is done through a controlled process of heating, cooling, and reheating the chocolate to specific temperature ranges.
For dark chocolate, this typically involves melting it completely around 45-50°C (113-122°F) to destroy all existing crystals, cooling it down to about 27-28°C (80-82°F) to initiate the formation of stable crystals, and then gently warming it back up to a working temperature of 30-32°C (86-90°F) to melt any unstable crystals while preserving the desired Type V ones. Milk and white chocolates have slightly different temperature curves due to their composition, generally requiring lower temperatures throughout the process.
Benefits of Using Tempered Chocolate in Dessert Recipes
Utilizing perfectly tempered chocolate elevates your desserts from good to extraordinary. The most immediate benefit is the visual appeal: tempered chocolate sets with a beautiful, glossy sheen and a smooth, even surface, unlike untempered chocolate which often looks streaky and dull. This professional finish makes desserts like chocolate-covered strawberries or bonbons truly stand out.
Beyond aesthetics, tempered chocolate provides superior structural integrity and texture. It shrinks slightly as it sets, making it easy to unmold from molds. Most importantly, it sets with a satisfying, firm 'snap' when broken, a hallmark of quality chocolate work. Furthermore, tempered chocolate is much more stable at room temperature, resisting melting and preventing the formation of 'bloom' – those unappealing white or grayish streaks caused by fat separation – which commonly affects untempered chocolate during storage. This stability is vital for creating durable and beautiful perfectly tempered chocolate desserts recipe components.
Mastering the Art of Chocolate Tempering: A Step-by-Step Guide for Home Bakers
Preparing Your Chocolate Tempering Station: Essential Tools and Ingredients
Before you begin tempering, gather all your tools and ingredients. You'll need high-quality chocolate – couverture chocolate, which has a higher cocoa butter content, is ideal for tempering due to its fluidity and ease of crystal formation. Ensure your workspace is cool, ideally between 18-20°C (64-68°F), and dry, as moisture is the enemy of melting chocolate.
Essential tools include:
- A reliable digital thermometer (infrared or probe-style are best for accuracy)
- A heat-proof bowl (glass or stainless steel)
- A double boiler or a saucepan and a separate bowl that fits snugly over it (ensure the bottom of the bowl does not touch the water)
- A rubber spatula or spoon for stirring
- For the seeding method, finely chopped tempered chocolate (about 25-30% of your total amount) or cocoa butter silk
- For the tabliering method, a clean marble slab or granite countertop and a metal scraper or palette knife
Having everything ready before you start will make the process much smoother and increase your chances of achieving perfectly tempered chocolate.
Method 1: Seeding Method for Perfectly Tempered Chocolate
The seeding method is a popular and relatively straightforward technique for home bakers. It involves melting the majority of your chocolate and then adding small pieces of already tempered chocolate (the 'seed') to introduce stable Type V crystals into the melted mass. This encourages the entire batch to crystallize correctly as it cools.
This method is particularly effective because the seed chocolate acts as a template for crystal formation. By stirring the melted chocolate constantly as the seed melts, you distribute these stable crystals throughout, guiding the cooling process towards the desired structure. It's crucial that the seed chocolate itself is in temper; using untempered chocolate as seed will not work. This method requires careful temperature monitoring but is less messy than the tabliering method.
Step 1: Melting the Chocolate for Seeding
Begin by finely chopping about 70-75% of the total chocolate you plan to temper. Place the chopped chocolate in a dry, heat-proof bowl set over a double boiler with gently simmering water (or use a microwave in short bursts, stirring frequently). Ensure no steam or water comes into contact with the chocolate, as this can cause it to seize.
Heat the chocolate slowly, stirring occasionally, until it is completely melted and smooth. For dark chocolate, aim for a temperature of 45-50°C (113-122°F). For milk or white chocolate, melt to 40-45°C (104-113°F). Remove the bowl from the heat source once melted.
Step 2: Adding Seed Chocolate to Initiate Crystallization
Once the chocolate is fully melted and has reached the initial target temperature, remove the bowl from the heat. Add the remaining 25-30% of finely chopped, tempered seed chocolate to the melted chocolate. Stir continuously with a spatula.
The goal here is to cool the chocolate down while introducing stable crystals. Keep stirring until the seed chocolate is completely melted and the overall temperature of the batch drops. For dark chocolate, you want to cool and stir until the temperature reaches 27-28°C (80-82°F). For milk or white chocolate, aim for 26-27°C (78-80°F) and 25-26°C (77-79°F) respectively. This constant stirring helps distribute the crystals and prevents lumps.
Step 3: Testing the Temper of Your Chocolate
After reaching the target cooling temperature and ensuring all seed chocolate is melted, gently rewarm the chocolate slightly over the double boiler or with a heat gun on a low setting, stirring constantly. For dark chocolate, bring the temperature up to 30-32°C (86-90°F). For milk chocolate, aim for 29-30°C (84-86°F), and for white chocolate, 28-29°C (82-84°F). This is your working temperature; the chocolate should be fluid and ready to use.
To test if your chocolate is properly tempered, dip the tip of a knife, spoon, or a piece of parchment paper into the chocolate. Scrape off any excess. Set the test piece aside at room temperature (or briefly in the refrigerator if your room is warm). Perfectly tempered chocolate should set and become firm within 3-5 minutes, exhibiting a glossy finish and no streaks. If it remains soft, streaky, or takes too long to set, it is not in temper and you will need to repeat the process.
Method 2: Tabliering Method (Marble Slab Tempering) for Professional Results
The tabliering method, also known as marble slab tempering, is a classic professional technique that offers excellent control over the cooling process. It involves pouring melted chocolate onto a cool, clean surface like a marble or granite slab and working it with spatulas or scrapers to rapidly cool it down and encourage crystal formation.
This method allows you to visually monitor the chocolate's consistency and crystal formation as you work it back and forth. While it can be messier than the seeding method, it's very effective for tempering larger quantities of chocolate and is favored by many chocolatiers for its reliability in producing a strong temper. It requires a bit more practice to get the feel for the right consistency.
Step 1: Melting and Cooling the Chocolate on a Marble Slab
Start by melting your chocolate completely over a double boiler or in the microwave, following the same initial temperatures as the seeding method (e.g., 45-50°C for dark chocolate). Ensure the marble slab is clean, dry, and cool.
Pour about two-thirds of the melted chocolate onto the center of the marble slab. Reserve the remaining one-third in the warm bowl, keeping it warm over the double boiler (off the heat) or under a heat lamp if available.
Step 2: Working the Chocolate to Achieve Proper Temper
Using a metal scraper and a palette knife, begin to spread the chocolate thinly across the marble surface and then scrape it back into a pile. Continuously work the chocolate in this manner, spreading and gathering, until it starts to thicken and becomes slightly paste-like. As you work it, the chocolate's temperature will rapidly drop.
For dark chocolate, continue working until its temperature falls to approximately 27-28°C (80-82°F). You'll notice a change in texture and appearance as the desired crystals begin to form – it will become less fluid and slightly opaque in places. Don't overwork it to the point where it becomes too stiff.
Step 3: Confirming the Temper with a Chocolate Test
Once the chocolate on the slab has reached the target cooling temperature and thickened, quickly scrape it back into the bowl with the reserved, still-warm chocolate. Stir the mixture thoroughly to combine the cooled, crystallized chocolate with the warmer, reserved chocolate.
This mixing step brings the overall temperature of the batch back up to the working temperature (30-32°C for dark chocolate) by melting any unstable crystals while leaving the desired Type V crystals intact. Stir until the chocolate is smooth and fluid again. Perform the same temper test as described in Method 1: dip a tool or parchment strip into the chocolate and check if it sets within 3-5 minutes with a glossy finish and snap.
Method 3: Using a Chocolate Tempering Machine for Consistent Results
For those who temper chocolate frequently or in larger quantities, a dedicated chocolate tempering machine can be a worthwhile investment. These machines automate the temperature control process, offering unparalleled consistency and ease of use, which is particularly helpful when creating perfectly tempered chocolate desserts recipe components on a regular basis.
Tempering machines typically use a gentle heating element and a cooling system, often combined with continuous stirring, to guide the chocolate through the precise temperature curve required for perfect temper. This removes much of the guesswork and manual effort associated with the seeding or tabliering methods, allowing you to maintain chocolate in temper for extended periods.
Understanding the Features of a Chocolate Tempering Machine
Chocolate tempering machines come in various sizes, from small countertop units perfect for home use or small bakeries, to large industrial machines. Key features to look for include: precise digital temperature control, a melting mode, a tempering mode, and often a holding mode to keep the chocolate at the working temperature. Some machines use a 'seeding' approach internally, while others use circulation and temperature differential.
Smaller machines might hold around 1-2 kilograms of chocolate, while larger ones can handle 5 kilograms or more. They often have removable bowls for easy cleaning and may include features like vibrating tables to remove air bubbles from molded chocolates. Understanding the capacity and specific temperature control capabilities of a machine is essential for choosing the right one for your needs.
Setting Up and Operating the Tempering Machine
Operating a tempering machine is typically straightforward, though it varies slightly by model. First, ensure the machine is clean and dry. Add your chocolate (either finely chopped or in callets) to the machine's bowl. Select the melting function and set the initial melting temperature according to the type of chocolate you are using (e.g., 45-50°C for dark).
Once the chocolate is fully melted, switch the machine to its tempering mode. You will typically input the desired working temperature (e.g., 31°C for dark chocolate). The machine will then cool the chocolate down to the crystallization temperature and gently warm it back up to the working temperature, often with continuous stirring. Some machines require you to add seed chocolate after the initial melt, while others manage the crystallization process internally. Follow the manufacturer's instructions precisely for the best results.
Maintaining and Cleaning Your Chocolate Tempering Machine
Proper maintenance and cleaning are crucial for the longevity and performance of your chocolate tempering machine. Always clean the machine immediately after use, before any residual chocolate has a chance to harden completely. Ensure the machine is unplugged and cooled down before cleaning.
Use hot water and a mild, non-abrasive detergent to clean the bowl and any removable parts. Be extremely careful not to get water into the machine's electrical components or heating element. Some machines have specific cleaning instructions, such as using only dry cloths for certain parts. Thoroughly dry all components before reassembling. Storing the machine in a cool, dry place will prevent dust and moisture from affecting its performance.
Troubleshooting Common Chocolate Tempering Problems
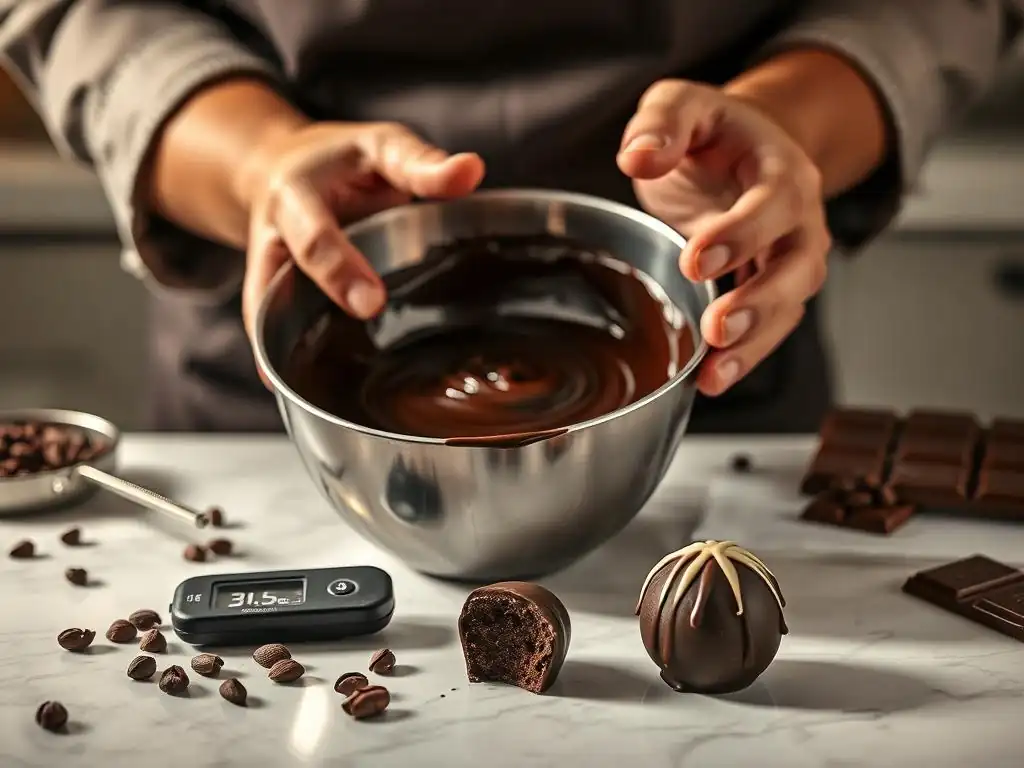
Chocolate Seizing: Causes and Solutions
Chocolate seizing is perhaps the most common and frustrating problem encountered when melting or tempering. It occurs when even a tiny amount of water or steam comes into contact with melted chocolate, causing the cocoa solids to clump together instantly, resulting in a thick, grainy, and unusable paste. This is because sugar, a key component, dissolves in water and attracts the cocoa solids, creating a tight bond.
The best solution is prevention: ensure all your equipment is perfectly dry and protect the melting chocolate from steam. If seizing does occur with a small amount of water, you might be able to rescue it by stirring in a tablespoon or two of a neutral oil (like vegetable or grapeseed oil) or melted cocoa butter, which can help disperse the clumps and smooth the mixture out, though the chocolate will no longer be suitable for tempering or coating applications where a firm set is needed.
For tempering purposes, seized chocolate is usually unrecoverable and best used in baked goods where texture is less critical.
Bloom on Tempered Chocolate: Identifying and Preventing It
Bloom is the appearance of a grayish or whitish film or streaks on the surface of chocolate. There are two types: sugar bloom and fat bloom. Sugar bloom happens when moisture condenses on the chocolate's surface and dissolves sugar crystals, which recrystallize into a grainy film as the moisture evaporates. Fat bloom, more common with improper tempering or storage, occurs when unstable cocoa butter crystals melt and rise to the surface, recrystallizing into a dull, powdery layer.
Preventing bloom relies on proper tempering and storage. Achieving a perfect temper ensures the cocoa butter is in its stable form. Storing tempered chocolate in a cool, dry place (ideally 15-18°C / 59-64°F) with stable temperature and humidity prevents both types of bloom. Avoid drastic temperature changes and humid environments. While bloomed chocolate is safe to eat, its texture and appearance are compromised. It can often be re-melted and re-tempered to restore its desired properties.
Achieving the Right Consistency: Tips for Adjusting Temper
Sometimes, even after following the steps, your chocolate might not be at the ideal working consistency – too thick or too thin – or it might start to go out of temper while you're working with it. If your chocolate is too thick and starts setting too quickly, its temperature is likely too low, or it contains too many stable crystals. Gently warm it slightly, stirring constantly, until it reaches the correct working temperature range (e.g., 30-32°C for dark chocolate). Don't overheat it, or you'll melt the stable crystals, taking it out of temper.
If your chocolate is too thin and isn't setting properly on your test piece, its temperature might be too high, or it didn't form enough stable crystals during the cooling phase. You need to cool it down slightly and encourage more crystallization. If using the seeding method, add a tiny bit more finely chopped seed chocolate and stir until it melts and the temperature drops slightly.
If using the tabliering method, pour a small amount back onto the marble slab to cool and work it, then stir it back into the main batch. Constant monitoring and small adjustments are key to maintaining the perfect temper while working.
Perfectly Tempered Chocolate Dessert Recipes to Showcase Your Skills
Mastering chocolate tempering opens up a world of possibilities for creating stunning desserts. Using perfectly tempered chocolate isn't just about technique; it fundamentally changes the texture, appearance, and stability of your final product, making these perfectly tempered chocolate desserts recipe ideas truly shine.
From simple coatings to intricate molded shapes, the snap, shine, and smooth melt of tempered chocolate elevate the entire dessert experience.
Classic Chocolate Truffles Recipe: A Simple Starting Point
Creating classic chocolate truffles often involves a rich ganache center rolled in cocoa powder or coated in chocolate. While the ganache itself doesn't require tempering, coating truffles in perfectly tempered chocolate is essential for achieving that desirable hard, snappy shell.
Dipping ganache balls into tempered chocolate creates a protective layer that prevents the ganache from drying out and gives the truffle a professional finish. The tempered chocolate sets quickly and firmly, making the truffles easy to handle and preventing them from melting in your fingers as readily as those coated in untempered chocolate. This is a fantastic entry point for using your newly acquired tempering skills in a delicious perfectly tempered chocolate desserts recipe.
Decadent Chocolate Bark Recipe: Customizable and Impressive
Chocolate bark is one of the easiest and most versatile perfectly tempered chocolate desserts recipe concepts to make with tempered chocolate. It involves spreading a thin layer of tempered chocolate onto parchment paper and scattering toppings like nuts, dried fruit, candies, or sprinkles before it sets.
Using tempered chocolate is crucial for bark because it ensures a firm, snappy texture that breaks cleanly. Untempered chocolate bark would be soft, dull, and prone to melting. The beautiful glossy surface achieved with tempering also makes the vibrant toppings stand out, creating an impressive treat that's simple to make but looks professionally crafted. You can customize it endlessly for different flavors and occasions.
Elegant Chocolate-Covered Strawberries Recipe: Perfect for Special Occasions
Chocolate-covered strawberries are a simple yet elegant dessert, and their success hinges entirely on using perfectly tempered chocolate. A perfectly tempered coating sets quickly, forming a thin, hard shell that gives a satisfying bite and contrast to the soft, juicy strawberry inside.
The glossy finish of tempered chocolate makes the strawberries look incredibly appealing. Furthermore, the stable nature of tempered chocolate means the coating won't melt easily at room temperature, making them ideal for gifting or serving at parties without becoming messy. This is a prime example of how tempering transforms a simple ingredient into a refined perfectly tempered chocolate desserts recipe.
Rich Chocolate Lava Cakes with Raspberry Coulis: Showcasing the Versatility of Tempered Chocolate
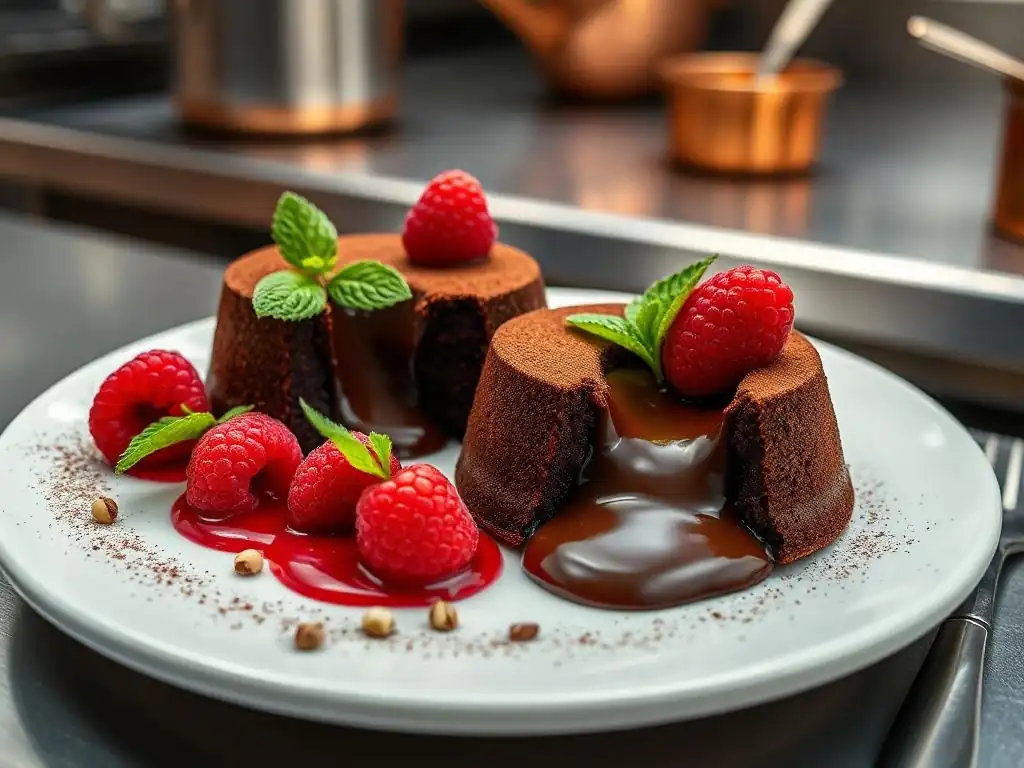
While the molten center of a chocolate lava cake doesn't use tempered chocolate, finely chopped tempered chocolate is often added to the batter. This might seem counterintuitive, but adding tempered chocolate pieces helps control the melting process during baking.
The stable crystals in the tempered chocolate melt at a slightly higher, more predictable temperature than untempered chocolate. This can contribute to achieving that perfect balance where the edges of the cake are set, but the center remains gloriously molten when cut into. Serving this with a vibrant raspberry coulis provides a beautiful color contrast and tangy counterpoint to the rich, warm chocolate. This perfectly tempered chocolate desserts recipe variation subtly utilizes tempering for textural perfection.
Glossy Chocolate Ganache Tart with Sea Salt: Elevating a Classic with Perfect Temper
A classic chocolate ganache tart is delicious, but finishing it with a perfectly tempered chocolate glaze or using tempered chocolate for decorative elements takes it to the next level. While the ganache filling is made from chocolate and cream (and isn't tempered), a thin layer of tempered chocolate can be brushed onto the pre-baked crust before adding the ganache to prevent the crust from becoming soggy.
For a truly stunning finish, the top of the set ganache can be coated with a thin, glossy layer of tempered chocolate, or tempered chocolate shards or curls can be used as garnish. The snap of the tempered chocolate shell or decoration provides a wonderful textural contrast to the creamy ganache, creating a sophisticated and visually appealing perfectly tempered chocolate desserts recipe. Sprinkling with sea salt enhances the chocolate flavor beautifully.
Tips for Working with Tempered Chocolate
Maintaining the Temper During Use
Once you've achieved perfect temper, the challenge becomes keeping the chocolate within its ideal working temperature range (e.g., 30-32°C for dark) while you use it. If the chocolate cools too much, it will thicken and start setting, becoming difficult to work with. If it gets too warm, the stable crystals will melt, and it will go out of temper.
To maintain the temper, keep the bowl of chocolate over a very gentle heat source – for a double boiler setup, this might mean placing it over the warm water off the heat, or periodically returning it briefly to the heat source. A warming bath set just below the working temperature is ideal. Stir the chocolate frequently to ensure even temperature distribution. If it thickens, gently warm it back up to the correct working temperature. If it goes out of temper (losing its gloss or setting improperly), you'll need to re-temper the entire batch.
Storing Tempered Chocolate Properly
Properly stored tempered chocolate will maintain its temper and quality for a significant time, sometimes up to a year if stored correctly. The key is to keep it away from temperature fluctuations, humidity, light, and strong odors, which chocolate can absorb.
Store tempered chocolate in an airtight container in a cool, dry place, ideally between 15-18°C (59-64°F). Avoid refrigeration if possible, as the humidity and temperature changes inside a fridge can cause sugar bloom. If you must refrigerate, place the chocolate in a truly airtight container and allow it to come to room temperature slowly before opening the container to prevent condensation.
Adding Flavorings and Inclusions to Tempered Chocolate
Adding flavorings or inclusions like extracts, nuts, or dried fruit to tempered chocolate requires care to avoid taking the chocolate out of temper or causing it to seize. Many liquid flavorings, especially water-based ones, can cause the chocolate to seize instantly. Use oil-based extracts or special chocolate flavorings designed for use with chocolate. Add them after the chocolate is tempered and at its working temperature, stirring them in gently.
For solid inclusions like nuts, dried fruit, or crispy rice, ensure they are completely dry. Adding cold inclusions can rapidly cool the chocolate, potentially taking it out of temper. It's often best to warm inclusions slightly before adding them to the tempered chocolate, bringing them closer to the chocolate's working temperature. Stir inclusions in quickly but thoroughly to distribute them evenly before the chocolate starts to set.
Beyond the Basics: Exploring Advanced Chocolate Techniques
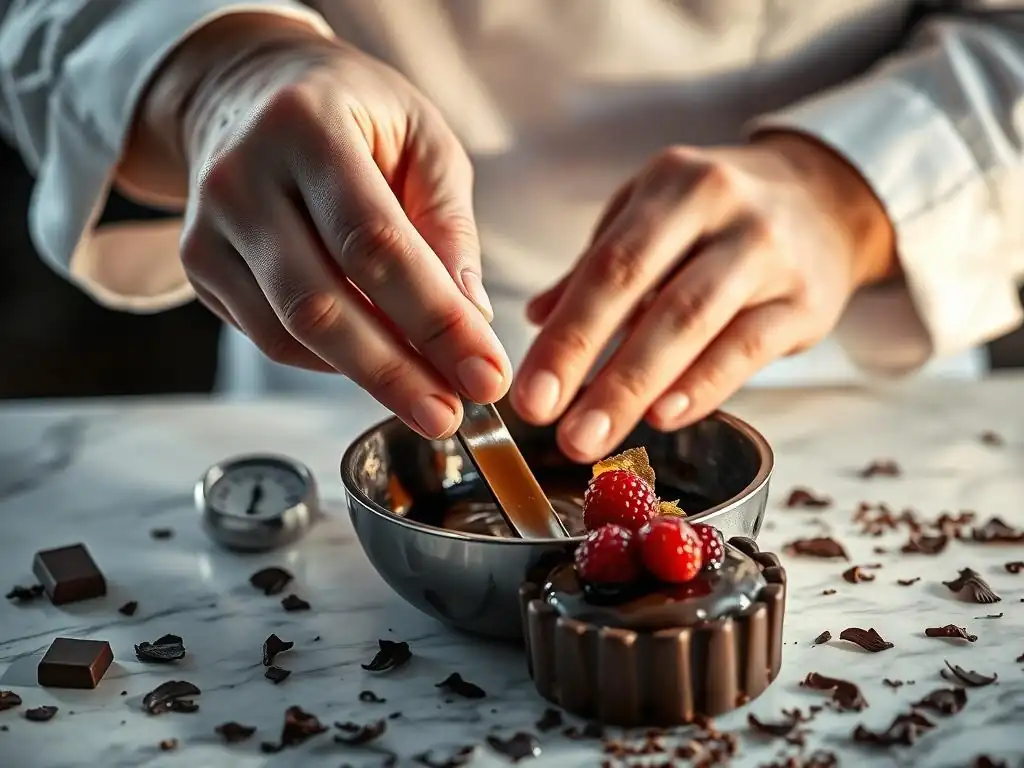
Once you're comfortable with basic tempering methods, you can explore more advanced techniques that utilize perfectly tempered chocolate to create truly stunning edible art and complex perfectly tempered chocolate desserts recipe components.
These techniques often involve working with specific tools and materials to manipulate the tempered chocolate into intricate shapes and designs, adding another layer of sophistication to your baking repertoire.
Creating Chocolate Decorations and Garnishes
Perfectly tempered chocolate is the foundation for beautiful chocolate decorations. Its ability to set firmly with a snap and shine makes it ideal for piping intricate designs onto parchment paper, creating chocolate curls using a vegetable peeler on a block of set tempered chocolate, or molding shapes using polycarbonate molds.
Techniques like creating chocolate fans, leaves (using real leaves as a template), or geometric shapes require the chocolate to be in perfect temper so it releases cleanly from surfaces and holds its shape as it sets. These garnishes not only add visual appeal but also provide textural contrast to your desserts.
Working with Colored Cocoa Butter
Colored cocoa butter is a specialized product used by chocolatiers to add vibrant colors to chocolate creations, particularly molded chocolates and bonbons. It is essentially cocoa butter that has been colored with fat-soluble food coloring. Like chocolate, colored cocoa butter also needs to be tempered before use, typically to a temperature around 28-30°C (82-86°F).
It is often applied to the inside of chocolate molds using brushes or airbrushes before the tempered chocolate is poured in. When the chocolate sets and is unmolded, the color transfers beautifully, creating stunning visual effects. Working with colored cocoa butter allows for incredible creativity in decorating your perfectly tempered chocolate desserts recipe items.
Understanding Different Types of Chocolate and Their Tempering Needs
Not all chocolate tempers the same way. Dark, milk, and white chocolate have different compositions, particularly in their cocoa butter and milk solid content, which affects their melting and crystallization points. As mentioned earlier, dark chocolate generally requires the highest temperatures, followed by milk chocolate, and then white chocolate, which has the lowest working temperature.
Understanding these differences is key to successful tempering. Using the correct temperature ranges for the specific type of chocolate you are working with is non-negotiable. Furthermore, chocolates from different manufacturers or with different cocoa percentages within the same type (e.g., 60% vs. 70% dark chocolate) can have slight variations in their ideal tempering curves, requiring a little experimentation and careful temperature monitoring.
Achieving Chocolate Perfection: Your Journey to Exquisite Desserts
Mastering the art of tempering chocolate is a skill that significantly elevates your baking. It transforms simple ingredients into visually stunning and texturally delightful perfectly tempered chocolate desserts recipe creations. While it may seem intimidating at first, with practice and attention to detail, achieving that perfect snap and shine is entirely within reach for the home baker.
Embrace the process, learn from any attempts that don't go perfectly, and enjoy the delicious rewards of working with beautifully tempered chocolate.
Practice Makes Perfect: Embrace the Learning Process
Tempering chocolate is a technique that often requires a few attempts to get right. Don't be discouraged if your first batch doesn't result in perfect snap and shine. Each attempt is a learning opportunity. Pay close attention to your temperatures, the look and feel of the chocolate at each stage, and how quickly your test piece sets.
Start with a simple technique like the seeding method and practice with a small amount of chocolate. As you gain confidence and understanding of the process, you can move on to other methods or larger quantities. The more you practice, the better you'll become at recognizing when your chocolate is in temper just by its appearance and fluidity.
Resources for Further Chocolate Tempering Education
To deepen your understanding of chocolate tempering and advanced techniques, explore various resources. Cookbooks specifically focused on chocolate work or patisserie often contain detailed sections on tempering. Online baking communities and forums can provide troubleshooting tips and shared experiences.
High-quality baking websites and blogs (like BakeWithEase!) offer tutorials and guides. Consider watching videos demonstrating the different tempering methods, as seeing the technique performed can be incredibly helpful. As you become more advanced, workshops or classes focused on chocolate work can provide hands-on learning opportunities.
Once you've successfully tempered chocolate and created some stunning perfectly tempered chocolate desserts recipe items, share your successes! Whether it's with friends and family or on social media, showing off the beautiful gloss and perfect snap of your creations is rewarding.
Sharing your journey can also inspire others to tackle this rewarding technique. Document your process, take photos of your finished desserts, and celebrate your progress. The joy of baking is often in sharing the delicious results, and perfectly tempered chocolate makes those results truly show-stopping.
Frequently Asked Questions
How important is tempering chocolate for desserts?
Tempering is crucial for achieving that smooth, glossy finish and satisfying snap. Untempered chocolate can be dull, streaky, and melt too easily.
What are the key signs of perfectly tempered chocolate?
Look for a shiny, hard finish and a clean break when snapped. It should also contract slightly when cooling, making it easy to release from molds.
What's the biggest mistake people make when tempering chocolate at home?
Many beginners struggle with precise temperature control. Using a reliable thermometer and following the recipe's temperature guidelines are essential for success.
Can I temper chocolate without special equipment like a marble slab?
Yes! You can use the seeding method or the microwave method. While a marble slab is helpful, these alternatives are perfectly viable.
What types of desserts benefit most from using tempered chocolate?
Desserts like chocolate-covered strawberries, bonbons, and molded decorations absolutely require tempered chocolate. It ensures a professional look and feel.
Final Reflection: The Enduring Allure of Perfectly Tempered Chocolate
The pursuit of perfectly tempered chocolate is more than just a culinary technique; it's a testament to the power of precision and patience in achieving culinary excellence. In a world increasingly focused on instant gratification, the deliberate process of tempering chocolate stands as a powerful reminder that sometimes, the most rewarding results require careful attention to detail and a willingness to embrace the nuances of the craft. The glossy sheen, the satisfying snap, the melt-in-your-mouth texture – these are not mere aesthetics; they are the hallmarks of a truly exceptional dessert experience.
The impact of perfectly tempered chocolate extends far beyond the individual dessert itself. It speaks to a deeper appreciation for quality ingredients and the artistry involved in transforming simple components into something truly extraordinary. It's a subtle yet significant detail that elevates the entire culinary experience, transforming a simple treat into a moment of mindful indulgence. As renowned pastry chef, Pierre Hermé, once said: Pastry is a form of poetry. It's about precision, passion, and a deep respect for the ingredients.
This sentiment perfectly encapsulates the spirit of tempering chocolate – a dedication to the craft that elevates the final product to a work of art.
Now, consider your own culinary journey. Perhaps you've experienced the frustration of poorly tempered chocolate, or the sheer delight of that perfect snap. I invite you to embrace the challenge of mastering this technique.
Don't be intimidated by the process; rather, see it as an opportunity to connect with your ingredients on a deeper level, to appreciate the subtle nuances of flavor and texture, and to create desserts that are not only delicious but also visually stunning. The journey to perfectly tempered chocolate is a journey of discovery, patience, and ultimately, profound satisfaction. So, embark on it, and savor the rewards.
Unlock Your Chocolate Masterpiece: Next Steps to Decadence
Thanks for taking the time to explore the art of tempering chocolate! You've just gained the knowledge to create truly exquisite desserts. Now it's time to put your new skills into action.
- Dive into your next baking project: Try tempering chocolate for your favorite recipe—that ganache, those truffles, or even a simple chocolate bark will taste unbelievably better! This is your opportunity to showcase your newly honed skills.
- Share your chocolate creations: Show off your perfectly tempered delights on social media and tag us! We’d love to see your masterpieces (#BakeWithEaseTempering).
- Experiment with different chocolates: Challenge yourself by using different types of chocolate and observing how tempering affects the final result. What unexpected flavors or textures will you discover?
Ready to transform your desserts from good to unforgettable? What exciting chocolate creation will you tackle first?