
Temperature's Twist: How Heat Affects Yeast Fermentation


Welcome to BakeWithEase, where baking becomes a breeze! Ever wondered how crucial temperature is to achieving that perfect rise? This week, we're diving deep into the fascinating world of yeast fermentation temperature control. Prepare to unlock the secrets to consistent, flavorful results by understanding how heat impacts your dough. Ready to master the art of temperature management and elevate your baking game? Let's get started!
- Bake Like a Pro: Mastering Yeast Fermentation Temperature Control
- Understanding Yeast Fermentation: A Baking Science Deep Dive
- The Science Behind Yeast and Temperature
-
The Impact of High Temperatures on Yeast
- Overheating Yeast: The Risks of Excessive Heat
- Consequences of High Fermentation Temperatures on Dough Quality
- Troubleshooting Overheated Dough: Adjusting Proofing Time
- Slow Fermentation: The Effects of Cold Temperatures
- Consequences of Slow Fermentation on Dough Development
- Awakening Dormant Yeast: Gentle Warming Strategies
- Yeast Types and Temperature Sensitivity
- Practical Tips for Yeast Fermentation Temperature Control
- The Sweet Spot: Achieving Ideal Yeast Fermentation Temperature
- Troubleshooting Common Temperature-Related Yeast Problems
- Advanced Techniques: Manipulating Temperature for Flavor Development
- Conclusion: Mastering Yeast Fermentation Temperature for Baking Success
-
Frequently Asked Questions
- What is the ideal temperature range for yeast fermentation when baking?
- Why is temperature control so important during yeast fermentation?
- What happens if the dough is too cold during yeast fermentation?
- How can I control the temperature of my dough during yeast fermentation, especially in a cold kitchen?
- What are the consequences of over-fermenting dough due to excessively high temperatures?
- Final Reflection: Harnessing the Heat: Yeast's Delicate Dance
- Unleash Your Inner Baker: Master Yeast's Temperature Tango!
Bake Like a Pro: Mastering Yeast Fermentation Temperature Control
Welcome back to BakeWithEase! Today, we're diving deep into a fundamental aspect of baking that often dictates success or failure: the temperature of your dough during yeast fermentation. Mastering yeast fermentation temperature control is not just a technique; it's an art that transforms simple ingredients into delicious, perfectly risen baked goods. Understanding how heat interacts with those tiny yeast cells is key to achieving consistent, professional-quality results in your home kitchen.
Whether you're aiming for a light, airy loaf of bread, a tender brioche, or a perfectly proofed pizza crust, the ambient temperature and the dough's internal temperature play critical roles. We'll explore the science, the practical tips, and the troubleshooting necessary to harness the power of yeast fermentation temperature control and elevate your baking game. Get ready to unlock the secrets to consistently beautiful bakes!
Understanding Yeast Fermentation: A Baking Science Deep Dive
Yeast fermentation is a biochemical process where yeast, a living microorganism, consumes sugars present in the dough and converts them into carbon dioxide gas and alcohol. This gas gets trapped within the gluten structure of the dough, causing it to rise. The alcohol contributes subtle flavor notes, and other byproducts of fermentation also play a significant role in developing the complex aromas and tastes we love in baked goods.
This metabolic activity of yeast is highly sensitive to its environment, particularly temperature. Just like any living organism, yeast thrives within a specific temperature range. Too cold, and it becomes sluggish or dormant; too hot, and it can be killed. Therefore, understanding and managing the temperature is paramount for successful fermentation and ultimately, a successful bake.
Why Yeast Fermentation Temperature Matters in Baking
The rate of yeast activity is directly proportional to temperature within its optimal range. A warmer temperature (within limits) speeds up fermentation, while a cooler temperature slows it down. This control over the fermentation rate allows bakers to influence not only how quickly the dough rises but also the development of flavor and texture. Precise yeast fermentation temperature control ensures a consistent rise and prevents issues like over-proofing or under-proofing.
Beyond just the rise, temperature influences the entire enzymatic process occurring in the dough. Enzymes in the flour and yeast break down starches into simpler sugars, which the yeast then consumes. Temperature affects the efficiency of these enzymes as well. Controlling the temperature allows for a balanced fermentation process, leading to a dough with good structure, desirable flavor compounds, and the right amount of rise for baking.
Optimal Temperature Range for Yeast Activity
For most common baking yeasts (like Saccharomyces cerevisiae), the optimal temperature range for fermentation is typically between 75°F and 85°F (24°C to 30°C). Within this range, yeast activity is vigorous, producing carbon dioxide at a steady pace, leading to a good rise in a relatively short time, usually within 1 to 2 hours for the first proofing depending on the recipe and yeast quantity.
However, it's important to note that while this range is optimal for activity, it's not always optimal for flavor development. Many bakers prefer slower fermentation at slightly lower temperatures, often between 68°F and 75°F (20°C to 24°C), which allows for a longer fermentation time (perhaps 2-4 hours or even overnight) and the production of more complex flavor compounds by the yeast and other enzymes. This highlights that the "optimal" temperature depends on the desired outcome for the final product, balancing speed with flavor.
The Science Behind Yeast and Temperature
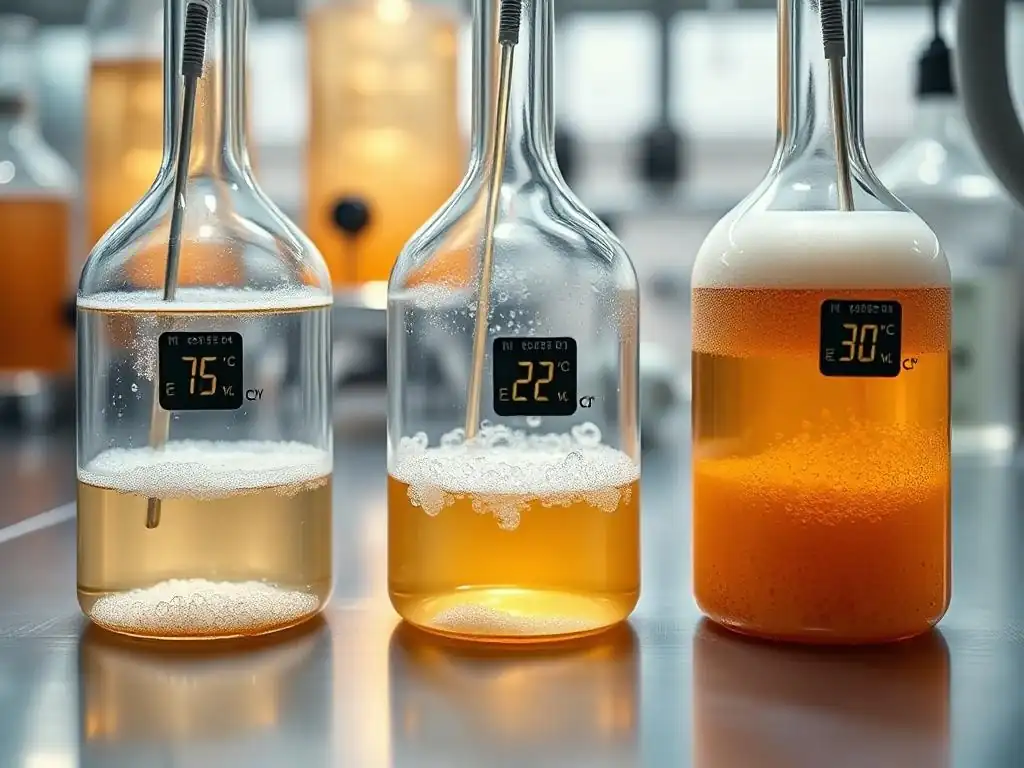
Yeast cells are single-celled fungi. Like all living cells, their internal biological processes, including metabolism and enzyme activity, are highly dependent on temperature. Temperature influences the rate of chemical reactions within the cell. As temperature increases (within limits), molecules move faster, collisions between enzymes and substrates happen more frequently, and reaction rates speed up.
Specifically for yeast fermentation, temperature affects the rate at which yeast cells take up sugar and convert it into ethanol and carbon dioxide. Each yeast cell contains enzymes that facilitate these conversions. The efficiency of these enzymes is temperature-dependent. Optimal temperatures allow these enzymes to work at their peak efficiency, leading to rapid fermentation.
How Temperature Affects Yeast Metabolism
At colder temperatures, typically below 50°F (10°C), yeast metabolism slows down significantly. The enzymes are less active, and the rate of sugar consumption and gas production drops dramatically. This is why refrigerating dough (cold fermentation) is used to slow down or halt the rise, allowing for extended proofing times and enhanced flavor development without the dough over-proofing quickly.
Conversely, as temperature rises above the optimal range, yeast metabolism initially speeds up but then begins to decline rapidly. Temperatures above 95°F (35°C) start to stress the yeast, and temperatures above 130°F to 140°F (54°C to 60°C) are typically lethal to most common baking yeasts. At these higher temperatures, the enzymes and cellular structures within the yeast begin to denature and break down, rendering the yeast inactive or dead.
The Role of Enzymes in Yeast Fermentation
Enzymes are biological catalysts, proteins that speed up chemical reactions without being consumed in the process. Yeast cells contain numerous enzymes crucial for fermentation. For example, invertase breaks down sucrose (table sugar) into glucose and fructose, which the yeast can then metabolize. Zymase is a complex of enzymes that converts these simpler sugars into ethanol and carbon dioxide.
The activity of these enzymes is highly sensitive to temperature. Each enzyme has an optimal temperature range where it functions most efficiently. Outside this range, their activity decreases. At very high temperatures, enzymes can denature, losing their functional shape and becoming inactive. This is why killing the yeast with excessive heat halts fermentation – the essential enzymes are destroyed.
The Impact of High Temperatures on Yeast
While warmth encourages yeast activity, excessive heat can be detrimental. Exposing yeast to temperatures significantly above its optimal range, generally above 95°F (35°C), can stress the cells and negatively impact the fermentation process. This is distinct from the lethal temperatures mentioned earlier; even sustained high temperatures below the killing point can cause problems.
High temperatures can lead to excessively rapid fermentation. While this might seem desirable for a quick rise, it often comes at the cost of flavor development. The yeast consumes sugars too quickly, and the enzymatic processes that contribute to complex flavors don't have enough time to occur. Furthermore, rapid gas production can sometimes outpace the gluten development, leading to a weaker structure.
Overheating Yeast: The Risks of Excessive Heat
The most significant risk of overheating yeast is killing it. If the liquid used to activate active dry yeast is too hot, or if the dough is placed in an environment that is too warm (like a hot car or directly on a heating vent), the yeast cells can be permanently damaged or killed. For instance, using water hotter than 120°F (49°C) is often cited as a temperature that can significantly harm or kill active dry yeast when proofing it directly in water.
Even if not killed, yeast subjected to high temperatures can become less vigorous or produce off-flavors. Rapid fermentation can also lead to a dough that rises too quickly and collapses, a condition known as over-proofing. The gluten structure, which needs time to develop elasticity and strength, can be stretched too thin by the rapid gas production, leading to a fragile dough that doesn't hold its shape or oven spring well.
Consequences of High Fermentation Temperatures on Dough Quality
When yeast fermentation occurs too quickly at high temperatures, the resulting dough can suffer in several ways. Texture is often compromised, leading to a coarse crumb structure rather than a fine, even one. The rapid rise can exhaust the available sugars quickly, potentially leaving less sugar for crust browning during baking, resulting in a pale crust.
Flavor is also significantly impacted. The nuanced flavors developed during slower, cooler fermentation are often absent in dough fermented rapidly at high temperatures. The alcohol and other metabolic byproducts that contribute to depth of flavor don't have adequate time to form or interact with the dough. The result can be a loaf that tastes bland or has an undesirable yeasty or alcoholic flavor.
Troubleshooting Overheated Dough: Adjusting Proofing Time
If you suspect your dough has been too warm during fermentation, the key is to adjust the subsequent steps, particularly the proofing time. If the first rise (bulk fermentation) was very rapid, the dough might reach its peak much faster than the recipe indicates. Keep a close eye on the dough's volume and feel, rather than strictly following the clock.
- Check the dough for signs of over-proofing: It will look very puffy, may have started to sag slightly, and will likely collapse when gently poked (the poke test will show a dent that doesn't spring back at all).
- If the dough hasn't collapsed but feels very airy and looks significantly larger than doubled, it might be close to over-proofing. Handle it very gently during shaping to preserve as much gas as possible.
- Reduce the final proofing time significantly, or potentially skip it altogether if the dough is already very airy and fragile after shaping. Bake the dough as soon as it shows minimal signs of readiness.
Just as high temperatures can harm yeast, excessively low temperatures can also impact fermentation, albeit in a different way. Cold temperatures don't typically kill yeast (unless freezing for extended periods depending on preparation), but they dramatically slow down its activity. Below 50°F (10°C), yeast becomes largely dormant.
This slowing down isn't necessarily a bad thing; it's the basis for techniques like cold fermentation or retarding dough in the refrigerator. However, if you're aiming for a standard fermentation time at room temperature and your environment is too cold, the process will be much slower than expected, potentially leading to under-proofed dough if you stick to the recipe's time guidelines.
Slow Fermentation: The Effects of Cold Temperatures
Slow fermentation at cooler temperatures, typically between 40°F and 55°F (4°C to 13°C) in a refrigerator, has profound effects on dough. While the yeast is less active, other enzymatic processes within the dough continue. Enzymes break down complex carbohydrates into simpler sugars over a longer period. This results in more available sugars for the yeast to consume slowly, and importantly, more sugars available for browning during baking.
The slow production of organic acids and other compounds by the yeast and lactic acid bacteria (especially in sourdough or long-fermented doughs) contributes significantly to flavor complexity and aroma. This is why cold-fermented pizza dough or bread often has a more developed, nuanced taste compared to dough fermented quickly at room temperature.
Consequences of Slow Fermentation on Dough Development
While beneficial for flavor, excessively slow fermentation at temperatures that are simply "too cold" for a standard recipe (e.g., a kitchen consistently below 65°F / 18°C) can lead to issues if not accounted for. The primary consequence is under-proofing if the recipe's fermentation time isn't extended. Under-proofed dough will be dense, have poor volume, and potentially a tough texture.
If the temperature is too low and the dough is left for an extended period without adequate yeast activity, certain enzymatic activities might continue without sufficient gas production to support the structure. This is less common than issues from high temperatures, but it highlights the need for intentional temperature control based on the desired fermentation speed and outcome.
Awakening Dormant Yeast: Gentle Warming Strategies
If your dough has been too cold and fermentation is sluggish, you can gently warm it up to kickstart yeast activity. Avoid sudden, drastic temperature changes. Place the dough in a slightly warmer spot in your kitchen.
- Try placing the dough bowl in a turned-off oven with the light on (the light often provides enough warmth to raise the internal temperature to around 75-85°F / 24-30°C).
- You can also create a warm water bath: fill a larger bowl with warm water (around 80-90°F / 27-32°C) and place your dough bowl inside, ensuring no water gets into the dough.
- A proofing box or dedicated proofer set to the desired temperature is ideal for precise control.
- Be patient; it may take 30-60 minutes for the dough's internal temperature to rise and the yeast to become active again. Monitor its progress closely once it starts to rise.
Yeast Types and Temperature Sensitivity
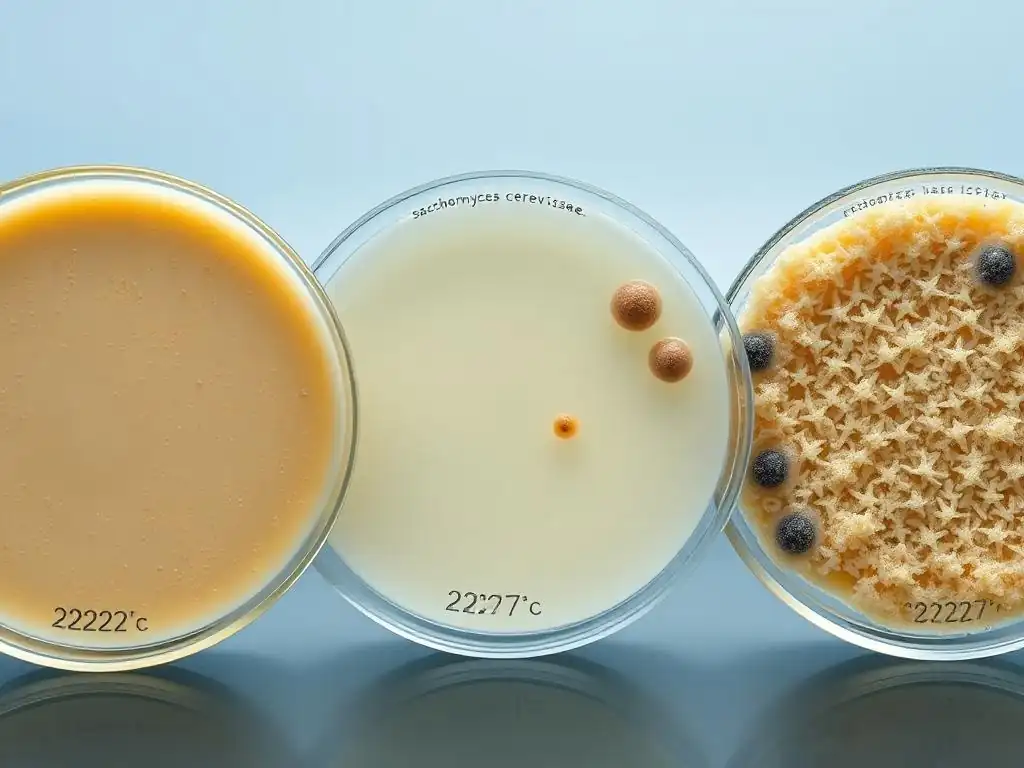
Not all yeasts are created equal when it comes to temperature preference and tolerance. While Saccharomyces cerevisiae is the dominant species in most commercial baking yeasts, different strains exist, and the processing method (active dry vs. instant) also affects how they respond to temperature. Wild yeasts found in sourdough starters have their own unique temperature profiles.
Understanding these differences is crucial for effective yeast fermentation temperature control. A temperature that works perfectly for instant yeast might be too cool for active dry yeast or too warm for a specific sourdough culture, influencing everything from the rise rate to the final flavor profile.
Different Yeast Strains: A Temperature Comparison
While specific temperature tolerances can vary slightly between commercial yeast strains, the general optimal range for Saccharomyces cerevisiae remains consistent, around 75-85°F (24-30°C). Some specialized strains might be marketed as performing better at slightly cooler or warmer temperatures, but these differences are often subtle for home bakers.
More significant differences are seen when comparing commercial baking yeast to other Saccharomyces strains used in brewing or winemaking, which may have different preferred temperature ranges. However, for baking purposes, focusing on the type of preparation (active dry vs. instant) and whether it's commercial yeast or a wild sourdough culture is more practical for managing temperature.
Instant Yeast vs. Active Dry Yeast: Temperature Considerations
The primary difference in temperature consideration between instant dry yeast and active dry yeast lies in their activation. Active dry yeast has a thicker cell wall and requires rehydration in warm liquid (typically 105-115°F / 40-46°C) before being added to dry ingredients. Temperatures below this range may not fully activate the yeast, while temperatures above 120°F (49°C) can damage it.
Instant dry yeast, on the other hand, is processed differently and can be added directly to dry ingredients. It activates more quickly once it comes into contact with liquid in the dough. While it doesn't require a specific warm liquid temperature for activation, its fermentation activity in the dough still follows the general optimal temperature range of 75-85°F (24-30°C). Using cooler liquid or dough temperatures will simply result in a slower rise compared to active dry yeast activated properly and used in dough at an optimal temperature.
Wild Yeast (Sourdough): Temperature Management for Optimal Flavor
Sourdough starters rely on a symbiotic culture of wild yeasts and lactic acid bacteria. The optimal temperature range for sourdough fermentation is often slightly different and broader than for commercial yeast, with many cultures thriving between 70°F and 80°F (21°C to 27°C). However, flavor development is heavily influenced by temperature.
- Warmer temperatures (above 75°F / 24°C) tend to favor the wild yeasts, leading to a faster rise and potentially a less sour flavor profile.
- Cooler temperatures (65-70°F / 18-21°C) slow down the yeast but encourage the lactic acid bacteria, resulting in a slower rise and a more pronounced sourness.
- Cold fermentation in the refrigerator (38-45°F / 3-7°C) dramatically slows both, allowing for very long fermentation periods (24-72 hours or more) which maximizes complex flavor development and improves dough structure.
Managing the temperature of your sourdough starter and dough is the primary tool for controlling its activity and influencing the final bread's flavor and texture.
Practical Tips for Yeast Fermentation Temperature Control
Achieving precise yeast fermentation temperature control doesn't require fancy equipment, though it certainly helps! Simple techniques and tools can make a significant difference in ensuring your dough ferments at the desired rate. Consistency is key, as fluctuating temperatures can lead to unpredictable results.
Here are some practical tips to help you maintain the ideal temperature for your dough during fermentation:
- Measure the temperature of your ingredients, especially the liquid.
- Calculate the desired dough temperature and adjust water temperature accordingly (using the DDT formula is advanced but effective).
- Find a consistent warm spot in your kitchen, like inside a turned-off oven with the light on.
- Use a proofing box or oven with a proofing setting if available.
- Consider cold fermentation in the refrigerator for flavor development.
Measuring Dough Temperature Accurately
Relying solely on ambient room temperature can be misleading, as the dough's internal temperature is what matters most for yeast activity. A simple digital instant-read thermometer is an invaluable tool for yeast fermentation temperature control. After mixing, insert the probe into the center of the dough mass to get an accurate reading.
Knowing the dough temperature allows you to assess if it's in the target range (e.g., 75-80°F / 24-27°C for a standard warm rise, or 40°F / 4°C for cold fermentation). If it's too cold, you can move it to a warmer spot; if it's too warm, you can place it in a slightly cooler location or even briefly in the refrigerator to bring the temperature down.
Controlling Room Temperature for Fermentation
Your kitchen's ambient temperature significantly impacts the dough temperature. If your kitchen is cold (below 65°F / 18°C), fermentation will be very slow. If it's very warm (above 80°F / 27°C), fermentation will be rapid. Try to find a location in your home with a relatively stable temperature within your desired range.
- Avoid drafty spots.
- Keep dough away from direct sunlight or heat sources like ovens (unless using a turned-off oven with the light on as a proofing box).
- In cold weather, find the warmest spot, perhaps higher up where warm air collects.
- In hot weather, find the coolest spot, or consider cold fermenting in the refrigerator.
Using a Proofer for Precise Temperature Regulation
For serious bakers seeking consistent results, a dedicated dough proofer or an oven with a "proof" setting is the ultimate tool for yeast fermentation temperature control. These appliances provide a stable, humid environment at a precisely controlled temperature.
A proofer allows you to set the temperature anywhere from refrigerator temperatures up to around 120°F (49°C), although the optimal range for yeast activity is lower. Setting a proofer to 78°F (26°C), for example, guarantees that your dough ferments consistently at that temperature, regardless of your kitchen's climate. This eliminates much of the guesswork and variability associated with ambient temperature proofing.
Cold Fermentation (Retarding) Techniques
Cold fermentation, or retarding dough, is a technique where the dough undergoes a long, slow fermentation in the refrigerator, typically at temperatures between 38°F and 45°F (3°C to 7°C). This process significantly slows down yeast activity but allows enzymes and other microbial processes to continue, developing complex flavors and improving dough structure.
To cold ferment, simply place the dough in an airtight container or a bowl covered tightly with plastic wrap and refrigerate for anywhere from 12 hours to 3 days, depending on the recipe and desired outcome. This technique is excellent for scheduling baking and produces breads and pizza crusts with superior flavor and texture compared to rapid room-temperature fermentation.
The Sweet Spot: Achieving Ideal Yeast Fermentation Temperature
Finding the "sweet spot" for yeast fermentation temperature control isn't about one magic number, but rather finding the temperature that best suits the specific recipe, yeast type, and desired outcome (speed vs. flavor). For most standard recipes using commercial yeast, aiming for a dough temperature between 75°F and 80°F (24°C to 27°C) is a good starting point for a balance of reasonable speed and decent flavor development.
However, don't be afraid to experiment with cooler or warmer temperatures (within the safe ranges) and observe how they affect your dough. A slightly warmer temperature (up to 85°F / 30°C) can speed things up on a tight schedule, while a cooler temperature (68-72°F / 20-22°C) over a longer time will build more flavor.
Visual Cues for Properly Fermented Dough
Beyond temperature and time, visual cues are essential indicators of proper fermentation. For the first rise (bulk fermentation), dough is typically ready when it has roughly doubled in volume. It should look visibly puffy and feel light and airy. The surface might show some small bubbles.
For the second rise (proofing), the dough should increase significantly in size, often expanding by 50-100% depending on the recipe and desired outcome. A properly proofed loaf will look soft and pillowy, and its surface will appear smooth and inflated. These visual cues, combined with temperature control and the poke test, help determine readiness.
Testing Dough Fermentation: The Float Test
The float test is a common method to check if a small piece of dough from a sourdough starter or fermented dough is ready. Take a small piece of dough (about the size of a walnut) and gently drop it into a bowl of water at room temperature.
If the dough floats, it indicates that enough carbon dioxide has been produced and trapped within the gluten structure to make it buoyant. This suggests the dough is sufficiently fermented. If it sinks, it likely needs more time to ferment. This test is particularly useful for sourdough starters to check their activity level before baking.
Adjusting Fermentation Time Based on Temperature
This is perhaps the most crucial aspect of yeast fermentation temperature control. Recipe times are usually guidelines based on a typical room temperature (often assumed to be around 70-75°F / 21-24°C). If your dough temperature is cooler, the fermentation will take longer; if it's warmer, it will be faster.
- If your dough is fermenting at 68°F (20°C) instead of the recipe's assumed 75°F (24°C), it might take 50-100% longer to reach the same volume increase.
- If your dough is at 80°F (27°C), it might reach the target volume 25-50% faster.
- Always watch the dough, not just the clock, especially if you are not controlling the temperature precisely. Use visual cues and the poke test to determine readiness.

Even with careful yeast fermentation temperature control, sometimes things don't go as planned. Understanding common issues related to temperature can help you diagnose problems and adjust your approach for future bakes.
| Problem | Likely Temperature Cause | How to Identify | Potential Solutions |
|---|---|---|---|
| Dough Not Rising | Too cold, or liquid used was too hot (killed yeast) | Dough shows no or minimal volume increase | Gently warm dough; Check yeast freshness & liquid temp for next batch |
| Dough Rising Too Fast | Too warm | Dough doubles very quickly, looks very puffy | Move to cooler spot; Reduce proofing time; Consider cold fermentation next time |
| Dough Collapsing | Over-proofed due to high temp / too long time | Dough rose, then started to shrink or is fragile | Handle gently; Bake immediately; Reduce initial yeast or lower temp next time |
Dough Not Rising: Investigating Temperature Issues
If your dough isn't rising, temperature is often the first suspect after checking that your yeast is fresh and active. If the dough feels cold to the touch, it's likely too cold for the yeast to be active. Warm it up gently using one of the methods described earlier (warm oven with light on, warm water bath).
Alternatively, if you used active dry yeast and proofed it in liquid that felt very warm, you might have killed the yeast. Check the temperature you used – ideally it should be between 105-115°F (40-46°C). If you used hotter water, the yeast is likely dead, and you'll need to start over with fresh yeast and correctly tempered liquid.
Over-Proofing: Preventing and Correcting Temperature Imbalances
Over-proofing occurs when dough ferments for too long or too quickly (often due to high temperatures), causing the gluten structure to weaken and collapse. To prevent this, be mindful of your dough's temperature and adjust fermentation time accordingly. If your kitchen is warm, check the dough's progress more frequently.
If you catch dough that is starting to over-proof but hasn't completely collapsed, you can try to gently reshape it and give it a very short final proof (or none at all) before baking immediately. If it has completely collapsed and become very sticky and loose, it might be salvageable as a flatbread or focaccia, but it won't achieve the intended lofty structure. Preventing over-proofing through diligent yeast fermentation temperature control is always the best approach.
Advanced Techniques: Manipulating Temperature for Flavor Development
Once you've mastered basic yeast fermentation temperature control, you can explore advanced techniques that use temperature specifically to enhance flavor and texture. These methods often involve longer fermentation times at non-traditional temperatures to encourage specific enzymatic activities and the production of desirable flavor compounds.
These techniques require patience but reward the baker with breads that have deeper, more complex aromas and textures. Manipulating temperature allows you to become a true alchemist of flavor in your kitchen.
Cold Proofing for Enhanced Flavor Complexity
Cold proofing, or retarding the final rise in the refrigerator, is a technique commonly used for sourdough and lean bread doughs. After shaping, the loaves are placed in the refrigerator (38-45°F / 3-7°C) for an extended period, often 12-48 hours.
During this slow, cold fermentation, enzymatic activity continues, breaking down starches into sugars, which caramelize beautifully in the oven, contributing to crust color. More importantly, the slow metabolic activity of yeast and bacteria produces organic acids and other volatile compounds that contribute to the bread's complex aroma and flavor profile. This technique is a cornerstone of developing the characteristic tang in sourdough and nuanced flavors in artisan breads.
Using a Warm Environment for Rapid Proofing
While slower fermentation often yields better flavor, sometimes speed is necessary. Using a warm environment, such as a proofing box set to 80-85°F (27-30°C) or a warm oven with the light on, allows for rapid proofing. This is useful for enriched doughs (like brioche or cinnamon rolls) that benefit from a quick rise to achieve a light, tender texture without developing excessive tang.
Rapid proofing is also practical when you're short on time. However, it's a trade-off: you gain speed but sacrifice some depth of flavor. If using this method, keep a close eye on the dough as it will rise much faster, and be careful not to over-proof. This method highlights how yeast fermentation temperature control is a tool to achieve different outcomes based on the baker's goals.
Conclusion: Mastering Yeast Fermentation Temperature for Baking Success
Understanding and controlling the temperature during yeast fermentation is arguably one of the most impactful skills a baker can develop. From the initial activation of yeast to the final proof before baking, temperature dictates the speed of fermentation, the development of gluten structure, and the creation of complex flavors and aromas. Whether you're a beginner or an experienced baker, paying attention to yeast fermentation temperature control will consistently improve your results.
By recognizing the optimal temperature ranges for different yeasts, learning to measure dough temperature, and utilizing simple techniques like finding a warm spot or employing cold fermentation, you gain the power to guide your dough towards perfection. Don't let temperature be a mystery; make it your ally in the kitchen.
Key Takeaways: Temperature's Influence on Yeast Fermentation
- Yeast activity is highly temperature-dependent, with an optimal range typically between 75-85°F (24-30°C) for rapid fermentation.
- Temperatures below this range slow down fermentation, which can be used intentionally for flavor development (cold fermentation).
- Temperatures significantly above this range can stress or kill yeast, leading to rapid, uncontrolled fermentation or inactive dough.
- Precise yeast fermentation temperature control influences rise rate, dough structure, and the development of complex flavors.
- Different yeast types (active dry, instant, wild) have slightly different temperature considerations, particularly regarding activation and optimal activity ranges for flavor.
- Measuring dough temperature and using techniques like proofing boxes or cold fermentation are key to consistent results.
- Always observe the dough's visual cues and feel, adjusting fermentation time based on its actual temperature rather than strictly following recipe times.
Resources: Further Exploration of Yeast Baking
- Consult baking science books that delve deeper into the biochemistry of yeast and dough.
- Explore online forums and communities dedicated to baking science and sourdough for shared experiences and tips on yeast fermentation temperature control.
- Experiment with different temperatures in your own kitchen, keeping detailed notes on dough behavior and final baked results to learn what works best for you and your environment.
Frequently Asked Questions
What is the ideal temperature range for yeast fermentation when baking?
The ideal range generally falls between 70-80°F (21-27°C). This temperature range allows the yeast to actively ferment, producing the carbon dioxide needed for rising.
Why is temperature control so important during yeast fermentation?
Temperature significantly impacts yeast activity. If it's too cold, fermentation slows down; if it's too hot, the yeast can die or produce undesirable flavors.
What happens if the dough is too cold during yeast fermentation?
If the dough is too cold, the yeast becomes sluggish. This results in a slower rise, which could lead to a dense and less flavorful baked product.
How can I control the temperature of my dough during yeast fermentation, especially in a cold kitchen?
You can create a warmer environment by placing the dough in a slightly warmed oven (turned off!), using a proofing box, or placing the bowl in a warm water bath.
What are the consequences of over-fermenting dough due to excessively high temperatures?
Over-fermentation, caused by high temperatures, leads to a deflated dough with a sour or alcoholic taste. The gluten structure can also weaken, resulting in a dense, unpleasant texture.
Final Reflection: Harnessing the Heat: Yeast's Delicate Dance
Understanding the precise impact of temperature on yeast fermentation is not merely a scientific curiosity; it's the key to unlocking consistent, high-quality results in countless food and beverage applications. From the artisan baker crafting sourdough to the brewer perfecting their latest IPA, mastering temperature control is paramount to success. The subtle shifts in yeast activity, as detailed throughout this article, directly translate to the final product's flavor, texture, and overall quality.
The exploration of optimal temperature ranges for yeast fermentation has profoundly shaped our understanding of this fundamental biological process. It's a testament to the intricate interplay between biology and human ingenuity, allowing us to harness the power of microscopic organisms for our own benefit. This journey of discovery continues, pushing the boundaries of what's possible in food production and beyond. The art of brewing is the art of controlling variables.
This simple statement encapsulates the essence of what we've discussed, highlighting the critical role of precise temperature management.
Now, consider your own experiences with baking or brewing. Have you noticed inconsistencies in your results? Perhaps a slightly off temperature was the culprit. I urge you to take the knowledge gained here and apply it to your next project. Experiment with different temperature ranges, meticulously record your observations, and witness firsthand the transformative power of controlled fermentation. The journey of mastering yeast fermentation is a rewarding one, filled with the satisfaction of creating something delicious and truly your own.
Unleash Your Inner Baker: Master Yeast's Temperature Tango!
Thanks for diving into the fascinating world of yeast fermentation! You've now unlocked a key to baking success – understanding the crucial role temperature plays. Ready to put this knowledge into action?
- Try a Temperature Experiment: Bake your favorite bread recipe, but this time, carefully monitor and record the temperature of your yeast mixture throughout the process. Note the impact on rise time and final product. This hands-on approach will solidify your understanding!
- Share Your Findings: Have a temperature-related baking triumph (or even a learning experience!)? Let’s connect! Share your story – and your results – in the comments below. Inspire other bakers!
- Explore Advanced Techniques: Delve deeper into the science behind yeast fermentation. Research different proofing methods and temperature control techniques to refine your skills.
What temperature variations have you noticed most impact your baking success? Let's discuss!