
Effectively Use Edible Spray Paints for Quick Color Coverage

Welcome to BakeWithEase, your baking sanctuary! Ever dreamt of achieving that flawless, vibrant finish on your pastries with minimal effort? Our latest guide unveils the secrets to effectively using edible spray paints – and even exploring surprisingly simple edible spray paint recipes you can create at home. Intrigued? Discover how to transform your desserts with a burst of color and creativity... let's get baking!
Edible spray paint has revolutionized the world of cookie decorating, offering a fast, efficient, and visually stunning way to add vibrant color and intricate detail to your baked creations. Whether you're a seasoned decorator or just starting to explore advanced techniques, mastering the use of edible spray paints can elevate your cookies from simple treats to edible works of art. This guide will walk you through everything you need to know, from understanding the paint itself to advanced application techniques and equipment care, helping you confidently use edible spray paint recipes and store-bought options.
- Introduction to Edible Spray Painting for Cookie Decorating
- Understanding Edible Spray Paint Ingredients
- Essential Tools and Equipment for Edible Spray Painting
- Step-by-Step Guide to Using Edible Spray Paint on Cookies
- Troubleshooting Common Edible Spray Paint Issues
- Edible Spray Paint Ideas and Techniques for Cookie Decorating
- Caring for Your Edible Spray Paint Equipment
- Edible Spray Paint Safety and Best Practices
- Advanced Edible Spray Paint Techniques
- Conclusion: Elevate Your Cookie Decorating with Edible Spray Paints
- Frequently Asked Questions
- Final Reflection: The Colorful Future of Edible Art
- Unleash Your Inner Cake Artist: Master Edible Spray Paint!
Edible spray painting is a technique that uses airbrushing or aerosol cans filled with food-grade colorants to apply a fine mist of color onto baked goods, particularly cookies. This method allows for smooth, even coverage, gradients, and the use of stencils for complex designs that are difficult or time-consuming to achieve with traditional brushing or piping methods. It's a powerful tool for achieving professional-looking results quickly.
What is Edible Spray Paint? A Baker's Overview
Edible spray paint is essentially food coloring in a form suitable for spraying. It's made from food-grade dyes or pigments mixed with a carrier like alcohol or water, designed to adhere to the surface of baked goods and dry quickly. These paints are specifically formulated to be safe for consumption, unlike regular spray paints. They come in various forms, including pre-pressurized aerosol cans for convenience and concentrated liquids designed for use with an airbrush system. Understanding the composition is key to choosing the right type for your project or even attempting DIY edible spray paint recipes.
The primary ingredients in most commercial edible spray paints include water, alcohol (often grain alcohol like ethanol, which evaporates quickly), artificial or natural food colorings (like FD&C certified dyes or natural extracts), and sometimes emulsifiers or stabilizers. The alcohol content is crucial as it helps the paint dry rapidly, preventing drips and smudges on the cookie surface. While aerosol cans offer ease of use for quick bursts of color or full coverage, airbrush systems provide greater control over intensity, coverage, and the ability to mix custom shades or use specific edible spray paint recipes developed for airbrushing.
Using edible spray paint offers numerous benefits over traditional coloring methods for cookies. Firstly, it provides incredibly smooth and even color coverage, which is challenging to achieve with brushes, especially on large or irregularly shaped cookies. A light mist can cover a surface in seconds, saving significant time compared to hand-painting or flooding with royal icing. This speed is particularly advantageous when decorating large batches of cookies for events.
Secondly, edible spray paint allows for unique effects like gradients, shading, and highlights that add depth and realism to cookie designs. You can easily create an ombre effect by gradually layering color or add shadows to give elements a 3D appearance. Furthermore, when combined with stencils, edible spray paint enables the creation of intricate patterns, logos, or detailed images with crisp lines, opening up a vast array of design possibilities that would be nearly impossible with other techniques. Exploring different edible spray paint recipes or store-bought options can unlock even more creative potential.
For advanced cookie decorators, edible spray paint is more than just a convenience; it's a tool that enables complex artistic expression. It allows for precision coloring on detailed royal icing work, adding subtle nuances or bold statements. For instance, you can airbrush a metallic sheen onto specific elements of a cookie or create a realistic wood grain texture by layering colors and using stencils.
The ability to control the intensity and opacity of the color through multiple passes gives decorators fine-grained control over the final look. This level of detail is essential for creating highly realistic or artistic cookie designs, such as portrait cookies or cookies mimicking other materials like stone or fabric. Incorporating edible spray paint recipes into your repertoire allows for even greater customization and control over the colors and finishes you can achieve. It truly pushes the boundaries of what's possible in edible art.
Understanding Edible Spray Paint Ingredients
Delving into the composition of edible spray paint is crucial for both safety and achieving optimal results. Knowing what's in the paint helps you understand how it behaves, how to mix it, and what to expect regarding drying time and finish. This knowledge is particularly valuable if you plan to experiment with creating your own edible spray paint recipes.
Decoding Edible Spray Paint Ingredients: What's Inside?
As mentioned earlier, the core components of edible spray paint are food-grade colorants and a carrier liquid. The colorants are typically concentrated food dyes or pigments approved for consumption. These can be synthetic FD&C dyes, known for their vibrant and consistent colors, or natural colorings derived from fruits, vegetables, or other plants, which might offer more muted tones. The choice of colorant affects the final hue and opacity.
The carrier liquid is usually a fast-evaporating solvent. Alcohol, commonly grain alcohol like ethanol, is popular because it helps the paint dry almost instantly upon contact with the cookie surface, minimizing spreading or dripping. Some formulations might use water or a mix of water and alcohol.
Other potential ingredients include small amounts of emulsifiers to keep the color evenly dispersed, preservatives to extend shelf life (though many are shelf-stable due to the alcohol content), and sometimes flavorings, though these are less common in pure spray paints. Understanding these components is vital, especially when considering the safety and stability of DIY edible spray paint recipes.
DIY Edible Spray Paint: Creating Your Own Recipes
While commercial edible spray paints are readily available, some decorators prefer to create their own, often referred to as edible spray paint recipes. This allows for complete control over color mixing, opacity, and ingredients. A basic DIY recipe typically involves mixing highly concentrated gel or liquid food coloring with a food-grade alcohol, such as clear grain alcohol (like vodka) or even lemon extract (which contains alcohol).
The ratio of coloring to alcohol is critical; too much coloring can clog the airbrush, while too little results in a weak color. A common starting point might be a few drops of gel coloring per ounce of alcohol, adjusting based on desired intensity.
Creating your own edible spray paint recipes requires careful experimentation. The type of coloring used (gel vs. liquid vs. powder) will significantly impact the consistency and required alcohol ratio. For instance, powder colors need to be thoroughly dissolved first. It's essential to use food-grade ingredients and ensure they are finely mixed and strained if necessary, to prevent clogging, especially when using an airbrush. While this offers customization, consistency can be harder to achieve compared to commercial products.
Exploring Different Types of Edible Food Spray Paints
Beyond DIY edible spray paint recipes, the market offers various types of ready-to-use edible food spray paints. The most common are aerosol cans, which are convenient for quick, broad coverage or stenciling. These are great for achieving basic metallic finishes or solid colors rapidly. However, they offer less control over pressure and coverage area compared to airbrush systems.
Airbrush-specific edible paints are liquids designed to be used with an airbrush machine. These come in a vast range of colors, including metallics and pearlized finishes. They are typically more concentrated than aerosol paints and require an airbrush system for application. Airbrush paints allow for fine detail work, gradients, and precise control over the amount of paint applied. Some specialized edible spray paints are designed for chocolate or other specific surfaces, having different carrier liquids or compositions to adhere properly. Choosing the right type depends on your project needs, desired effects, and budget.
Essential Tools and Equipment for Edible Spray Painting
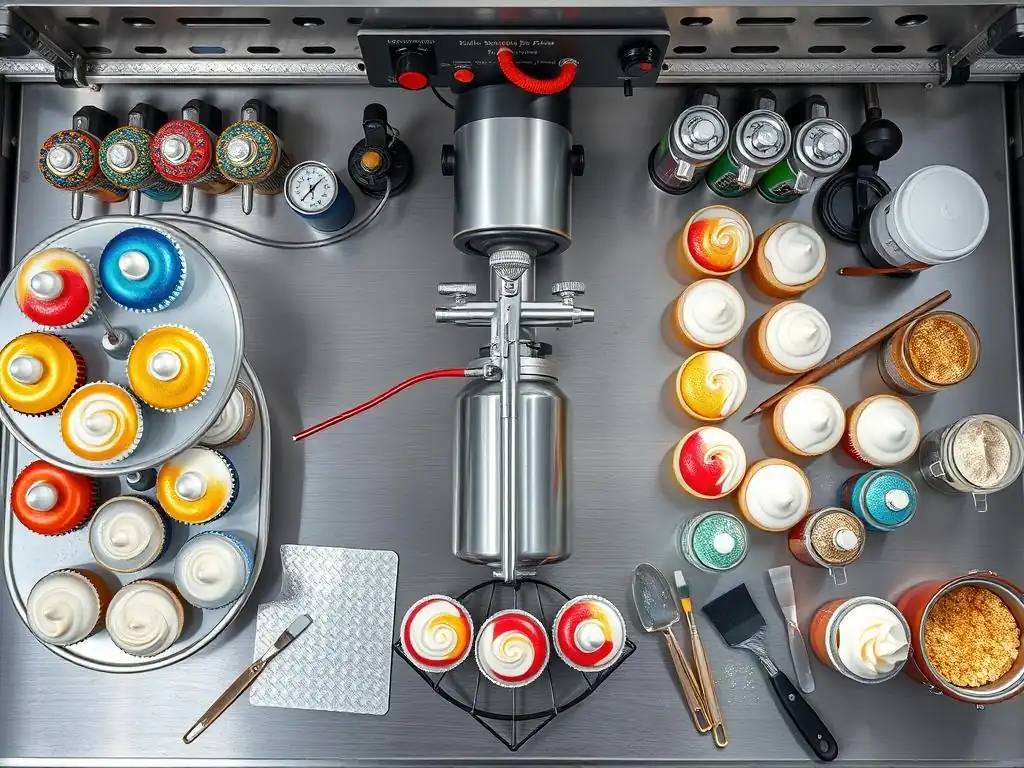
Achieving great results with edible spray paint goes beyond just having the paint itself. The right tools and a properly set up workspace are crucial for efficiency, cleanliness, and safety. Whether you're using an airbrush system or aerosol cans, having the right equipment makes the process smoother and the results more professional.
Preparing Your Workspace for Edible Spray Paint Application
Edible spray paint, while food-safe, can create a fine mist that travels. Proper workspace preparation is essential to avoid coloring unintended surfaces. Designate a well-ventilated area for spraying. Covering your work surface and surrounding areas with plastic sheeting, newspaper, or a disposable tablecloth is highly recommended. A spray booth, even a makeshift one made from a cardboard box, can help contain the overspray significantly.
Ensure good lighting so you can clearly see how the color is applying to your cookies. Have all your tools, paints (including any custom edible spray paint recipes), and cookies ready before you start spraying. A clean, organized space minimizes the risk of accidents and helps maintain food safety standards. Having paper towels or rags handy for quick cleanups is also advisable.
Choosing the Right Airbrush or Spray Gun for Edible Colors
If you plan on doing detailed work, gradients, or using airbrush-specific edible spray paint recipes, an airbrush system is necessary. These systems consist of a compressor and an airbrush gun. Compressors vary in power and features; a basic compressor suitable for cake decorating usually provides sufficient pressure (measured in PSI, typically 20-40 PSI is adequate). Look for a compressor with a moisture trap to prevent water from spitting onto your work.
Airbrush guns come in single-action (air and paint flow controlled by one trigger movement) or dual-action (air and paint flow controlled independently by trigger movement) types. Dual-action guns offer more control over the spray pattern and paint volume, making them better for detailed work and shading. When selecting an airbrush, ensure it's easy to clean, as edible paints can clog easily if not maintained properly. While some larger spray guns exist, airbrushes are generally preferred for the precision required in cookie decorating.
Safety Gear: Protecting Yourself During Edible Spray Painting
While edible spray paint is food-safe, inhaling the fine mist is not recommended. Proper safety gear is a must, especially when using an airbrush system or spraying for extended periods. A respirator mask designed for fine particles or vapors is highly recommended to protect your lungs from inhaling paint particles.
Gloves are also important to keep your hands clean and prevent transferring oils or dirt to the cookie surface. Safety glasses or goggles can protect your eyes from stray paint particles. Working in a well-ventilated area, as mentioned earlier, complements the use of personal protective equipment. Taking these precautions ensures a safer and more pleasant decorating experience, whether you're using commercial paints or experimenting with edible spray paint recipes.
Once you have your workspace prepared and your tools ready, it's time to start spraying. Following a systematic approach ensures you get the best possible results, whether you're applying a simple base coat or creating complex layered designs.
The first step is to ensure your cookies are properly prepared. For most edible spray paint applications, cookies are typically decorated with a base layer of royal icing that has completely dried and hardened. A smooth, dry surface is ideal for paint adhesion and prevents the color from bleeding or soaking into the icing unevenly. Allow royal icing to dry for at least 8-12 hours, or preferably 24 hours, before attempting to spray paint.
Ensure the cookie surface is free from any grease, crumbs, or dust. A gentle brush with a clean, dry pastry brush can help remove any surface debris. For bare cookies (like shortbread without icing), ensure they are completely cooled and free of excess surface butter. The texture of the cookie surface will directly impact how the spray paint adheres and looks, so a smooth, dry base is key. This preparation is crucial whether you're using a pre-made spray or one of your custom edible spray paint recipes.
Priming Techniques for Optimal Edible Paint Adhesion
While not always strictly necessary, priming can sometimes enhance the vibrancy and evenness of edible spray paint, especially on certain surfaces or when using lighter colors over darker ones. A thin, even layer of white edible paint (either airbrushed or a very thin layer of white royal icing) can serve as a primer, providing a consistent base color.
Alternatively, some decorators use a light dusting of cornstarch or powdered sugar brushed onto a slightly tacky royal icing surface just before it fully dries. This creates a very fine texture that can help hold the spray paint. However, this technique requires careful timing to avoid a powdery finish. For most applications on dry royal icing, a primer isn't needed, but if you find colors aren't adhering well or appearing vibrant enough, experimenting with a thin white base layer might help, particularly when working with less opaque edible spray paint recipes.
Applying Edible Spray Paint: Achieving Even Color Coverage
To achieve even color coverage with edible spray paint, whether from an aerosol can or an airbrush, hold the spray source a consistent distance from the cookie surface (typically 6-10 inches for aerosol, 3-6 inches for airbrush, depending on the tool and desired coverage). Use smooth, sweeping motions, moving across the cookie rather than spraying in one spot. Overlapping your passes slightly ensures full coverage without streaks.
Apply the paint in thin layers. It's better to apply two or three thin coats, allowing each to dry for a few seconds between passes, than one thick coat, which can lead to drips, pooling, or an uneven finish. Keep the spray source moving constantly while the trigger is engaged. Practice on a piece of parchment paper or a spare cookie to get a feel for the spray pattern and coverage before working on your final pieces. This technique applies whether you are using a commercial product or a batch of your favorite edible spray paint recipes.
Layering and Shading Techniques with Edible Spray Paint
Layering and shading are where edible spray paint truly shines for adding depth and dimension. To layer colors, simply allow the first color to dry completely (which happens very quickly with alcohol-based paints), then apply the next color on top. This is how you build complexity in a design or create multi-colored backgrounds.
For shading, use your airbrush (or carefully controlled bursts from an aerosol can) to apply color selectively to certain areas. To create shadows, apply a darker shade lightly along edges or in recessed areas. For highlights, use a lighter color or even white in raised areas or where light would naturally hit.
Varying the distance of the airbrush from the surface and the amount of paint applied allows for subtle transitions and blending. Dual-action airbrushes are particularly effective for these techniques as they allow for precise control over paint flow and air pressure, enabling delicate shading effects not possible with simple edible spray paint recipes applied with a brush.
Troubleshooting Common Edible Spray Paint Issues
Like any decorating technique, using edible spray paint can present challenges. Knowing how to identify and fix common problems will save you frustration and ensure your cookies turn out beautifully.
Addressing Uneven Color Distribution
Uneven color distribution, resulting in splotchy or streaky coverage, is a common issue. This often occurs due to inconsistent spraying technique, holding the spray source too close or too far, or not moving it continuously. The solution is to practice your sweeping motion and maintain a consistent distance. Applying multiple thin layers instead of one thick layer also helps achieve a smoother finish.
Another cause can be clogged paint or an improperly mixed edible spray paint recipe. Ensure your paint is well-shaken or stirred and properly filtered if it's a DIY mix. If using an airbrush, check that the nozzle is clean and the air pressure is consistent. Sometimes, the cookie surface itself might be the issue – uneven royal icing or residual grease can prevent the paint from adhering uniformly.
Preventing Clogging in Your Spray Gun
Clogging is a frequent problem with airbrushes, especially when using thicker paints or improperly mixed edible spray paint recipes. The best way to prevent clogging is to use paints specifically designed for airbrushing and to ensure any DIY mixes are very finely filtered. Always thin your paint appropriately according to the manufacturer's instructions or your recipe's guidelines; it should have a consistency similar to milk.
Regular cleaning is paramount. Clean your airbrush thoroughly immediately after each use, especially when switching colors. Even a few minutes of dried paint can cause blockages. Disassemble the airbrush and use appropriate cleaning solutions (often water or alcohol, depending on the paint base) and small cleaning brushes or wires to clear all passages. Running clean solvent through the airbrush between color changes is also a good practice.
Fixing Runs and Drips in Edible Spray Paint
Runs and drips happen when too much paint is applied in one area, overwhelming the surface's ability to hold it or the paint's ability to dry quickly. This is often a result of holding the spray source too close, moving too slowly, or applying too thick a layer.
To fix minor runs on a dry surface, you might be able to gently dab them with a clean, dry brush or paper towel if the paint is still slightly wet. If the run has dried, it's much harder to fix seamlessly. The best approach is prevention: apply paint in light, even coats, allowing each layer to dry before applying the next.
Ensure your edible spray paint recipes have a high enough alcohol content to facilitate rapid drying. If a run occurs, sometimes the best option is to let it dry completely and potentially cover it with additional decoration, like piping or sprinkles, if the design allows.
Dealing with Texture Issues: Achieving a Smooth Finish
Ideally, edible spray paint should dry to a smooth finish. Texture issues can arise from several factors. Applying paint too heavily can create a slightly textured or bumpy surface. Spraying from too far away can cause the paint to partially dry before hitting the surface, resulting in a dusty or speckled texture (often called "overspray" or "dry tip").
To achieve a smooth finish, ensure your paint is properly thinned and your airbrush is clean and functioning correctly. Hold the spray source at the recommended distance and apply paint in smooth, consistent passes. If you encounter a dusty texture, move slightly closer to the cookie or increase the paint flow slightly (if using an airbrush).
If the surface below the paint is textured (e.g., bumpy royal icing), the paint will follow that texture. Ensure your base layer is as smooth as possible before spraying. Experimenting with the consistency of your edible spray paint recipes can also help optimize for a smooth finish.
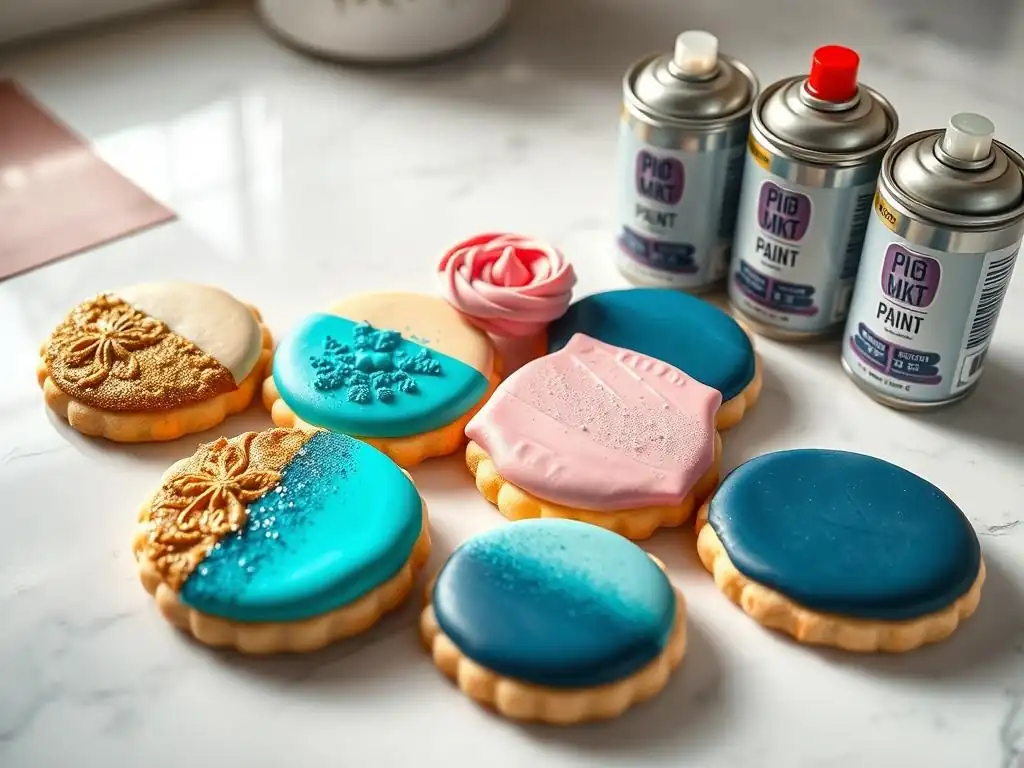
Beyond basic color coverage, edible spray paint opens up a world of creative possibilities. Combining it with other techniques or using it in inventive ways can transform your cookies into stunning edible art pieces.
Creating Ombre Effects with Edible Spray Paint
Ombre, the gradual blending of one color hue to another, is a popular and beautiful effect easily achieved with edible spray paint. To create an ombre effect, start with your base color (or leave the base white). Begin spraying the lightest color very lightly at one end of the cookie, moving the spray source back and forth.
Then, introduce the next color, overlapping slightly with the first, and concentrate the spray more heavily towards the area you want that color to dominate. Continue this process with subsequent colors, gradually building intensity and blending where the colors meet. Using an airbrush allows for the most control over the subtle transitions required for a smooth ombre. Practice on parchment paper first to perfect your color transitions before applying to your cookies. This technique works wonderfully with both commercial paints and carefully crafted edible spray paint recipes designed for blending.
Using Stencils for Intricate Designs with Edible Colors
Stencils are fantastic tools to use with edible spray paint for adding patterns, images, or text with crisp, clean lines. Place a clean, dry stencil flat against the surface of your dried royal icing cookie. Hold the stencil firmly in place to prevent underspray.
Spray a thin layer of edible paint over the stencil, holding the spray source perpendicular to the surface. Avoid spraying at an angle, as this can force paint underneath the stencil edges. Apply just enough paint for coverage; oversaturating can also lead to bleeding under the stencil. Carefully lift the stencil straight up immediately after spraying.
For multi-colored stencils, allow each color layer to dry completely before applying the next or repositioning the stencil. Stencils are a great way to quickly replicate detailed designs across many cookies, enhanced by the speed of edible spray paint application. Many edible spray paint recipes can be used effectively with stencils, provided they are thinned correctly.
Adding Metallic Accents with Edible Spray Paint
Metallic edible spray paints are incredibly popular for adding shimmer and luxury to cookies. These often contain mica-based pigments that reflect light. They are available in aerosol cans (commonly gold, silver, bronze) and as airbrush-specific liquids.
To apply metallic spray paint, shake the can or airbrush paint reservoir thoroughly before and during use, as the metallic particles can settle. Apply in thin, even coats over a dry base color (black, white, or a color matching the metallic hue can enhance the effect). Building up layers will increase the opacity and shine.
Be aware that some metallic edible spray paint recipes might require a specific carrier liquid or mixing technique to keep the mica particles suspended and spray evenly. Metallic sprays are perfect for adding elegant touches, highlighting details, or creating fully metallic cookies for special occasions.
Edible spray paint is a versatile tool that works well in conjunction with other decorating methods. For example, you can pipe intricate details with royal icing, let them dry, and then airbrush a gradient background behind them. Or, you can flood a cookie with one color of royal icing, let it dry, then use a stencil and edible spray paint to add a pattern on top.
Another common technique is to use edible markers or painted details on top of a sprayed background. You can also use edible spray paint to color fondant or gum paste elements before attaching them to the cookie. Experimenting with combining techniques, such as using edible spray paint recipes for a base color and then adding brush-painted details or piped accents, can lead to unique and stunning cookie designs. The key is to ensure each layer is dry before applying the next technique.
Caring for Your Edible Spray Paint Equipment
Proper care and maintenance of your edible spray paint equipment are essential for its longevity and performance. Neglecting cleaning, especially with airbrushes, is the quickest way to cause clogs and malfunctions.
Cleaning Your Airbrush or Spray Gun After Use
Thorough cleaning immediately after each use is non-negotiable for airbrushes. If using water-based edible paints or edible spray paint recipes with a water base, flush the airbrush with clean water until it runs clear. If using alcohol-based paints or recipes, flush with clean alcohol (like vodka or airbrush cleaner).
For a more thorough clean, especially after using opaque or metallic colors, disassemble the airbrush according to the manufacturer's instructions. Use small cleaning brushes, pipe cleaners, and specialized airbrush cleaning solutions (if available and compatible with edible paints) to clean all parts, particularly the needle, nozzle, and paint cup. Soak stubborn, dried paint in a suitable solvent if needed. Reassemble only when all parts are completely clean and dry. Running water or solvent through the airbrush between color changes during a single decorating session is also recommended.
Storing Edible Spray Paint Properly
How you store your edible spray paint affects its shelf life and usability. Aerosol cans should be stored upright in a cool, dry place away from direct sunlight and heat sources. Ensure the cap is securely on to prevent accidental spraying.
Liquid edible paints for airbrushes, including your custom edible spray paint recipes, should also be stored in airtight containers in a cool, dark place. Refrigeration is not usually necessary unless specified by the manufacturer, but keeping them away from temperature extremes is important. Always ensure lids are tightly sealed to prevent the carrier liquid (especially alcohol) from evaporating, which can thicken the paint and lead to clogging. Check the expiration dates on commercial paints and note the date you mixed any DIY recipes.
Maintaining Your Equipment for Longevity
Regular maintenance goes beyond just cleaning. Periodically check your airbrush compressor for proper function. Ensure the air hose connections are secure and leak-free. If your compressor has a moisture trap, empty it regularly.
Inspect your airbrush gun for any damage to the needle or nozzle. Bent needles or damaged nozzles can cause irregular spray patterns. Keep a set of spare parts (needles, nozzles, O-rings) handy, as these are small and can be easily lost or damaged. Lubricate moving parts according to the manufacturer's instructions using food-grade lubricant if necessary. Proper maintenance ensures your equipment is always ready when you want to use your edible spray paint recipes or commercial paints.
Edible Spray Paint Safety and Best Practices

Using edible spray paint involves working with food products and potentially aerosols or air compressors. Adhering to safety guidelines and best practices ensures that your decorating process is safe and the final cookies are safe for consumption.
Understanding Food Safety Regulations for Edible Colors
All colorants used in edible spray paint must be food-grade and approved for consumption in your region. In the United States, this means using FD&C certified dyes or other colorings on the FDA's list of approved food additives. Natural colorings must also be approved. Ensure that any commercial edible spray paint you purchase explicitly states it is "edible" or "food-grade" and lists approved ingredients.
When creating your own edible spray paint recipes, source food colorings and carrier liquids (like alcohol) that are specifically labeled as food-grade. Using non-food-grade products, even if they seem similar, can introduce harmful substances. Maintain a clean workspace and follow general food handling safety practices throughout the decorating process.
Avoiding Common Mistakes When Using Edible Spray Paint
Several common mistakes can hinder success with edible spray paint. One is not letting royal icing dry completely before spraying, leading to bleeding or damage to the icing surface. Another is applying paint too heavily, causing drips and an uneven finish. Forgetting to shake or stir the paint can lead to inconsistent color or clogging, especially with metallic or DIY edible spray paint recipes.
Not cleaning your equipment thoroughly after use is a major pitfall that leads to clogs and reduced performance. Skipping safety gear like a respirator mask can lead to inhaling paint particles. Finally, holding the spray source too close or too far can result in poor coverage or texture issues. Being mindful of these common errors will improve your results.
The primary concern is ensuring all materials used are food-safe. As mentioned, only use edible-grade paints and ingredients. Ensure your workspace is clean and sanitized, just as you would for any food preparation.
While alcohol-based edible spray paints dry quickly, allowing the painted cookies to air dry completely before packaging or stacking is important. This prevents smudging and ensures any residual alcohol has evaporated. Store decorated cookies in airtight containers away from moisture and direct sunlight to maintain quality and safety. If using edible spray paint recipes with different carrier liquids, ensure they are also food-safe and evaporate or are otherwise safe for consumption in the quantities used.
Advanced Edible Spray Paint Techniques
Once you've mastered the basics, you can explore more advanced techniques to create truly spectacular cookie designs using edible spray paint.
Creating Realistic Textures with Edible Spray Paint
Edible spray paint is excellent for mimicking realistic textures like wood grain, stone, or fabric. For wood grain, start with a base color, then use a stencil with a wood grain pattern and apply a darker shade with your airbrush, varying the pressure and distance slightly to create depth. Layering different brown and black tones can enhance the effect.
For stone or marble, apply a base color, then use torn paper or plastic wrap as a stencil, lightly spraying contrasting colors through the gaps and lifting the stencil quickly. For fabric textures, you can use textured stencils or even real fabric (ensure it's clean and food-safe or use a barrier) as a guide for spraying. Experimenting with different edible spray paint recipes with varying opacities can also help achieve different textural effects. The key is layering thin coats and using light, controlled bursts of paint.
Mastering Freehand Edible Spray Painting
Freehand airbrushing allows for artistic expression without the constraints of stencils. This technique requires practice to control the spray pattern and create desired shapes and shading directly onto the cookie. You can freehand airbrush elements like clouds, abstract backgrounds, or even simple illustrations.
Varying the distance from the cookie and the air pressure (if your compressor allows) provides control over the spray width and softness. Holding the airbrush closer creates sharper lines and smaller dots, while moving it further away creates softer edges and broader coverage. Mastering freehand requires good hand-eye coordination and consistent practice. It's a skill that develops over time, allowing for highly customized and unique cookie designs using your preferred edible spray paint recipes.
Developing Unique Color Palettes with Edible Spray Paint Recipes
One of the greatest advantages of liquid edible paints and airbrush systems is the ability to mix custom colors. While commercial edible spray paint recipes offer a wide range, being able to blend colors allows you to match specific themes, branding, or create truly unique hues.
Start with primary edible colors and experiment with mixing small amounts in your airbrush cup or a separate container. Keep notes on the ratios you use to recreate successful custom colors later. Consider the base color of your cookie or icing, as this will affect the final appearance of the sprayed color. Developing your own edible spray paint recipes for specific color palettes opens up endless creative possibilities and ensures your cookies are always perfectly coordinated.
Edible spray paint is a powerful and versatile tool that can significantly enhance your cookie decorating skills. From providing quick, even coverage to enabling intricate stenciled designs, realistic textures, and beautiful gradients, it offers capabilities that are difficult to replicate with traditional methods.
The Future of Edible Spray Paint in Baking
The use of edible spray paint in baking, particularly for intricate decorations on cookies and cakes, continues to grow. As technology advances, we may see even finer airbrush systems, more vibrant and stable edible colorants, and perhaps even edible paint printers capable of applying complex digital designs directly onto baked goods. The development of more natural and allergen-friendly edible spray paint recipes is also likely to expand its accessibility and appeal.
The demand for highly customized and visually stunning baked goods ensures that techniques like edible spray painting will remain relevant and continue to evolve, offering decorators new ways to express their creativity and meet customer demands for unique edible art.
To consistently achieve great results with edible spray paint:
- Always start with a completely dry and smooth cookie surface (typically royal icing).
- Apply paint in thin, even layers, allowing each layer to dry quickly between passes.
- Hold the spray source at a consistent distance and use smooth, sweeping motions.
- Use appropriate safety gear, especially a respirator mask, in a well-ventilated area.
- Clean your airbrush or spray gun thoroughly immediately after every use.
- Practice on scrap cookies or parchment paper before working on your final pieces.
- Experiment with different colors, techniques, and even your own edible spray paint recipes to find what works best for your style and project.
By following these guidelines and dedicating time to practice, you'll find edible spray paint becomes an indispensable tool in your cookie decorating arsenal, helping you create stunning, professional-quality cookies with speed and precision.
Frequently Asked Questions
What exactly is edible spray paint and what is it used for?
Edible spray paint is a food-safe coloring agent used to quickly and evenly coat baked goods. It's primarily used for adding metallic sheens or vibrant colors to cakes, cookies, and other desserts for decorative purposes.
Where can I find edible spray paint recipes?
While BakeWithEase offers many baking recipes, finding a DIY edible spray paint recipe is tricky. Typically, pre-made edible sprays are recommended for safety and consistency. However, related techniques and tips can be found on our site.
Is edible spray paint safe to consume?
Yes, edible spray paint is formulated to be safe for consumption in small quantities. Always read the product label and follow the manufacturer's instructions for proper usage and to avoid any potential allergic reactions.
What are some tips for using edible spray paint effectively?
To achieve the best results, shake the can well, hold it about 6-8 inches away from the surface, and apply in light, even coats. Allow each coat to dry completely before applying another to prevent drips and ensure even coverage.
Can I use edible spray paint on any type of baked good?
Edible spray paint works best on surfaces that are relatively smooth and dry, such as fondant, buttercream, or chocolate. Be cautious with porous surfaces like bread, as they may absorb the spray unevenly.
Final Reflection: The Colorful Future of Edible Art
The ease and precision of edible spray paints are revolutionizing the way we approach food decoration, moving beyond simple sprinkles and frostings to a world of vibrant, customizable creations. This accessibility opens doors for both professional pastry chefs and home bakers, allowing for intricate designs and personalized touches previously unimaginable. The demand for unique and visually stunning desserts is higher than ever, and edible spray paints are perfectly positioned to meet this growing need.
The impact of readily available edible spray paint recipes extends beyond mere aesthetics; it fosters creativity and empowers individuals to express themselves through culinary art. It's a democratization of design, allowing anyone with a vision and a can of paint to transform ordinary treats into extraordinary masterpieces. The most beautiful thing we can experience is the mysterious. It is the source of all true art and science.
- Albert Einstein. This quote, while not directly about edible spray paint, speaks to the inherent wonder and creativity that this technique unlocks, transforming the mundane into something awe-inspiring.
Now, it's your turn. Consider the possibilities: What delicious creations will you bring to life using the techniques and recipes explored in this article? Don't be afraid to experiment, to push boundaries, and to let your imagination run wild. The world of edible art awaits, and your unique contribution is ready to be unveiled. Grab your spray can and let the colors flow!
Unleash Your Inner Cake Artist: Master Edible Spray Paint!
Thanks for diving into the world of edible spray paints with us! You've just unlocked a whole new level of cake decorating creativity. Ready to put your newfound knowledge into action?
- Transform a plain cake into a masterpiece: Grab your supplies and try a simple design you've always dreamed of. It's easier than you think!
- Share your creation: Show off your edible spray paint skills on social media using #BakeWithEaseSprayPaint – we'd love to see what you create!
- Experiment with different techniques and flavors: Don't be afraid to get creative and try new flavor combinations. The possibilities are endless!
What unexpected flavor combination will you try with your next edible spray paint project?