
Incorporate Wafer Paper for Lightweight, Intricate Cookie Decoration

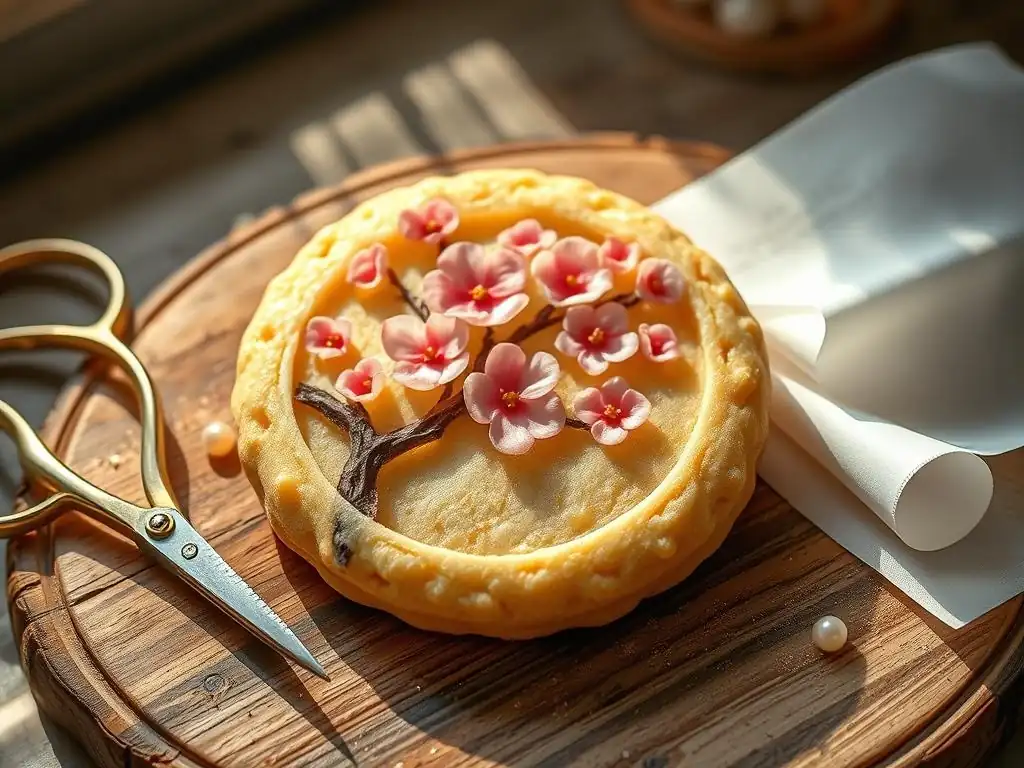
Welcome to BakeWithEase, your haven for baking inspiration! Ever dreamt of crafting cookies that are not only delicious but also breathtakingly beautiful? This time, we delve into a technique that unlocks a world of delicate detail: wafer paper cookie decorating. Prepare to be amazed at how easily you can transform ordinary cookies into edible works of art. Read on to discover the secrets and techniques that will elevate your baking game!
- Wafer Paper for Exquisite Cookie Decoration
- Introduction to Wafer Paper Cookie Decorating
- Essential Tools and Materials
- Preparing Wafer Paper
- Applying Wafer Paper to Cookies
- Advanced Techniques
- Troubleshooting
- Project Ideas
- Tips and Tricks
- Conclusion: Elevate Your Cookie Decorating
-
Frequently Asked Questions
- What exactly is wafer paper, and why is it good for cookie decorating?
- Can I print on wafer paper, and if so, what kind of printer do I need?
- How do I apply wafer paper to my cookies without it wrinkling or dissolving?
- What are some creative ways to use wafer paper besides just printing images?
- Is wafer paper safe to eat, and does it have a noticeable taste?
- Final Reflection: The Delicate Art of Wafer Paper Wonders
- Unleash Your Inner Cookie Artist!
Wafer paper, also known as rice paper (though it contains no rice), is a versatile edible paper made primarily from potato starch, water, and vegetable oil. It's virtually flavorless and dissolves in water, making it an excellent medium for adding intricate designs and textures to edible creations like cookies. Unlike fondant or royal icing which add significant weight and sweetness, wafer paper is incredibly lightweight and thin, typically ranging from about 0.27mm to 0.65mm in thickness. This allows for delicate, detailed decorations that don't overpower the cookie's taste or structure.
Utilizing wafer paper for cookie decorating opens up a world of creative possibilities that are difficult to achieve with traditional methods. Its smooth surface is perfect for printing edible images or creating hand-painted designs with edible inks. Because it's so thin, it can be easily cut into complex shapes using scissors, craft punches, or even electronic cutting machines, offering precision that piping often can't match. For example, creating a delicate lace pattern or a realistic floral arrangement on a cookie becomes significantly more manageable and visually striking with wafer paper.
One of the primary benefits of incorporating wafer paper into your cookie decorating repertoire is the ability to achieve highly detailed and realistic effects with relative ease compared to sculpting or intricate piping. Think of creating wafer paper feathers that are gossamer-thin or delicate butterfly wings that appear almost translucent. These effects are challenging and time-consuming with other edible mediums. Wafer paper dries quickly when applied correctly and doesn't require the extensive drying time that royal icing demands for complex layered designs, which can be hours or even overnight depending on humidity.
Furthermore, wafer paper offers a significant advantage in terms of texture and flavor impact. It adds almost no discernible taste or texture to the cookie itself, allowing the flavor of your perfectly baked cookie to remain the star. This is a stark contrast to thick layers of fondant or royal icing that can alter the overall eating experience.
For decorators focused on creating lightweight, visually stunning designs for events or gifts, mastering wafer paper cookie decorating is invaluable. It provides a professional finish and allows for unique artistic expression, from photorealistic images printed directly onto the paper to abstract art created with edible paints.
Essential Tools and Materials
Must-Have Wafer Paper Decorating Tools
To embark on your wafer paper cookie decorating journey, you'll need a few key tools. Sharp scissors are essential for basic cutting, but for more intricate shapes, a craft knife (like an X-Acto knife) with a self-healing cutting mat is invaluable. Precision tweezers are also incredibly helpful for handling small or delicate pieces of wafer paper without damaging them. For applying the paper, a small, soft brush is needed for edible glue.
Beyond basic cutting tools, consider investing in specialized items to elevate your wafer paper cookie decorating. Craft punches designed for paper can create consistent shapes like circles, hearts, or stars quickly. If you plan on creating detailed patterns or cutting many identical shapes, an electronic cutting machine compatible with wafer paper can be a game-changer, offering unparalleled precision down to fractions of a millimeter. Ball tools and foam pads, typically used in gumpaste work, are also useful for shaping and adding dimension to wafer paper elements like petals or leaves.
Selecting the Right Type of Wafer Paper
Wafer paper comes in various thicknesses and grades. Standard wafer paper, often labeled as 'edible paper' or 'rice paper,' is the most common and is suitable for printing, basic cutting, and flat applications. It's relatively flexible but can be brittle, especially in dry conditions. Thicker grades, sometimes referred to as 'wafer card' or specific brand names like 'FlexiPaper,' offer more structure and flexibility, making them better suited for 3D work like standing elements or complex flower structures without needing additional support.
For wafer paper cookie decorating, the choice depends on your project. Standard thickness works well for flat applications like printed images or simple cutouts glued onto the cookie surface. If you're aiming to create realistic wafer paper flowers or other dimensional elements, opting for a slightly thicker or more flexible variety will yield better results and be less prone to breaking during manipulation. Always check the ingredient list; some wafer papers contain a small amount of sugar, which can affect how they handle moisture. For printing high-quality images, look for smooth, opaque varieties designed specifically for edible ink printers.
Edible Inks and Colors for Wafer Paper Designs
Edible inks are specially formulated food-grade inks used with dedicated edible ink printers to print images or patterns directly onto wafer paper. These inks are safe for consumption and come in standard food coloring shades. Using an edible ink printer allows for incredibly detailed and complex designs, from photographs to intricate illustrations, that would be impossible to hand-paint or pipe. Ensure your printer is used only for edible inks to prevent contamination.
For hand-coloring or painting wafer paper for cookie decoration, you'll use edible food coloring. Gel or paste colors can be diluted with a small amount of clear alcohol (like vodka or food-grade ethanol) or edible artesian water to create paint. Alcohol evaporates quickly, which is beneficial as excess moisture can cause wafer paper to wrinkle or dissolve. Edible dusts or powders can also be brushed onto dry wafer paper for shading and adding depth, particularly useful for creating realistic flower petals or adding shimmer effects. Always use colors specifically labeled as edible.
Preparing Wafer Paper
Cutting Wafer Paper for Intricate Designs
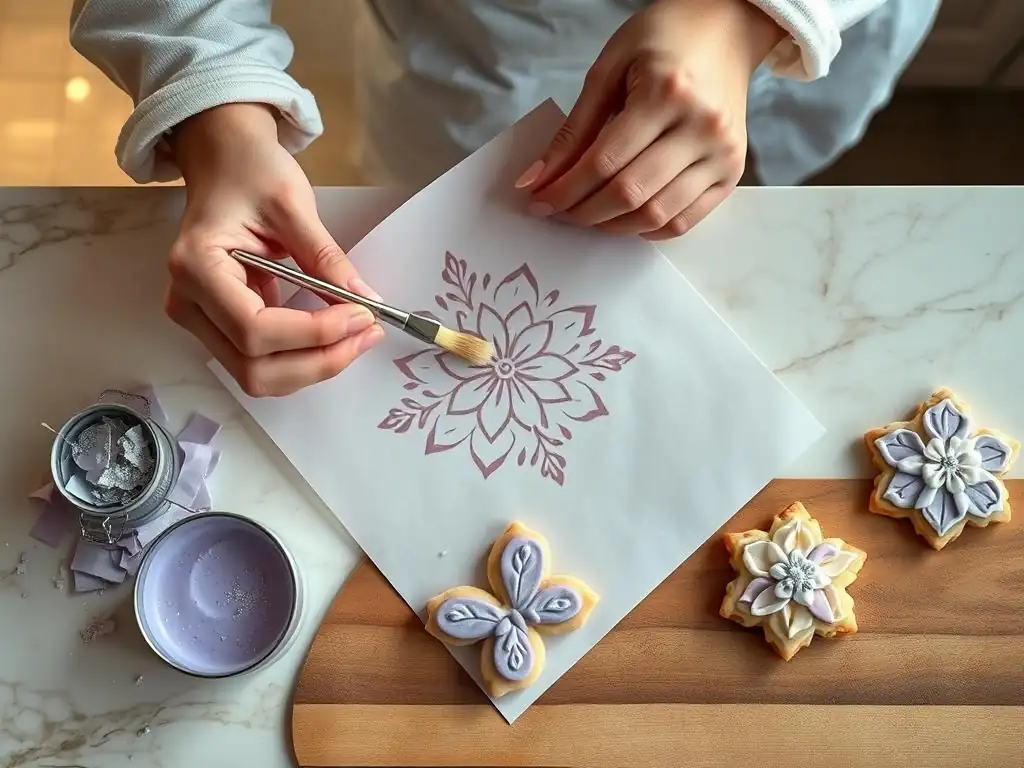
Cutting wafer paper precisely is key to achieving professional-looking wafer paper cookie decorating. For simple shapes like squares or strips, sharp scissors work well. Ensure they are clean and dry. For more complex shapes, such as delicate filigree, letters, or custom patterns, a craft knife on a self-healing cutting mat provides greater control. Always use a fresh, sharp blade for clean cuts without tearing.
When cutting intricate designs, take your time and work slowly. For very detailed patterns, it helps to have a template printed on regular paper that you can place under the wafer paper (if it's translucent enough) or trace lightly onto the wafer paper itself using an edible marker. For repetitive shapes or high volume, craft punches or an electronic cutting machine programmed with your design are the most efficient and accurate methods. Remember that wafer paper can be brittle, especially in dry environments, so handle cut pieces carefully.
Shaping and Molding Wafer Paper for 3D Decorations
Shaping wafer paper allows you to create stunning 3D elements for your cookie decorations, such as petals, leaves, or ruffles. The simplest way to add shape is by gently bending or ruffling the paper with your fingers or a ball tool on a foam pad. For more defined curves, you can lightly mist the paper with water or a clear alcohol/water mix. A very light mist is crucial – too much moisture will cause the paper to dissolve or become sticky and difficult to handle.
To create more complex shapes like flower petals or structured ruffles, you can use cutters (like petal cutters) and then immediately shape the cut pieces using ball tools on a foam pad to cup or curl the edges. Some decorators lightly mist the wafer paper and then place it in a mold or shape it around a form (like a dowel or a crumpled piece of foil) while it dries to help it hold its shape. Thicker or more flexible wafer papers are generally better suited for 3D work as they are less likely to crack when manipulated.
Storing Wafer Paper for Optimal Use
Proper storage is vital for keeping wafer paper in good condition for wafer paper cookie decorating. Wafer paper is highly sensitive to moisture and humidity. Store it flat in an airtight container or a resealable plastic bag. Adding a desiccant packet (like the small silica gel packets found in packaging – ensure they are food-safe or keep them outside the direct contact with the paper) can help absorb excess moisture and prevent the paper from becoming brittle.
Keep the stored wafer paper in a cool, dry place away from direct sunlight and sources of heat or humidity, such as near a sink or oven. High humidity will cause the paper to become soft, sticky, and difficult to handle, potentially wrinkling or dissolving. Conversely, overly dry conditions can make it excessively brittle and prone to cracking when cut or shaped. Stored correctly, wafer paper can last for a year or two, though it's always best to check for signs of damage or degradation before use.
The surface of your baked cookie needs to be prepared properly to ensure the wafer paper adheres smoothly and securely. For flat applications like printed images or cutouts, the cookie surface should be dry and relatively smooth. If using royal icing, let the icing dry completely and harden before applying wafer paper – typically 12-24 hours depending on humidity. A smooth, flood-coated surface works best.
If you're not using royal icing, or want a very thin application, you can apply the wafer paper directly to a very lightly brushed-on layer of simple syrup or piping gel on the cooled, bare cookie. However, applying to a dry, iced surface with edible glue is generally the most reliable method for flat applications. For 3D elements, you might apply them to partially dried royal icing or use thicker royal icing as an adhesive where needed on the cookie surface. Ensure the cookie itself is fully cooled before any application to prevent steam from affecting the wafer paper.
Attaching Wafer Paper Using Edible Glue
Edible glue is the most common and effective adhesive for applying wafer paper to cookies, especially over royal icing. Edible glue is typically made from CMC powder (Tylose powder) mixed with water, or sometimes from meringue powder and water. You want a relatively thin consistency, similar to thin corn syrup or slightly thicker than water, to avoid adding too much moisture.
Apply a very thin, even layer of edible glue to the back of the wafer paper piece using a small, soft brush. Do not apply too much glue, as it can cause the wafer paper to wrinkle or dissolve. Carefully position the glued wafer paper piece onto the desired location on the cookie surface. Gently smooth it down from the center outwards using a clean, dry finger or a small roller to remove any air bubbles and ensure full contact. Avoid rubbing vigorously. For larger pieces, work quickly before the glue starts to set.
Preventing Curling or Wrinkling
Preventing curling and wrinkling is a common challenge in wafer paper cookie decorating. The primary culprit is excess moisture. When applying wafer paper, use the absolute minimum amount of edible glue or adhesive necessary. Brush it on thinly and evenly. If applying over royal icing, ensure the icing is completely dry. Applying wafer paper to wet or even slightly damp icing is a recipe for wrinkles.
Humidity can also cause wafer paper to curl or ripple, even after application. Work in a relatively dry environment if possible. Once applied and dry, storing the decorated cookies in an airtight container with a desiccant packet can help maintain their appearance.
For 3D elements, ensure they are fully dry and set before attaching them to the cookie. Sometimes, a very light misting with a clear alcohol/water mix before shaping can help prevent cracking, but again, moderation is key. Placing a piece of parchment paper and a light, flat object on top of a freshly applied flat piece of wafer paper for a few minutes can also help it adhere smoothly while the glue dries.
Advanced Techniques
Creating Wafer Paper Flowers
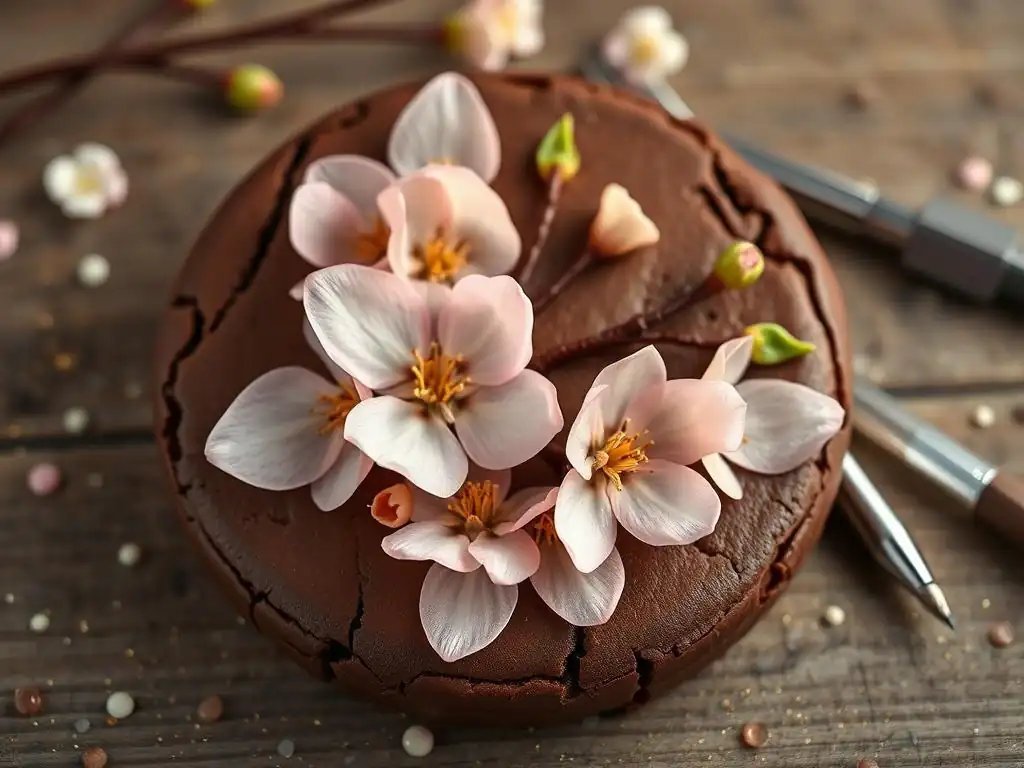
Creating realistic wafer paper flowers is a popular advanced wafer paper cookie decorating technique. This involves cutting individual petals and leaves from wafer paper, shaping them, and then assembling them into flowers. Thicker or more flexible wafer paper is often preferred for petals as it holds shape better. Petals are typically cut using specialized cutters or by hand, then gently shaped using ball tools on a foam pad to create curvature and movement.
Once shaped, petals are assembled layer by layer, often attached using a dab of edible glue or a small amount of melted candy melts or royal icing as an adhesive base on the cookie. For more complex flowers, a central bud might be formed first, and petals attached around it.
Edible dusts can be brushed onto the dry petals to add shading and realism, mimicking the subtle color variations found in natural flowers. This technique requires patience and practice to achieve lifelike results, but the lightweight nature of wafer paper makes it ideal for creating large, impressive floral arrangements on cookies that wouldn't be feasible with heavier mediums.
Painting and Coloring Wafer Paper
Wafer paper's smooth surface makes it an excellent canvas for painting with edible colors. This technique allows for custom designs, gradients, and artistic effects directly onto the paper before or after application to the cookie. Use gel or paste food colors diluted with clear alcohol (like vodka) or edible artesian water. Alcohol is preferred as it dries very quickly, minimizing the risk of dissolving the paper.
Apply the diluted color with a fine brush, using techniques similar to watercolor painting. You can create washes, fine lines, or blend colors. Edible dusts can also be used dry-brushed onto the paper for softer shading or metallic effects. For a unique look, you can lightly crinkle or texture the wafer paper before painting to create interesting patterns that catch the color differently. Remember to use a light hand and build up color in thin layers, allowing each layer to dry briefly if needed, to avoid oversaturating the paper.
Wafer Paper Stenciling and Airbrushing
Stenciling and airbrushing offer further possibilities for adding detail and color to wafer paper for cookie decorating. Stenciling involves placing a stencil over the wafer paper and applying color through the openings. You can use edible dusts brushed over the stencil, or carefully airbrush with edible airbrush colors. For airbrushing, very light, even coats are essential to avoid warping the paper.
Airbrushing allows for smooth color transitions and gradients directly onto the wafer paper or onto wafer paper elements already attached to the cookie. You can airbrush solid colors, create ombré effects, or use stencils to airbrush patterns. When stenciling with dusts or airbrushing, secure the wafer paper and stencil well to prevent movement. This technique is particularly useful for creating backgrounds, repetitive patterns, or adding subtle shading to wafer paper designs on your cookies.
Troubleshooting
Preventing Wafer Paper Brittleness
Wafer paper can become brittle, especially in dry climates or if stored improperly. Brittleness makes it prone to cracking when cut or handled. To combat this, ensure your wafer paper is stored in an airtight container with a desiccant packet. Before use, if it feels very brittle, you can try very lightly misting the air around the paper (not directly on it) with water or placing it in a slightly more humid environment for a short period, though this requires caution.
Another approach is to use a more flexible type of wafer paper if your project allows. When cutting brittle paper, use a very sharp blade and make firm, confident cuts rather than sawing motions. Allowing wafer paper to acclimate to your working environment for a short time after removing it from storage can also help. If you're working in a very dry area, consider using a humidifier in your workspace, but be mindful of not creating too much humidity, which causes other issues.
Repairing Tears and Imperfections
Despite careful handling, small tears or imperfections can sometimes occur when working with wafer paper for cookie decorating. Minor tears in flat pieces can sometimes be "patched" by carefully applying a tiny amount of edible glue to the edges of the tear and pressing them together. For larger or more visible tears, or if a piece breaks, it might be necessary to cut a new piece.
For 3D elements like petals, small cracks or tears can often be repaired by gently applying a minuscule amount of edible glue to the damaged area and holding it in place until it sets. If the piece is significantly damaged, recreating it is often the best solution for a clean finish.
When applying wafer paper to cookies, if a piece wrinkles, you might be able to gently lift an edge and try to smooth it again with a dry finger or brush, but this is often difficult once the glue has started to set and the paper has absorbed moisture. Prevention through careful handling and proper application is always the best strategy.
Addressing Humidity Issues
Humidity is the nemesis of wafer paper cookie decorating. High humidity causes wafer paper to become soft, sticky, and prone to wrinkling, dissolving, and losing its shape. Low humidity can make it excessively brittle. Ideally, work in a climate-controlled environment. If that's not possible, try to work during the driest part of the day.
Store your wafer paper and finished decorated cookies in airtight containers with desiccant packets. If you are applying wafer paper during humid conditions, work quickly. Use minimal adhesive. Allow decorated cookies to dry in a location with a fan or dehumidifier if possible before storing them. For 3D elements, shape them in a dry environment and allow them to fully harden before attaching them to the cookie, as they will be more resistant to humidity once dry.
Project Ideas
Wafer paper succulents are a stunning example of advanced wafer paper cookie decorating. These are created by cutting numerous petal shapes from green wafer paper, often in varying sizes. The petals are then shaped using ball tools on a foam pad to give them a cupped or curved form. They are then assembled layer by layer onto a royal icing base or directly onto the cookie surface (using royal icing as glue) to build up the form of a succulent.
Different shades of green wafer paper can be used, or plain wafer paper can be painted or airbrushed with edible greens and purples for added realism. Edible dusts can be brushed onto the tips of the petals for shading. A typical succulent might require anywhere from 15 to 40 petals depending on its size and complexity. These dimensional elements add incredible visual appeal and texture to cookies.
Wafer paper feathers are another beautiful and delicate application for wafer paper cookie decorating. They are relatively simple to create but yield impressive results. Start by cutting feather shapes from wafer paper using scissors or a craft knife. You can make them in various sizes and shapes. For added detail, use a craft knife to cut fine slits along the edges of the feather shape, mimicking the barbs of a real feather.
Once cut, you can gently shape the feather by placing it on a foam pad and lightly running a ball tool down the center spine to create a slight curve. Edible dusts or airbrush colors can be applied to add shading and color variations. A touch of metallic edible dust can enhance the ethereal look. These lightweight feathers can be attached flat to a cookie surface with edible glue or applied to the side of a cookie for a trailing effect, adding elegance without bulk.
Tips and Tricks
Achieving a Professional Finish
- Use high-quality wafer paper and edible supplies.
- Ensure your cutting tools are sharp for clean edges.
- Practice shaping techniques on scrap pieces before working on your final design elements.
- Apply adhesives sparingly to avoid wrinkles and warping.
- Allow components to dry fully if creating 3D elements before assembly.
- Keep your workspace clean and dry.
- Handle wafer paper with clean, dry hands or tweezers.
Maximizing Shelf Life
- Store wafer paper flat in an airtight container with a desiccant packet in a cool, dry place.
- Avoid exposure to direct sunlight, heat, and humidity.
- Decorated cookies with wafer paper should also be stored in airtight containers, ideally with a desiccant, in a single layer if possible to prevent damage to the delicate paper elements.
- While wafer paper itself has a long shelf life, moisture migration from the cookie or icing over time can affect its appearance. Wafer paper decorations look best when consumed within a few days of application.
Experimenting with Textures and Effects
- Try lightly crinkling or folding wafer paper before coloring or applying it for a textured look.
- Use edible dusts to create subtle shading, gradients, or metallic effects.
- Experiment with edible glitter or shimmer dusts applied over a light layer of edible glue.
- Cut wafer paper into thin strips and layer them to create ruffles or layered textures.
- Consider using patterned wafer paper or creating your own patterns with stencils or freehand painting.
Wafer paper has transformed the possibilities in cookie decorating, allowing for unprecedented levels of detail, realism, and lightness. As edible printing technology becomes more accessible and wafer paper formulations improve (offering more flexibility and durability), we can expect to see even more innovative uses. Imagine hyper-realistic printed images integrated seamlessly with delicate 3D sculpted elements, all made from wafer paper. The trend towards highly personalized and visually stunning cookies for special events will likely continue to drive creativity in wafer paper cookie decorating, pushing the boundaries of edible art.
The exploration of new techniques, such as combining wafer paper with other mediums like isomalt or chocolate for structural elements, also points towards an exciting future. Decorators are constantly finding new ways to manipulate this versatile material, from creating edible fabric effects to intricate architectural details. The future of wafer paper in cookie design is bright, promising increasingly intricate, lightweight, and artistic creations that are as delightful to behold as they are to eat.
Finding High-Quality Wafer Paper and Supplies
To excel in wafer paper cookie decorating, using quality materials is paramount. Look for reputable cake decorating supply stores, online retailers specializing in edible art supplies, or even large craft stores with a dedicated baking section. Read product descriptions carefully to understand the paper's thickness, flexibility, and intended use (e.g., printing, shaping).
When sourcing edible inks, ensure they are specifically designed for edible ink printers and are compatible with your printer model. Edible food colors, dusts, and glues should be food-grade and from trusted brands. Don't compromise on quality, as inferior supplies can make working with wafer paper frustrating and yield subpar results. Investing in good tools and materials will make your wafer paper cookie decorating experience more enjoyable and successful, allowing you to focus on unleashing your creativity.
Frequently Asked Questions
Wafer paper is a thin, edible paper made from potato starch, water, and oil. It's ideal for cookie decorating because it's lightweight and allows for intricate designs without adding bulk.
Can I print on wafer paper, and if so, what kind of printer do I need?
Yes, you can print on wafer paper. You'll need a special edible ink printer that uses food-safe inks. Regular printers are not suitable.
Use a thin layer of corn syrup or piping gel as an adhesive. Apply the wafer paper gently and avoid over-wetting it to prevent wrinkling or dissolving.
What are some creative ways to use wafer paper besides just printing images?
You can cut wafer paper into shapes, flowers, or geometric patterns and attach them to cookies. You can also paint or airbrush it with edible colors for unique effects.
Is wafer paper safe to eat, and does it have a noticeable taste?
Yes, wafer paper is generally safe to eat. It has a very mild, almost neutral taste that shouldn't significantly affect the flavor of your cookies.
Final Reflection: The Delicate Art of Wafer Paper Wonders
The intricate beauty of wafer paper cookie decorating isn't just a fleeting trend; it's a testament to the enduring power of creativity and the pursuit of edible artistry. This method allows for breathtaking designs, previously unimaginable in traditional cookie decorating, opening up a world of possibilities for both professional bakers and enthusiastic hobbyists. The lightweight nature of wafer paper allows for delicate details and complex layering, transforming ordinary cookies into miniature masterpieces.
The impact of wafer paper on the culinary landscape is undeniable. It's moved beyond simple embellishments, becoming a key element in creating truly stunning and personalized treats. This shift reflects a broader cultural appreciation for detail and craftsmanship, a desire to elevate even the simplest of pleasures. The details are not the details. They make the design.
– Charles Eames. This quote perfectly encapsulates the transformative power of wafer paper, turning seemingly insignificant details into the very essence of the design. The ability to create personalized, intricate designs has also fostered a strong sense of community among bakers, sharing techniques and inspiring each other through online platforms and workshops.
Now, it's your turn to explore the boundless potential of wafer paper. Don't be afraid to experiment, to push the boundaries of your creativity, and to let your imagination run wild. Pick up your tools, gather your supplies, and embark on a journey of edible artistry. The delicate beauty of wafer paper awaits, ready to transform your cookies into edible works of art and bring joy to those you share them with. Let your next creation be a testament to the magic you can create with a little patience and a lot of imagination.
Thanks for taking the time to explore the world of wafer paper cookie decorating! We hope you've discovered a new level of creativity and detail for your baking. Ready to put your newfound skills to the test?
- Craft your masterpiece: Start decorating your own cookies today! Use the techniques you learned to create stunning designs. Let your imagination run wild!
- Share your creations: Show off your amazing wafer paper cookies on social media – use #BakeWithEaseWaferPaper to connect with other passionate bakers.
- Experiment with new designs: Challenge yourself to create a unique cookie design using the techniques discussed, and share your results in the comments below!
What incredible wafer paper wonder will you bake next?