
Sourdough Pretzels: Shaping and Baking Techniques


Welcome to BakeWithEase, your trusted guide to the delightful world of baking!
Ever dreamt of crafting the perfect, tangy sourdough pretzel at home? Unlock the secrets to our easy sourdough pretzel recipe and discover the shaping and baking techniques that will transform your kitchen into a pretzel paradise. Are you ready to elevate your baking skills and enjoy a warm, chewy masterpiece? Let's get started!
- Sourdough Pretzels: Shaping and Baking Techniques - BakeWithEase
- Introduction to Sourdough Pretzels: A BakeWithEase Guide
- The Essential Sourdough Pretzel Dough Recipe
- Shaping Sourdough Pretzels: A Step-by-Step Visual Guide
- The Baking Process: Achieving Perfect Sourdough Pretzel Color and Texture
- Troubleshooting Common Sourdough Pretzel Problems
- Serving and Storing Your Homemade Sourdough Pretzels
- Advanced Sourdough Pretzel Variations and Flavors
- Easy Sourdough Pretzel Recipe: Summary and Printable Version
-
Frequently Asked Questions
- How is this sourdough pretzel recipe considered "easy," given sourdough's reputation for complexity?
- What makes these sourdough pretzels different from regular pretzels?
- Can I substitute ingredients in the sourdough pretzel recipe?
- What shaping techniques are recommended for achieving the classic pretzel shape?
- How do I achieve that characteristic dark, glossy crust on my sourdough pretzels?
- Final Reflection: The Humble Pretzel, A Testament to Patience and Flavor
- Unleash Your Inner Pretzel Baker!
Sourdough Pretzels: Shaping and Baking Techniques - BakeWithEase
Introduction to Sourdough Pretzels: A BakeWithEase Guide
Elevate Your Baking: Mastering the Art of Sourdough Pretzels
Diving into the world of sourdough baking offers a unique journey, and mastering sourdough pretzels is a particularly rewarding step. Unlike conventional pretzels made with commercial yeast, sourdough pretzels boast a complex, slightly tangy flavor profile thanks to the slow fermentation process. This method not only enhances taste but also contributes to a superior texture – a chewy interior encased in a perfectly crisp, dark brown crust. By learning the techniques outlined in this guide, you can confidently bake these artisanal treats right in your own kitchen, bringing the authentic taste of a classic German bakery home.
This guide from BakeWithEase will take you through every crucial step, from preparing your active sourdough starter to achieving that iconic pretzel shape and the critical lye bath that gives them their signature look and taste. We'll cover the nuances of working with sourdough dough, which behaves differently than standard yeasted dough due to its acidity and the wild yeast and bacteria culture. Understanding these differences is key to successful baking. Whether you're aiming for a simple twisted shape or more intricate bites, following an easy sourdough pretzel recipe can open up new possibilities in your baking repertoire.
Why Sourdough Pretzels? Exploring the Unique Flavor & Texture
The hallmark of a sourdough pretzel lies in its distinctive flavor, a result of the lactic acid bacteria present in the starter. This fermentation process imparts a subtle tang that balances the richness of the dough and the saltiness of the finished product. Compared to instant-yeast pretzels which ferment quickly, sourdough develops deeper, more nuanced flavors over a longer period, typically 4-12 hours for the bulk fermentation and potentially longer for proofing. This slow development is what elevates them from a simple snack to a truly gourmet experience.
Beyond flavor, the texture is paramount. A well-made sourdough pretzel should have a dense, chewy crumb inside a thin, shatteringly crisp crust. This texture is primarily achieved through the combination of a low-hydration dough, proper shaping techniques that build tension, and the crucial alkaline bath (traditionally lye) before baking at a high temperature. The alkaline solution gelatinizes the starch on the surface, promoting the Maillard reaction during baking, which creates that desirable dark brown color and signature crust. Mastering an easy sourdough pretzel recipe means understanding how these elements work together.
The Essential Sourdough Pretzel Dough Recipe
Ingredients for Authentic Sourdough Pretzels
Crafting authentic sourdough pretzels requires just a few basic ingredients, but their quality matters. You'll need active sourdough starter, bread flour (which has a higher protein content, typically 12-14%, providing structure), water, and salt. Some recipes may include a small amount of malt powder (diastatic or non-diastatic) to aid in browning and flavor development. For a standard batch yielding about 8-10 medium pretzels, you might use around 300-400 grams of bread flour, 180-220 grams of water, 100-150 grams of active sourdough starter, and about 7-10 grams of fine sea salt.
The ratio of ingredients, especially the hydration level (water to flour ratio) and the amount of starter, directly impacts the dough's handling properties and the final texture. A lower hydration dough (around 55-60% hydration relative to the flour weight) is typical for pretzels as it provides the necessary structure and chewiness. Using an active starter, one that has been fed recently and is bubbly and doubled in size, is crucial for providing the leavening power needed for a good rise and open crumb structure within the dense pretzel body. This forms the foundation of any easy sourdough pretzel recipe.
Preparing Your Sourdough Starter for Pretzels
For successful sourdough pretzels, your starter needs to be active and vigorous. This means feeding it 4-12 hours before you plan to mix your dough, typically with equal parts starter, water, and flour (e.g., 50g starter, 50g water, 50g flour). The starter should double in size within this timeframe, be bubbly throughout, and pass the float test (a small dollop dropped in water should float). Using a starter that is past its peak or not sufficiently active will result in a slow or nonexistent rise during fermentation, leading to dense, flat pretzels.
The type of flour used to feed your starter can also influence its activity and the final dough. While all-purpose flour works, using rye or whole wheat flour for feeding can sometimes boost activity due to higher enzyme content. Ensure your starter is at room temperature and has reached its peak activity before incorporating it into the pretzel dough. This ensures the wild yeast are ready to work, providing the lift and fermentation needed for that signature sourdough flavor and texture in your easy sourdough pretzel recipe.
Step-by-Step Guide to Mixing the Sourdough Pretzel Dough
Mixing the dough for sourdough pretzels is straightforward but requires attention to detail. Begin by combining the active sourdough starter and water in a large bowl, stirring to disperse the starter. Add the flour and salt (and malt powder, if using). Mix with a spoon or your hands until a shaggy dough forms and no dry pockets of flour remain. The dough will be relatively stiff compared to bread dough due to the lower hydration.
Turn the dough out onto a lightly floured surface and knead for 8-10 minutes. Alternatively, use a stand mixer with a dough hook on low speed for 6-8 minutes. The goal is to develop gluten, which will give the pretzels their structure and chewiness. The dough should become smooth, elastic, and pass the windowpane test (a small piece can be stretched thin enough to see light through without tearing). Proper kneading is essential for the texture of an easy sourdough pretzel recipe.
First Fermentation: Developing Flavor and Texture
After kneading, the dough needs to undergo its first fermentation, also known as bulk fermentation. Place the dough in a lightly oiled bowl, cover it tightly, and let it ferment at room temperature. The duration of this stage is highly dependent on the ambient temperature and the activity of your starter, but it typically ranges from 4 to 12 hours. During this time, the dough should increase in volume by about 50-75% and become noticeably airier.
For optimal flavor development, especially the characteristic tang, a longer, cooler fermentation is beneficial. After an initial period at room temperature (say, 2-4 hours), you can transfer the dough to the refrigerator for a cold fermentation period of 12-48 hours. This slows down the yeast activity but allows the lactic acid bacteria to produce more flavor compounds. Cold fermentation also makes the dough easier to handle and shape later. This step is key to unlocking the full potential of your easy sourdough pretzel recipe.
Shaping Sourdough Pretzels: A Step-by-Step Visual Guide
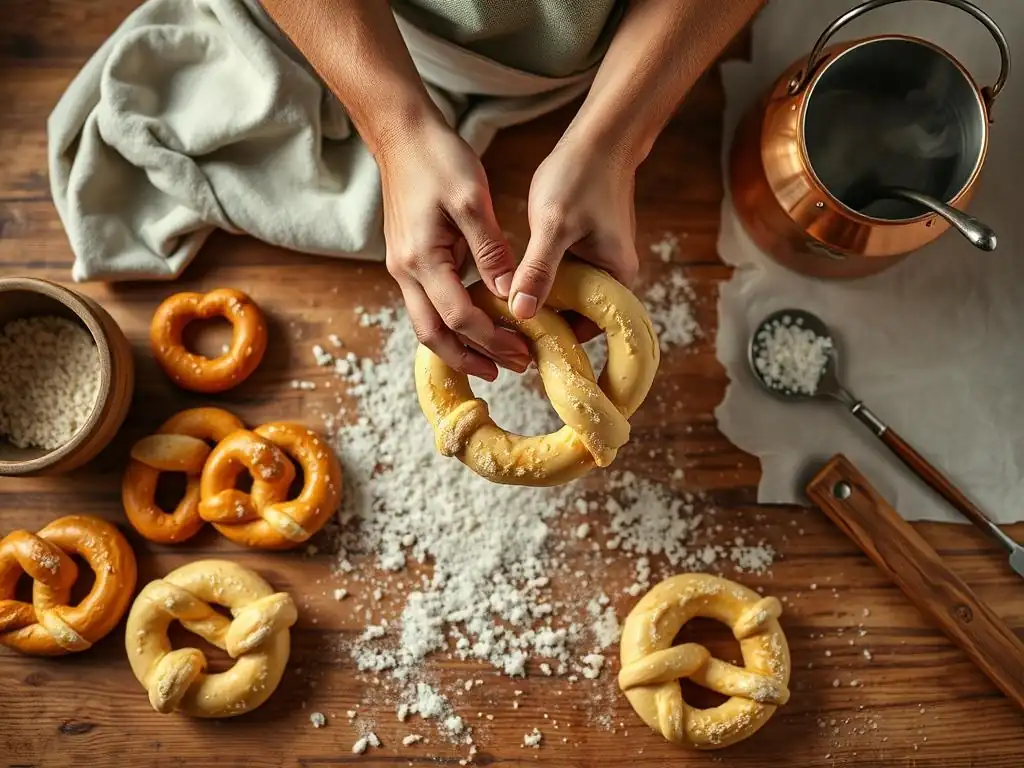
Different Shaping Techniques for Sourdough Pretzels
Shaping is where the pretzel truly comes to life. While the classic twisted shape is iconic, sourdough dough is versatile enough for various forms, including pretzel bites, sticks, or even rolls. The key principle across all shapes is creating tension in the dough to help it hold its form during proofing and baking and contribute to the chewy texture. Before shaping, gently degas the dough by turning it out onto a lightly floured surface and pressing it into a rectangle.
Divide the dough into equal portions, typically ranging from 80 to 120 grams depending on your desired pretzel size. Weighing the portions ensures uniform size, which is important for even baking. Keep the portions you aren't working with covered to prevent them from drying out. While a visual guide would show photos, imagine the process: rolling, twisting, or cutting into segments. Mastering the shape is part of perfecting an easy sourdough pretzel recipe.
The Classic Pretzel Twist: Detailed Instructions
To shape the classic twist, take one portion of dough and roll it into a long, thin rope, about 20-24 inches long and roughly 1/2 to 3/4 inch thick. Try to make the rope uniform in thickness, tapering slightly at the ends. This requires gentle but firm pressure, working from the center outwards. Avoid tearing the dough.
Once the rope is formed, lift it by the ends, cross the ends over each other about 3-4 inches from the tips, and then twist them together twice. Bring the twisted ends down and press them firmly into the bottom curve of the pretzel shape, sealing them securely. This creates the familiar loop and arms. Place the shaped pretzel onto a parchment-lined baking sheet. Repeat with the remaining dough portions. Ensure the ends are well-sealed to prevent them from separating during the bath and baking. This technique is fundamental to an easy sourdough pretzel recipe.
Shaping Variations: Pretzel Bites and Sticks
Beyond the classic twist, shaping offers flexibility. For pretzel bites, roll the dough portion into a thick rope, about 1-1.5 inches in diameter. Use a bench scraper or knife to cut the rope into bite-sized pieces, typically 1-1.5 inches long. There's no need for intricate shaping here; the simple cut pieces are sufficient.
For pretzel sticks, roll the dough portion into a thick rope, similar to the bites, but instead of cutting into small pieces, cut it into longer segments, perhaps 4-6 inches in length. Both bites and sticks are simpler to shape than the traditional twist, making them ideal for a truly easy sourdough pretzel recipe, especially for beginners. They undergo the same subsequent steps of proofing and the alkaline bath.
Proofing Your Shaped Sourdough Pretzels
After shaping, the pretzels need a short proofing period. Place the shaped pretzels on a parchment-lined baking sheet. To prevent them from sticking during the cold proof and the subsequent bath, it's helpful to place the baking sheet in the freezer for 15-30 minutes until the pretzels are firm. This freezing step makes them much easier to handle when transferring them to the alkaline bath.
Following the brief freeze, the pretzels should be transferred to the refrigerator for a cold proof. This step is crucial for developing a skin on the surface, which helps them hold their shape in the lye bath and contributes to the crust development. Proofing time in the refrigerator can range from 1 hour up to 24 hours. A longer cold proof can further enhance flavor. They won't expand significantly during this cold proof, perhaps only by 10-20%. This cold proof is a critical step in an easy sourdough pretzel recipe, ensuring the shape holds.
The Baking Process: Achieving Perfect Sourdough Pretzel Color and Texture
The Lye Bath: A Crucial Step for Authentic Flavor and Color
The lye bath is arguably the most defining step in creating authentic German-style pretzels. A diluted solution of food-grade sodium hydroxide (lye) and water gives pretzels their signature deep brown color, unique flavor, and contributes significantly to the chewy-then-crisp texture. Dipping the shaped, cold-proofed pretzels in this alkaline solution causes the surface starches to gelatinize, which promotes the Maillard reaction during baking at a much lower temperature than would otherwise be possible, resulting in that desirable dark crust.
While recipes vary, a typical lye bath uses a 3-4% concentration of food-grade lye. For example, dissolving 30-40 grams of lye in 1 liter of cold water. It is imperative to always add lye to water, never water to lye, as the reaction generates heat. The pretzels are dipped for a very short time, usually 15-30 seconds per side, before being carefully removed and placed back on the parchment-lined baking sheet. This step is non-negotiable for achieving a truly authentic easy sourdough pretzel recipe.
Safety Precautions When Working with Lye
Working with lye requires strict safety precautions as it is a caustic chemical that can cause severe burns upon contact with skin, eyes, or respiratory tissues. Always wear chemical-resistant gloves (like nitrile or neoprene, not latex), safety glasses or goggles, and long sleeves. Work in a well-ventilated area, or use a fan to direct fumes away from you.
Use only food-grade lye and handle it carefully. Mix the solution in a non-reactive container, such as glass, stainless steel, or food-grade plastic (PP or HDPE). Never use aluminum. Keep vinegar handy as a neutralizing agent in case of skin contact. Dispose of the used lye solution responsibly and according to local regulations; it can often be neutralized with vinegar before disposal, though caution is still required. Prioritizing safety is paramount when attempting an easy sourdough pretzel recipe involving lye.
How to Prepare and Use a Lye Solution for Pretzels
To prepare the lye bath, measure the required amount of cold water into your chosen container. Carefully weigh the food-grade lye using a precise scale. Slowly add the lye beads or flakes to the water, stirring gently with a non-reactive utensil (like a stainless steel spoon or plastic spatula) until fully dissolved. The solution will heat up as the lye dissolves; this is normal. Allow it to cool slightly before use, though it's most effective when warm.
Working with one cold-proofed pretzel at a time, carefully lower it into the lye solution using a slotted spoon or spider. Ensure the entire surface is submerged. Flip it over after 15-30 seconds using the utensil. Lift the pretzel out, allowing excess solution to drip back into the container, and return it to the parchment-lined baking sheet. The surface will look slightly slimy and may turn yellowish. Proceed immediately to topping and baking. This step is fundamental to an easy sourdough pretzel recipe's success.
Baking Your Sourdough Pretzels to Golden Perfection
Immediately after the lye bath, the pretzels are ready for baking. Sprinkle them generously with coarse pretzel salt or other desired toppings. The wet, alkaline surface helps the salt adhere. Place the baking sheet into a preheated oven. High heat is essential for achieving a crisp crust and proper browning.
Bake the pretzels until they are a deep, rich mahogany brown. The exact baking time will depend on your oven and the size of your pretzels, but it typically ranges from 12 to 20 minutes at temperatures between 400°F (200°C) and 450°F (230°C). Rotate the baking sheet halfway through baking for even coloring. Properly baked pretzels will have a hard, dark crust and a chewy interior. This high-temperature bake perfects your easy sourdough pretzel recipe.
Oven Temperature and Baking Time: Key Factors
Precise oven temperature is critical for achieving the characteristic pretzel crust and color. Most recipes recommend baking between 400°F (200°C) and 450°F (230°C). A hotter oven promotes rapid browning and crust formation before the interior overcooks. Ensure your oven is fully preheated to the correct temperature before loading the pretzels; using an oven thermometer can help verify accuracy.
Baking time is determined by the pretzel size and oven temperature. Smaller pretzel bites might bake in 10-15 minutes, while larger classic twists could take 15-20 minutes. The key visual cue is the color: aim for a deep brown, not just golden. If they are too light, they won't have the proper crust texture or flavor. If they brown too quickly, the inside might be underbaked; if too slowly, they might dry out. Finding the sweet spot is part of mastering your easy sourdough pretzel recipe.
Achieving the Perfect Crust: Tips and Tricks
Beyond the lye bath and high heat, a few other factors contribute to the perfect pretzel crust. Ensuring the pretzels are cold from the refrigerator proof before the lye bath helps the surface gelatinize properly. Don't overcrowd the baking sheet; leave space between pretzels to allow hot air to circulate freely, promoting even baking and browning.
Consider using a baking stone or steel if you have one. Preheat it in the oven before placing the baking sheet directly on it (or sliding the parchment with pretzels onto it). This provides a burst of intense heat from below, which can improve oven spring and crust development. Finally, resist the urge to open the oven door frequently during baking, as this causes temperature fluctuations that can negatively impact the crust. These techniques enhance any easy sourdough pretzel recipe.
Troubleshooting Common Sourdough Pretzel Problems
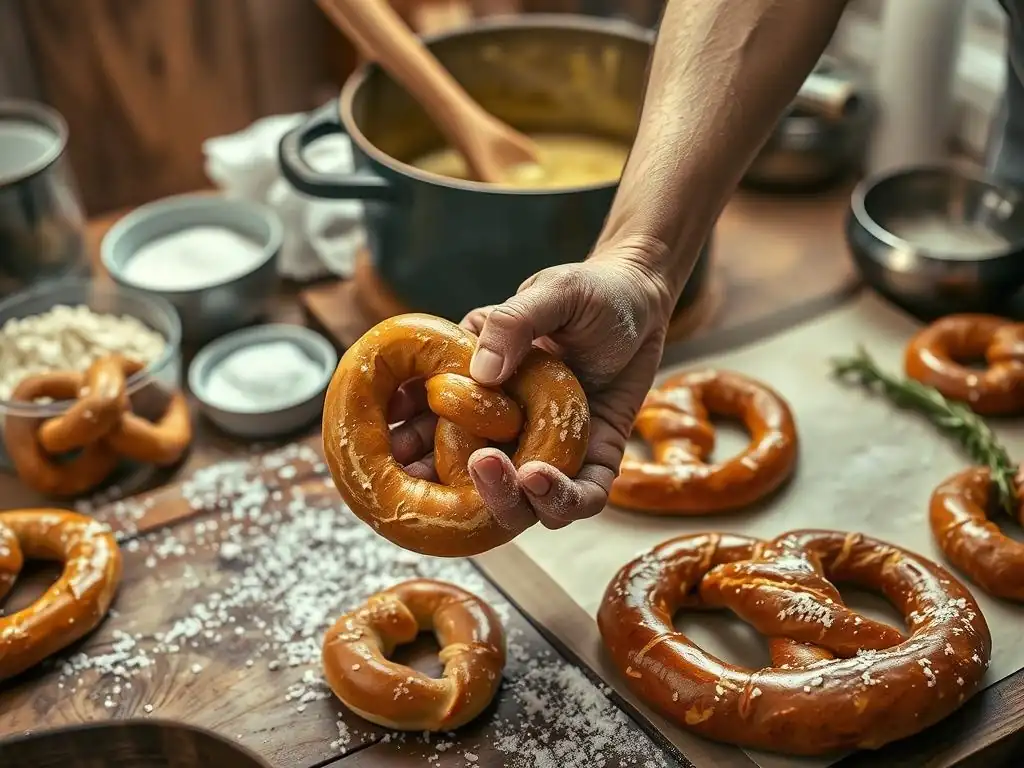
Dough Too Sticky? Solutions and Adjustments
If your sourdough pretzel dough is excessively sticky after kneading, it likely has too high a hydration level for pretzel making. While sourdough can be sticky, pretzel dough should be relatively stiff and easy to handle after proper gluten development. A sticky dough is difficult to shape and may result in flat, poorly formed pretzels.
To remedy this, you can try incorporating a small amount of additional flour during the final stages of kneading, just enough to make the dough manageable. For future batches following your easy sourdough pretzel recipe, adjust the water amount slightly downwards. Remember that flour absorption varies depending on the type of flour and ambient humidity, so minor adjustments are sometimes necessary. Starting with a lower hydration in your initial recipe is often safer.
Pretzels Not Rising? Troubleshooting Tips
If your sourdough pretzels aren't rising adequately during the bulk fermentation or show poor oven spring, the primary culprit is usually an inactive sourdough starter. Ensure your starter was recently fed, bubbly, and active (passing the float test) before mixing the dough. Using a starter that is past its peak or underfed will not provide sufficient leavening power.
Other factors could include insufficient kneading, which prevents proper gluten development needed to trap gases, or fermenting/proofing at too cold a temperature. While cold fermentation is good for flavor, the initial bulk fermentation needs enough warmth (typically 70-78°F or 21-26°C) to kickstart yeast activity. Ensure your easy sourdough pretzel recipe specifies appropriate fermentation times and temperatures.
Achieving a Uniform Color and Texture
Uneven color or texture can stem from several issues. If pretzels are lighter in some spots, it might be due to inconsistent dipping in the lye bath – ensure the entire surface is submerged evenly for the specified time. Uneven oven heat is also a common cause; rotating the baking sheet halfway through baking can help mitigate this.
Texture problems, like pretzels that are too soft or not chewy enough, can relate to hydration (too high hydration results in softer pretzels) or insufficient kneading. If the crust isn't crisp or dark, the lye bath might have been too weak, the dipping time too short, or the oven temperature too low. Experimenting with minor adjustments in your easy sourdough pretzel recipe and baking process can help fine-tune results.
Serving and Storing Your Homemade Sourdough Pretzels
Delicious Serving Suggestions for Sourdough Pretzels
Freshly baked sourdough pretzels are best enjoyed warm, straight from the oven. The classic pairing is with coarse pretzel salt, which provides a delightful crunch and burst of flavor. However, the possibilities are endless! Serve them with a variety of dips like mustard (Dijon, spicy brown, or honey mustard), cheese sauce (like a classic beer cheese dip), or even a simple melted butter dip seasoned with garlic or herbs.
For a heartier snack or meal, split them horizontally and use them as sandwich rolls. They are excellent with cold cuts, cheese, or even sliced bratwurst. The slightly tangy sourdough flavor pairs wonderfully with both savory and slightly sweet accompaniments. Enjoying them fresh is the ultimate reward for mastering an easy sourdough pretzel recipe.
How to Store Sourdough Pretzels for Optimal Freshness
Sourdough pretzels are best consumed on the day they are baked for optimal texture. The crust will soften over time. If you have leftovers, store them at room temperature in a paper bag to allow some air circulation; this helps prevent the crust from becoming completely soggy, which can happen in airtight containers. They will typically keep reasonably well for 1-2 days stored this way.
To refresh leftover pretzels, lightly spritz them with water and reheat them in a preheated oven at 350°F (175°C) for 5-10 minutes. This will help crisp up the crust again. For longer storage, cooled pretzels can be frozen in an airtight container or freezer bag for up to 2-3 months. Thaw at room temperature and reheat in the oven as described above. Proper storage ensures you can enjoy the fruits of your easy sourdough pretzel recipe later.
Advanced Sourdough Pretzel Variations and Flavors
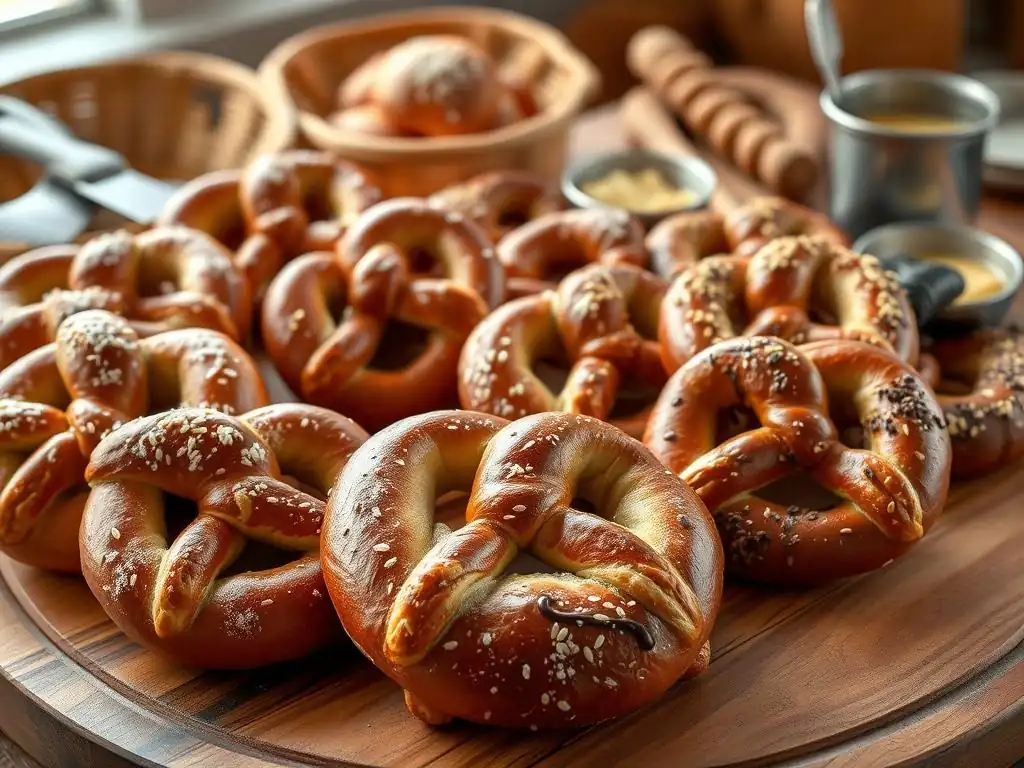
Adding Flavor to Your Dough: Herbs, Spices, and More
While the classic sourdough pretzel is delicious on its own, the dough provides a great base for incorporating other flavors. During the kneading process, you can add dried herbs like rosemary, thyme, or everything bagel seasoning directly into the dough. Spices such as smoked paprika, caraway seeds, or black pepper can also add intriguing notes.
For a cheesy twist, mix in some shredded sharp cheddar or Gruyère cheese towards the end of kneading. About 5-10% of the flour weight in add-ins is a good starting point to avoid interfering too much with the dough structure. These additions create unique variations on an easy sourdough pretzel recipe.
Sweet Sourdough Pretzels: A Delicious Twist
Sourdough isn't just for savory bakes; it can also create wonderful sweet treats. To make sweet sourdough pretzels, you can slightly increase the sugar content in the dough (if your base recipe includes sugar) or simply omit the salt bath and savory toppings. Instead, dip the cold-proofed pretzels in a solution of baking soda and hot water (a less caustic alternative to lye that still promotes browning, though less intensely) or simply brush with an egg wash.
After baking, brush the warm pretzels with melted butter and sprinkle generously with cinnamon sugar. Another option is to dip them in a simple glaze made from powdered sugar and milk or lemon juice. These sweet variations offer a delightful contrast to the traditional savory easy sourdough pretzel recipe.
Exploring Different Toppings for Your Sourdough Pretzels
Beyond the standard coarse salt, the surface of a lye-bathed pretzel is perfect for a variety of toppings that stick well. Everything bagel seasoning is a popular choice, adding sesame seeds, poppy seeds, dried garlic, and onion. Grated cheese, like Parmesan or cheddar, can be sprinkled on before baking for a cheesy crust.
Seeds like sesame, poppy, or pumpkin seeds can also be used, either alone or in combination. For a different flavor profile, try caraway seeds, often found on rye bread, which pair wonderfully with the sourdough tang. Experimenting with toppings is a fun way to customize your easy sourdough pretzel recipe.
Easy Sourdough Pretzel Recipe: Summary and Printable Version
Your Go-To Guide for Baking Delicious Sourdough Pretzels at Home
Baking sourdough pretzels at home is a rewarding endeavor that yields deeply flavorful, texturally perfect results. This guide from BakeWithEase has walked you through the essential steps: preparing an active starter, mixing and fermenting a low-hydration dough, shaping the classic twist and variations, cold-proofing, performing the crucial lye bath with safety in mind, and baking at high heat. While seemingly complex, each step is manageable with practice and attention to detail, making it possible to achieve an easy sourdough pretzel recipe.
Remember the key takeaways: use an active starter, knead well for structure, cold ferment for flavor and handling, prioritize safety with lye, dip briefly, and bake hot for color and crust. Troubleshooting common issues like sticky dough or poor rise will become easier with experience. Armed with these techniques, you are well-equipped to bake delicious, authentic sourdough pretzels that rival those from your favorite bakery. Enjoy the process and the incredible results!
Frequently Asked Questions
How is this sourdough pretzel recipe considered "easy," given sourdough's reputation for complexity?
This recipe simplifies the process by using established sourdough starter and clear, step-by-step instructions. It focuses on achievable techniques for bakers of all levels, making sourdough less intimidating.
What makes these sourdough pretzels different from regular pretzels?
Sourdough pretzels have a distinct tangy flavor and a chewier texture compared to those made with commercial yeast. The sourdough fermentation process adds depth and complexity.
Can I substitute ingredients in the sourdough pretzel recipe?
While some substitutions are possible, it's crucial to maintain the correct hydration levels and proportions of flour and starter. Changes may affect the pretzel's texture and rise.
What shaping techniques are recommended for achieving the classic pretzel shape?
The recipe provides detailed visual guides and step-by-step instructions on rolling, twisting, and shaping the dough into the traditional pretzel form. Practice makes perfect!
How do I achieve that characteristic dark, glossy crust on my sourdough pretzels?
The recipe typically involves a baking soda bath before baking, which helps create the Maillard reaction and results in that desirable dark color and chewy exterior.
Final Reflection: The Humble Pretzel, A Testament to Patience and Flavor
The art of sourdough baking, particularly when applied to the seemingly simple pretzel, reveals a profound connection between technique, patience, and the ultimate reward of unparalleled flavor. Mastering the process, as detailed in this guide, isn't just about following a recipe; it's about understanding the subtle nuances of fermentation and the transformative power of heat. This knowledge, readily accessible to home bakers, empowers us to create something truly special.
The journey of crafting a sourdough pretzel is a microcosm of life itself – requiring careful attention to detail, a willingness to embrace the unpredictable nature of fermentation, and the unwavering belief that the effort will be worth it. The satisfying chew, the delicate saltiness, the subtle tang – these are rewards that extend beyond mere sustenance. They represent a connection to a long tradition of baking, a testament to human ingenuity, and a source of immense personal satisfaction. The best things in life are worth waiting for,
a sentiment perfectly encapsulates the process of sourdough baking.
Now, armed with the knowledge shared in this article, I invite you to embark on your own pretzel-making adventure. Don't be intimidated by the seemingly complex steps; embrace the process, savor the aromas, and relish the satisfaction of creating something delicious and beautiful with your own hands. The journey may be challenging, but the reward – a perfectly crisp, tangy, and utterly irresistible sourdough pretzel – is well worth the effort. Let the baking begin!
Unleash Your Inner Pretzel Baker!
Thanks for joining us on this journey into the world of sourdough pretzels! We hope you've gained valuable insights into shaping and baking techniques that will elevate your baking game. Now it's time to put your newfound knowledge into action.
- Dive into your next baking project: Try your hand at crafting your own sourdough pretzels – the satisfying process and delicious results are well worth the effort! Remember to experiment with different shapes and seasonings.
- Share your pretzel creations: Show off your baking prowess and inspire others by sharing photos of your pretzels on social media. Use #BakeWithEasePretzels to connect with our community.
- Explore new sourdough adventures: Consider tackling other sourdough recipes – from classic loaves to innovative pastries! Our website is filled with inspiration waiting for you.
Ready to transform your kitchen into a pretzel paradise? What unique twist will you add to your first sourdough pretzel creation?