
Exploring Different Crusts to Elevate Your Cream Pies

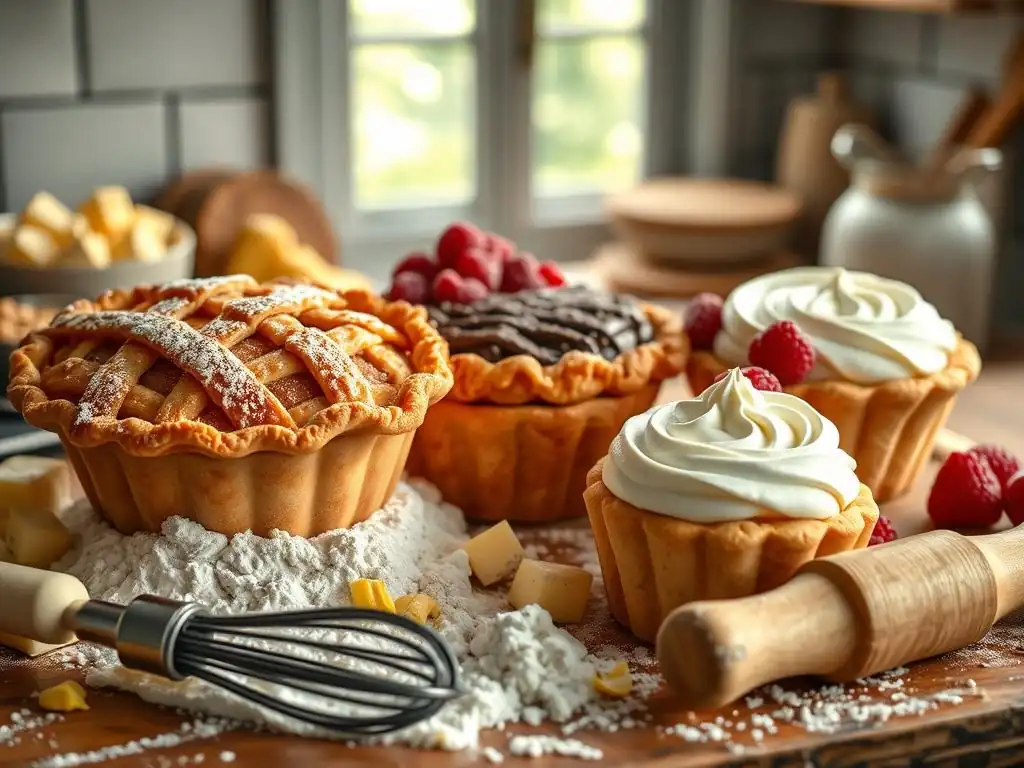
Welcome to BakeWithEase, your trusted guide to unlocking baking brilliance! Ever wondered what truly separates a good cream pie from a perfect one? It all starts with the crust. Dive in as we embark on a delicious journey exploring different crusts to elevate your cream pies, revealing the secrets to achieving that flaky, melt-in-your-mouth texture. Get ready to take your cream pie game to the next level – the perfect crust awaits!
- Perfecting Cream Pie Crust Recipes: An Introduction
- Understanding the Fundamentals of Cream Pie Crusts
- Classic Cream Pie Crust Options
- Exploring Alternative Cream Pie Crusts for Unique Flavors
- Comparing Different Crusts for Cream Pie: Flavor and Texture Profiles
- Troubleshooting Common Cream Pie Crust Problems
- Expert Tips for Baking the Ultimate Cream Pie Crust
- Advanced Techniques for Cream Pie Crust Perfection
- Cream Pie Crust Variations: Beyond the Basics
- Conclusion: Choosing the Right Crust for Your Cream Pie Masterpiece
-
Frequently Asked Questions
- What are the key differences between various cream pie crust recipes?
- How can I avoid a soggy bottom crust when making cream pies?
- What ingredients are essential for a truly perfect cream pie crust?
- What techniques should I employ to ensure a flaky cream pie crust?
- Where can I find easy-to-follow cream pie crust recipes suitable for beginners?
- Final Reflection: The Crust's Crucial Contribution to Cream Pie Perfection
- Unleash Your Inner Pie Master: Craft the Perfect Crust!
Perfecting Cream Pie Crust Recipes: An Introduction
Welcome to the delicious world of cream pies! While the luscious filling often steals the show, the crust is the unsung hero, providing structure, texture, and a crucial flavor counterpoint. A truly outstanding cream pie requires a perfectly executed crust. Whether you're aiming for a classic flaky base, a simple crumb crust, or something more adventurous, understanding the fundamentals and exploring different options is key to perfecting cream pie crust recipes. This guide will walk you through various crust types, essential techniques, and tips to ensure your next cream pie is a masterpiece from top to bottom.
Getting the crust just right can feel like a challenge, but with a bit of knowledge and practice, you can confidently tackle any recipe. We'll cover everything from traditional methods like blind baking a flaky pastry to simple no-bake options like graham cracker crusts. Our goal is to equip you with the skills and information needed for perfecting cream pie crust recipes, making the process enjoyable and the results consistently delicious. Let's dive in and discover how the right crust can transform your cream pie experience.
Understanding the Fundamentals of Cream Pie Crusts
Creating a stable, flavorful, and texturally appealing base is paramount for any cream pie. Unlike fruit pies where the crust bakes with the filling, cream pies typically require a pre-baked or no-bake crust because the filling is often cooked separately and then chilled. The crust needs to withstand the moisture of the filling without becoming soggy, while also complementing its richness and sweetness. This means paying close attention to ingredients, mixing methods, and baking (or chilling) techniques.
A well-made cream pie crust provides the necessary foundation, preventing leaks and making slicing easy. Beyond structure, it adds a vital layer of flavor and texture – think of the buttery crunch of a flaky crust against smooth vanilla filling, or the sweet crumbly texture of graham cracker with chocolate cream. Understanding how different components interact is the first step towards perfecting cream pie crust recipes and achieving consistently excellent results.
The Role of Ingredients in a Perfect Pie Crust
The quality and type of ingredients you use significantly impact the final texture and flavor of your pie crust. For a traditional flaky crust, the ratio of flour, fat, and water is critical. A common ratio by weight is roughly 2 parts flour to 1 part fat, with just enough water to bring the dough together. All-purpose flour is standard, providing structure from gluten development, but overmixing can lead to toughness. The fat, typically cold unsalted butter or shortening, is cut into the flour to create small pockets. As the crust bakes, the fat melts, creating steam that separates the layers of dough, resulting in flakiness. Using cold fat is essential; butter should be around 35-40°F (1.5-4.5°C) when you work it in.
Salt enhances flavor and balances sweetness, while a touch of sugar can aid browning and add slight tenderness, especially in sweeter crusts. The amount of water is crucial; too little results in a dry, crumbly dough, while too much develops too much gluten, leading to toughness. Ice water is preferred because it keeps the fat cold and inhibits gluten development during mixing.
For crumb crusts, the ingredients are much simpler: crushed cookies or crackers, melted butter, and often a bit of sugar. The butter binds the crumbs together, and chilling or a short bake sets the crust. The type of crumb (graham cracker, chocolate wafer, shortbread) dictates the base flavor.
Mastering Pie Crust Techniques for Cream Pies
Specific techniques are vital for achieving the desired texture, particularly for flaky pastry. The "cutting in" of cold fat into the flour is perhaps the most important step for flakiness. You want pieces ranging in size from small peas to lima beans. This can be done with a pastry blender, forks, or even a food processor using short pulses. Overworking the dough develops gluten and melts the fat, both detrimental to flakiness. The goal is to mix until just combined; streaks of butter are a good sign!
Hydration is another key technique. Add ice water one tablespoon at a time, mixing gently until the dough just comes together when squeezed. It should not be sticky or wet. Chilling the dough for at least 30 minutes (or up to 2 days) before rolling is non-negotiable for flaky crusts.
This rests the gluten, firms the fat, and makes the dough easier to handle. For crumb crusts, the technique is simpler: combine crumbs, melted butter, and sugar, press firmly into the pie plate, and chill or bake briefly. Pressing firmly is key to a stable crust that won't fall apart when sliced.
Classic Cream Pie Crust Options
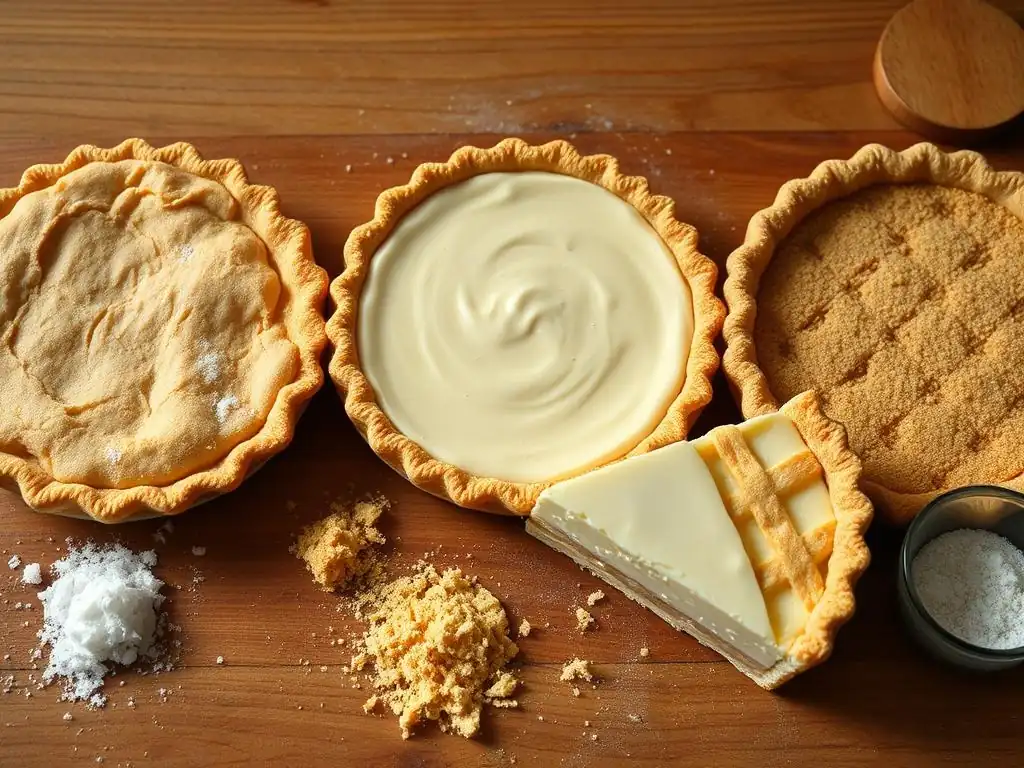
When it comes to perfecting cream pie crust recipes, two options stand out as classics: the traditional flaky pastry and the simple graham cracker crust. Each offers a distinct texture and flavor profile that pairs beautifully with various cream fillings. Understanding how to prepare these foundational crusts is essential for any baker looking to create stunning cream pies.
These two crust types represent different approaches to texture and preparation time. The flaky pastry requires more technique and handling but yields a delicate, buttery result. The graham cracker crust is quick, easy, and provides a sweet, slightly crumbly texture that's perfect for no-bake fillings or when you need a speedy dessert base. Mastering both gives you versatility in your cream pie endeavors.
Traditional Flaky Pie Crust for Cream Pies: A Step-by-Step Guide
Creating a beautiful, flaky pie crust from scratch is a rewarding process. Here's a basic outline for perfecting cream pie crust recipes using the traditional method:
- Combine dry ingredients: Whisk together
1 ½ cupsall-purpose flour and½ teaspoonsalt in a medium bowl. - Cut in cold fat: Add
½ cup(1 stick) very cold unsalted butter, cut into ½-inch cubes, and¼ cupcold shortening or lard, cut into pieces. Use a pastry blender or your fingers to cut the fat into the flour until the mixture resembles coarse meal with some pea-sized pieces of fat remaining. - Add ice water: Gradually add
4 to 6 tablespoonsof ice water, one tablespoon at a time, mixing lightly with a fork until the dough just comes together when you squeeze a small amount. - Chill the dough: Gather the dough into a ball, flatten it into a disc, wrap tightly in plastic wrap, and refrigerate for at least 30 minutes, or up to 2 days.
- Roll the dough: On a lightly floured surface, roll the chilled dough into a 12-inch circle about ⅛ inch thick.
- Transfer to pie plate: Carefully transfer the dough to a 9-inch pie plate, pressing gently into the bottom and up the sides. Trim excess dough, leaving about a 1-inch overhang. Crimp or flute the edges decoratively.
- Chill again: Refrigerate the formed crust for another 15-30 minutes before blind baking.
This process, while detailed, sets the stage for a truly exceptional base when perfecting cream pie crust recipes. The chilling steps are crucial for preventing shrinkage and ensuring maximum flakiness.
Achieving the Perfect Flaky Texture
The secret to a perfect flaky texture lies in the cold fat and minimal handling. As mentioned, the cold butter and shortening create layers within the dough. When the crust bakes, the water in the butter turns to steam, puffing up those layers and creating that desirable flaky structure. Overmixing the dough develops gluten, which makes the crust tough, not flaky. This is why gentle mixing, adding just enough water, and resting the dough are so important. Some bakers even freeze their butter and grate it into the flour for maximum coldness and even distribution.
Another technique is to use a combination of butter and shortening or lard. Butter provides superior flavor, but shortening/lard has a higher melting point, which can contribute to more pronounced layers and tenderness. Experimenting with different fat combinations (e.g., 100% butter, 50/50 butter/shortening) can help you discover your preferred texture when perfecting cream pie crust recipes. Remember, keeping everything cold – your ingredients, your hands, even your rolling pin – is paramount.
Baking Your Flaky Crust Blind for Cream Pies
Since cream pie fillings are typically cooked before adding to the crust, the flaky pastry shell must be fully baked before filling. This is called blind baking. To blind bake, line the chilled pie shell with parchment paper or aluminum foil, pressing it against the sides and bottom. Fill the lined shell with pie weights, dried beans, or rice. This prevents the crust from puffing up or shrinking during baking.
Bake the weighted crust in a preheated oven, typically around 375°F (190°C), for about 15-20 minutes, or until the edges are lightly golden. Carefully remove the weights and liner. Prick the bottom of the crust all over with a fork (this helps prevent bubbles).
Return the crust to the oven and bake for another 10-15 minutes, or until the bottom is golden brown and looks dry and fully baked. This ensures the crust is sturdy enough to hold the filling and less likely to become soggy. Allowing the crust to cool completely before adding the filling is crucial for preventing a soggy bottom.
Graham Cracker Crust: A Simple and Sweet Alternative
For those seeking a quick, easy, and delicious base for their cream pies, the graham cracker crust is an excellent choice. It requires no rolling, minimal ingredients, and often no baking (though a short bake can improve stability). This crust provides a sweet, slightly sandy texture that pairs beautifully with fillings like key lime, chocolate cream, or banana cream. It's a fantastic option for beginners or when you're short on time but still want a homemade touch, contributing to the versatility of perfecting cream pie crust recipes.
The simplicity of the graham cracker crust makes it incredibly approachable. Its sweet flavor profile complements a wide range of cream fillings, from tangy citrus to rich chocolate. Plus, the lack of intricate techniques like cutting in fat or rolling dough means it's much harder to "mess up" compared to a traditional pastry crust.
Making a Graham Cracker Crust from Scratch
Making a graham cracker crust is incredibly straightforward. You'll need graham crackers (about 10-12 full sheets for a 9-inch pie), melted butter (typically 5-6 tablespoons), and often a tablespoon or two of sugar, depending on how sweet you like it. Crush the graham crackers into fine crumbs. A food processor works best for uniform crumbs, but you can also place them in a zip-top bag and crush them with a rolling pin.
Combine the graham cracker crumbs and sugar in a bowl. Pour the melted butter over the crumb mixture and stir until everything is evenly moistened and the crumbs resemble wet sand. Pour the mixture into a 9-inch pie plate. Use the bottom of a glass or a measuring cup to firmly press the crumbs onto the bottom and up the sides of the pie plate. Pressing firmly is key to creating a crust that holds together when sliced.
Tips for a Firm Graham Cracker Crust
To ensure your graham cracker crust is firm and holds its shape when sliced, several factors are important. Firstly, make sure your crumbs are fine and uniform; large pieces won't bind as well. Secondly, use the correct amount of melted butter – too little won't bind, too much can make it greasy. The mixture should hold together when you squeeze a small amount in your hand.
Thirdly, and perhaps most importantly, press the mixture very firmly into the pie plate. Use a flat-bottomed object like a glass or measuring cup and press down hard, especially along the edges. Finally, chilling or baking sets the crust. For a no-bake crust, refrigerate for at least 1-2 hours. For added stability and a slightly toasted flavor, bake the pressed crust in a preheated oven (around 350°F or 175°C) for 8-10 minutes, then cool completely before filling. This short bake helps the butter bind the crumbs more securely.
Exploring Alternative Cream Pie Crusts for Unique Flavors
While classic crusts are fantastic, exploring alternative options can add exciting new dimensions to your cream pies. These variations allow you to introduce different flavors and textures, creating truly unique desserts. From rich chocolate to nutty bases and even gluten-free options, the possibilities for perfecting cream pie crust recipes extend far beyond the traditional.
These alternative crusts often use crushed cookies, nuts, or gluten-free flours as their base, offering distinct taste profiles and catering to different dietary needs or preferences. They provide an opportunity to get creative and tailor the crust specifically to the filling, enhancing the overall flavor experience of your cream pie.
Chocolate Cream Pie Crust: Adding Richness to Your Dessert
A chocolate crust adds a layer of deep, rich flavor that is perfect for pairing with contrasting fillings like vanilla cream, peanut butter, or even a tangy raspberry cream. It's a simple variation of the crumb crust, substituting chocolate cookies or wafers for graham crackers. This results in a decadent base that elevates the entire dessert and is a delightful way to enhance your perfecting cream pie crust recipes repertoire.
Using chocolate cookies provides a different kind of sweetness and a richer color compared to graham crackers. The texture is similar to a standard crumb crust – slightly sandy and firm, especially when baked or well-chilled. It's an easy switch that makes a big impact on the final flavor profile.
Recipe for a Decadent Chocolate Pie Crust
Here's a basic recipe for a chocolate crumb crust:
- Crush about
25-30chocolate sandwich cookies (like Oreos, with or without the cream filling depending on preference) into fine crumbs (about1 ½ cupsof crumbs). - Combine the crumbs with
4-5 tablespoonsof melted unsalted butter and1-2 tablespoonsof sugar (optional, especially if using sandwich cookies with filling). Stir until the crumbs are evenly moistened. - Press the mixture firmly into a 9-inch pie plate, covering the bottom and sides.
- Chill for at least 1 hour, or bake at 350°F (175°C) for 8-10 minutes for a firmer crust. Cool completely before filling.
Using the entire cookie, including the filling, adds extra richness and helps bind the crust, sometimes requiring slightly less melted butter. Experiment to find your preferred balance.
Pairing Chocolate Crust with Different Cream Pie Fillings
A chocolate crust is incredibly versatile. It's a natural partner for classic chocolate cream pie filling, doubling down on the cocoa flavor. However, it also creates exciting contrasts. Imagine a bright, tangy lemon cream filling against a rich chocolate base – a delightful surprise! Peanut butter cream pie is another perfect match, reminiscent of popular candy combinations.
Consider pairing a chocolate crust with:
- Classic Vanilla Bean Cream
- Peanut Butter Cream
- Raspberry or Strawberry Cream
- Mint Chocolate Chip Cream
- Coffee or Mocha Cream
The depth of the chocolate can stand up to bold flavors while also providing a sturdy, flavorful base for lighter, sweeter fillings, expanding the possibilities when perfecting cream pie crust recipes.
Nutty Cream Pie Crusts: Pecan, Almond, and More
Adding nuts to your pie crust introduces wonderful flavor and texture. Nutty crusts, whether made primarily from ground nuts or incorporating chopped nuts into a traditional pastry, offer a warm, toasted flavor and a delightful crunch. Pecan and almond are popular choices, but walnuts, hazelnuts, or even macadamia nuts can create unique bases for your cream pies. This is a delicious way to add complexity when perfecting cream pie crust recipes.
Nut crusts can be made entirely from ground nuts mixed with fat and a binder, or nuts can be added to a standard flour-based dough. The key is often toasting the nuts first to enhance their flavor, bringing out their oils and natural sweetness.
Creating a Pecan Pie Crust for Cream Pies
A pecan crust provides a rich, buttery flavor that's fantastic with fillings like caramel, maple, or even a classic vanilla or chocolate cream. One method is to make a crumb-style crust:
- Finely grind about
1 ½ cupstoasted pecans in a food processor. Be careful not to process too long, or you'll end up with nut butter. - Combine the ground pecans with
3-4 tablespoonsmelted butter,2 tablespoonssugar, and optionally1 tablespoonflour (to help bind). - Press the mixture firmly into a 9-inch pie plate.
- Bake at 350°F (175°C) for 10-12 minutes, or until lightly golden and fragrant. Cool completely before filling.
Alternatively, you can add finely chopped toasted pecans to a standard flaky pie dough recipe during the dry ingredient stage. This gives you the flakiness of traditional pastry with the added flavor and texture of nuts.
Toasting Nuts for Enhanced Flavor
Toasting nuts is a simple step that dramatically improves their flavor. It brings out their natural oils and deepens their taste, adding a layer of complexity to your crust. You can toast nuts on the stovetop in a dry skillet over medium heat, stirring frequently, for 5-10 minutes until fragrant and lightly browned. Be careful, as they can burn quickly!
Another option is toasting them in the oven. Spread nuts in a single layer on a baking sheet and bake at around 325°F (160°C) for 8-15 minutes, stirring halfway through. The time will vary depending on the type of nut and whether they are whole or chopped. Let the nuts cool completely before using them in your crust recipe. This simple technique is a game-changer for nutty bases when perfecting cream pie crust recipes.
Gluten-Free Cream Pie Crusts: Options for Dietary Needs
For those with gluten sensitivities or celiac disease, creating a delicious cream pie crust requires using alternative flours or ingredients. Fortunately, there are many excellent options available today that allow for perfecting cream pie crust recipes without gluten. These range from using gluten-free flour blends to naturally gluten-free crumb bases.
While working with gluten-free dough can sometimes present challenges (like being more crumbly), with the right techniques and ingredient choices, you can achieve a wonderful texture and flavor. It's all about understanding the properties of different gluten-free flours and binders.
Gluten-Free Flour Blends for Pie Crusts
Commercially available gluten-free all-purpose flour blends are often the easiest route for a pastry-style gluten-free crust. These blends typically contain a mix of flours like rice flour, potato starch, tapioca starch, and sometimes binders like xanthan gum or guar gum. Xanthan gum is often added to mimic the elasticity and structure that gluten provides. A typical gluten-free pastry crust recipe might use a blend, cold butter or shortening, and ice water, similar to a traditional recipe, but often with slightly different ratios or techniques to handle the dough's unique texture.
Alternatively, you can create your own blend using a combination of flours like brown rice flour, white rice flour, sorghum flour, tapioca starch, and potato starch. A common ratio might be 40% whole grain GF flour, 40% starch, and 20% white rice flour. Adding a small amount of xanthan gum (e.g., ½ teaspoon per cup of flour blend) is usually necessary for structure. Naturally gluten-free crumb crusts, like those made from almond flour, coconut flour, or gluten-free cookies (like gluten-free graham crackers or chocolate wafers), are also excellent and often simpler options.
Tips for Working with Gluten-Free Dough
Working with gluten-free pie dough requires a slightly different approach than traditional wheat-based dough. Gluten-free dough tends to be more delicate and crumbly, lacking the elasticity that gluten provides.
Here are some tips for perfecting cream pie crust recipes using gluten-free dough:
- Use a reputable blend or recipe: Start with a well-tested gluten-free pie crust recipe specifically designed for blends or alternative flours.
- Keep ingredients cold: Just like traditional dough, cold fat and ice water are crucial for texture.
- Don't overwork: Mix just until combined. Overmixing can make some GF doughs tough or gummy depending on the blend.
- Handle with care: Gluten-free dough can be fragile. Roll it between two pieces of parchment paper or plastic wrap to make transferring it to the pie plate easier.
- Patching is okay: If the dough cracks when rolling or transferring, simply press pieces together to patch it in the pie plate.
- Blind bake: Gluten-free pastry crusts almost always need to be blind baked to ensure they are fully cooked and sturdy. Follow similar blind baking steps as for wheat pastry, potentially baking slightly longer if needed.
Crumb crusts made from gluten-free cookies or nuts are often the easiest and most reliable gluten-free option for cream pies. Gluten-free graham crackers, vanilla wafers, or chocolate cookies work perfectly using the standard crumb crust method.
Comparing Different Crusts for Cream Pie: Flavor and Texture Profiles
Choosing the right crust is a crucial step in perfecting cream pie crust recipes. Each type offers a unique combination of flavor and texture that interacts differently with various fillings. Understanding these profiles helps you make the best match for your desired outcome.
Let's look at how some of the most common crusts stack up in terms of their sensory characteristics and how they pair with different cream pie fillings. This comparison will highlight why certain crusts are traditional pairings and where you might experiment for exciting new combinations.
Flaky vs. Graham Cracker vs. Chocolate: A Taste Test
Consider the experience of biting into a slice of cream pie with these different bases:
- Flaky Pastry: Offers a buttery, often slightly savory flavor (if unsweetened) and a delicate, layered, crisp texture. It provides a sophisticated counterpoint to rich, smooth fillings. It has less inherent sweetness than crumb crusts.
- Graham Cracker Crust: Provides a sweet, slightly honeyed, and cinnamon-spiced flavor. Its texture is uniformly crumbly, offering a pleasant contrast to creamy fillings. It's softer than flaky pastry.
- Chocolate Crust: Delivers a deep, sometimes slightly bitter (depending on the cookies used), rich chocolate flavor. Its texture is similar to graham cracker crust – dense and crumbly. It adds significant color and intensity.
| Feature | Flaky Pastry | Graham Cracker Crust | Chocolate Crust |
|---|---|---|---|
| Flavor | Buttery, Mildly Savory | Sweet, Honey, Cinnamon | Rich Chocolate |
| Texture | Layered, Crisp, Light | Uniformly Crumbly | Dense, Crumbly |
| Sweetness | Low to Moderate | High | Moderate to High |
| Preparation | More Technical | Simple, Quick | Simple, Quick |
Matching Crusts to Specific Cream Pie Fillings
The best crust often depends on the filling. Here are some classic pairings and ideas for perfecting cream pie crust recipes:
- Classic Vanilla or Banana Cream Pie: A traditional flaky butter crust is a perfect match. Its richness and delicate texture provide an elegant base that doesn't overpower the subtle flavors of the filling. A graham cracker crust also works well, adding a sweeter, more casual touch.
- Chocolate Cream Pie: A chocolate crumb crust is a natural, intensifying the chocolate flavor. A flaky crust can also work, offering a textural contrast, but the chocolate crumb is often preferred for its complementary flavor profile.
- Key Lime or Lemon Cream Pie: Graham cracker crust is the traditional choice. Its sweetness and slight spice balance the tartness of the citrus beautifully. A nutty crust (like pecan or almond) can also be a surprisingly good pairing, adding warmth.
- Peanut Butter Cream Pie: A chocolate crumb crust is arguably the best pairing, creating a flavor combination reminiscent of peanut butter cups. A standard graham cracker crust is also a good option.
- Coconut Cream Pie: A flaky pastry crust is classic, providing a delicate base for the creamy, tropical filling. A macadamia nut or even a plain shortbread crumb crust could also be interesting alternatives.
Ultimately, personal preference plays a big role. Don't be afraid to experiment and find your favorite combinations when perfecting cream pie crust recipes!
Troubleshooting Common Cream Pie Crust Problems
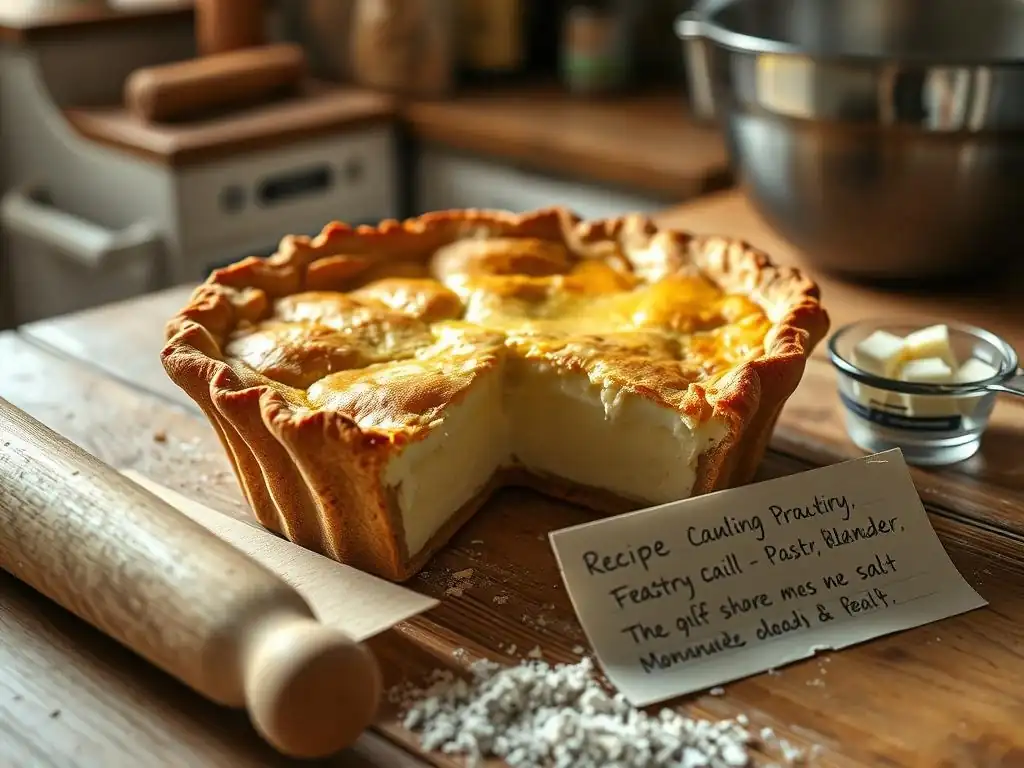
Even experienced bakers encounter issues with pie crusts. Knowing how to identify and fix common problems is crucial for consistently perfecting cream pie crust recipes. From soggy bottoms to shrinking edges, these issues can be frustrating but are often preventable or fixable with the right knowledge.
Let's address some of the most frequent complaints about pie crusts and how to overcome them. Understanding the causes behind these problems will empower you to achieve better results every time you bake a cream pie.
Soggy Crusts: Preventing and Fixing
A soggy bottom is perhaps the most common and disappointing pie crust problem, especially with wet cream fillings. It happens when moisture from the filling (or the air) seeps into the fully baked crust, turning it soft and unpleasant.
Prevention is key:
- Blind Baking: Fully bake your crust until the bottom is golden brown and appears dry and firm before adding the filling. This creates a barrier.
- Egg Wash/Chocolate Seal: For flaky crusts, brush the fully blind-baked hot crust with a thin layer of beaten egg white or tempered white chocolate after removing from the oven. The residual heat will cook the egg white or melt the chocolate, creating a moisture barrier. Let it cool completely before filling.
- Cool Completely: Ensure both the crust and the filling are completely cool before assembling the pie. Adding a warm filling to a warm or even cool crust is an invitation for sogginess.
- Fill Just Before Serving (if possible): For some very moist fillings, assembling the pie closer to serving time can help.
If you end up with a slightly soggy bottom, it's hard to "fix" once the pie is assembled. However, ensuring the crust is properly baked and sealed during the blind baking phase is your best defense for perfecting cream pie crust recipes without the dreaded soggy bottom.
Shrinking Crusts: How to Avoid
Pie crust shrinkage, where the dough pulls away from the sides of the pie plate during baking, is another common issue. This often results in a smaller, thicker bottom crust and can ruin the aesthetic of your pie.
Here's how to prevent shrinkage:
- Don't Overwork the Dough: Overworking develops gluten, which is elastic and will cause the dough to spring back and shrink when baked.
- Chill, Chill, Chill: Properly chilling the dough after forming it in the pie plate is crucial. This relaxes the gluten and firms the fat. Refrigerate the formed crust for at least 30 minutes before blind baking. Some bakers even freeze it briefly (15-20 minutes).
- Don't Stretch the Dough: When transferring the rolled dough to the pie plate, ease it in gently. Don't stretch it to fit, as it will snap back during baking.
- Use Pie Weights: Filling the crust with pie weights during the initial blind bake helps hold the dough in place and prevents the sides from collapsing or shrinking down significantly.
By following these steps, you can minimize shrinkage and maintain the size and shape you intended for your crust, essential for perfecting cream pie crust recipes with a professional finish.
Tough Crusts: Techniques for Tenderness
A tough, hard pie crust is usually the result of overdeveloping gluten. This happens when too much water is used, the dough is overworked during mixing or rolling, or the dough isn't handled gently.
To ensure a tender crust:
- Use Cold Ingredients: Cold fat and ice water slow down gluten development.
- Add Just Enough Water: Only add enough water for the dough to just come together. It should be slightly crumbly but hold its shape when squeezed.
- Mix Minimally: Stop mixing as soon as the dough forms a cohesive mass. Streaks of fat are desirable!
- Handle Gently: When rolling and transferring, use a light touch. Don't knead the dough like bread.
- Rest the Dough: Chilling the dough allows the gluten to relax, resulting in a more tender baked crust.
Achieving tenderness is a key aspect of perfecting cream pie crust recipes. It's a balance of hydration and handling; less is often more when it comes to mixing and working the dough.
Expert Tips for Baking the Ultimate Cream Pie Crust
Beyond the basic techniques, a few expert tips can elevate your crust from good to truly exceptional. These nuanced practices contribute significantly to the texture, flavor, and appearance of your finished pie shell, making your efforts in perfecting cream pie crust recipes even more successful.
Incorporating these tips into your baking routine can make a noticeable difference in the quality and consistency of your pie crusts. They are details that experienced bakers swear by for achieving that perfect result.
Chilling Dough for Optimal Results
We've mentioned chilling multiple times, but its importance cannot be overstated, especially for flaky pastry. Chilling serves several critical purposes:
- Firms the Fat: Cold fat is essential for creating layers of flakiness. Chilling ensures the butter/shortening remains solid until it hits the hot oven, where it melts and creates steam pockets.
- Relaxes Gluten: Working dough develops gluten, which can make it elastic and tough. Chilling allows the gluten strands to relax, making the dough easier to roll and preventing shrinkage during baking.
- Makes Dough Easier to Handle: Cold dough is less sticky and more manageable to roll out and transfer to the pie plate without tearing.
Aim for at least 30 minutes of chilling after mixing and after forming the crust in the pie plate. For best results, chilling the dough disc for 1-2 hours (or even overnight) before rolling is ideal. For the formed crust, 30-60 minutes in the fridge or 15-20 minutes in the freezer before blind baking works wonders for perfecting cream pie crust recipes.
Using the Right Baking Equipment
Having the correct tools can make the pie crust process smoother and improve results. A good quality pie plate is essential. Glass or ceramic pie plates conduct heat evenly and allow you to see the bottom crust browning, which is helpful for preventing sogginess. Metal pie pans also work and can result in a crispier bottom crust due to faster heat transfer.
Other useful equipment includes:
- Pastry Blender or Food Processor: For cutting cold fat into flour efficiently without warming it up too much with your hands.
- Rolling Pin: A sturdy rolling pin helps you roll the dough to an even thickness.
- Pastry Mat or Parchment Paper: Provides a non-stick surface for rolling and makes transferring dough easier.
- Pie Weights: Essential for blind baking to prevent the crust from puffing or shrinking. Ceramic weights, dried beans, or rice work.
- Bench Scraper: Useful for portioning dough and cleaning your work surface.
Investing in a few key pieces of equipment can significantly improve your experience and results when perfecting cream pie crust recipes.
Achieving a Golden-Brown Crust
The color of your baked crust is an indicator of flavor and texture development. A pale crust is often undercooked, potentially leading to a tough or soggy result. A beautiful golden-brown color indicates that the starches have caramelized, the fat has rendered properly, and the crust is fully baked, resulting in maximum flavor and crispness.
Tips for achieving a golden-brown crust:
- Proper Oven Temperature: Ensure your oven is accurately preheated. An oven thermometer can help verify this.
- Adequate Baking Time: Don't rush the baking process, especially during the second phase of blind baking after removing the weights. Allow the crust sufficient time to brown on the bottom and sides.
- Sugar in Dough (Optional): A small amount of sugar in a flaky pastry dough can promote browning.
- Egg Wash (for appearance): While not essential for blind baking, brushing the edge of the crust with a little milk or egg wash before the final bake can give it a nice sheen and golden color, enhancing the visual appeal of your perfected cream pie crust recipes.
Monitor your crust closely during the final minutes of baking, as it can go from golden to burnt quickly.
Advanced Techniques for Cream Pie Crust Perfection
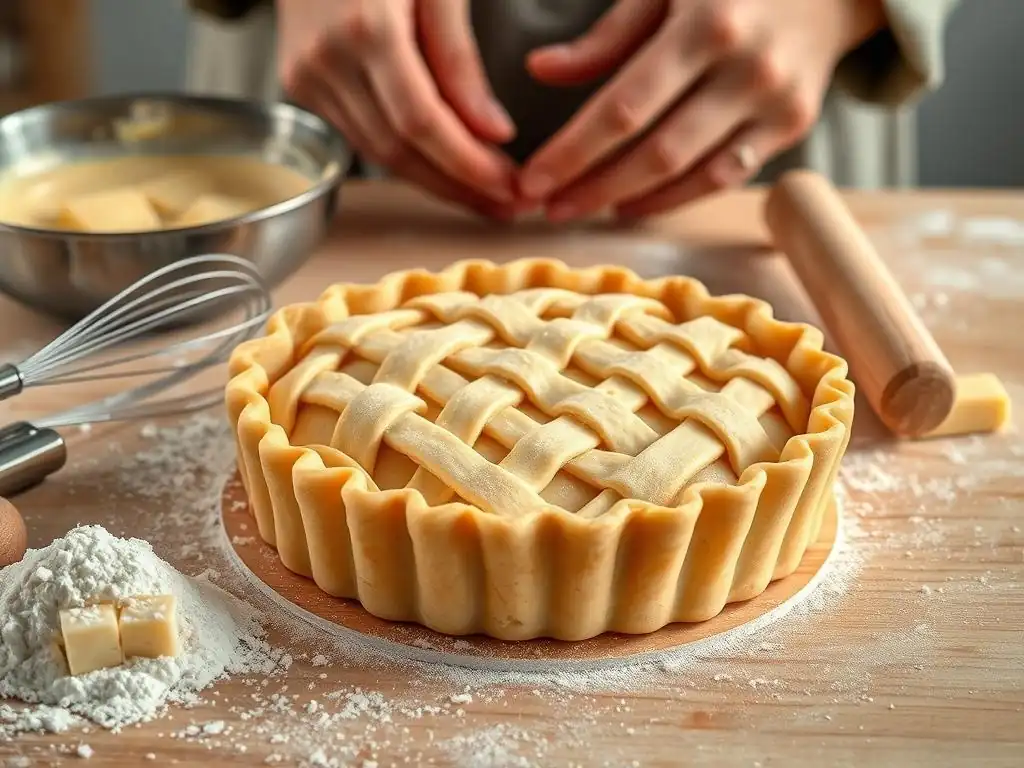
Once you've mastered the basics, you might want to explore more advanced techniques that add both structural integrity and visual flair to your cream pie crusts. These methods require a little more practice but result in a truly professional-looking and perfectly baked shell, taking your perfecting cream pie crust recipes to the next level.
These techniques are particularly relevant for flaky pastry crusts, ensuring they can support substantial fillings and present beautifully.
Pre-Baking and Blind Baking for Cream Pies
As previously discussed, blind baking (or pre-baking) is essential for most cream pies. It involves baking the empty pie shell before adding the filling. This ensures the crust is fully cooked, sturdy, and less susceptible to becoming soggy from the moist filling.
The standard process for blind baking involves:
- Lining the chilled, formed crust with parchment paper or foil.
- Filling the liner with pie weights, dried beans, or rice.
- Baking at a relatively high temperature (e.g., 375°F or 190°C) for 15-20 minutes with weights.
- Removing the weights and liner.
- Pricking the bottom with a fork.
- Continuing to bake for another 10-15 minutes (or longer) until the crust is fully golden brown and cooked through.
For fillings that require a very sturdy base, some bakers even slightly overbake the crust during the blind bake phase to ensure maximum dryness and structure, a key consideration for perfecting cream pie crust recipes intended for very wet fillings.
Lattice Crusts and Decorative Edges for Cream Pies
While cream pies often feature a single crust base, sometimes you might want to add a decorative top (like a lattice, though less common than with fruit pies) or simply make the edge of the base crust visually appealing. Decorative edges, like fluting or crimping, add a beautiful finishing touch to your perfected cream pie crust recipes.
Techniques for edges:
- Fluting: Using your thumb and index finger of one hand and the index finger of the other to create a wavy edge.
- Crimping: Using a fork to press down around the edge.
- Rope Edge: Twisting two thin ropes of dough together and attaching them around the rim.
For a lattice top (less common for cream pies but possible if the filling sets very firmly), roll out a second disc of dough. Cut it into even strips (e.g., 1-inch wide). Arrange half the strips parallel across the filled pie, then fold back alternate strips to weave the remaining strips perpendicularly. Trim and attach the ends to the bottom crust edge. Brush with egg wash for shine. This is more often seen on custard pies that bake with a top, but the technique can be adapted.
Cream Pie Crust Variations: Beyond the Basics
Stepping further outside the traditional, there's a world of creative crumb crusts that can add unique and memorable flavors to your cream pies. These variations are typically easy to make, following the basic crumb crust method but substituting different cookies or even pretzels for the graham crackers, offering exciting new avenues for perfecting cream pie crust recipes.
These alternative crumb crusts are fantastic for adding a playful twist or incorporating specific flavor pairings that complement your cream filling in unexpected ways. They are generally simple to execute and require minimal baking skill, making them accessible for all levels.
An Oreo cookie crust is a specific and popular type of chocolate crumb crust that uses the whole cookie, including the cream filling. This adds extra richness and sweetness, and the filling helps bind the crumbs together effectively.
To make an Oreo crust:
- Process about
25-30whole Oreo cookies (filling included) into fine crumbs in a food processor. - Stir in
4-6 tablespoonsof melted unsalted butter. The amount of butter needed can vary slightly depending on the humidity and how finely the cookies are ground. - Press the mixture firmly into a 9-inch pie plate.
- Chill for at least 1 hour, or bake at 350°F (175°C) for 6-8 minutes for extra firmness. Cool completely.
This crust is particularly wonderful with vanilla, mint, or peanut butter cream fillings, creating flavor combinations reminiscent of popular desserts and candies. It's a simple swap that dramatically changes the character of the pie, proving that perfecting cream pie crust recipes can involve just a few ingredient tweaks.
Pretzel Crusts: A Sweet and Salty Delight for Cream Pies
For a truly unique flavor experience, consider a pretzel crust. The combination of salty pretzels and sweet sugar, bound with butter, creates a fascinating sweet-and-salty base that pairs surprisingly well with cream cheese-based fillings, fruit creams (like strawberry or raspberry), or even caramel or peanut butter.
To make a pretzel crust:
- Crush about
1 ½ cupsof pretzels (the twisted kind work well) into coarse crumbs. Some larger pieces are okay for texture. - Combine the pretzel crumbs with
½ cupsugar and6-8 tablespoonsmelted unsalted butter. Stir until the crumbs are evenly coated. - Press the mixture firmly into a 9-inch pie plate.
- Bake at 350°F (175°C) for 10-12 minutes, or until lightly golden and fragrant. Cool completely before filling.
The saltiness of the pretzels provides a wonderful contrast to sweet cream fillings, creating a more complex flavor profile. This crust is a fantastic option when you want to surprise your guests and showcase your creativity in perfecting cream pie crust recipes.
Conclusion: Choosing the Right Crust for Your Cream Pie Masterpiece
Perfecting cream pie crust recipes is about understanding the interplay of ingredients, techniques, and desired outcomes. We've explored the fundamentals of flaky pastry, the simplicity of graham cracker crusts, and exciting variations like chocolate, nutty, and even pretzel bases. Each crust offers a unique contribution in terms of flavor, texture, and ease of preparation.
When selecting a crust for your cream pie, consider the filling you plan to use and the overall flavor and texture experience you want to create. Do you want a delicate, buttery contrast to a rich filling? Opt for a flaky pastry. Do you prefer a sweet, crumbly base that requires minimal effort? A graham cracker or other cookie crumb crust is ideal.
Are you looking for a bold flavor pairing? Explore chocolate, nutty, or sweet-and-salty options. By considering these factors and practicing the techniques discussed, you are well on your way to perfecting cream pie crust recipes and creating truly memorable desserts. Happy baking!
Frequently Asked Questions
What are the key differences between various cream pie crust recipes?
Different crusts vary in fat content, flour type, and mixing method, significantly impacting texture. Some use butter for flakiness, while others use shortening for tenderness.
How can I avoid a soggy bottom crust when making cream pies?
Preventing a soggy crust involves blind baking the crust fully before adding the filling and using a glaze to create a moisture barrier. You can also chill the pie before filling.
What ingredients are essential for a truly perfect cream pie crust?
High-quality butter or shortening, cold water, and all-purpose flour are fundamental. A pinch of salt enhances flavor, and some recipes include sugar for added sweetness.
What techniques should I employ to ensure a flaky cream pie crust?
Keep ingredients cold, avoid overmixing, and laminate the dough by folding in butter pieces. This creates layers that separate during baking, resulting in flakiness.
Where can I find easy-to-follow cream pie crust recipes suitable for beginners?
BakeWithEase.com offers step-by-step guides and simple recipes tailored for bakers of all skill levels, including those new to making cream pie crusts.
Final Reflection: The Crust's Crucial Contribution to Cream Pie Perfection
The perfect cream pie isn't just about the creamy filling; it's about the harmonious partnership between that luscious center and a flawlessly executed crust. A truly exceptional pie elevates the entire experience, transforming a simple dessert into a moment of pure indulgence. This exploration into diverse crust options underscores the often-overlooked importance of this foundational element.
The journey through various crust recipes – from classic buttery shortcrust to the surprising textures of gingersnap and pecan – has highlighted the profound impact a crust can have on the overall taste and aesthetic appeal of a cream pie. It's not simply a vessel; it's an active participant in the symphony of flavors and textures. As Julia Child wisely said, Find something you're passionate about and keep tremendously interested in it.
My passion for baking, and specifically for perfecting the cream pie, has led me down this path of crust exploration, and I hope it inspires you to experiment as well.
Now, it's your turn. Don't be afraid to venture beyond the familiar. Experiment with different flours, fats, and additions to find the perfect crust that complements your favorite cream pie filling. Consider the interplay of textures and flavors – a delicate, flaky crust might pair beautifully with a light and airy filling, while a robust, nutty crust could enhance a richer, more decadent cream. The possibilities are endless, and the journey of discovery is just as rewarding as the final, delicious bite.
Unleash Your Inner Pie Master: Craft the Perfect Crust!
Thanks for exploring the wonderful world of pie crusts with us! We hope you've discovered new techniques and inspiration to elevate your baking game. Ready to put your newfound knowledge into practice?
- Bake your dream pie: Try out one of the crust recipes discussed – the flaky all-butter, the easy-to-handle lard crust, or perhaps even the surprising gluten-free option. Let your creativity flow!
- Share your creations: Show us your masterpiece! Post a picture of your perfect pie on social media using #BakeWithEasePieCrust. We'd love to see what you bake.
- Experiment with flavors: What unique flavor combinations will you create with your newly mastered crust? Think beyond the usual – what unexpected ingredients could you incorporate?
What exciting flavor profile will you create with your next perfect pie crust?