
FasterProofing Sweet Rolls: An Intermediate Time Saver

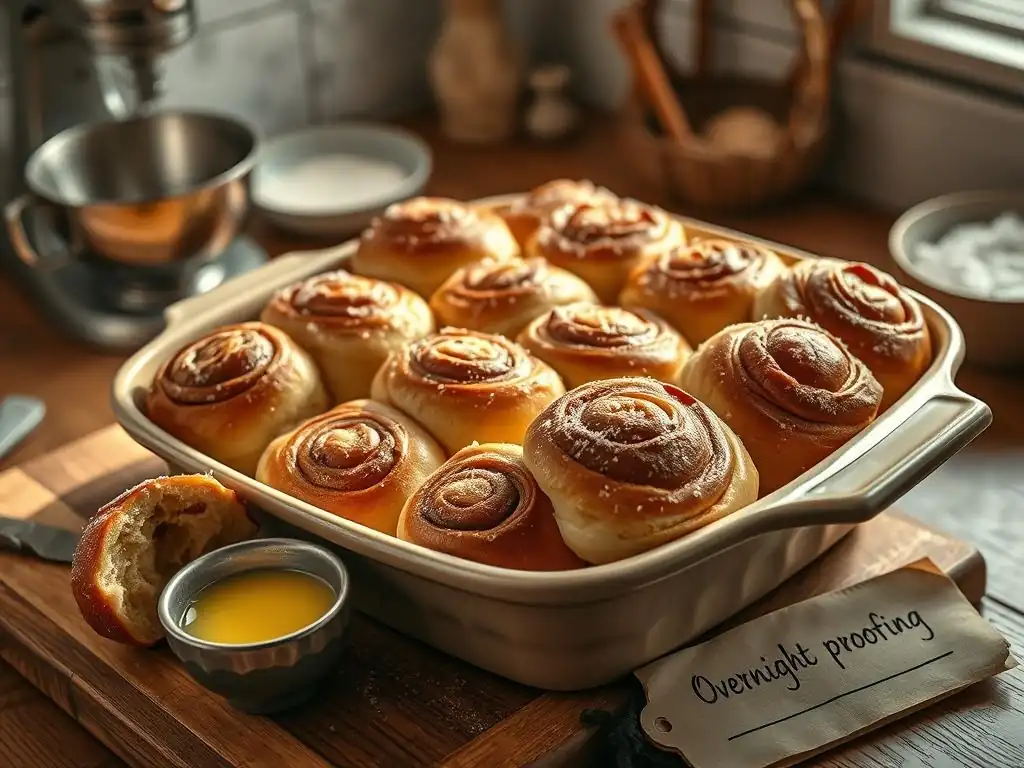
Welcome to BakeWithEase, your companion in the delightful world of baking! Are you ready to unlock a secret that will revolutionize your sweet roll game? Dive into our latest guide and discover the magic of easy overnight sweet roll proofing. Learn how to transform your weekend baking plans with this time-saving technique, and start creating those delicious rolls faster than ever before. The tantalizing aroma awaits—let's get baking!
- Introduction: Streamlining Your Sweet Roll Baking Process
- Understanding Traditional Sweet Roll Proofing Times
- Introducing Faster Proofing Techniques for Sweet Rolls
- Method 1: Utilizing a Warm Environment for Accelerated Proofing
- Method 2: The Dough Enhancer Approach to Rapid Proofing
- Method 3: Optimizing Yeast Activity for Quicker Proofing
- Troubleshooting Faster Proofing Challenges
- Recipe Adaptation: Converting Traditional Sweet Roll Recipes for Faster Proofing
- Tips and Tricks for Consistently Perfect Faster-Proofed Sweet Rolls
- Conclusion: Mastering Faster Proofing for Delicious Sweet Rolls
-
Frequently Asked Questions
- How does overnight proofing benefit sweet rolls?
- What's the ideal temperature for overnight proofing sweet rolls?
- Can I over-proof sweet rolls if I leave them in the refrigerator too long?
- Do I need to adjust the amount of yeast when using the overnight proofing method?
- How do I prepare the sweet rolls for baking after overnight proofing?
- Final Reflection: The Sweetness of Efficiency
- Unleash Your Inner Baking Ninja: Faster Rolls, More Fun!
Introduction: Streamlining Your Sweet Roll Baking Process
Baking sweet rolls is a rewarding experience, filling your home with irresistible aromas and culminating in delicious treats. However, the traditional process often involves significant waiting periods, primarily during the dough proofing stage. For intermediate bakers looking to refine their skills and manage their time more efficiently, mastering faster proofing techniques can be a genuine game-changer. This article explores practical methods to significantly reduce the time it takes for your sweet roll dough to rise, allowing for more flexible baking schedules without compromising quality.
Sweet rolls, from classic cinnamon swirls to sticky pecan buns, rely on a well-executed proof to achieve their signature light and fluffy texture. While an easy overnight sweet roll proofing method offers convenience by spreading the work over two days, it requires foresight and planning. Faster proofing provides an alternative, enabling you to enjoy freshly baked sweet rolls in a fraction of the time, perfect for spontaneous baking urges or fitting baking into a busy day.
Why Faster Proofing is a Game Changer for Sweet Roll Bakers
For many home bakers, especially those moving beyond basic recipes, time management is a critical factor in deciding what and when to bake. Traditional sweet roll recipes often call for proofing times ranging from 1 to 2 hours at room temperature for the first rise, and sometimes a similar duration for the second rise after shaping.
This means a significant portion of your baking time is spent waiting, which can be inconvenient when you have other tasks or a tight schedule. Faster proofing techniques drastically cut down this waiting period, allowing you to move from mixing the dough to baking in a much shorter timeframe.
Embracing faster proofing opens up new possibilities for bakers. It means you can decide to make sweet rolls in the morning and have them ready for an afternoon treat, or start them after dinner and enjoy them for breakfast without needing an easy overnight sweet roll proofing plan. This increased flexibility encourages more frequent baking and experimentation with different sweet roll variations. It empowers intermediate bakers to take control of the baking process, making it fit their life rather than letting the long proofing times dictate their schedule.
Understanding Traditional Sweet Roll Proofing Times
Traditional sweet roll recipes typically rely on ambient room temperature for the dough to rise, a process that can be quite variable depending on the environment. Yeast activity, the engine of proofing, is heavily influenced by external factors. Understanding these factors is key to appreciating why traditional proofing takes as long as it does and how faster methods work by manipulating these same elements.
The classic method, while reliable, can be time-consuming. A typical first proof for a sweet roll dough might take 60 to 90 minutes at a room temperature of around 70°F (21°C), with the dough expected to double in size. The second proof after shaping can take another 45 to 75 minutes. These times are estimates and can fluctuate significantly. Recognizing these variables is the first step towards implementing techniques that can reliably speed up the process.
Factors Affecting Standard Proofing Duration (Temperature, Humidity, Ingredients)
The most significant factor influencing proofing speed is temperature. Yeast is most active within a specific temperature range, roughly 75-85°F (24-29°C). At cooler room temperatures, say 65°F (18°C), yeast activity slows down considerably, potentially doubling the required proofing time or more.
Conversely, temperatures above 95°F (35°C) can cause yeast to become overactive and produce off-flavors, while temperatures above 140°F (60°C) will kill the yeast entirely. Humidity also plays a role; a dry environment can cause the surface of the dough to dry out, forming a crust that restricts expansion, whereas adequate humidity helps maintain a pliable surface for even rising.
Ingredient composition also impacts proofing speed. Sweet roll doughs are often enriched with sugar, butter, and eggs. Sugar, while providing food for the yeast, can also inhibit yeast activity in high concentrations due to osmotic pressure. Fat from butter and eggs coats gluten strands, potentially slowing down dough development and rise. Different types of flour also absorb liquid differently, affecting dough consistency and proofing. A dough with a higher sugar or fat content might naturally take longer to proof than a lean bread dough, even under optimal temperature conditions.
The Drawbacks of Long Proofing Times: Planning and Spontaneity
The primary drawback of relying solely on traditional, longer proofing times is the significant time commitment and the need for careful planning. If a recipe calls for a 90-minute first proof and a 60-minute second proof, you're looking at over two hours of waiting time just for the dough to rise, not including mixing, shaping, or baking. This makes it difficult to bake sweet rolls on a whim or squeeze the activity into a busy afternoon. Baking becomes an event that needs to be scheduled well in advance.
This lack of spontaneity can be frustrating for intermediate bakers eager to practice their skills or share fresh treats. While an easy overnight sweet roll proofing method solves the timing issue by allowing the dough to rise slowly in the refrigerator while you sleep, it still requires planning the day before. Faster proofing techniques offer an alternative that reduces the overall time from start to finish, making it possible to bake sweet rolls more spontaneously, perhaps deciding to bake after lunch and having warm rolls ready for an early dinner or snack.
Introducing Faster Proofing Techniques for Sweet Rolls
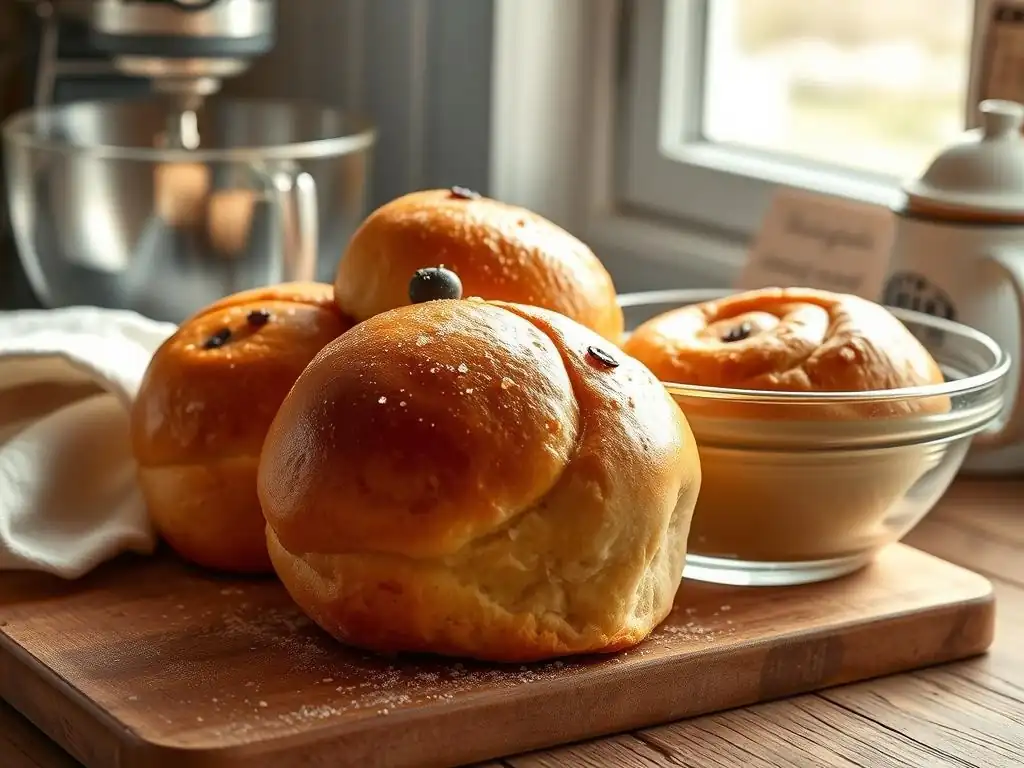
Faster proofing refers to methods that accelerate the natural process of yeast fermentation, causing the dough to rise more quickly than it would at standard room temperature. This is achieved by optimizing the conditions for yeast activity or by using ingredients that enhance the dough's ability to rise rapidly. The goal is to significantly reduce the proofing time, often cutting it in half or even more, while still developing sufficient gas to create a light and airy texture.
Implementing faster proofing is not about skipping essential steps but about making the existing steps more efficient. It requires understanding the science behind yeast activity and dough development. By providing the yeast with an ideal environment or giving the dough a helping hand, you can achieve a fully proofed state in less time. This allows you to move on to the baking phase sooner, enjoying your delicious sweet rolls without the extended wait.
What is Faster Proofing and How Does it Work?
Faster proofing techniques primarily work by increasing the metabolic rate of the yeast or improving the dough's structure to capture gas more efficiently. Yeast produces carbon dioxide gas as it consumes sugars in the dough. This gas gets trapped within the gluten network, causing the dough to expand (rise). The speed at which yeast produces gas is highly dependent on temperature. By raising the dough's temperature to the optimal range for yeast activity (around 75-85°F or 24-29°C), you dramatically increase the rate of gas production compared to a cooler room temperature.
Beyond temperature, certain ingredients or methods can also accelerate the process. Using a higher percentage of yeast than a traditional recipe, within reason, will naturally lead to faster gas production. Dough enhancers containing substances like ascorbic acid (Vitamin C) or vital wheat gluten can strengthen the gluten network, allowing it to stretch further and trap more gas, which can give the appearance of faster proofing or support a more rapid rise. Diastatic malt powder provides enzymes that break down starches into sugars, offering more food for the yeast and potentially speeding up fermentation.
Maintaining Flavor and Texture with Accelerated Proofing
A common concern with faster proofing is whether it negatively impacts the flavor and texture of the sweet rolls. Much of the complex flavor in traditionally proofed bread comes from the slower, longer fermentation process, where yeast and other microorganisms produce various aromatic compounds.
Rapid proofing can sometimes lead to a less complex flavor profile or a texture that is slightly less tender if not managed correctly. However, for enriched doughs like sweet rolls, which derive much of their flavor from butter, sugar, and fillings, the impact of a shorter proof on overall flavor complexity is often less pronounced compared to lean bread doughs.
To maintain excellent texture and flavor with accelerated proofing, it's crucial not to rush the process too much. The goal is faster proofing, not instantaneous proofing. Using a warm environment (75-85°F) is generally preferred over excessively high temperatures (above 90°F or 32°C), which can stress the yeast and lead to off-flavors.
Allowing the dough to go through both a bulk fermentation and a shorter second proof after shaping is still important for developing structure. Techniques like using a warm environment or optimizing yeast are generally better for flavor than simply adding excessive amounts of yeast or relying solely on chemical enhancers.
Method 1: Utilizing a Warm Environment for Accelerated Proofing
One of the most effective and straightforward ways to speed up sweet roll proofing is by placing the dough in a warm environment. As discussed, yeast thrives in warmth, and providing an optimal temperature significantly increases its activity, leading to a faster rise. This method is accessible to most home bakers and doesn't require special ingredients. It's about creating the right conditions for the yeast already present in your dough to work more efficiently.
Using a warm environment is a reliable technique for achieving faster proofing for sweet rolls. It leverages the biological activity of the yeast itself. By consistently providing a temperature in the yeast's ideal range, you ensure a steady and predictable rise, cutting down the typical 1-2 hour waiting period to potentially half that time or even less, depending on the specific temperature and dough.
Creating the Ideal Warm Proofing Environment at Home
Fortunately, you don't need specialized equipment to create a warm proofing environment. One common method is to use your oven. Simply preheat the oven to its lowest setting (often around 170-200°F or 75-95°C) for just a minute or two, then turn it OFF. Alternatively, you can just turn on the oven light, which often generates enough heat to warm the small space to a suitable temperature, typically around 75-85°F (24-29°C). Place your covered dough inside the turned-off, slightly warmed oven.
Another simple technique is to place the dough in a warm spot in your kitchen, such as near a sunny window (ensure it's not too hot, though, which could kill the yeast or melt butter in the dough), on top of a warm appliance like a refrigerator (which often emits heat), or near a pilot light on a gas stove. Some bakers heat a cup of water in a microwave, then place the covered dough inside the microwave with the hot water (do not turn the microwave on!).
The steam from the water also helps maintain a humid environment, preventing the dough surface from drying out.
Temperature Control: The Sweet Spot for Fast Proofing
Maintaining the correct temperature is crucial when using a warm environment for faster proofing. The sweet spot for yeast activity is generally considered to be between 75°F and 85°F (24°C and 29°C). Within this range, yeast ferments vigorously, producing gas rapidly. Temperatures slightly below this range will still result in faster proofing than cool room temperature, but it will take longer.
However, caution is needed to avoid temperatures that are too high. Above 90°F (32°C), yeast activity can become excessively rapid, potentially leading to over-proofing before sufficient gluten development occurs, resulting in a poor texture. Even worse, temperatures exceeding 130°F (54°C) can start to kill the yeast, stopping the rise altogether. If using the oven method, always turn the oven off before placing the dough inside and monitor the temperature if possible (a simple oven thermometer works). If the oven feels too hot to comfortably hold your hand in, it's too hot for the dough.
Monitoring Sweet Roll Rise in a Warm Environment
Because the dough is proofing faster in a warm environment, it's essential to monitor its progress closely. The visual cues for readiness remain the same – the dough should roughly double in size during the first proof (bulk fermentation) and become visibly puffy and expanded during the second proof after shaping. However, the time it takes to reach these stages will be significantly reduced compared to standard room temperature.
Instead of the typical 60-90 minutes for the first proof, you might find your sweet roll dough is ready in 30-50 minutes in a warm environment. The second proof after shaping might take only 20-40 minutes. Use the "poke test" to check readiness: gently press a finger into the dough; if the indentation springs back very slowly or only partially, it's likely ready. If it springs back immediately, it needs more time. If it collapses, it's likely over-proofed. Rely on visual cues and the poke test more than strict timing when using accelerated methods.
Method 2: The Dough Enhancer Approach to Rapid Proofing
Dough enhancers are ingredients, often used in commercial baking, that can improve dough handling, texture, volume, and indeed, proofing speed. For home bakers looking for reliable faster proofing, particularly if struggling to create a consistent warm environment, certain dough enhancers can be a valuable tool. They work by strengthening the dough's structure or providing additional food for the yeast, allowing for a more robust and potentially faster rise.
Using a dough enhancer is a way to give your sweet roll dough an internal boost. It's not just about making the yeast work harder, but about making the dough matrix better equipped to handle the gas the yeast produces, leading to a more efficient and sometimes quicker expansion. While not strictly necessary for delicious sweet rolls, they can offer an extra layer of reliability for faster proofing, especially in variable conditions.
Understanding Dough Enhancers and Their Impact on Proofing Time
Dough enhancers are formulations designed to improve various aspects of bread and pastry dough. Some common components include vital wheat gluten, ascorbic acid (Vitamin C), enzymes (like amylase found in diastatic malt), and sometimes emulsifiers. Vital wheat gluten, for instance, increases the protein content of the flour, strengthening the gluten network. A stronger network can trap more gas, leading to a higher rise and potentially allowing the dough to reach its proofed state faster, or at least tolerate faster proofing conditions better without collapsing.
Ascorbic acid is a dough conditioner that acts as an oxidizing agent, strengthening the gluten structure by forming more disulfide bonds. This makes the dough more elastic and extensible, allowing it to expand further without tearing. Enzymes like amylase break down complex starches into simple sugars, which are readily consumed by yeast, potentially providing a more consistent food source and supporting more vigorous fermentation. While not all enhancers directly speed up yeast activity, they improve the dough's capacity to rise, which can be critical in faster proofing scenarios where gas production is accelerated.
Choosing the Right Dough Enhancer for Sweet Rolls
For home bakers focusing on sweet rolls and faster proofing, vital wheat gluten and diastatic malt powder are two of the most accessible and effective enhancers. Vital wheat gluten is particularly useful when using lower-protein flours (like all-purpose) in recipes that benefit from a stronger structure, helping the enriched dough rise higher and hold its shape. Adding just a tablespoon or two per cup of flour can make a noticeable difference.
Diastatic malt powder provides enzymes that convert starch to sugar, giving the yeast more fuel. This can lead to a more active and potentially faster fermentation, as well as improved crust browning and flavor development. Non-diastatic malt provides flavor and color but does not contain the active enzymes that aid proofing. When choosing a malt, ensure it is diastatic if your goal is to support faster proofing. These enhancers are widely available online and in specialty baking stores.
Precise Measurement: Ensuring Optimal Results with Dough Enhancers
Using dough enhancers requires precision. They are potent ingredients, and too much can negatively impact the dough's texture and flavor. Vital wheat gluten is typically added at a rate of 1-2% of the flour weight, or about 1-2 tablespoons per cup of all-purpose flour. Adding too much can result in a tough, dense texture.
Diastatic malt powder is used in even smaller quantities, usually 0.5% to 1% of the flour weight. For a recipe using 3-4 cups of flour (roughly 400-500g), this might mean adding only 2-5 grams, or about ½ to 1 teaspoon. Exceeding the recommended amount of diastatic malt can lead to excessive enzymatic activity, resulting in a sticky, gummy dough interior. Always start with the lower recommended amount and adjust in future bakes based on your results.
Method 3: Optimizing Yeast Activity for Quicker Proofing
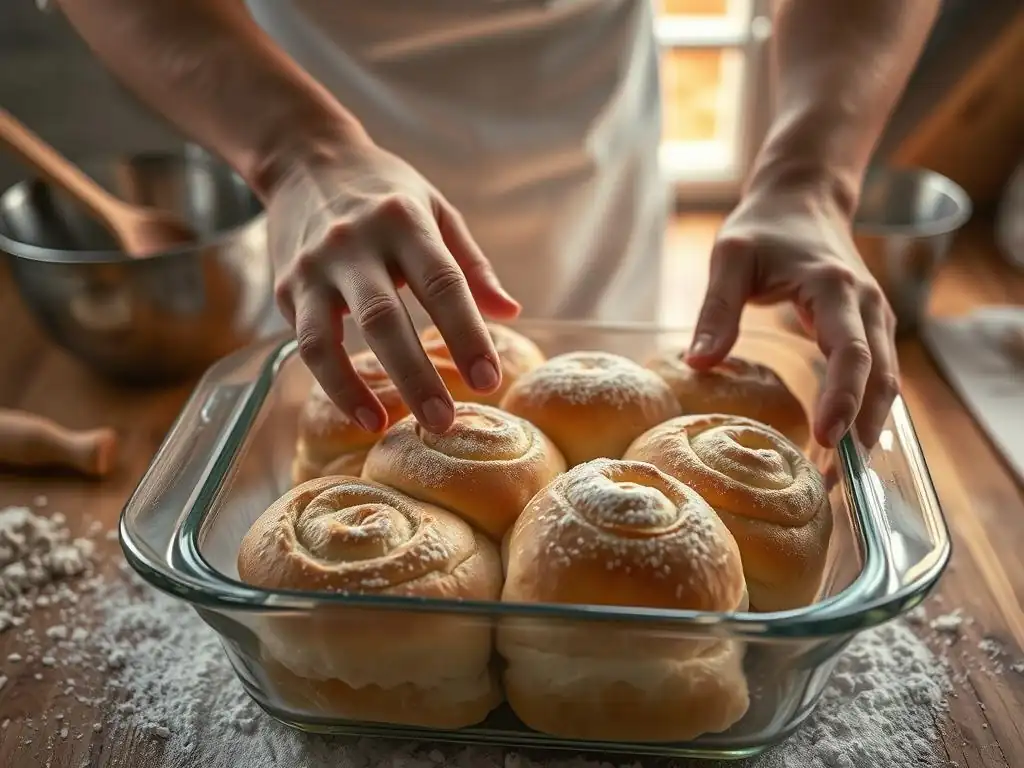
The type of yeast you use and how you handle it significantly impacts proofing speed. While all baker's yeast (Saccharomyces cerevisiae) performs the same basic function, different processing methods result in yeasts that behave differently. Understanding these differences allows you to select the yeast best suited for faster proofing and activate it for maximum efficiency.
Optimizing your yeast usage is a fundamental aspect of controlling the proofing process. By choosing the right type and ensuring it's working at its peak, you inherently accelerate the rate of gas production, making faster proofing a more attainable goal for your sweet rolls. This method works well in conjunction with a warm environment.
Selecting the Right Yeast: Instant vs. Active Dry
The two most common types of dry yeast available to home bakers are Active Dry Yeast (ADY) and Instant Dry Yeast (IDY). Active dry yeast consists of larger granules that are dormant and require rehydration in warm liquid before being added to dry ingredients. This activation step ensures the yeast is alive and ready to work, but it adds a step and a potential waiting period (5-10 minutes).
Instant dry yeast, on the other hand, is processed into smaller particles and contains dough conditioners that allow it to be mixed directly with the dry ingredients without prior hydration. IDY is known for being more vigorous and reliable, often causing dough to rise about 20-30% faster than ADY in the same conditions. For bakers prioritizing faster proofing, IDY is often the preferred choice due to its convenience and speed. While an easy overnight sweet roll proofing often uses less yeast or cooler temperatures to slow things down, faster methods benefit from the inherent efficiency of IDY.
Yeast Activation Techniques for Faster Rise
If you are using Active Dry Yeast, proper activation is key to ensuring a fast and vigorous start to proofing. Dissolve the yeast in the amount of warm liquid specified in your recipe (usually water or milk). The ideal temperature for activating ADY is between 105°F and 115°F (40°C and 46°C). Add a pinch of sugar to the liquid; this provides immediate food for the yeast, encouraging it to become active and start multiplying. Let the mixture sit for 5-10 minutes until it becomes foamy and bubbly. This foam indicates the yeast is alive and active.
When using Instant Dry Yeast, you typically just add it directly to your flour and other dry ingredients and proceed with mixing. The liquid in the recipe will hydrate the yeast during the mixing process. While IDY doesn't require proofing in liquid, some bakers still prefer to bloom it briefly in warm liquid (up to 130°F or 54°C) to ensure it's active, especially if they are unsure about the yeast's age or viability. However, for most fresh IDY, simply adding it to the dry ingredients works perfectly and is part of why it's considered "instant" and faster.
Adjusting Liquid Temperature for Enhanced Yeast Performance
The temperature of the liquid used in your sweet roll dough is another critical factor in influencing yeast activity and proofing speed. While yeast can tolerate a range of temperatures, using liquid that is too cold will significantly slow down fermentation, resulting in very long proofing times. Using liquid that is too hot, however, can damage or kill the yeast.
For optimal yeast performance and faster proofing, aim for liquid temperatures between 105°F and 115°F (40°C and 46°C) when activating Active Dry Yeast. If you are using Instant Dry Yeast mixed directly with dry ingredients, the liquid temperature can be slightly warmer, up to 120-130°F (49-54°C), as the dry ingredients help buffer the temperature and protect the yeast. Using liquid in this warmer range gives the yeast a head start, initiating fermentation more quickly than cooler liquids and contributing to a faster overall proofing time for your sweet rolls.
Troubleshooting Faster Proofing Challenges
While faster proofing offers significant time-saving benefits, it also introduces potential pitfalls if not managed carefully. The accelerated pace means less room for error and requires more attentive monitoring than traditional, slower methods or an easy overnight sweet roll proofing approach. Understanding common issues like over-proofing and under-proofing, and knowing how to identify and correct them, is essential for consistent success with faster techniques.
Troubleshooting is a natural part of the baking process, especially when experimenting with new methods. Don't be discouraged if your first attempts at faster proofing aren't perfect. By learning to recognize the signs of common problems and understanding their causes, you can quickly adapt and improve your technique, leading to reliably delicious faster-proofed sweet rolls.
Over-Proofing: Recognizing the Signs and Preventing It
Over-proofing occurs when dough is allowed to rise for too long, causing the yeast to consume all available sugars and the gluten structure to become weakened and unable to support the gas produced. In a warm environment, where yeast is highly active, over-proofing can happen quite rapidly. Signs include the dough rising very high and then starting to sag or collapse, large, irregular bubbles forming on the surface, and a strong, sometimes sour, fermented smell. When poked, over-proofed dough will deflate completely.
Preventing over-proofing with faster methods requires diligent monitoring. Since the dough proofs quickly, especially in a warm environment (75-85°F), you cannot simply rely on the timing given in a traditional recipe. Start checking the dough for readiness (doubled in size, poke test) earlier than you might expect.
If using a proofing box or warm oven, check every 15-20 minutes. If you suspect over-proofing, you can sometimes salvage the dough by gently punching it down, reshaping (if it's the first rise), and giving it a very short second proof, but the final texture may still be compromised. Baking the dough as soon as it hits the "just right" stage is the best prevention.
Under-Proofing: Identifying and Correcting the Issue
Under-proofing happens when the dough hasn't risen enough before baking. The yeast hasn't produced sufficient gas to create a light texture, and the gluten structure hasn't relaxed enough. Signs of under-proofed sweet rolls include a dense, heavy texture, poor oven spring (the final burst of rising in the oven), and a tight crumb structure. The rolls might look smaller and less puffy before baking, and the poke test will show the indentation springing back immediately.
Correcting under-proofing is usually straightforward: simply give the dough more time to rise. If you're using a warm environment and the dough isn't ready after the expected shorter timeframe, leave it in the warm spot and check again in 10-15 minutes. Ensure your warm environment isn't too hot, which could be inhibiting the yeast, or that your yeast wasn't expired or damaged.
If using ADY, ensure it was properly activated and foamy before adding it. Sometimes, simply moving the dough to a slightly warmer spot is enough to get things moving. Patience is key if the dough is slow to rise.
Adapting Proofing Times to Different Recipes
It's important to understand that faster proofing isn't a universal formula that applies identically to every sweet roll recipe. The ideal proofing time, even with accelerated methods, will vary based on the recipe's ingredients (amount of sugar, fat, and flour type), the yeast quantity, the ambient temperature, and the specific faster proofing technique used. A rich dough with a high percentage of butter and sugar will typically proof slower than a leaner dough, even in a warm environment.
Therefore, when using faster proofing techniques, use the suggested timings as a guideline but rely more heavily on visual cues and the poke test to determine when the dough is ready. Monitor the dough's expansion and feel frequently. If a recipe typically calls for a 90-minute proof at room temperature, and you're using a warm environment (80°F / 27°C), you might estimate it will take around 40-50 minutes, but start checking at 30 minutes. Learning to read the dough is the most reliable skill for successful faster proofing across various sweet roll recipes.
Recipe Adaptation: Converting Traditional Sweet Roll Recipes for Faster Proofing
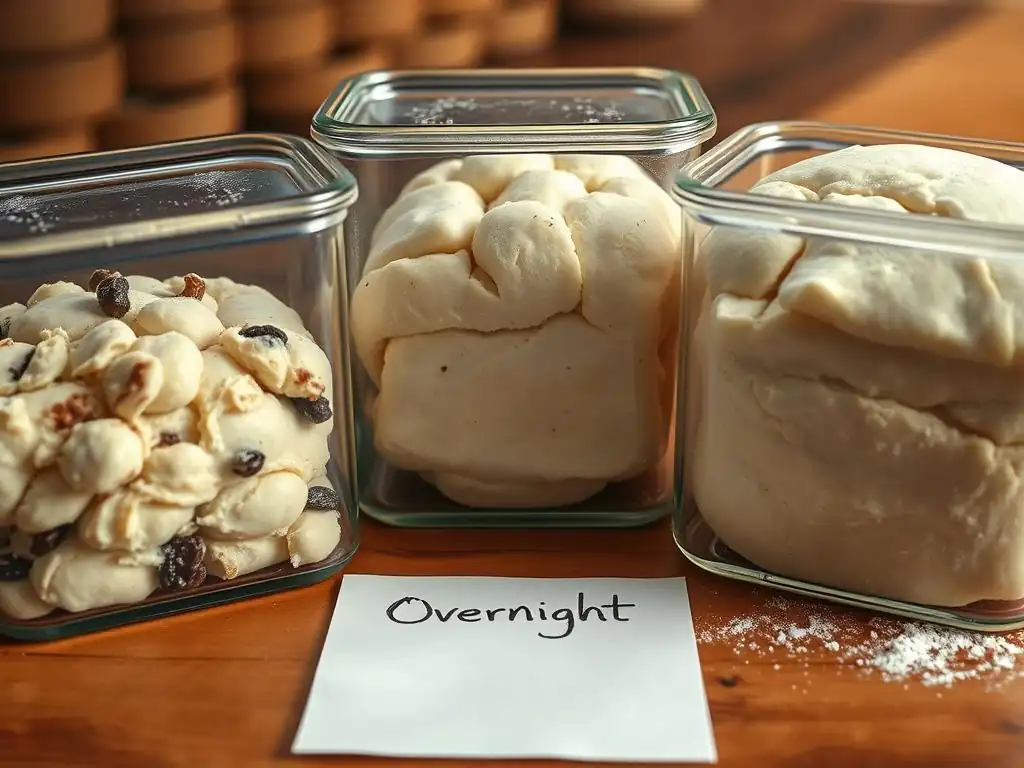
Most traditional sweet roll recipes are written assuming proofing will occur at average room temperature (around 70°F / 21°C). To successfully use faster proofing techniques with these recipes, you need to adapt your approach, primarily by adjusting your expectations for proofing time and potentially making minor ingredient considerations. It's less about changing the recipe itself and more about changing the process and being observant.
Converting a recipe for faster proofing means consciously applying one or more of the discussed techniques – using a warm environment, potentially a dough enhancer, or optimizing yeast usage – and then closely monitoring the dough's progress. It's not about rewriting the ingredient list significantly (unless adding an enhancer) but about controlling the conditions under which those ingredients ferment.
Calculating Adjusted Proofing Times for Your Favorite Recipes
There isn't a precise mathematical formula to calculate the exact adjusted proofing time for every recipe when using faster methods, as variables like specific temperature, dough richness, and yeast viability play a role. However, you can use approximations based on typical yeast behavior. For example, raising the proofing temperature from 70°F (21°C) to 80-85°F (27-29°C) can often reduce the required proofing time by 50-70%.
So, if a recipe calls for a 90-minute first proof at room temperature, using a warm environment might mean it's ready in 25-45 minutes. A 60-minute second proof might finish in 20-30 minutes. These are estimates; always check the dough visually and with the poke test. Keep notes on how long it takes for specific recipes under your chosen faster proofing conditions to build a more accurate personal guideline. This approach allows you to convert almost any easy overnight sweet roll proofing recipe or standard recipe into a faster one.
Ingredient Adjustments for Optimal Texture and Flavor
While significant ingredient changes aren't usually necessary for faster proofing, minor adjustments can sometimes optimize results, especially when using enhancers. As mentioned, adding vital wheat gluten (1-2% of flour weight) can help strengthen dough made with lower-protein flour, ensuring it can support a faster rise without collapsing. A small amount of diastatic malt (0.5-1% of flour weight) can provide extra sugar for the yeast, potentially boosting fermentation speed and improving crust color.
Avoid the temptation to drastically increase the amount of yeast in an attempt to speed things up. While a slight increase (e.g., using 1.25x the amount of IDY compared to ADY if substituting) is fine, adding excessive yeast can lead to an unpleasant yeasty flavor and a poor texture. Focus instead on optimizing the environment and yeast activity through temperature control and proper activation. For very rich doughs, slightly reducing the sugar content (if it's very high) can sometimes help yeast perform better, but this should be done cautiously to maintain sweetness.
Tips and Tricks for Consistently Perfect Faster-Proofed Sweet Rolls
Achieving consistently excellent results with faster proofing techniques involves more than just speeding up the clock. Attention to detail during the proofing process ensures that the dough rises evenly, maintains the correct moisture level, and develops the best possible structure before baking. These final tips help refine your faster proofing practice.
Mastering faster proofing is an iterative process. Each time you bake, you learn a little more about how your specific dough and environment behave. Incorporating these tips will help you troubleshoot common issues and produce beautiful, light, and delicious sweet rolls every time you opt for a quicker proof over an easy overnight sweet roll proofing or standard method.
Achieving Uniform Proofing: Rotating and Positioning Techniques
When using a warm environment like a slightly warm oven or a proofing box, heat sources might not be perfectly uniform. This can lead to uneven proofing, where rolls on one side of the tray rise faster than those on the other. To combat this, periodically rotate your baking sheet or proofing container during the proofing time. For example, if proofing in a warm oven, turn the tray 180 degrees halfway through the estimated proofing time.
If proofing near a heat source (like a warm appliance), ensure the dough is positioned at a consistent distance and angle to receive even warmth. Avoid placing the dough directly on a hot surface, which could kill the yeast at the bottom. If proofing multiple trays, swap their positions halfway through. Uniform proofing ensures all your sweet rolls are ready to bake at the same time and have a consistent texture.
Maintaining Dough Moisture During Proofing
Regardless of the proofing speed, preventing the surface of the dough from drying out is crucial. A dry crust inhibits the dough's ability to expand fully and can result in a tough exterior on your baked rolls. Always cover your sweet roll dough during proofing.
Use plastic wrap lightly greased with cooking spray or oil, placed directly on the surface of the dough (for bulk fermentation) or loosely over the pan of shaped rolls. Alternatively, you can cover the bowl or pan with a damp, clean kitchen towel, ensuring the towel doesn't dry out during the proofing period, especially in a warm environment. Some proofing boxes or methods involving hot water naturally provide humidity, which is beneficial.
The Importance of Resting the Dough After Proofing
Even with accelerated proofing, allowing the dough a short rest after shaping and before the final proof can be beneficial. This brief rest period, sometimes called "bench rest" after dividing or a few minutes after shaping the rolls, allows the gluten to relax. Relaxed gluten is more extensible, meaning it can stretch more easily during the final proof and in the oven, leading to better volume and a lighter texture.
After shaping your sweet rolls, cover them and let them rest for 5-10 minutes at room temperature before placing them in your warm environment for the final faster proof. This short relaxation period can improve the overall structure and rise, even when using methods designed to speed things up. It's a small step that can make a noticeable difference in the final quality of your faster-proofed sweet rolls.
Conclusion: Mastering Faster Proofing for Delicious Sweet Rolls
Mastering the art of baking sweet rolls is a journey, and learning to control the proofing process is a significant step for intermediate bakers. While traditional methods and easy overnight sweet roll proofing offer their own benefits, faster proofing techniques provide invaluable flexibility and spontaneity, allowing you to enjoy warm, fresh sweet rolls on demand.
By understanding the science behind yeast activity, utilizing warm environments effectively, considering the judicious use of dough enhancers, and optimizing your yeast, you can significantly reduce the time spent waiting for dough to rise. This doesn't mean sacrificing quality; with careful monitoring and attention to the dough's cues, you can achieve the same light, fluffy texture and delicious flavor you expect from perfectly proofed sweet rolls, just faster.
Embrace the Speed and Convenience of Faster Sweet Roll Proofing
Faster proofing isn't just a technique; it's a way to make baking sweet rolls more accessible and enjoyable for busy home bakers. It removes the barrier of long waiting times, opening up opportunities for more frequent baking and experimentation. Imagine deciding on a Sunday morning to make cinnamon rolls and having them ready for brunch!
Armed with the knowledge of how temperature, yeast, and enhancers influence proofing, and equipped with the skills to monitor and troubleshoot, you are well on your way to mastering this efficient approach. So, the next time you crave warm, gooey sweet rolls, don't let the clock stop you. Embrace the speed and convenience of faster proofing and enjoy the delicious results.
Frequently Asked Questions
How does overnight proofing benefit sweet rolls?
Overnight proofing allows for a slower, more even rise in the refrigerator. This process develops complex flavors and results in a softer, more tender sweet roll.
What's the ideal temperature for overnight proofing sweet rolls?
The ideal temperature for overnight proofing is within the refrigerator's temperature range, typically between 35-40°F (2-4°C). This slows down yeast activity without stopping it completely.
Can I over-proof sweet rolls if I leave them in the refrigerator too long?
Yes, it's possible to over-proof sweet rolls, but it's less likely in the refrigerator. Look for signs like deflated dough or a sour smell, and adjust proofing time accordingly.
Do I need to adjust the amount of yeast when using the overnight proofing method?
Generally, no. The recipe should already account for the extended proofing time. However, you might slightly reduce yeast if you live in a very warm climate to prevent over-proofing.
How do I prepare the sweet rolls for baking after overnight proofing?
After overnight proofing, let the rolls sit at room temperature for 30-60 minutes to warm up slightly. Then, bake according to the recipe's instructions for a golden brown finish.
Final Reflection: The Sweetness of Efficiency
The pursuit of effortless baking is a timeless one, and mastering overnight proofing techniques, as explored in this guide to FasterProofing Sweet Rolls, is a significant step towards that goal. This isn't just about saving time; it's about reclaiming precious hours in your day, allowing you to focus on the joy of baking, rather than being tethered to the kitchen timer. The ease and efficiency of this method make delicious, homemade sweet rolls accessible to even the busiest baker.
The impact of readily available, convenient baking methods on our modern lives is profound. It allows us to connect with traditional recipes and the comforting rituals they represent, without sacrificing our increasingly demanding schedules. Baking is at once child's play and adult joy. And love.
- This sentiment, though not directly about overnight proofing, perfectly captures the emotional connection we forge with baking, a connection made even stronger by methods that simplify the process. The ability to prepare dough the night before and wake up to the aroma of rising sweet rolls is a small luxury that adds immense satisfaction to the baking experience.
Consider this your invitation to experiment with FasterProofing. Try the recipe, adapt it to your own preferences, and savor the delicious results. Don't let the perceived complexity of homemade sweet rolls deter you; embrace the efficiency and the joy of creating something beautiful and delicious from scratch. The time you save is a gift you give yourself, allowing you to fully appreciate the simple pleasure of sharing warm, homemade sweet rolls with loved ones.
Unleash Your Inner Baking Ninja: Faster Rolls, More Fun!
Thanks for joining us on this baking adventure! We hope you learned some seriously sweet time-saving tricks for crafting those perfect sweet rolls. Now it's time to put your new skills to the test!
- Master the Method: Try baking a batch of your favorite sweet rolls using the FasterProofing method today. Notice the difference in time and taste!
- Share Your Success: Show off your perfectly proofed creations on social media using #BakeWithEaseFasterRolls – we’d love to see them!
- Explore New Flavors: Experiment with different fillings and glazes – the possibilities are endless!
So, what delicious twist will you add to your next batch of sweet rolls? Let us know in the comments below!